You are browsing camaro5 

|
 03-03-2016, 02:26 PM
|
#603 |
|
'It's an experiment'

Drives: [COTW 2/09/15] '11 GPI LSA SC Z/LE Join Date: May 2014
Location: Dallas TX
Posts: 8,709
|
Yes -- search is my friend -- but if I'm gonna be in there... might as well do it just once and be done ;o)
-Don
__________________
747 RWHP 794 RWTQ
"Horsepower sells cars, torque wins races." - Enzo Ferrari See My Build: http://www.camaro5.com/forums/showthread.php?t=385577 |

|

|
|
03-03-2016, 03:35 PM
|
#604 |
|
'It's an experiment'
Drives: [COTW 2/09/15] '11 GPI LSA SC Z/LE Join Date: May 2014
Location: Dallas TX
Posts: 8,709
|
Well, thanks to DynoSteve, I'm going with the DSS 1000 hp axles and, its good to have a friend in the chevy parts dept.
PN 25954415 rear axle hubs for a Z28 $245 each so can't complain with that (vs about $445 list)... Talking with DynoSteve, the clicking I'm hearing is different vs what was in the video (doesn't just click when doing drive/reverse) so sounds like a possible CV joint -- gonna be safe and replace them -- and upgrade @ the same time ;o) -Don
__________________
747 RWHP 794 RWTQ
"Horsepower sells cars, torque wins races." - Enzo Ferrari See My Build: http://www.camaro5.com/forums/showthread.php?t=385577 Last edited by hammdo; 03-11-2016 at 11:38 PM. |
|
|
|
|
03-03-2016, 03:45 PM
|
#605 |
|
'It's an experiment'
Drives: [COTW 2/09/15] '11 GPI LSA SC Z/LE Join Date: May 2014
Location: Dallas TX
Posts: 8,709
|
If you're looking for some, ebay has them 100 each -- open box but new... looks like they are for the front and rear...
http://www.ebay.com/itm/331690268679 -Don
__________________
747 RWHP 794 RWTQ
"Horsepower sells cars, torque wins races." - Enzo Ferrari See My Build: http://www.camaro5.com/forums/showthread.php?t=385577 |
|
|
|
|
03-04-2016, 06:09 PM
|
#606 |
|
'It's an experiment'
Drives: [COTW 2/09/15] '11 GPI LSA SC Z/LE Join Date: May 2014
Location: Dallas TX
Posts: 8,709
|
Z/28 Hubs
Picked up the rear hubs today -- man those are beefy (# 10 in the parts image below)!
Hubs are ZL1/1LE/Z28 and all 4 are part number: 25954415  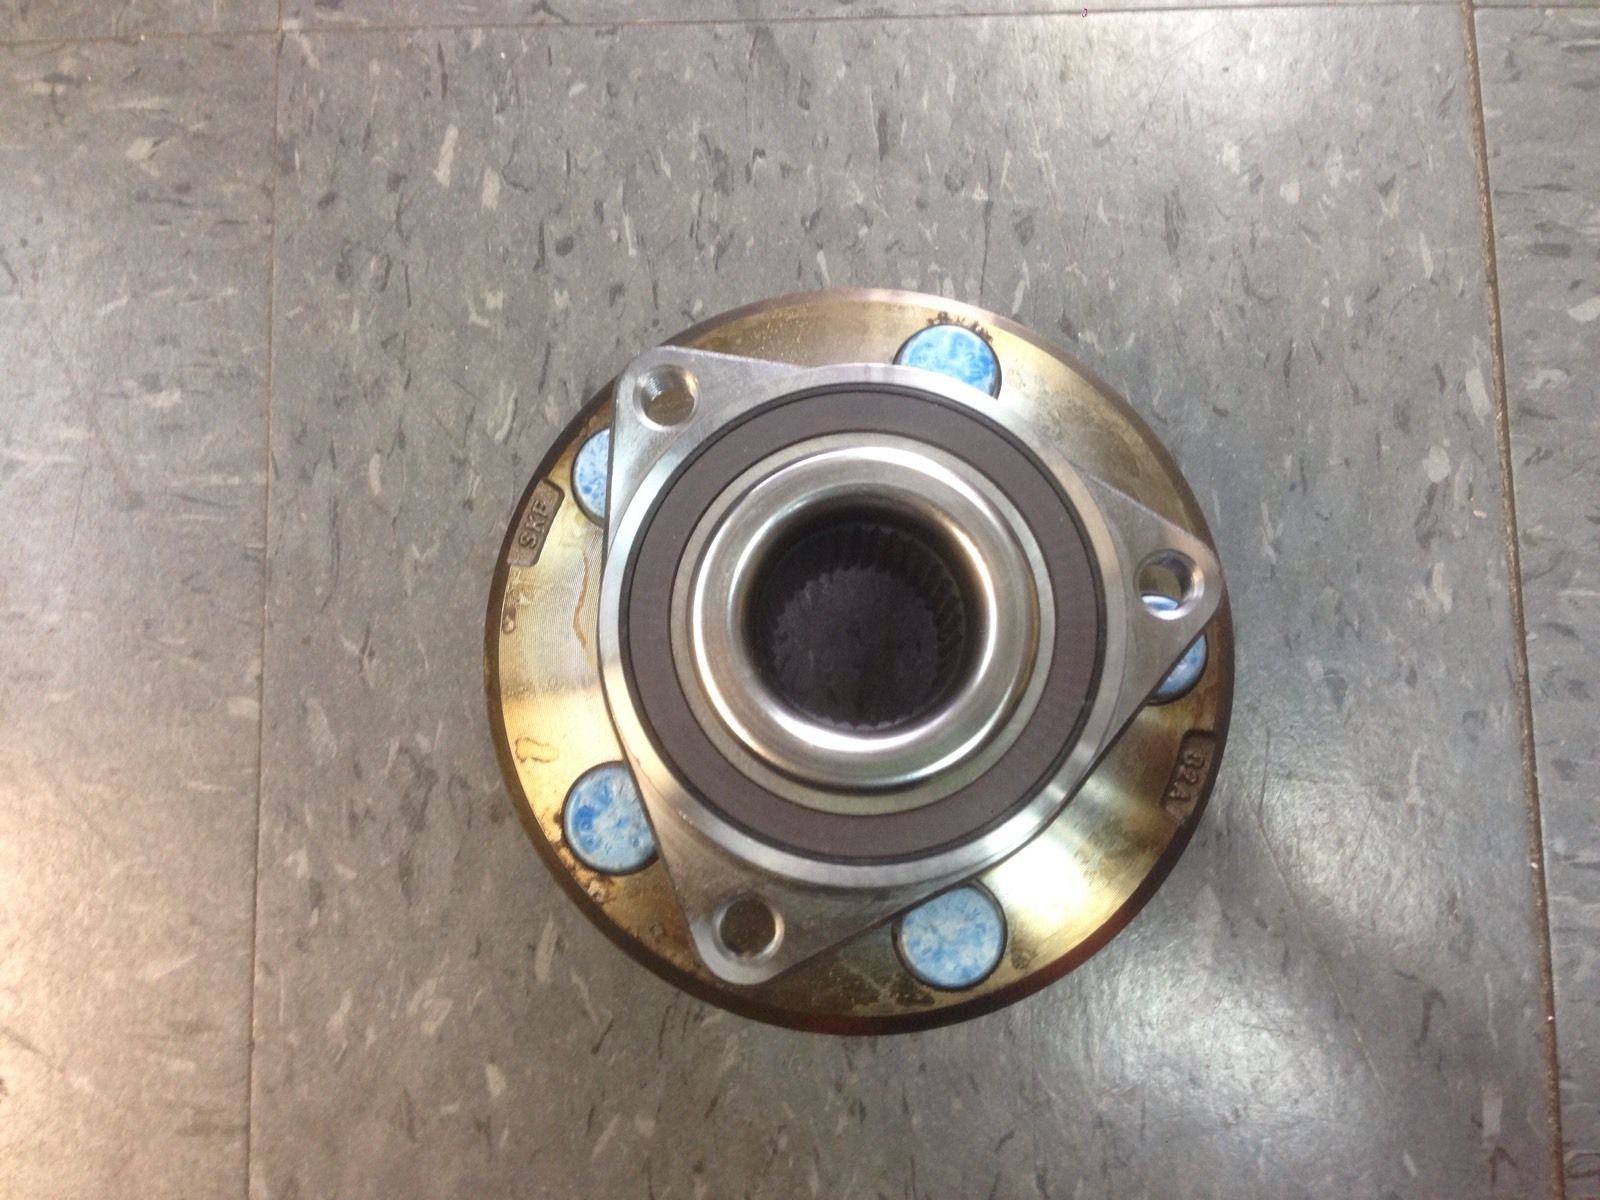  Also picked up the 2 washers (rear axle): 11611965 (these are used in the 1LE/ZL1 also!) 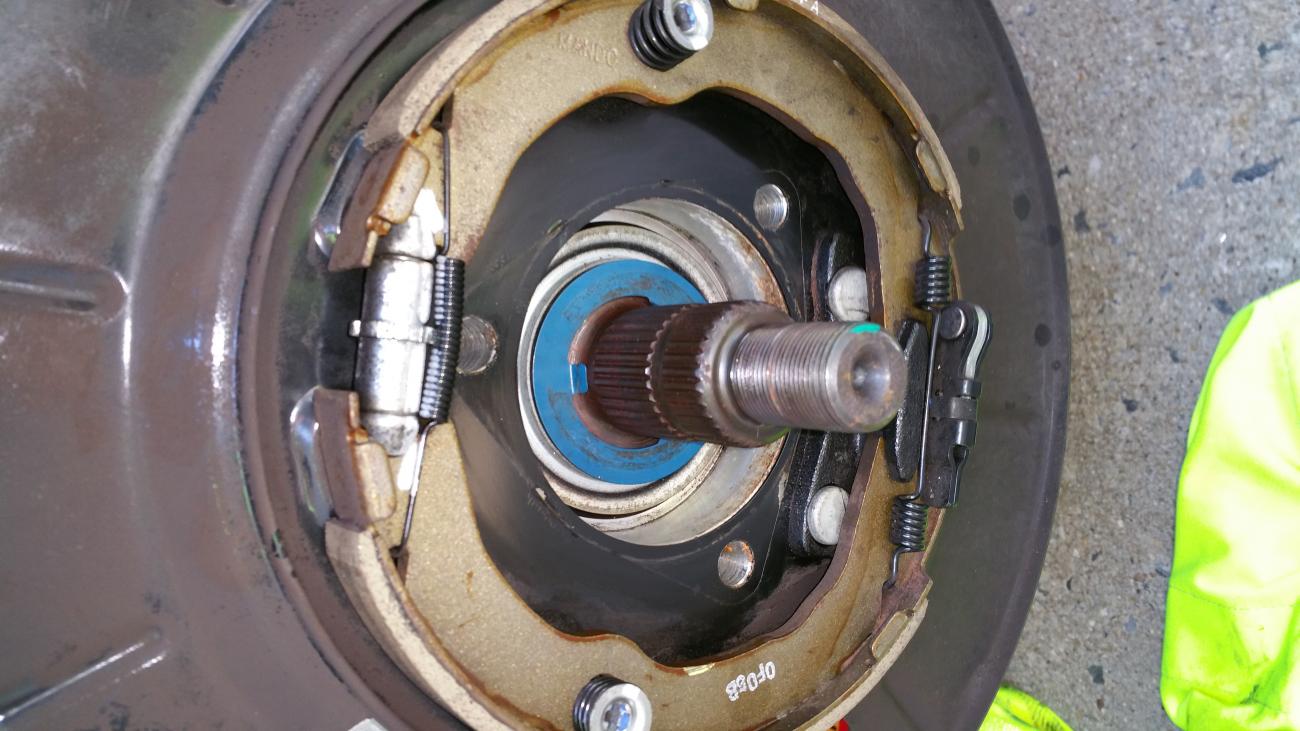 Picked up 2 dust shields for the front (did I mention I also bought the front hubs?): 92199863 # 19 in the image:  4 bolts for the rotors (holds them in place # 11 in above image): 11570339 New lug nuts: 9598179 (blue means 111 ft lbs, silver is 140 ft lbs torque) Dust shields are used in the front on the back of the Knuckle side. No dust shield on the rear apparently since the rear axle covers it (washer is used though!) Now, just waiting on the axles -- more fun to follow... -Don
__________________
747 RWHP 794 RWTQ
"Horsepower sells cars, torque wins races." - Enzo Ferrari See My Build: http://www.camaro5.com/forums/showthread.php?t=385577 Last edited by hammdo; 10-30-2017 at 10:42 AM. |
|
|
|
|
03-06-2016, 10:10 AM
|
#607 |
|
Cone Killer

Drives: 2012 SS Join Date: Dec 2013
Location: St. Albans, West Virginia
Posts: 832
|
Don, I've got two questions for you. One, did your steering feel change any going to the spherical tie rod ends? Second, do you have a link to where you got them? I haven't been able to find them.
__________________
2012 Camaro SS - Sold
Selling off my remaining wheels, tires, 27mm front sway bar, and MGW shift knob. Get them out of my house before my wife puts me out! |
|
|
|
|
03-06-2016, 11:07 AM
|
#608 |
|
'It's an experiment'
Drives: [COTW 2/09/15] '11 GPI LSA SC Z/LE Join Date: May 2014
Location: Dallas TX
Posts: 8,709
|
I did the turn one and the bump steer kit about the same time. The bump steer helped most on keeping the car straight when the road changed... In other words didn't wander.
The feeling is tighter and more precise . Now, I have the ZL1 wheels so those also impact the feel as they are wider up front. But the before and after was neglible in difference normal drive feel, but bumps and turns are quick and reactive. I actually got these from Ohio Speed https://www.ohio-speed.com/p-9456-20...-306-5030.aspx One thing you'll notice if you get them.. Loose going on. I had to measure the entire length from rack to tie rod outer end before I started as I had to screw the bump steer end all the way to the inner tie rod last thread and then adjust the the rod length on the heim. That was a challenge as I had a inner tie rod bent. Glad I had the quick trik. If you get them and that is not clear, let me know and I'll get you some pics from mine. What I like most since I'm lowered is it holds track better on the road... Keeping toe in ck is the primary use..steering shouldn't feel too different. Also, you want to make sure they are parallel through the range of travel. Easy if the front is up in the air and you sight it in with the lower arm like I showed in the pics... My guess these have multiple cars they fit. But, I do like them... P.S. I also did lube hiems with Amsoil motorcycle chain lube, just like the back toe rods... Let me know! -Don
__________________
747 RWHP 794 RWTQ
"Horsepower sells cars, torque wins races." - Enzo Ferrari See My Build: http://www.camaro5.com/forums/showthread.php?t=385577 Last edited by hammdo; 03-12-2016 at 12:00 AM. |
|
|
|
|
03-06-2016, 02:39 PM
|
#609 |
|
'It's an experiment'
Drives: [COTW 2/09/15] '11 GPI LSA SC Z/LE Join Date: May 2014
Location: Dallas TX
Posts: 8,709
|
Ordered this one today:
http://www.phastekperformance.com/20...hing-bk008.htm thanks to Burt 'THE Cone Killer' ;o) -Don
__________________
747 RWHP 794 RWTQ
"Horsepower sells cars, torque wins races." - Enzo Ferrari See My Build: http://www.camaro5.com/forums/showthread.php?t=385577 |
|
|
|
|
03-09-2016, 04:38 PM
|
#610 |
|
'It's an experiment'
Drives: [COTW 2/09/15] '11 GPI LSA SC Z/LE Join Date: May 2014
Location: Dallas TX
Posts: 8,709
|
Rest of the hubs are in! Got them from the ebay ref I had -- brand new, perfect match OEM -- just not in the original box -- not bad for the $$$!
Now, just waiting on the axles. Still waiting on the emissions to get ready (ugh)... takes so long... -Don
__________________
747 RWHP 794 RWTQ
"Horsepower sells cars, torque wins races." - Enzo Ferrari See My Build: http://www.camaro5.com/forums/showthread.php?t=385577 |
|
|
|
|
03-11-2016, 11:21 PM
|
#611 |
|
'It's an experiment'
Drives: [COTW 2/09/15] '11 GPI LSA SC Z/LE Join Date: May 2014
Location: Dallas TX
Posts: 8,709
|
While I'm waiting on the axles, I started replacing the front hubs -- this was very easy.
Since I had ZL1 brakes on the front, I used this: https://www.chevrolet.com/content/da...6-22989384.pdf as a reference guide for torque numbers. First, after taking off the wheel, I removed the speed sensor. This is what most folks forget when it comes to r-n-r the hubs: 10MM socket and off it goes. Removed from the strut: .jpg) .jpg) .jpg) Then I removed the brake line from the strut (10MM socket):  And then the calipers -- resting them on a box (18MM socket): .jpg) Then I removed the torx bolt (T30) and removed the rotor -- set it aside: .jpg) I then, removed all the hub bolts (16MM) -- you can see the hub came off very easy: .jpg) .jpg) .jpg) Cleaned all the bolts (had loctite) then setup to install the new hub. Here the SS vs Z/28s: .jpg) You can make out the difference. I was lucky as the dust shields were still in great shape, so I don't have to replace them (they were only $2 so no harm in keeping them). Installed the hub and torqued to 80 ft lbs -- with RED loctite (books says 74 ft lbs then 28* but these are reused). .jpg) Re-installed the rotor (torx, 89 in lbs with blue loctite), caliper (50 ft lbs red loctite on the bolts), brake line, speed sensor (89 in lbs), and wheel (new lug nuts (blue color) 111 ft lbs). Rinse and repeat on the right front -- very easy to install! More to come... -Don
__________________
747 RWHP 794 RWTQ
"Horsepower sells cars, torque wins races." - Enzo Ferrari See My Build: http://www.camaro5.com/forums/showthread.php?t=385577 Last edited by hammdo; 03-11-2016 at 11:45 PM. |
|
|
|
|
03-12-2016, 01:31 PM
|
#612 |
|
'It's an experiment'
Drives: [COTW 2/09/15] '11 GPI LSA SC Z/LE Join Date: May 2014
Location: Dallas TX
Posts: 8,709
|
Finished the right side this morning. This is such a simple upgrade on the fronts. With power tools, probably a 15 to 20 minute job per side. If you're looking to upgrade all 4, the eBay link that I posted when last I looked still had 4... Buy one, get 3 free basically when you compare to list of $445 each...
-Don
__________________
747 RWHP 794 RWTQ
"Horsepower sells cars, torque wins races." - Enzo Ferrari See My Build: http://www.camaro5.com/forums/showthread.php?t=385577 |
|
|
|
|
03-14-2016, 09:13 PM
|
#613 |
|
'It's an experiment'
Drives: [COTW 2/09/15] '11 GPI LSA SC Z/LE Join Date: May 2014
Location: Dallas TX
Posts: 8,709
|
Booked for LS Fest this year at the host! With CamaroFest next April of 2017, this will be a great alternative...
Got my BMR bushing today for the Rack n Pinion, will put that on this week...
__________________
747 RWHP 794 RWTQ
"Horsepower sells cars, torque wins races." - Enzo Ferrari See My Build: http://www.camaro5.com/forums/showthread.php?t=385577 |
|
|
|
|
03-15-2016, 11:04 PM
|
#614 |
|
'It's an experiment'
Drives: [COTW 2/09/15] '11 GPI LSA SC Z/LE Join Date: May 2014
Location: Dallas TX
Posts: 8,709
|
Well, the last few days, I've had a persistent squeaking noise in the right rear -- different from the clicking, but the squeaking was very noticeable between 2 and 20 mph -- just moving the car -- not over bumps. So, I lubed up the BMR bushings again, and it still persisted. Driving over 20 mph -- didn't hear it. Well today, I decided to torque the trailing arms, toe rods, shocks/springs, sway bar/links, and upper and lower control arms -- each individually -- to find which one it was. Did all of that, no joy. Then, I thought I'd check the Hotckis max brace since I recently had that off for the drive shaft -- no joy there. Finally, I did the rear sub-frame bushings -- I had solids put in last year -- and sure enough, those were it. 3 of the 4 loosened up enough that when I torqued them to 100 ft lbs, I needed a couple of turns.
So, I'd be looking out for that if you happen to be making some decent RWHP and have solids. I'll be checking those twice a month for a while just to be sure. If I see it loosen up again, I'll add blue loctite on each one to make sure. Its been about 7 months since I had those done so, it may be necessary to re-torque them after they settle in. No squeaking finally (still a bit of clicks -- but I'm going to replace the washers and that should do it -- of course hubs and axles since I'm in there ;o)... Glad I'm 'tuned' into the car and any 'oddities' -- don't let any of those go for long... -Don
__________________
747 RWHP 794 RWTQ
"Horsepower sells cars, torque wins races." - Enzo Ferrari See My Build: http://www.camaro5.com/forums/showthread.php?t=385577 |
|
|
|
|
03-19-2016, 06:21 PM
|
#615 |
|
'It's an experiment'
Drives: [COTW 2/09/15] '11 GPI LSA SC Z/LE Join Date: May 2014
Location: Dallas TX
Posts: 8,709
|
Still waiting on the axles, so I had time to install the BMR Rack n Pinion bushing on the right side.
This took about 20 minutes total time -- very easy to install. Take the wheel off on the right side and its very easy to get to the bolts (they are actually 18 MM socket -- not 15 like the instructions say). The OEM bracket has an arrow that tells you the 'front' side. Here is the bracket, bushing (OEM and BMR), instructions et. al.: The kit: .jpg) Bracket off: .jpg) Bushing out -- this was easy to remove. I just used a screwdriver to remove the bracket and remove the bushing. The Rack does lower just a bit, but with a small pry bar, you can lift it up just enough to slide it in: .jpg) Bushing lubed (inside and out) and the bracket -- arrow facing forward -- set in place. Make sure to line up both halves of the bushing: .jpg) .jpg) .jpg) Bolted and torqued to 45 ft lbs (with blue loctite): .jpg) .jpg) Verify bottom halves lined up: .jpg) Now, just waiting on the emissions to get ready and the axles to get here... -Don
__________________
747 RWHP 794 RWTQ
"Horsepower sells cars, torque wins races." - Enzo Ferrari See My Build: http://www.camaro5.com/forums/showthread.php?t=385577 |
|
|
|
|
03-19-2016, 10:00 PM
|
#616 |
|
'It's an experiment'
Drives: [COTW 2/09/15] '11 GPI LSA SC Z/LE Join Date: May 2014
Location: Dallas TX
Posts: 8,709
|
Evap Emissions Drive Cycle 2011 Camaro V8
Well, some of you may wonder what it takes to satisfy the 'Evap Emissions' drive cycle. So, if you REALLY want to know what the service manual states, I've put together the 'relative' sections in this pdf. Hopefully, it will give folks a clue as just 'driving' is not all you have to do, you also need to let it 'sit' for up to 17 hours between runs.
CRAZY... Anyway, this is what I'm 'trying' to follow. Remember, I did a 400 mile trip from GPI and the Evap still has not set yet. So now, I'm doing this. Here it is if you're curious or need the info (this if or the V8)... Letting it sit is the missing step it appears... http://accelerationtech.com/photos/D...e-Cycle-V8.pdf -Don
__________________
747 RWHP 794 RWTQ
"Horsepower sells cars, torque wins races." - Enzo Ferrari See My Build: http://www.camaro5.com/forums/showthread.php?t=385577 Last edited by hammdo; 03-19-2016 at 10:21 PM. |
|
|
|
|
|
|
|
 |
|
|


