You are browsing camaro5 

|
 09-16-2014, 03:12 PM
|
#2801 |
|
Eh, that'll happen

Drives: 2010 2SS Join Date: Apr 2012
Location: Mesa, Arizona
Posts: 1,841
|
Hey Nathan, what type of sanding/polishing bits for your grinder did you get? It just seems like bits are going to get used up real quick, so just wondering what you had the best luck with. Thanks!
__________________
2010 Camaro SS LS3 - No Modz
|

|

|
|
09-16-2014, 07:17 PM
|
#2802 | |
|
ou mai gad

Drives: SW 2SS x2 Join Date: Feb 2010
Location: MX
Posts: 643
|
Quote:
wait a minute...
__________________
 |
|
|
|
|
|
09-17-2014, 11:16 PM
|
#2803 | ||
|
Drives: G5.R Join Date: Sep 2010
Location: SoCal
Posts: 2,377
|
Quote:
Quote:
LOL, I hear ya, I suck! |
||
|
|
|
|
09-19-2014, 09:27 PM
|
#2804 | |||
|
Drives: G5.R Join Date: Sep 2010
Location: SoCal
Posts: 2,377
|
Quote:
Quote:
This is solely Justin's baby. My only contribution has been suggestion on the finishes, LOL. We are trying different finishes before settling on one. This particular set we had polishes before going of to the anodized next week. Stay tunes next week for the final product. For those that might be interest in the camber plates, Here is the link to the thread: http://www.camaro5.com/forums/showthread.php?t=377990 While i was at my buddy's polishing shop to pick up the camber plates, I figured it would be a good time to make the video I have been promising to post for over a year on how to make sanding cartridges. So now without any further ado, it brings me great pleasure to debut the long awaited, over a year in the makings, much anticipated video backed by popular demand...............Drum roll please............ how to make sanding cartridges . Last edited by Moreno1; 09-19-2014 at 10:06 PM. |
|||
|
|
|
|
09-20-2014, 10:35 AM
|
#2805 |
|
ou mai gad
Drives: SW 2SS x2 Join Date: Feb 2010
Location: MX
Posts: 643
|
holly... I should gather my stuff and jump into the bunker. The END is coming!
__________________
|
|
|
|
|
09-21-2014, 01:57 PM
|
#2806 | |
|
Drives: G5.R Join Date: Sep 2010
Location: SoCal
Posts: 2,377
|
Quote:
In a effort to keep everything in line with the theme of racy and industrial instead of bling, Justin found a place about 90 minutes away that had a water blasting (Supposedly these water blasted are really expensive.... like $30,000  ) machine. It gives a really fine finish vs sand blasting, almost like the finish on an Apple I pad. The owner was nice enough to let us use it for $65 an hour. Justin spent 3.5 hours doing these parts. We still need to do a few more parts to everything done. ) machine. It gives a really fine finish vs sand blasting, almost like the finish on an Apple I pad. The owner was nice enough to let us use it for $65 an hour. Justin spent 3.5 hours doing these parts. We still need to do a few more parts to everything done.Here are the obligatory pics, LOL Before and after 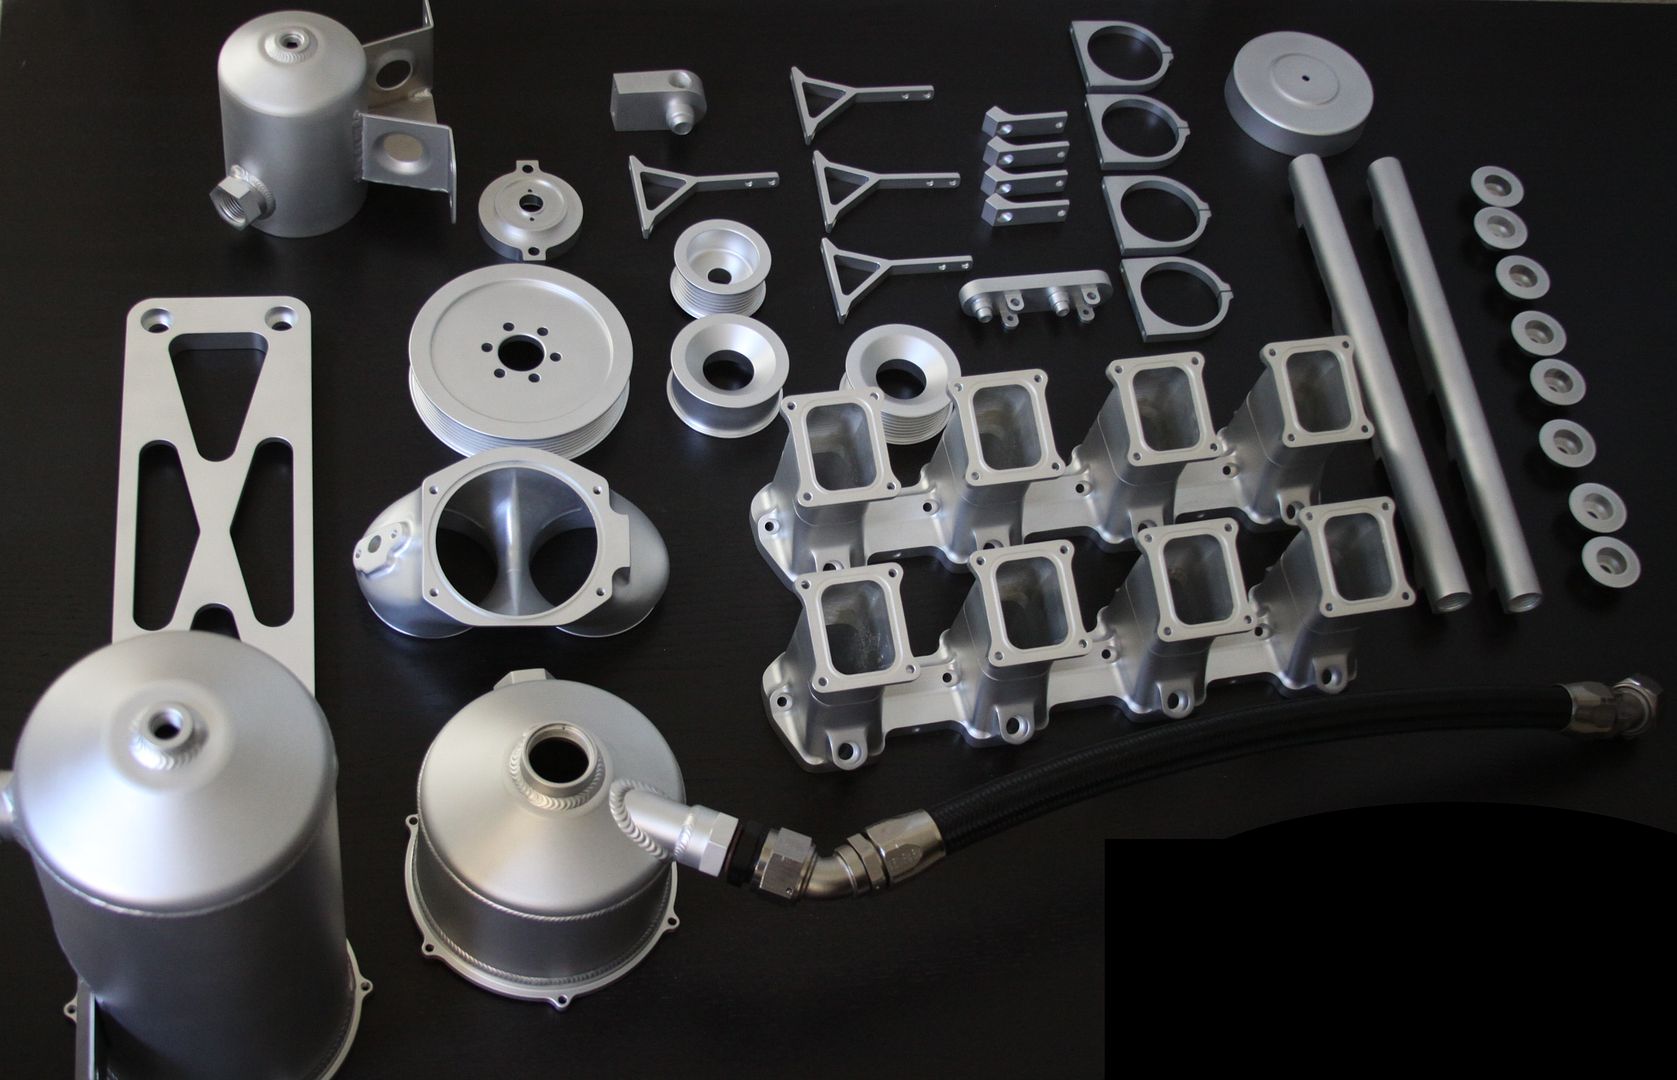 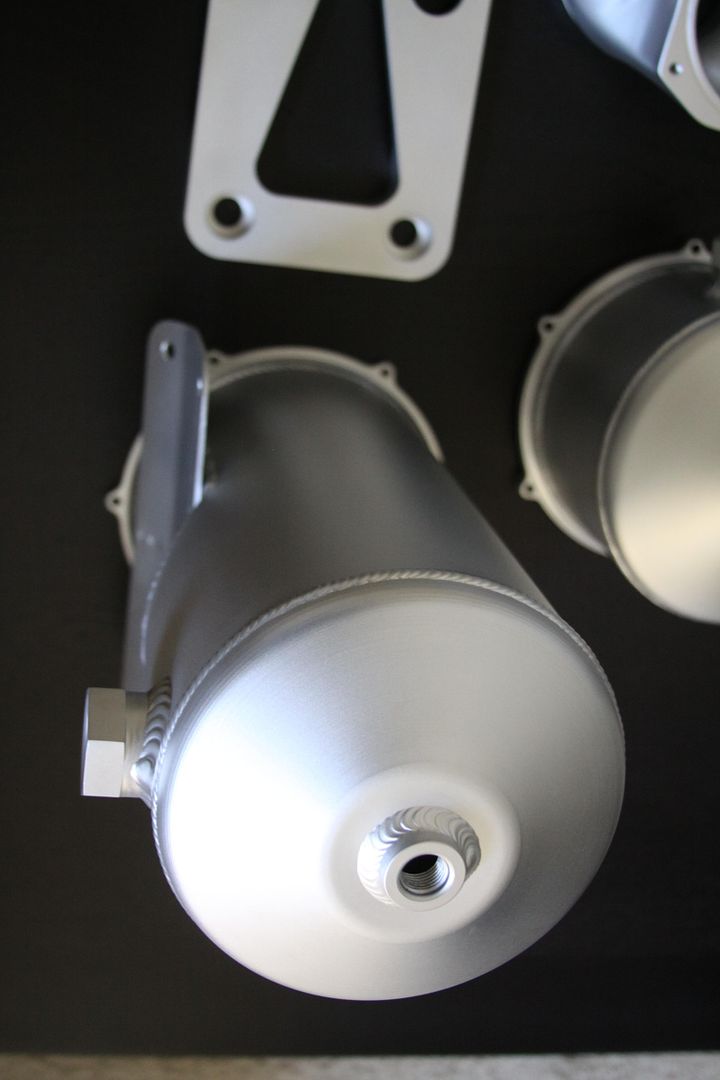 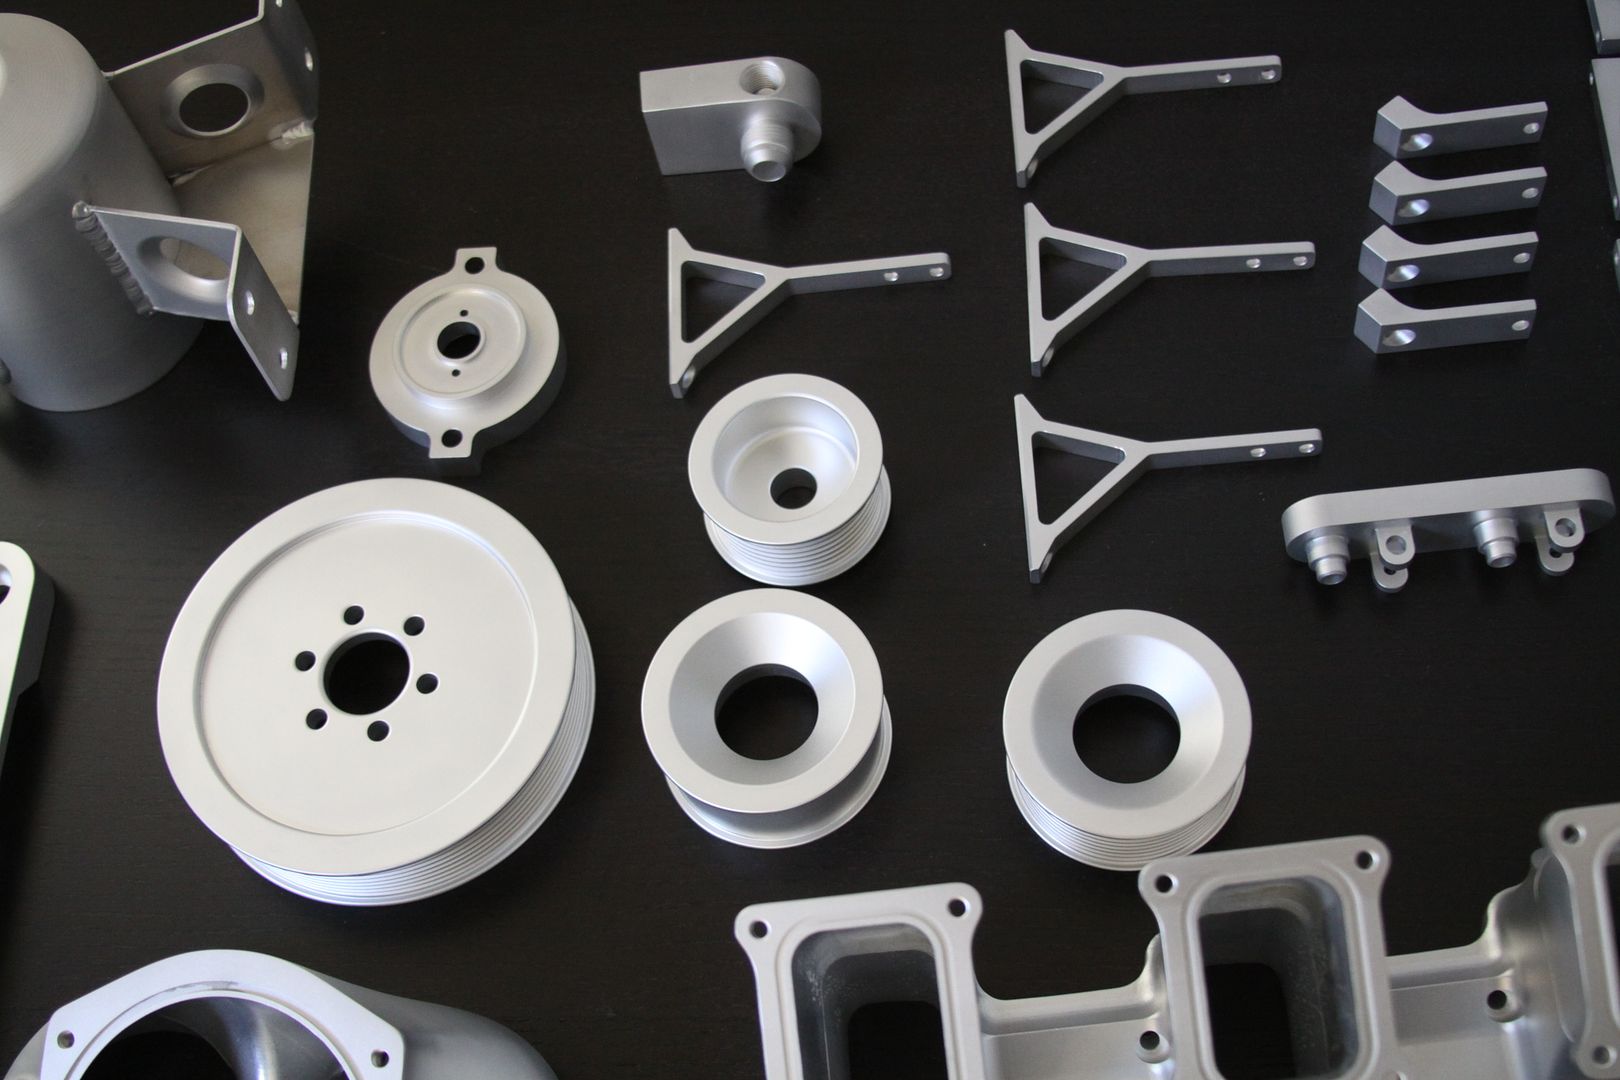 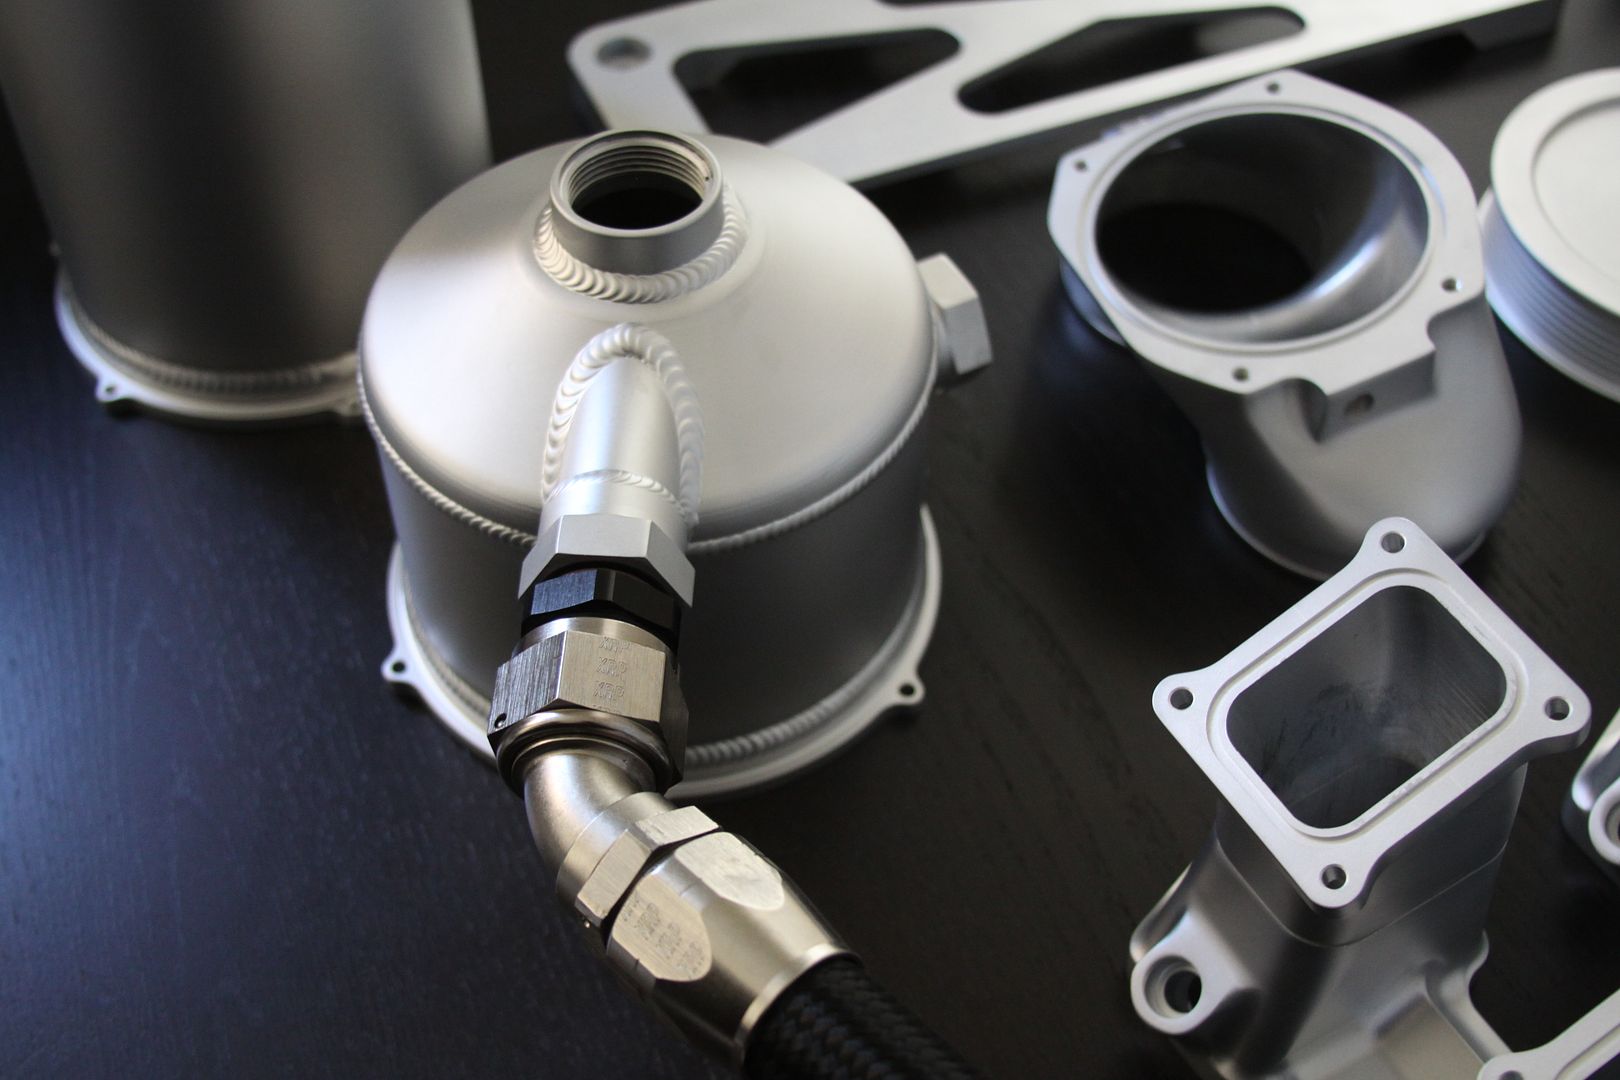
|
|
|
|
|
|
09-21-2014, 05:22 PM
|
#2807 |
 
Drives: 2012 2SS/RS LS3 Join Date: May 2012
Location: Pearland, TX
Posts: 388
|
Beautiful pieces!
__________________
Victory Red 2012 2SS/RS LS3 Camaro
Pat G. Spec Cam from Cam Motion 228/236 .599/.599 112+2LSA Kooks 1-7/8" LTs w/ Cats Roto-Fab, Bo White TB, Borla Touring Catback 3.91 1LE Gears, MGW Tuned by Pat G |
|
|
|
|
09-21-2014, 06:07 PM
|
#2808 |
  
Drives: 93GMC sierra stepside/ ctsv3 Join Date: Dec 2011
Location: San Antonio, Texas
Posts: 914
|
That's pretty sick.. was going to upload some pics of my progress but not after that
|
|
|
|
|
09-22-2014, 09:48 AM
|
#2809 | |||
|
Drives: G5.R Join Date: Sep 2010
Location: SoCal
Posts: 2,377
|
Quote:
Quote:
Quote:
I going to work on the OP to make hyper of everybody's contributions to make easier for members to find info on what they are interest in doing as the thread has gotten to big. Also anybody that has updated pictures of their engine bay, please post them as I will be updating the picture gallery on the OP also. I will probably move the gallery to the top of the OP so it's the first thing you see when you click on the thread. |
|||
|
|
|
|
09-22-2014, 10:37 AM
|
#2810 |
|
Drives: 93GMC sierra stepside/ ctsv3 Join Date: Dec 2011
Location: San Antonio, Texas
Posts: 914
|
I'll post some pics later today when I get home from work
Sent from my SAMSUNG-SM-N900A using Tapatalk |
|
|
|
|
09-23-2014, 07:19 PM
|
#2811 |
|
Drives: 93GMC sierra stepside/ ctsv3 Join Date: Dec 2011
Location: San Antonio, Texas
Posts: 914
|
Alright so here is my progress.. I still have some stuff to do like tucking the wires alittle better, lengthening the drivers side injector and coil plugs along with the starter wires.. I also need to mount the computer so its not banging around
Any recommendations are encouraged this being my first time doing this The beginning 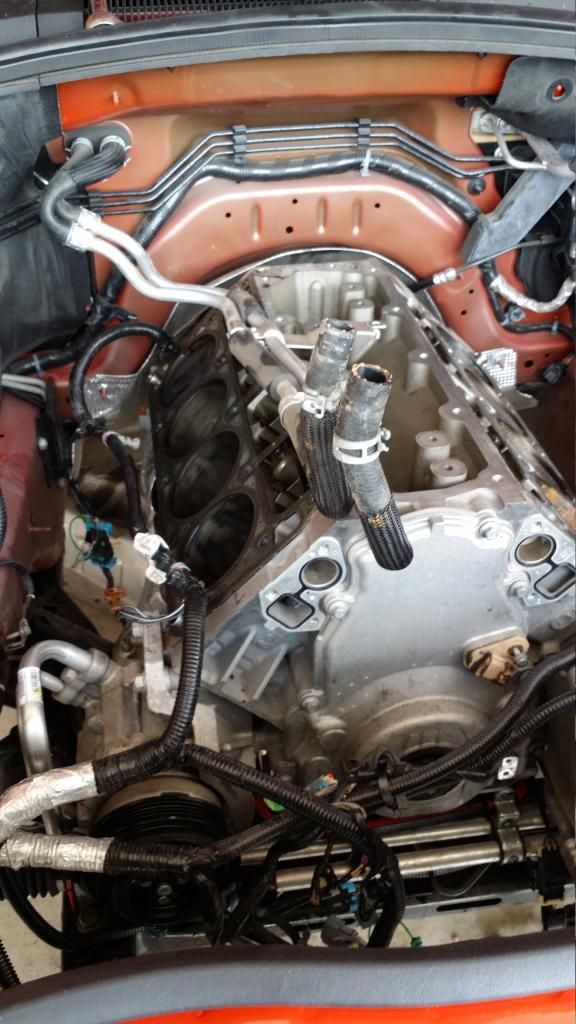 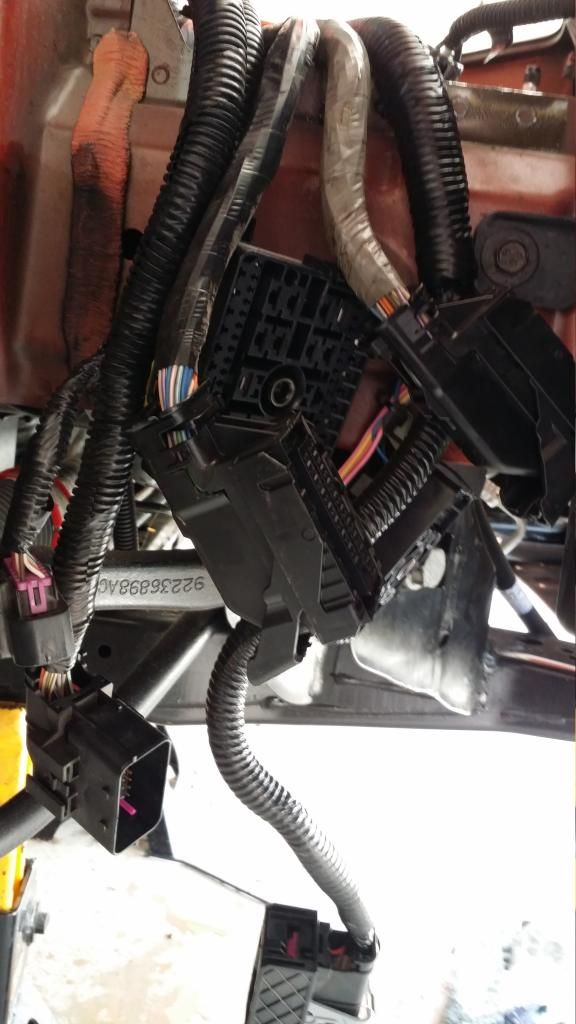 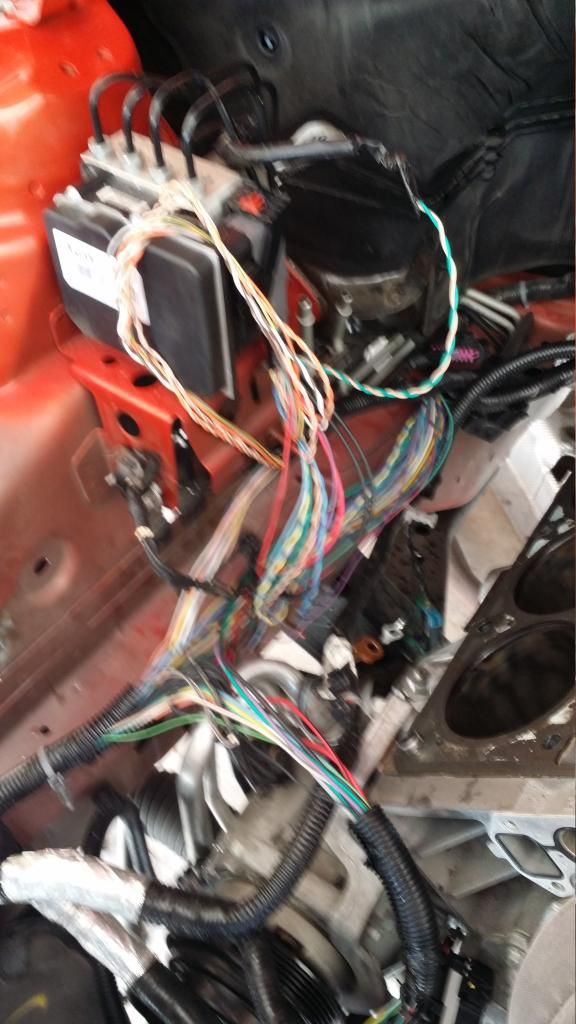 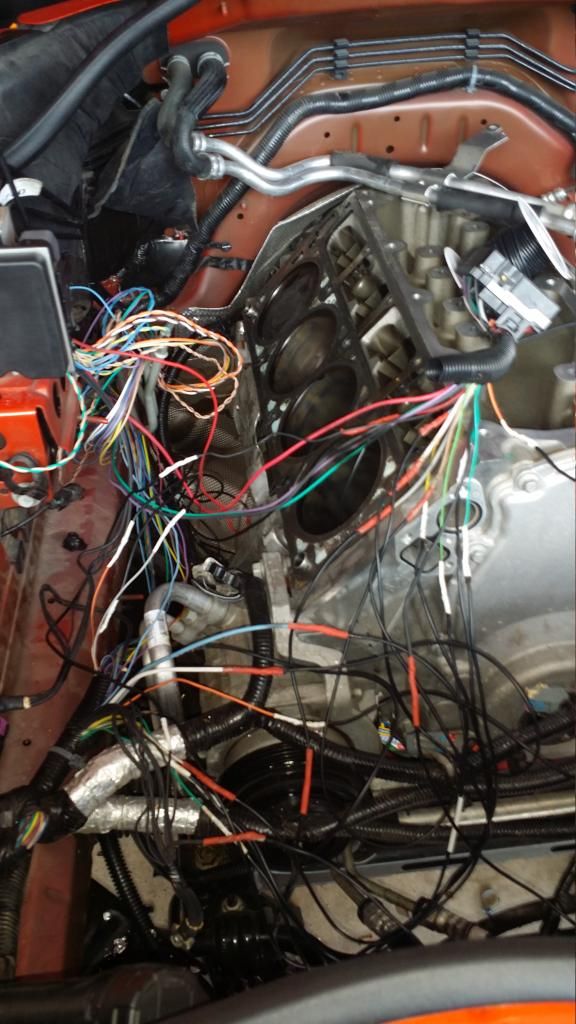 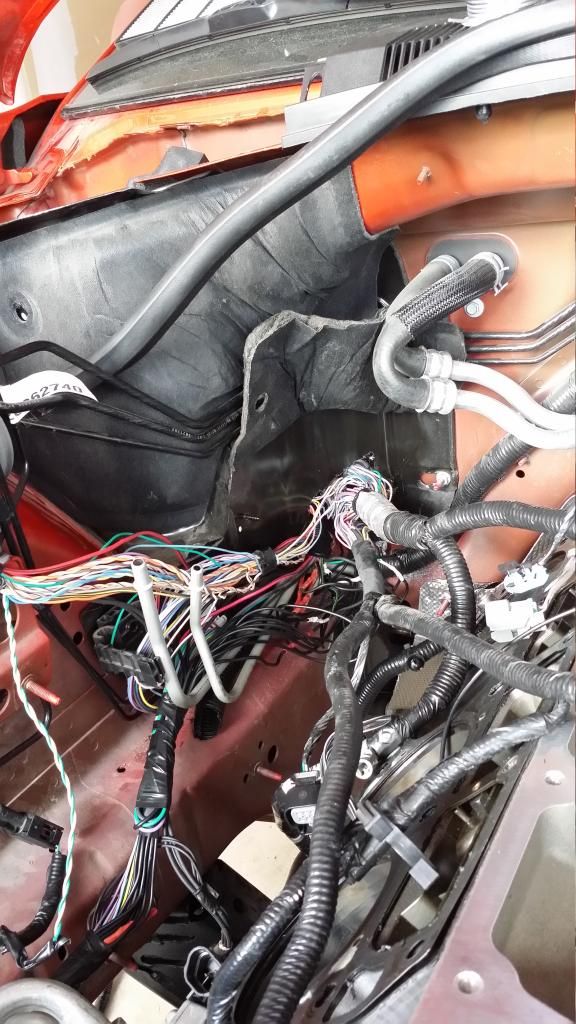 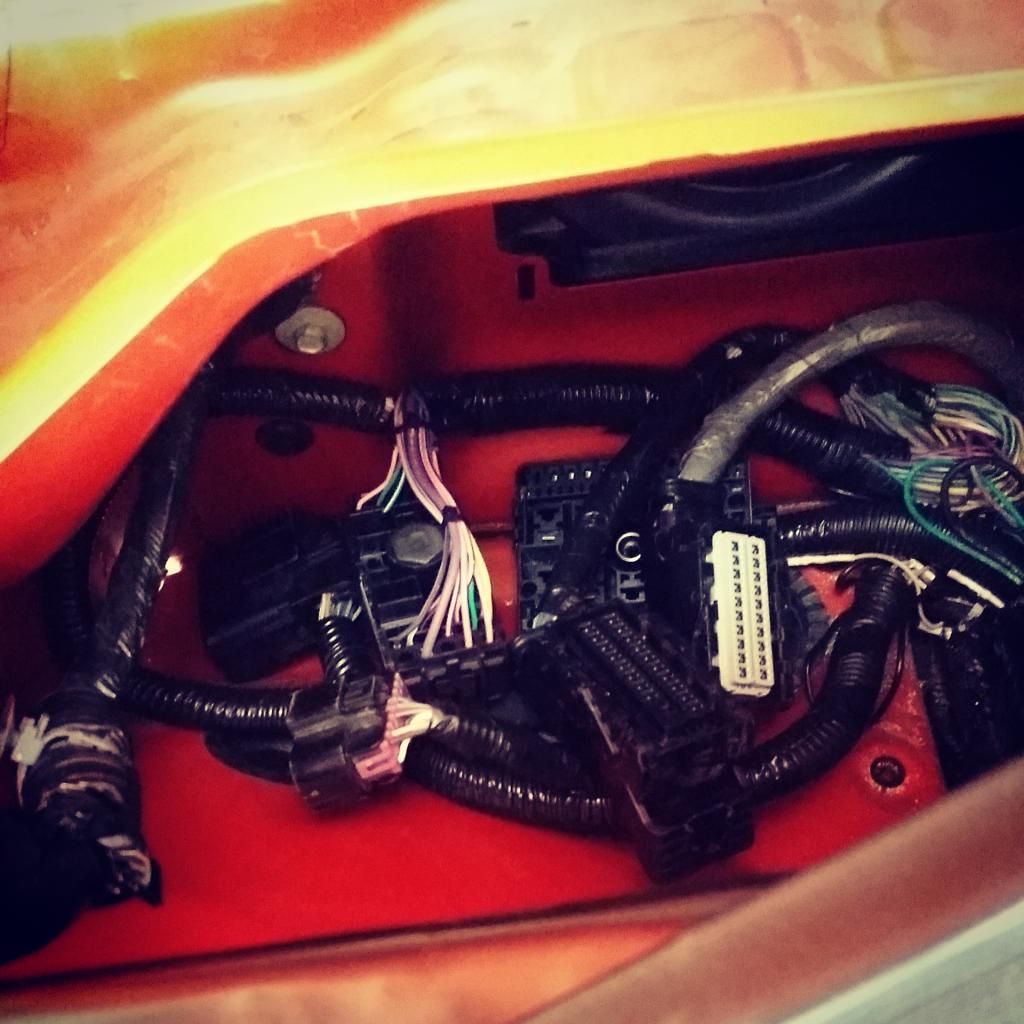 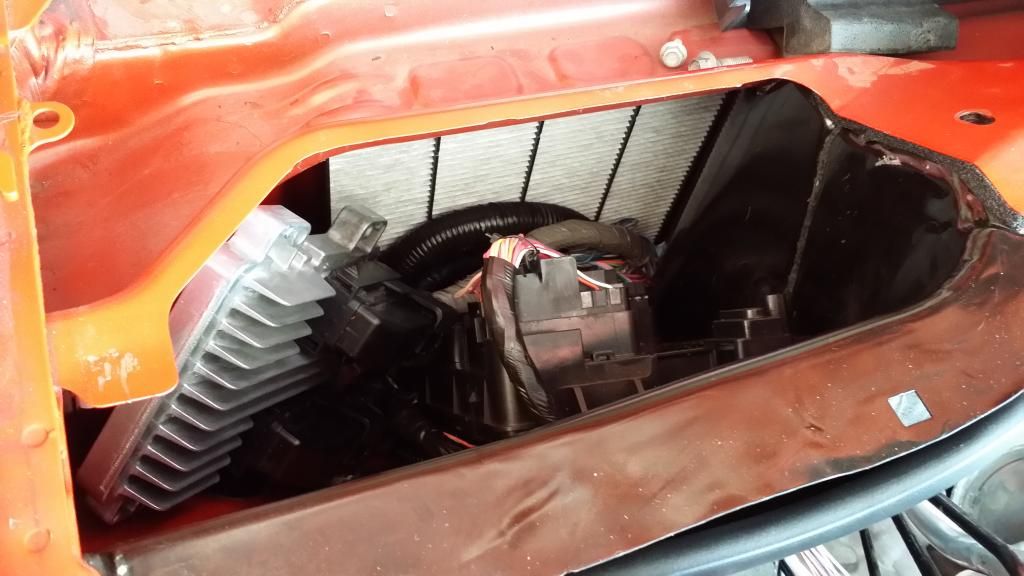 I need to tighten this up a little bit more and tuck it better but I hate wiring and can only take so much a day before I need to stop.. Also I am thinking about moving the abs but I don't know if I want to deal with bending lines and stuff.. would look really good gone though. Reason I am moving the fuse box and computer is because here in the near future I will need the room for one of the twins to set 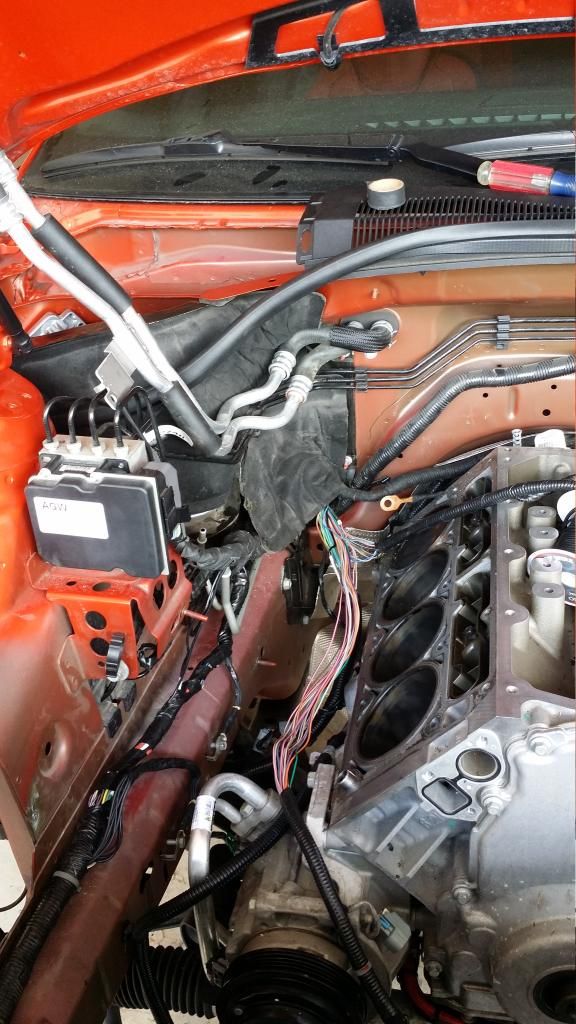 also the un covered wires in this picture are the ones I needed to lengthen for the injectors and coil packs |
|
|
|
|
09-23-2014, 07:56 PM
|
#2812 |

Drives: 2010 2SS/RS Inferno Orange Join Date: Mar 2013
Location: San Antonio, TX
Posts: 628
|
Man, Rich, you are going all out. Can't wait to see the finished product!
Sent from my iPhone using Tapatalk
__________________
 U.S. Army Retired |
|
|
|
|
09-24-2014, 09:06 AM
|
#2813 |
|
Matthew Pigott

Drives: 2010 Camaro 2SS Join Date: Sep 2013
Location: Toronto, Ontario
Posts: 109
|
Finished routing the brake lines for ABS removal. Mounted prop block. Waiting on my master to be finished at the machine shop.
|
|
|
|
|
09-24-2014, 03:20 PM
|
#2814 |
|
Drives: 93GMC sierra stepside/ ctsv3 Join Date: Dec 2011
Location: San Antonio, Texas
Posts: 914
|
I may tackle the abs.. I'll just get a line bender and that should make it easier
Sent from my SAMSUNG-SM-N900A using Tapatalk |
|
|
|
|
|
|
|
 |
|
|
 Similar Threads
|
||||
| Thread | Thread Starter | Forum | Replies | Last Post |
| Roto-Fab | Engine Covers - S/C | Fuse Relay Cover | Radiator Cover | Billet Oil Cap+ | AutoAgenda | Exterior Parts & Accessories | 14 | 02-06-2013 08:43 PM |
| New Texas Speed & Performance Engine Machining Center! | Trevor @ Texas Speed | Camaro V8 LS3 / L99 Engine, Exhaust, and Bolt-Ons | 18 | 01-16-2013 03:46 PM |
| Hawk Performance Brake Pads part HB247Z.575 $85.00 | Rogan | USA - Florida | 2 | 10-07-2011 12:10 PM |
| Acronyms? | KEEP RT | Camaro V8 LS3 / L99 Engine, Exhaust, and Bolt-Ons | 20 | 03-11-2011 08:57 PM |
| Great Read and Info on Oil Weight | Banshee | Mechanical Maintenance: Break-in / Oil & Fluids / Servicing | 1 | 11-23-2009 09:03 PM |


