You are browsing camaro5 

|
 01-10-2012, 07:43 AM
|
#1 |
 
Drives: 2011 Camaro Vert RS A6 Join Date: Sep 2011
Location: Texas
Posts: 244
|
AAC afterburner tail lights
For those who have installed them do you like them and how hard are they to install? Oh and could i see pics please i am on the fence about these or the head lights.....
__________________
[
 |

|

|
|
01-10-2012, 08:19 AM
|
#2 |
|
www.macsautodetail.com

|
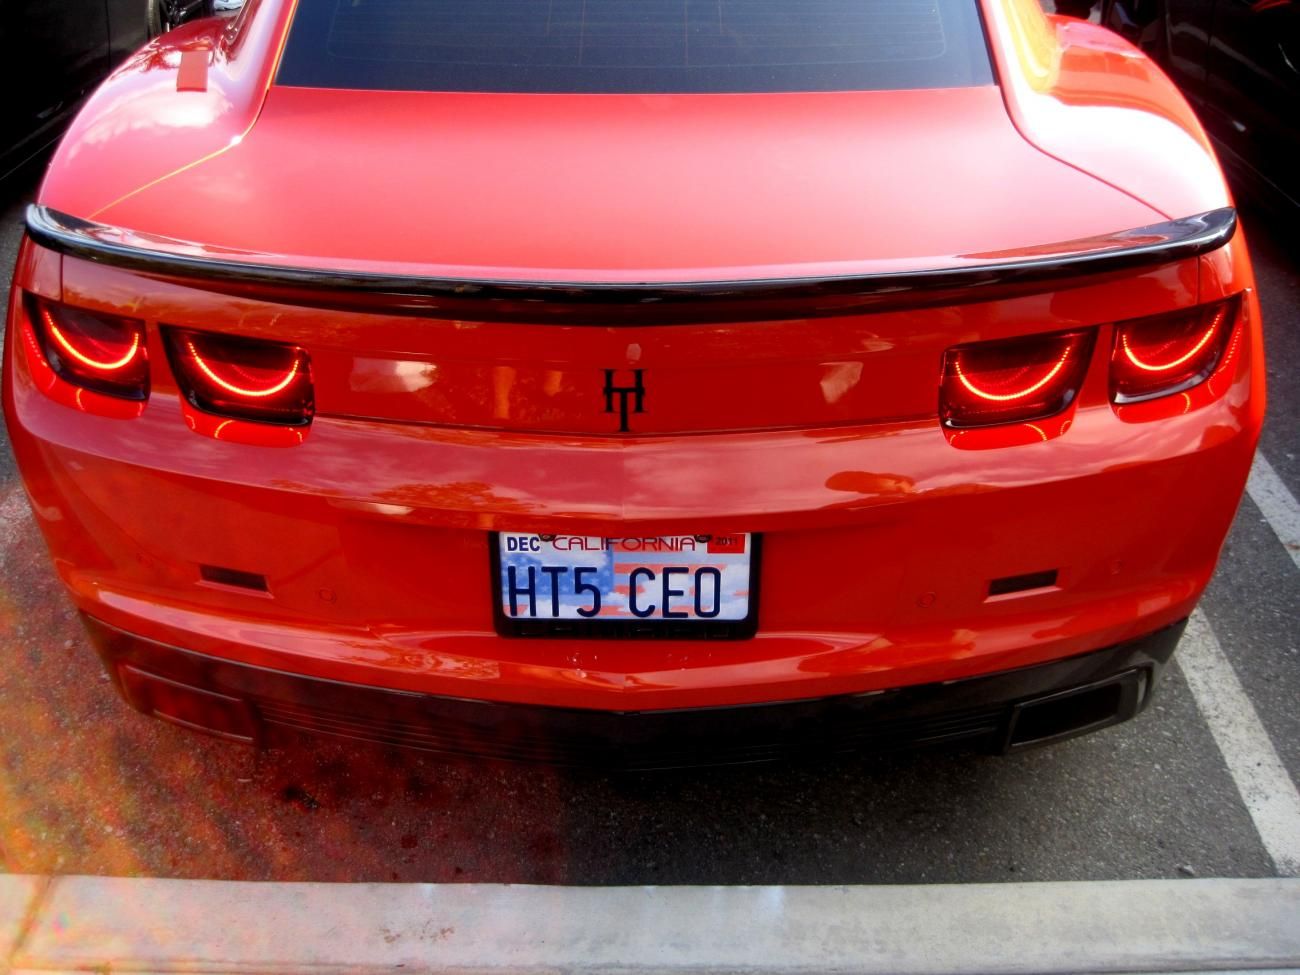
I love mine - just think they look sweet. I paid to have the install done by someone else. I don't know anything about wiring and don't trust myself to do anything like this. They do come with a DVD which contains an install video.

|
|
|
|
|
01-10-2012, 09:12 AM
|
#3 |
|
Drives: 2011 Camaro Vert RS A6 Join Date: Sep 2011
Location: Texas
Posts: 244
|
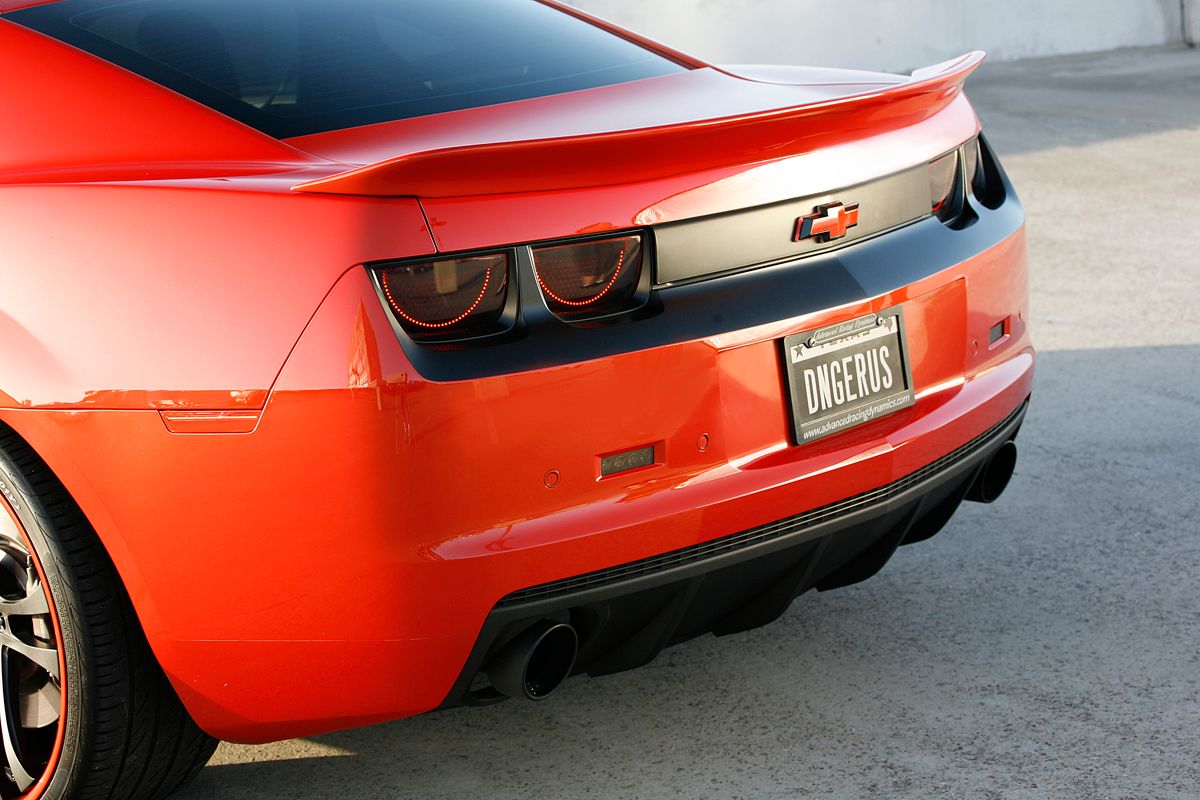
dorfmac those look nice thanks for the pics
__________________
[
|
|
|
|
|
01-10-2012, 10:05 AM
|
#4 |
 
Drives: www.CamaroLighting.com Join Date: May 2010
Location: New Orleans, LA
Posts: 3,245
|
|
|
|
|
|
01-10-2012, 10:06 AM
|
#5 |
       
Drives: 2011 Camaro 2SS/RS (Black) L99 Join Date: Aug 2010
Location: Pilot Point, Texas
Posts: 2,185
|
colorshift or these? colorshift for sure!
__________________
 Follow me on Instagram @C7Corvettes |
|
|
|
|
01-10-2012, 10:07 AM
|
#6 |
|
Drives: www.CamaroLighting.com Join Date: May 2010
Location: New Orleans, LA
Posts: 3,245
|
|
|
|
|
|
01-10-2012, 10:09 AM
|
#7 | |
|
Drives: 2011 Camaro 2SS/RS (Black) L99 Join Date: Aug 2010
Location: Pilot Point, Texas
Posts: 2,185
|
Quote:
__________________
Follow me on Instagram @C7Corvettes |
|
|
|
|
|
01-10-2012, 10:20 AM
|
#8 |
|
Drives: 2010 IOM Camaro Join Date: Jan 2012
Location: South Florida
Posts: 40
|
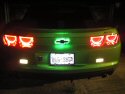
Are they just the halo rings or does more light up?
|
|
|
|
|
01-10-2012, 03:37 PM
|
#9 |
|
God Bless Dawson
Drives: Synergy for my Daughter Join Date: Feb 2010
Location: Texas
Posts: 3,057
|
__________________
 |
|
|
|
|
01-10-2012, 11:47 PM
|
#10 |
|
Drives: '15 Z06, '01 NBM SS, '97 SS Join Date: May 2009
Location: Rio Rancho, NM
Posts: 12,170
|
Moar!!
Last edited by Ivan @ Southwest Speed; 01-10-2012 at 11:48 PM. Reason: Spelling for winners.... |
|
|
|
|
01-11-2012, 03:20 AM
|
#11 |
|
:chevy:

Drives: 2LT/RS Join Date: Jun 2008
Location: Toronto
Posts: 13,033
|
I have them and LOVE THEM!
Installed them myself. My DVD came with everything but the Burner install  After alot of pms with Stieger and AAC, i got it done. After alot of pms with Stieger and AAC, i got it done.My thoughts about the Install. HONEST Review Alright so my GF bought me tail light blackouts a few years ago, so doing the core exchange was not an option for me. Also, the install price was an extra $200 and as a student, I couldnt afford that. So I decided to install them myself. How hard can they be right? LOL Ok so first off, removing the nuts on the tail lights- The corner tail lights have a nut you have to remove in one of the most impossible places, seriously its ridiculous. Thank god mine were finger tight because I didnt have any tool which would fit in there. Ok so you get all the bolts out, now you have to take the bezels out. I watched a thousand videos on removing them, still didnt stop me from fudging up the first one lol I said no biggie, im going to paint them flat black anyways. Keep in mind, I take extra precautions to protect the tail lights and bezel but it still seemed to make blemishes on the bezel. Oh well- I suggest getting Nylon pry tools as other members suggested and swear by it. Some people also take em out with no problems. I was doing this in an unheated garage when the temps outside were -15 degrees Alright so at this point you have all four taillights out. The cutting part is quite terrifying at first. Come on, how many owners do you see cutting their own tail lights?! Anyways, some how I grew the nads to continue cutting the lens off and got better with each tail light. I was going to sand down the rough edges but then realized that keeping them helped with alligning the lens and housing back into perfect position so I didnt sand it off (kinda like a puzzle). Installing the rings is a breeze, Im a perfectionist by nature which is another reason I did these myself, Im EXTREMELY picky lol After I got all four rings in, it was time to seal. Problem was I bought clear silicon that apparently came white and dried clear in 14 days!! Oops (Moral of the story, make sure you get the right silicon and a quality one at that) SO after buying the right silicon, I sealed the lens. I first cleaned the lens and housing thoroughly and then sealed them up. After I sealed all four lights. I came back and sealed them again. Then sealed them again, and one more time for added insurance. Overkill? Definitly- but it was peace of mind for me. Oh and I should add, my seal job looked brutal after all those layers but oh well, bezel covers it up anyways. So after all that, came the wiring part. This part is a breeze -seriously - a breeze. I installed all four lights, wired them up and modified the tail light bulbs as well. Car looked great. Then I went down and painted all my bezels flat black, boy did that make a difference. So now my car sits in the garage, and everytime I take the winter car out, I open the garage, press unlock on my Camaro key fob (yes I carry it around with me lol) and watch those burners come on and just say "WOW" Ill post a crappy pic for now but I just recently took some better pics which i still need to add to the PC. So thats my honest review on the install, would I do it again? Definitly Was it easy? Hell no but working on your own car is priceless. Can I break something? The Lens if your not carefull but majority of the mistakes youll make, like me which was cutting the lens, is covered by the silicon seal anyways. Do you like the AAC Burners? Is it worth it? NO.....I LOVE THEM and wish I had them sooner! One more fun fact- GF bought me the burners for Christmas....shes a keeper 
__________________
CAMARO
Consult your doctor before taking Camaro Side effects include Sudden increase in Heart Rate, Insomnia and occasional hallucinations If you experience Permagrin exceeding 4 hours after taking Camaro, seek immediate Camaro5 Help CAMARO Bringing excitment back into the Garage |
|
|
|
|
01-11-2012, 08:37 AM
|
#12 | |
|
Drives: www.CamaroLighting.com Join Date: May 2010
Location: New Orleans, LA
Posts: 3,245
|
Quote:

|
|
|
|
|
|
01-11-2012, 04:28 PM
|
#13 | |
|
:chevy:
Drives: 2LT/RS Join Date: Jun 2008
Location: Toronto
Posts: 13,033
|
Quote:

__________________
CAMARO
Consult your doctor before taking Camaro Side effects include Sudden increase in Heart Rate, Insomnia and occasional hallucinations If you experience Permagrin exceeding 4 hours after taking Camaro, seek immediate Camaro5 Help CAMARO Bringing excitment back into the Garage |
|
|
|
|
|
01-11-2012, 04:34 PM
|
#14 |
|
:chevy:
Drives: 2LT/RS Join Date: Jun 2008
Location: Toronto
Posts: 13,033
|
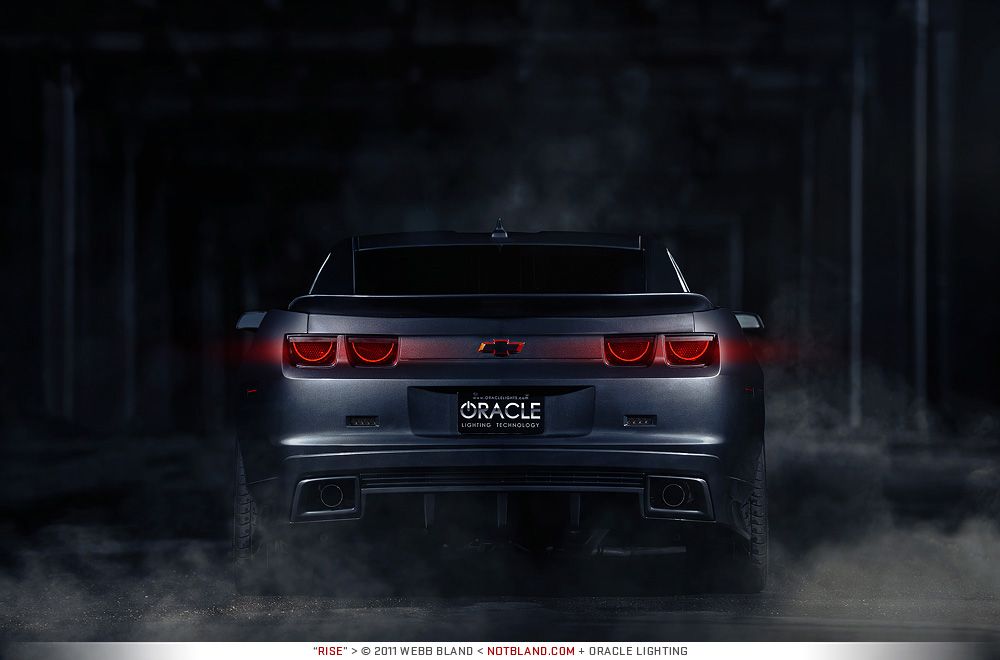
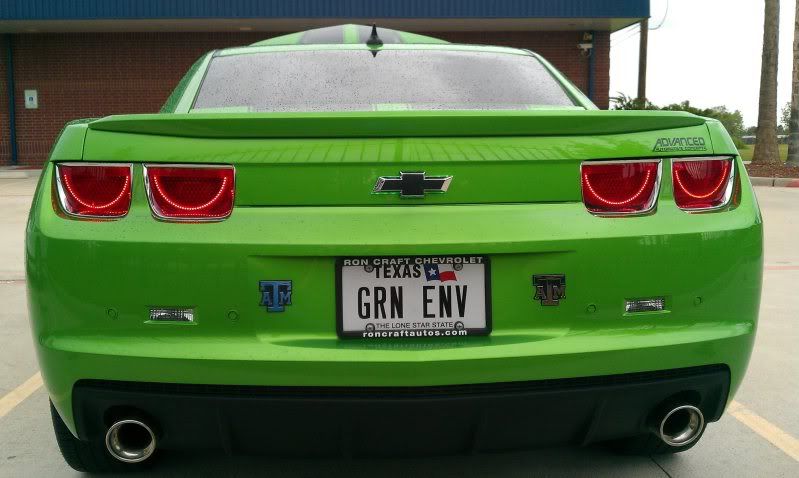
Got Burners?
 Just like the Camaro, pics dont capture how awesome the afterburners are in person 
__________________
CAMARO
Consult your doctor before taking Camaro Side effects include Sudden increase in Heart Rate, Insomnia and occasional hallucinations If you experience Permagrin exceeding 4 hours after taking Camaro, seek immediate Camaro5 Help CAMARO Bringing excitment back into the Garage |
|
|
|
|
|
|
|
 |
|
|
 Similar Threads
|
||||
| Thread | Thread Starter | Forum | Replies | Last Post |
| DIY making the afterburner effect tail lights | 2SSRS@Gen5diy | Camaro DIY & HOW-TO instructions & discussions | 89 | 03-09-2015 11:33 PM |
| Blacking Out the Tail Lights, Head Lights, Side Lights. | atlang3lo | Cosmetics and Lighting Modification Discussions | 12 | 04-03-2012 06:52 PM |
| Wiring AACstyle Afterburner Tail Lights | chorey | Camaro DIY & HOW-TO instructions & discussions | 0 | 08-28-2011 10:07 AM |
| FS / FEELER : RS AAC AFTERBURNER TAIL LIGHTS | x7productions | Exterior Parts & Accessories | 8 | 11-22-2010 08:26 AM |
| Concept Afterburner Tail lights? | SnoopyAce7 | Cosmetics and Lighting Modification Discussions | 2 | 08-17-2010 10:22 PM |


