You are browsing camaro5 

 |
|
|
#1 |
|
Texas Camaros
Drives: 2011 Synergy Green 2SS/RS Join Date: Oct 2010
Location: Venus, Tx
Posts: 1,681
|
NightOwl DRL Install
This is only for installing the DRL halos to the main NightOwl module. If you have another system to control them, please skip step 17 as this step will be different for you.
I want to send a special thanks to Joe at NightOwlLeds.com. I asked many, many questions and he answered every single one and he was with me every step of the way. Also, Lightner75 for assisting me with the project. On to the DIY.... NOTE: These are not a plug & play item. There is a bit of wiring/rewiring involved in these. First remove the bezels and DRLs. I was able to use ramps and crawl under the car, so I didn't take off the bumper. RedJewel2SS' photo shows the clips on the backside of the bezels / DRLs. You should be able to use a plastic pry bar to push the bezels towards the front of the car, but if it feels stuck, you can also lift up on the tab in the middle to help get it out. Once the bezels are out, you'll need to squeeze and push out the 3 sets of 3 tabs that hold the DRLs in place. 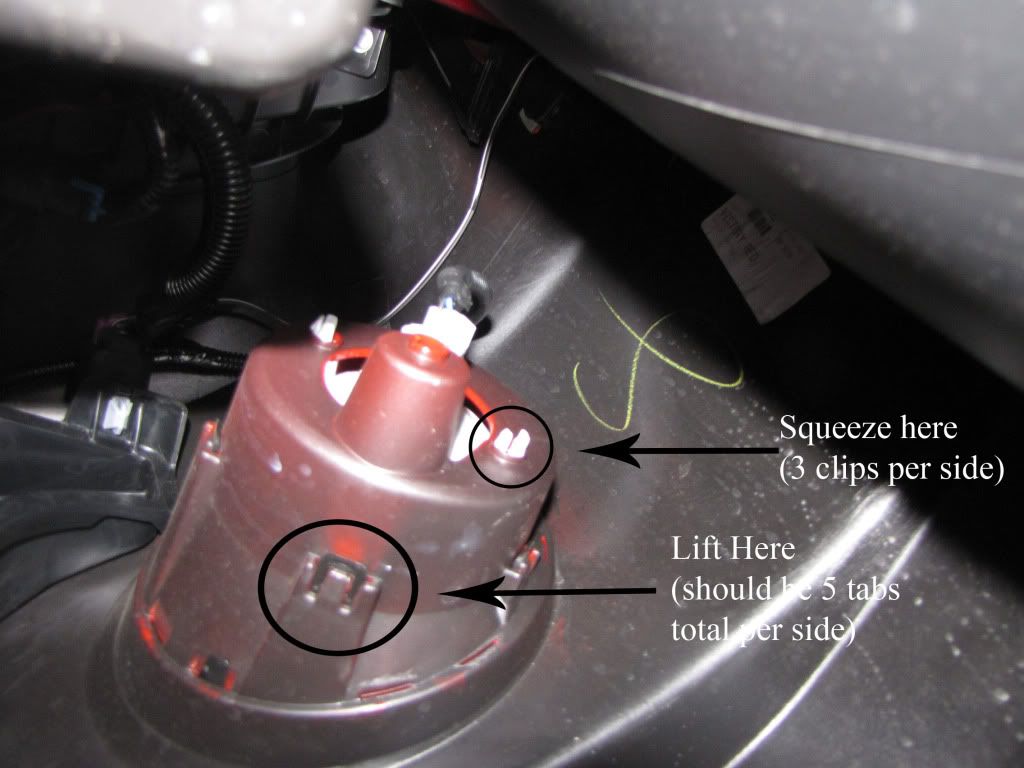 From this point on, I'll be following NightOwl's instructions which is on their PDF document found here: https://store.nightowlleds.com/downl...on%20Sheet.pdf 1. "Place a mark on the lens and housing so that you can put the lens back on in the same direction." I put 2 marks on one lens and 3 on the other so I wouldn't run the risk of mixing up the lenses. 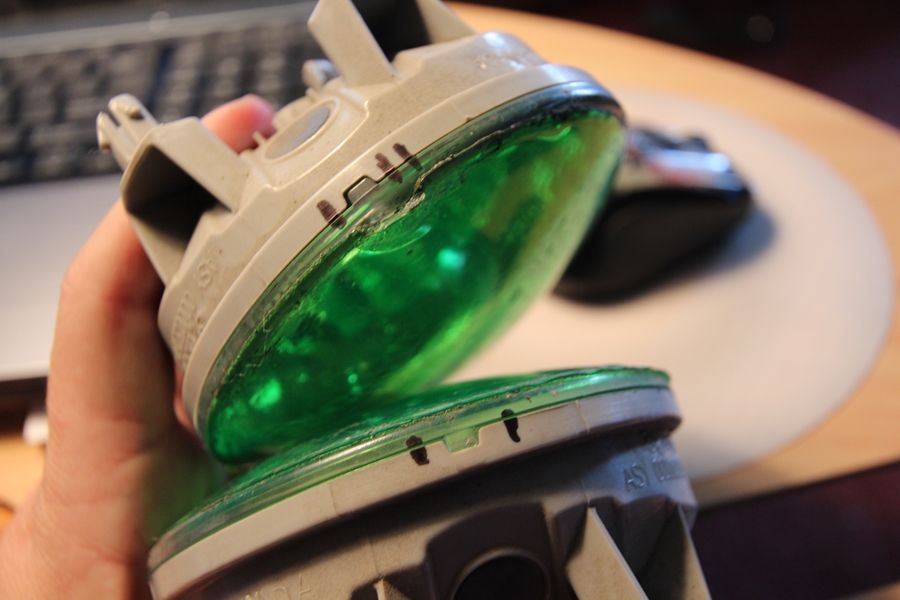 2. "Cut the lens off of the housing. You can do this with a band saw or a multipurpose cutoff tool." We used a dremel tool to cut the lenses apart and sand the edges. One thing to note here.. The black marks on mine disappeared when doing this. I would recommend to cut almost all the way around, then go back and remark the lenses, if necessary. This way the marks are not rubbed off and can still be seen once the entire cut has been made. 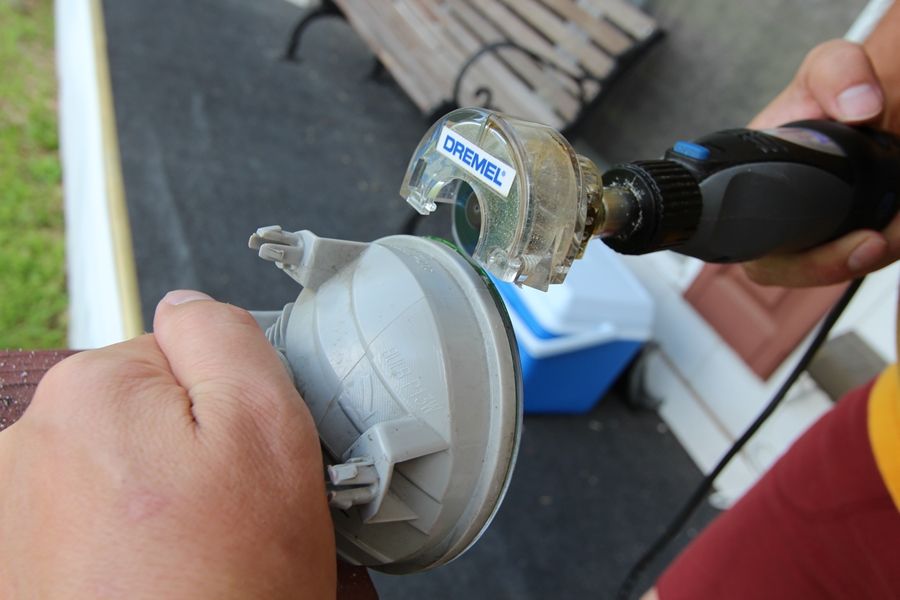 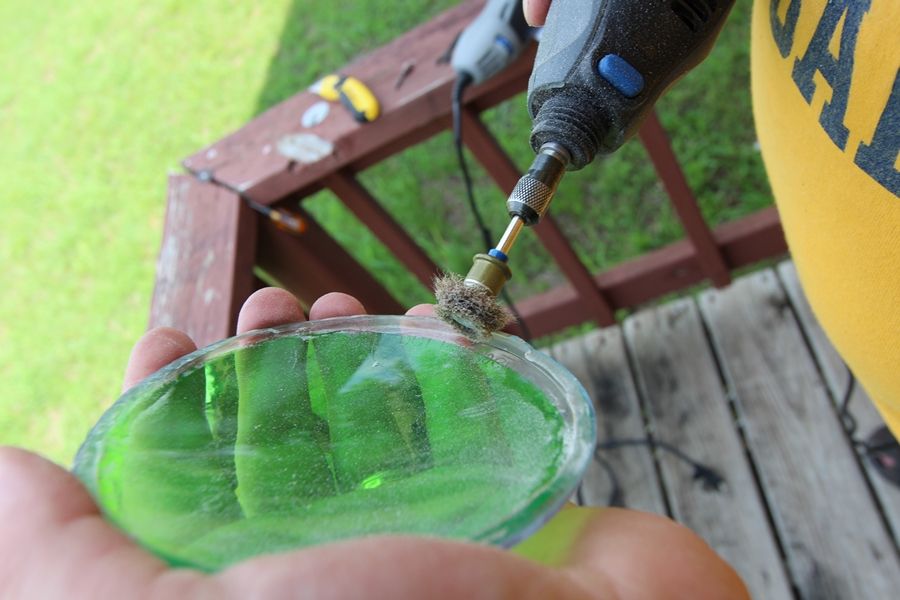 3. "Keep the inside as clean and scratch-free as possible." There was no 'keeping the inside clean' for me, so afterwards, I used a window cleaner and a detail rag to gently wipe away all the dust. 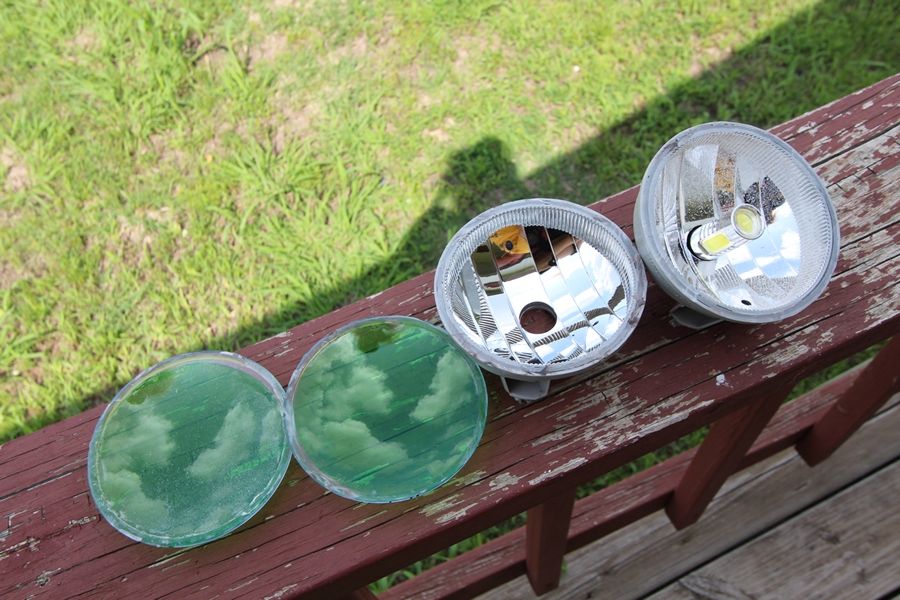 4. "The diffuser ring will benefit with a couple of notches cut into it so that it doesn't rock back and forth inside the housing You can modify the diffuser ring by painting the sides or frosting the inside. See the DIY thread at: www.camaro5.com/forums/showthread.php?p=7601635. " My LEDs were already inside the diffuser, so i used a plastic pry bar (L-END) to gently (VERY gently) pry the LEDs out of the diffuser. A sanding wheel on the dremel tool was used to make the notches. 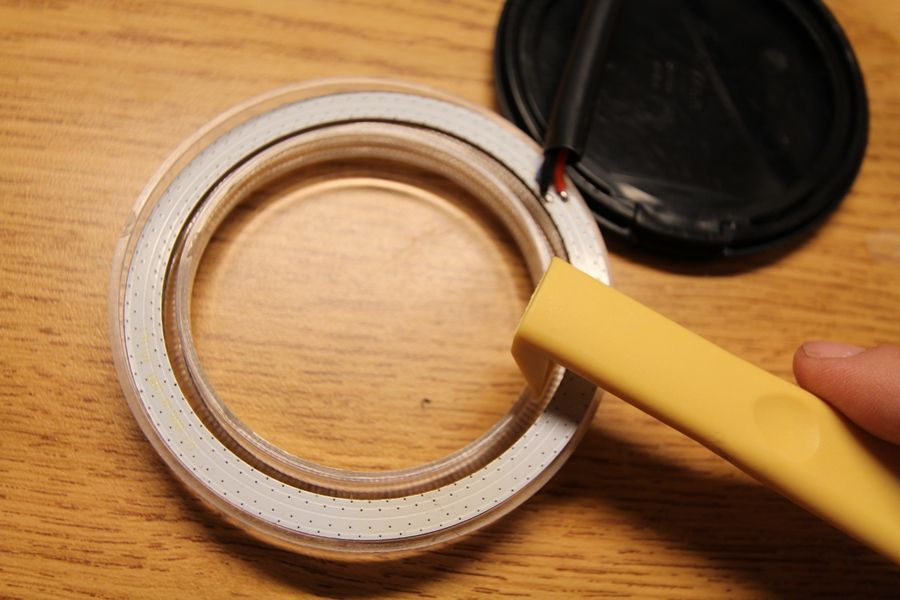 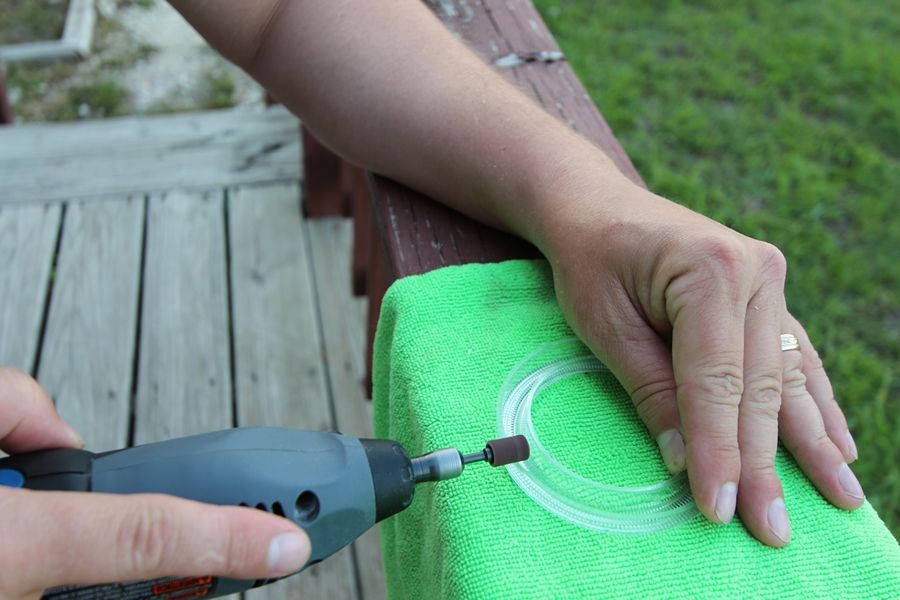 5. "Snap the halo ring into the back of the diffuser ring. If you leave it towards the back of the diffuser, the colors will have more chances to mix." Just put the halo ring behind the diffuser and lightly push. I used the plastic pry tool to help keep the halo ring straight. 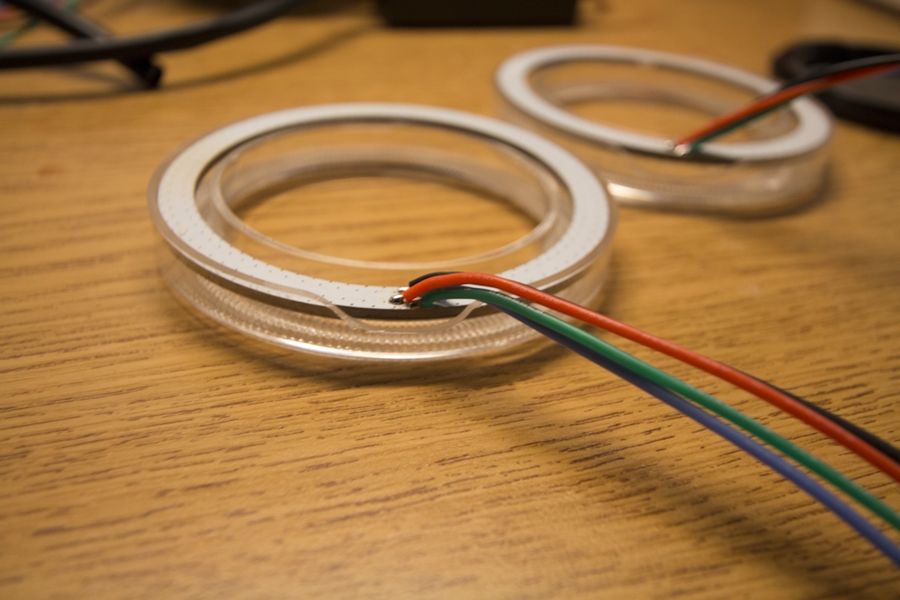 6. "Remove the pins from the pin housing. To do this, use a small paper clip. Looking at the pins, there is a large hole on one side of the pin, and a small hole on the other side. Take the paper clip and stick the end into the small hole. Push in, and you should feel a little click. You should be able to remove that terminal. Remove all 4 wires. Make sure that the tabs on the terminals are bent back to their original positions as shown in the diagram above." Each wire has it's own small hole that you'll use with the paper clip. This is a little easier if you have two people. One pushing with the paper clip and one gently pulling the wires. However if you're doing this by yourself, you'll have to hold the harness and grab/pull each wire with one hand while pressing the paper clip into the small hole. Also, I did not feel the 'click' when removing all 4 wires, but I didn't have any problems getting them all out. 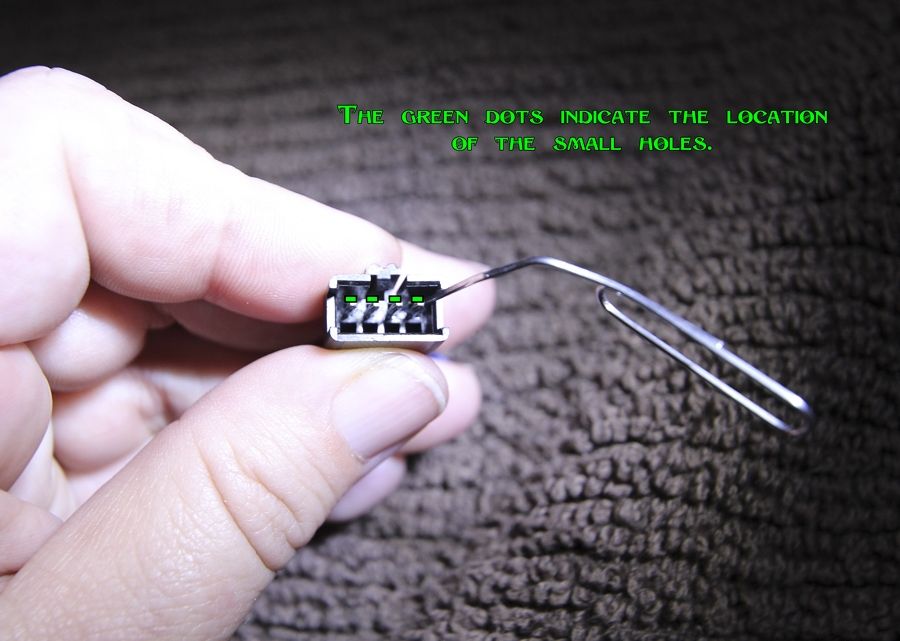 7. "There is a small hole on the back of the DRL housing towards the top. You may need to enlarge this hole." I used a 11/64 bit. It barely make the hole larger, more like it became more of a rounder shape instead of the original oval shape. 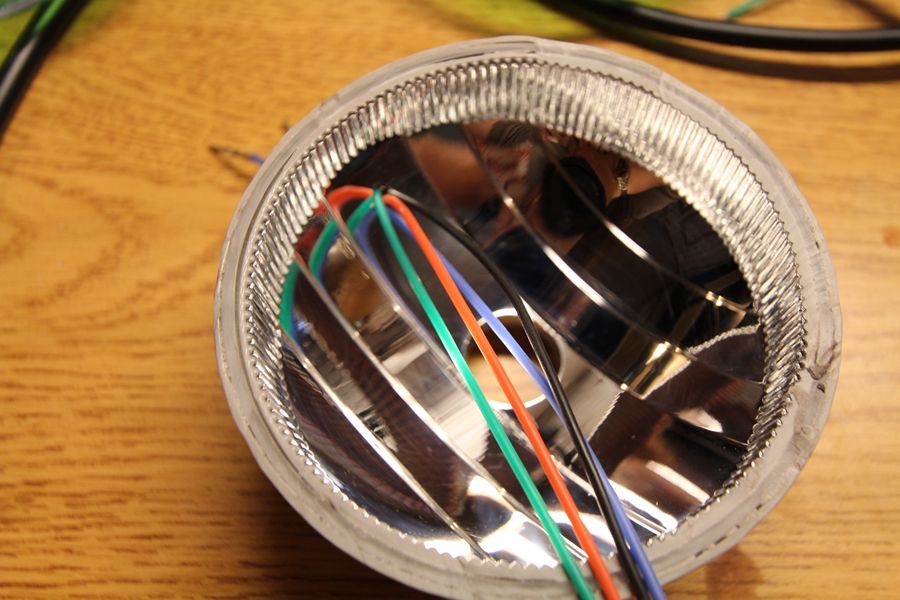 Steps 8, 9, and 10 kind of run together.. 8. "Insert the halo wire through the hole and test the fit of the halo and diffuser ring. Adjust where necessary." I took off the wire sleeve first, then inserted the halo wires to test fit. After being satisfied with the fit, I put the wire sleeve back over the wires. You can also choose to leave the wire sleeve on and just make a slightly larger hole in Step 7. 9. "Place a few drops of epoxy where the diffuser ring makes contact with the housing." 10. "Place a spray-paint can on top of the diffuser ring until the epoxy sets up. Make sure the ring is in place and the epoxy has cured. You don't want to redo this later." To help keep the diffuser centered, I used 4 toothpicks in the grooves between the diffuser and the housing instead of using the can of spray paint. When I would attempt to use the can, the diffusers would slant to one direction and the toothpicks helped take care of this issue. I probably needed to make the notches a bit wider.. Instead, I used 60 second epoxy so I didn't have to hold them with pressure for very long. 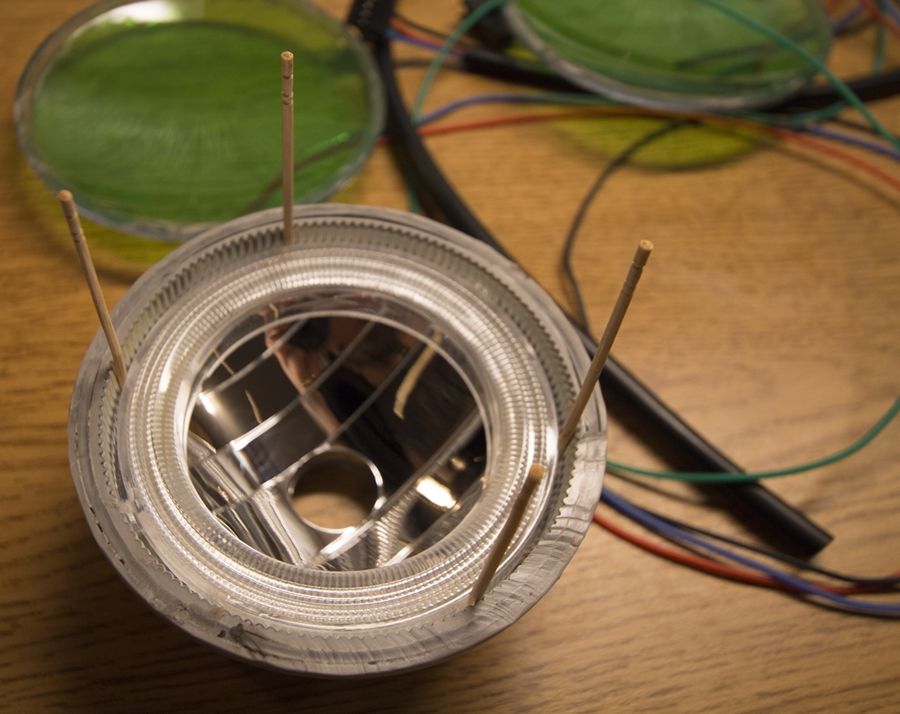 11. "Apply a small bead of clear silicon around the perimeter of the housing. Be very careful not to get extra silicon on the lens." 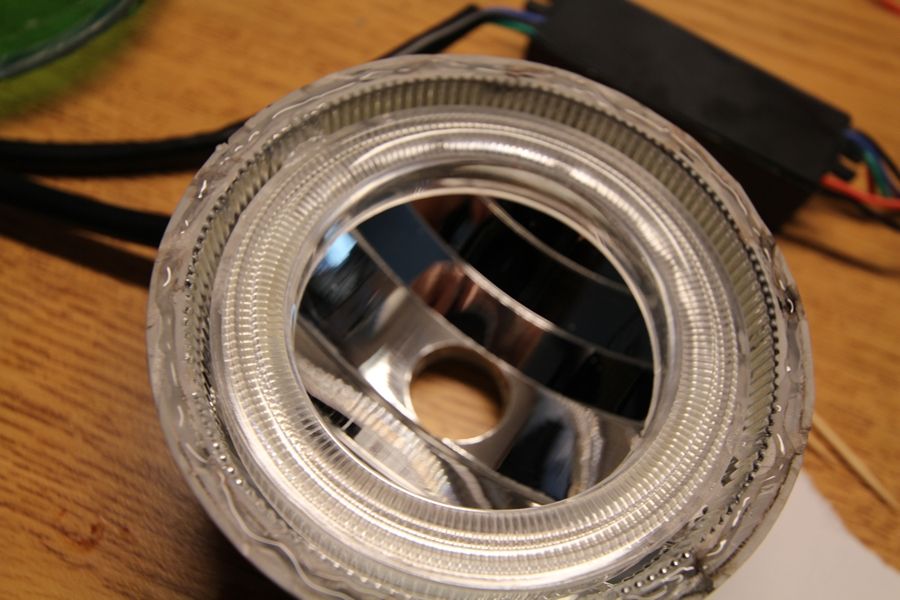 12. "Place the lens back on. Apply masking tape in a few spots to hold on the lens until it cures." I actually used the spray paint cans here, to help keep the lenses together. 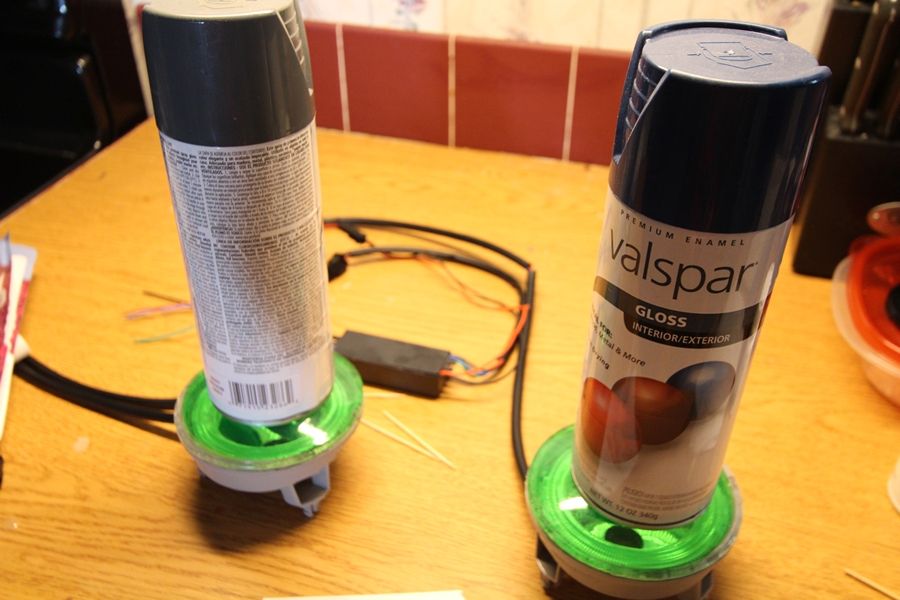 13. "Seal the wires with silicon where they come out of the housing." 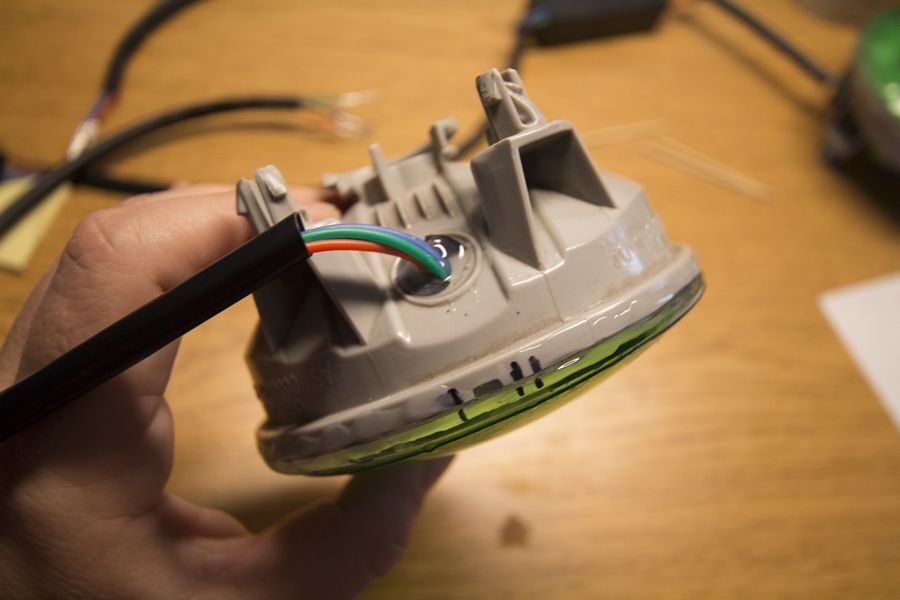 14. "Using the connector where it comes out of the LED driver, match up the colors and put the pins back into the housing." Make sure that the tangs are all pulled out a bit so the pins don't come back out of the connector. There is a tiny hole on the opposite side of the tang, so if it's pressed down too much, you can insert a needle into the hole and push the tang out a bit. I held the two pieces of the connectors together before I put all the wires back into them to make sure I was reinserting the wires in the correct order. 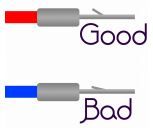 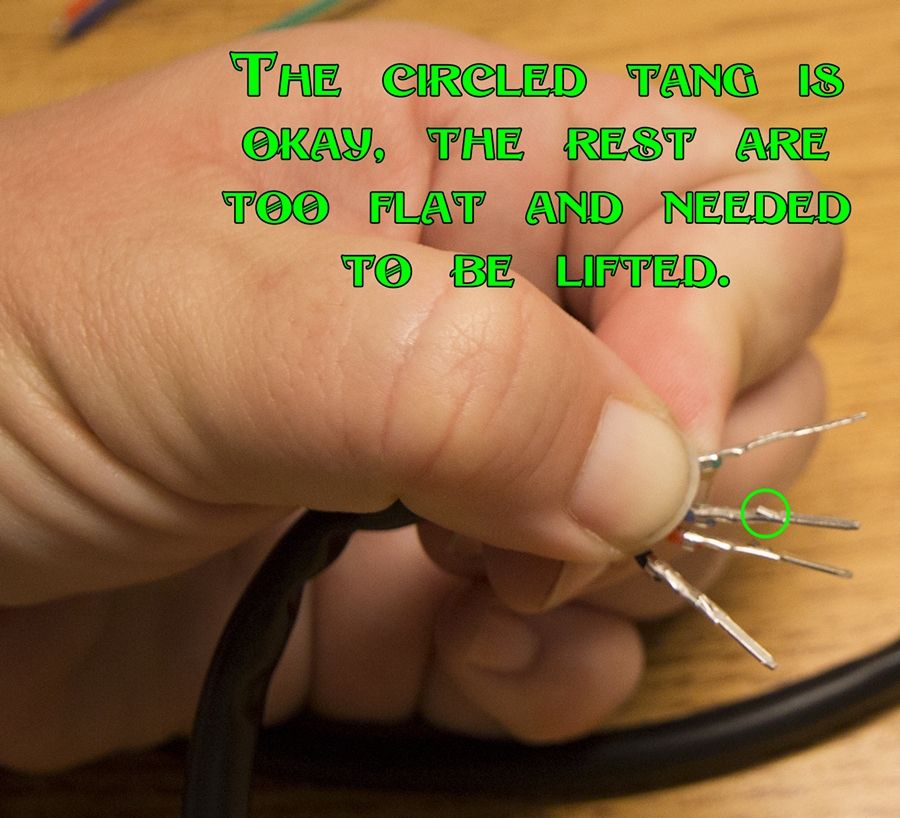 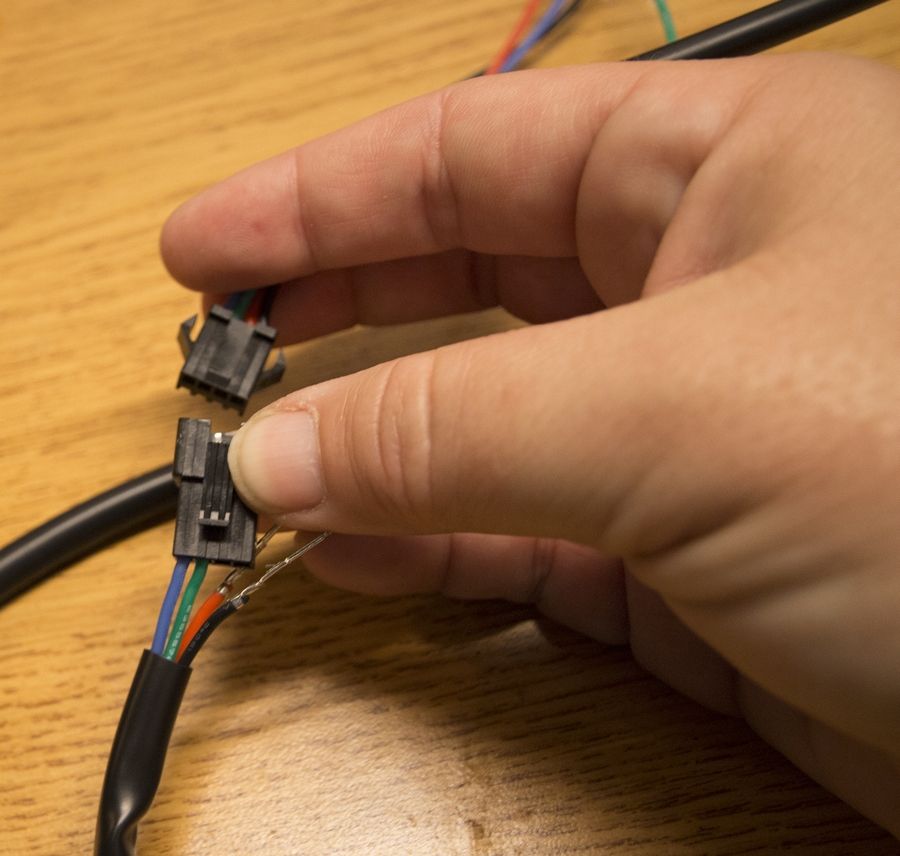 15. "If the wiring cover goes all the way into the DRL housing, this will become a straw for water to run in. Seal the end of the cover by squeezing in silicon." Remember in step 6, I took off the black wire sleeve? When I put it back on, I cut it in two to make it easier to slide over the wires. I added silicon to both ends of the wire sleeve and also the middle section where I made the cuts. I also went ahead and put a dab of silicon where the wires come out of the connector boxes for a bit of added protection. I used binder clips to help hold the wire sleeve in place while the silicon dried. *Note. Step 18 says to seal all of the non-waterproof connectors.* I did this on this step while everything was still in the house and easy to access. I used silicon on every possible opening. They're not all done in the photo, but the green circles are where I ended up adding the silicon. The yellow is the heat shrink over the folded up red wire. I also added connectors (see Step 17) to the ends of the loose wires and put heat shrink over those as well. 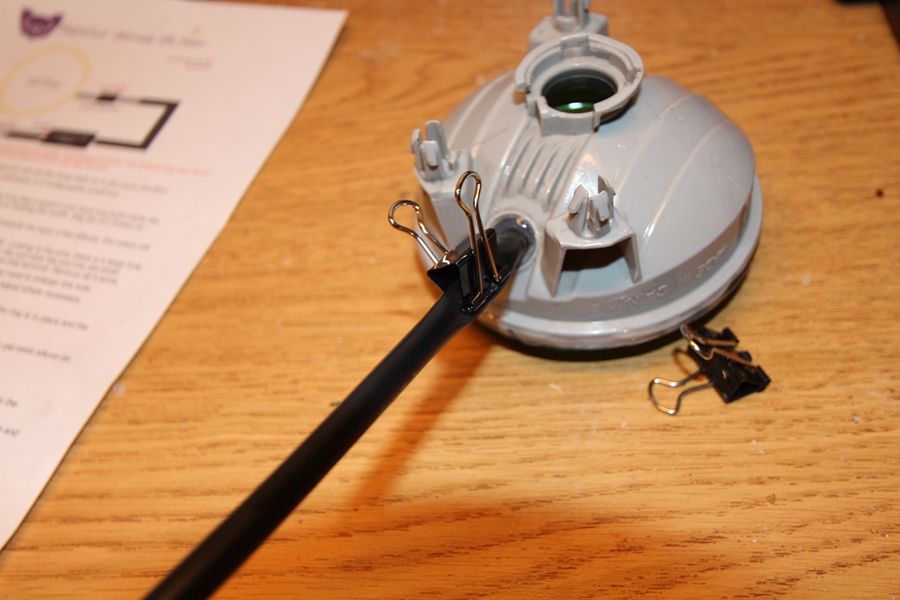 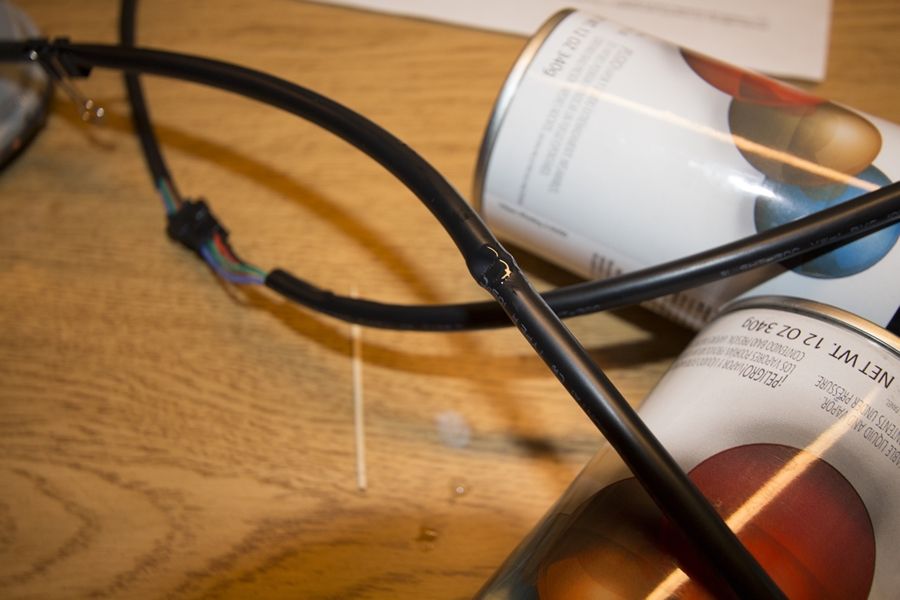 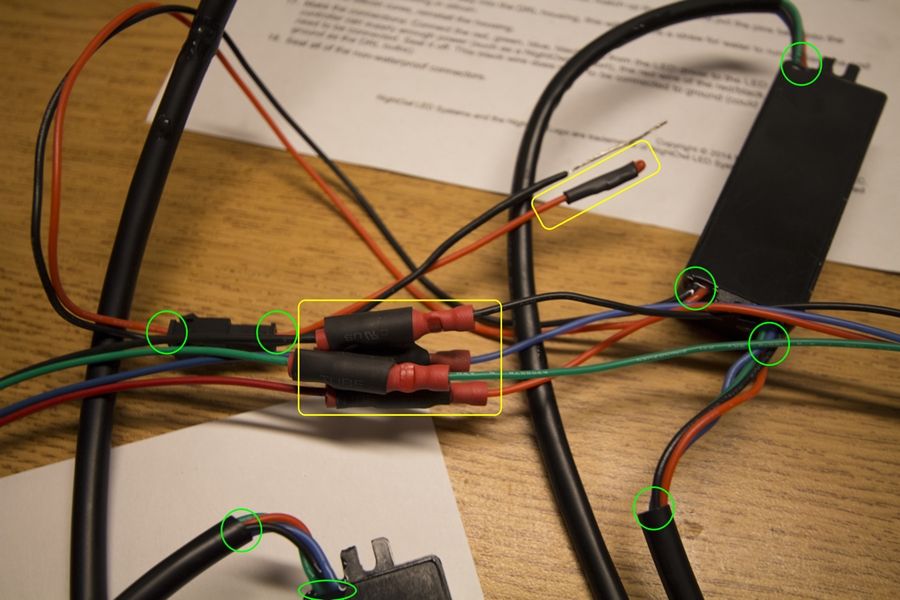 16. "Once the silicon cures, reinstall the housing." Reinstall the halo bezels first, then feed the wires through and follow with the DRL. Push until it clicks in place. 17. "Make the connections: Connect the red, green, blue, black wire from the LED driver to the LED controller. If the controller can supply enough power (such as a NightOwl SL port), the red wire of the red/black bundle does not need to be connected. Seal it off. This black wire does need to be connected to ground (could be the same ground as the DRL bulbs)." I got the pigtails to control the DRLs independently so my Step 17 was slightly different. I connected the red, green, blue and black wires from the halo to the red, green, blue and black wires going from the pigtails instead of directly into a controller. 18. "Seal all of the non-waterproof connectors." *I did this in Step 16.* Connect your wires to the HP Module and ta da! Stand back and admire you new totally awesome mod! ps. I have on green tint on the DRLs, so at the moment my DRL halos are shining a different color as the headlight halos. I haven't taken the time yet to play with the colors to make them match. For awesome photos of this mod, see NightOwl's thread: http://www.camaro5.com/forums/showthread.php?t=354276 Please excuse my video as the camera had a difficult time focusing at night, so it's really not that great. Plus all the autofocus noise drives me nuts. In person, it's more than fantastic!! My goal in the next couple of days is to go out at dusk and retake the video.
__________________
 |
|
|

|
|
|
#2 |
     Drives: IOM 2013 2SS/RS, Greenie, 06 FXSTBi Join Date: Apr 2009
Location: Turd Town, WI
Posts: 1,585
|
Best DIY ever. Super write-up.
|
|
|

|
|
|
#3 |
         Drives: '16 2SS Join Date: Apr 2011
Location: Chicago Suburbs
Posts: 2,271
|
Very nice, and, good comments!
|
|
|

|
|
|
#4 |
   Drives: 2012 45th Edition 2LT RS,2005 Tahoe Join Date: Mar 2012
Location: Henderson Nevada
Posts: 1,200
|
Thanks for the write up, I will be using this as I just ordered these this morning..
|
|
|

|
|
|
#5 |
|
US Veteran
Drives: 2011 Silver Ice Metallic 2SS/RS A6 Join Date: Jan 2011
Location: Bossier City, La
Posts: 1,407
|
Nice!
__________________
Dear Lord, give me the strength to carry on despite my Camaro addiction!
JRE iTSX tune, full cat-less Dynatech exhaust, CAI intake, Stillen Slotted/Drilled Rotors, RB braided brake lines, BMR lowering springs, (reserved for definite future MODS) |
|
|

|
|
|
#6 |
|
Drives: 2011 SS Convertible Join Date: Mar 2013
Location: Suwanee, GA
Posts: 373
|
Excellent job, Anita! You have a knack for DIYs, that's for sure.
|
|
|

|
|
|
#7 |
|
COTW 12/3/12
Drives: 2012 Ashen Gray ZL1 Join Date: Aug 2011
Location: Glen Carbon, IL
Posts: 3,279
|
NightOwl DRL Install
Excellent write-up! Subscribed so I can share with others!
|
|
|

|
|
|
#8 |
         Drives: 2LS 2014 Join Date: Oct 2013
Location: Staten ISland
Posts: 3,404
|
NICE!!

__________________
 |
|
|

|
|
|
#9 |
         Drives: 2016 SS w/2SS A8 Blue Velvet Join Date: Dec 2009
Location: 39.793153,-86.238223
Posts: 3,678
|
I have these but I have the JDP halos and was told the Nightowls will or can be tapped into the JDP harness and that way they will work in conjunction with my halos. We'll see how that goes. I've had these for some time now and really want to get this done.
Nice tutorial! I'm going to see about getting my DRLs out and at least get the Nightowls installed and hopefully wired up soon thereafter.
__________________
Never grow up, it's a trap!
|
|
|

|
|
|
#10 |
|
Texas Camaros
Drives: 2011 Synergy Green 2SS/RS Join Date: Oct 2010
Location: Venus, Tx
Posts: 1,681
|
Thanks. I started with the JDP halos, but switched over to the NightOwl system. I ended up having to take off the JDP harness as well. The only thing left from JDP that I have is the wiring into each headlight, but the harness that went from the control box to the headlights and then into the on/off/on switch and the interior LED indicator has all been removed.
__________________
 |
|
|

|
|
|
#11 |
       Drives: 2011 Camaro 2SS/RS (Black) L99 Join Date: Aug 2010
Location: Pilot Point, Texas
Posts: 2,185
|
How much do you charge to do this for mine? I have had the DRL lights in a box since June. I don't have the expertise to do this! :(
|
|
|

|
|
|
#12 |
 Drives: 2010 ss/rs 6 speed manual Join Date: Aug 2013
Location: Ny
Posts: 584
|
Nice write up
__________________
2010 camaro ss/rs, standard 6 speed, ls3 motor, bmr subframe connectors, jba 3” competition Exhaust, stainless works 1 7/8" headers, adm cold air intake, hurst short throw shifter, bo white ported tb, mishimoto aluminum radiator, mishimoto oil cooler.
|
|
|

|
|
|
#13 |
 |
Any insight on removal of the DRL from a ZL1? - The housing/backing is different than above pictured. Seems to have a different backplane/support. It does however have 3 squeeze points like the above but maybe more stiff, as I cannot get any of them to budge. Any more pressure I might break them...There are 5 other tabs as well..
Searches coming up empty..shouldn't have to put anything else but "ZL1 DRL housing removal" but alas nada. Pic attached
__________________
- 2013 Black ZL1 - A6 - Lingenfelter/Cordes Stage 2.5 packages E85 - FORE Fuel System - Kooks LTHs - Magnaflow Cans - Rotofab CAI/Big Gulp/Coolant Tank - Savini 3pc Forged - Underhood Dress Up (ACC & Drake & Moroso) - Hurst Shifter Kit - Custom Audio w/ JL Audio Sub/Amp/Stealthbox - Hand Polished Brace - Oracle Ghost Sidemarkers - LEDs everywhere - 624/617 on E85 & 545/548 on 91 (Sept 2015) - 693rwhp (Dec 15)
|
|
|

|
|
|
#14 |
 |
I am considering the Nightowl system - if I decide to go with Nightowl I will definatley use this thread to install. Very good detailed DIY.
__________________
K & N Cold Air Intake, 25% window tint, 2 sets of 6000K LED fogs added, bow ties delete, Pypes catback mid exhaust, MGP Caliper covers, Spyder projection HID 6000K lighting with dual CCFL halos, Technostalgia Rapid Fire LED Tail Lights, blacked out rear bezels, Oracle Ghosted side marker lights, Platinum Ultra Rims, LED tag, dome, trunk lighting, Razzi Ground Effects, Billet Grille, Oracle Concept Mirrors, Eibach Pro Springs,
GM Strut Tower Brace and LED lit door sills.  |
|
|

|
|
|
|
|
 |
|
|