You are browsing camaro5 

|
 06-17-2020, 12:28 PM
|
#589 | |
 
Drives: 2010 camaro limited edition turbo Join Date: Mar 2014
Location: saint petersburg, florida
Posts: 499
|
Quote:
|
|

|

|
|
06-18-2020, 05:40 AM
|
#590 | |
|
RIP Betsy ( Vitara )
Drives: '11 SGM 1LT/RS Join Date: Oct 2012
Location: Ottawa, Ontario
Posts: 1,178
   |
Quote:
I've had mine on and off about 50x already. I do it all myself.
__________________
 First retrofitted 2014 mylink. |
|
|
|
|
|
06-18-2020, 10:50 PM
|
#591 |
 
Drives: Camaro 2011 RS Join Date: Jun 2015
Location: Anaheim
Posts: 231
|
Seriously looking forward to that video!
__________________
Sometimes Rattlecan rims look good...
 |
|
|
|
|
06-22-2020, 05:03 PM
|
#592 |
|
Drives: 2010 camaro limited edition turbo Join Date: Mar 2014
Location: saint petersburg, florida
Posts: 499
|
I primered the top of the bumper so I can wet sand and be sure that those hood humps are gone and everything is flat. Installed it to check and all looks really great, within shimming distance. Really excited about this modification. I also looked at bumper support and there are a number of ways to accomplish this and I will address this in an upcoming thread. I have all the body lines sanded perfect and this will look like it came from the factory when I'm finished.
As far cutting off the engagement pins and replacing with bolts from the back side, it can be done but hard to get to the other side to tighten the bolts. Somehow you would have to entrap the blind side to keep them from turning when tightening the nuts. I think a good solid belly pan made of aluminum or composite material and bolted to the subframe will keep the bumper from sagging. That is what I am going to do. |
|
|
|
|
06-22-2020, 11:13 PM
|
#593 | |
|
RIP Betsy ( Vitara )
Drives: '11 SGM 1LT/RS Join Date: Oct 2012
Location: Ottawa, Ontario
Posts: 1,178
|
Quote:
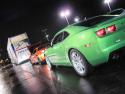
To do the reverse bolt method you need t-nuts you thread and glue in. It'll be quite the while before I do the mod but its not 100% needed. This is my alignment / no sag with only mending plates.
__________________
First retrofitted 2014 mylink. |
|
|
|
|
|
06-23-2020, 01:54 AM
|
#594 |
|
WHPLSH

Drives: 2010 SS Maggie,ARH,Meth,AFE Coilove Join Date: Mar 2010
Location: San Clemente ,Ca
Posts: 128
|
The method I described above really tightens up the sag and with the belly pan properly installed my new bumper is rock solid. Under the hood the 2 piece fasteners do not lock it in place so with using those rubber body fasteners it really locked it in place
|
|
|
|
|
06-23-2020, 06:27 AM
|
#595 | |
|
Drives: 2010 camaro limited edition turbo Join Date: Mar 2014
Location: saint petersburg, florida
Posts: 499
|
Quote:
|
|
|
|
|
|
06-23-2020, 11:23 PM
|
#596 | |
|
Drives: Camaro 2011 RS Join Date: Jun 2015
Location: Anaheim
Posts: 231
|
Quote:
__________________
Sometimes Rattlecan rims look good...
|
|
|
|
|
|
07-06-2020, 11:25 PM
|
#597 |
 Drives: 2014 2LT Camaro RS Join Date: Sep 2016
Location: Uvalde
Posts: 69
|
Has anyone fixed bumper sag issue and explain in further detail.
Also I need a new fog light bezel I’ve looked can’t find one?? |
|
|
|
|
07-07-2020, 09:44 PM
|
#598 |
|
RIP Betsy ( Vitara )
Drives: '11 SGM 1LT/RS Join Date: Oct 2012
Location: Ottawa, Ontario
Posts: 1,178
|
Not sure if they make the bezels proprietary or if they just copied the mold from a 6th gen. When I was lined up side by side with a actual 6th gen it looked like a 100% copy.
Also bumper sag is being worked on by many of us. Mine seems to have self corrected but I still want to make more improvements.
__________________
First retrofitted 2014 mylink. |
|
|
|
|
07-08-2020, 09:03 AM
|
#599 |
|
Drives: 2010 camaro limited edition turbo Join Date: Mar 2014
Location: saint petersburg, florida
Posts: 499
|
I'm working on it, too. My shop is busy and time is at a premium but should have something soon.
|
|
|
|
|
07-08-2020, 04:54 PM
|
#600 |
 Drives: 2014 Camaro Join Date: Jan 2020
Location: NE
Posts: 31
|
+1 for tlamb2s idea with the well nuts, I used four and this bumper isnt moving. Piloted the holes .25 higher so that when I installed the grommet it pulled the bumper up. I needed this also because my hood was a bit shy of where I wanted it sitting. Once the well nuts went in it really pulled the bumper to the fenders, almost a little to much, so I actually had to loosen them up a little to get the lines of the fender to match up.
|
|
|
|
|
07-09-2020, 12:53 AM
|
#601 |
|
WHPLSH
Drives: 2010 SS Maggie,ARH,Meth,AFE Coilove Join Date: Mar 2010
Location: San Clemente ,Ca
Posts: 128
|
It tightens it up nicely huh.
|
|
|
|
|
07-14-2020, 08:01 PM
|
#602 | |
|
Drives: 2014 2LT Camaro RS Join Date: Sep 2016
Location: Uvalde
Posts: 69
|
Sag
Quote:
|
|
|
|
|
|
|
|
|
 |
|
|


