You are browsing camaro5 

|
 12-24-2014, 08:17 PM
|
#71 |
|
'It's an experiment'

Drives: [COTW 2/09/15] '11 GPI LSA SC Z/LE Join Date: May 2014
Location: Dallas TX
Posts: 8,694
|
OK, continuing on the r n r...
Needed to remove the grounds on the passenger head -- rear and near the middle just above and next to the headers: 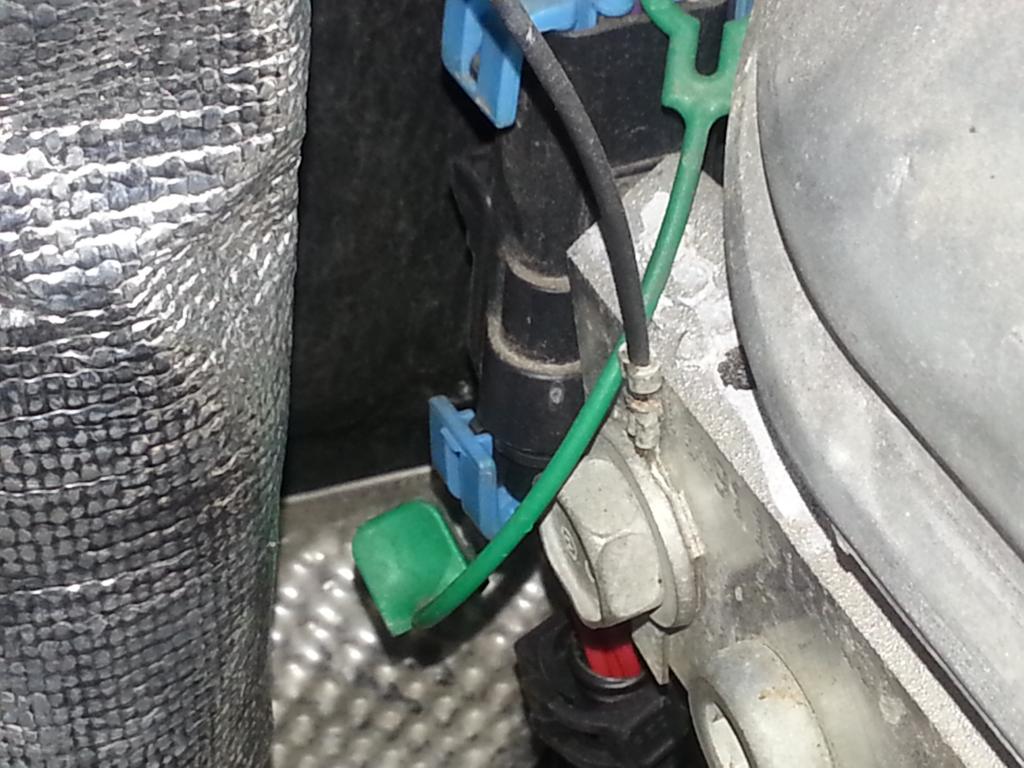 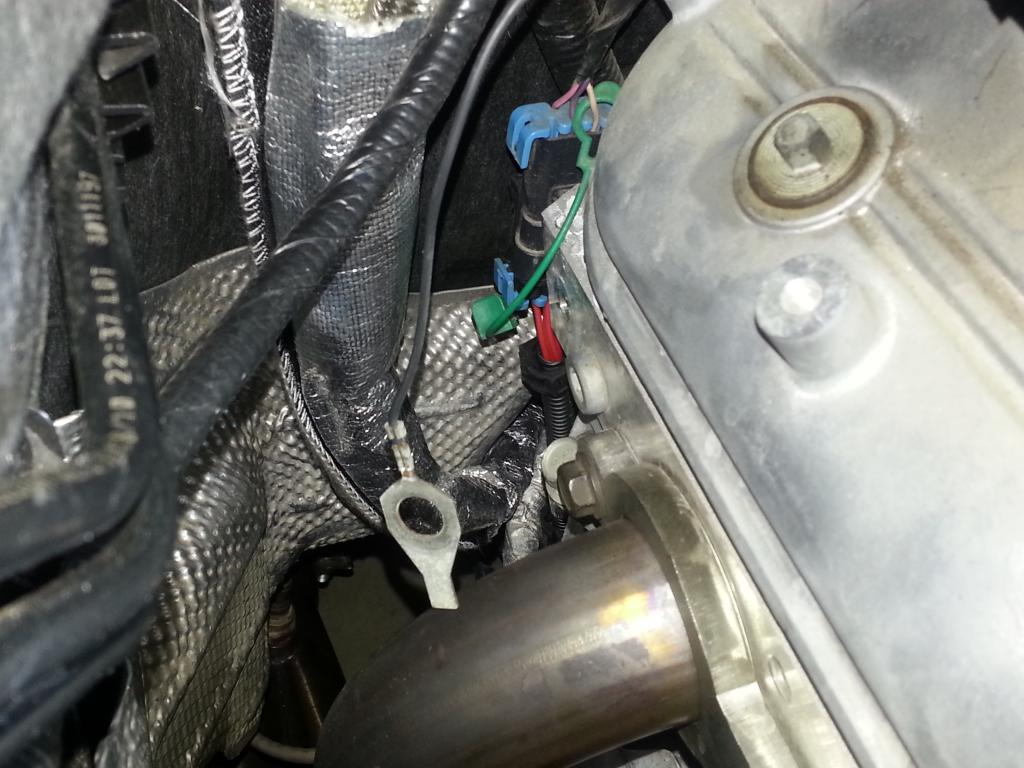 O/2 Connector disconnected while I'm back there:  This is the loom in the back that holds part of the O/2 connector against the head (screws into the back of it near the passenger side rear outer):  Other ground near the middle passenger side right above the header: 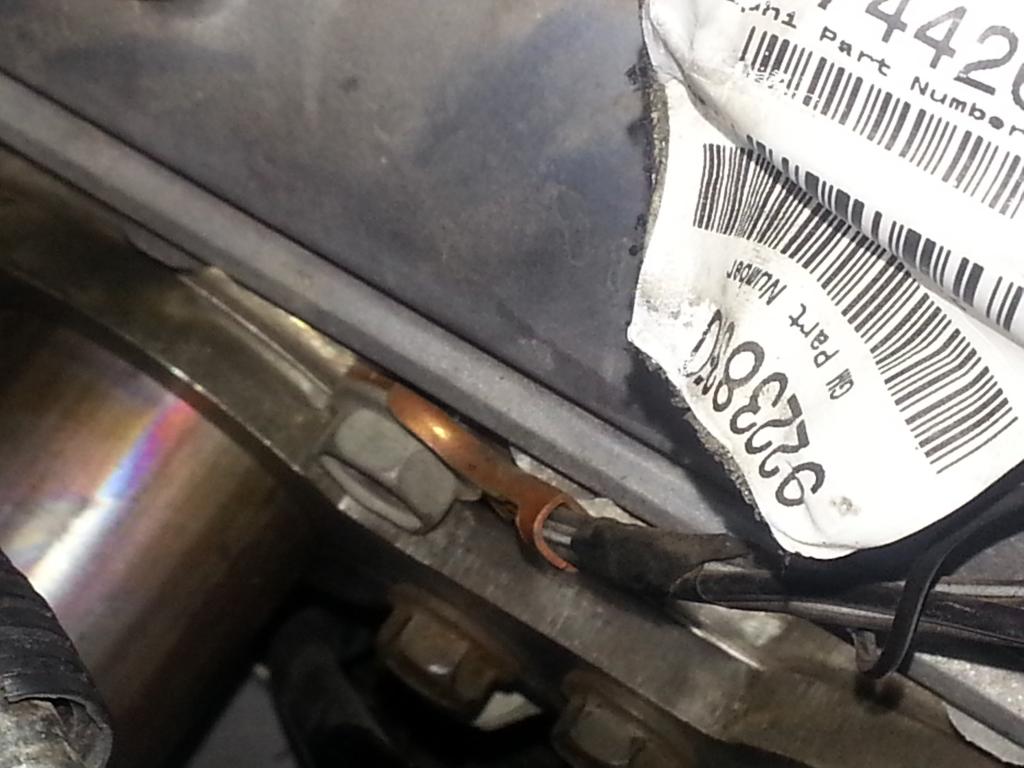 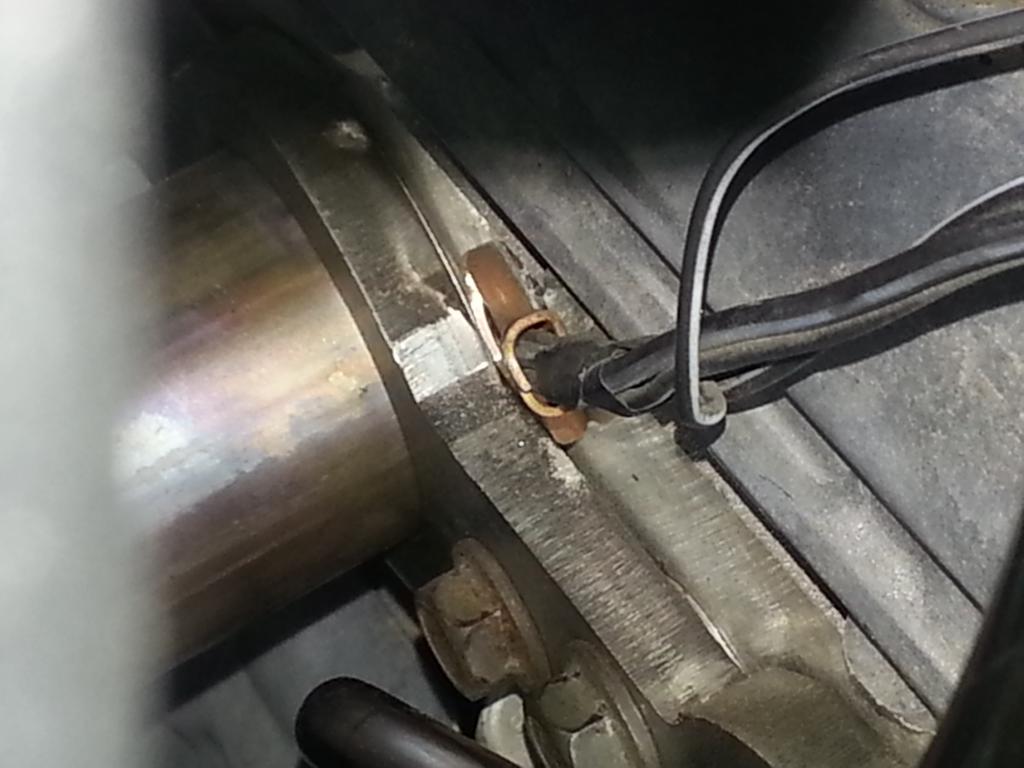 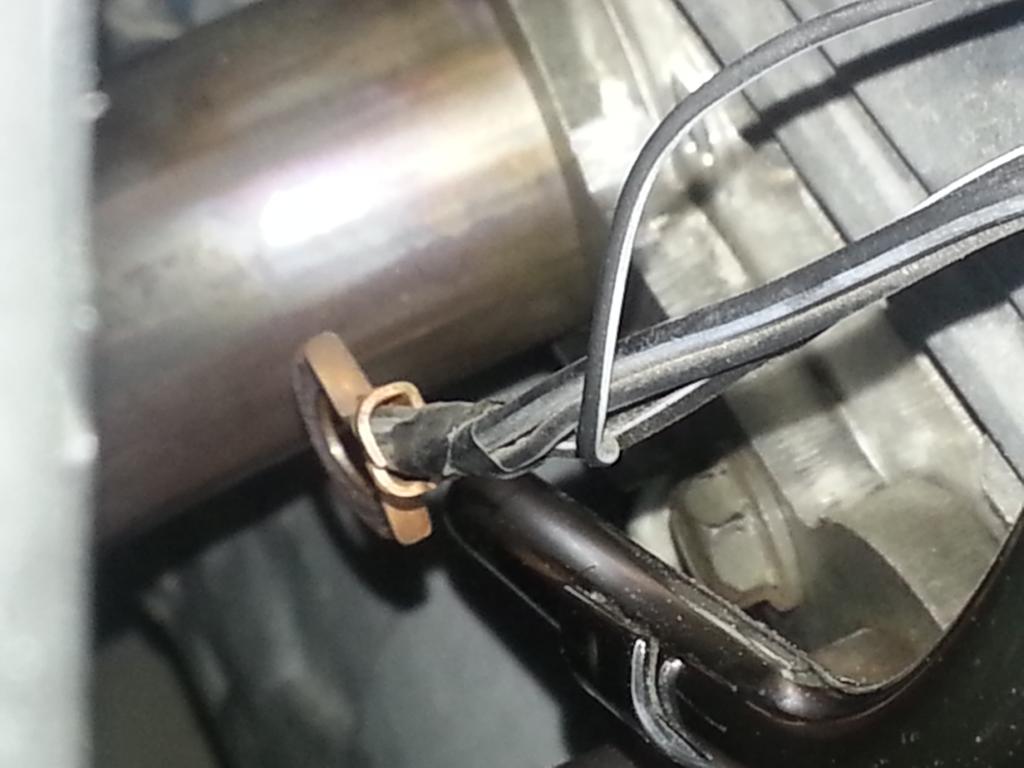 Dip stick tube bolt near the middle: 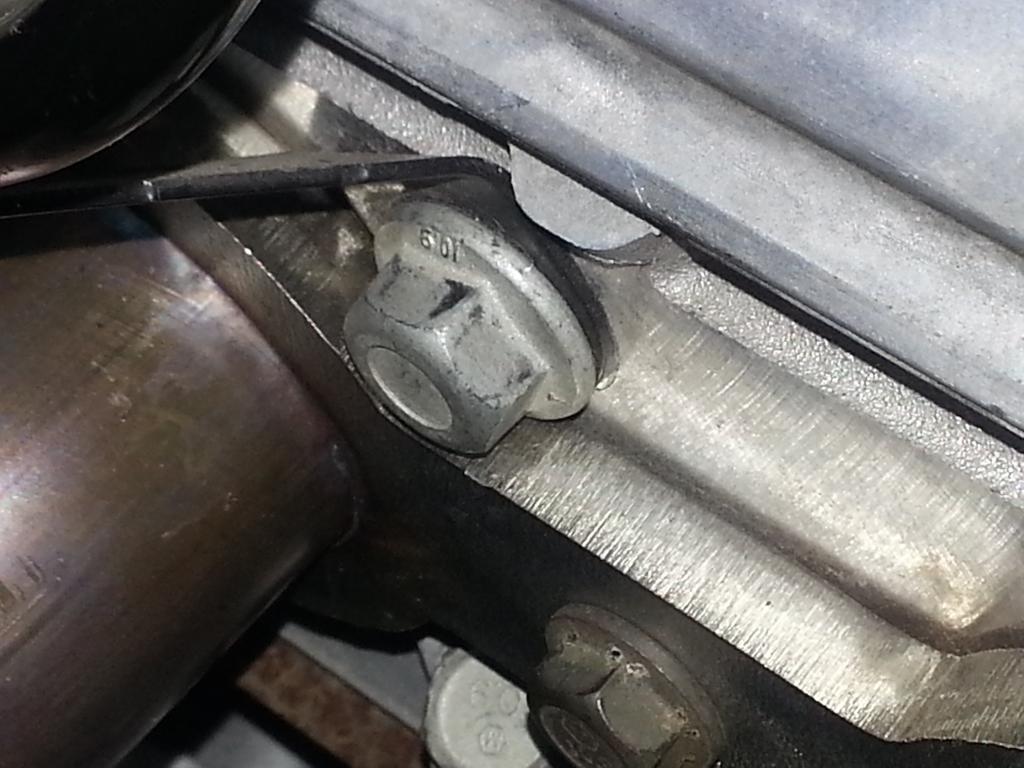 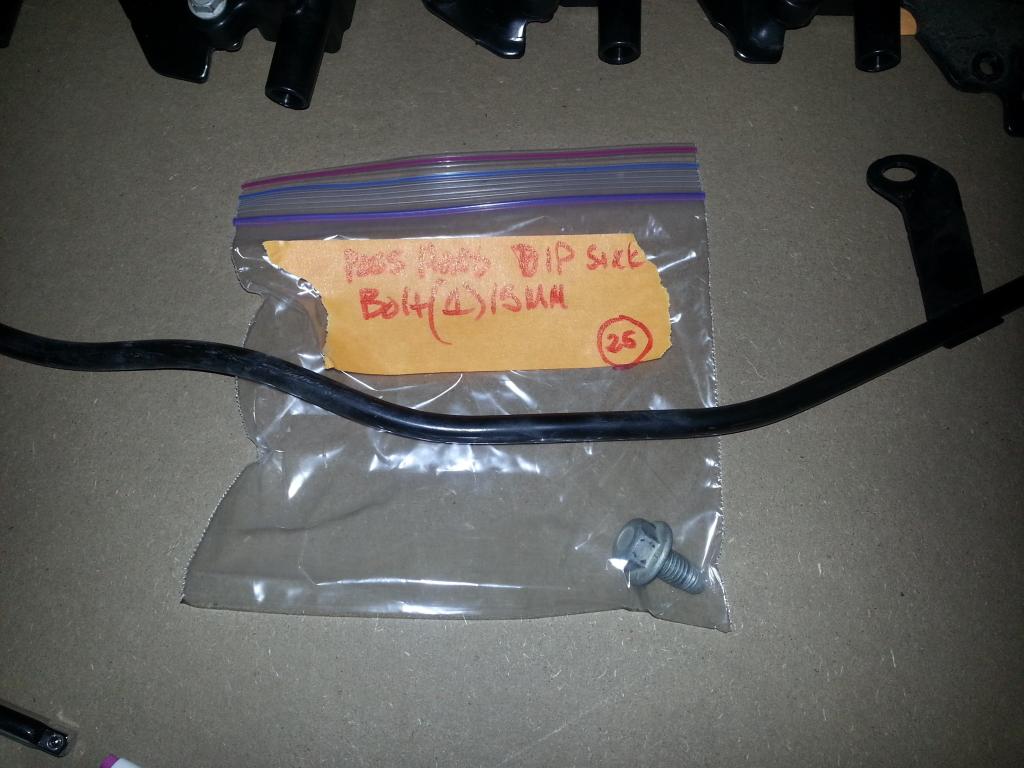 Now removing the plugs and header from the passenger side:  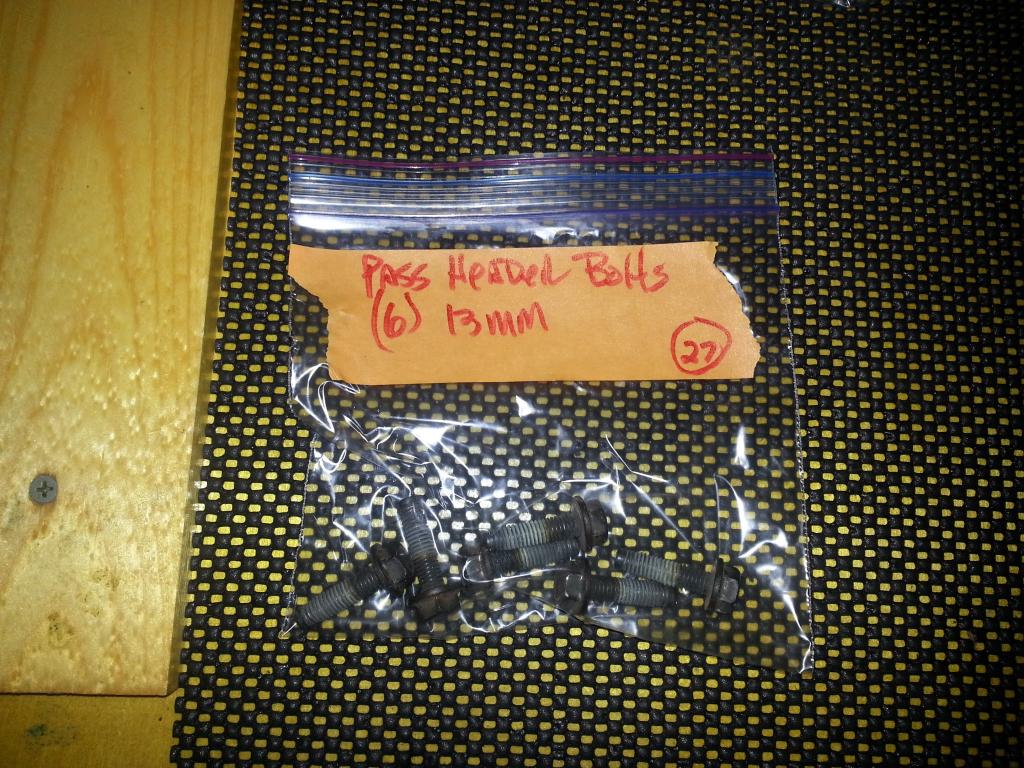 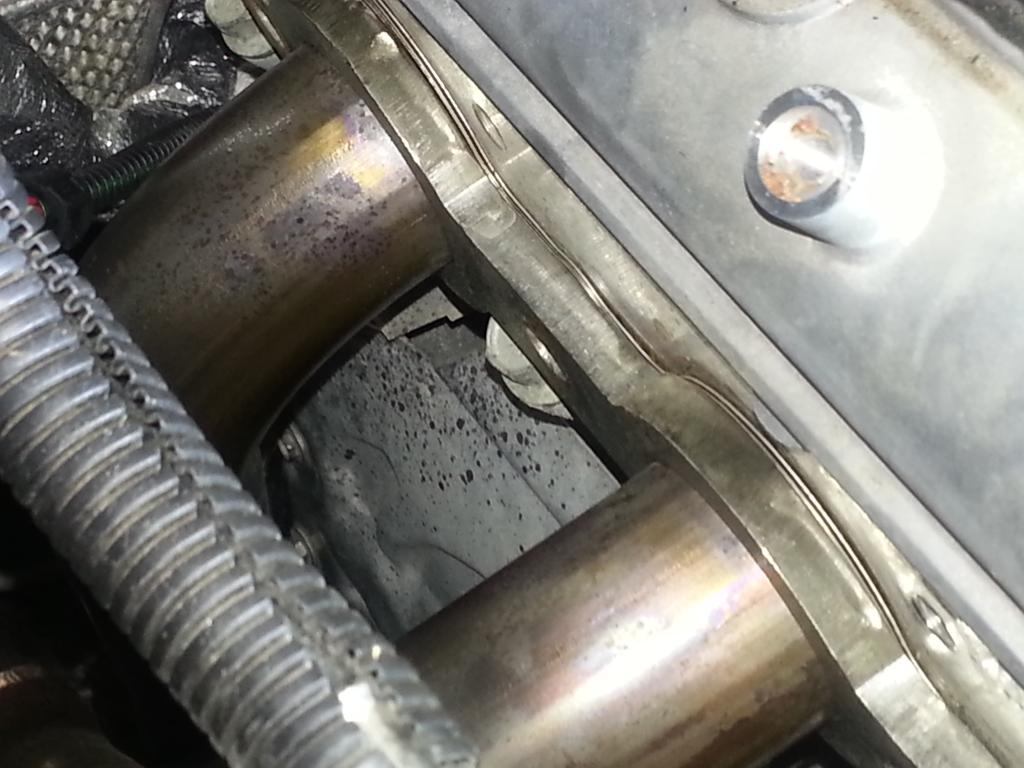 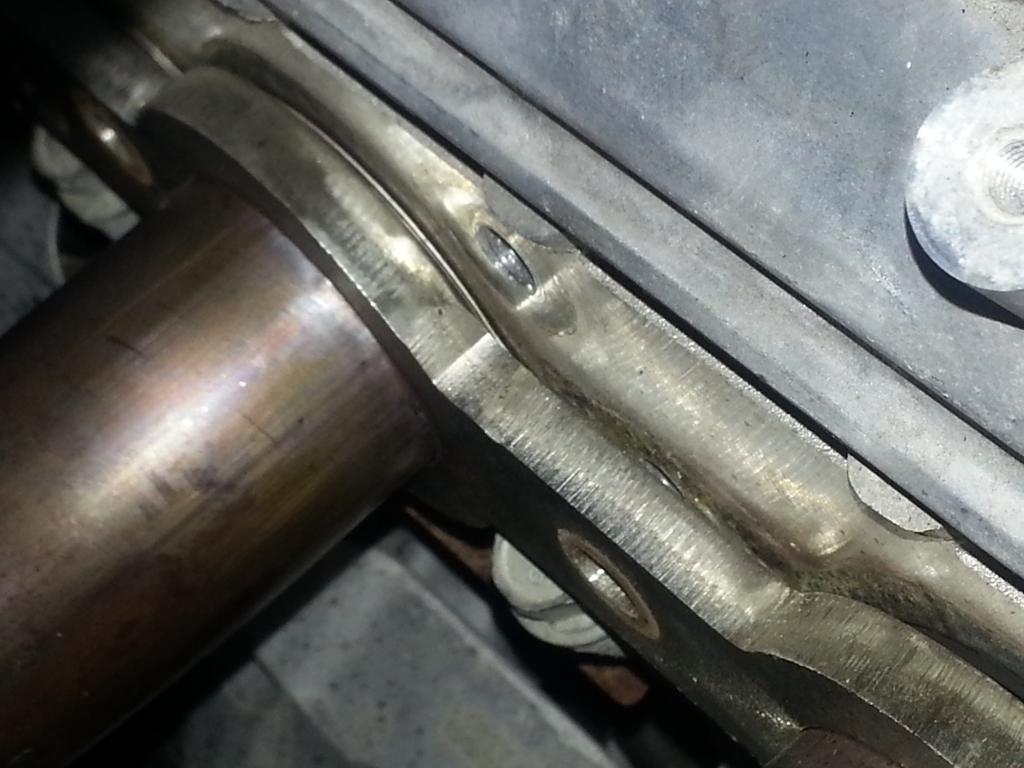 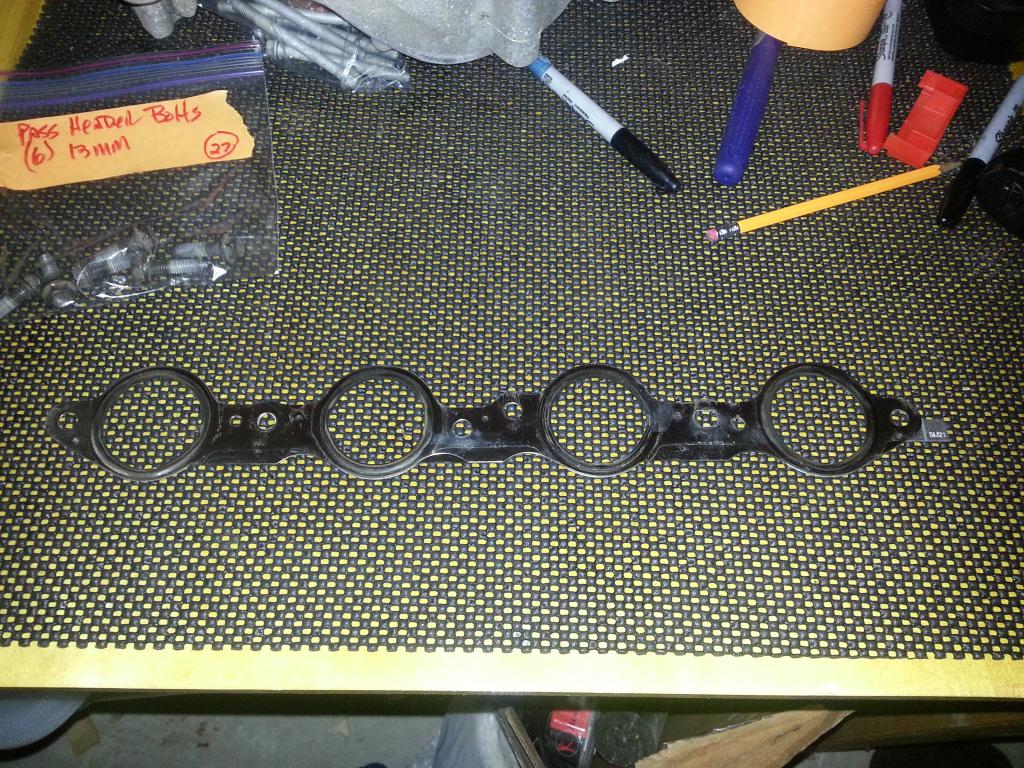 Drivers plugs and header: 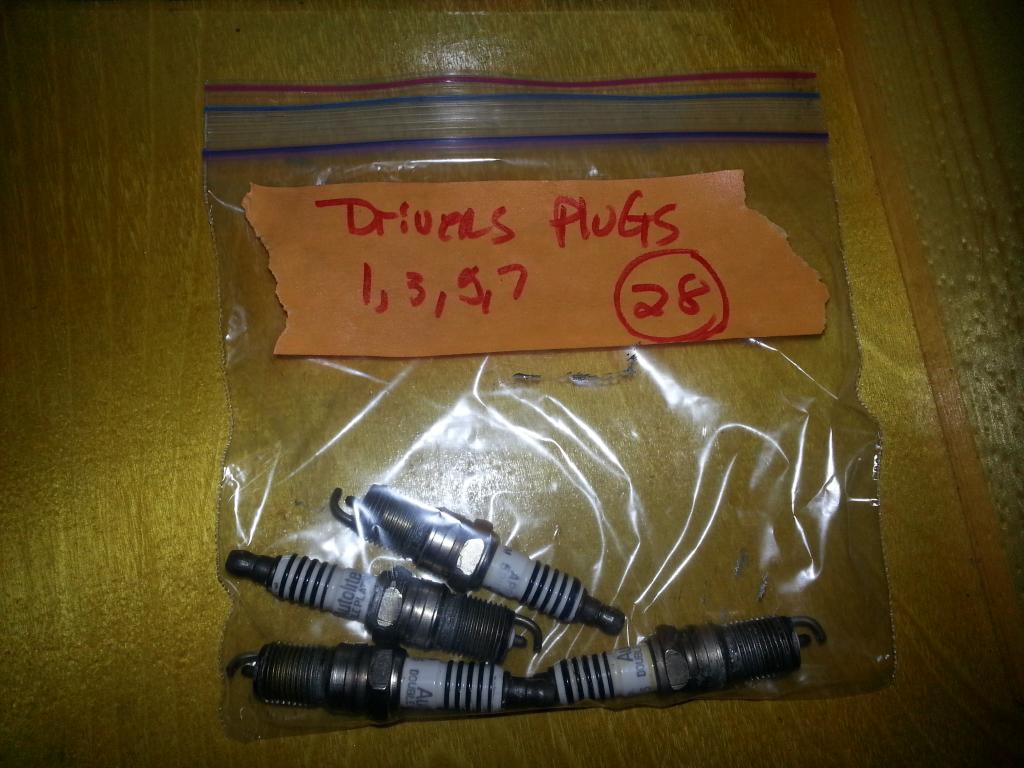 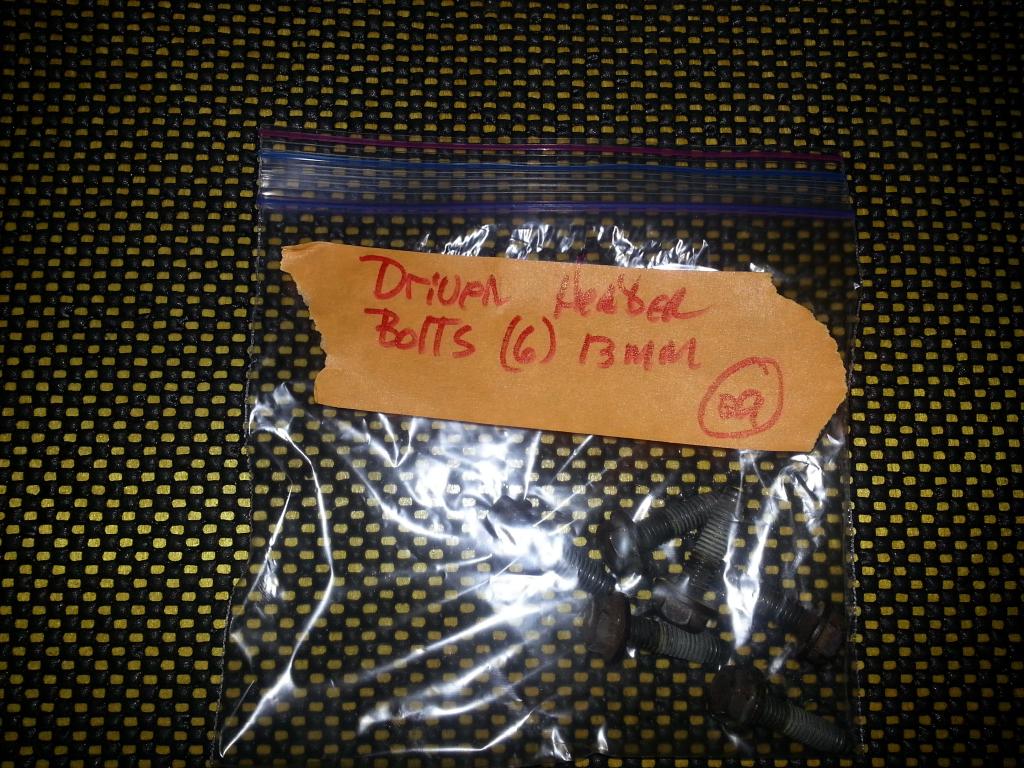 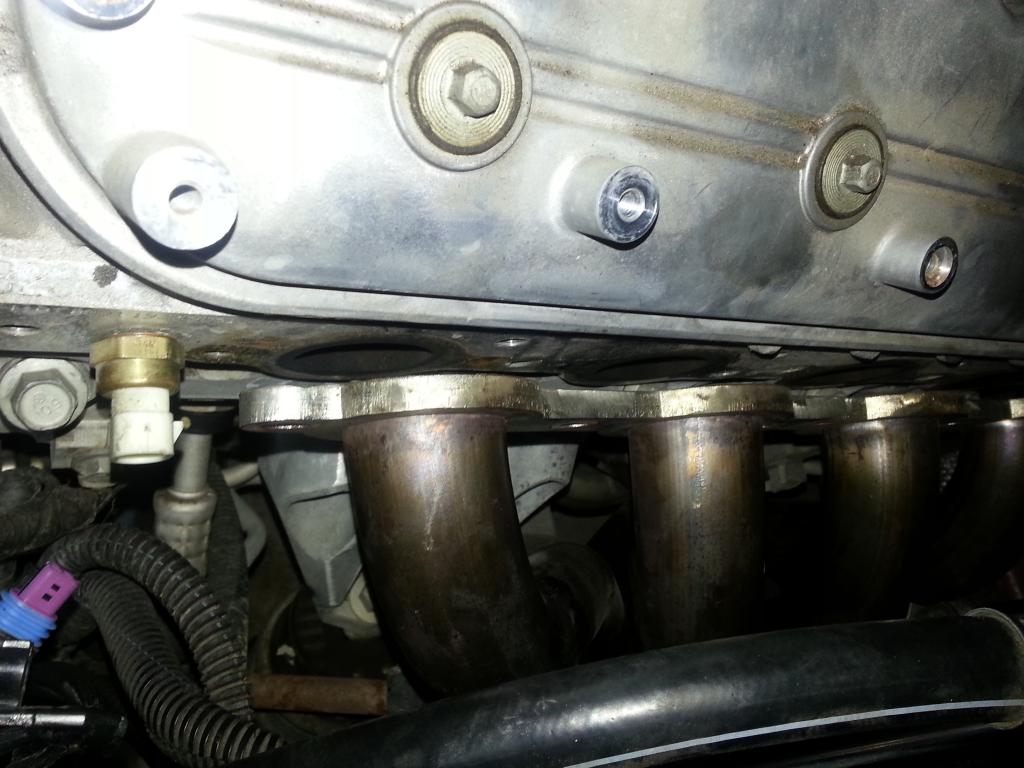  Now, we can remove the temp probe from the drivers side head (near the front -- 19 mm deep wall socket): 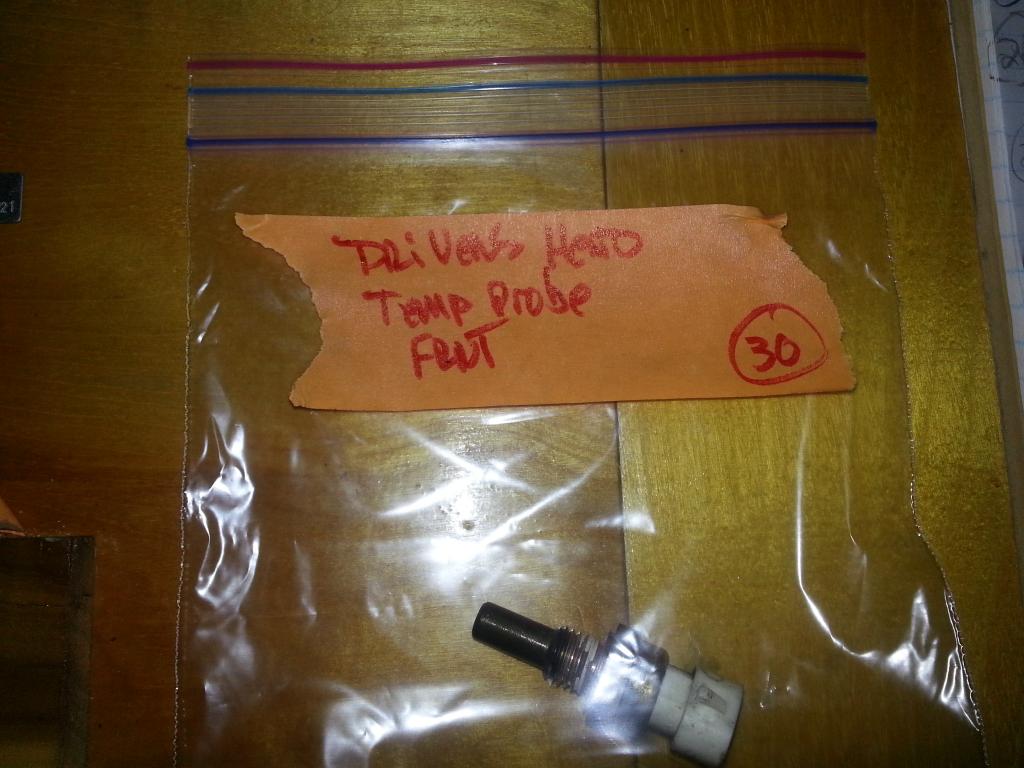 Mark the head for reference: 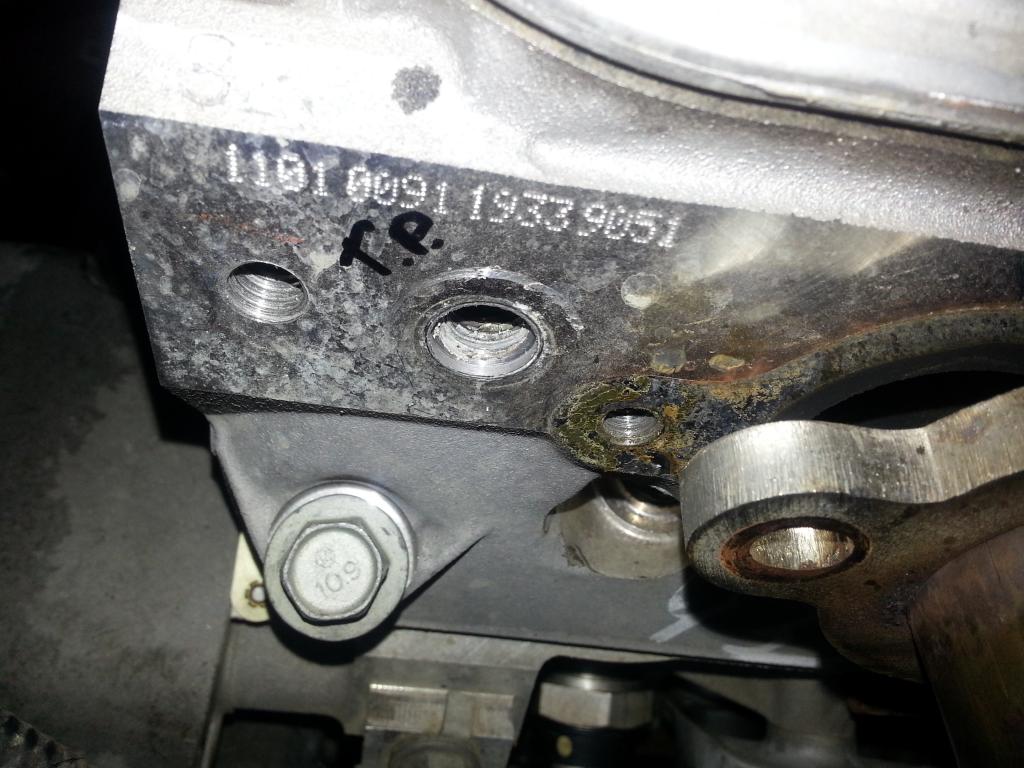 Now that everything is pretty much removed from the head, I'll do the valve covers, rocker arms, and push rods next time! -Don Last edited by hammdo; 07-02-2017 at 12:34 AM. |

|

|
|
12-25-2014, 09:43 AM
|
#72 |
  
Drives: Silver SS/RS, Man 6 Join Date: Apr 2009
Location: DFW area, Texas
Posts: 884
|
Very good pics of your dismantle. You have been a busy guy, any chance you will do more on Xmas day? Ha Ha Thanks Don, you are doing great work in covering your build. Take some time off; OR not. Thanks
__________________
Silver 2SS/RS Man/6
CTS-V front 6-Piston Calipers, GM 3.91 Rear Gears |
|
|
|
|
12-25-2014, 12:52 PM
|
#73 |
|
'It's an experiment'
Drives: [COTW 2/09/15] '11 GPI LSA SC Z/LE Join Date: May 2014
Location: Dallas TX
Posts: 8,694
|
OK, short day today (Xmas) so I removed the valve covers, rockers, and push rods and organized them -- marked each rocker just in case something 'happens' and they fall...
Valve covers need to be 'tapped' to loosen them up: 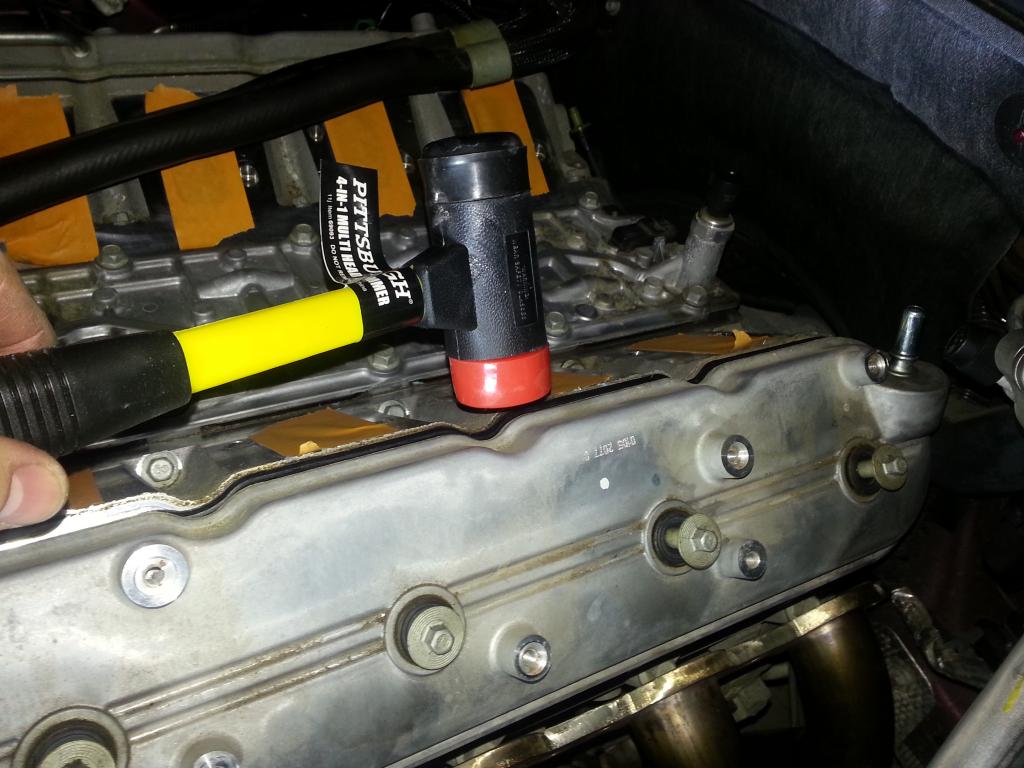 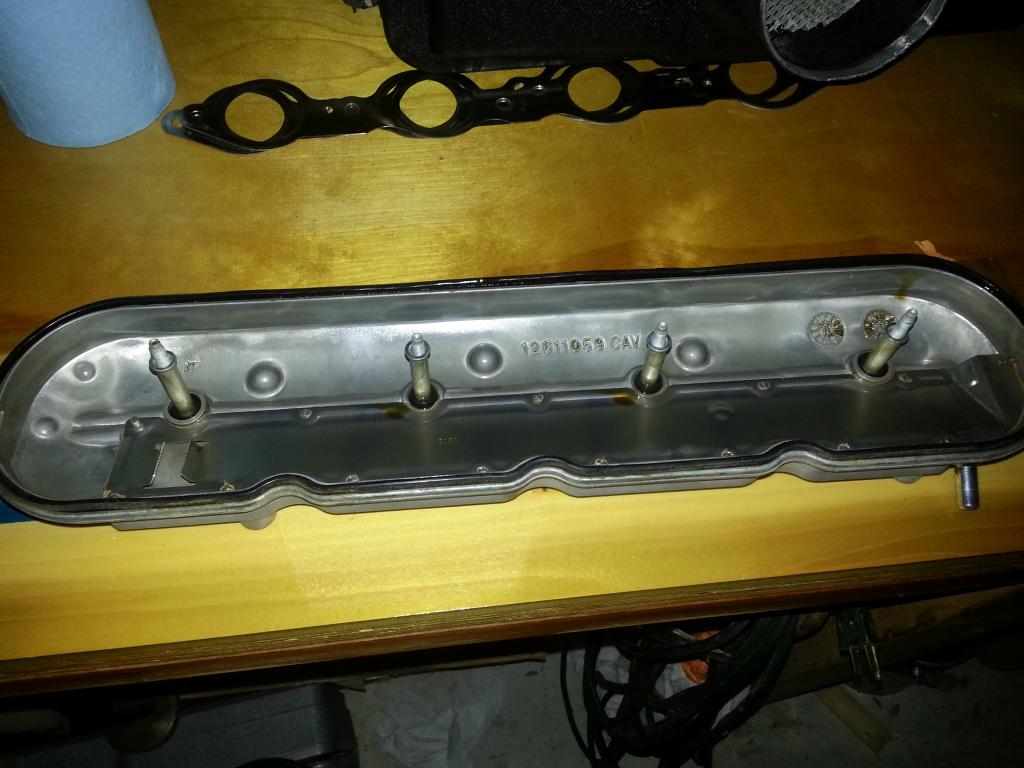 Nice and clean -- ready to remove rockers and push rods, first the Driver's Side: 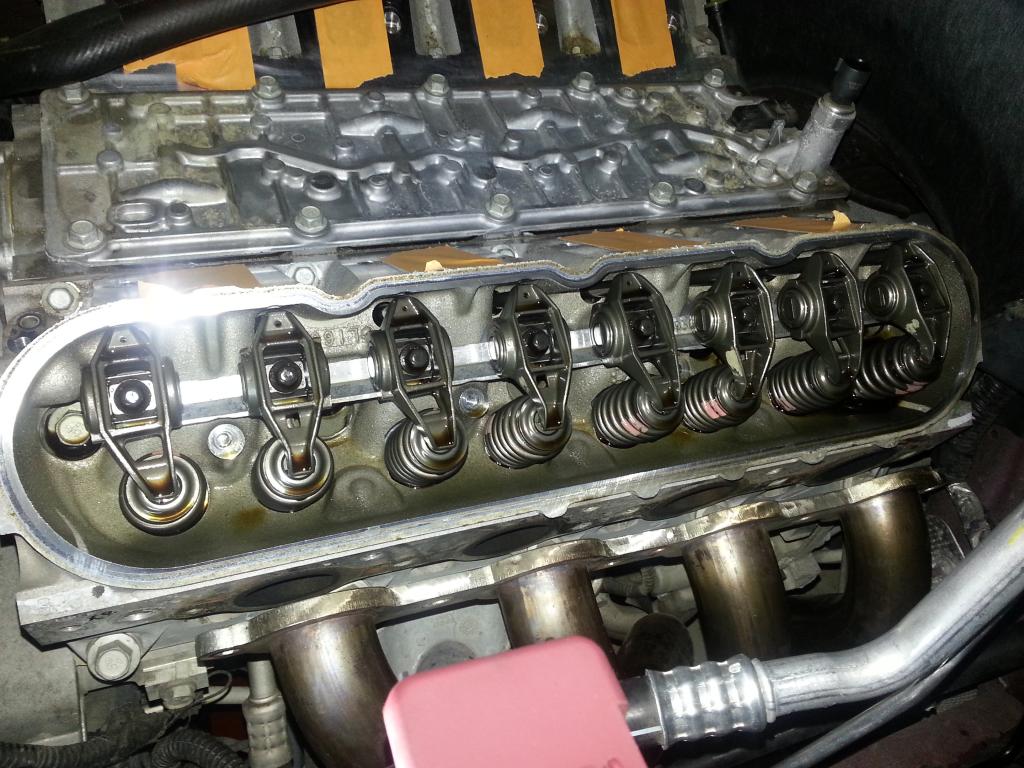 Note the intake (offset) and exhaust rockers: 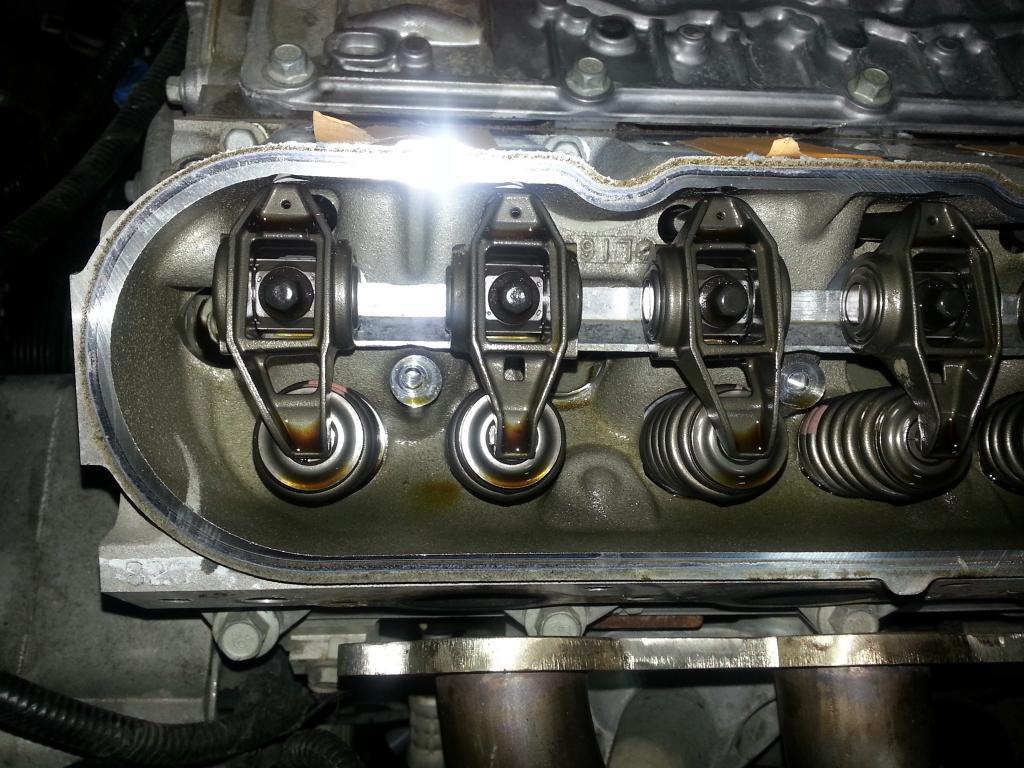 Organized in order: 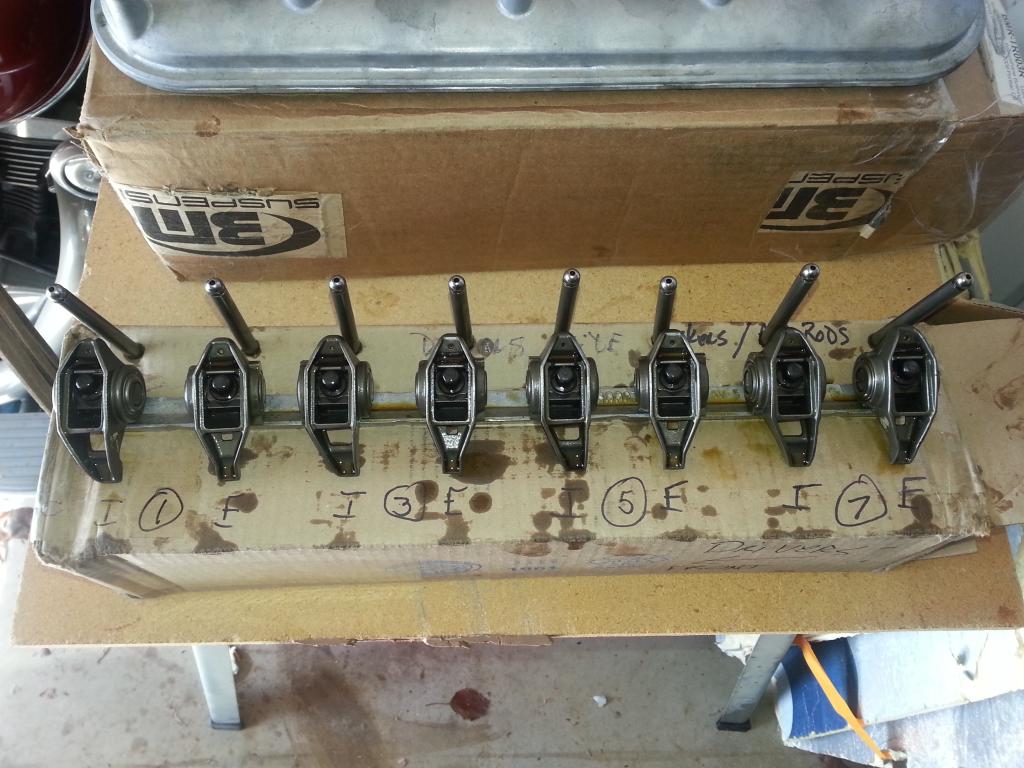 Each rocker marked: 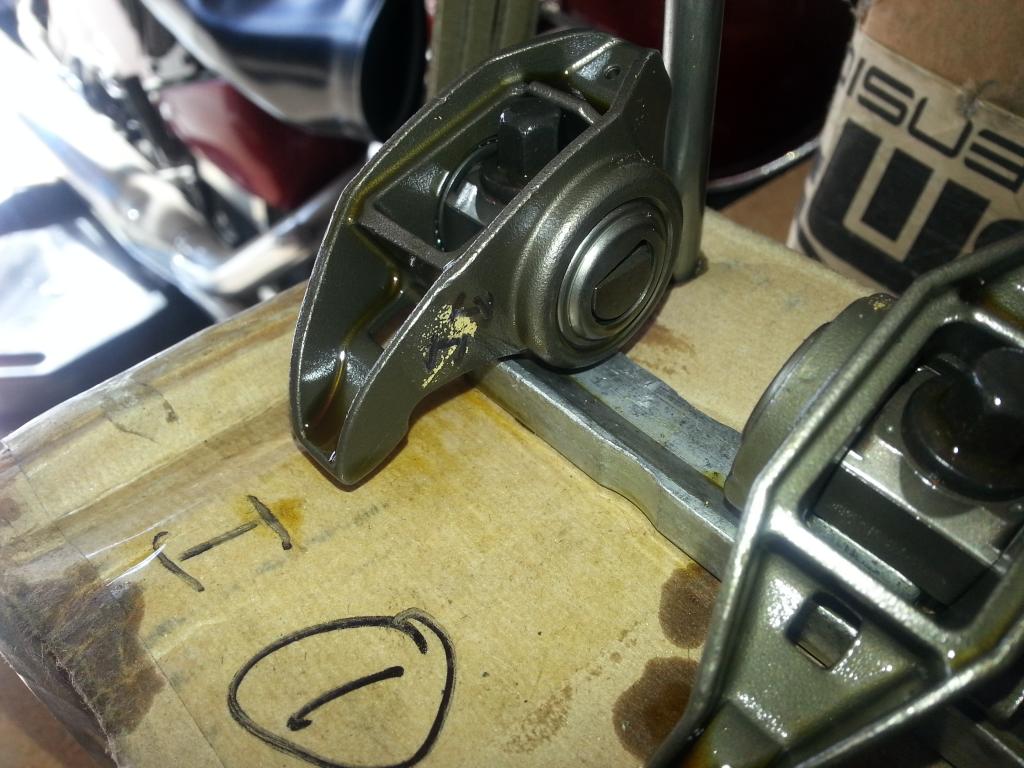 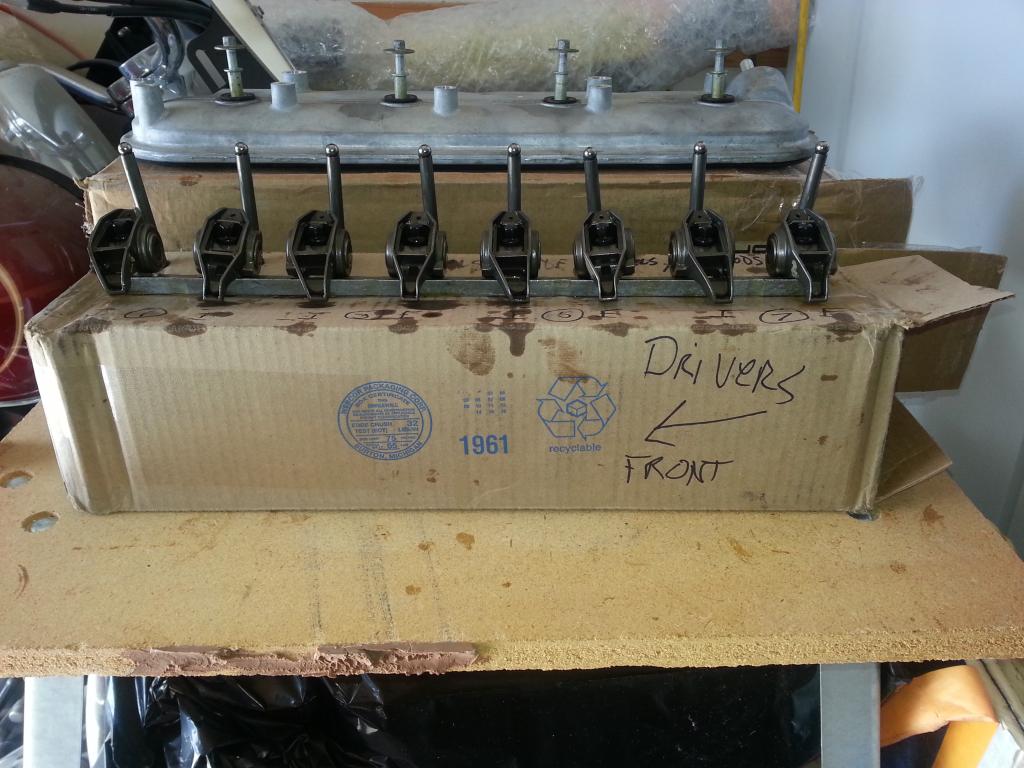 Valve Cover inside box: 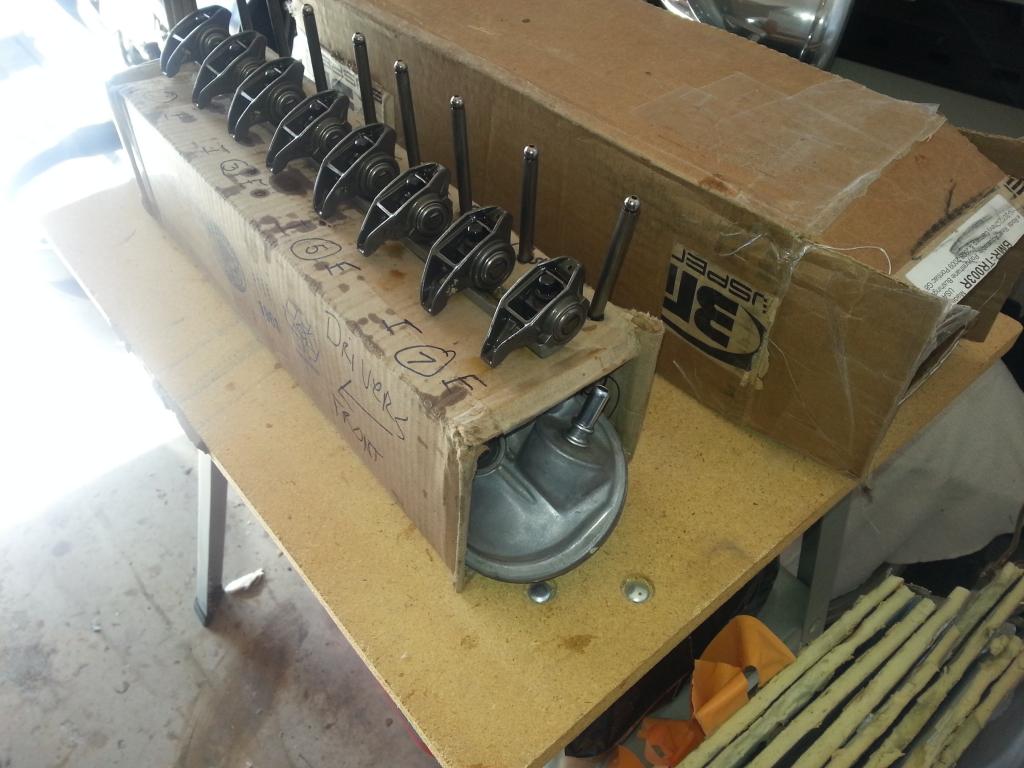 Passenger side: 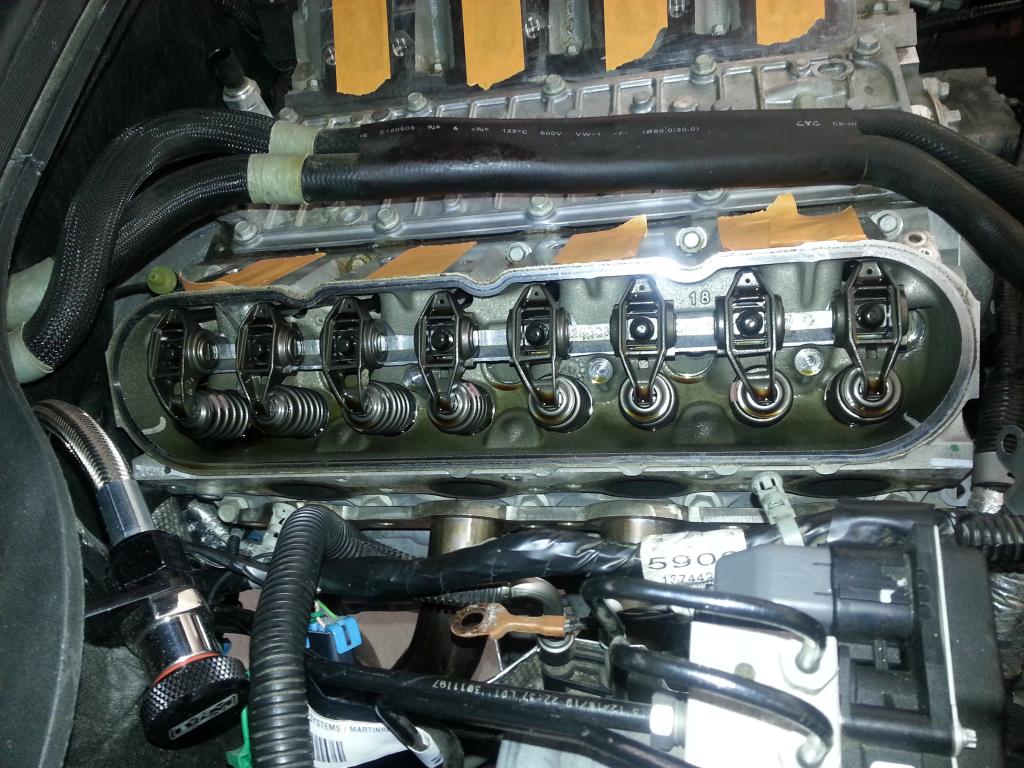 Now all organized with push rods, etc.: 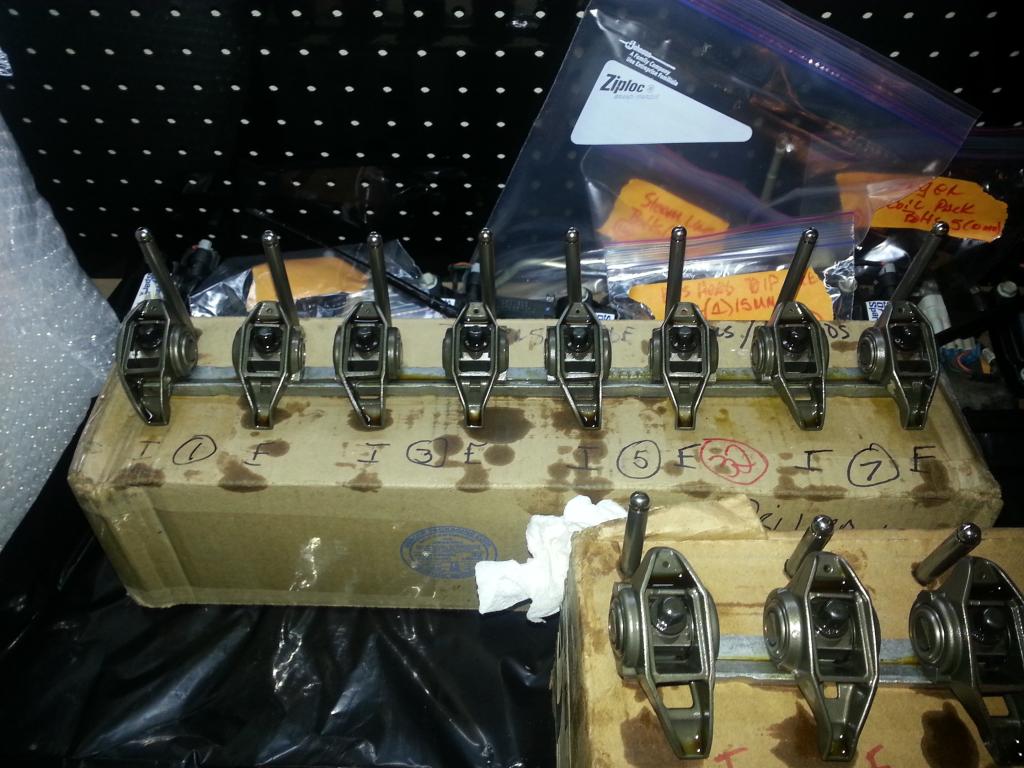 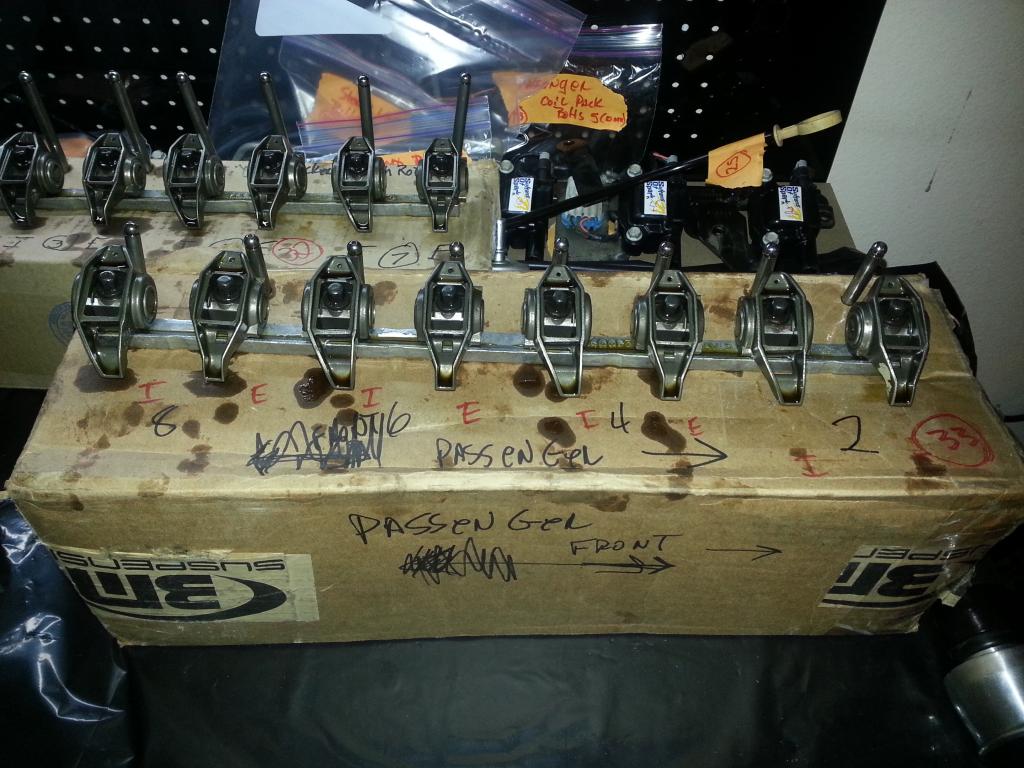 So, next will be draining the rest of the dexcool out of the block. I also noticed the headers are in the way so, jacked up the car as high as I can get it. I'll need to remove the header from the collectors and do what I can to give more room. This will involve: 1) unplugging ALL O/2 sensors -- may have to remove them from the header and Hight Flow cats. 2) rotate and see if that will give enough room or 3) Drop the headers down as far as I can to make room or 4) Remove the headers. Planning on step 4 but hoping dropping them some will do the job. While this does NOT have anything to do with the LSA Supercharger, for an L99, removing the AFM and the AFM Lifters is pretty much a necessity when doing a cam -- thus the heads HAVE to come off. Next will be doing what is necessary to get the heads off! Then full clean up before doing the timing cover... DON'T forget to protect your work (keep junk OUT ;o): 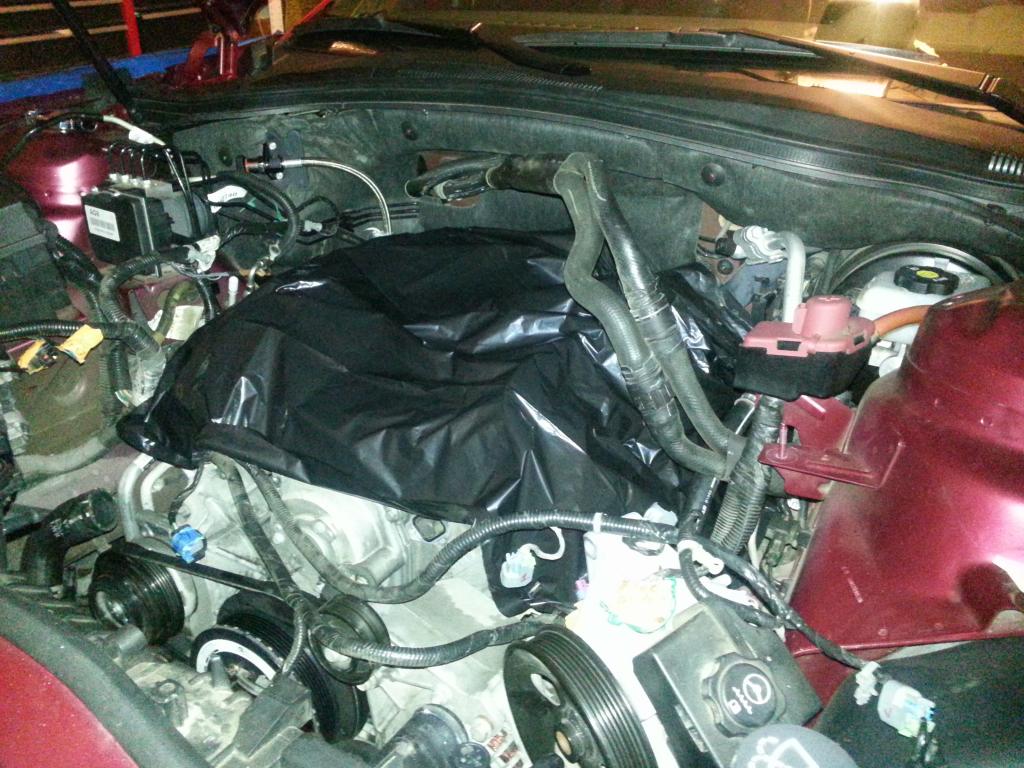 -Don Last edited by hammdo; 07-02-2017 at 12:33 AM. |
|
|
|
|
12-25-2014, 12:55 PM
|
#74 | |
|
'It's an experiment'
Drives: [COTW 2/09/15] '11 GPI LSA SC Z/LE Join Date: May 2014
Location: Dallas TX
Posts: 8,694
|
 Quote:
Thanks! I detail these steps so 'I' can remember what I did Merry Christmas -- now for that Turkey and Ham I have going  -Don |
|
|
|
|
|
12-25-2014, 01:57 PM
|
#75 |
|
'It's an experiment'
Drives: [COTW 2/09/15] '11 GPI LSA SC Z/LE Join Date: May 2014
Location: Dallas TX
Posts: 8,694
|
And these are what I use for 'tags' -- coming from Amazon:
http://www.amazon.com/gp/product/B00...?ie=UTF8&psc=1 Really work great... -Don |
|
|
|
|
12-26-2014, 11:37 AM
|
#76 |
|
'It's an experiment'
Drives: [COTW 2/09/15] '11 GPI LSA SC Z/LE Join Date: May 2014
Location: Dallas TX
Posts: 8,694
|
OK, The first part of the day is removing the Driver's side head.
Firstly, I used a wet/dry vac to remove as much dexcool from the block as I could:   Note how I covered the water pump holes so it would create better suction. This worked great! Remove a lot of dexcool... In this pic: 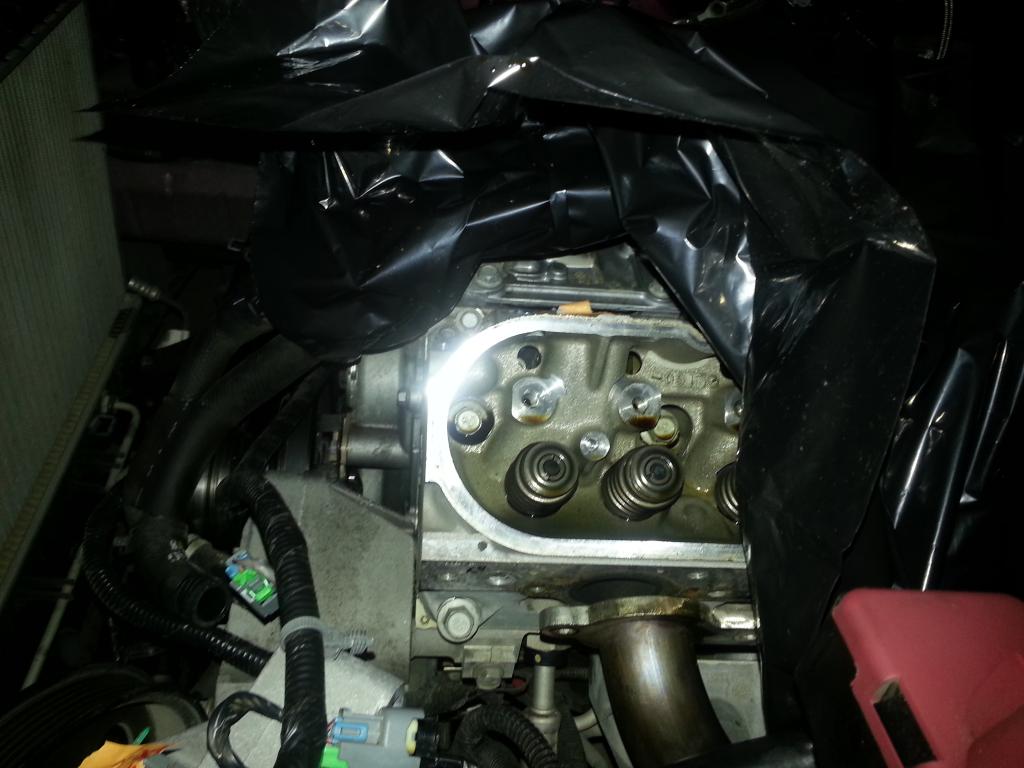 you can see there is very little room with the header in the way to get the head bolts out. I have stainless works headers and they don't have the 'typical' collector so I had to unclamp and rotate the header out of the way. First, I had to 'remove' the ty-wrap that was holding the 'front' O/2 connector: 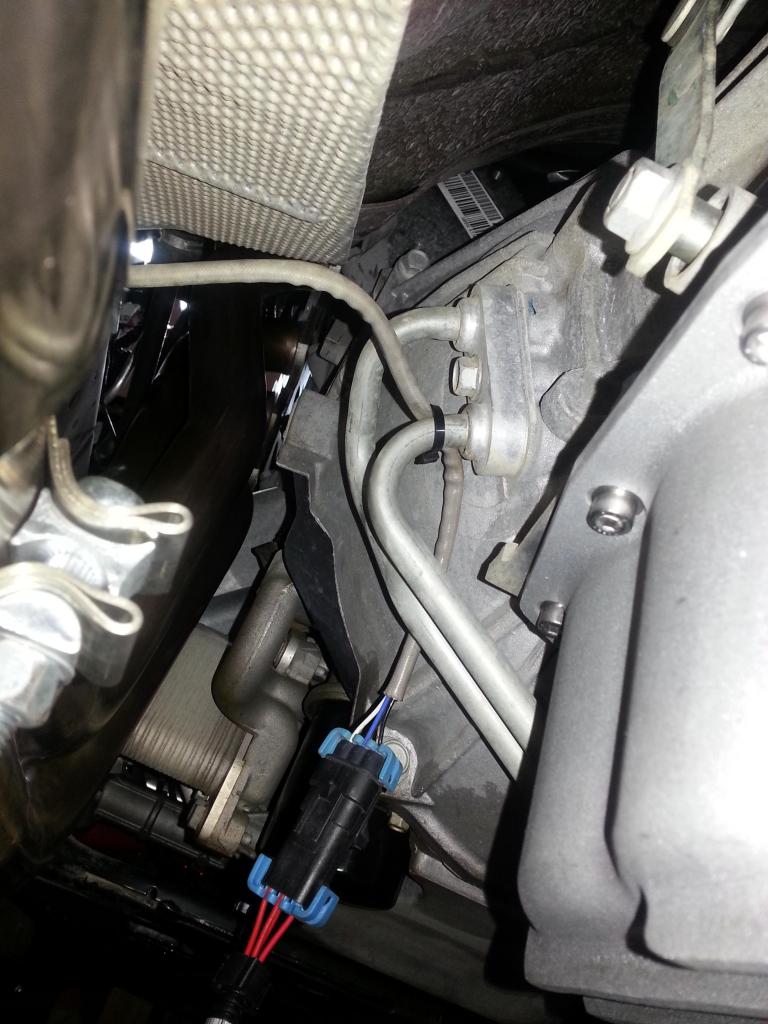 I didn't need to unclip the 2nd O/2 connector so that was nice (here is where it's located): 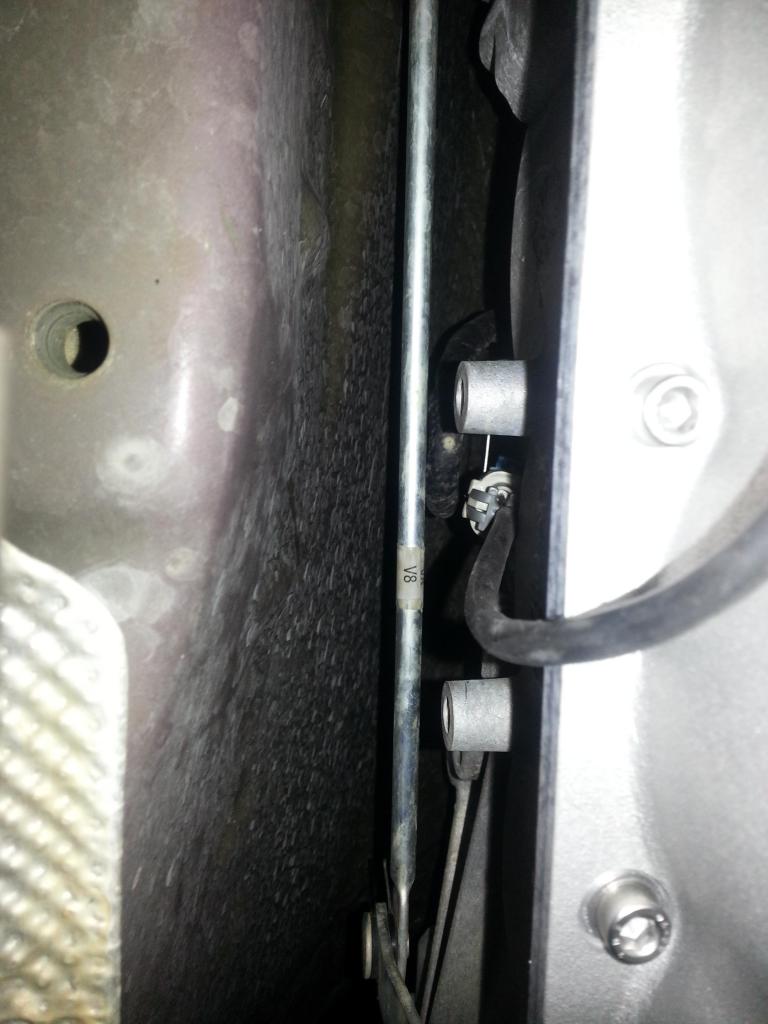 Here is how the header is connected: 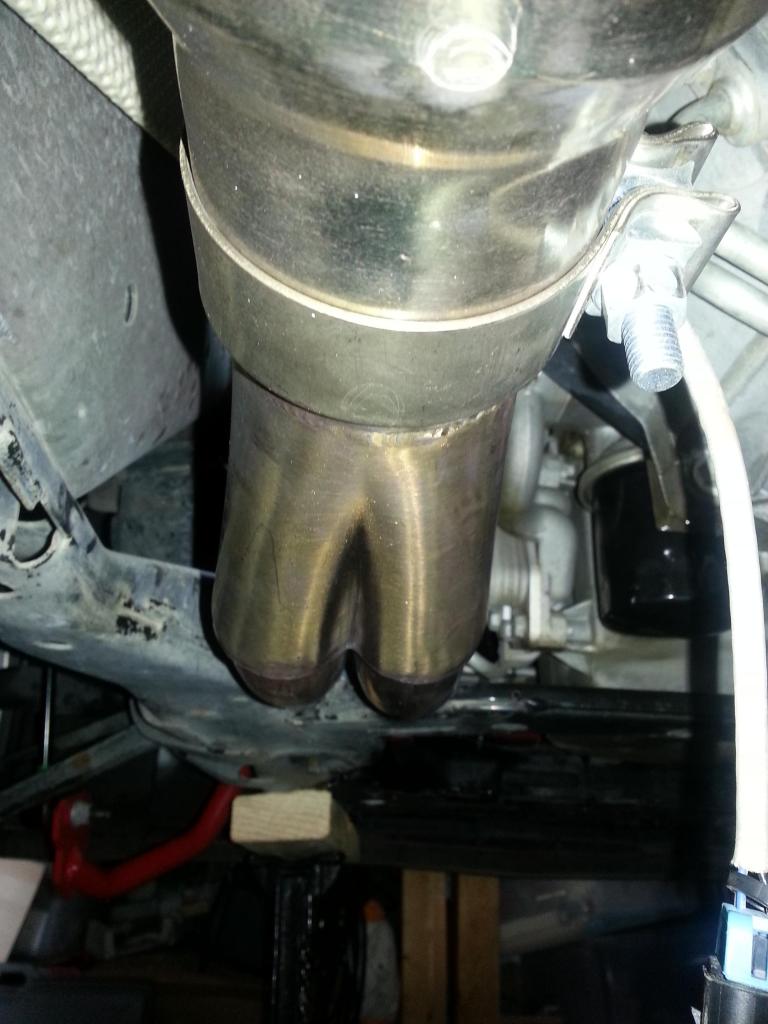 I used a ratched and 15 mm socket and BY HAND, loosened (more about why by hand in a bit): Here is the header rotated and dropped down (but not fully) so I could get to the head bolts. It was pretty easy after I loosened the header off the HFC, I just pulled it forward, slipped it to the right of the HFC and it gave me all the room I needed: 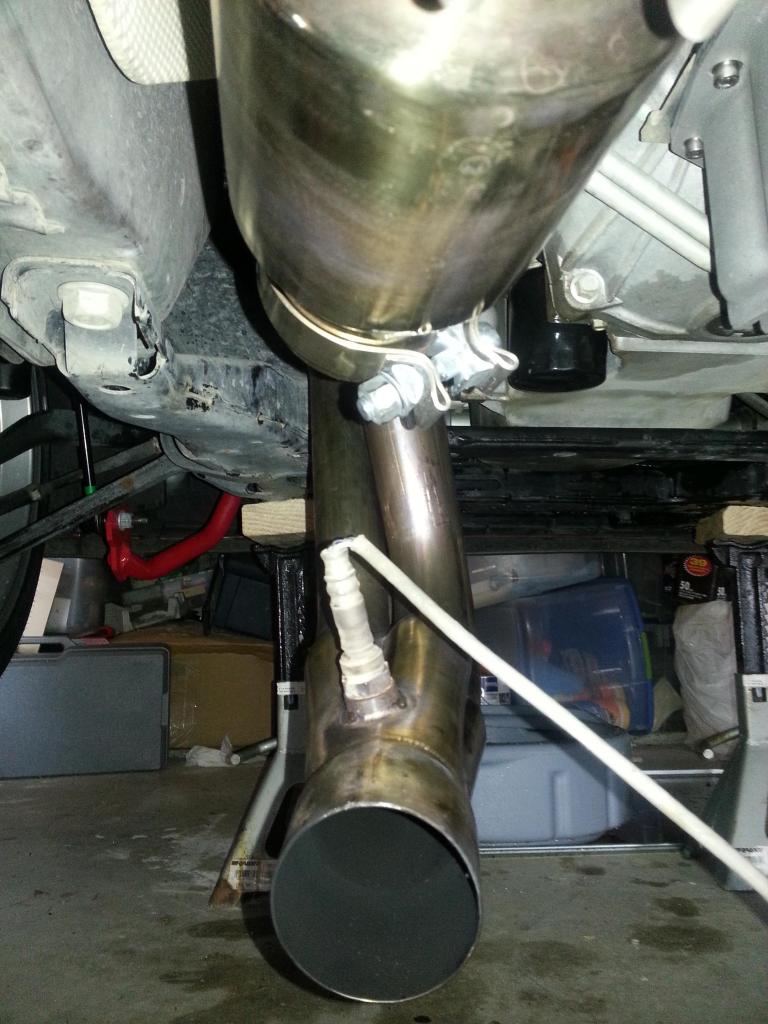 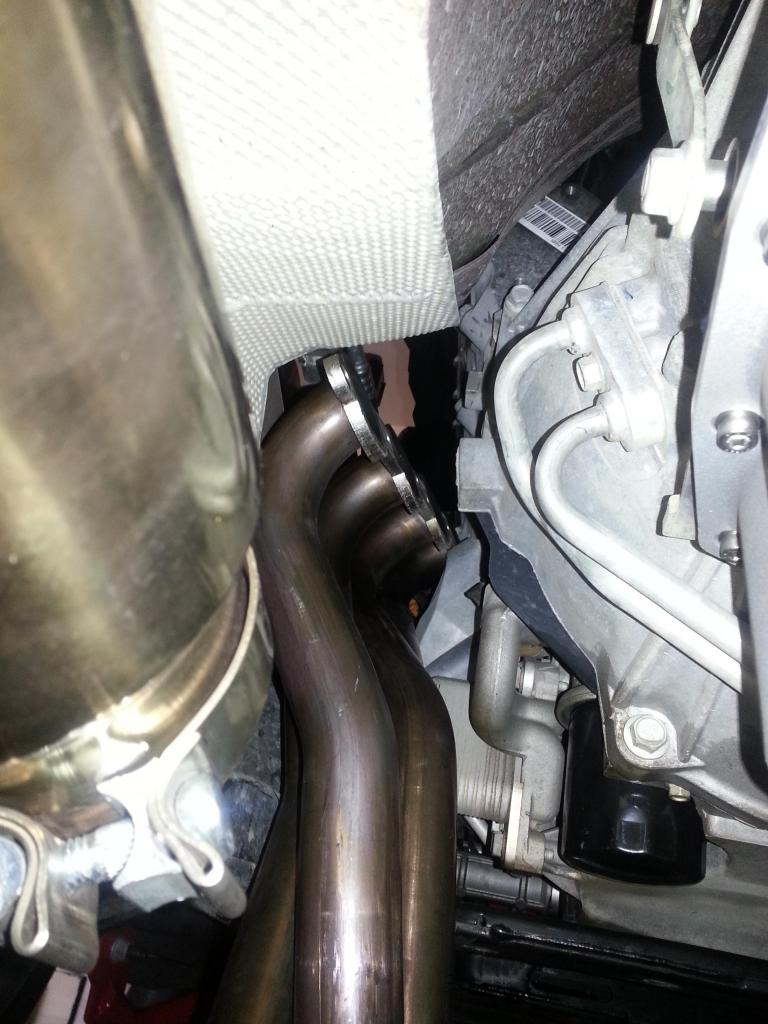 This was the BEST option I wanted ;o)... Now, for the head. I used a 1/2 ratchet with a 10mm socket for the smaller bolts and a 15mm socket for the larger ones. What I did was loosen each bolt in REVERSE sequence -- this is an old habit and I always did that with unbolting heads (especially steel bolts on aluminum blocks -- NO AIR TOOLS). The reason for this is I want to be able to 'feel' if a bolt is hard to un bolt -- if so, I'll spray wd-40 down the hold and let it soak. I don't know if any of you have had heli-coil a block before, but its not fun. So, after loosening, I then unbolted them in reverse order: 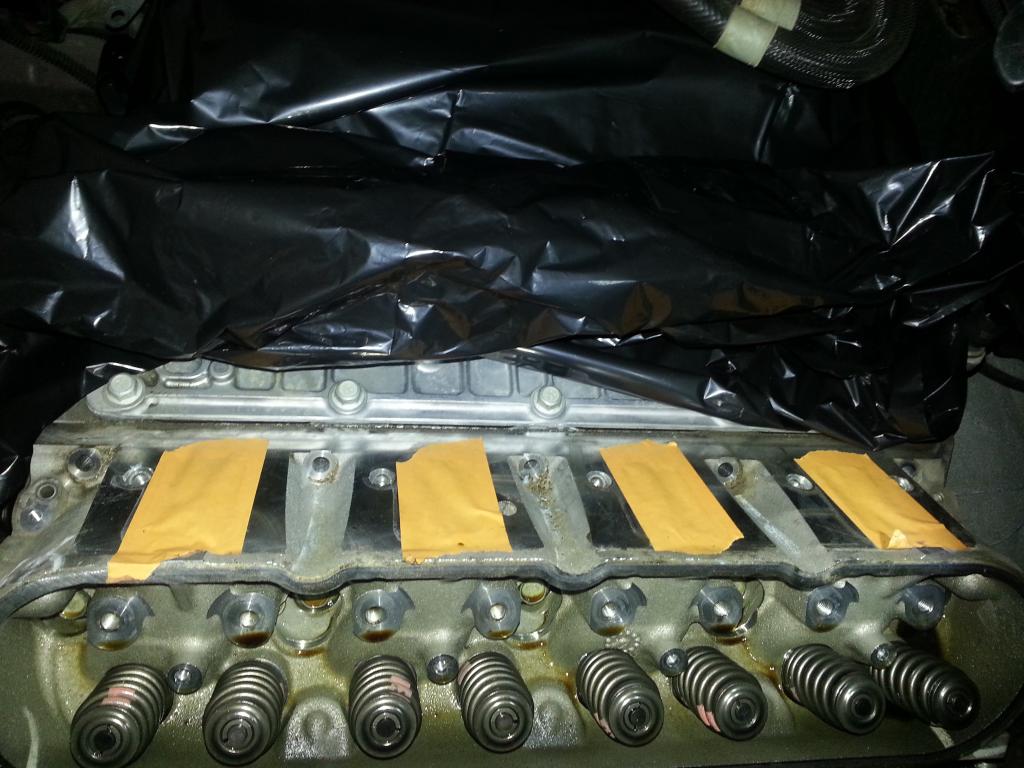  Magnet for those hard to reach areas: 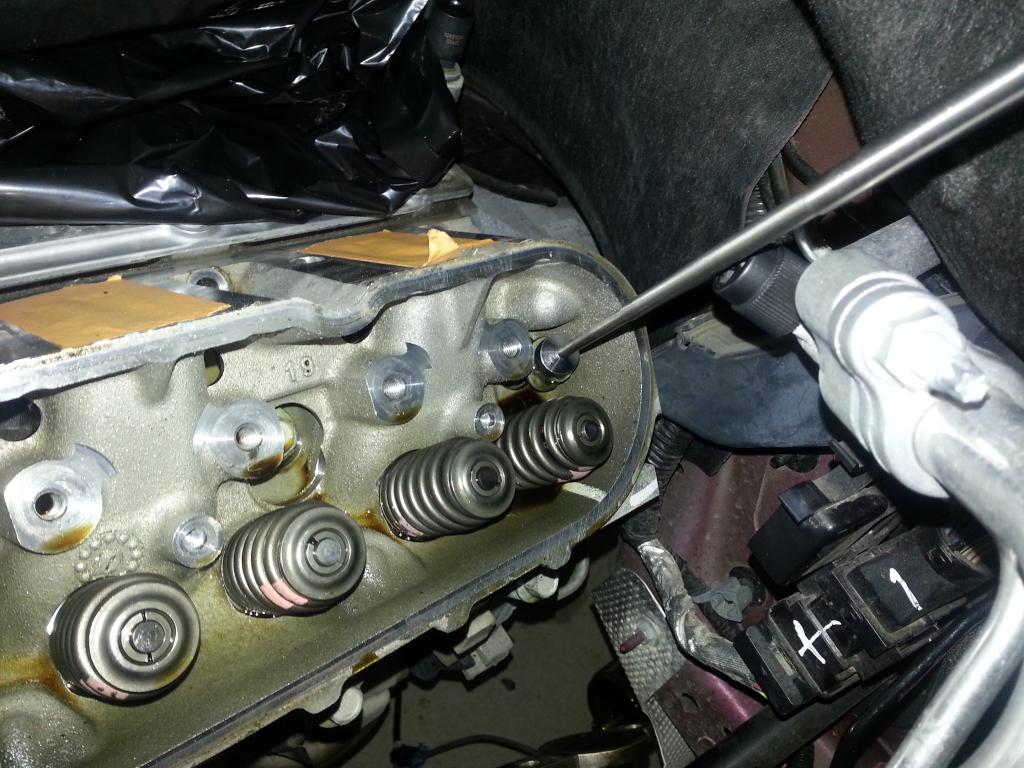 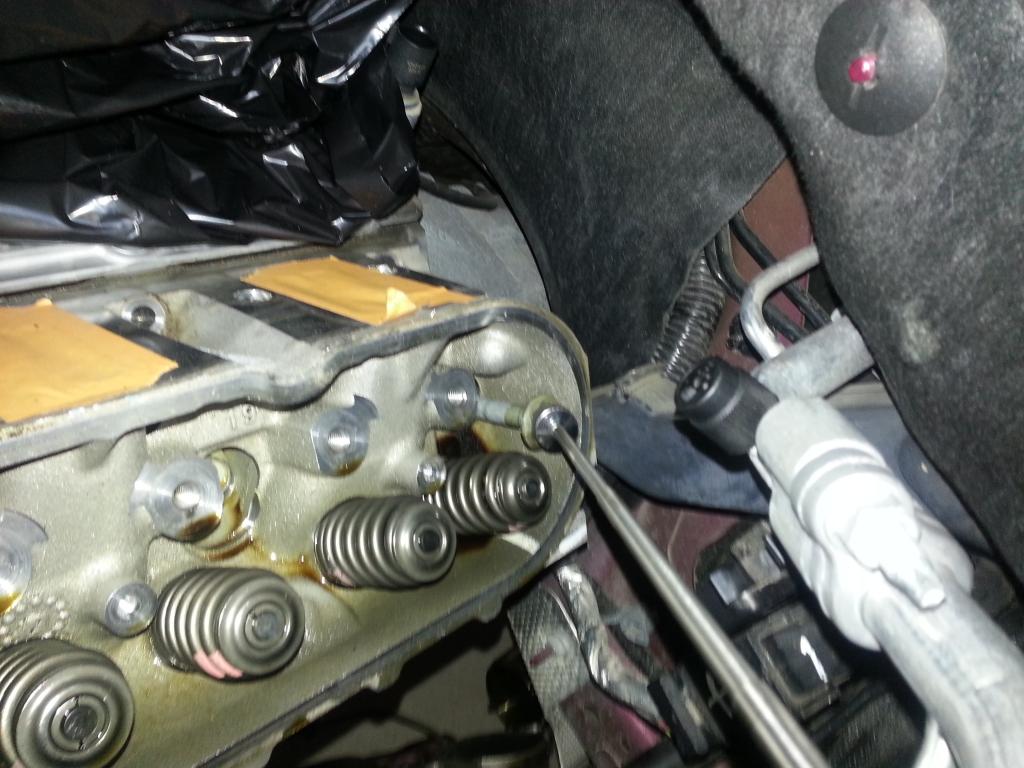 Bolts loosened all the way and ready for 'tag n bag': 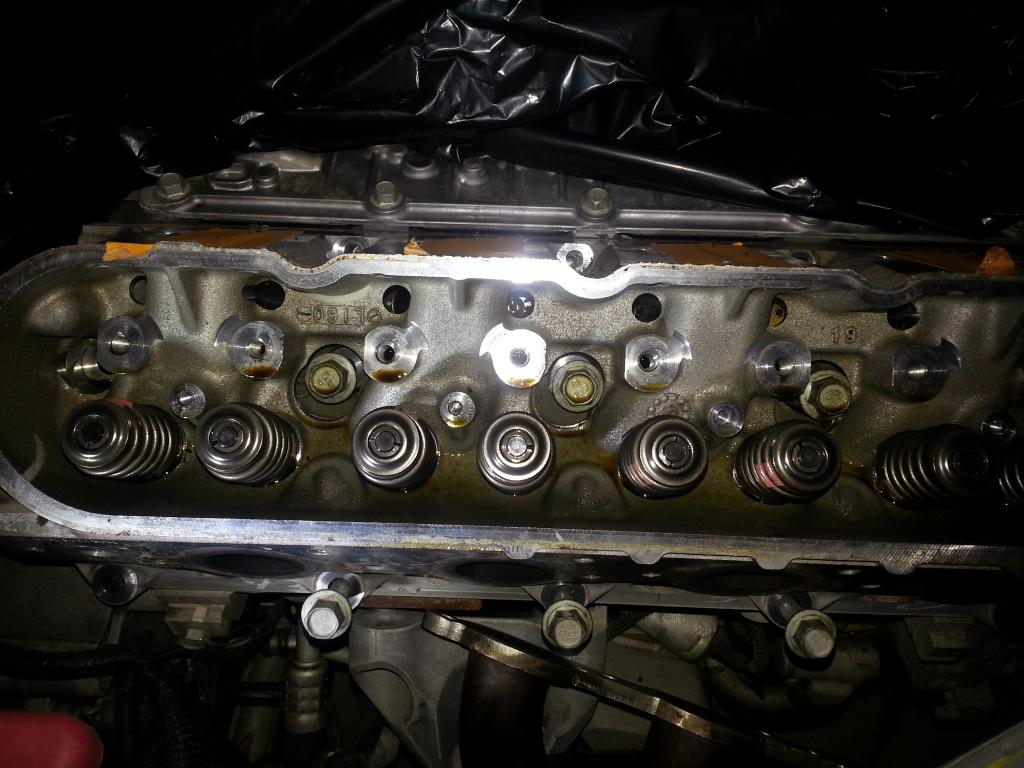 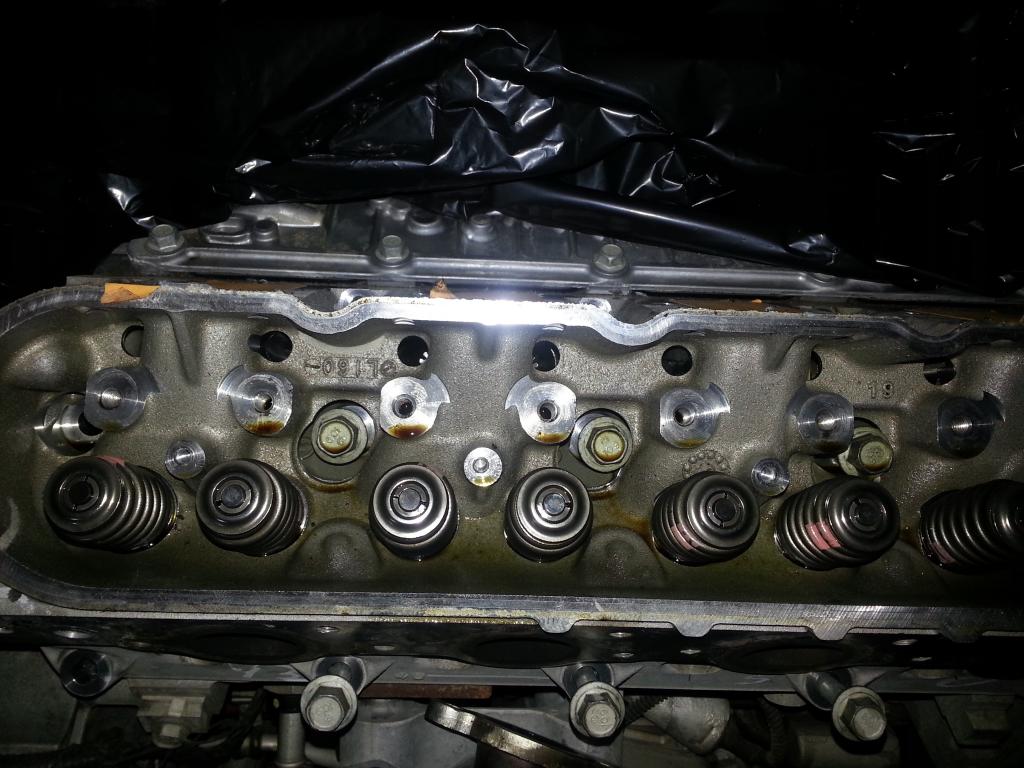 Now, a tug on the head and it pulled right off! WAY better than the old days ;o): 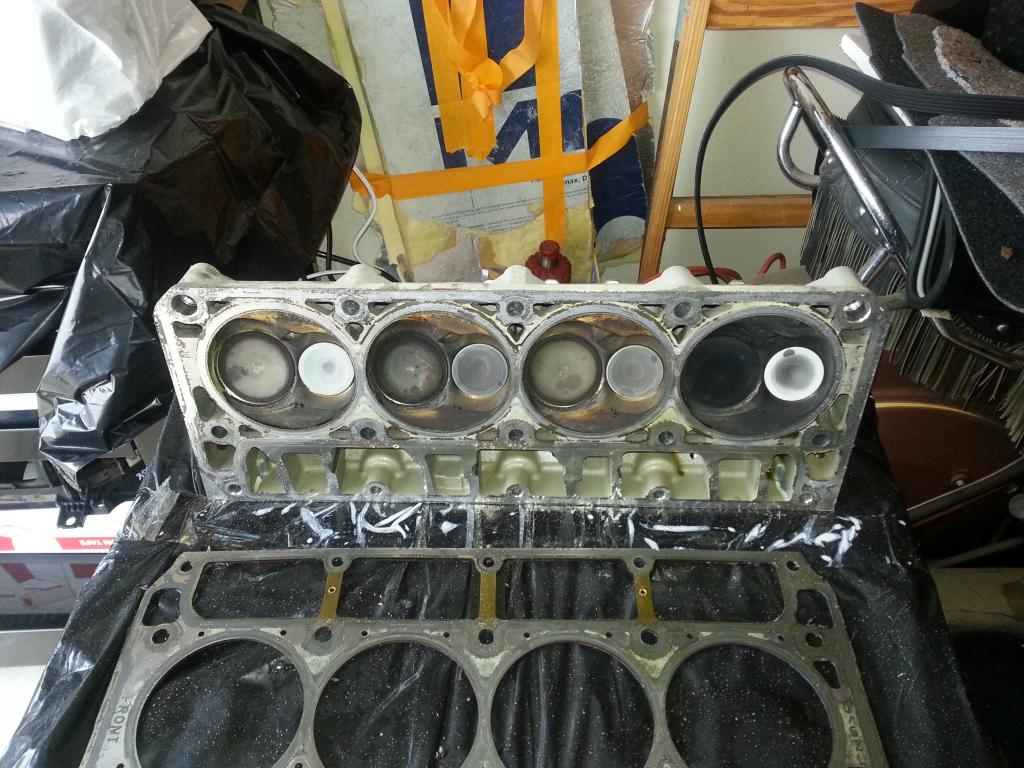 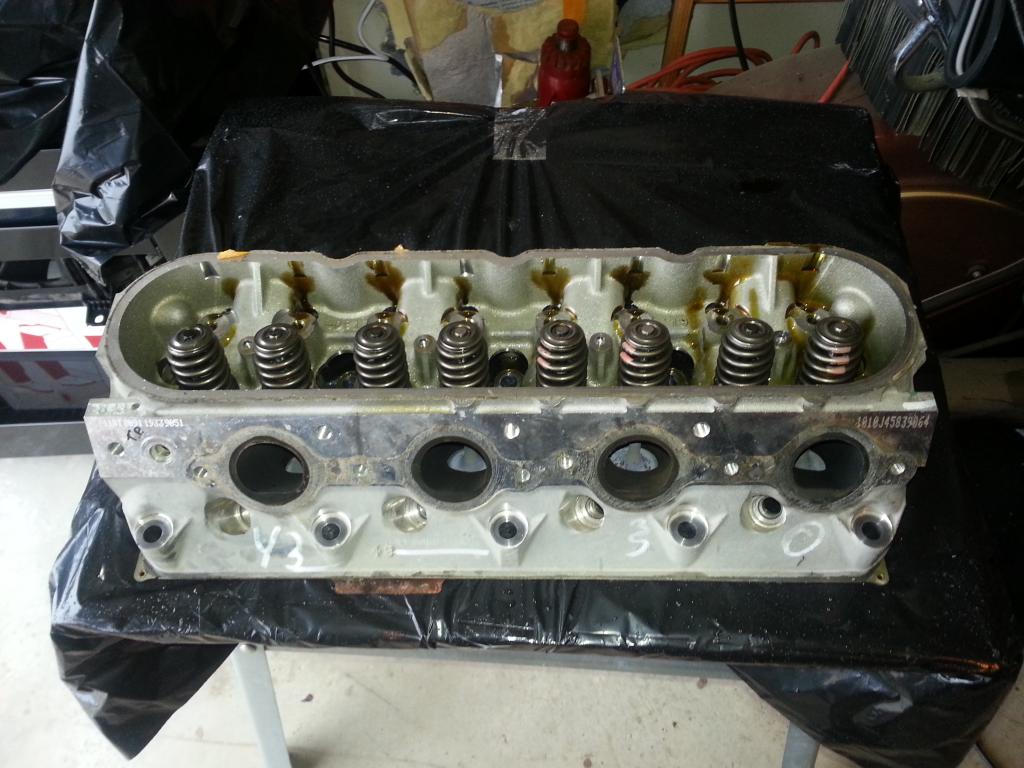 I did notice #7 on the head was a bit on the 'rich' side -- the plug did not show this when I examined it. I placed the head on a 'wooden' portable work bench that was covered with plastic -- to protect the head for return to GPI. Now, here is the block: 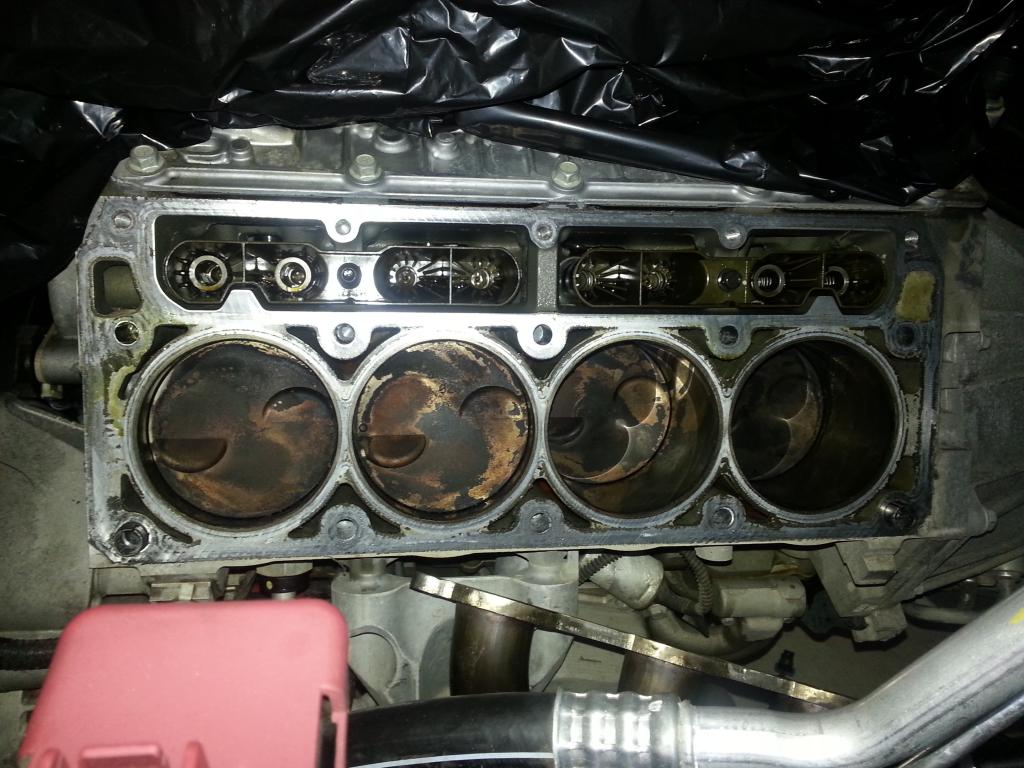 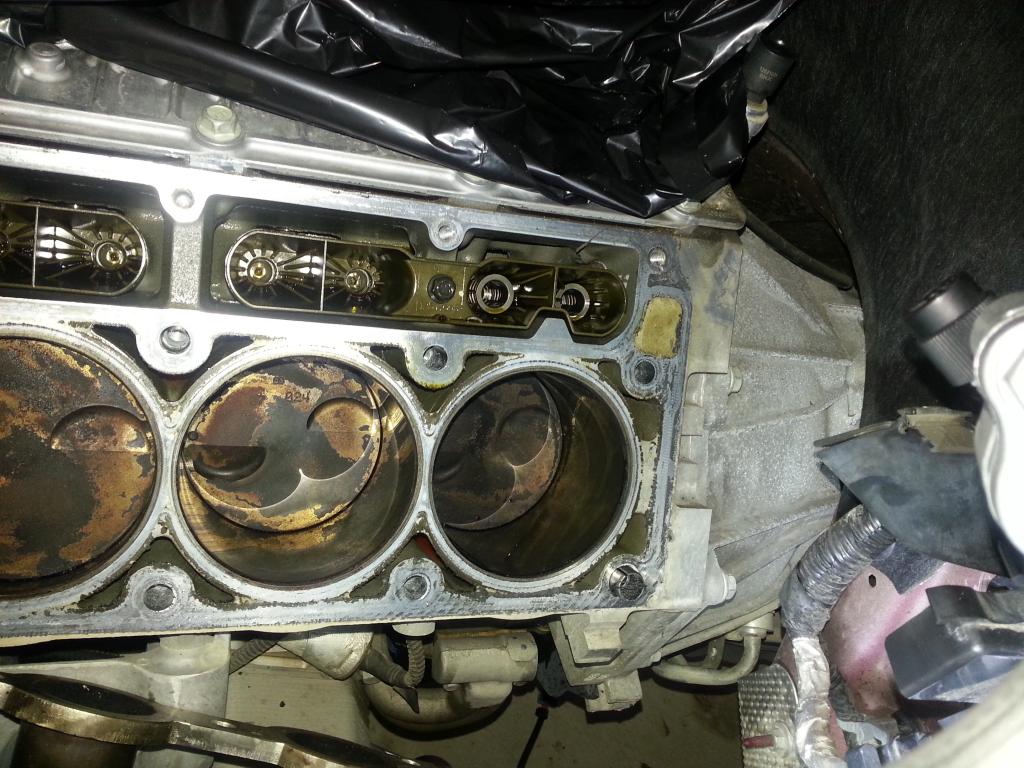 The 'wash' on the pistons do not look bad @ all. Looks like the tune was doing its job... When I'm done 'cleaning' this area, it should look like it was 'new' again -- I have an 'old school' cleaner from Mopar that should do the job ;o). BTW, you'll see there was no DexCool leaked when I pull the head! The wet/dry vac did an excellent job making sure I didn't have a flood! Passenger's side (after lunch ;o) next... -Don Last edited by hammdo; 07-02-2017 at 12:32 AM. |
|
|
|
|
12-26-2014, 02:41 PM
|
#77 |
|
'It's an experiment'
Drives: [COTW 2/09/15] '11 GPI LSA SC Z/LE Join Date: May 2014
Location: Dallas TX
Posts: 8,694
|
OK, got lucky on the passenger's side -- the header only had to be loosened and twisted to the right -- and full access to the bolts!
So, following the same pattern, loosened the head bolts in reverse order, then got it ready to r n r: Passenger header loosened: 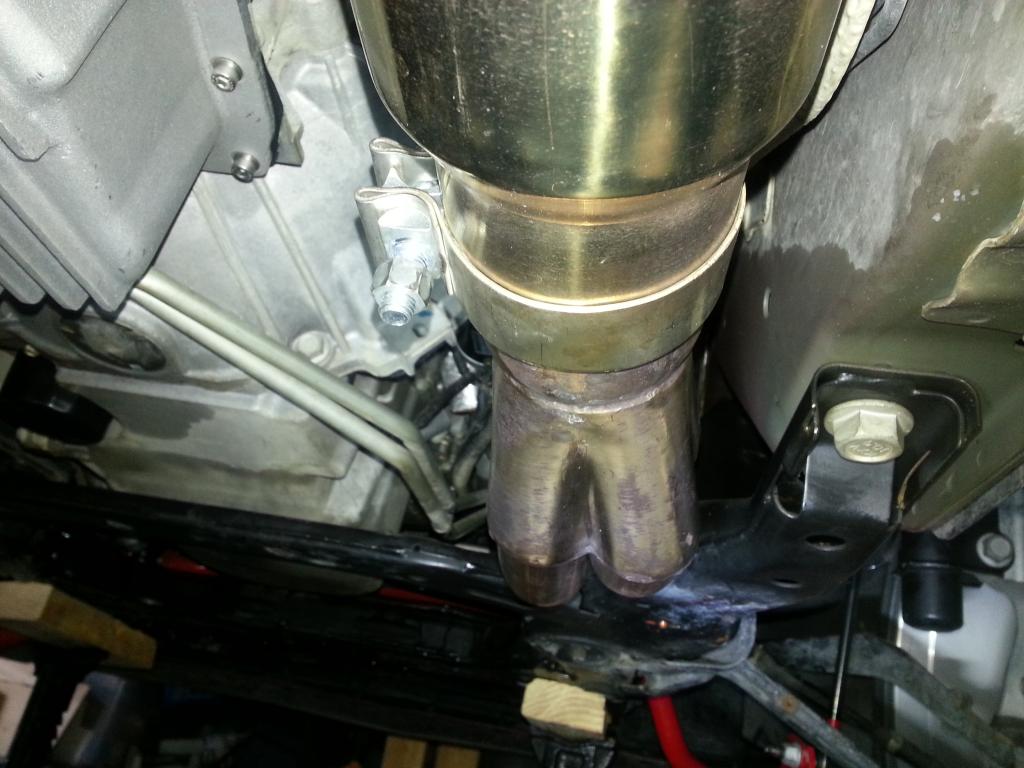 Pulled the passenger side O/2 connector out of the way (next to the starter you'll see the opening where I pulled it from: 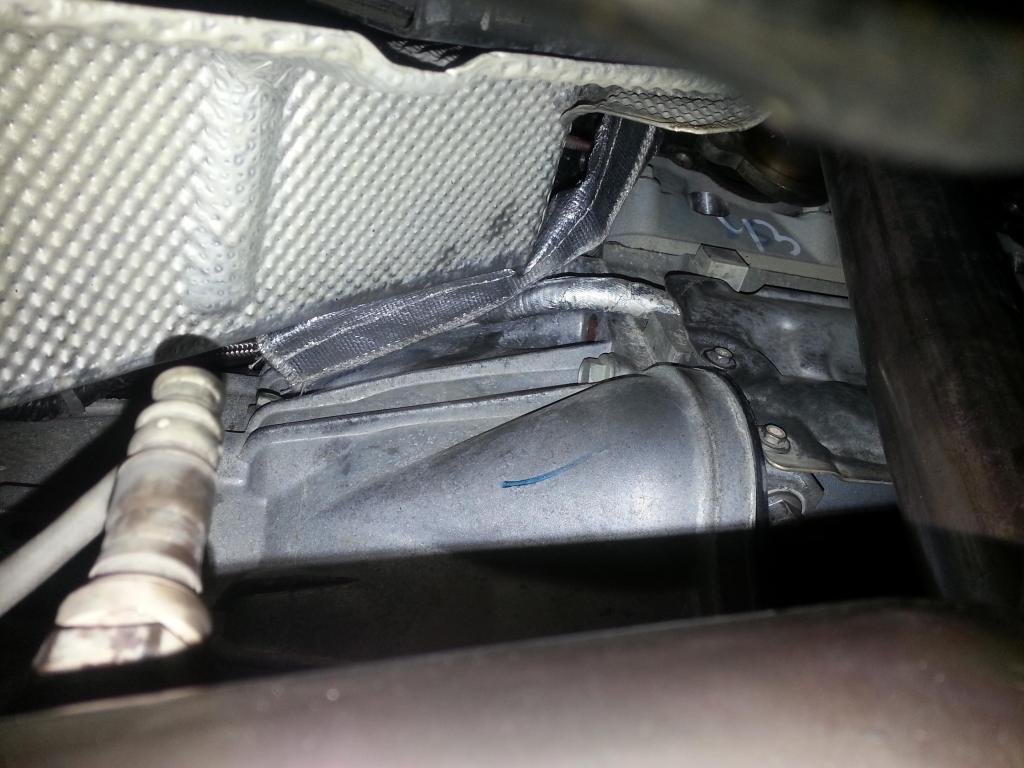 Unbolting the passenger head: 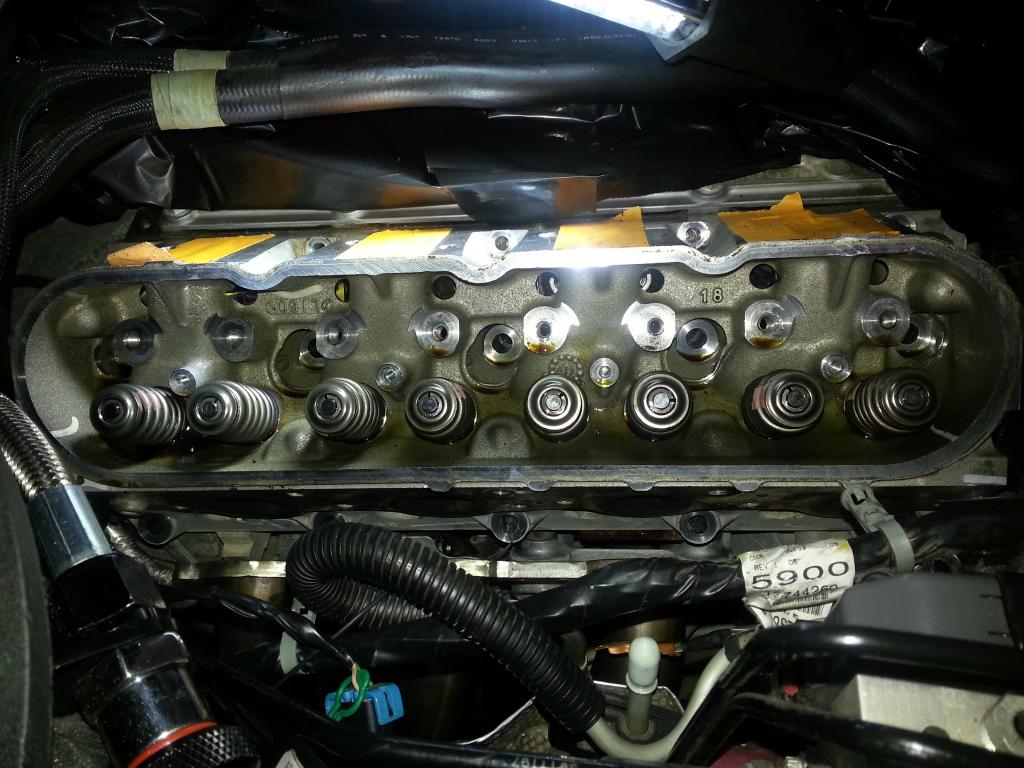 Head removed! Again -- NO DexCool all over the place!: 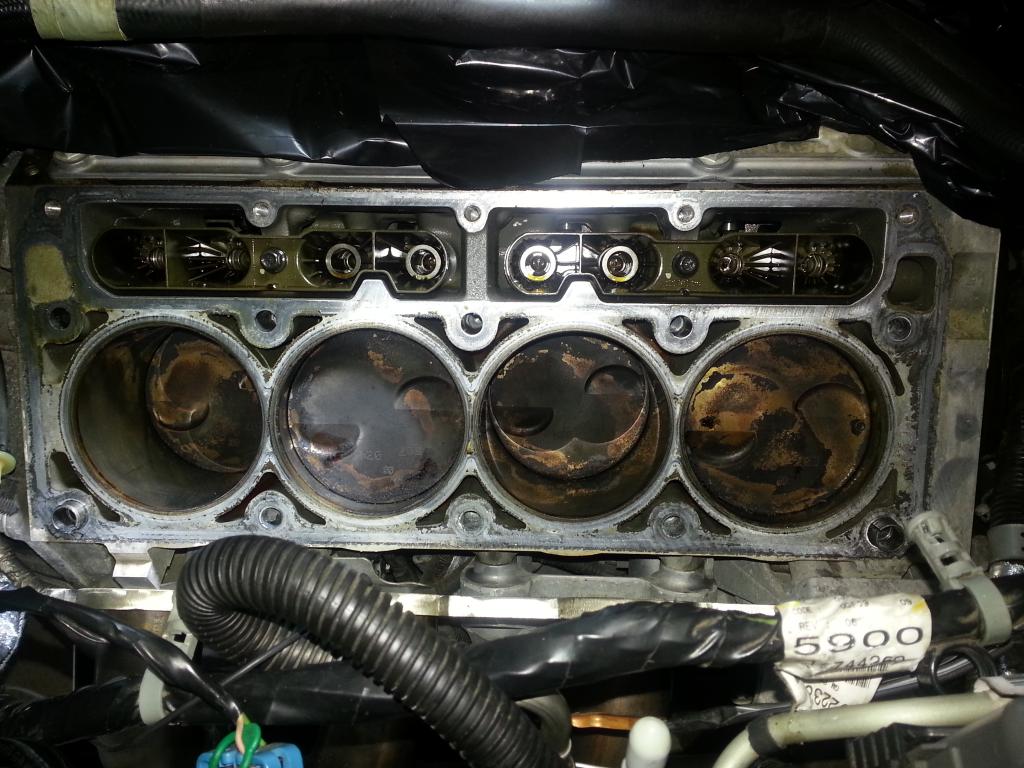  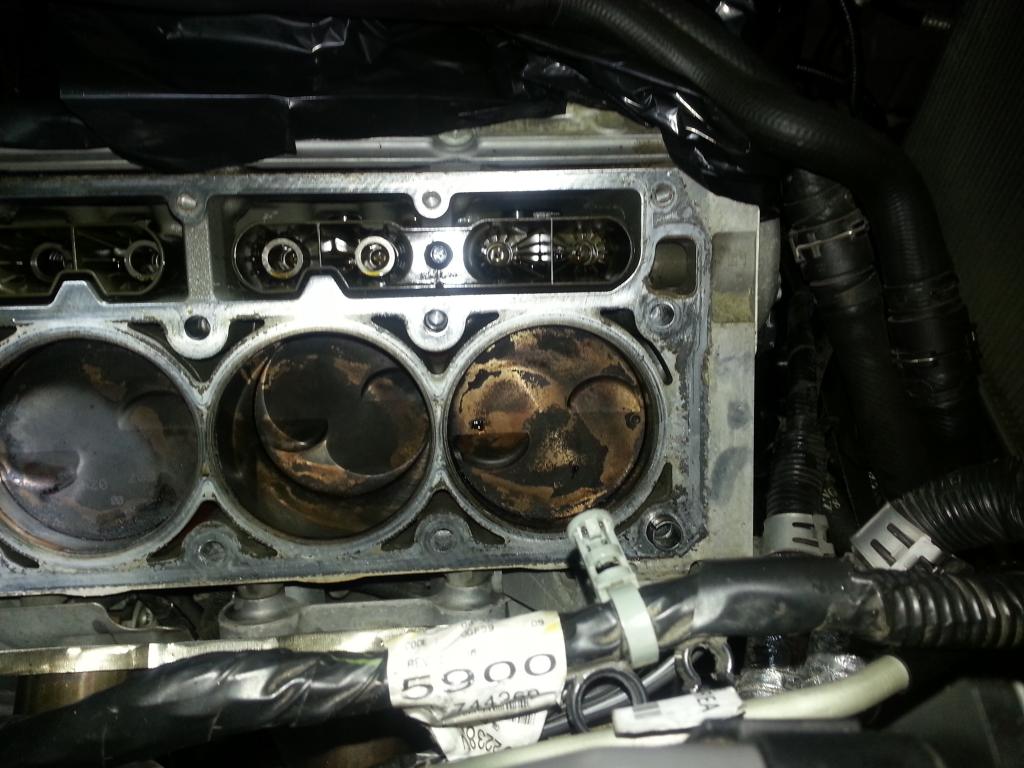 Wash looks good on this side too. Passenger head -- looks good...: 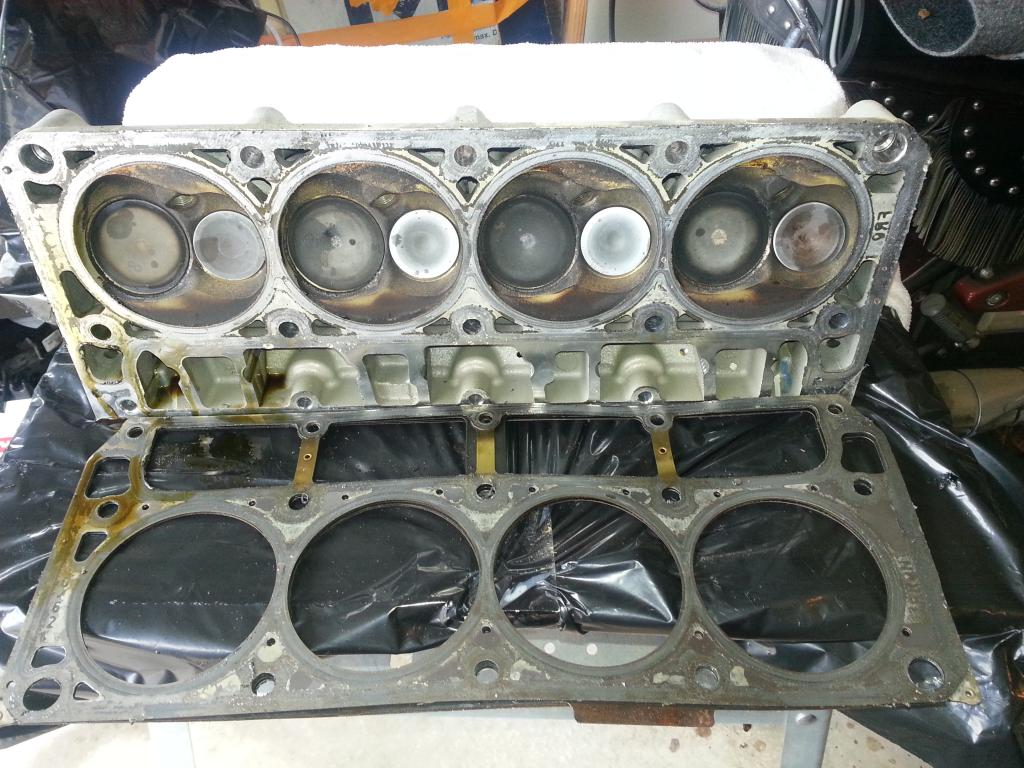 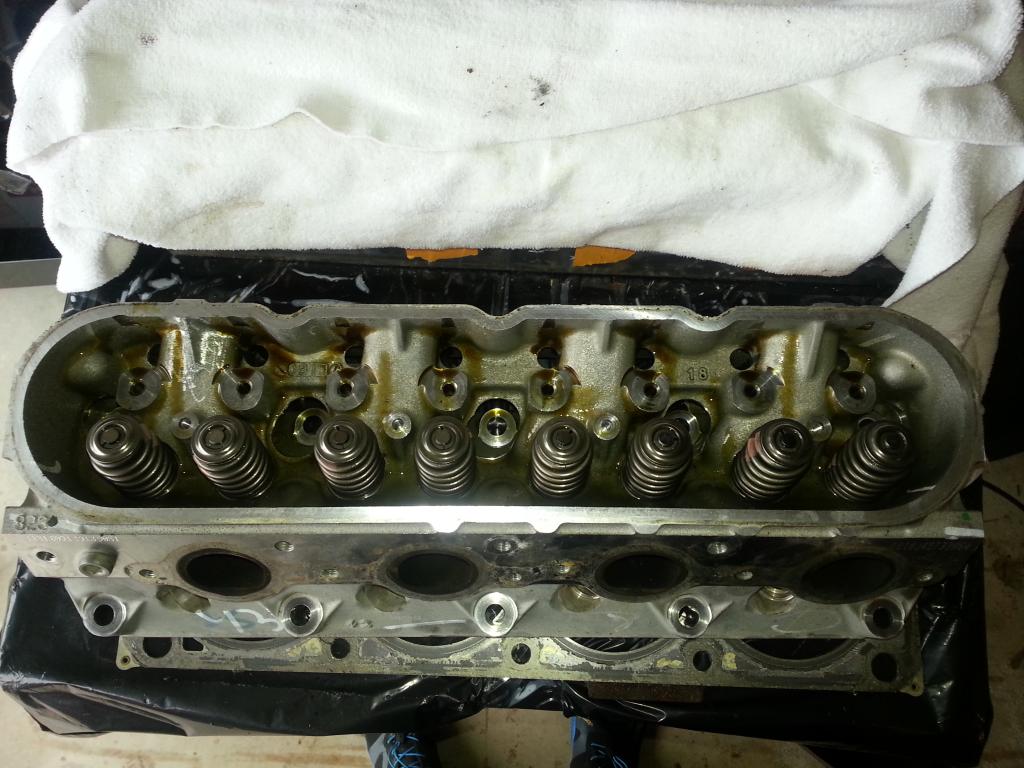 Protecting until I get to the lifters (next!): 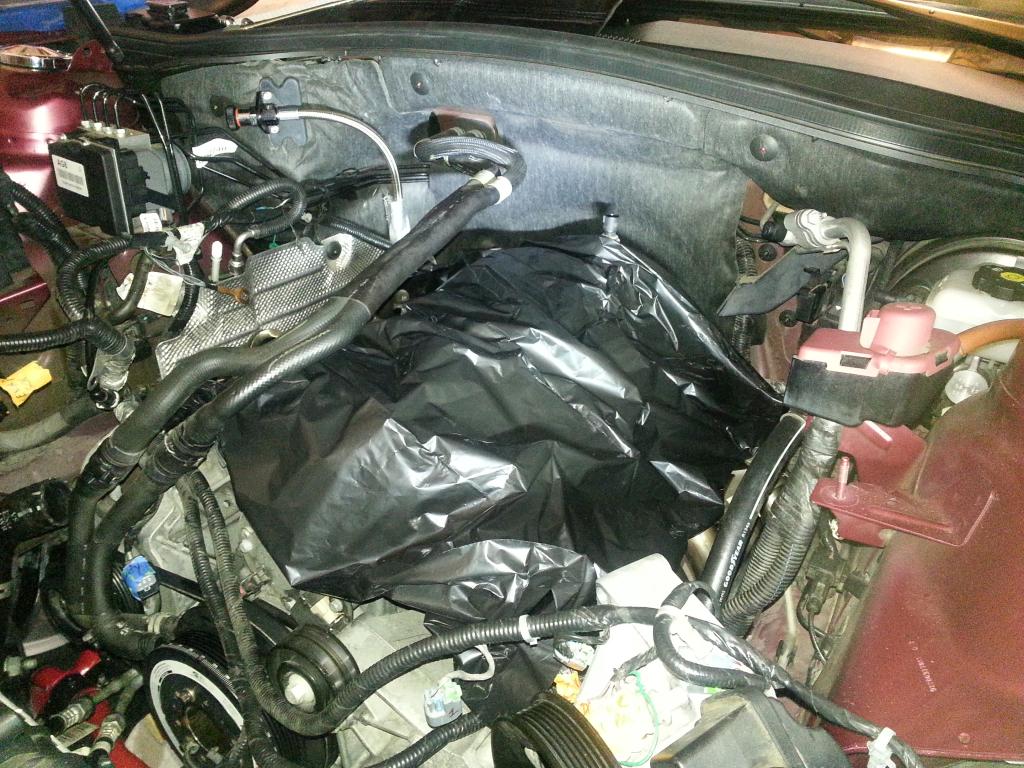 Heads ready to return to GPI: 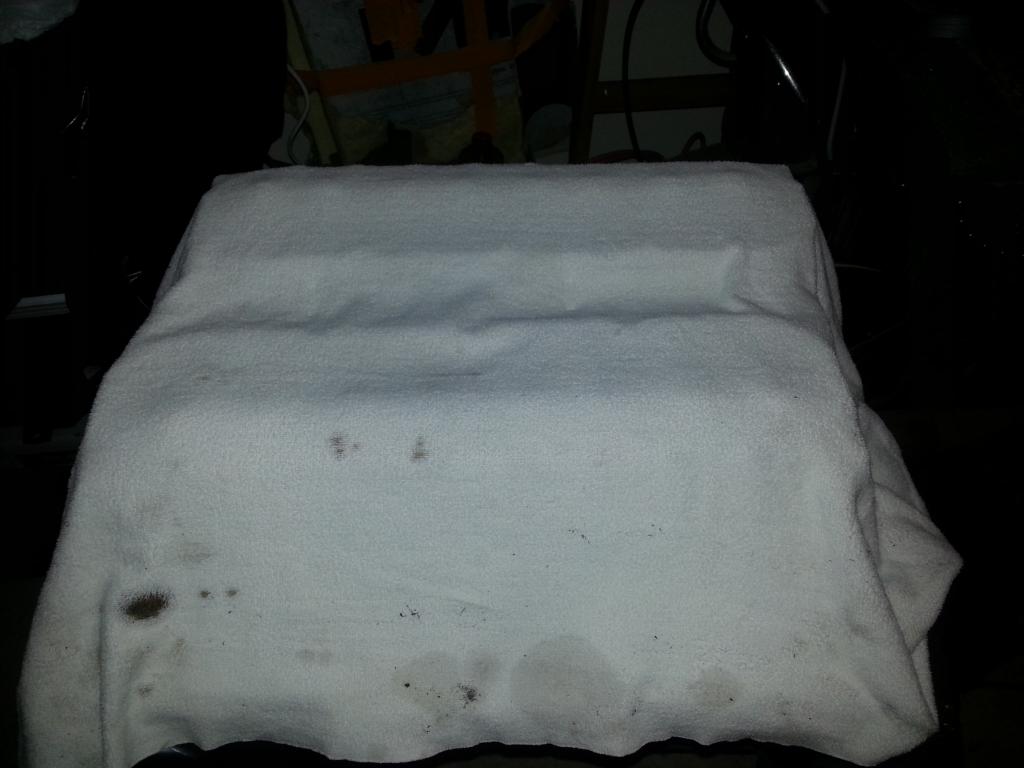 -Don Last edited by hammdo; 07-02-2017 at 12:31 AM. |
|
|
|
|
12-26-2014, 04:54 PM
|
#78 |
|
'It's an experiment'
Drives: [COTW 2/09/15] '11 GPI LSA SC Z/LE Join Date: May 2014
Location: Dallas TX
Posts: 8,694
|
Next, I am going to do a heater hose relocation. So first, I took off the heater hoses (removed the clamps and slowly sliced the hoses so I could separate them). When I put the hoses back on, I'm going to use AGS heater hose lube -- NOT petroleum base and made specifically for heater/radiator hoses!
 http://www.autozone.com/greases-and-...be/374056_0_0/ Here is the hose removal: 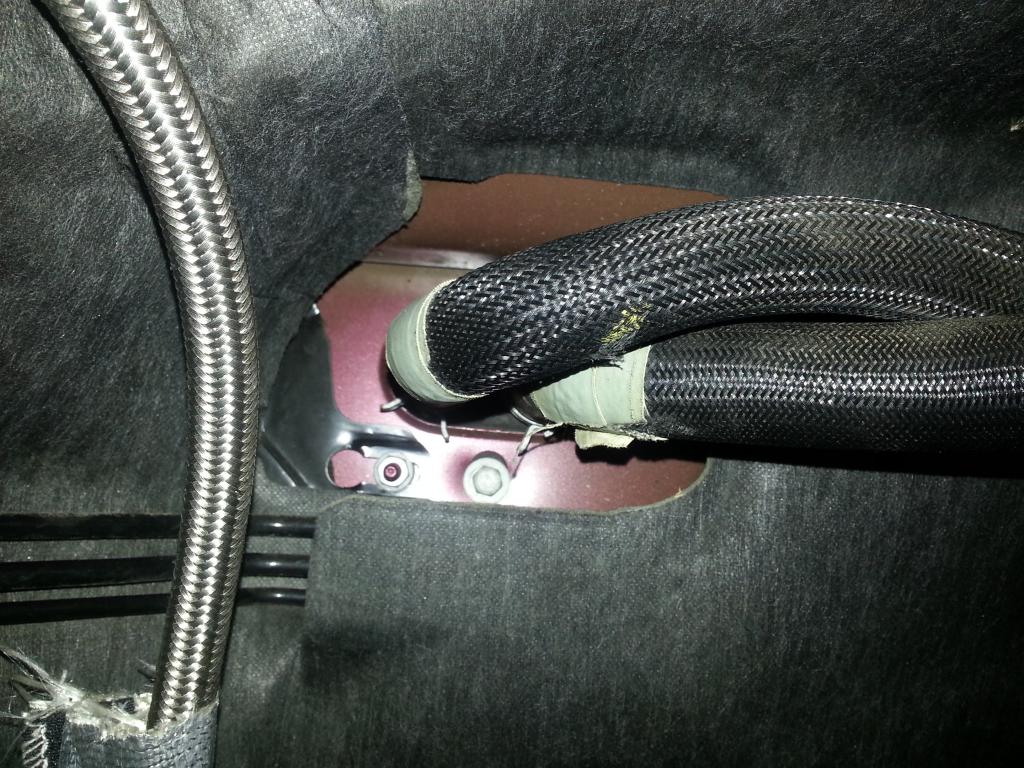 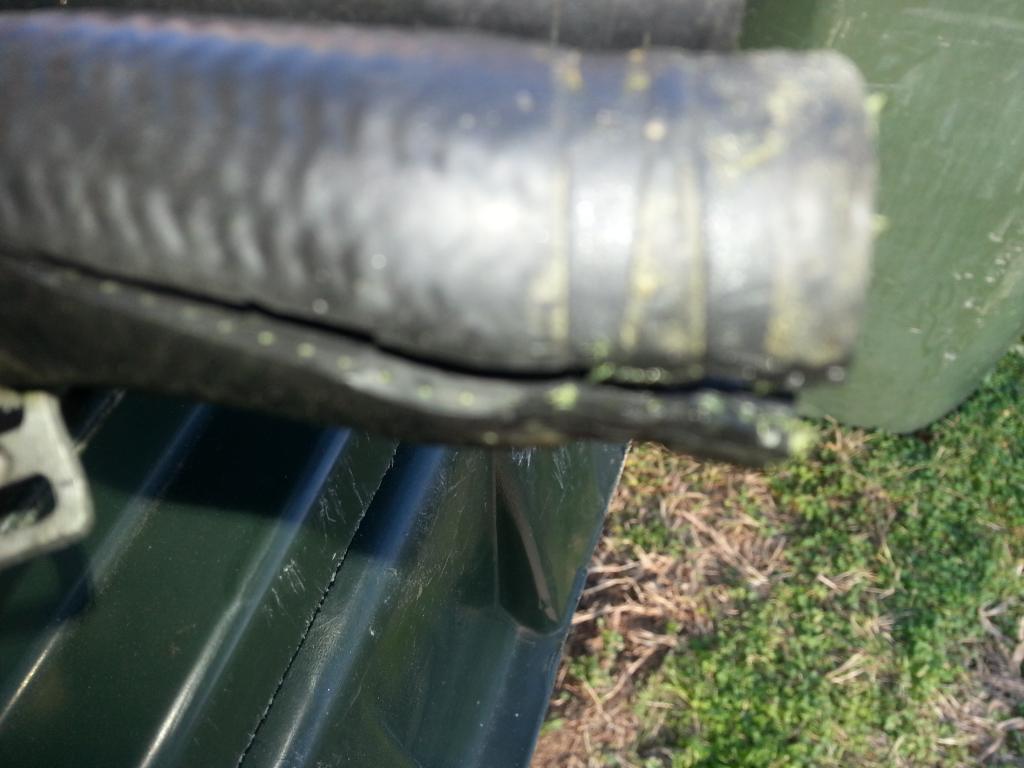 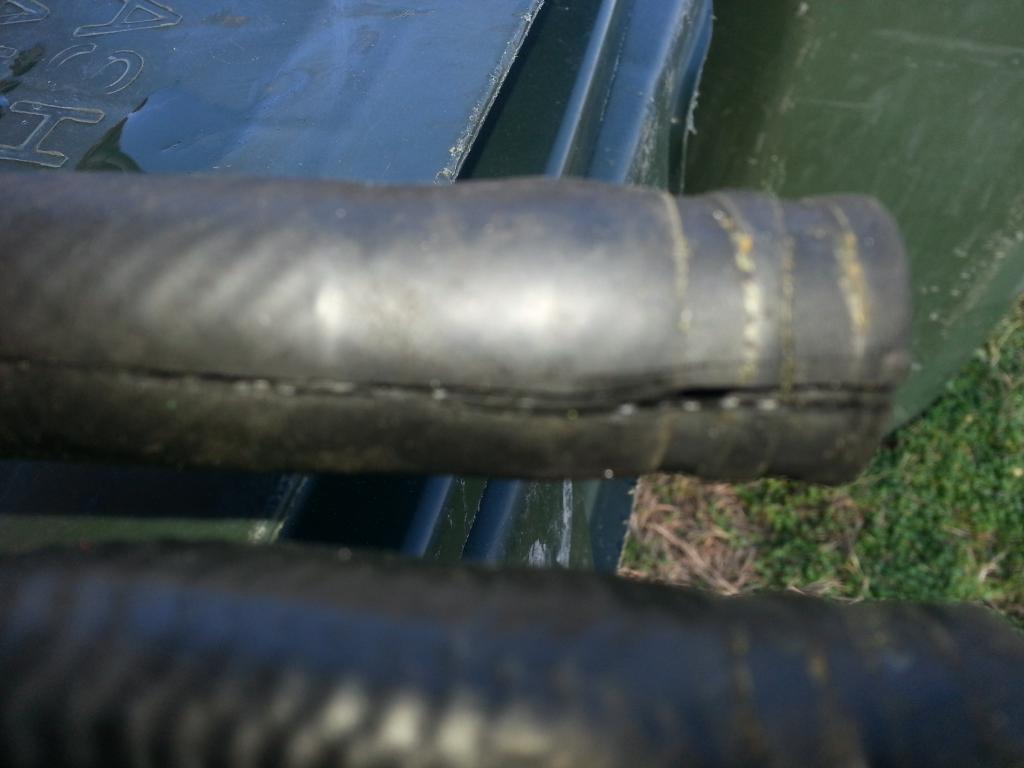 Off!: 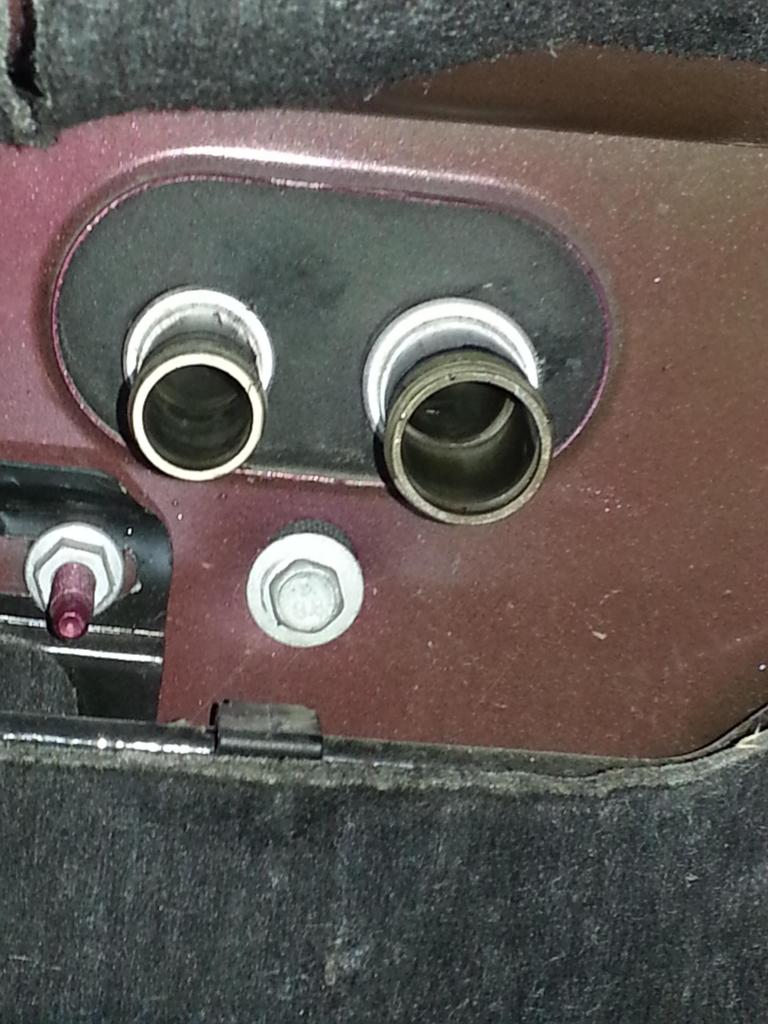 Next I removed the AFM lifters in trays from the drivers and passengers side. First, I used a wet/dry vac to clean out everywhere (including the head bolt holes) and then lubed the cylinder walls with Marvels Mystery oil -- just to play it safe -- used this stuff for years -- great lube: 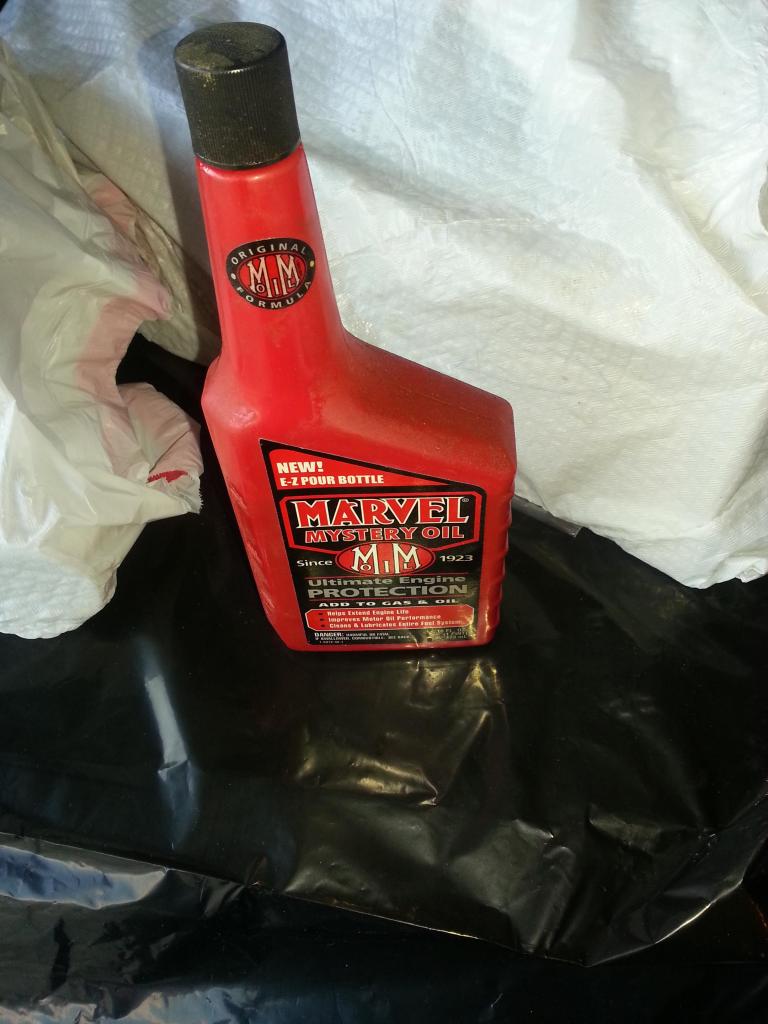 Now that everything is cleaned up, the lifter trays! I rotated the crank serveral times in an attempt to have the lifters 'lock' in the tray -- about 7 times around. Drivers: 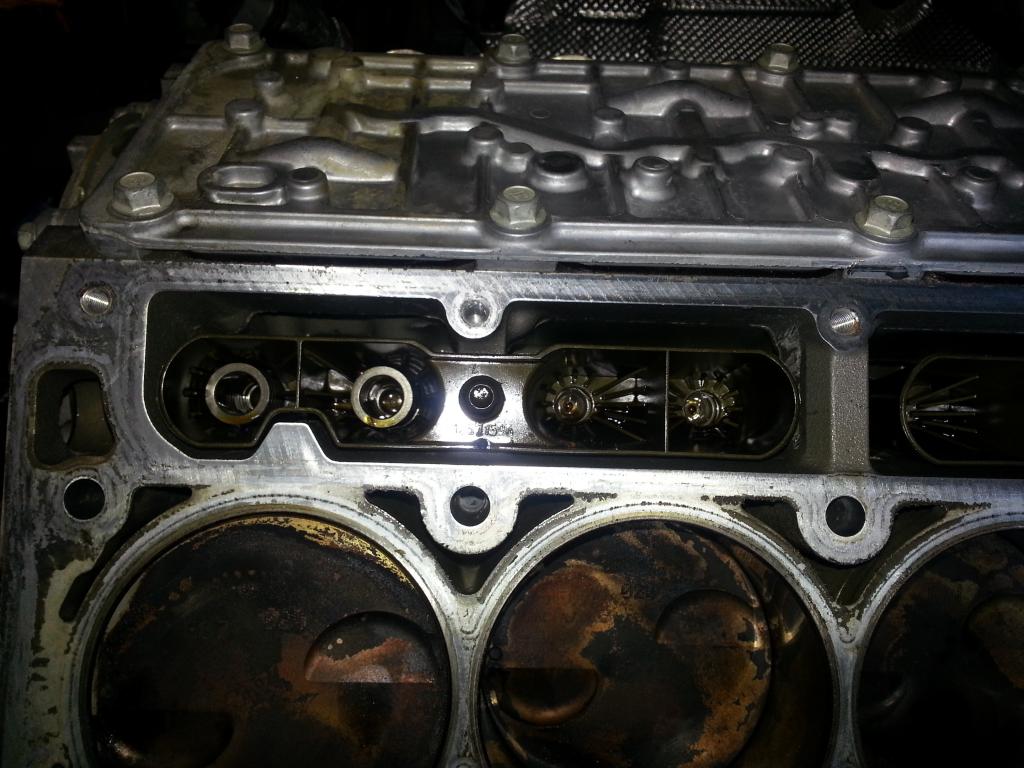 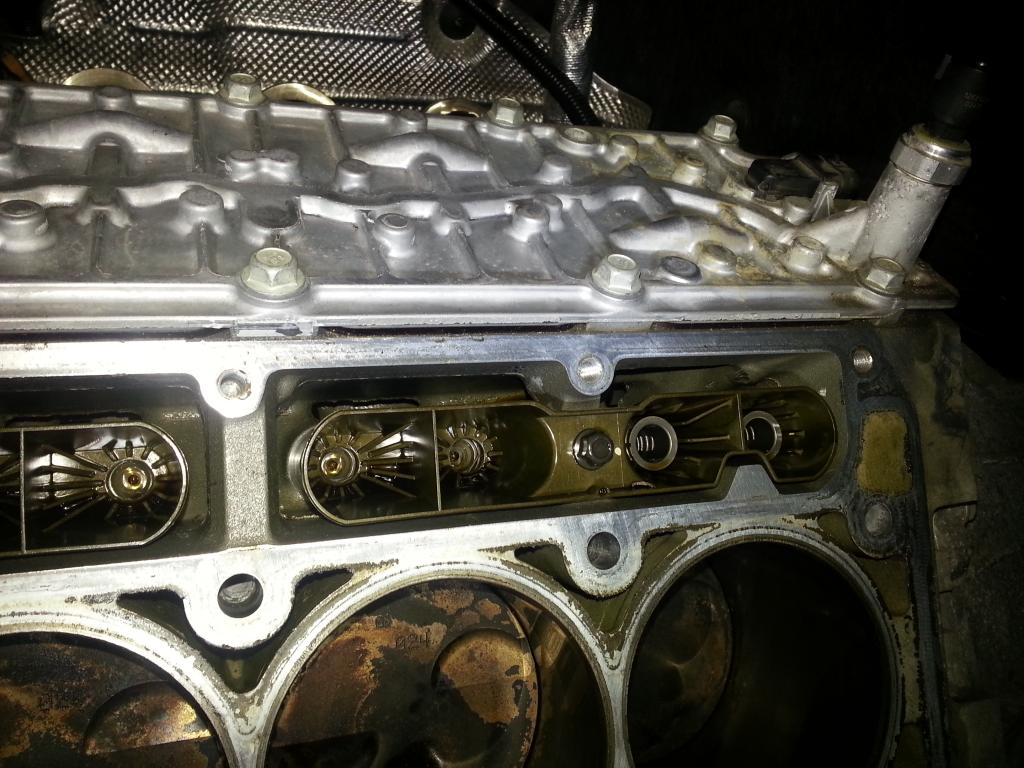 tagged n bagged: 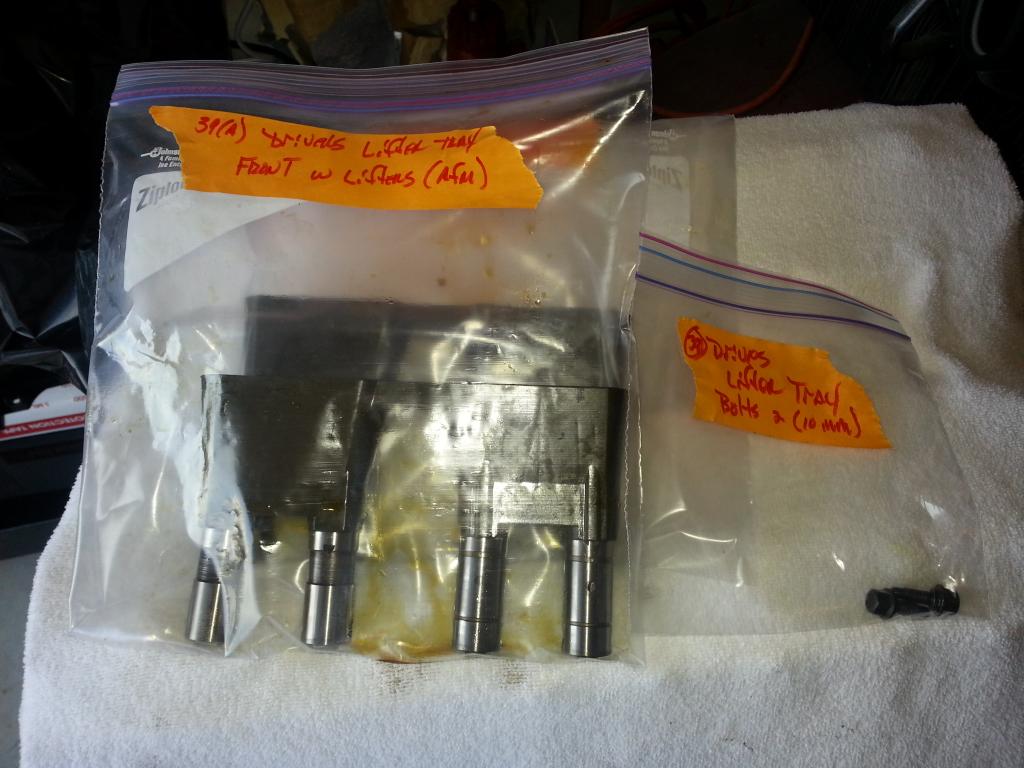 Some lifters stayed in the block so needle nose pliers and a magnet and out they came! 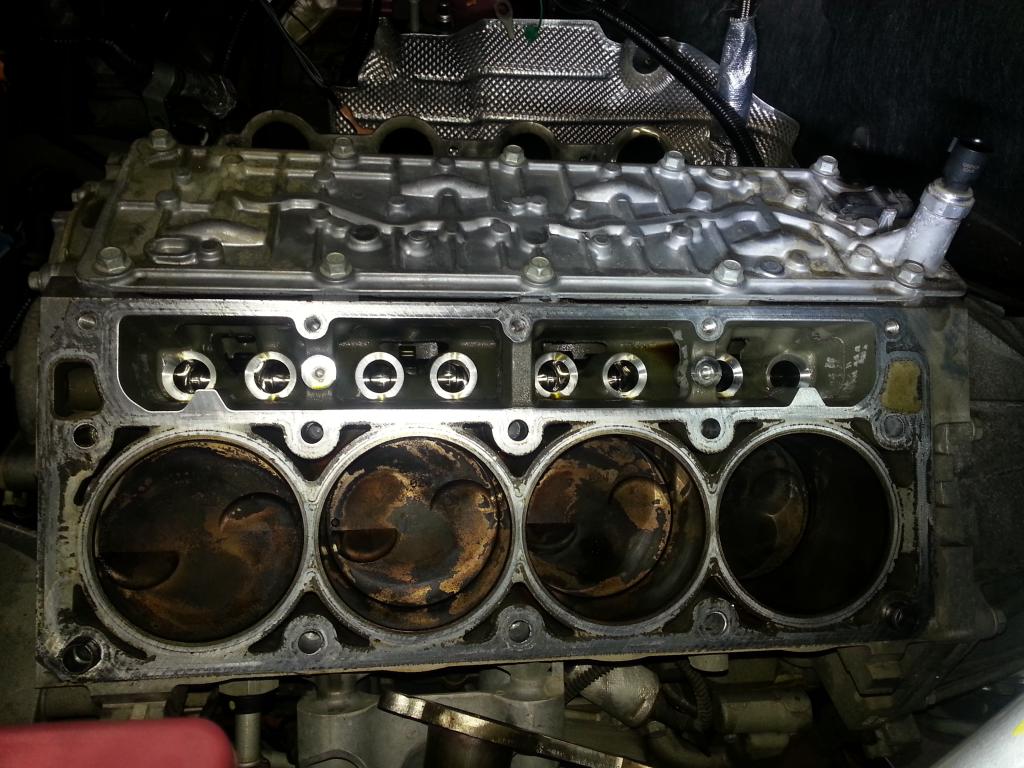 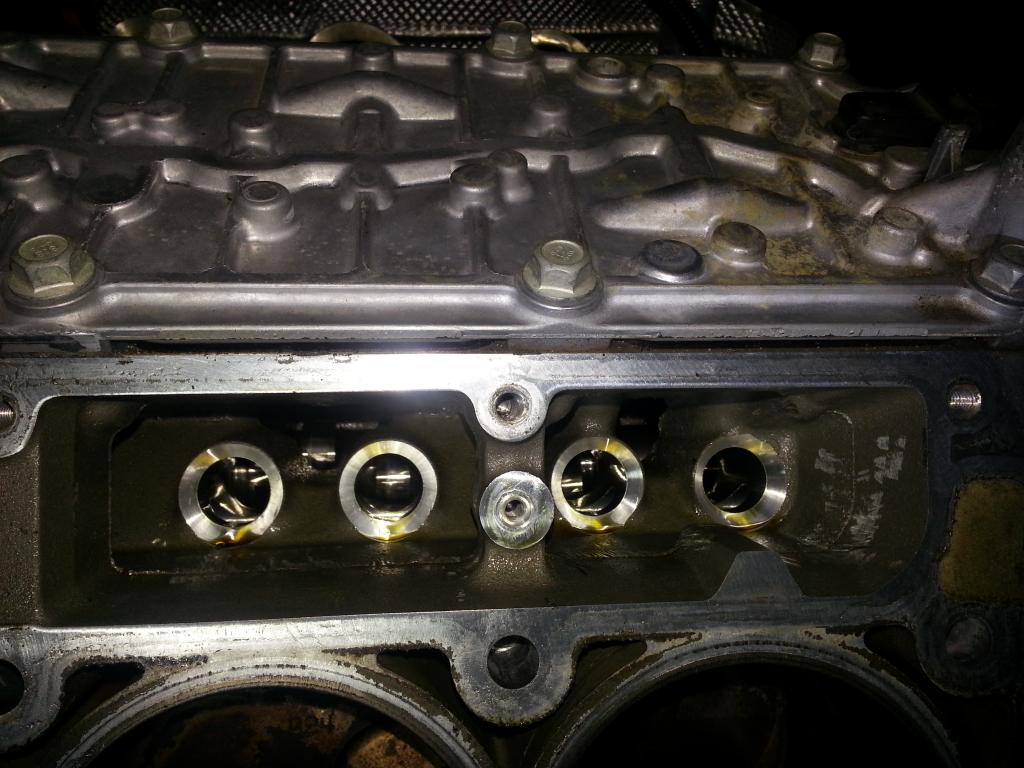 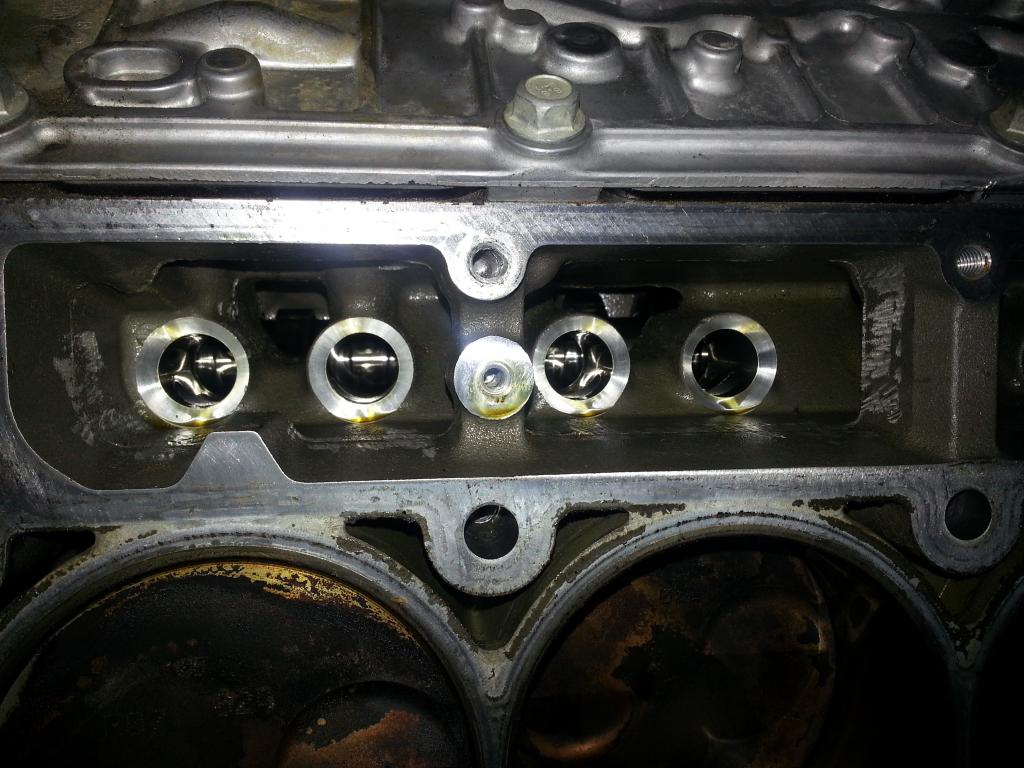 Passenger's Side: 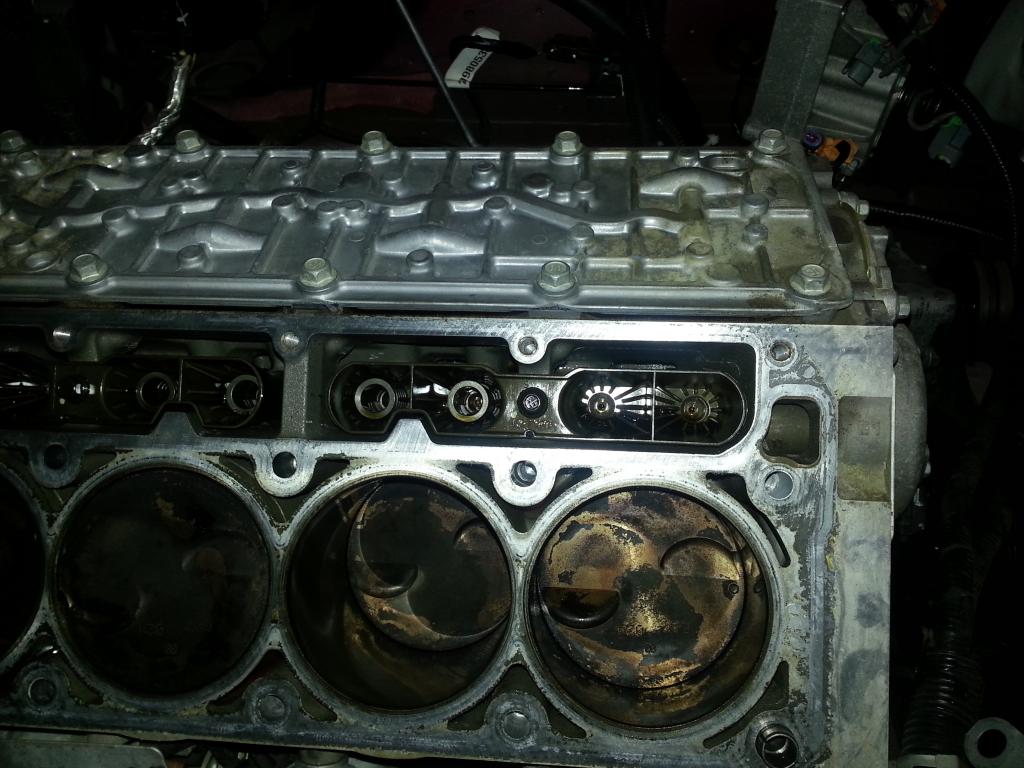 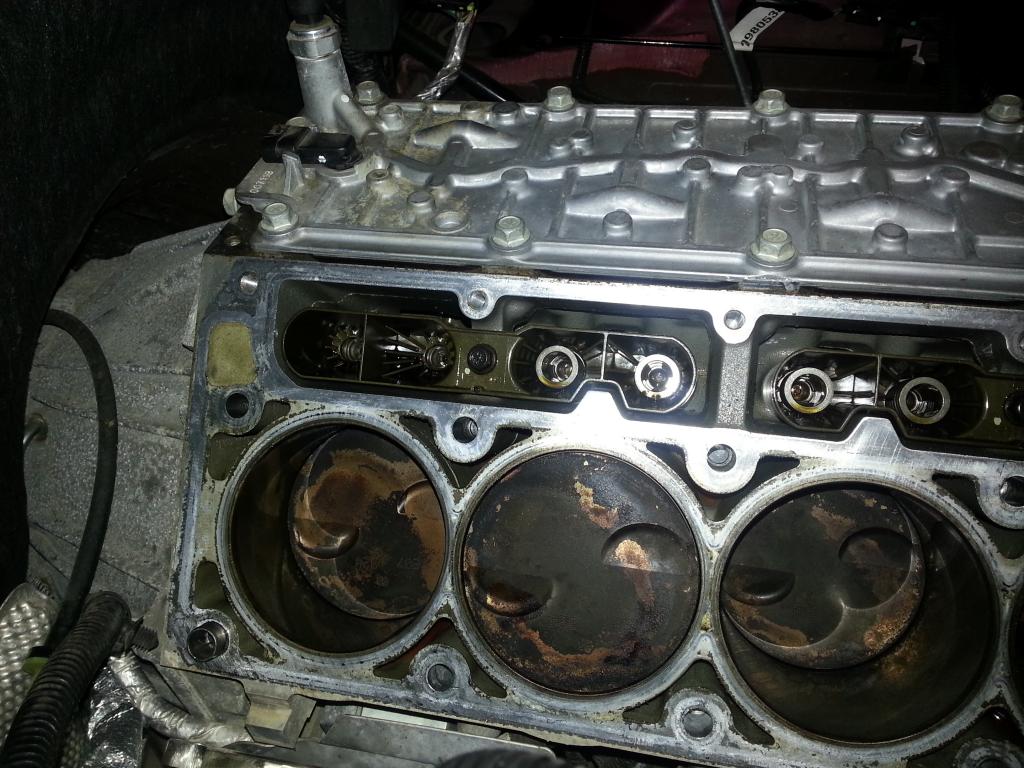 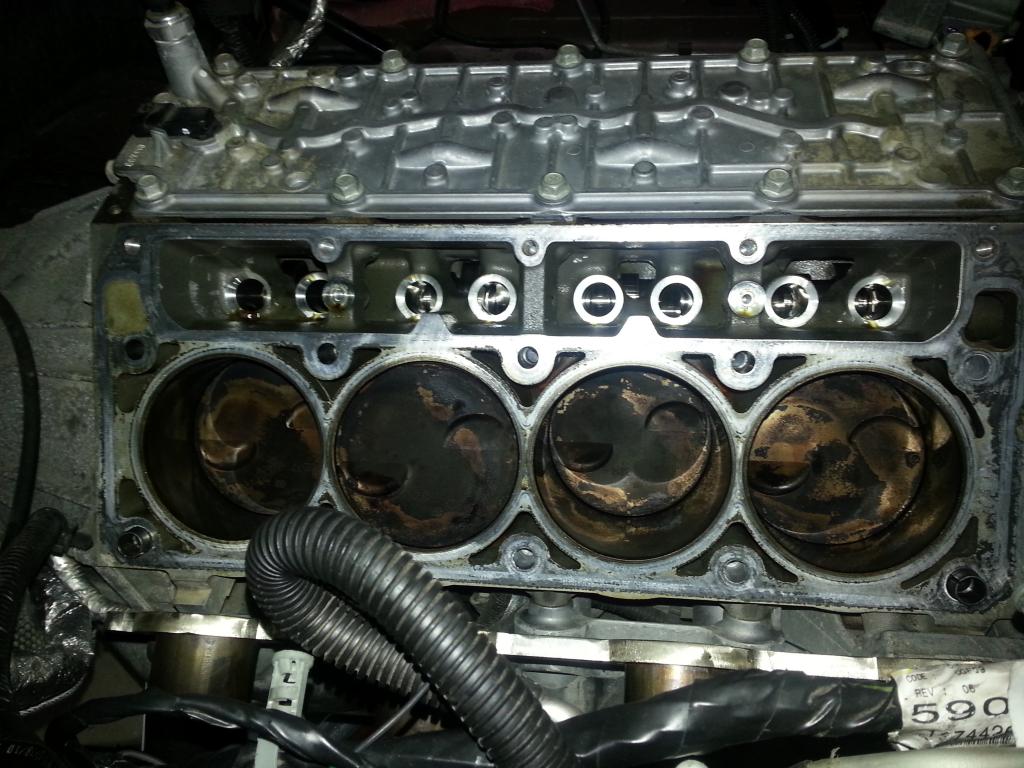 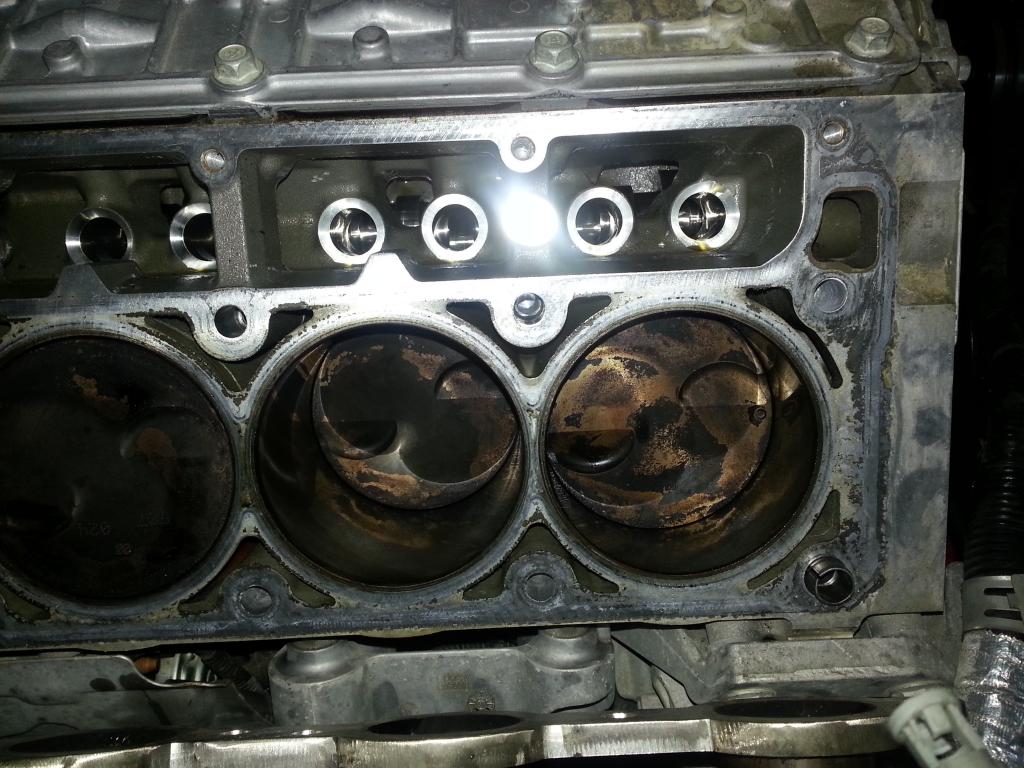 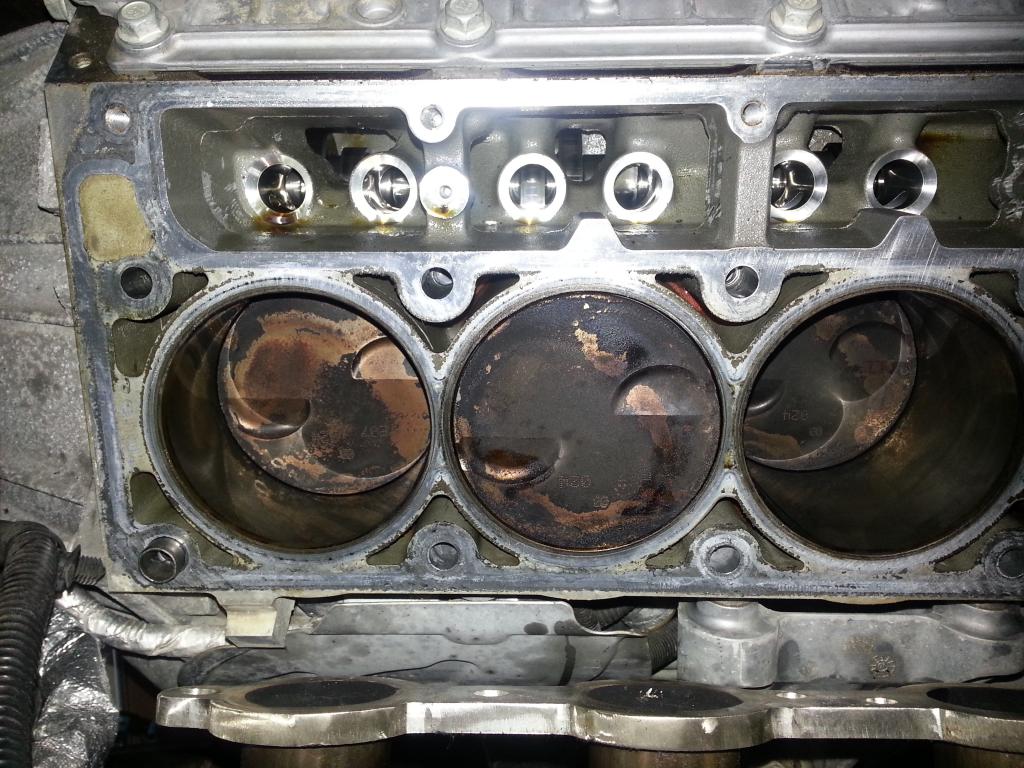 Ready for the AFM delete and the timing cover to come off next!:  More to come... -Don Last edited by hammdo; 07-02-2017 at 12:30 AM. |
|
|
|
|
12-26-2014, 05:04 PM
|
#79 |
|
'It's an experiment'
Drives: [COTW 2/09/15] '11 GPI LSA SC Z/LE Join Date: May 2014
Location: Dallas TX
Posts: 8,694
|
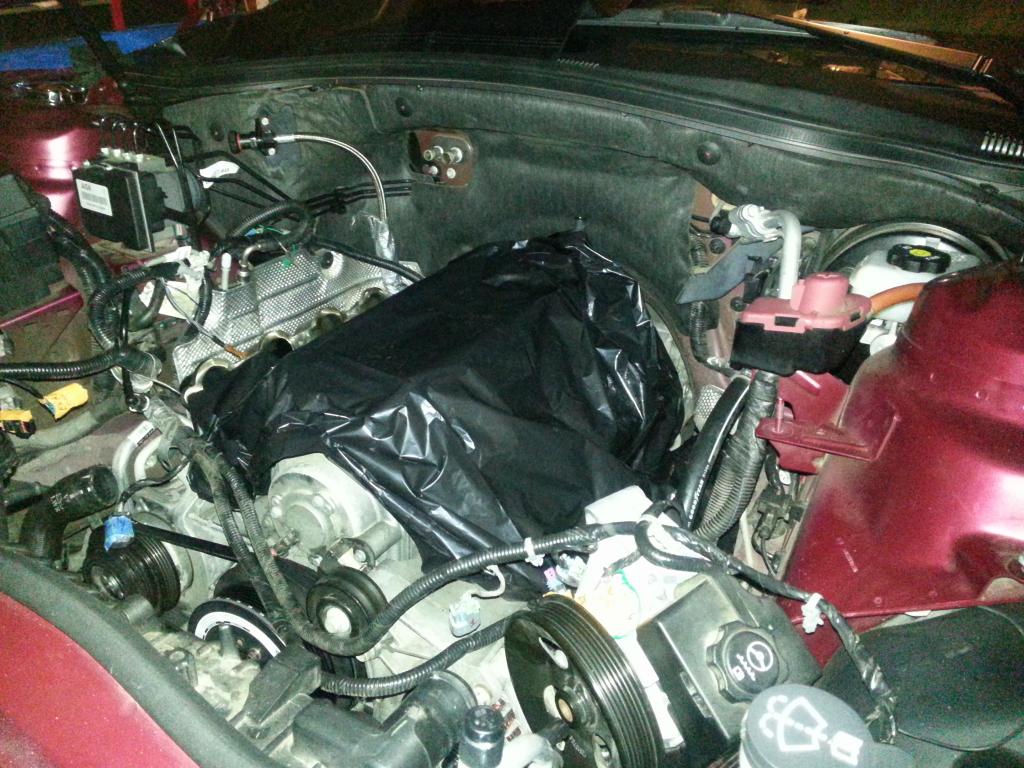
Covered up to protect what I've done up to this point:
Last edited by hammdo; 07-02-2017 at 12:29 AM. |
|
|
|
|
12-26-2014, 07:30 PM
|
#80 |
|
Anabolic Connoisseur

Drives: Sold - Blown Camaro 2SS/RS LS3 Join Date: Sep 2010
Location: Oklahoma
Posts: 22,094
|

__________________
 |
|
|
|
|
12-27-2014, 12:01 AM
|
#81 |
|
'It's an experiment'
Drives: [COTW 2/09/15] '11 GPI LSA SC Z/LE Join Date: May 2014
Location: Dallas TX
Posts: 8,694
|
So, did a little bit of cleaning the pistons before I stopped for the day.
This is what I started with: Used this: 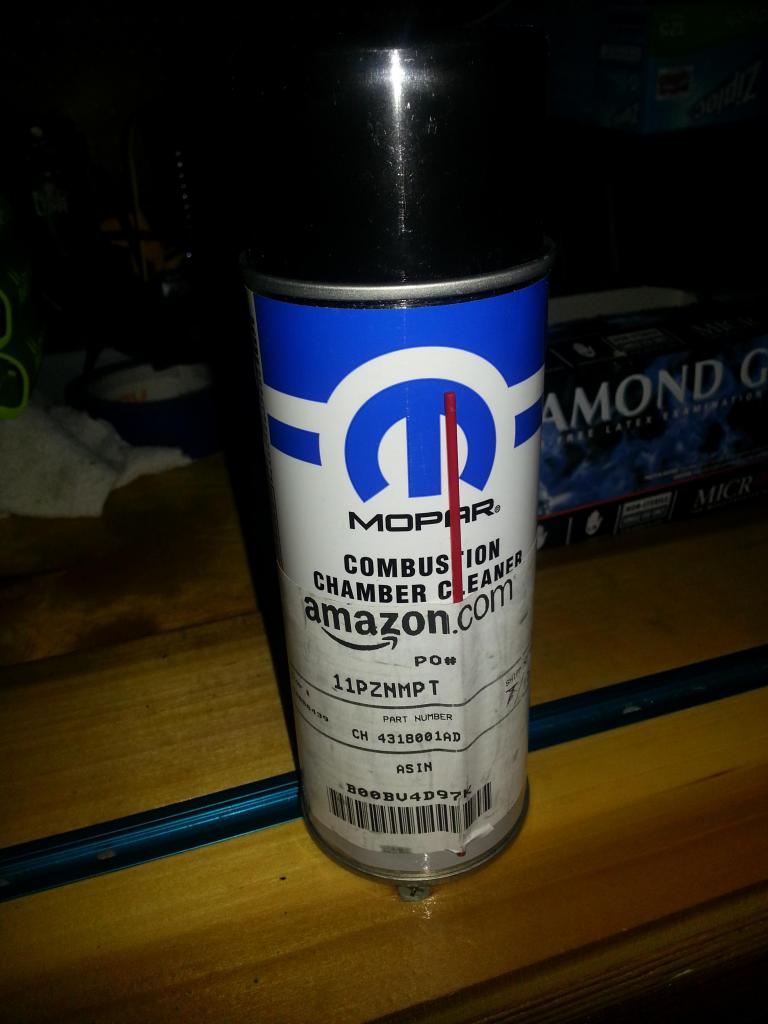 Just sprayed it in the cylinder and let it sit for about 50 minutes (you DON'T let this sit overnight as it can 'etch' the cylinders): 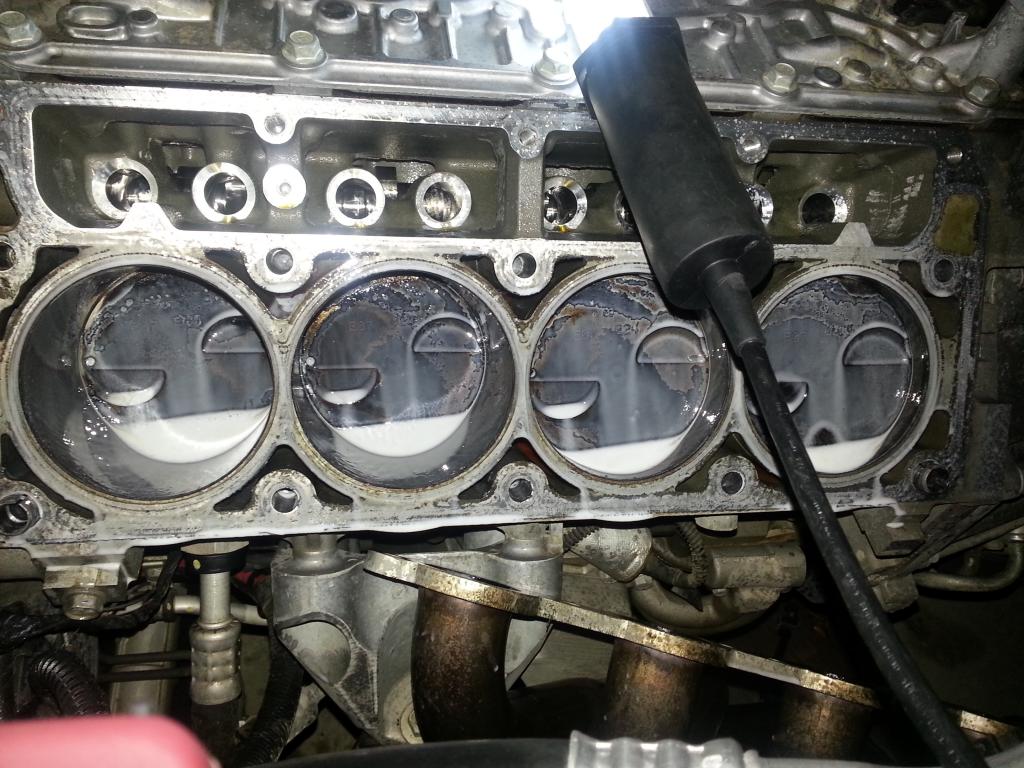 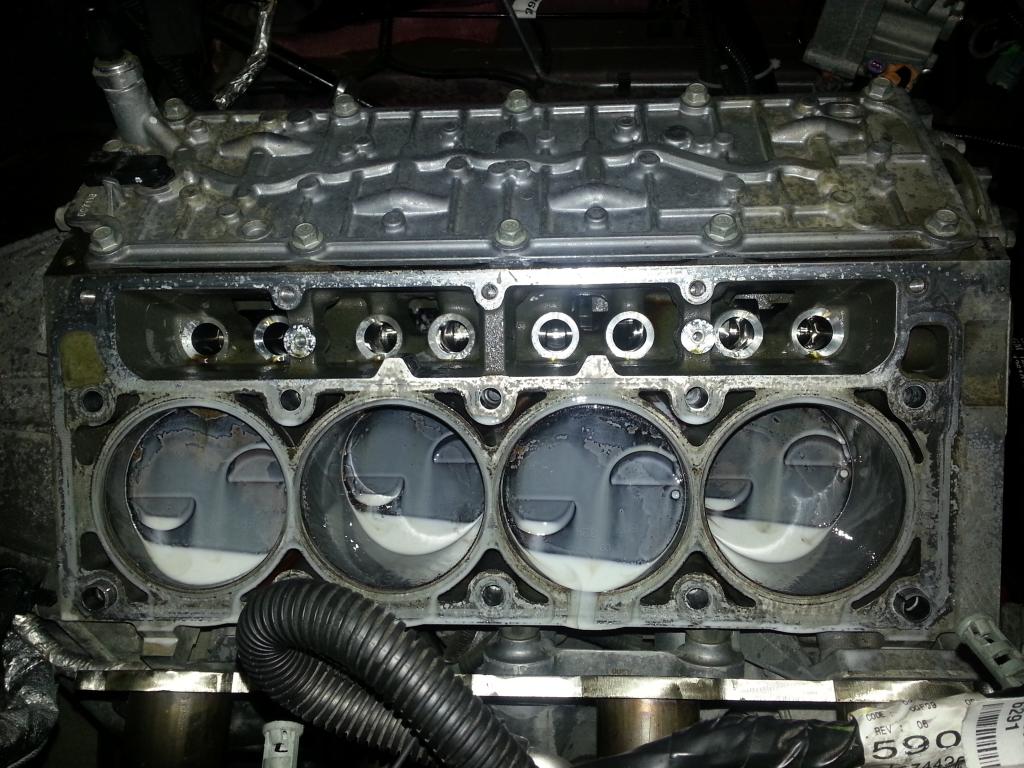 A VERY light scrubbing with a soft brush and its getting closer!: 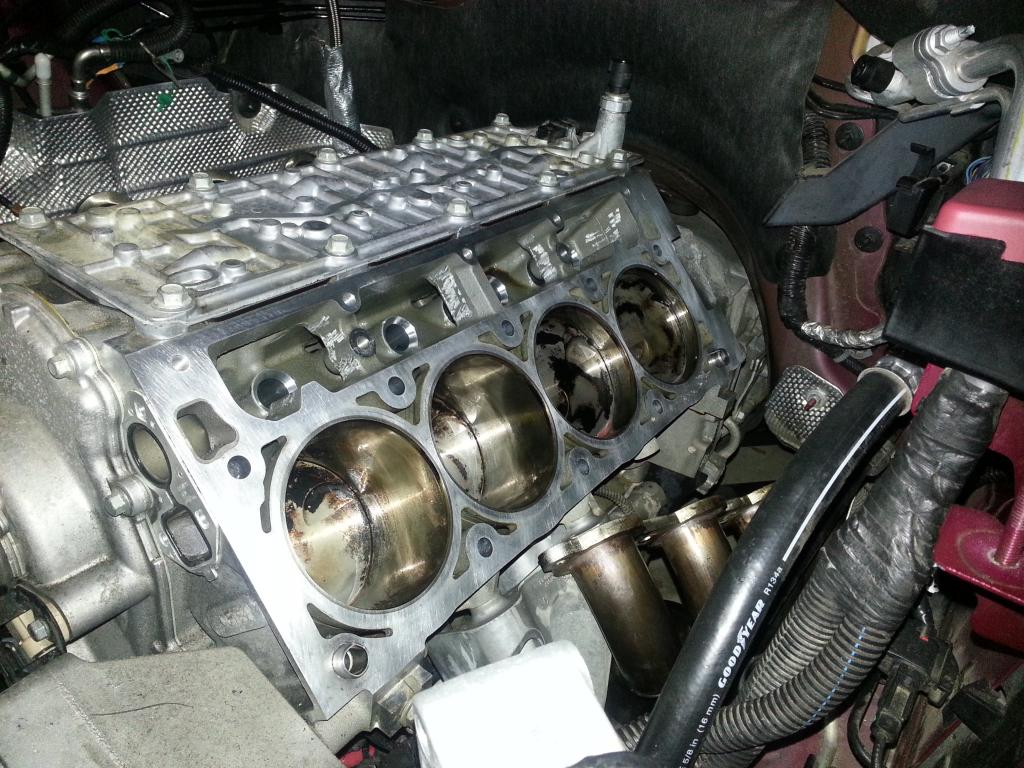 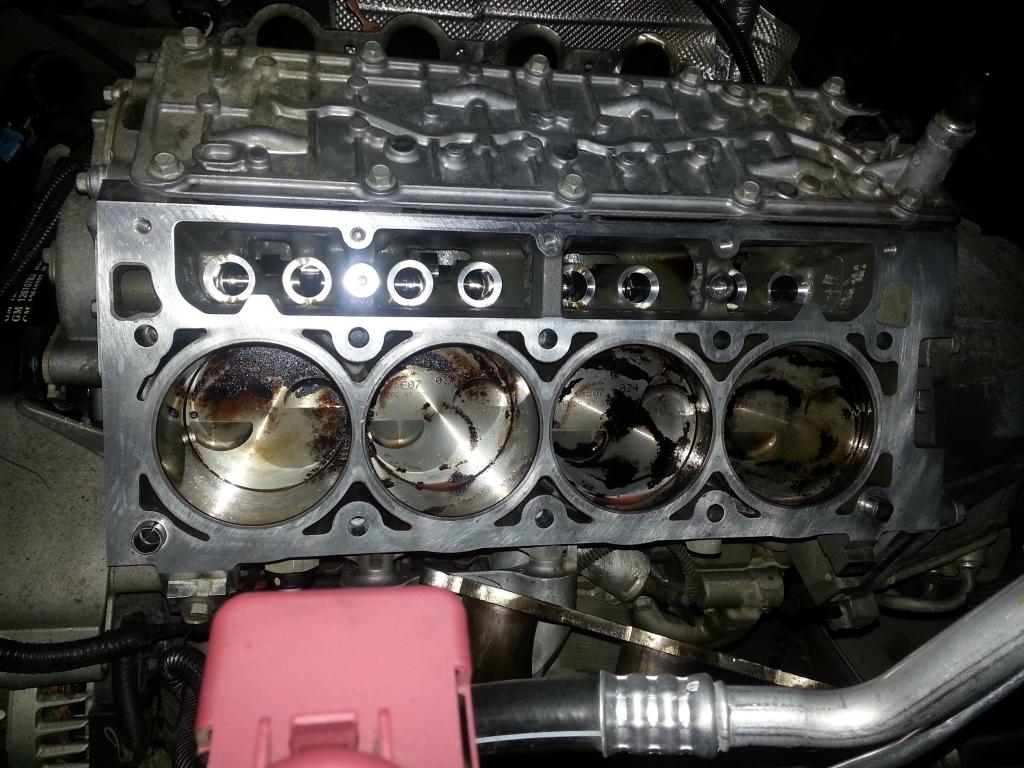 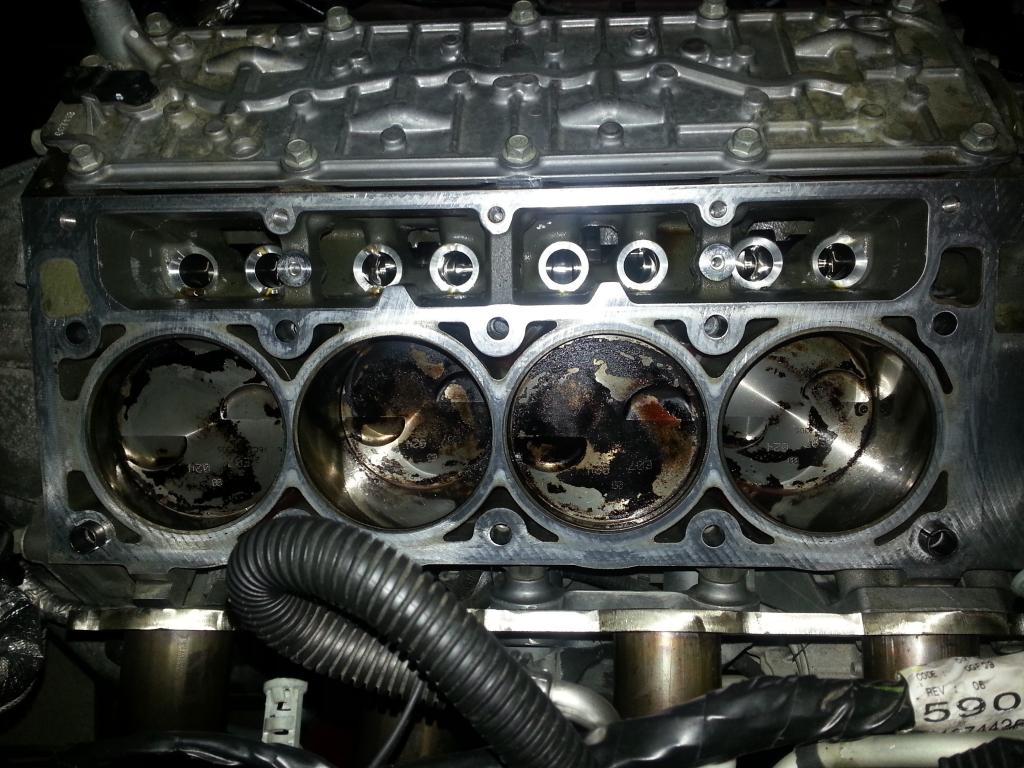 So, I cleaned out the Mopar CCC with brake clean, wiped it down, then added Marvels Mystery Oil into the cylinders for the night... Not bad for about 1 hour total time (with me sitting watching TV while this stuff did its magic)... More to come.... -Don Last edited by hammdo; 07-02-2017 at 12:28 AM. |
|
|
|
|
12-27-2014, 03:36 PM
|
#82 |
|
'It's an experiment'
Drives: [COTW 2/09/15] '11 GPI LSA SC Z/LE Join Date: May 2014
Location: Dallas TX
Posts: 8,694
|
OK, soaking # 2 today. To help it along, I used one of my plastic trim tools to clean off some of the 'thicker' residue, as it won't gouge or scrape the aluminum or cylinder walls:
Tool: 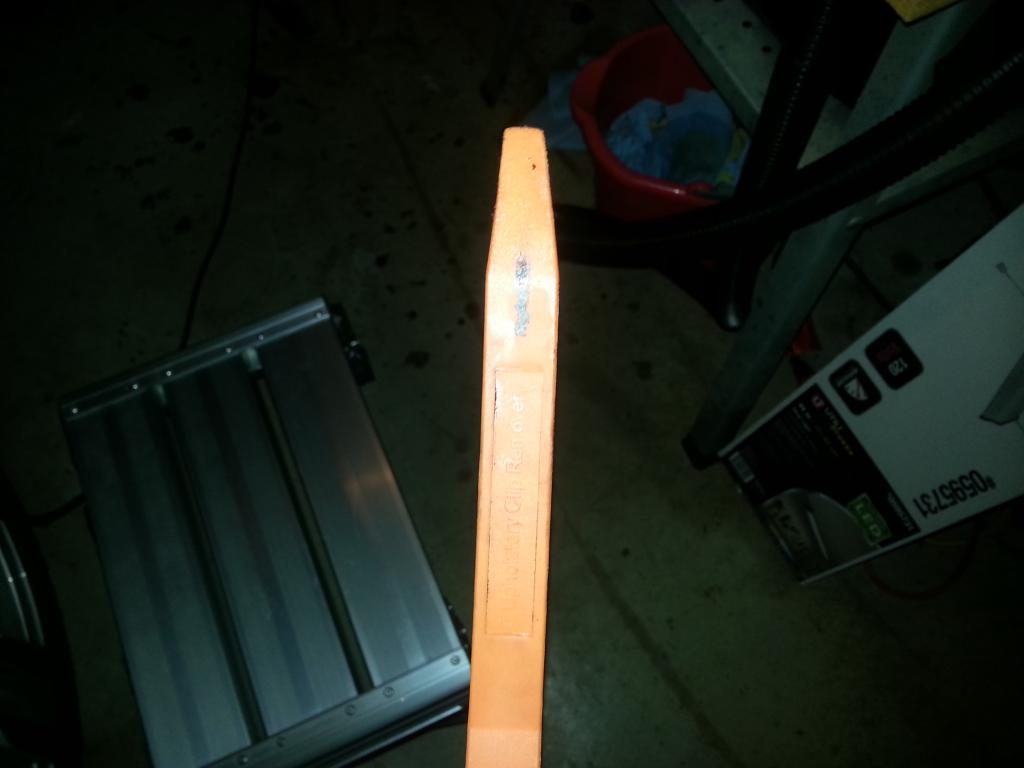 Soaking some more: I do use a nylon soap brush (non-abrasive) to clean the pistons some -- helps loosen up the gunk. I also used my razor to clean the decking more -- getting there: 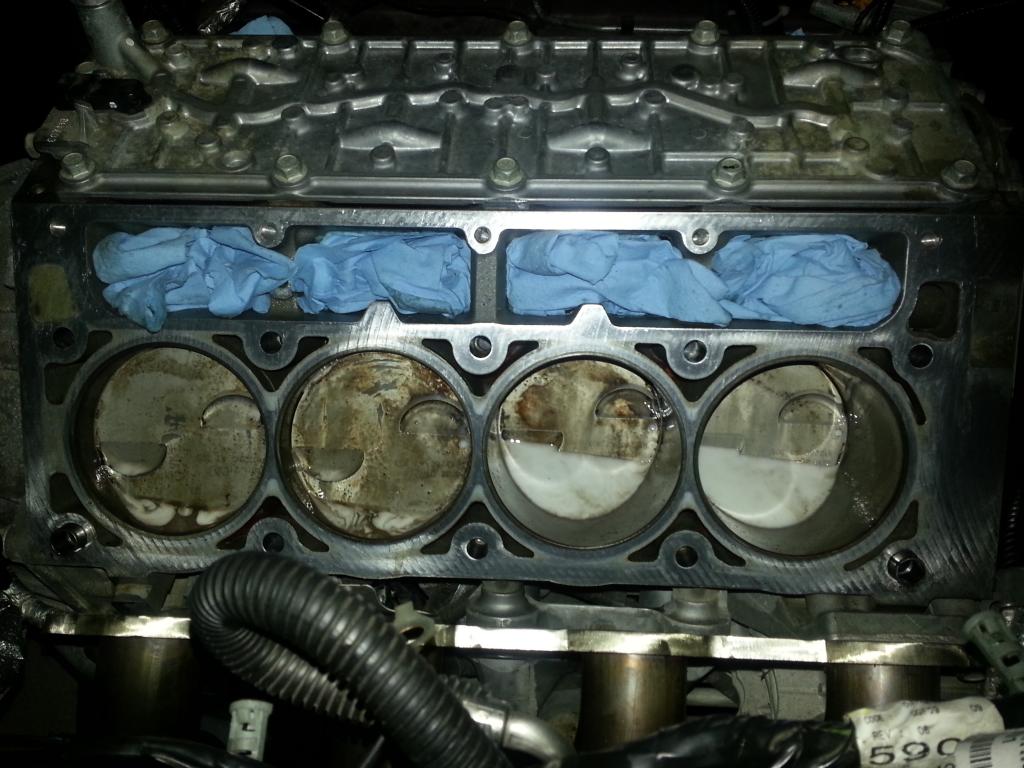 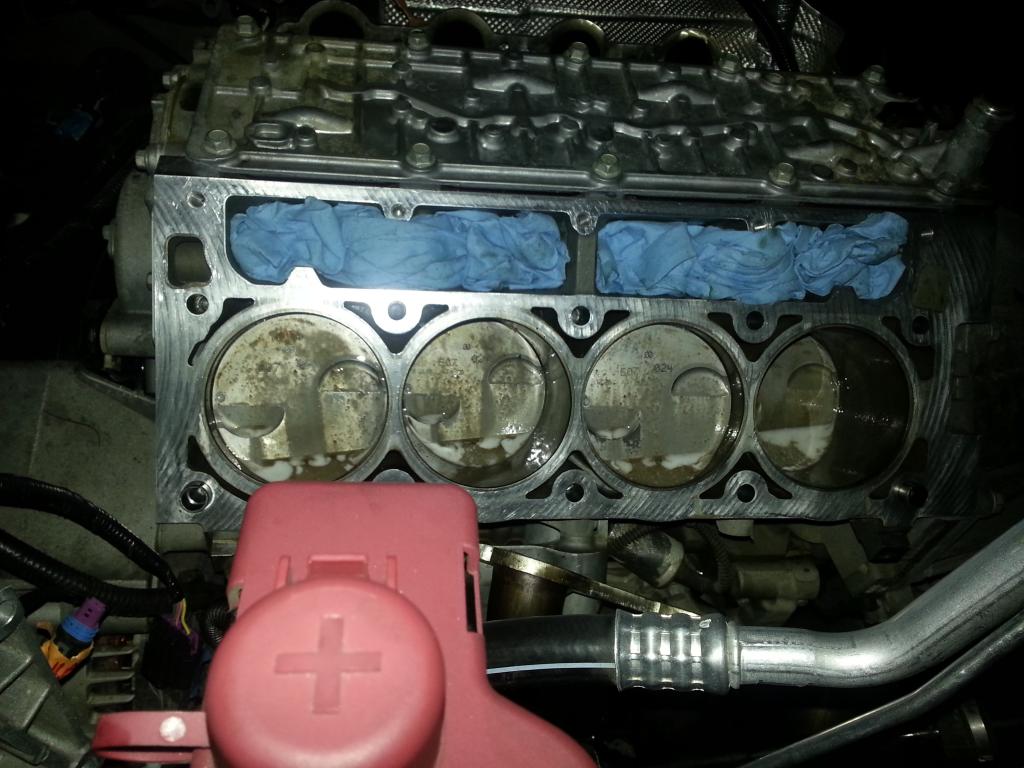 Once the pistons get there I'll clean out the cylinders with brake kleen, then coat with marvels again, and rotate to make sure I have them fully clean. A keen eye will note I did not drain the oil yet -- that is so it would catch anything that may slip by -- an drain when I do change the oil. I do cover up holes to keep out as much as possible. I'll use a wet/dry vac to clean the coolant passages again as well as the lifter galley and cylinders before I rotate anything again. Also, will be cleaning out the bolt holes after the pistons are ready... -Don Last edited by hammdo; 07-02-2017 at 12:27 AM. |
|
|
|
|
12-27-2014, 04:55 PM
|
#83 |
|
'It's an experiment'
Drives: [COTW 2/09/15] '11 GPI LSA SC Z/LE Join Date: May 2014
Location: Dallas TX
Posts: 8,694
|
OK, I can be anal or just accept the fact this is going to be as good as it gets (razor cleaned the decking well use a dulled razor and scrape slowly with a reverse pull on the blade to avoid chunks of aluminum coming off. If reusing heads, do, the same):
Driver's Side (Passenger's still needs more time): First, cleaned it out, then used brake-kleen, then compressed air -- did that 4 times. After that, coated with Marvels: Before: After:  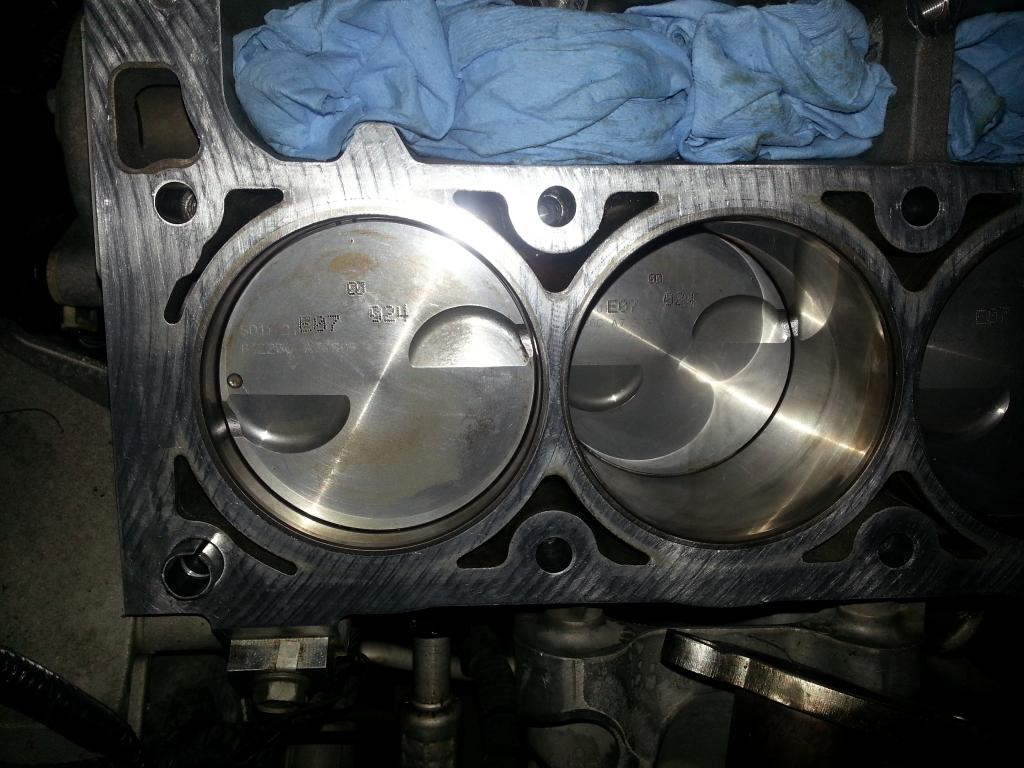 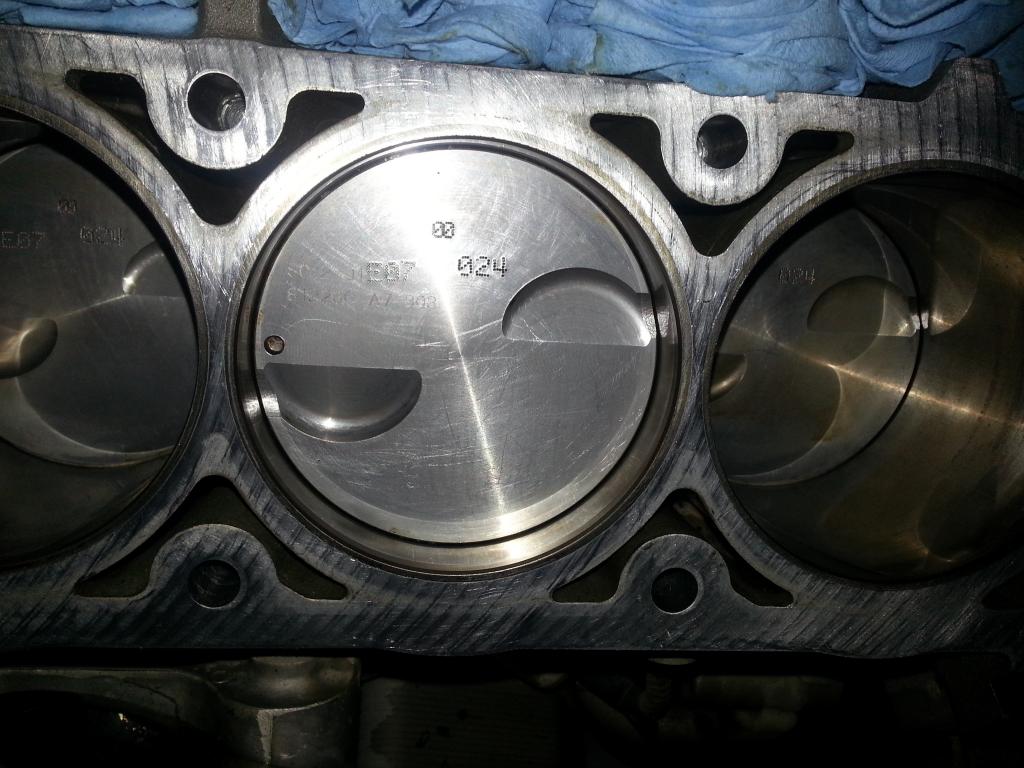 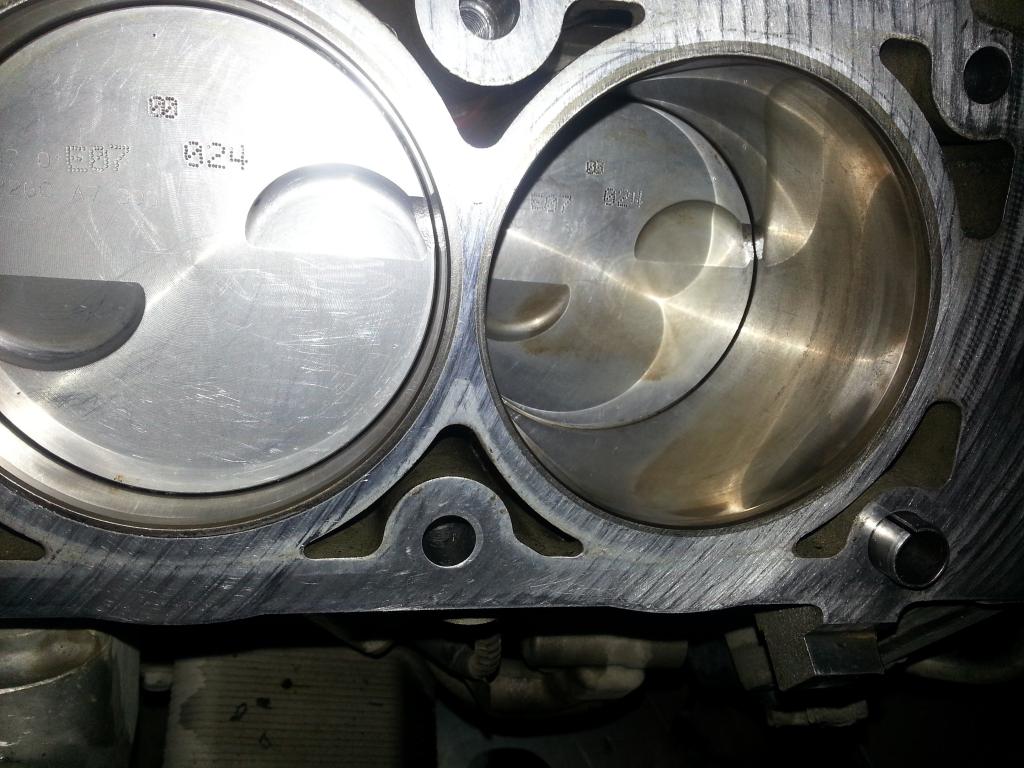 Marvels: 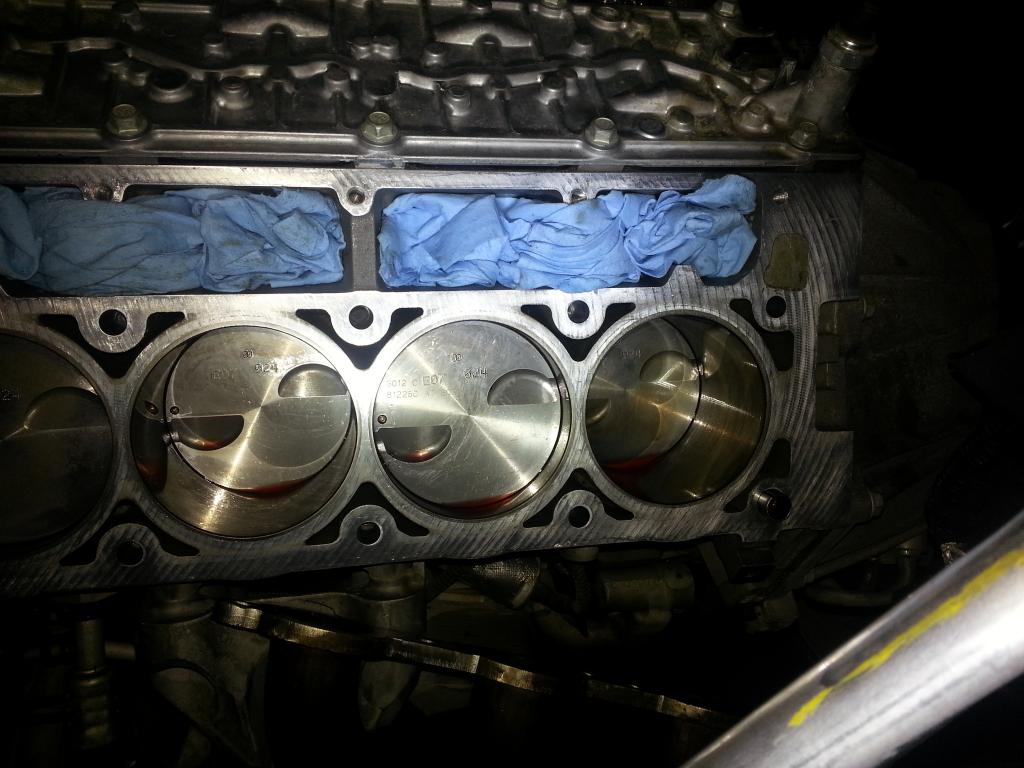 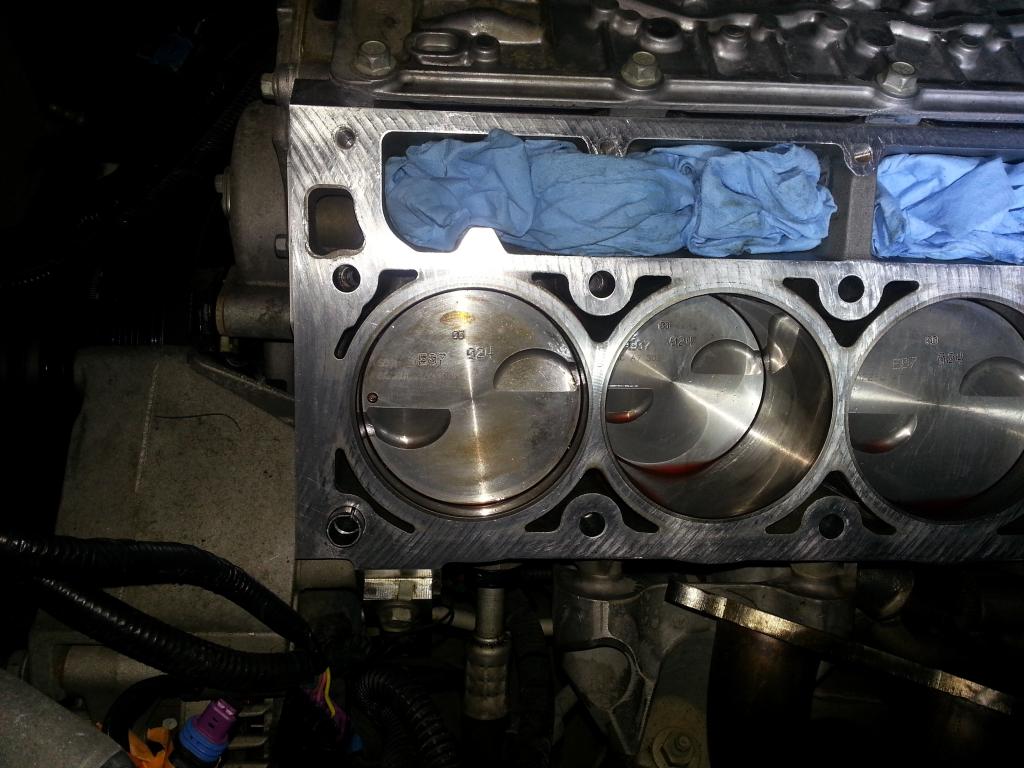 Covered Driver's side, now working on the passengers... -Don Last edited by hammdo; 06-22-2019 at 08:47 AM. |
|
|
|
|
12-27-2014, 06:20 PM
|
#84 |
|
'It's an experiment'
Drives: [COTW 2/09/15] '11 GPI LSA SC Z/LE Join Date: May 2014
Location: Dallas TX
Posts: 8,694
|
Passenger side was certainly more 'dirty' so one more soaking to get it right:
Started with: Currently:  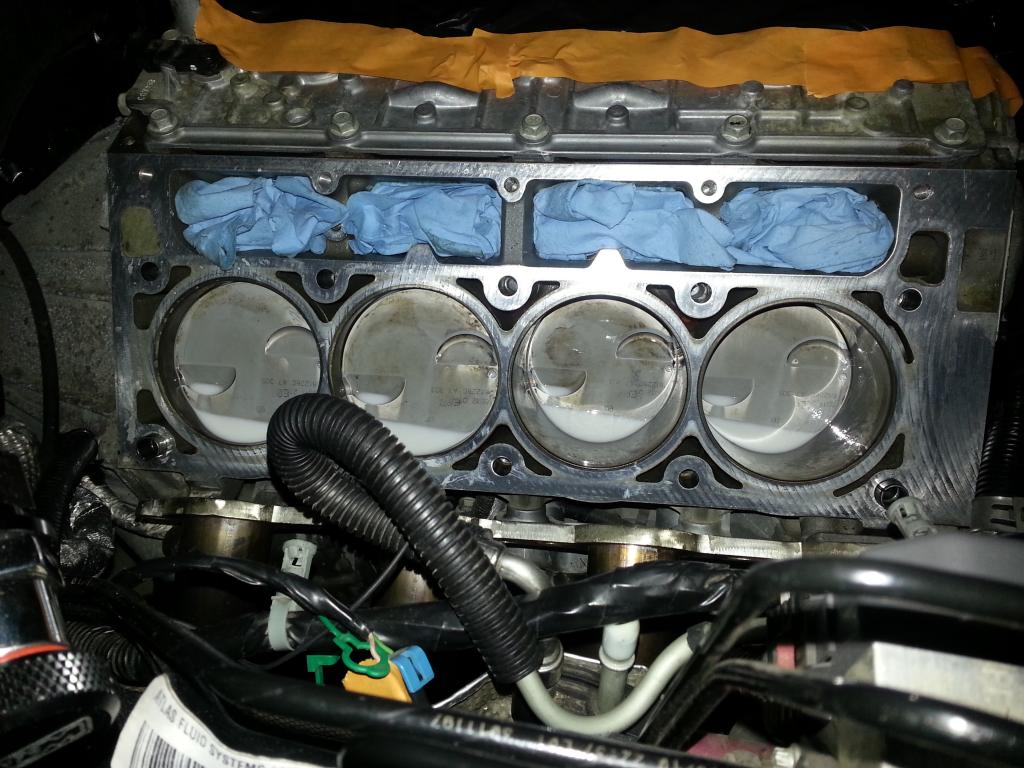 Almost there... The 'varnish' is not coming 'totally' off but still very clean... -Don Last edited by hammdo; 07-02-2017 at 12:25 AM. |
|
|
|
|
|
|
|
 |
|
|


