You are browsing camaro5 

|
 08-23-2018, 09:58 AM
|
#2185 |
|
'It's an experiment'

Drives: [COTW 2/09/15] '11 GPI LSA SC Z/LE Join Date: May 2014
Location: Dallas TX
Posts: 8,693
|
No, when racing at NCM the drivers side axle was popping out only - NCM is hard on the left side. Normal driving, was fine. At the time this happened, the diff was fairly new (clutch packs, bearings, etc.). Only the bushings were still stock...
-Don
__________________
747 RWHP 794 RWTQ
"Horsepower sells cars, torque wins races." - Enzo Ferrari See My Build: http://www.camaro5.com/forums/showthread.php?t=385577 |

|

|
|
08-23-2018, 08:12 PM
|
#2186 |
|
'It's an experiment'
Drives: [COTW 2/09/15] '11 GPI LSA SC Z/LE Join Date: May 2014
Location: Dallas TX
Posts: 8,693
|
LSA ProMeth Setup cont.
Working on the lid removal. Had to drop the cradle due to the spacer.
While I have the lid off, bought this: https://www.dedicatedmotorsports.com.../gmrifbzl1.htm  Ill swap that in for the existing one to save time. Once this is done, I should have a very stout setup! -Don
__________________
747 RWHP 794 RWTQ
"Horsepower sells cars, torque wins races." - Enzo Ferrari See My Build: http://www.camaro5.com/forums/showthread.php?t=385577 |
|
|
|
|
08-24-2018, 10:42 AM
|
#2187 |
|
'It's an experiment'
Drives: [COTW 2/09/15] '11 GPI LSA SC Z/LE Join Date: May 2014
Location: Dallas TX
Posts: 8,693
|
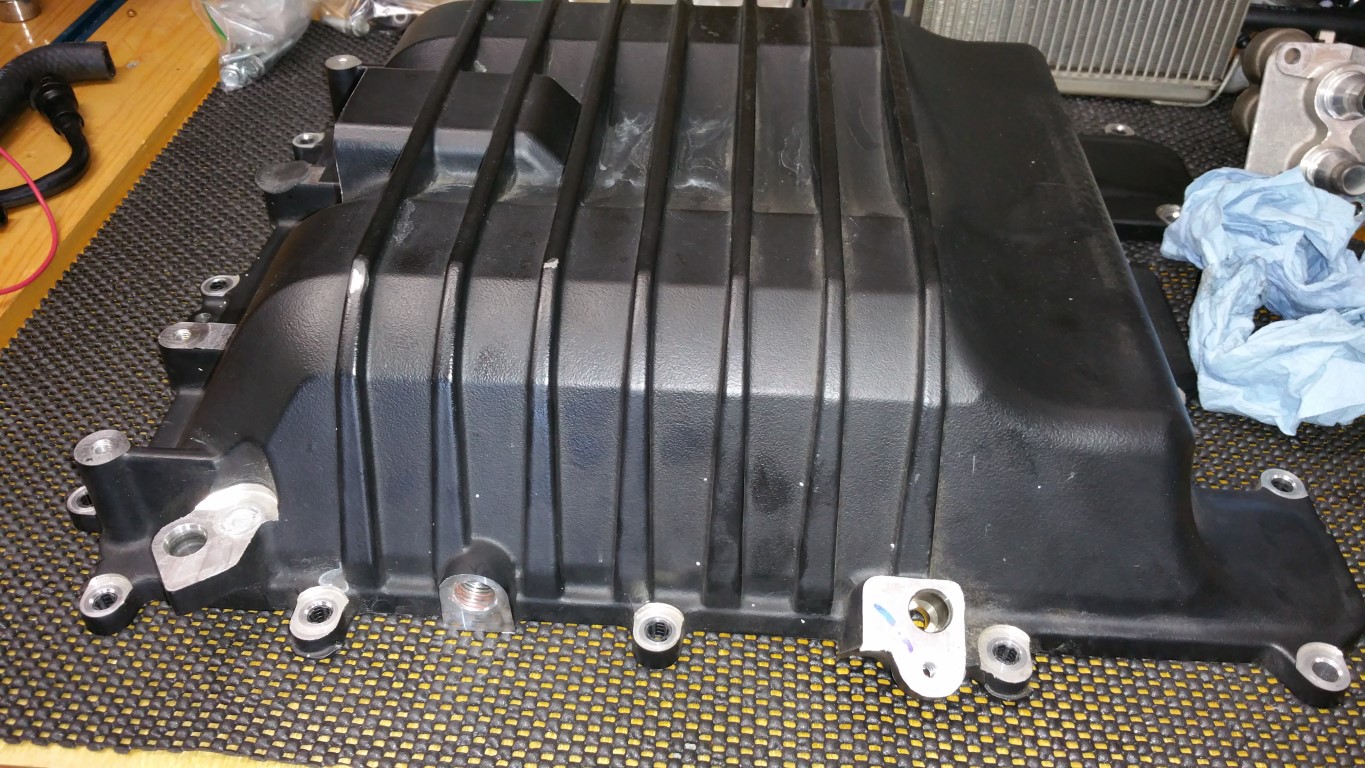
LSA ProMeth Setup cont.
Lid is off and boy is it clean:
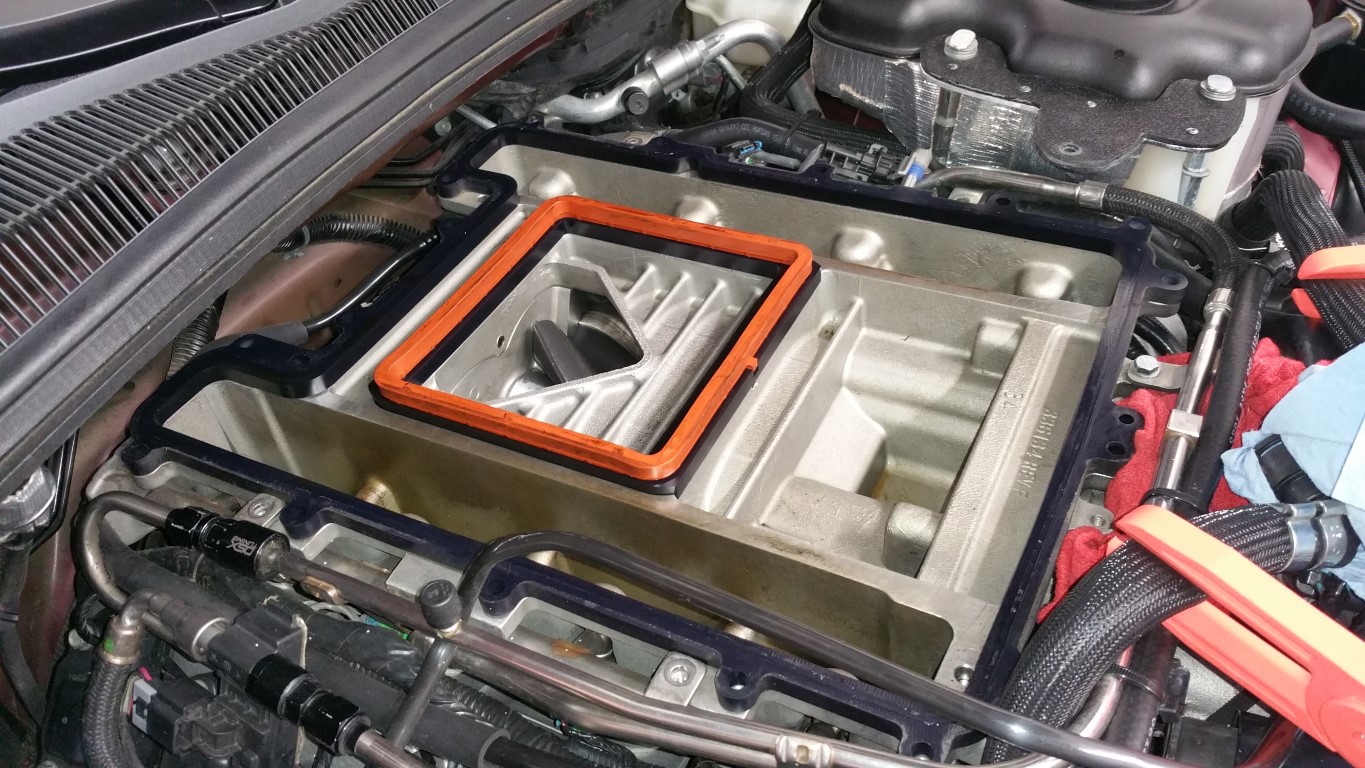  Catch cans were doing their job! Covered it up: 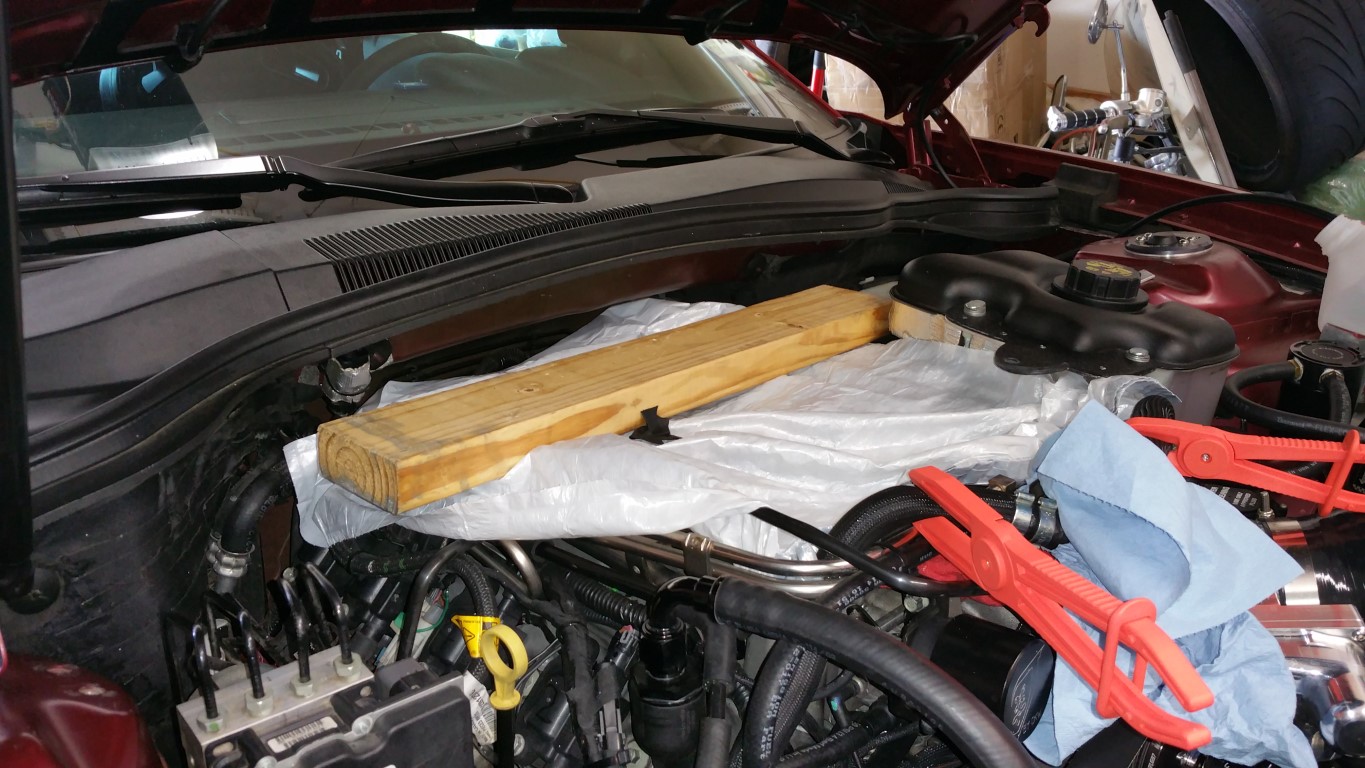 I'll clean things a bit and install new gaskets for the lid -- have them -- might as well. The new brick is due in today so I'll be plugging nozzles soon! -Don
__________________
747 RWHP 794 RWTQ
"Horsepower sells cars, torque wins races." - Enzo Ferrari See My Build: http://www.camaro5.com/forums/showthread.php?t=385577 |
|
|
|
|
08-24-2018, 02:50 PM
|
#2188 |
|
'It's an experiment'
Drives: [COTW 2/09/15] '11 GPI LSA SC Z/LE Join Date: May 2014
Location: Dallas TX
Posts: 8,693
|
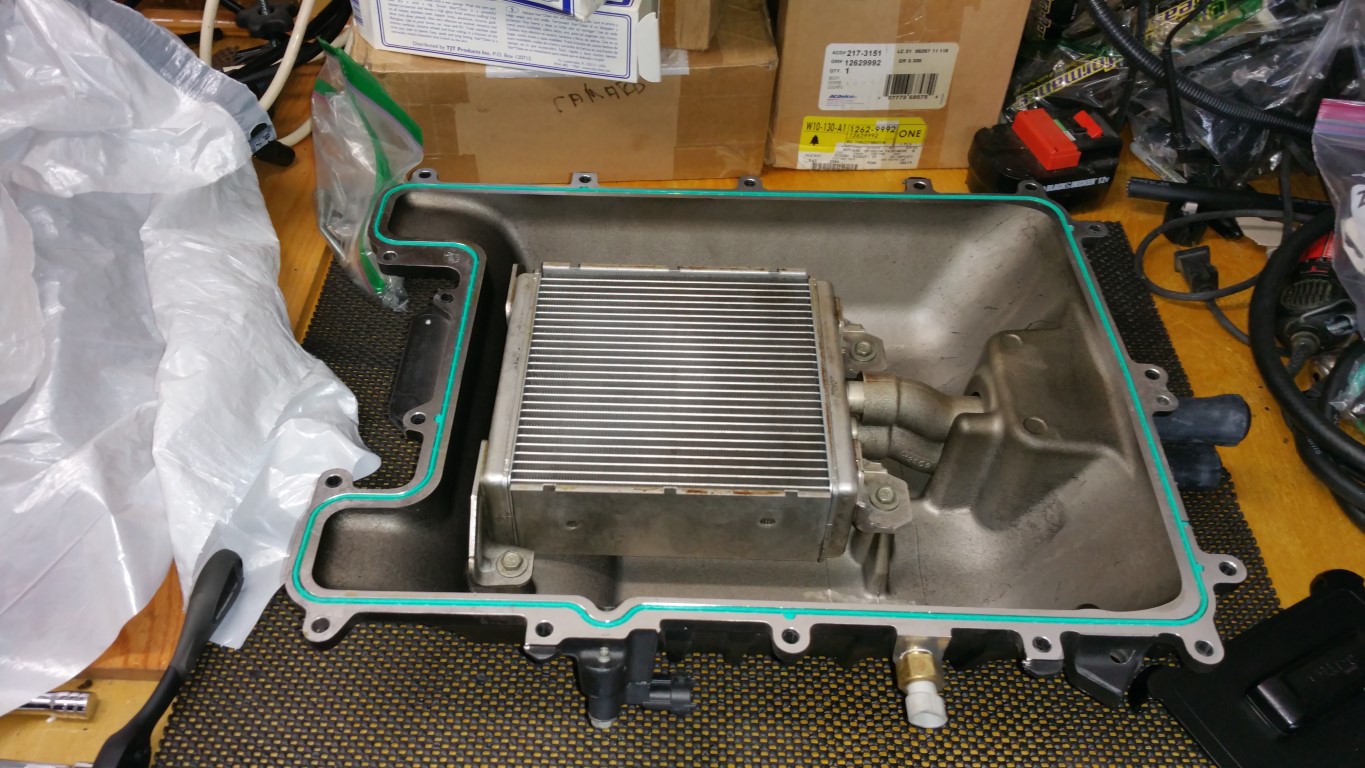
LSA ProMeth Setup cont.
OK, continued with LID dismantle. Removed the Brick and the 'manifold' from the lid:
 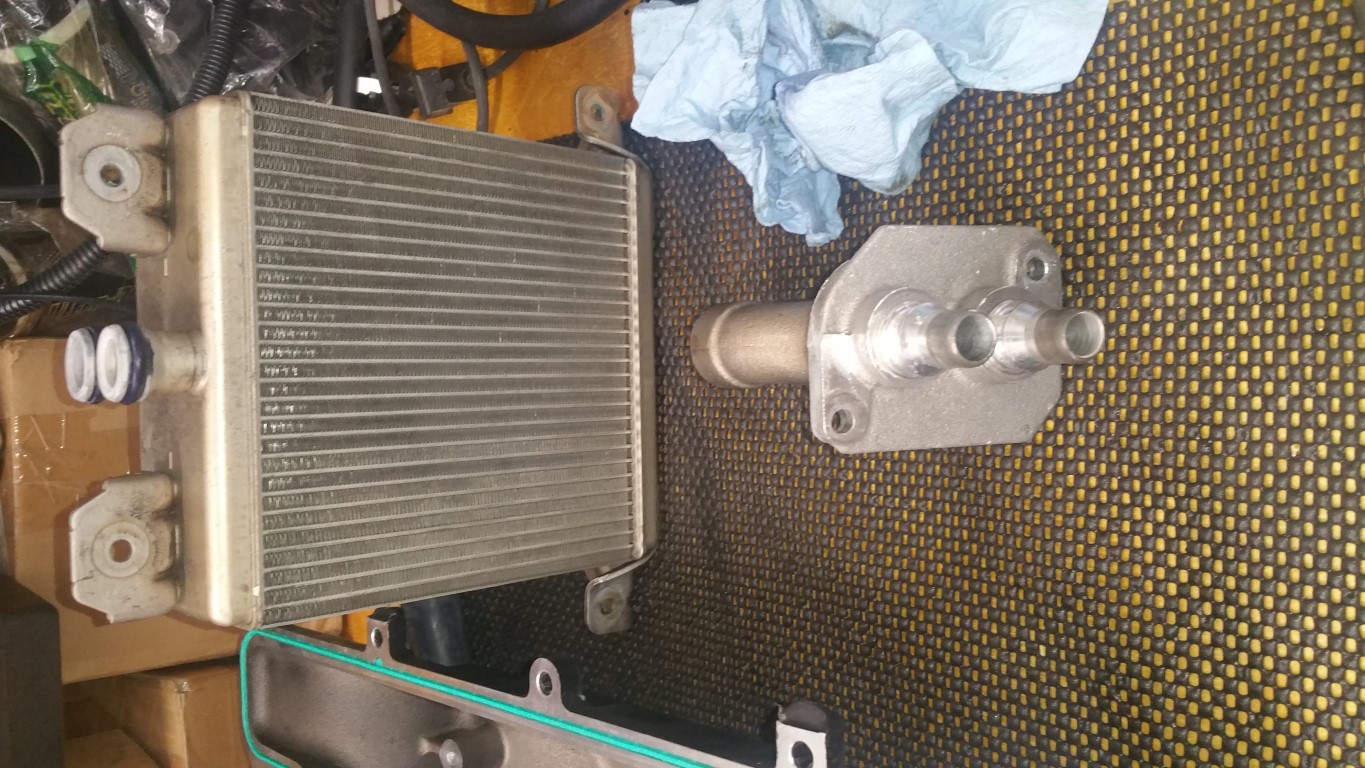     very straight forward -- removed the MAP and IAT2 sensors -- now time to drill some nozzles! -Don
__________________
747 RWHP 794 RWTQ
"Horsepower sells cars, torque wins races." - Enzo Ferrari See My Build: http://www.camaro5.com/forums/showthread.php?t=385577 |
|
|
|
|
08-24-2018, 06:33 PM
|
#2189 |
|
'It's an experiment'
Drives: [COTW 2/09/15] '11 GPI LSA SC Z/LE Join Date: May 2014
Location: Dallas TX
Posts: 8,693
|
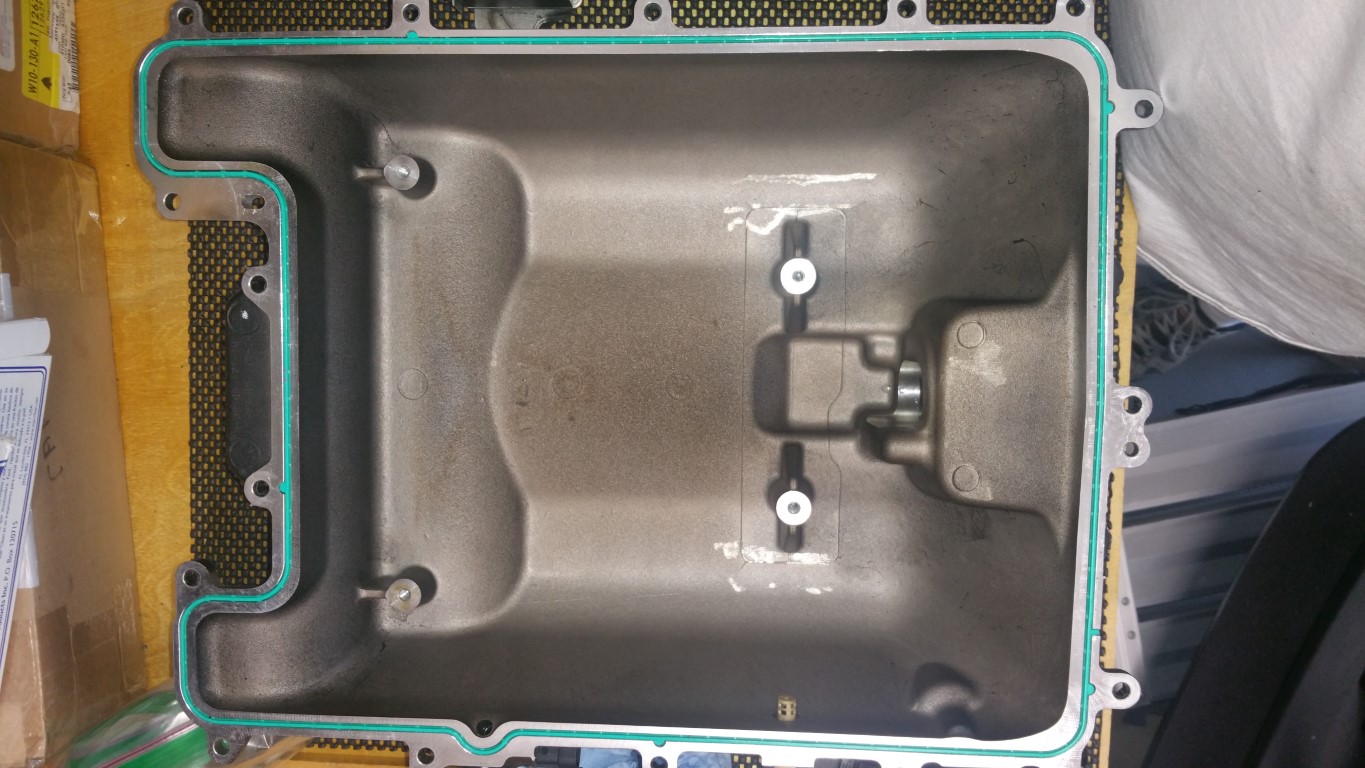
LSA ProMeth Setup ZL1 Lid cont.
OK, holes drilled and tapped!
I basically had to measure several times until I came up with this: 2 1/6" up from the bottom of the lid, then 8 1/8" center to center Keep in mind, I have a lid spacer! that worked perfectly: Marked then center punched: 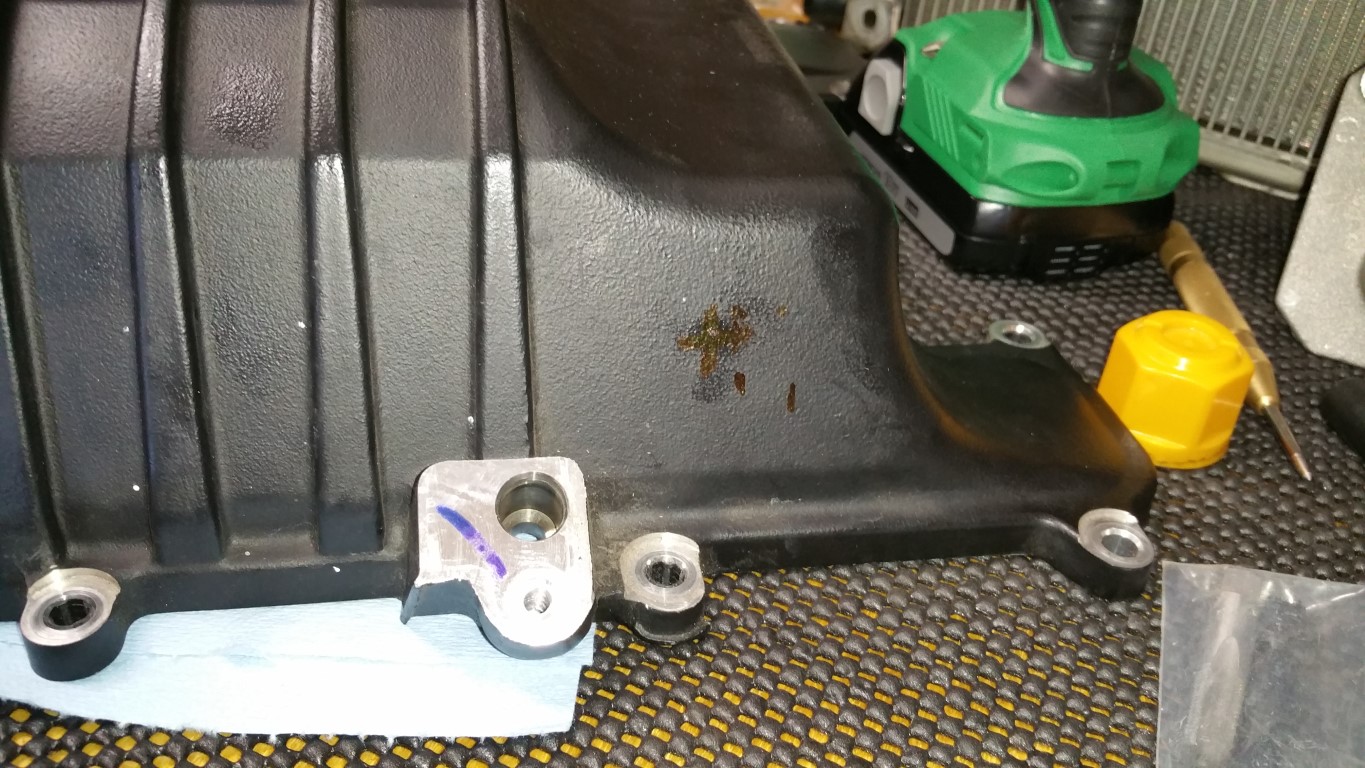 Drill baby drill: Pilot hole: 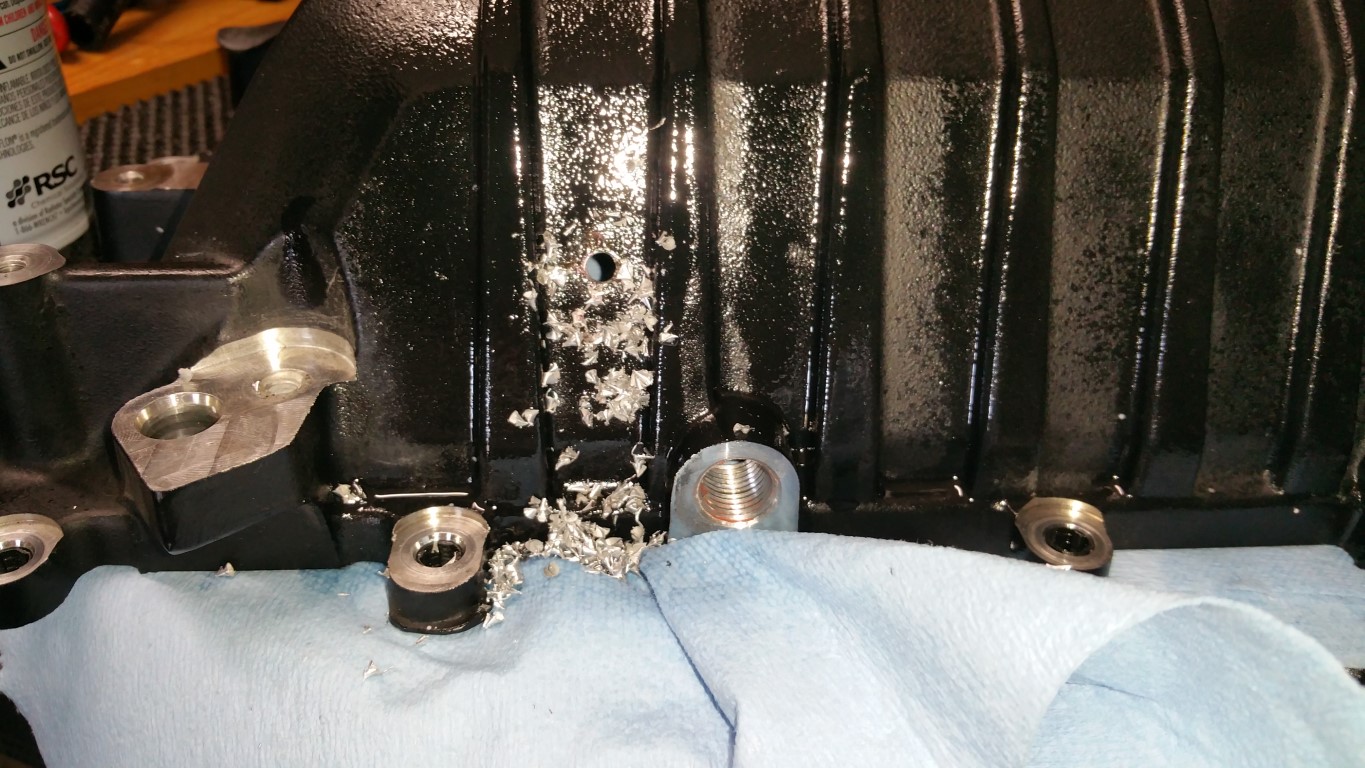 Ready to tap: 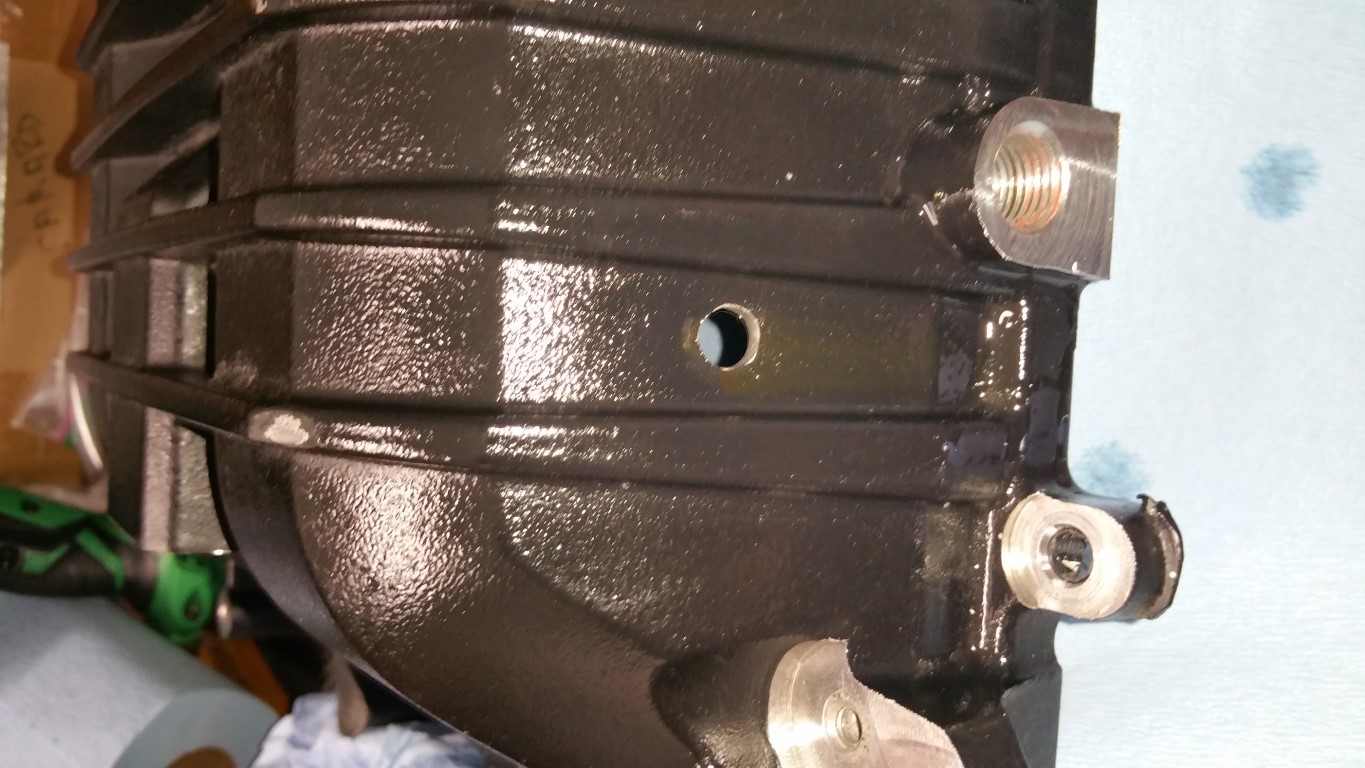 Tap that thing: 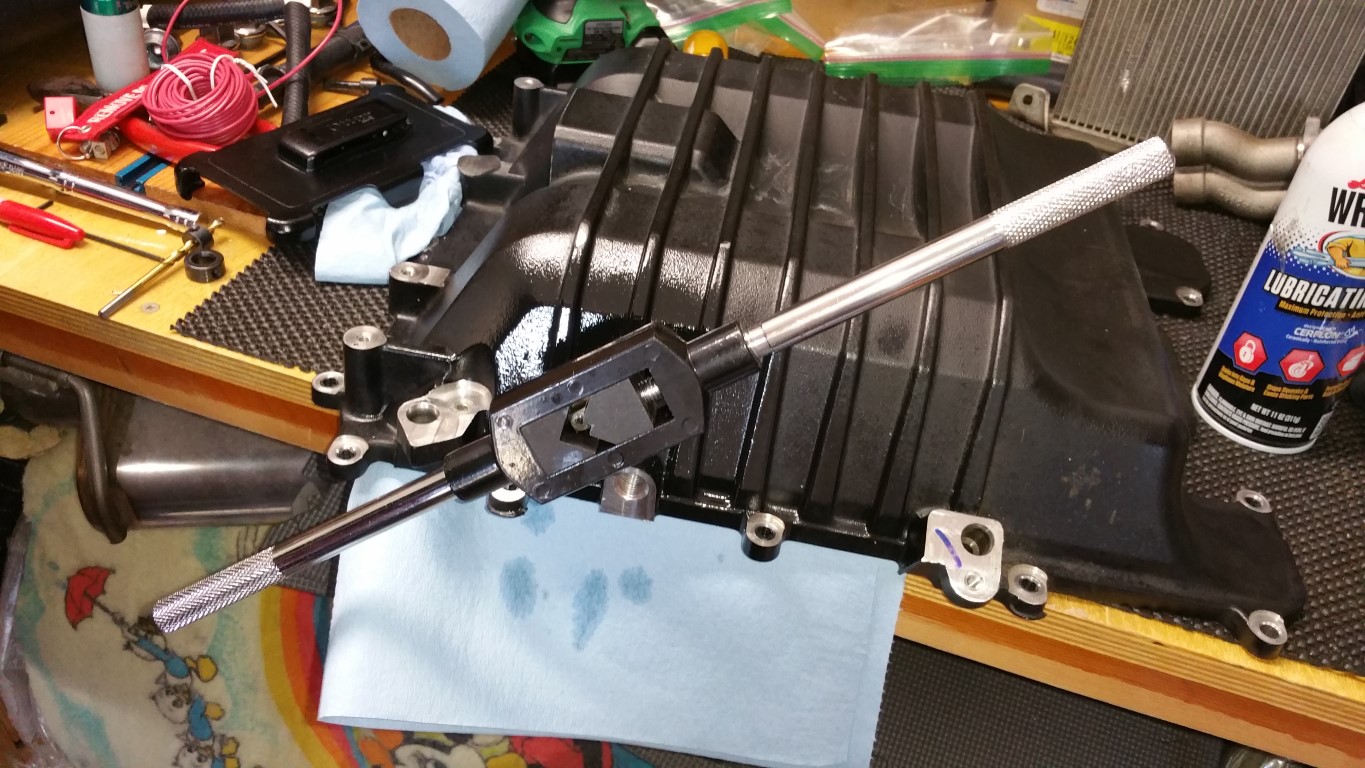 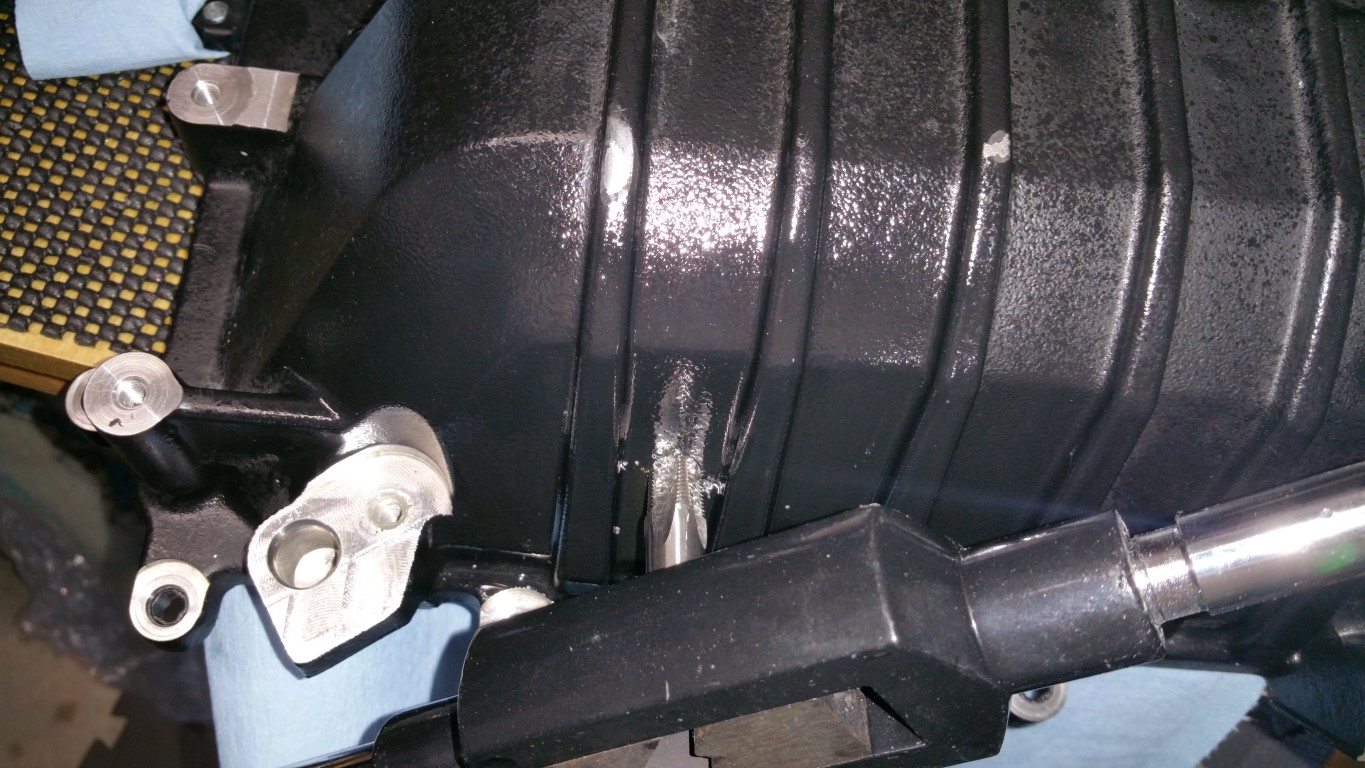 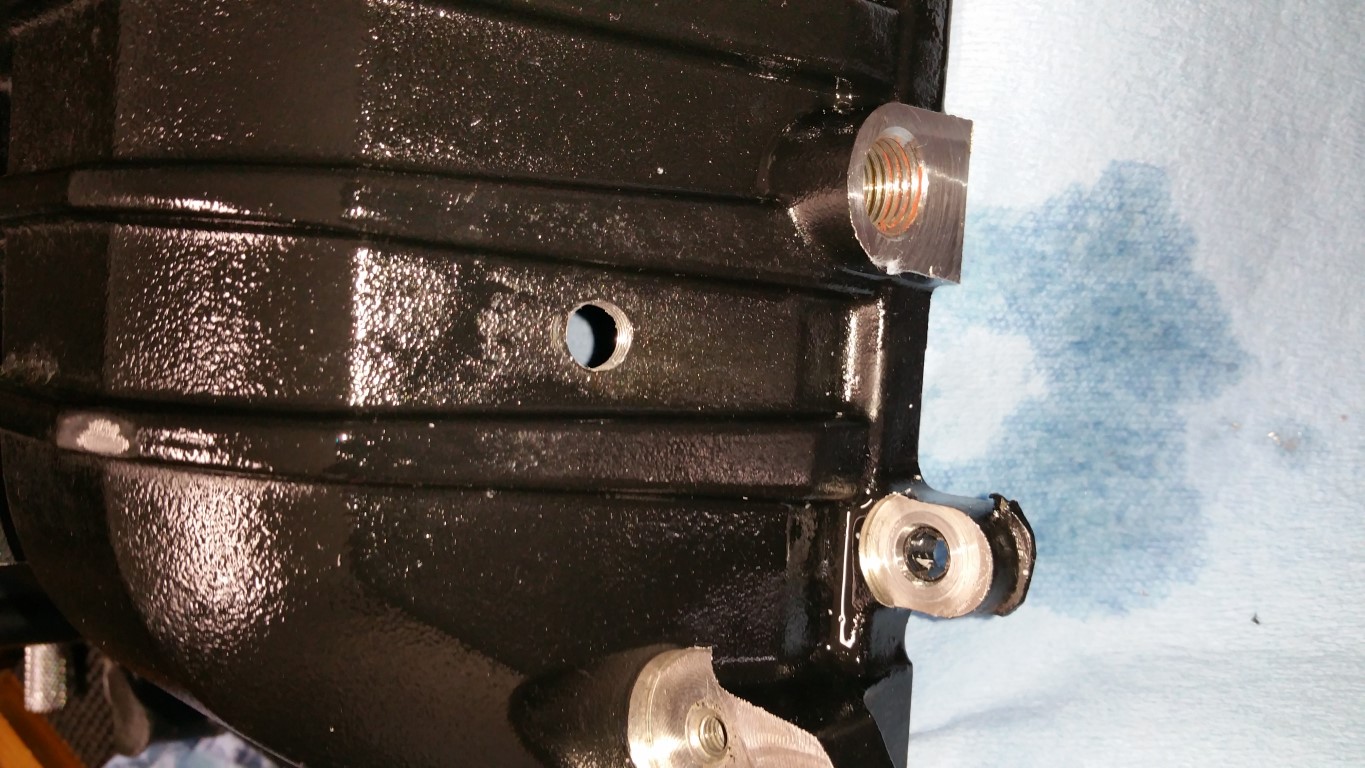 Don't say it -- I know what you're thinking... Here is how it looks from the inside: 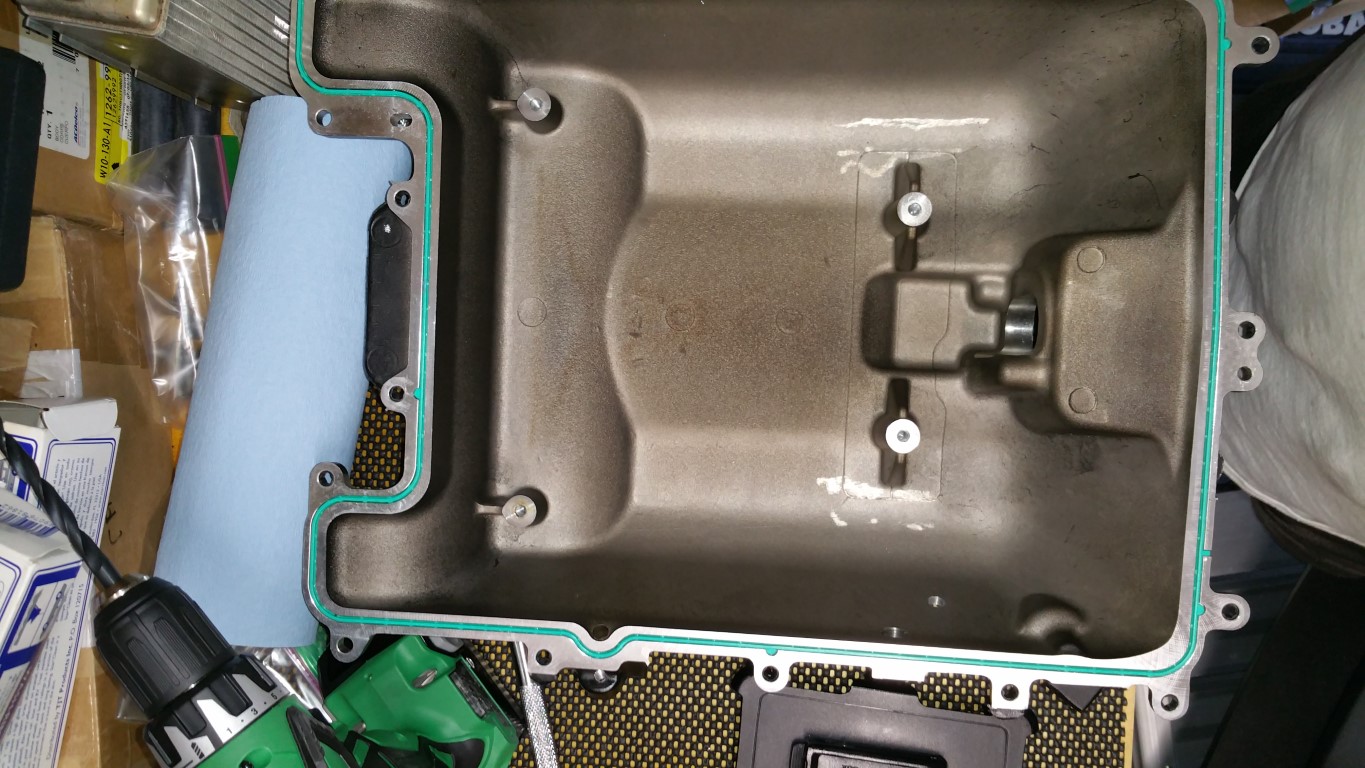 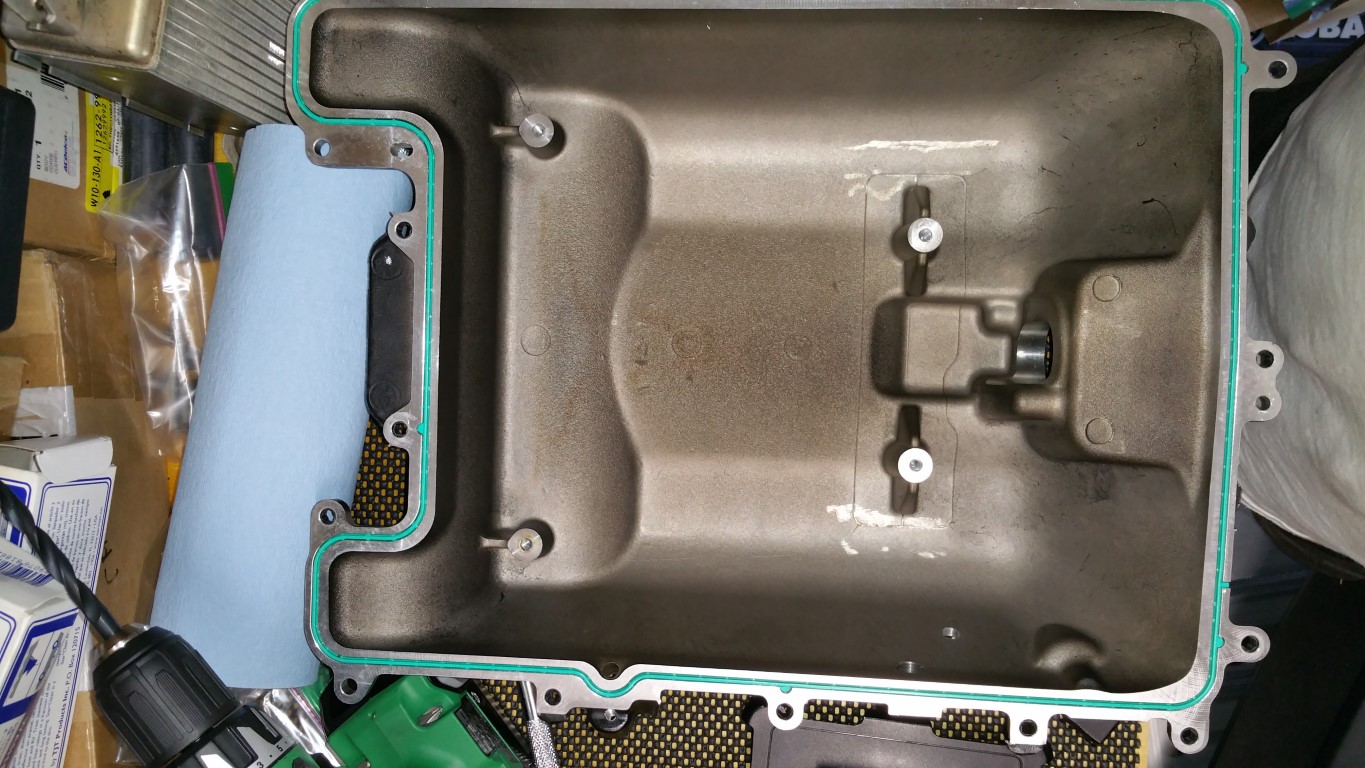 More of the same (repeated 3 more times): 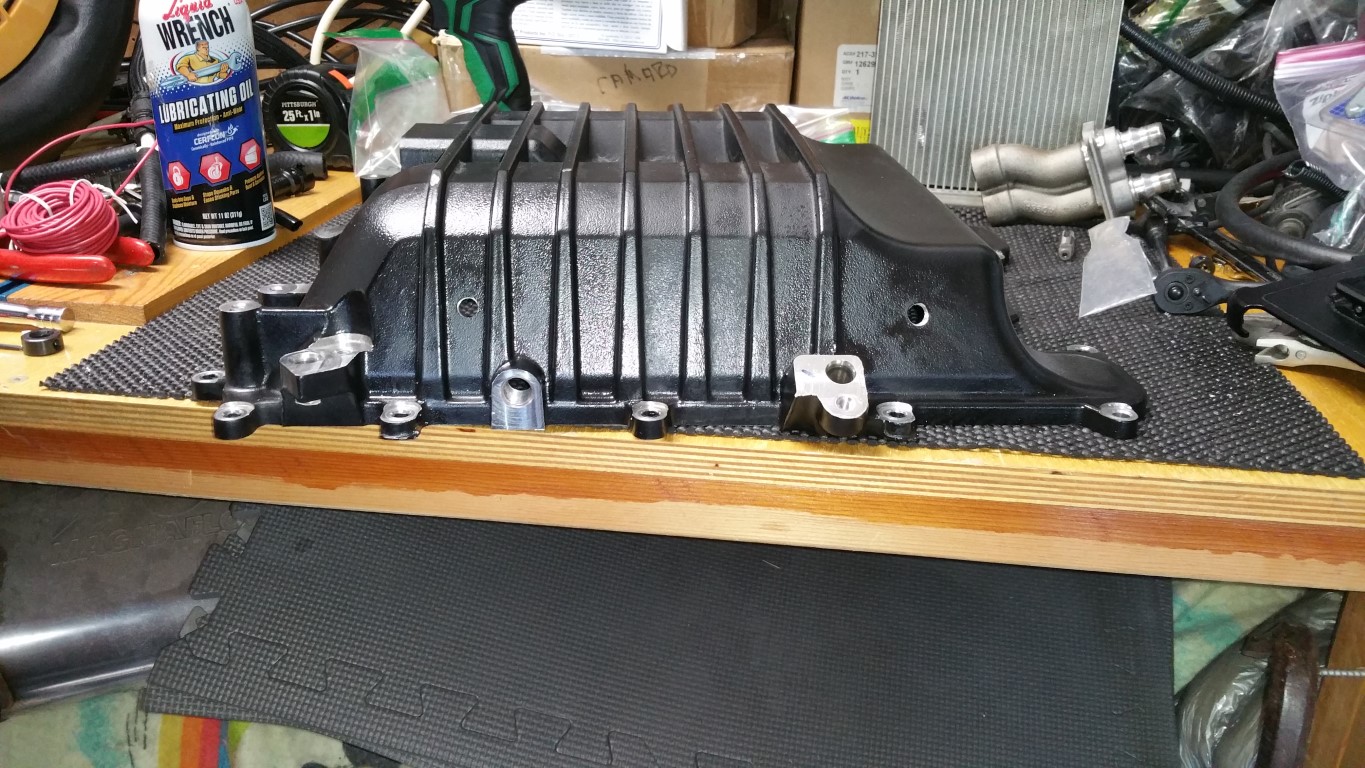 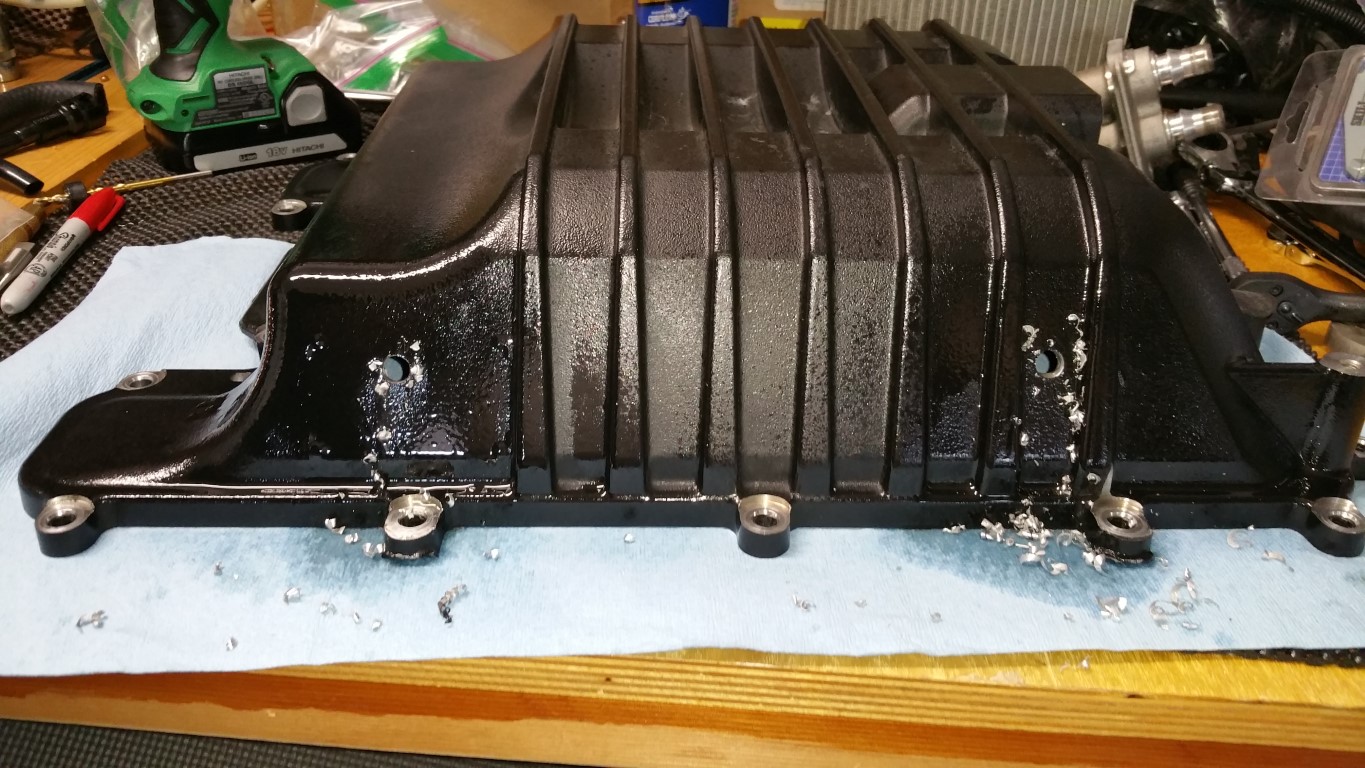  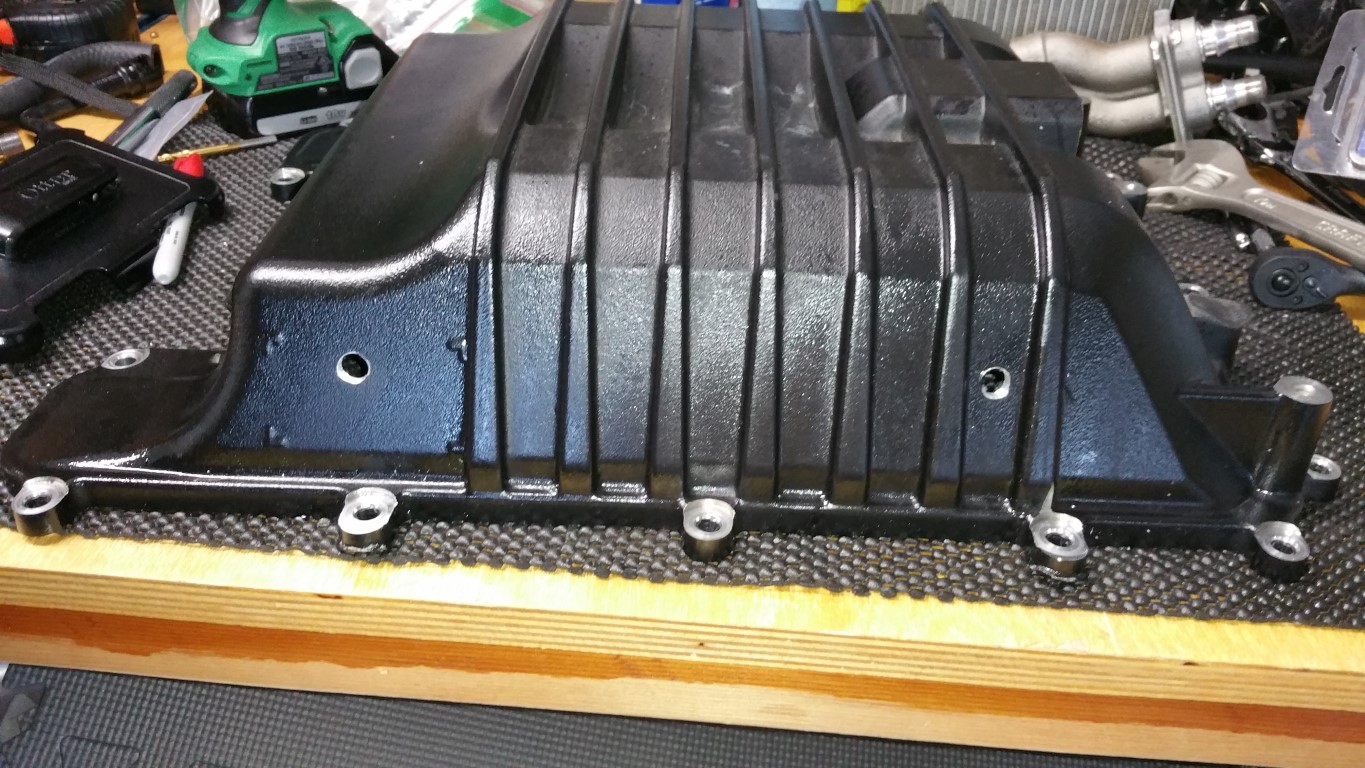 Underneath: 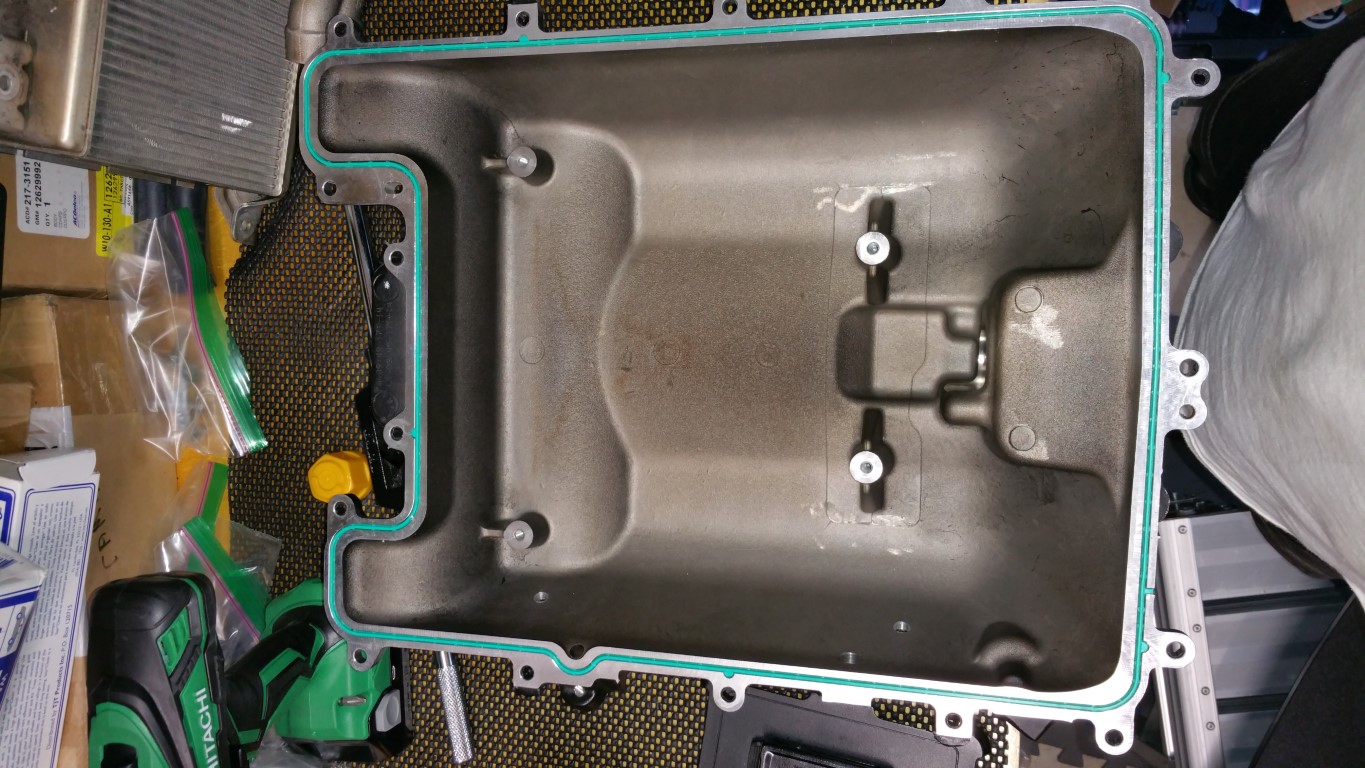 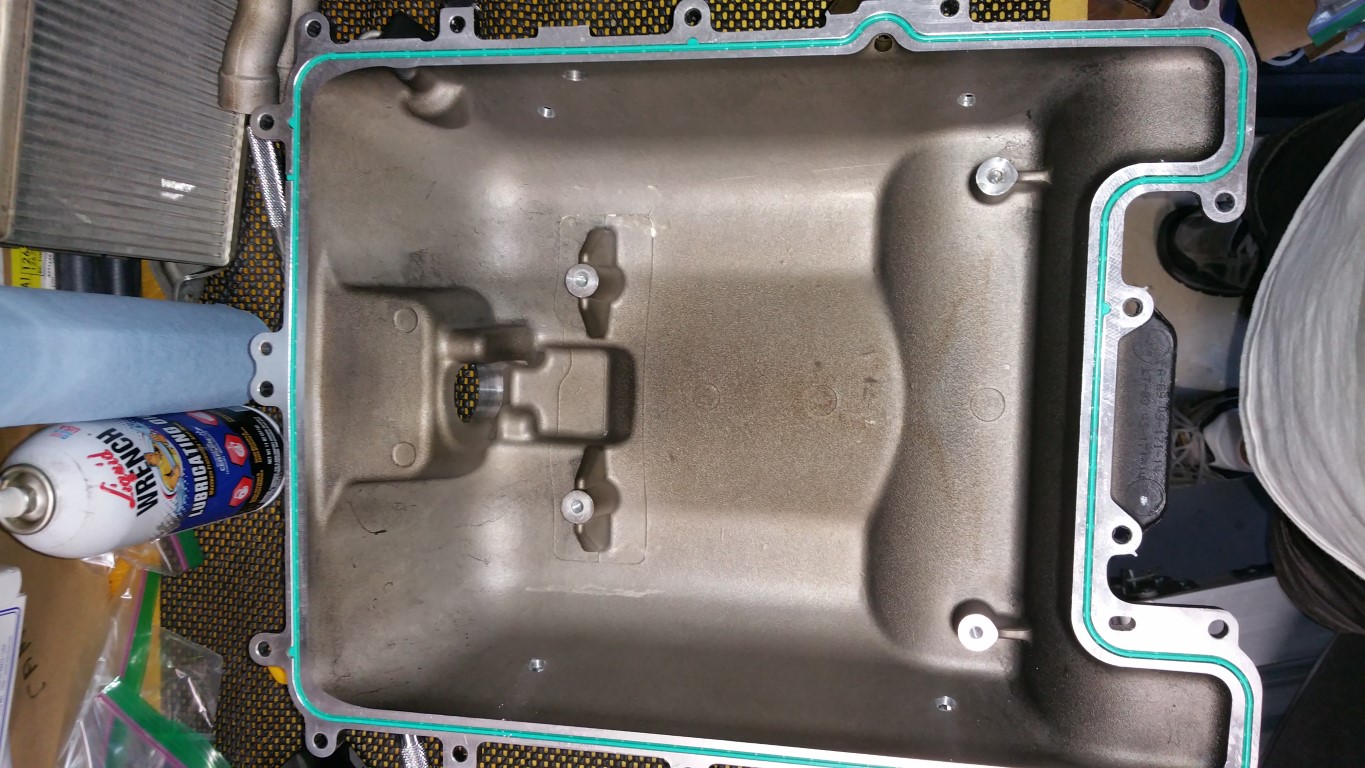 Next full clean up, my new brick came in (need to get the o-rings off the old one), then re-assemble the lid, install the nozzles and get it back together! Here is the full montey from ProMeth: 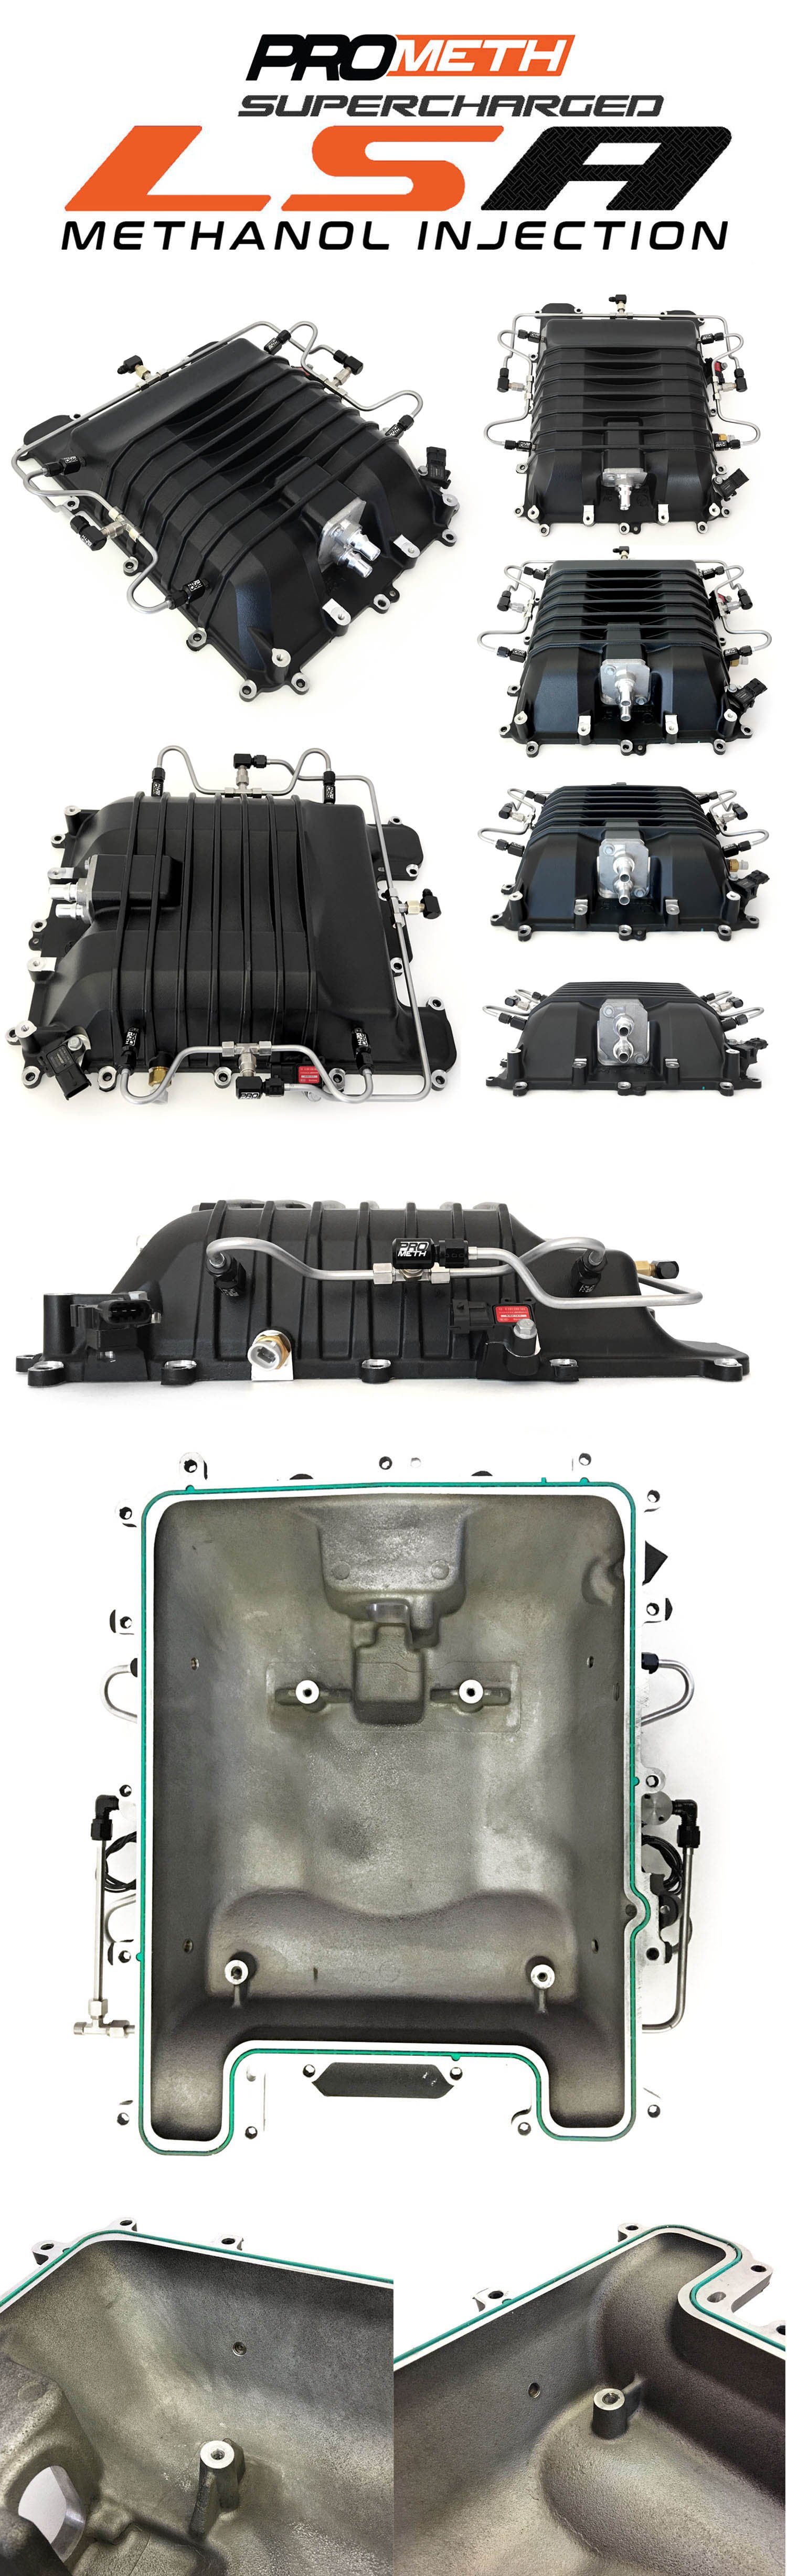 -Don
__________________
747 RWHP 794 RWTQ
"Horsepower sells cars, torque wins races." - Enzo Ferrari See My Build: http://www.camaro5.com/forums/showthread.php?t=385577 Last edited by hammdo; 08-26-2018 at 02:17 PM. |
|
|
|
|
08-24-2018, 09:10 PM
|
#2190 |
|
'It's an experiment'
Drives: [COTW 2/09/15] '11 GPI LSA SC Z/LE Join Date: May 2014
Location: Dallas TX
Posts: 8,693
|
LSA ProMeth Setup ZL1 Lid cont.
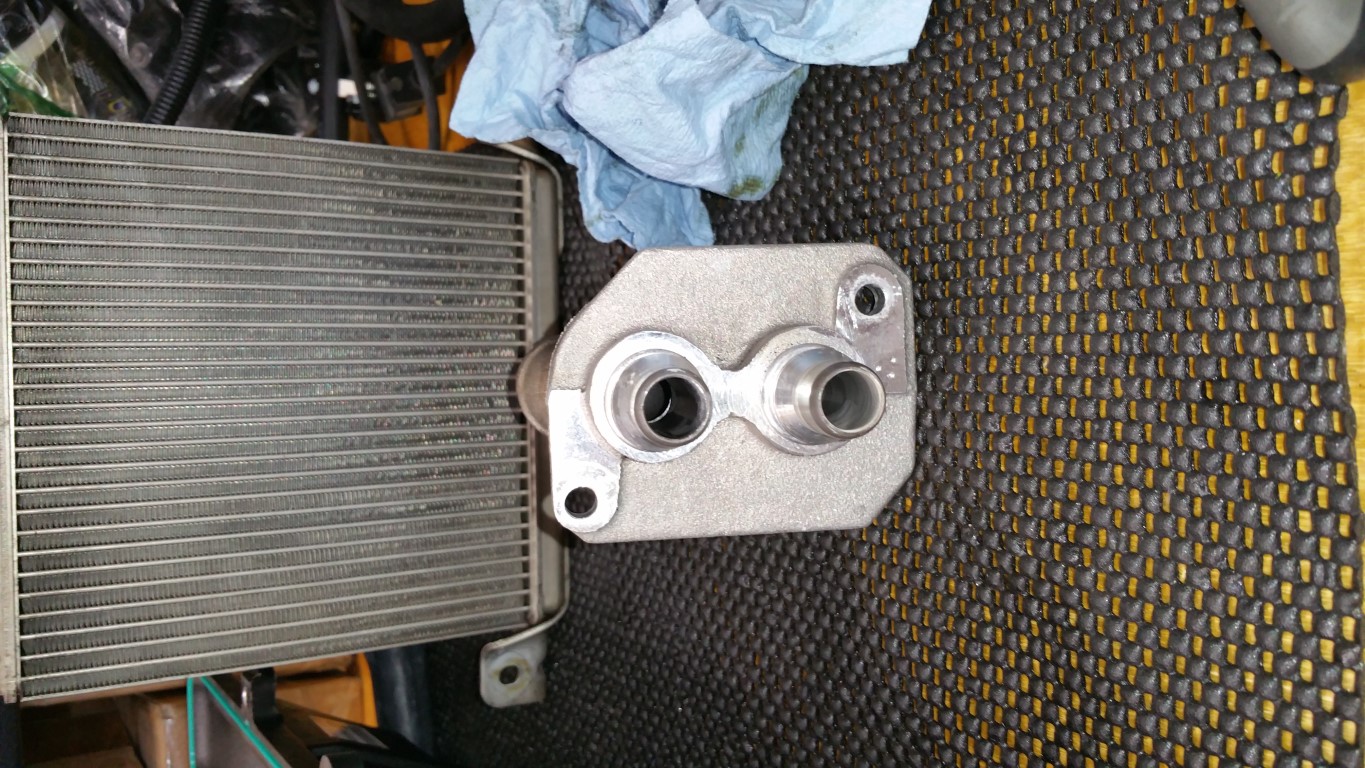
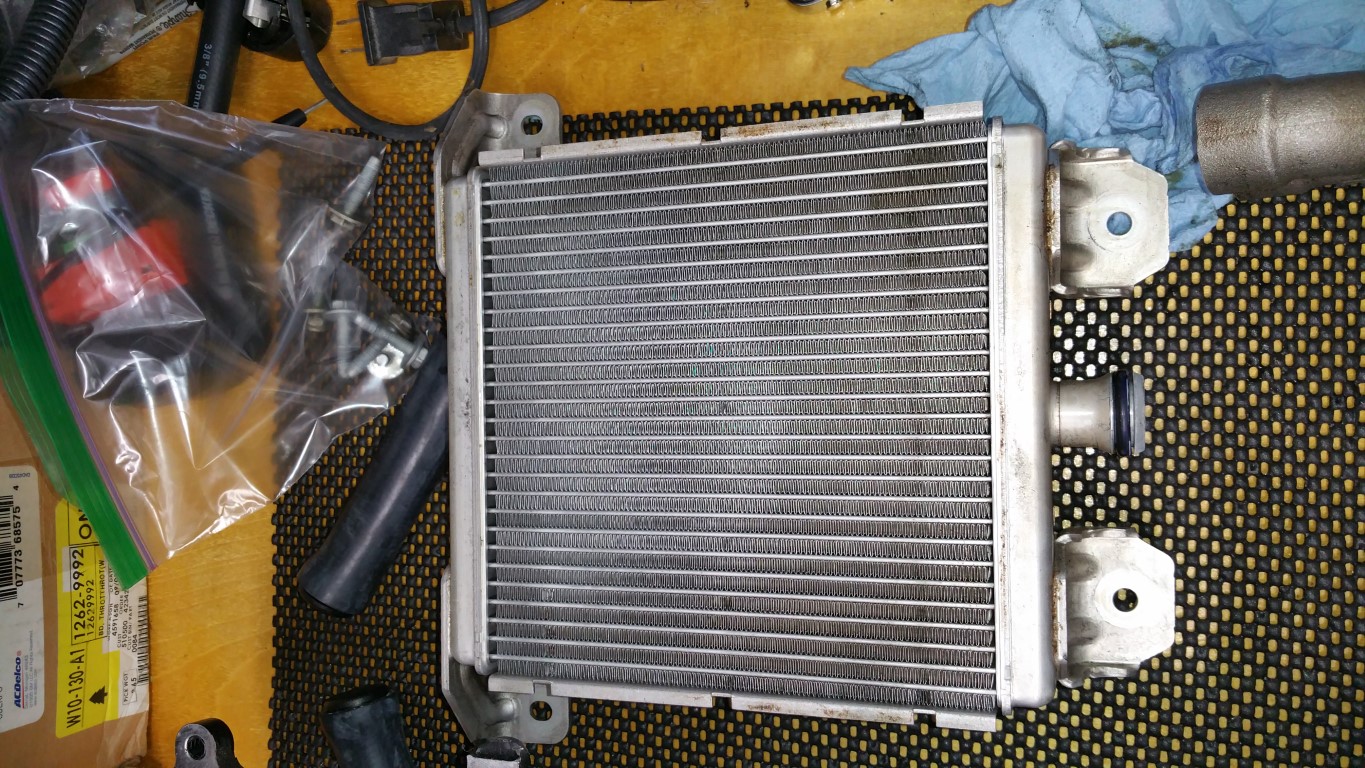
So, next was to put the new brick in and the manifold. I had to remove the old o-rings, clean them up, lube them with AGS Radiator Hose grease. I then set the brick in with only the back 2 bolts in -- this allows the brick to 'slide' as I setup the manifold.
Once I have the manifold started, I can then bolt down the manifold -- BTW, you WILL need to use blue loctite on the bolts. After all slid together, I installed the other 2 front brick bolts and then torqued all to 89 in lbs: 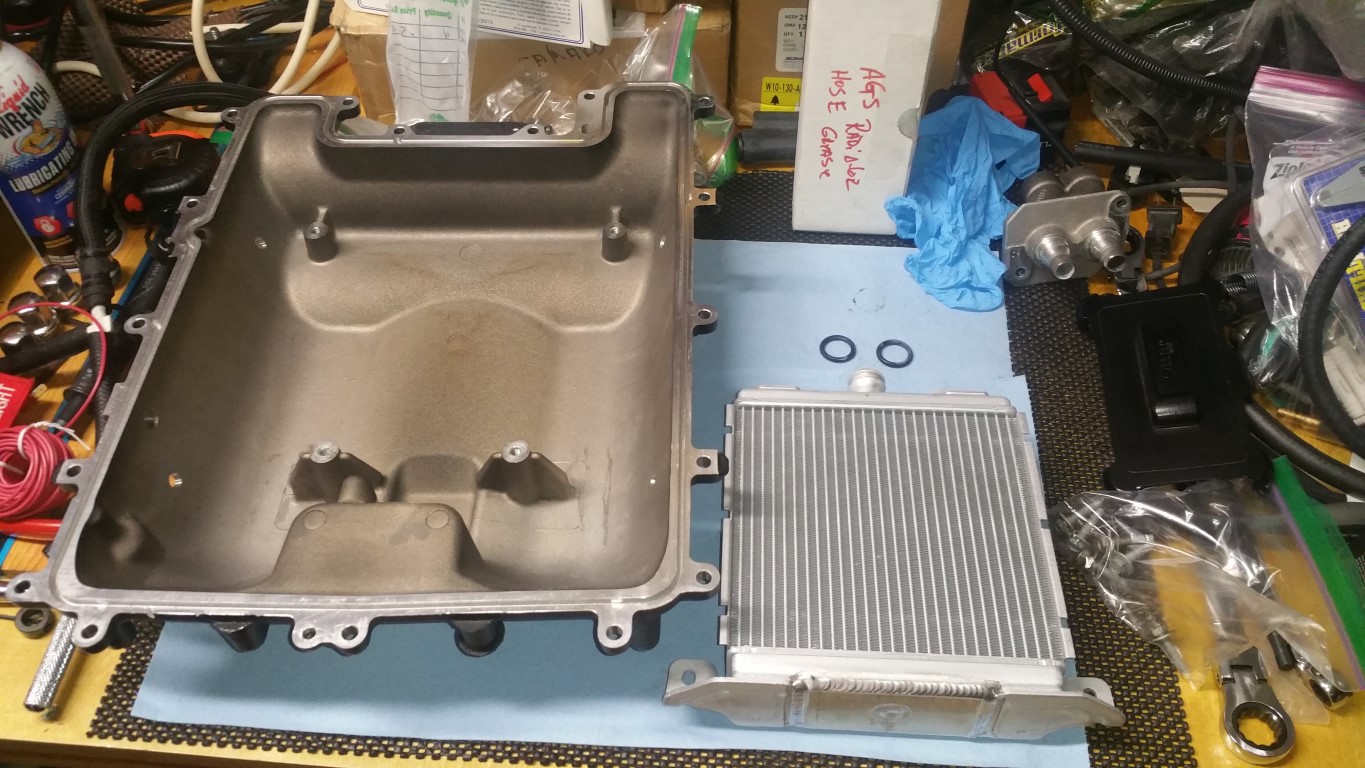 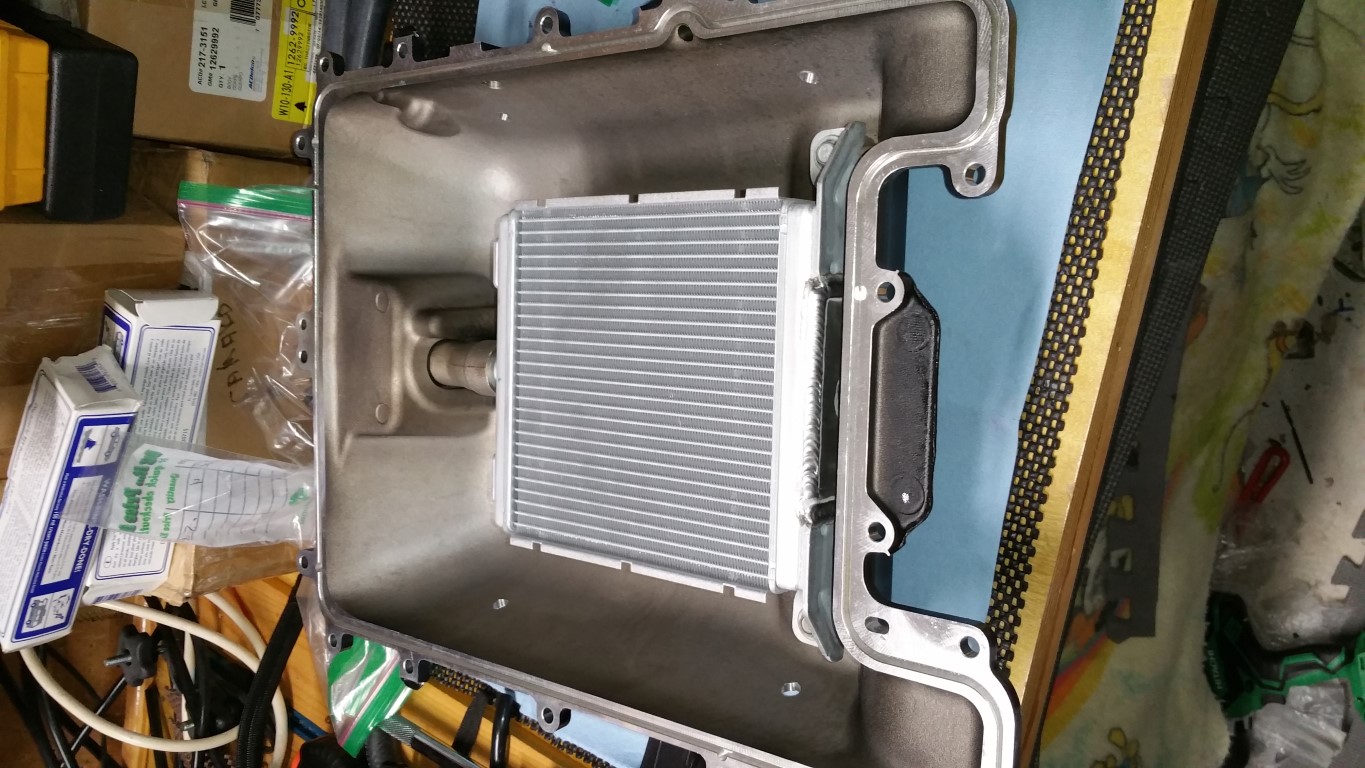 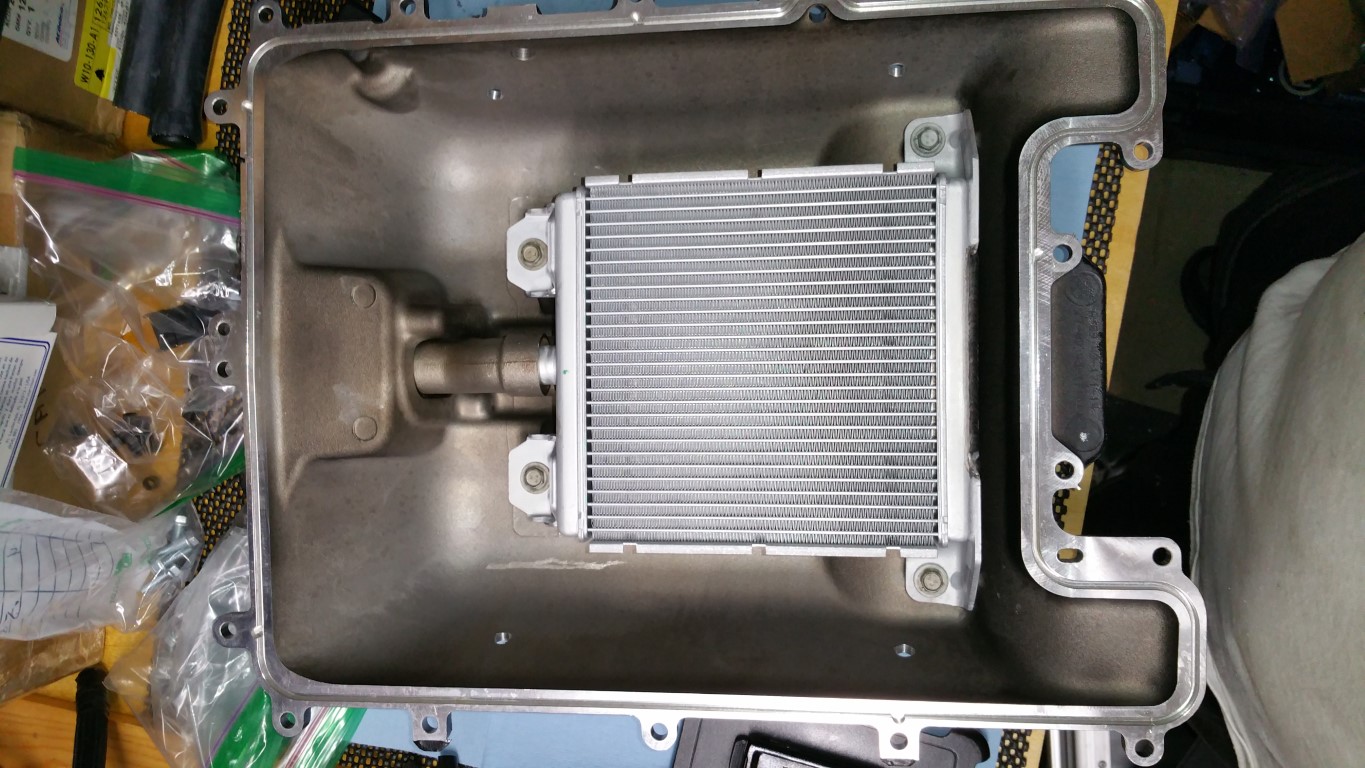 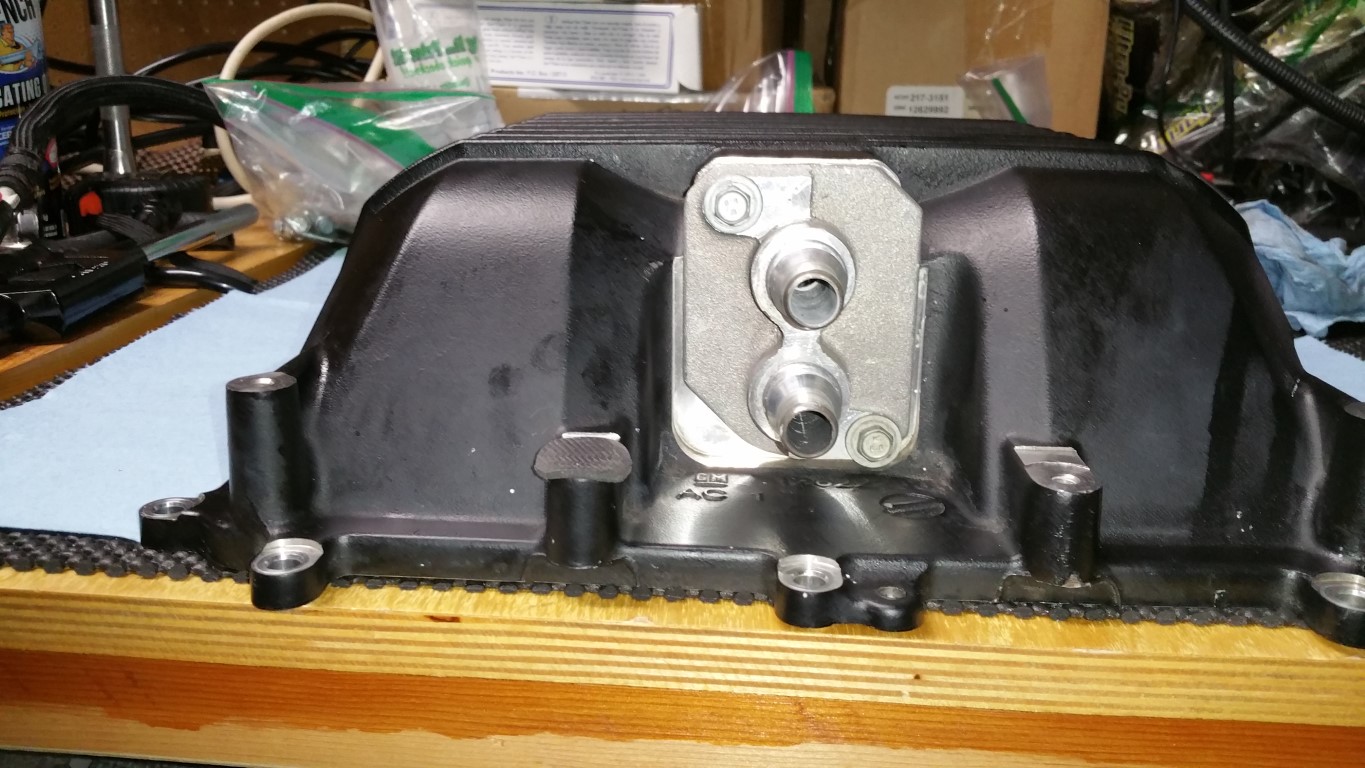 Now the temp sensor and MAP:  Next will be the nozzles and fitting -- I will need to trim the Solid SS lines as they are currently 10" center to center -- I have a Ridgid SS tube cutter for that! I'll give the lid a final cleaning then do the nozzle kit... -Don
__________________
747 RWHP 794 RWTQ
"Horsepower sells cars, torque wins races." - Enzo Ferrari See My Build: http://www.camaro5.com/forums/showthread.php?t=385577 Last edited by hammdo; 08-27-2018 at 07:14 PM. |
|
|
|
|
08-25-2018, 04:22 PM
|
#2191 |
|
'It's an experiment'
Drives: [COTW 2/09/15] '11 GPI LSA SC Z/LE Join Date: May 2014
Location: Dallas TX
Posts: 8,693
|
LSA ProMeth Setup ZL1 Lid cont.
Lots of goodies today. Started on the nozzle install and setup.
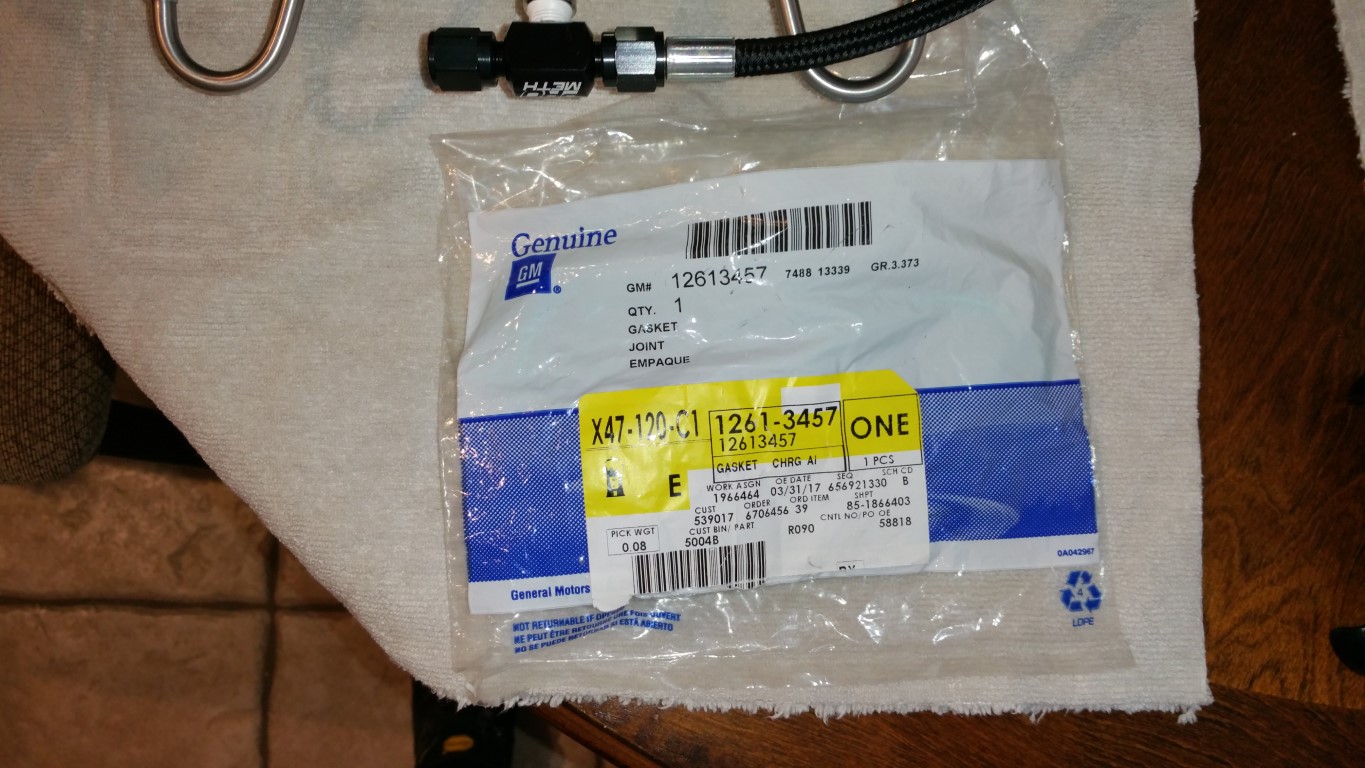
First, Teflon taping 'small' items is a pain but, anything that is NPT, I taped it. So, here are the nozzles installed, I installed the nozzle until they were 'flush' with inside:  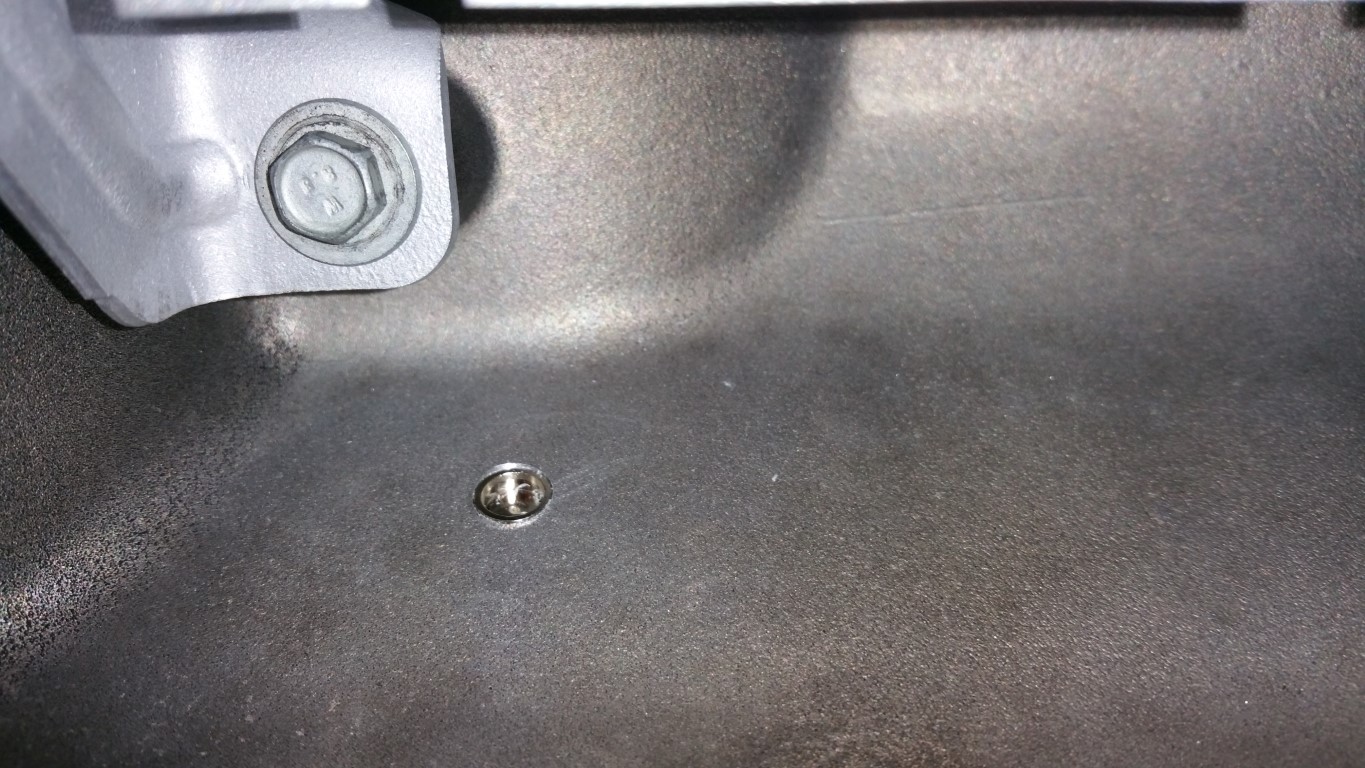 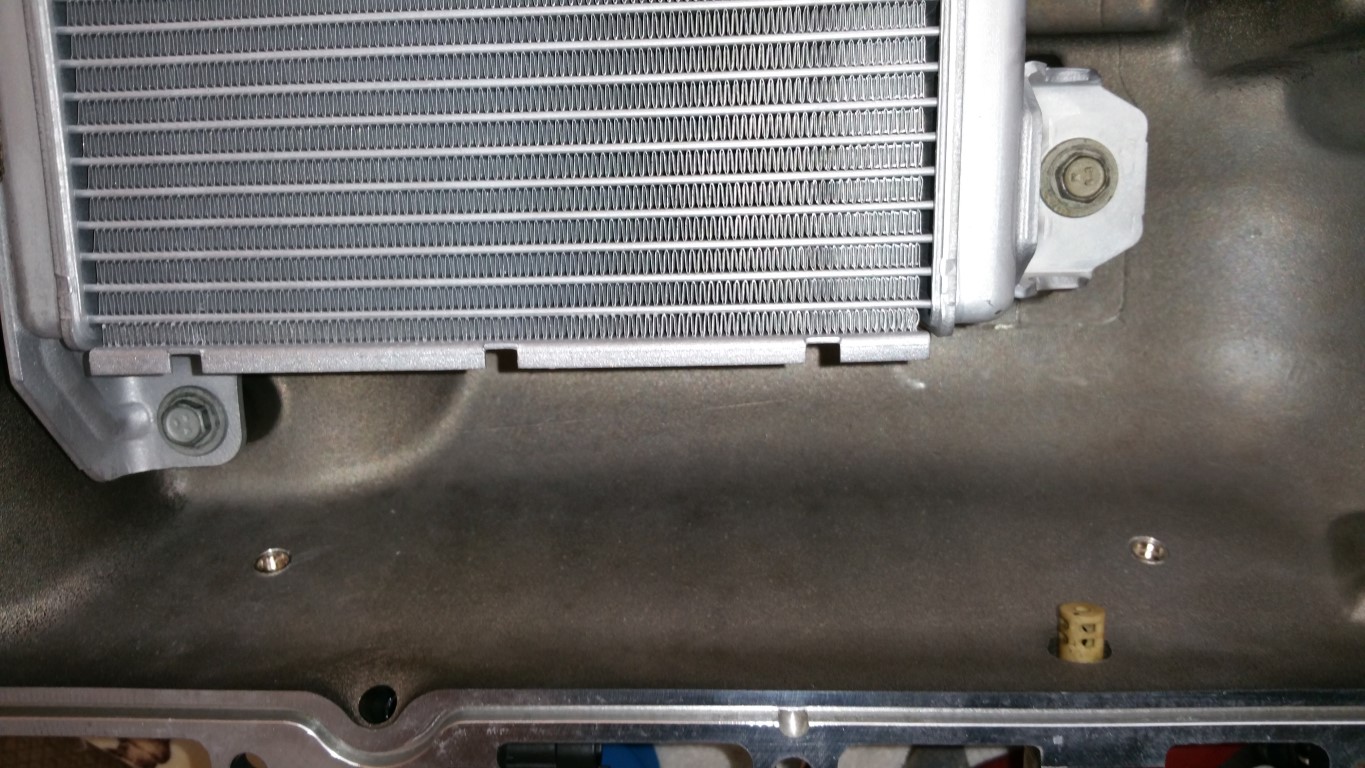 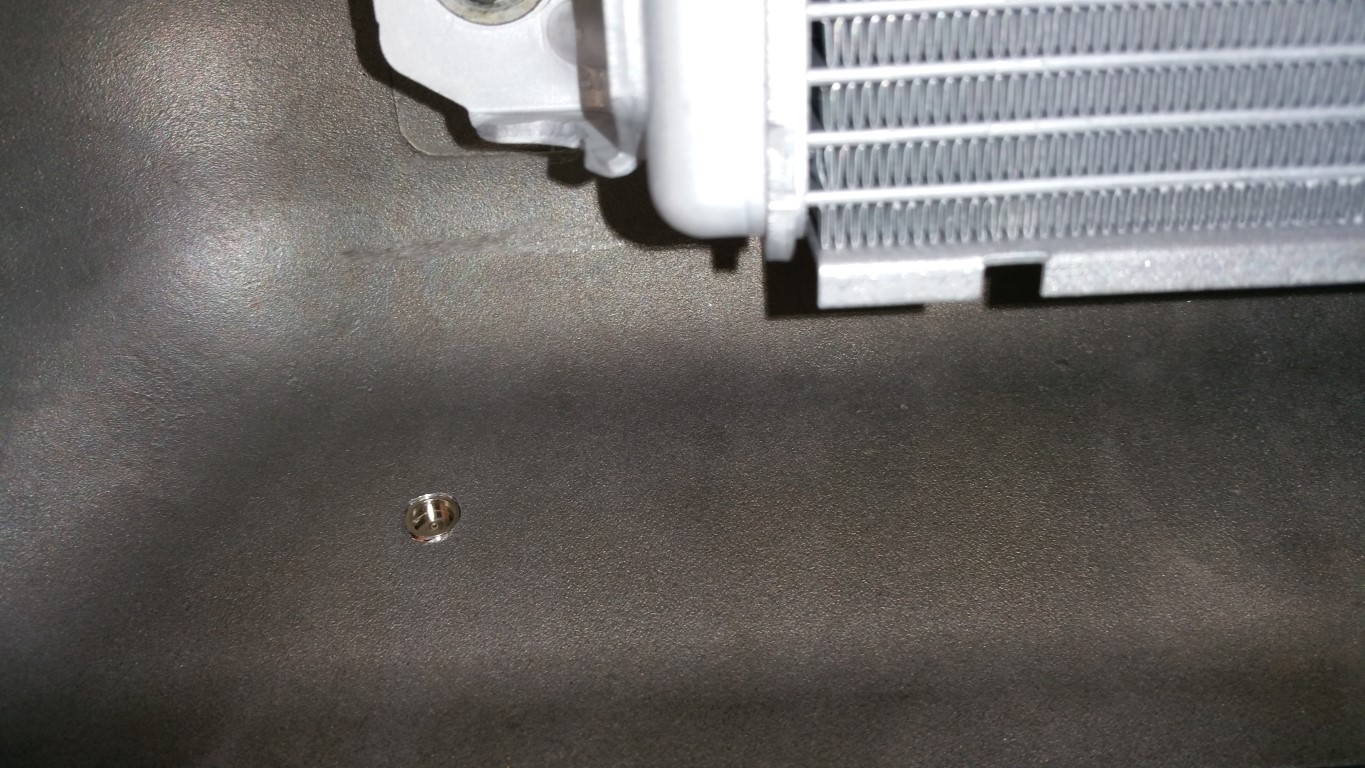 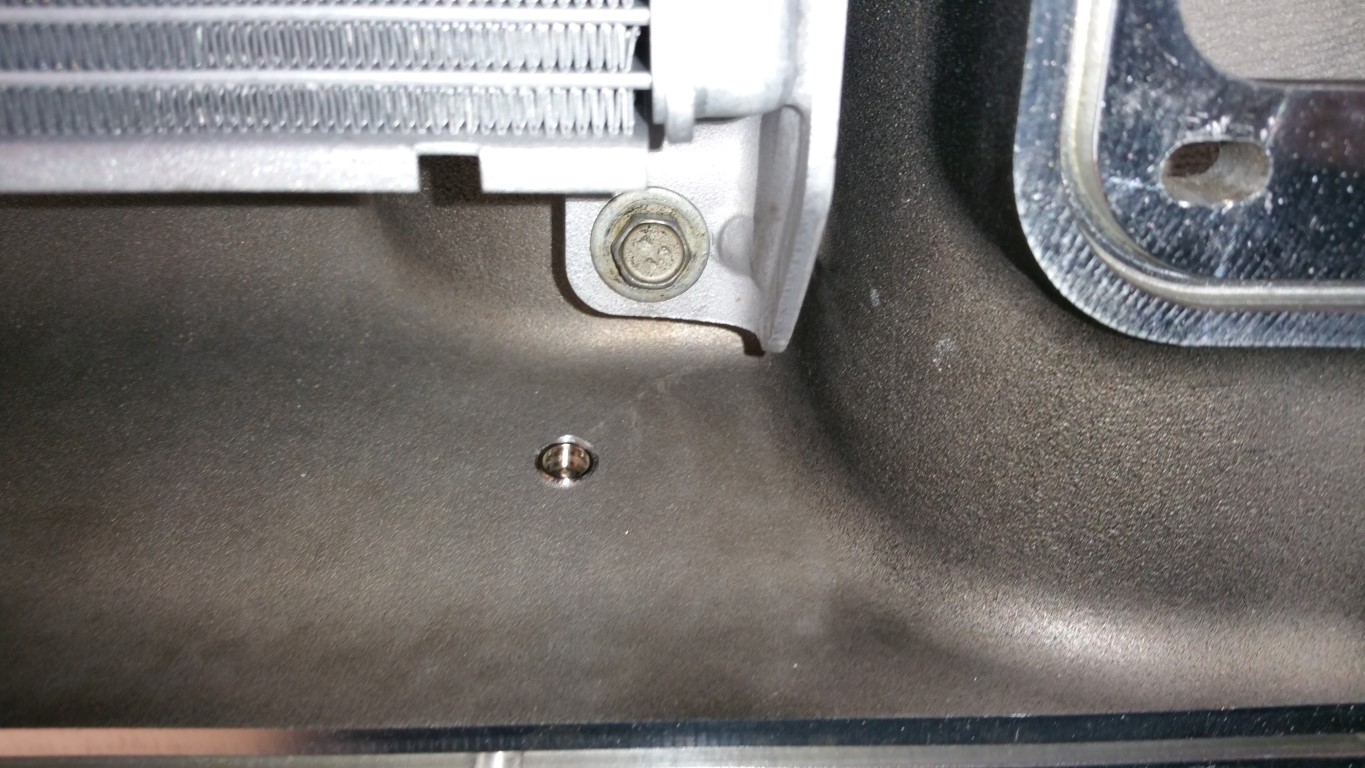 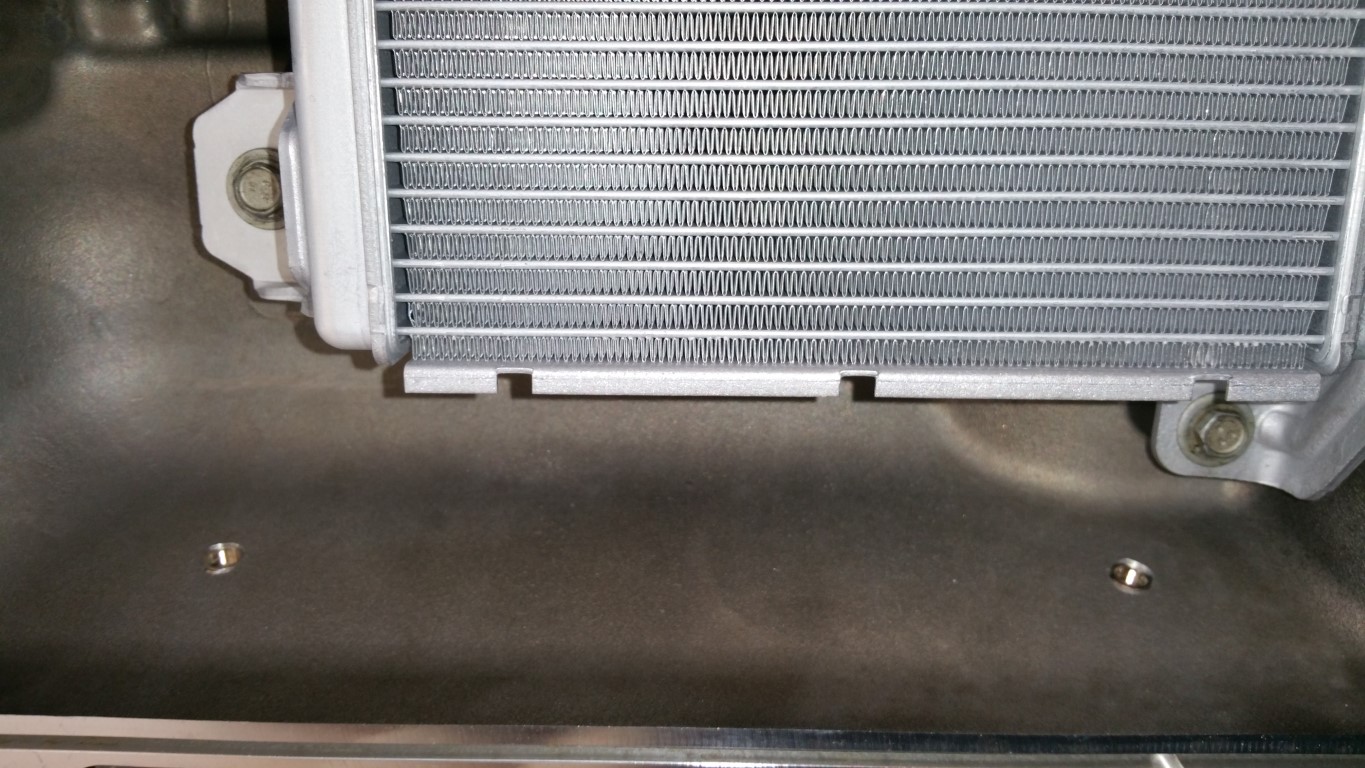 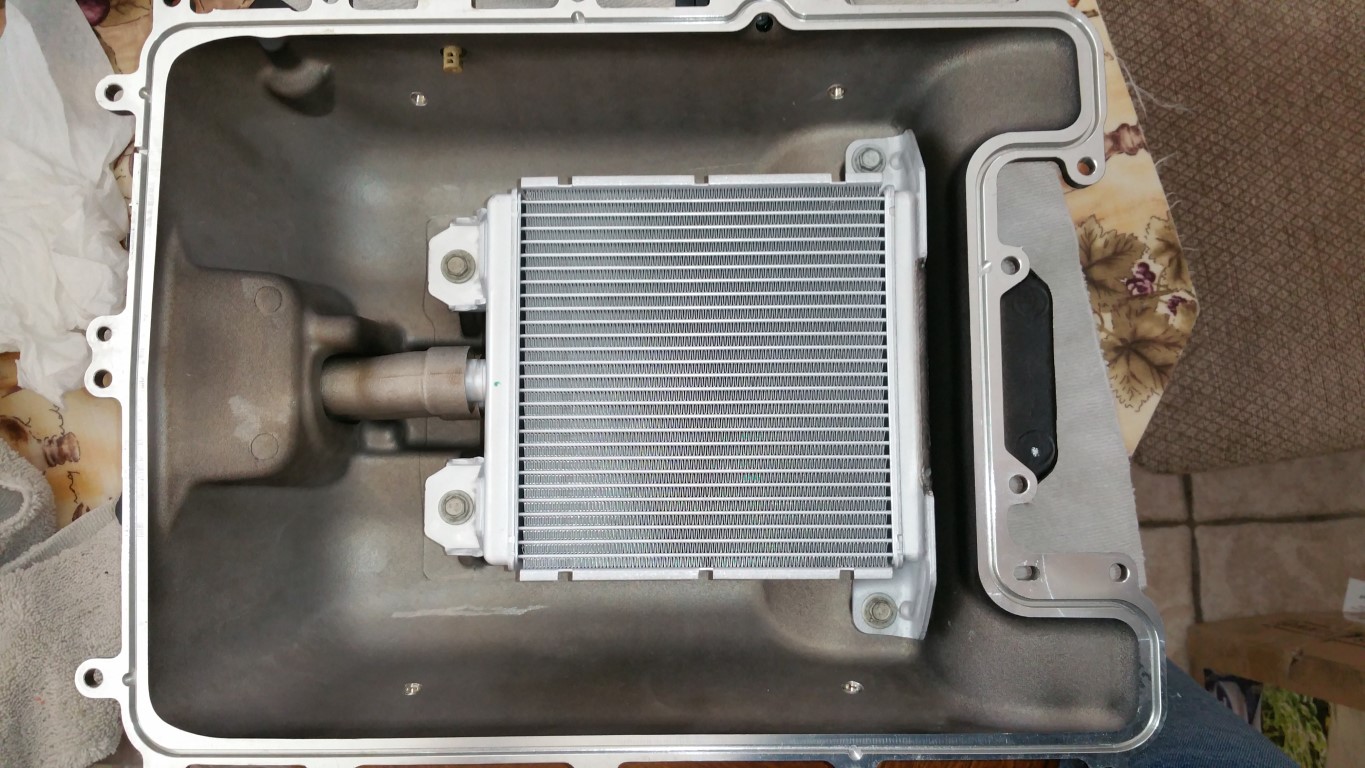 Nozzles: 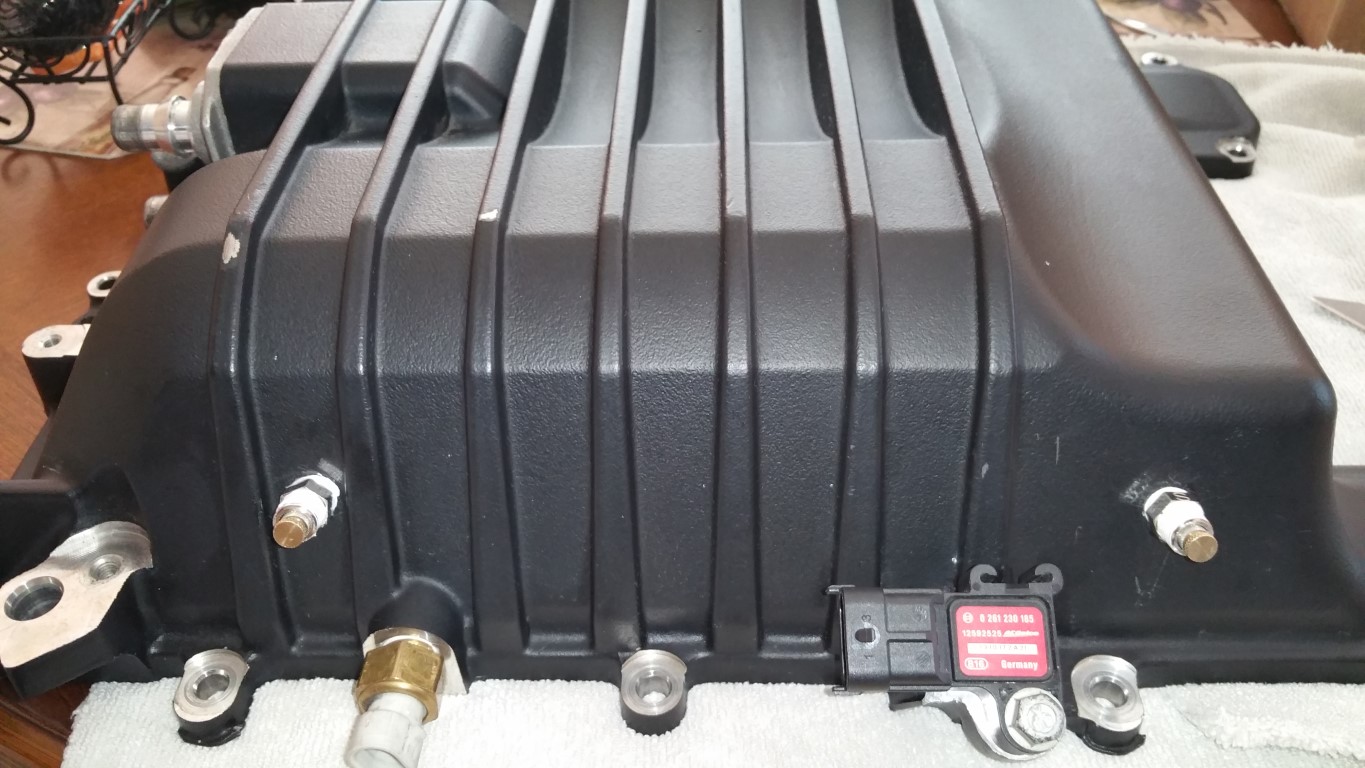 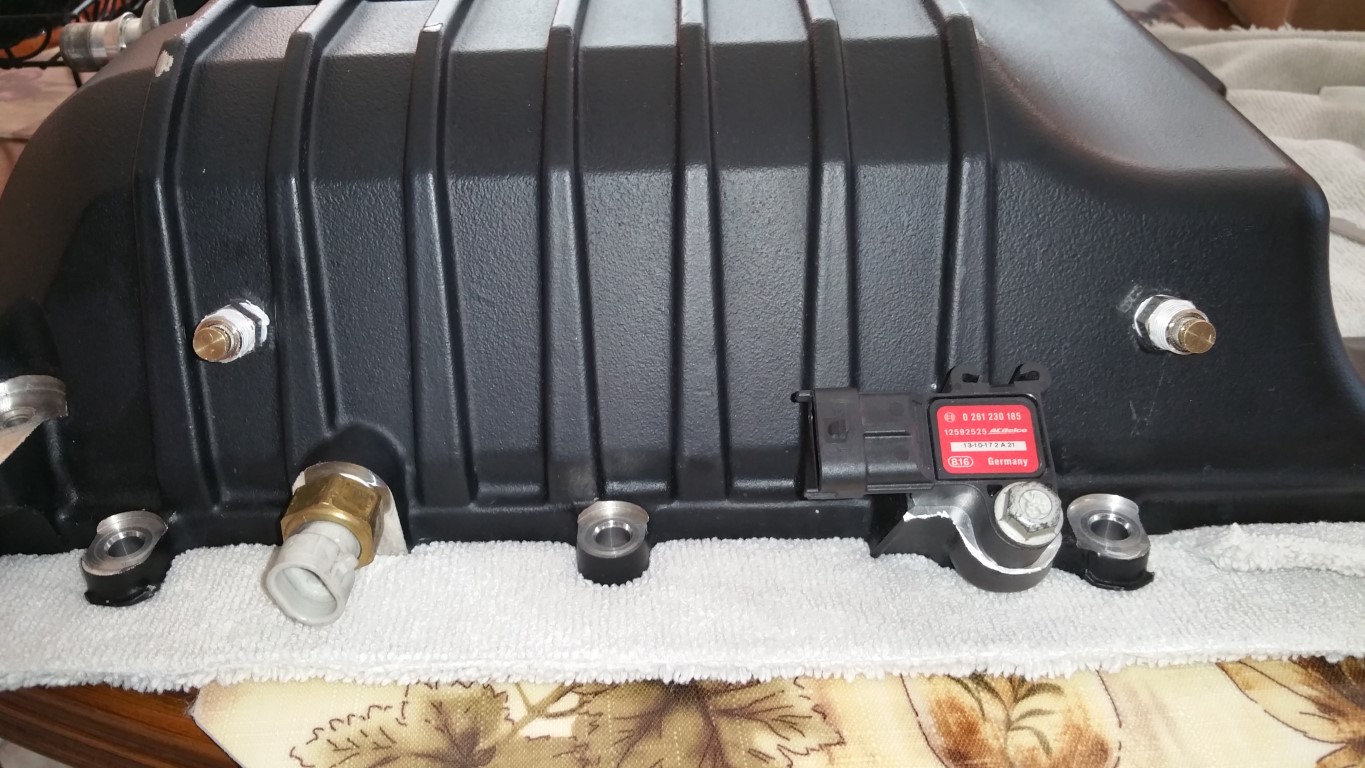 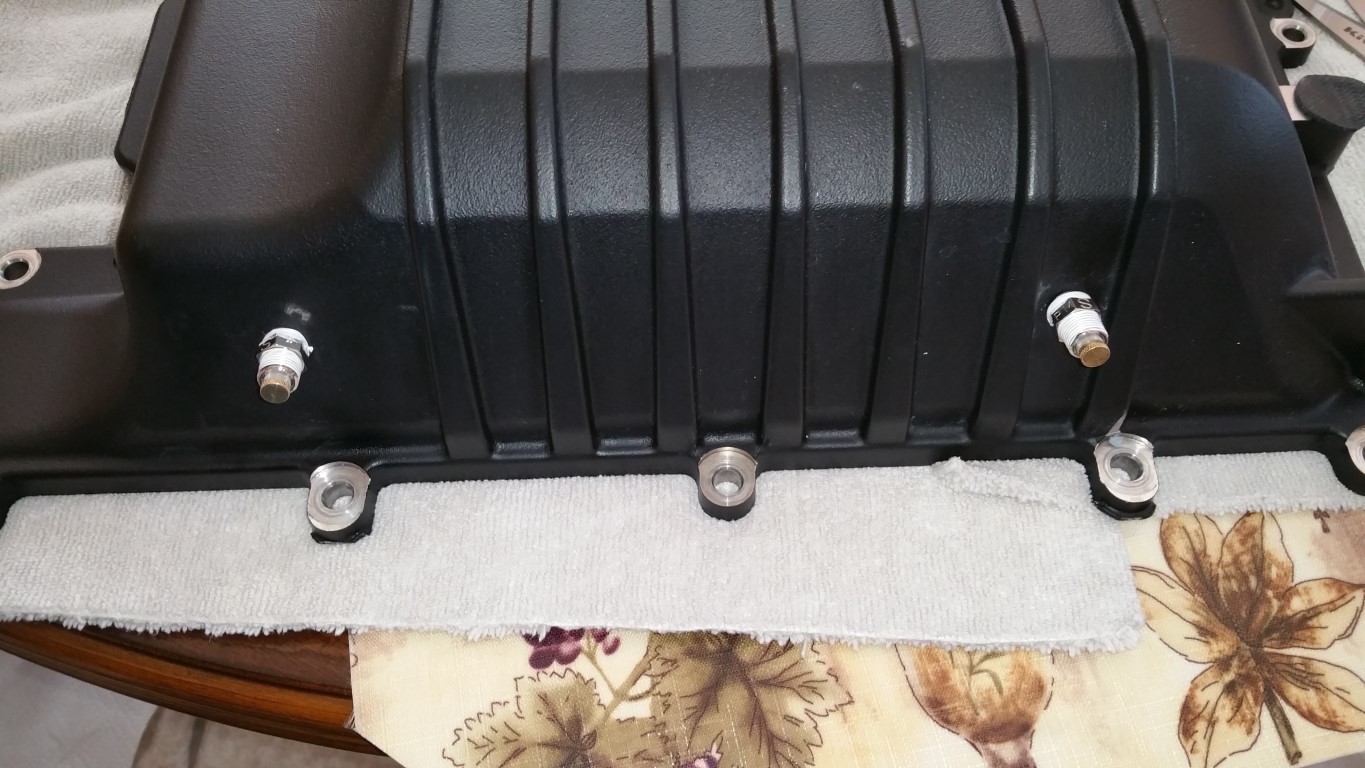  Next, I cut the lines to fit -- notice I am 3 'ribs' from the end -- that is in keeping with the pics from ProMeth. Also I used a bit to 'clean' the cuts and make a nice smooth transition for the compression fittings: 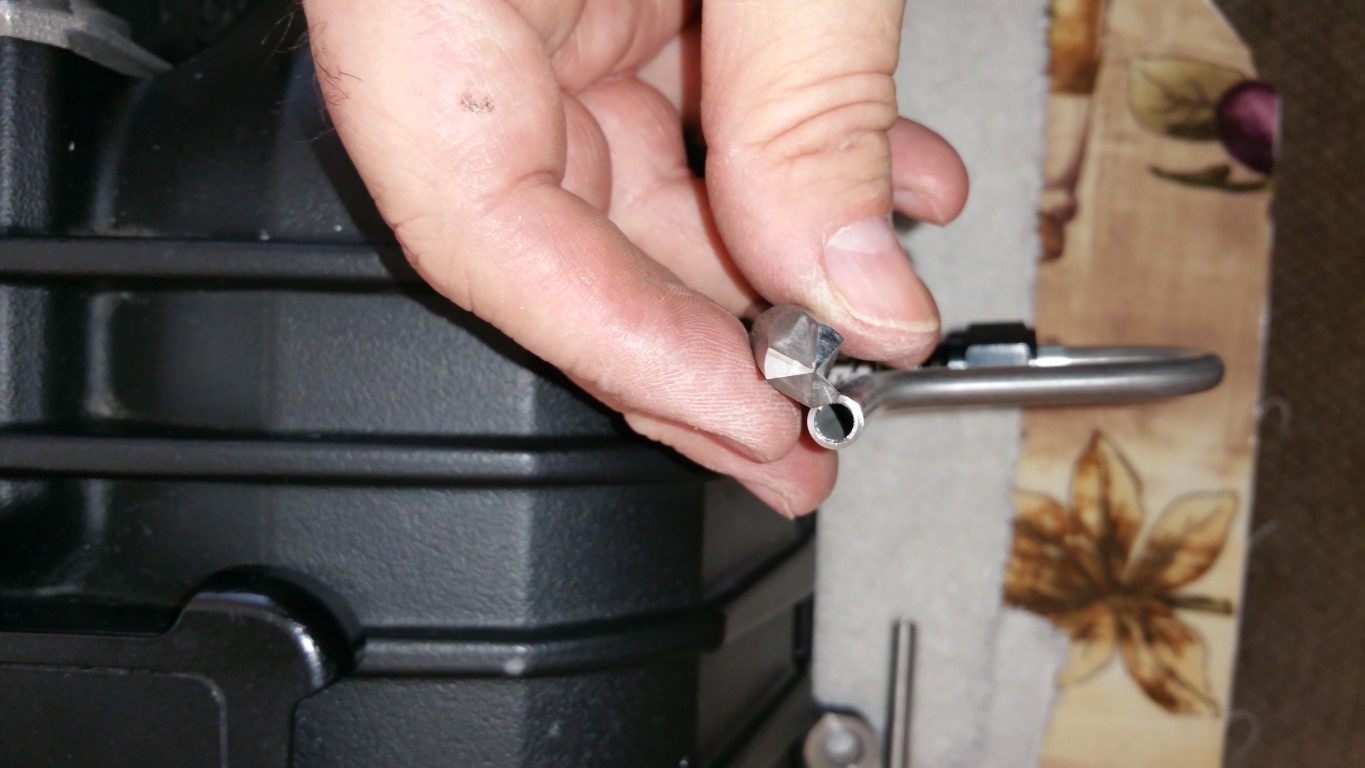 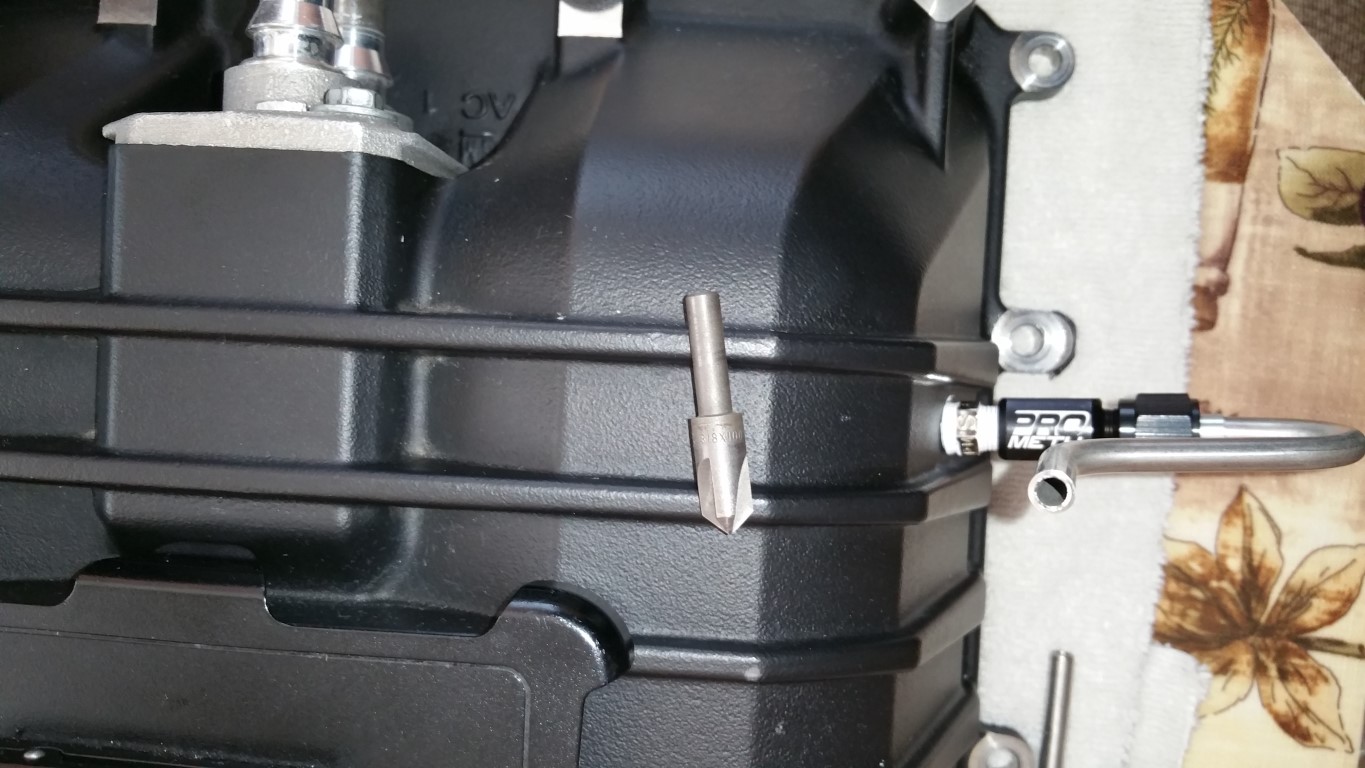 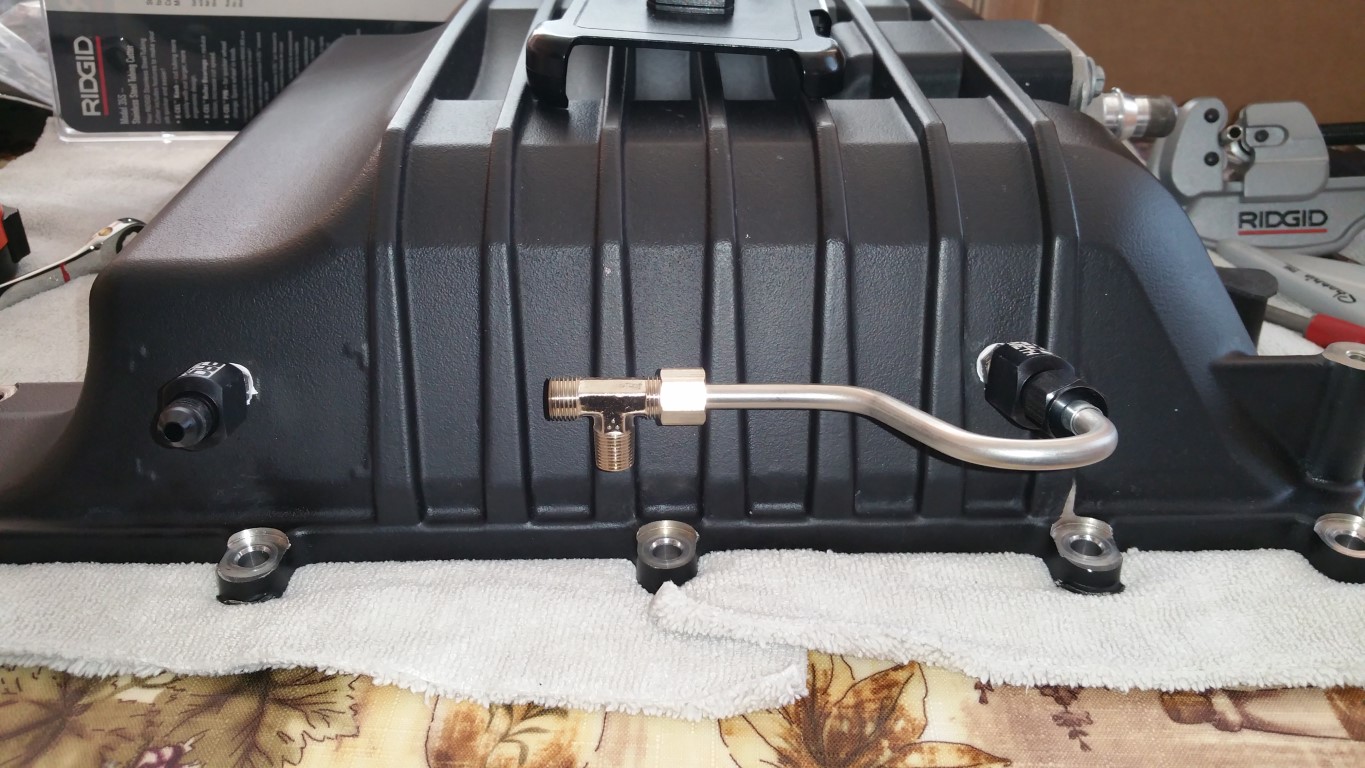 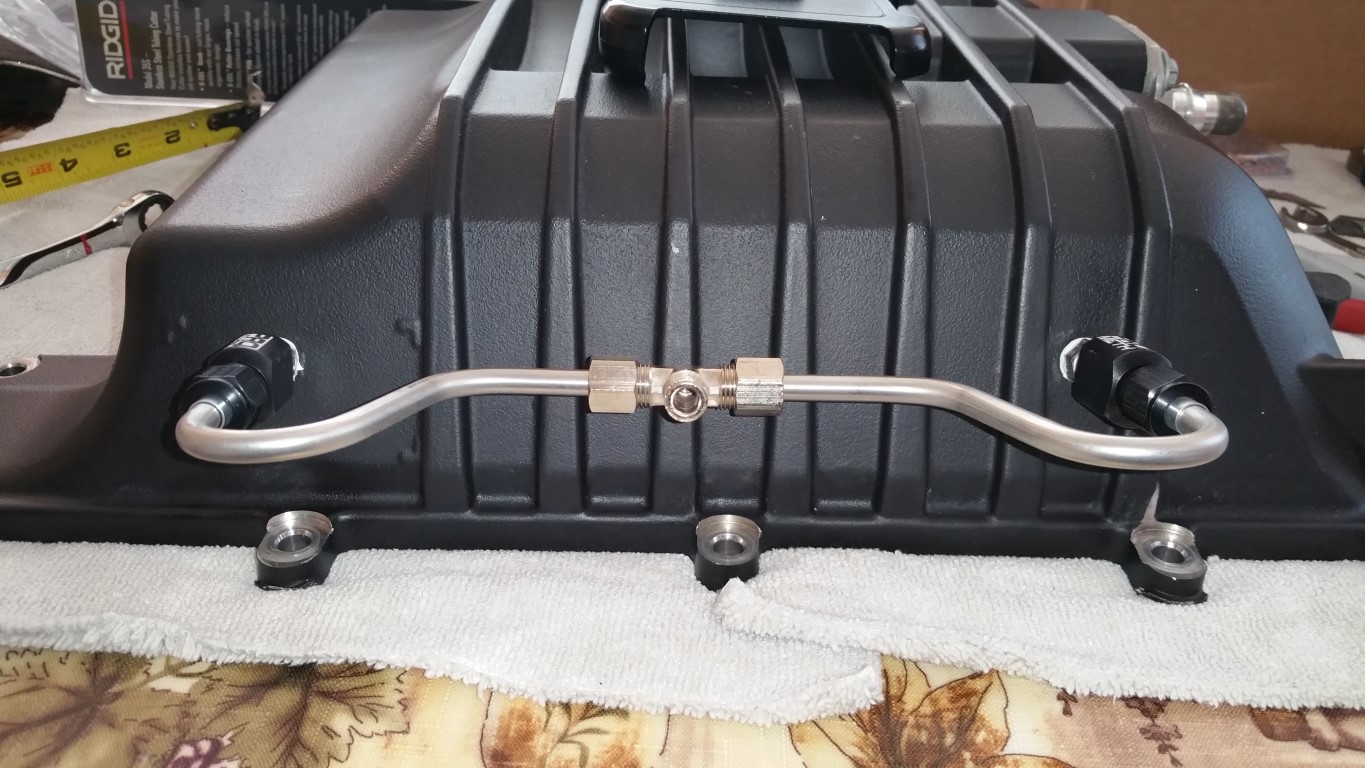 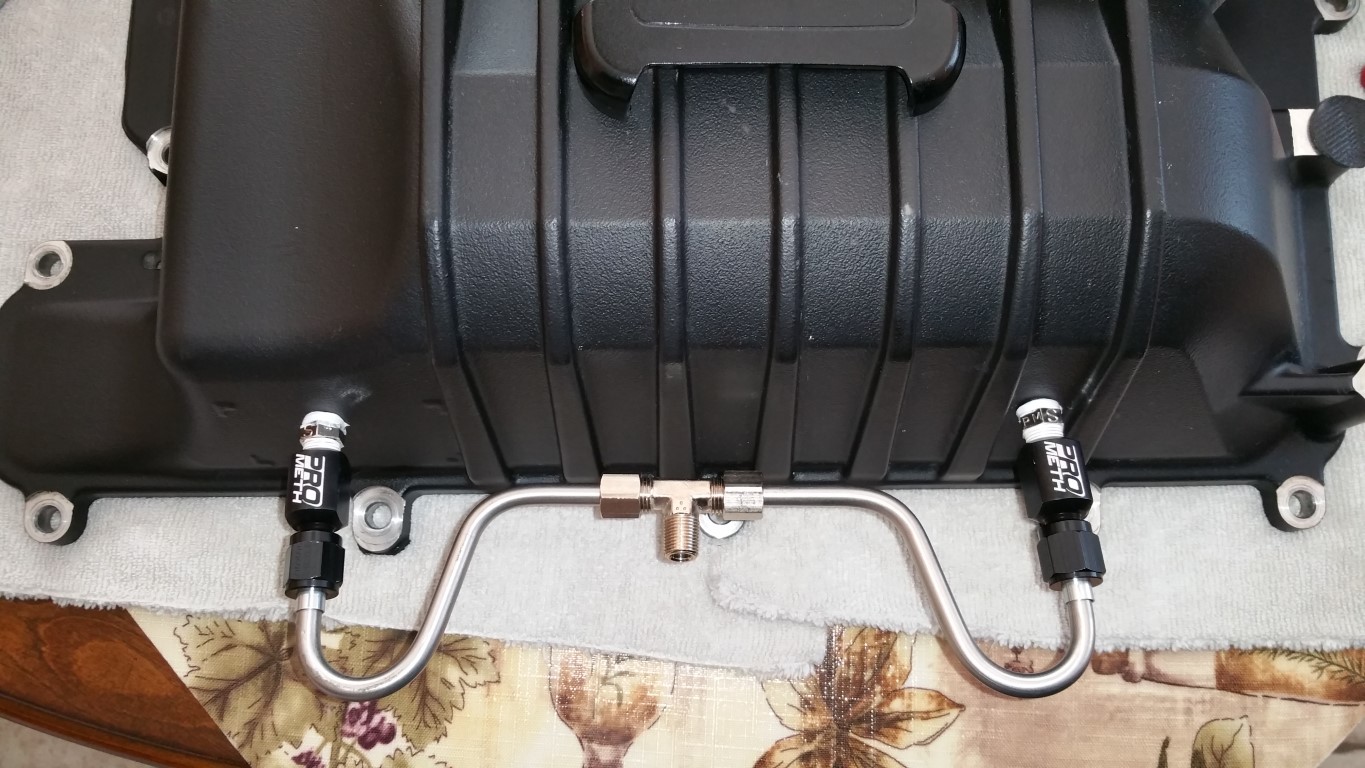 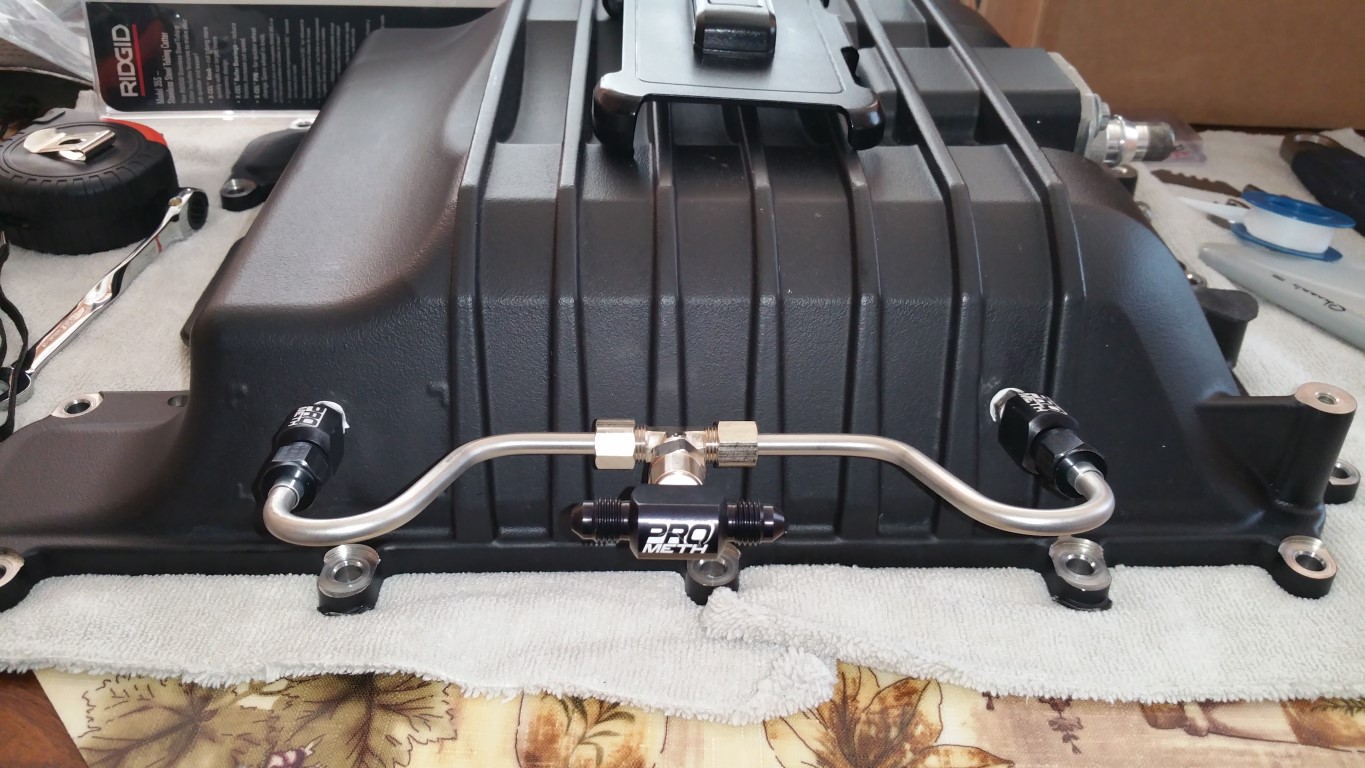 I cut the tubes so they lined up (I cut 1 tube 1 1/8" and the other tube 1"). The way I cut the tubes lined up nicely. Left side and the rest 'fitted' in place: 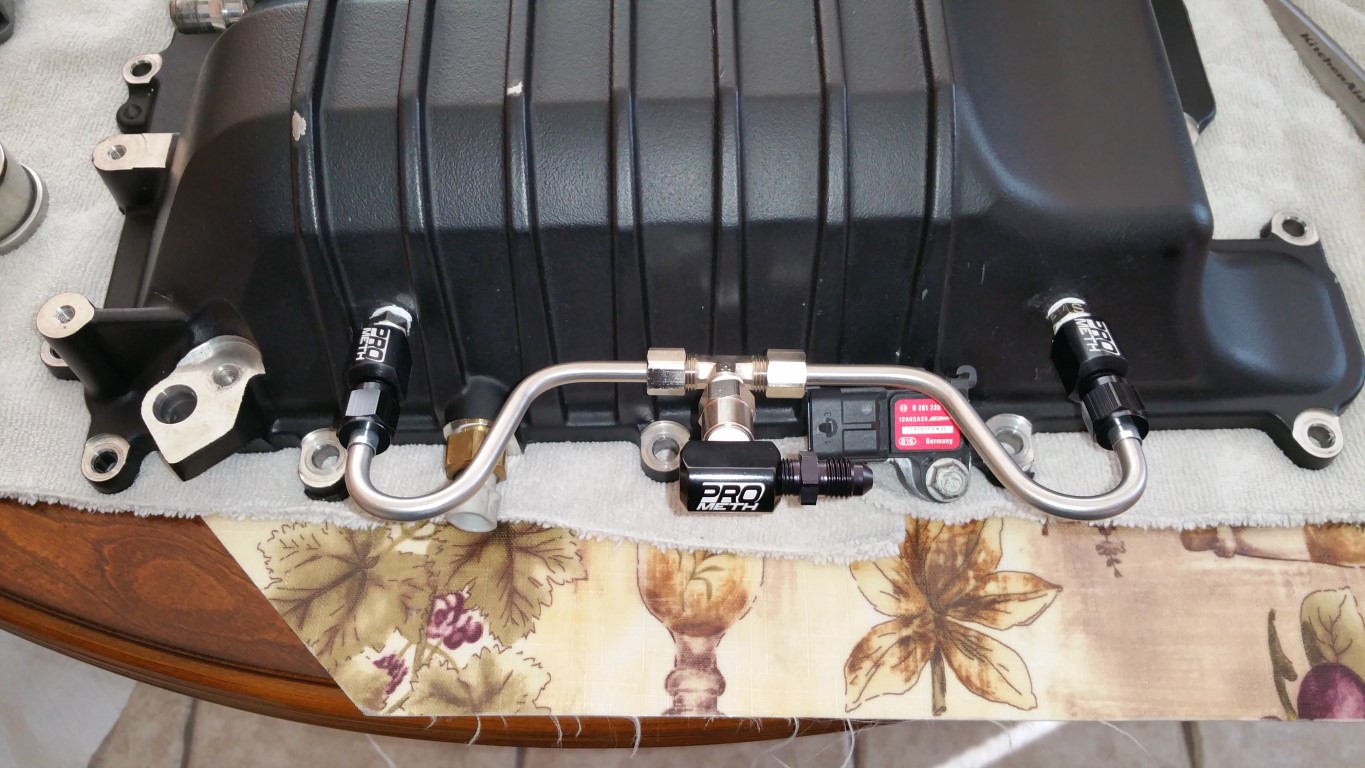 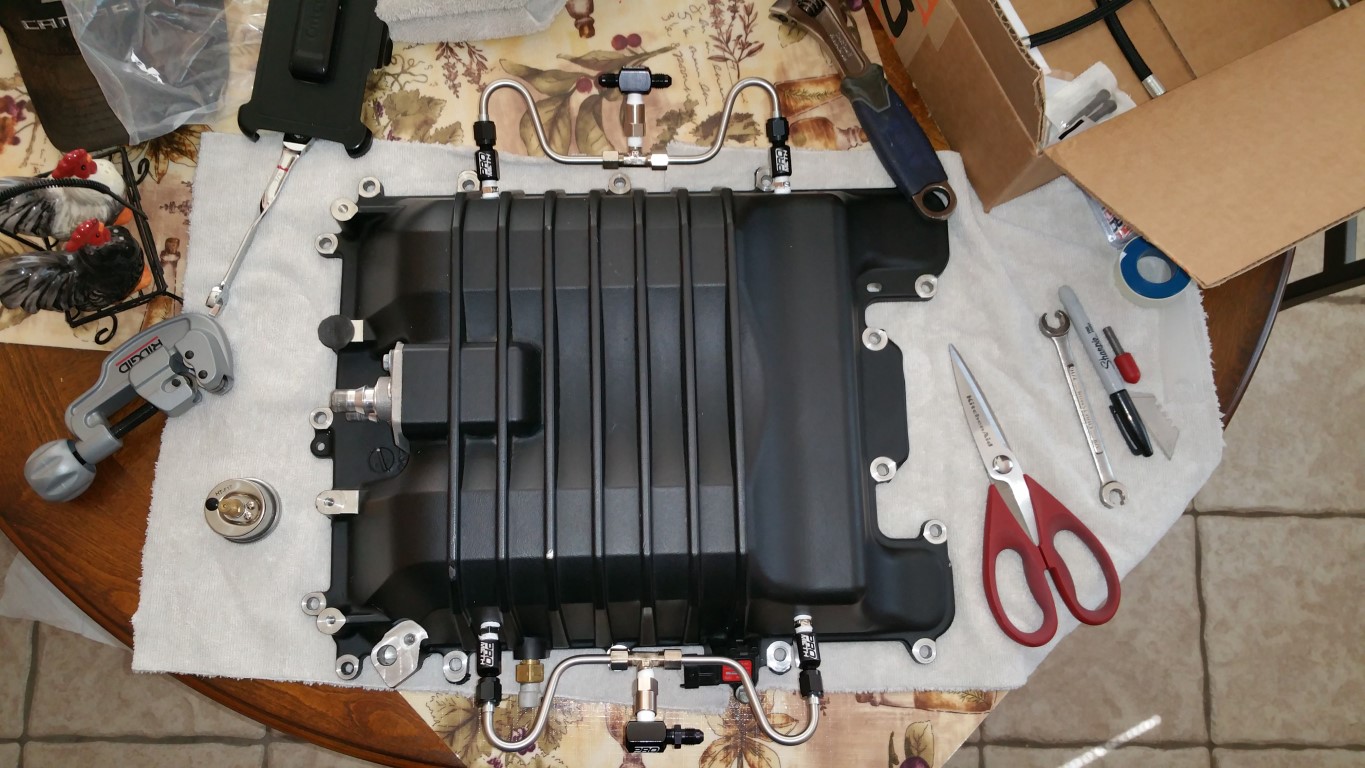 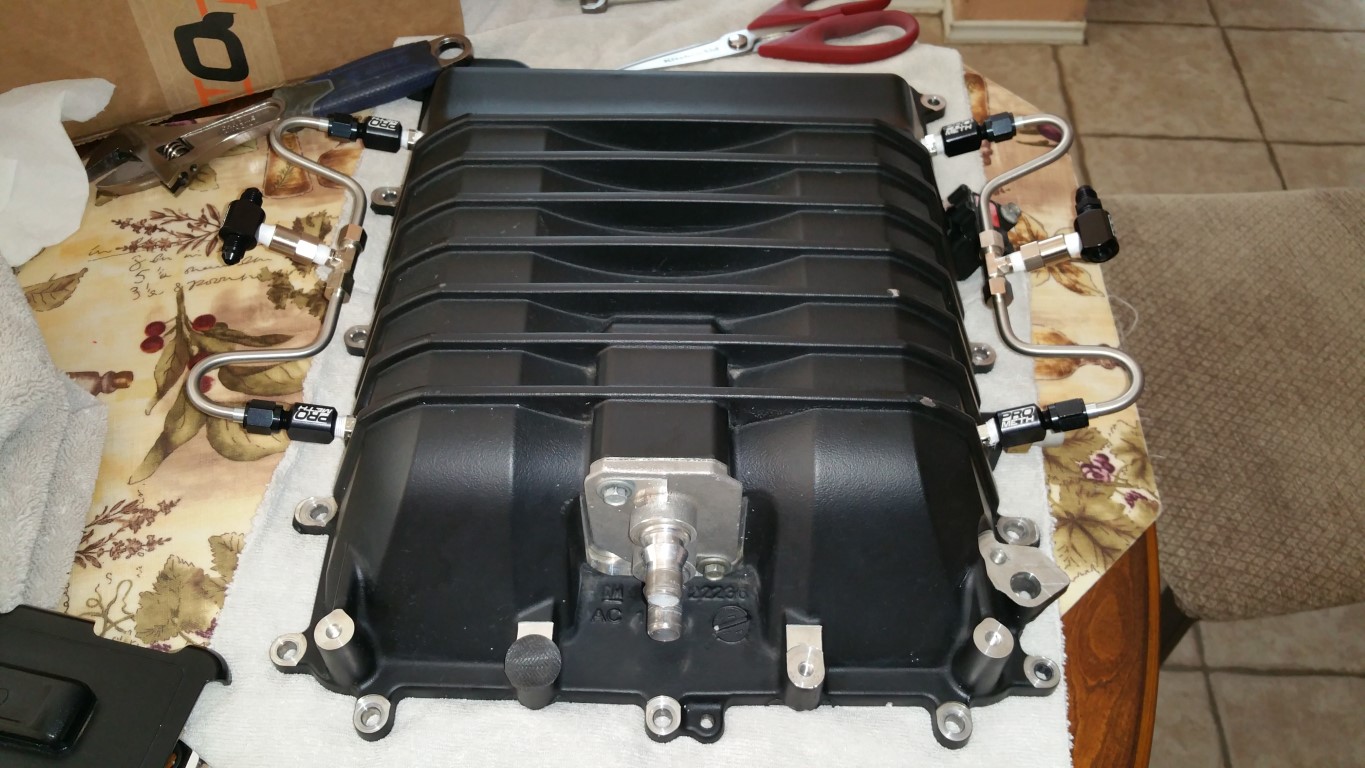 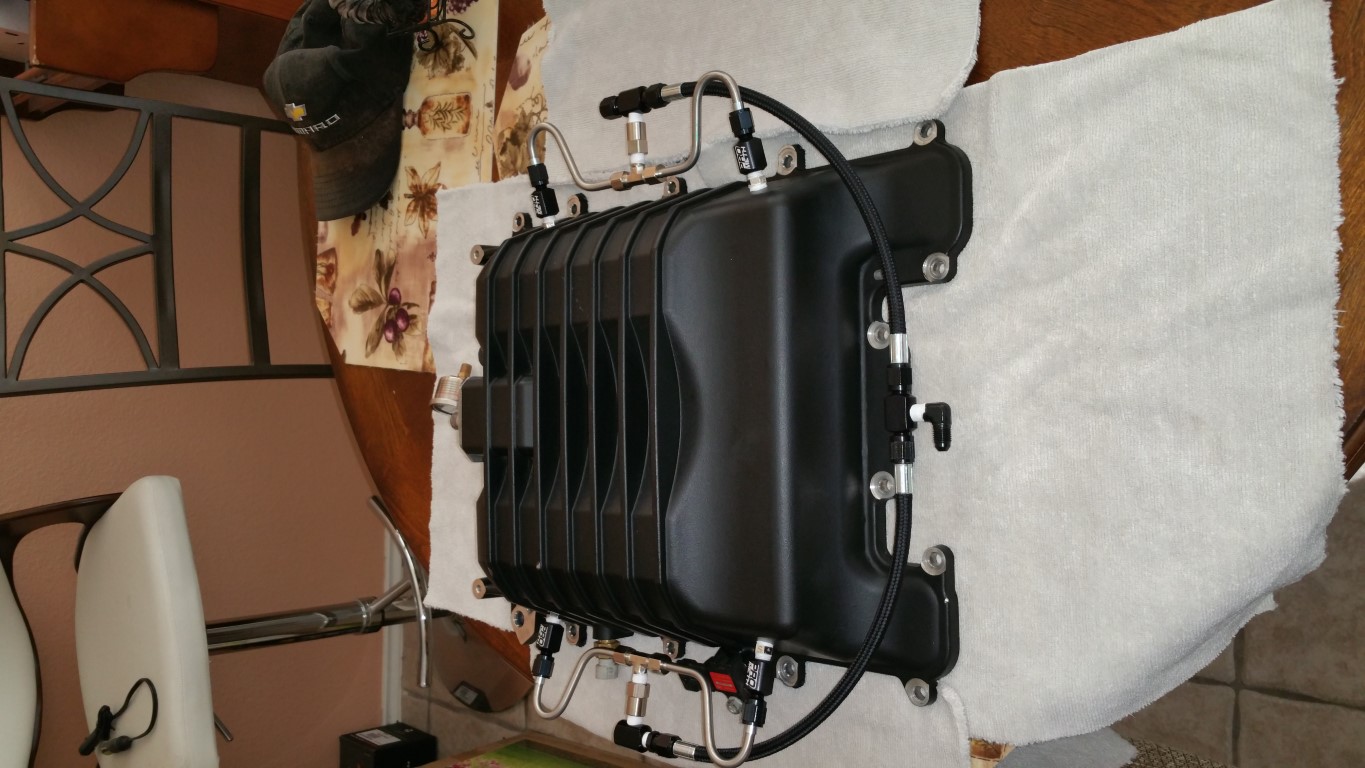 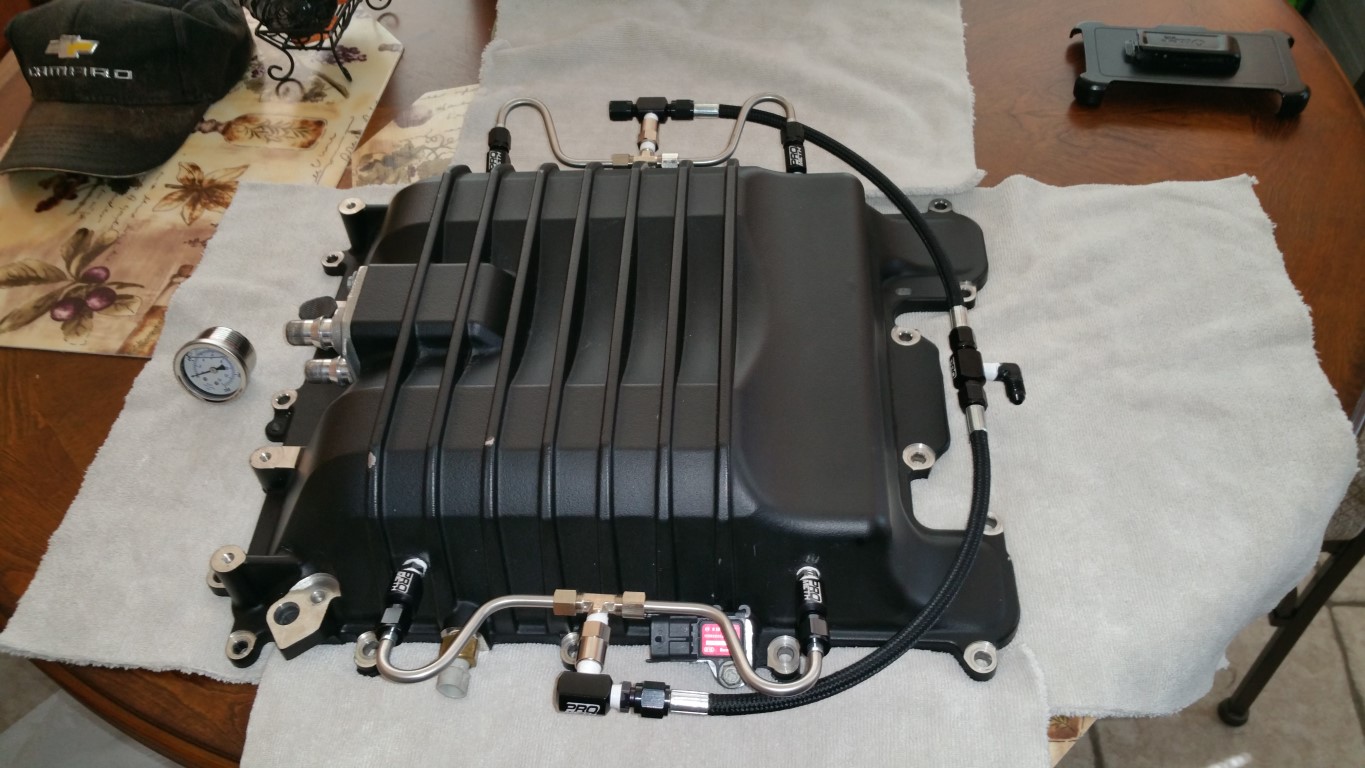 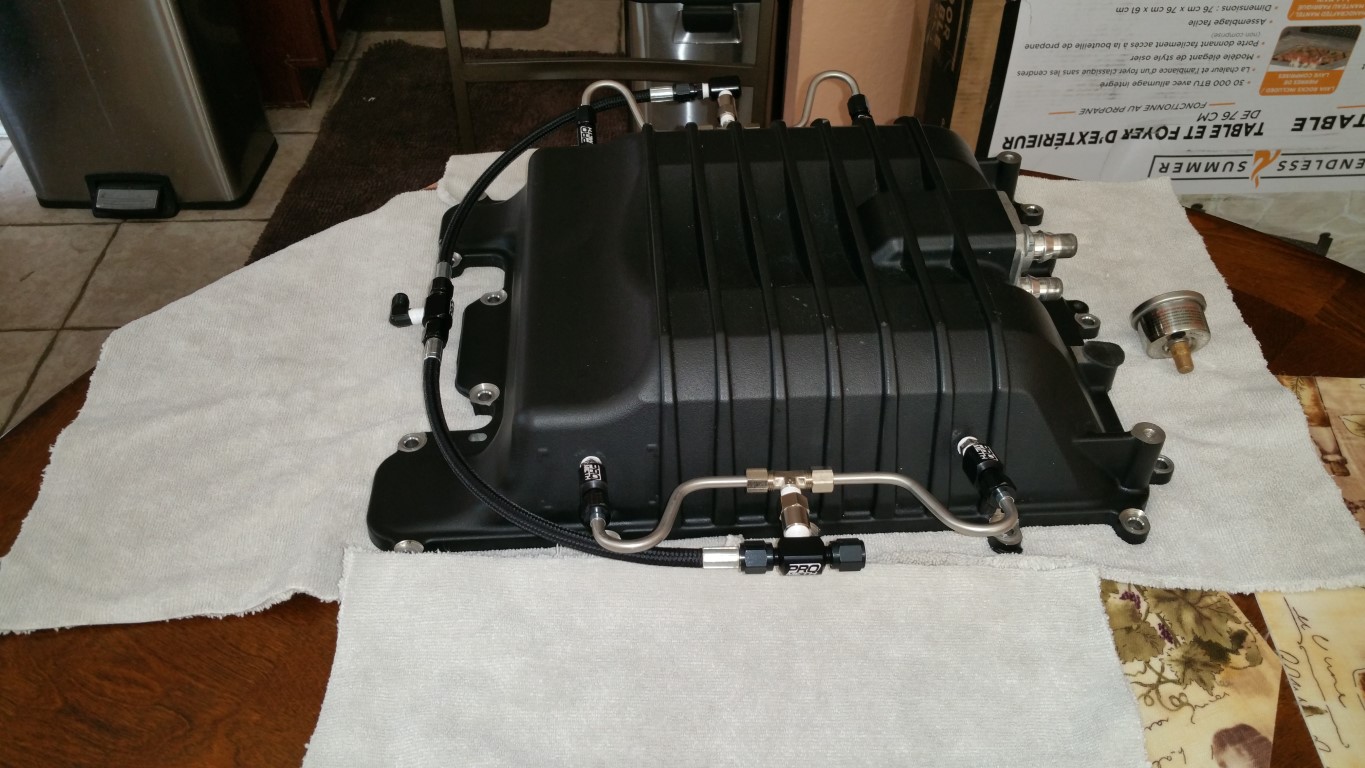 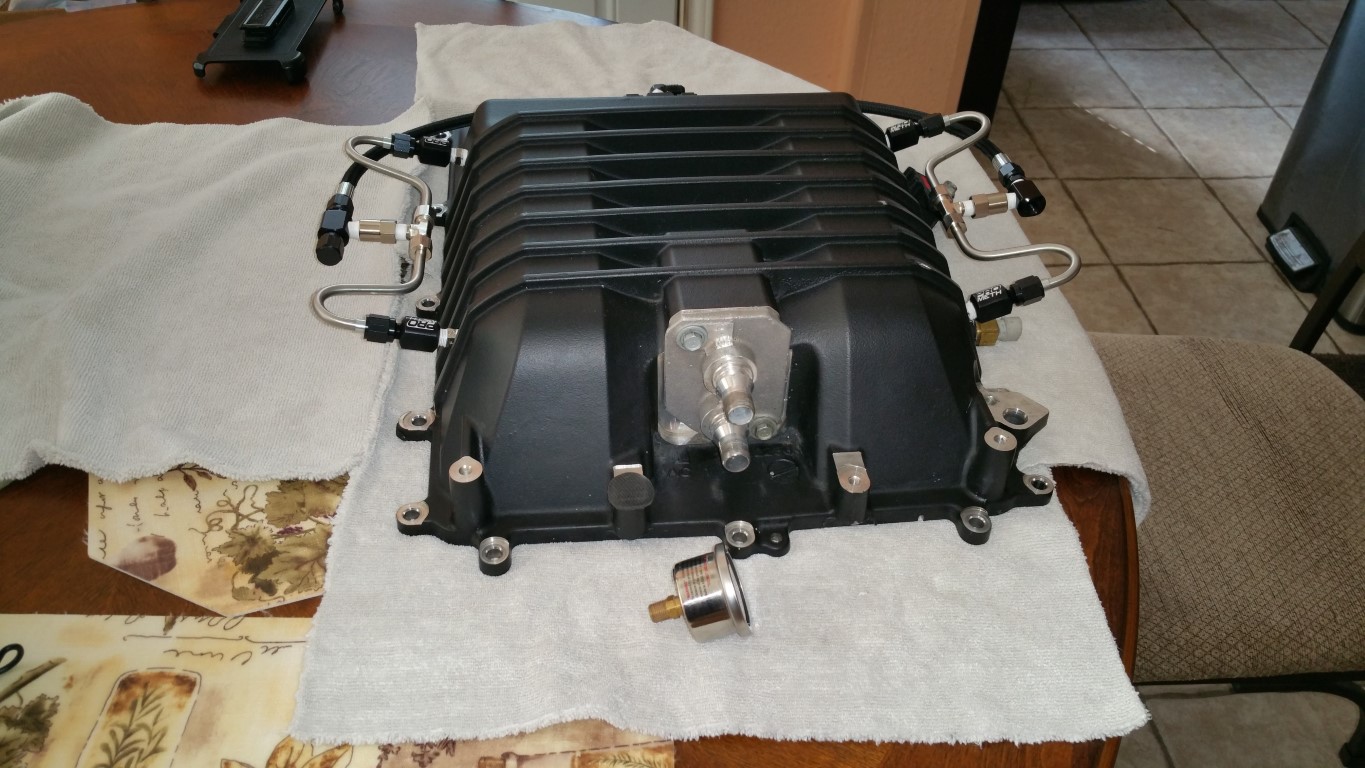 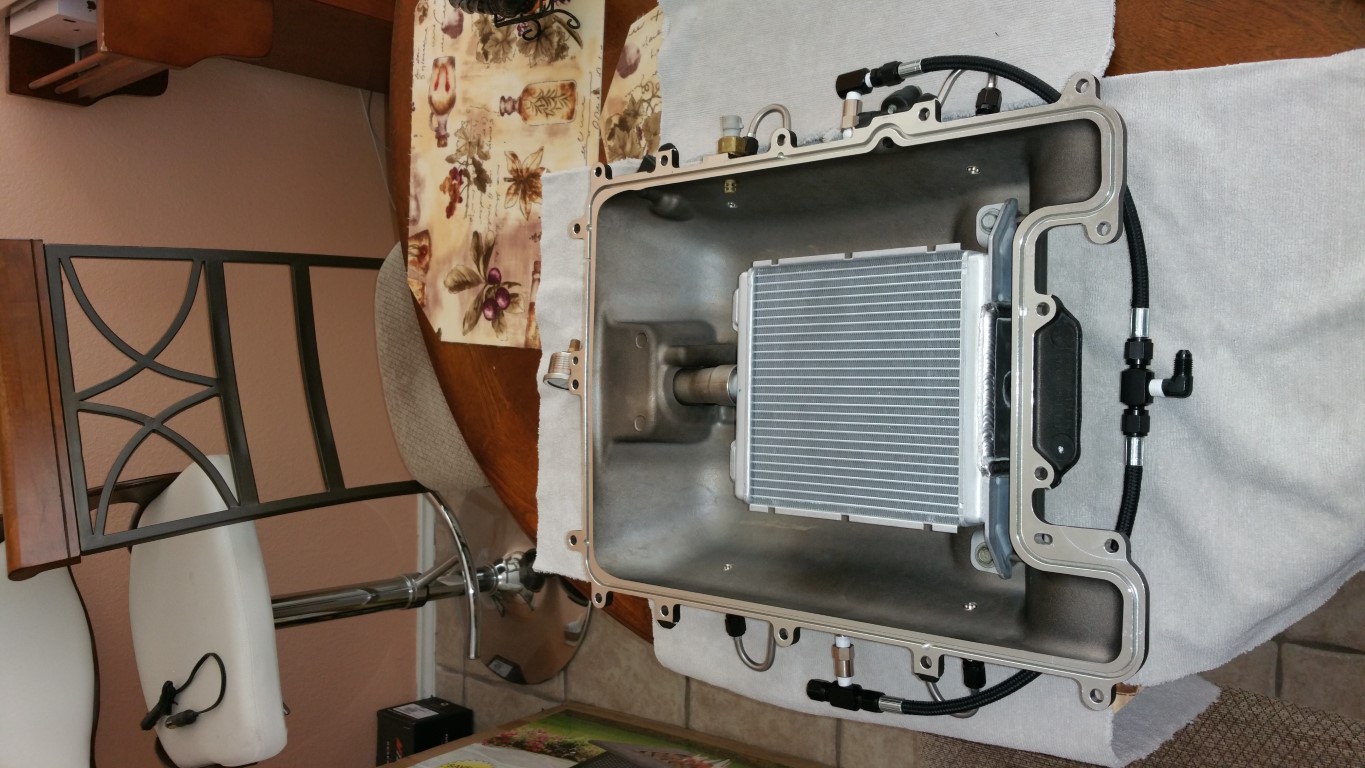 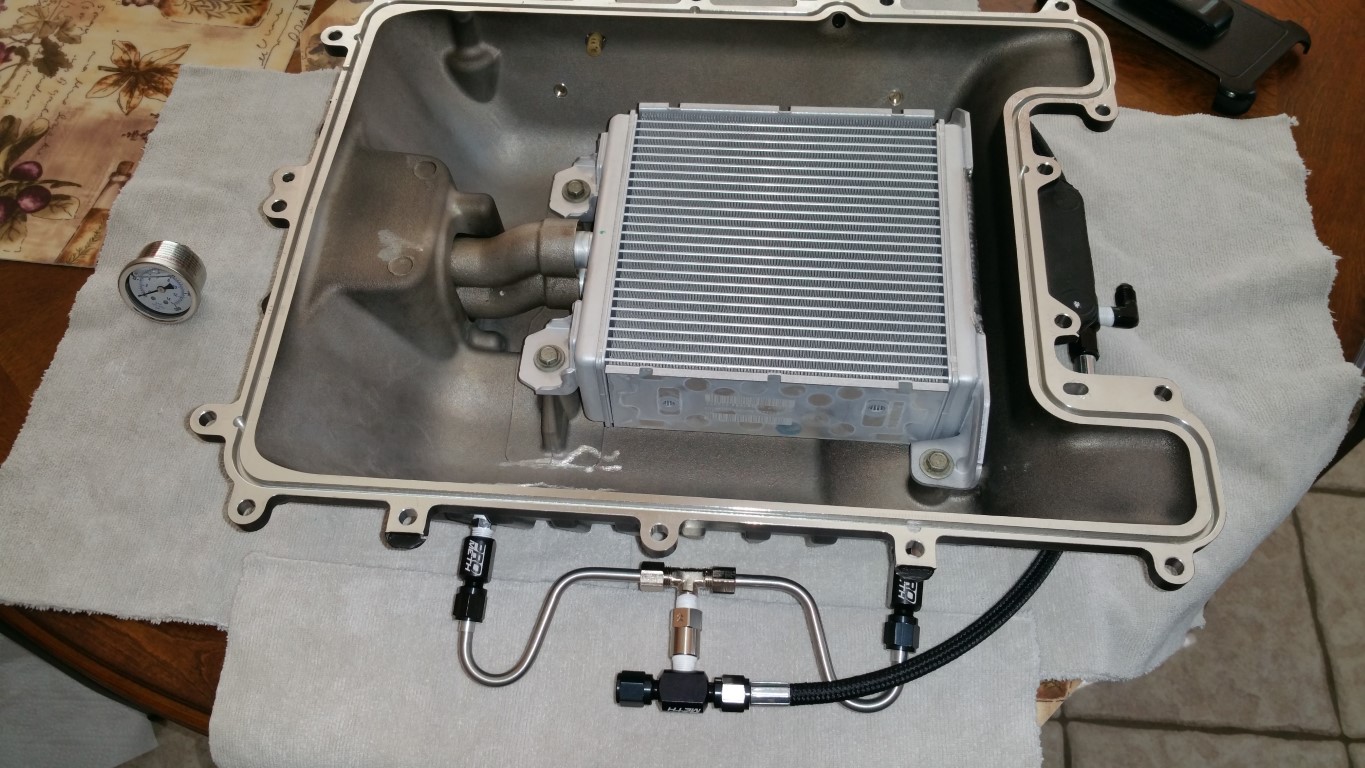 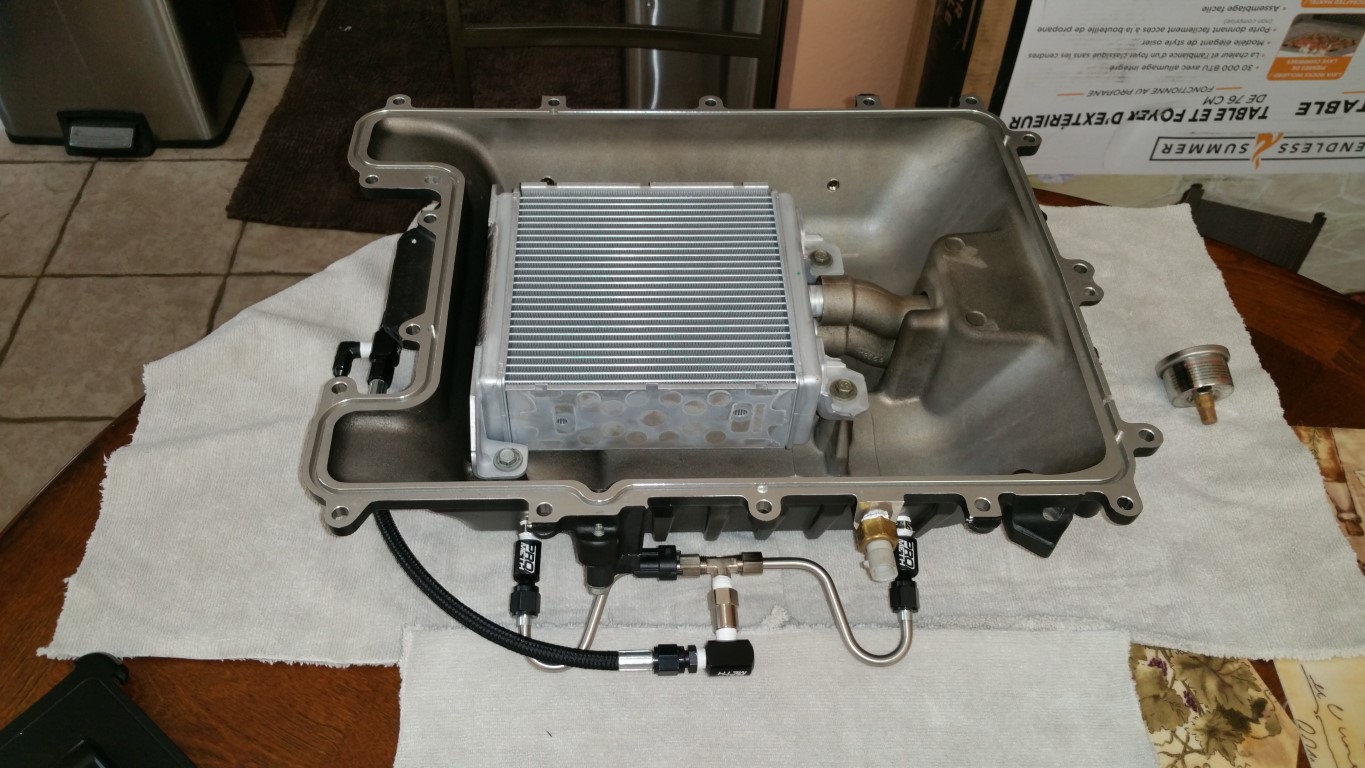 Next, I'm going to 'trial' fit the lid, set everything in place (tighten up) then, do a test of the nozzles! After the test (which I'll video), I'll then do one more cleaning of everything, install the new gaskets, then button this puppy up! -Don
__________________
747 RWHP 794 RWTQ
"Horsepower sells cars, torque wins races." - Enzo Ferrari See My Build: http://www.camaro5.com/forums/showthread.php?t=385577 Last edited by hammdo; 08-25-2018 at 09:53 PM. |
|
|
|
|
08-25-2018, 08:41 PM
|
#2192 | |
|
'It's an experiment'
Drives: [COTW 2/09/15] '11 GPI LSA SC Z/LE Join Date: May 2014
Location: Dallas TX
Posts: 8,693
|
LSA ProMeth Setup ZL1 Lid cont.
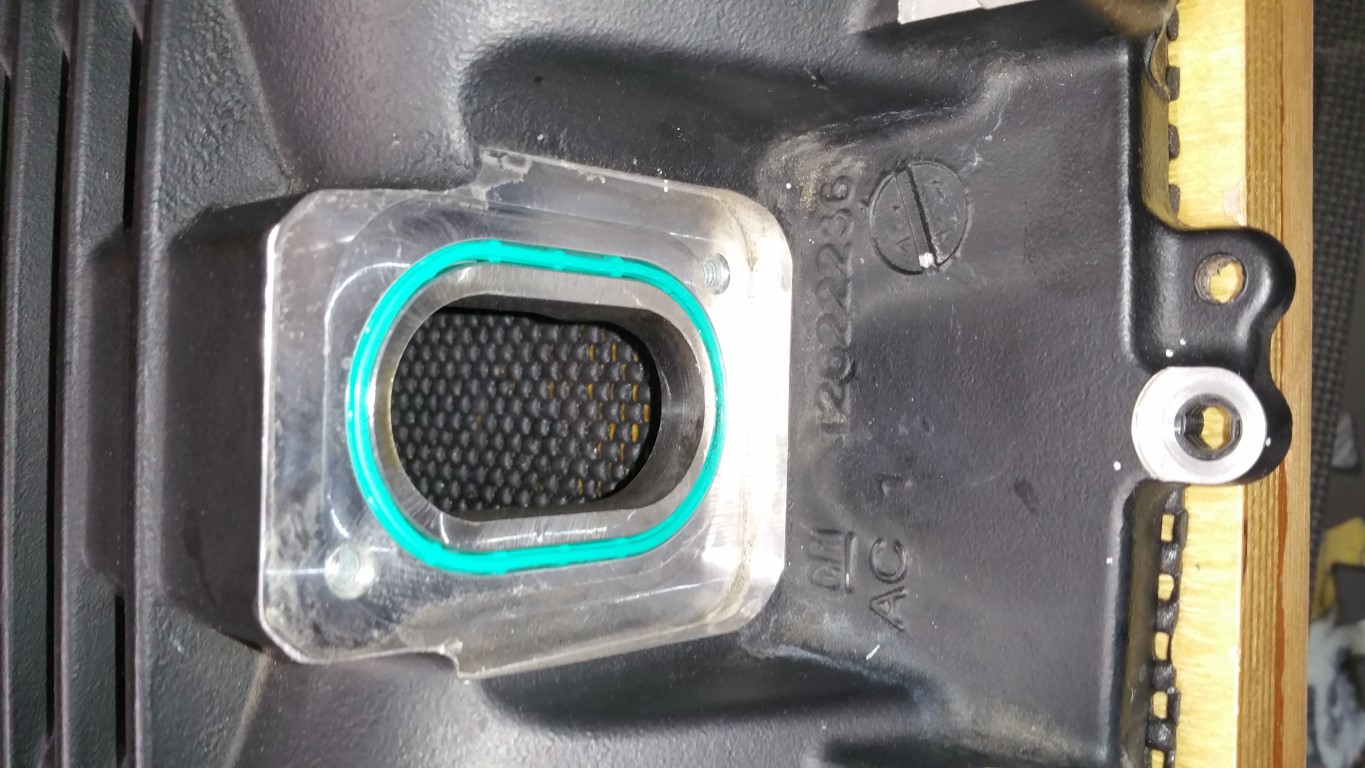
Test time! Here I installed the new lid gasket, then did a test fit to make sure I had clearance and things fit:
 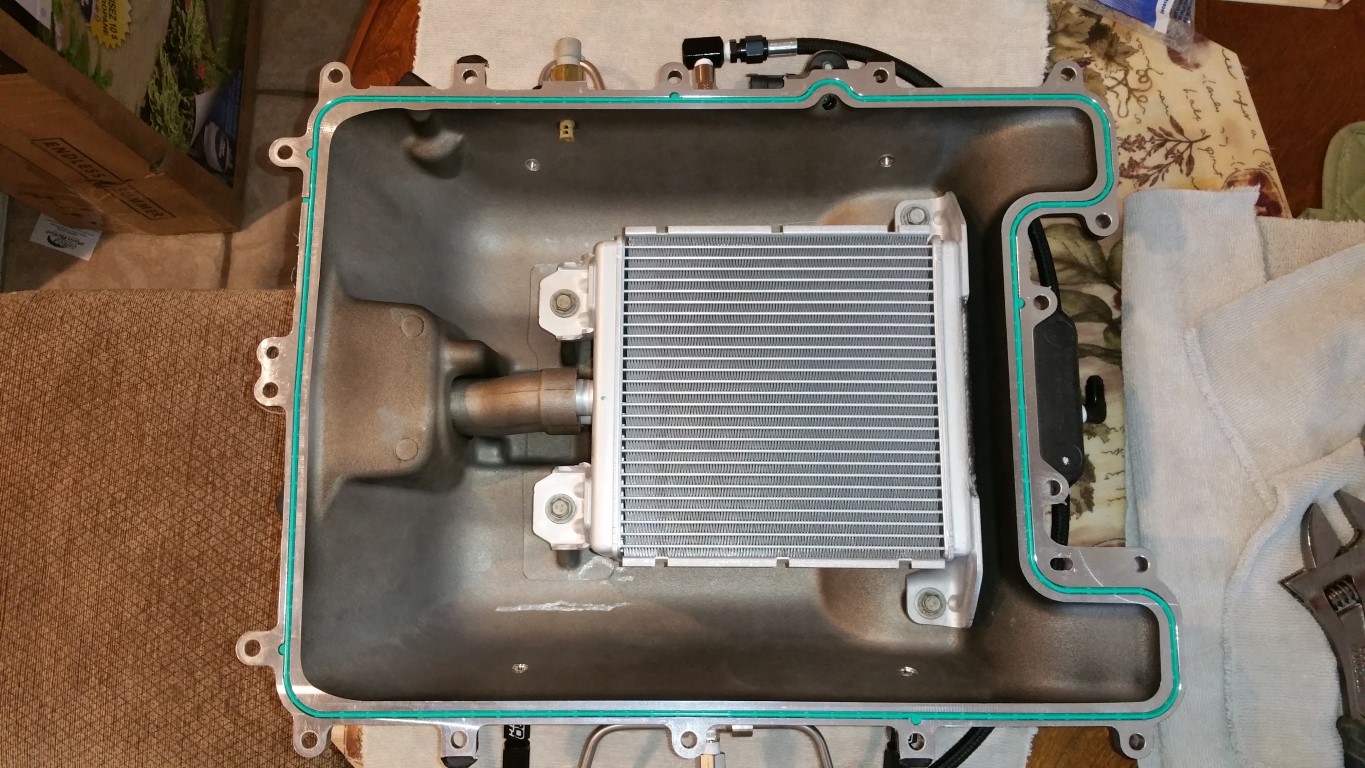 Test fit: 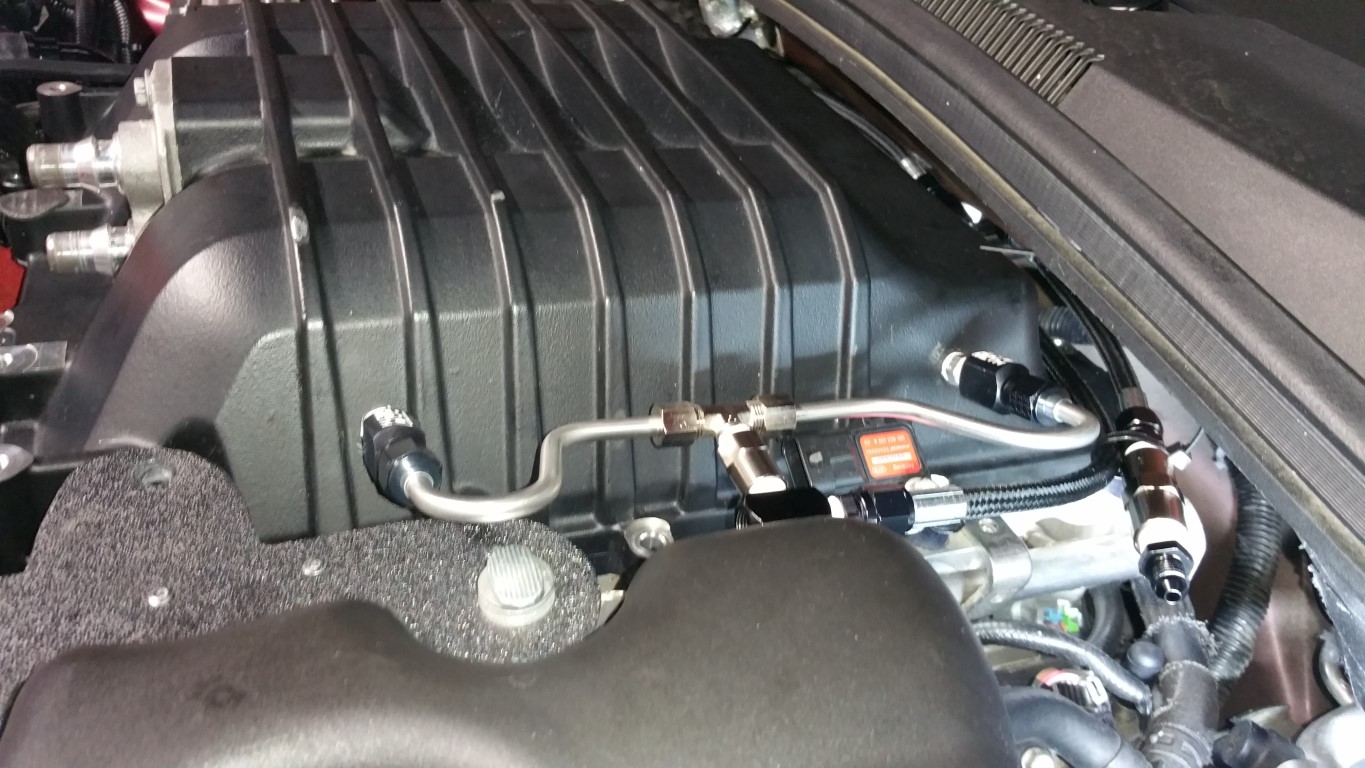 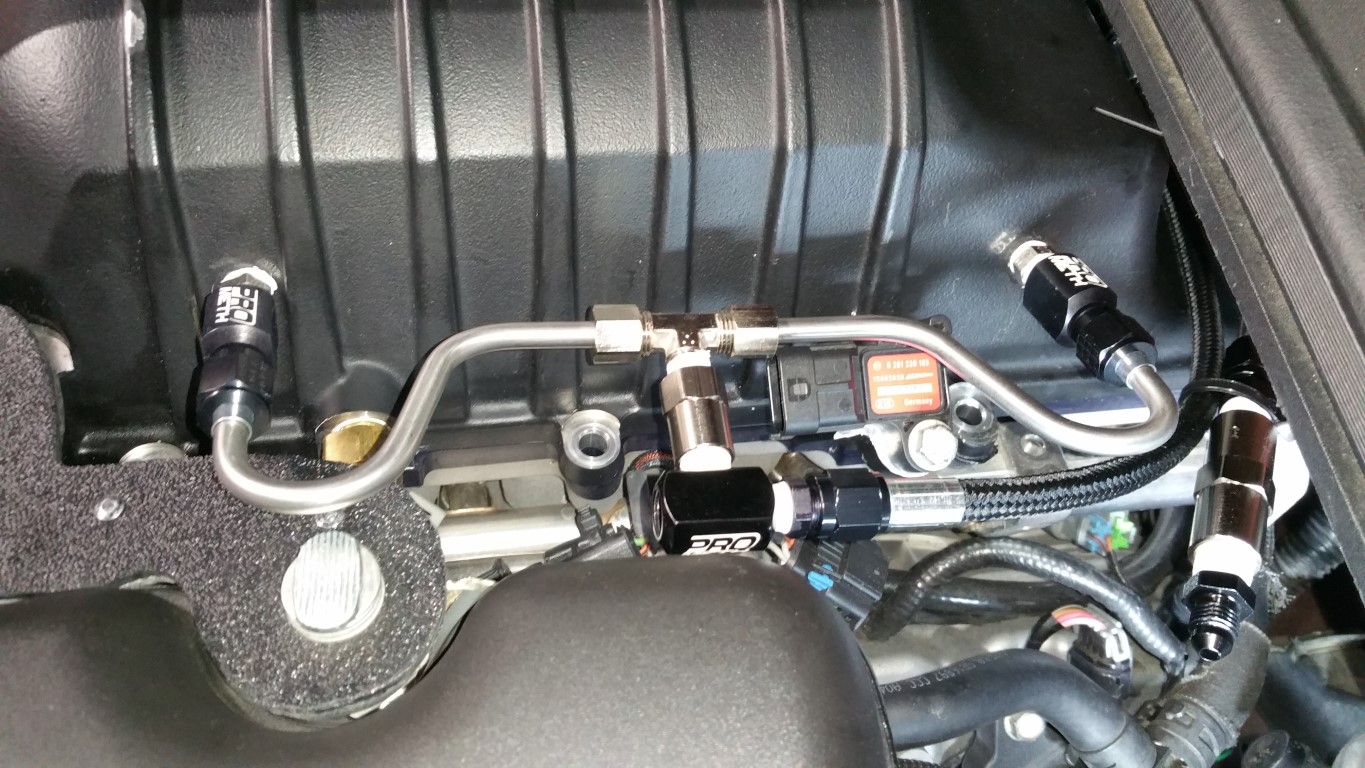 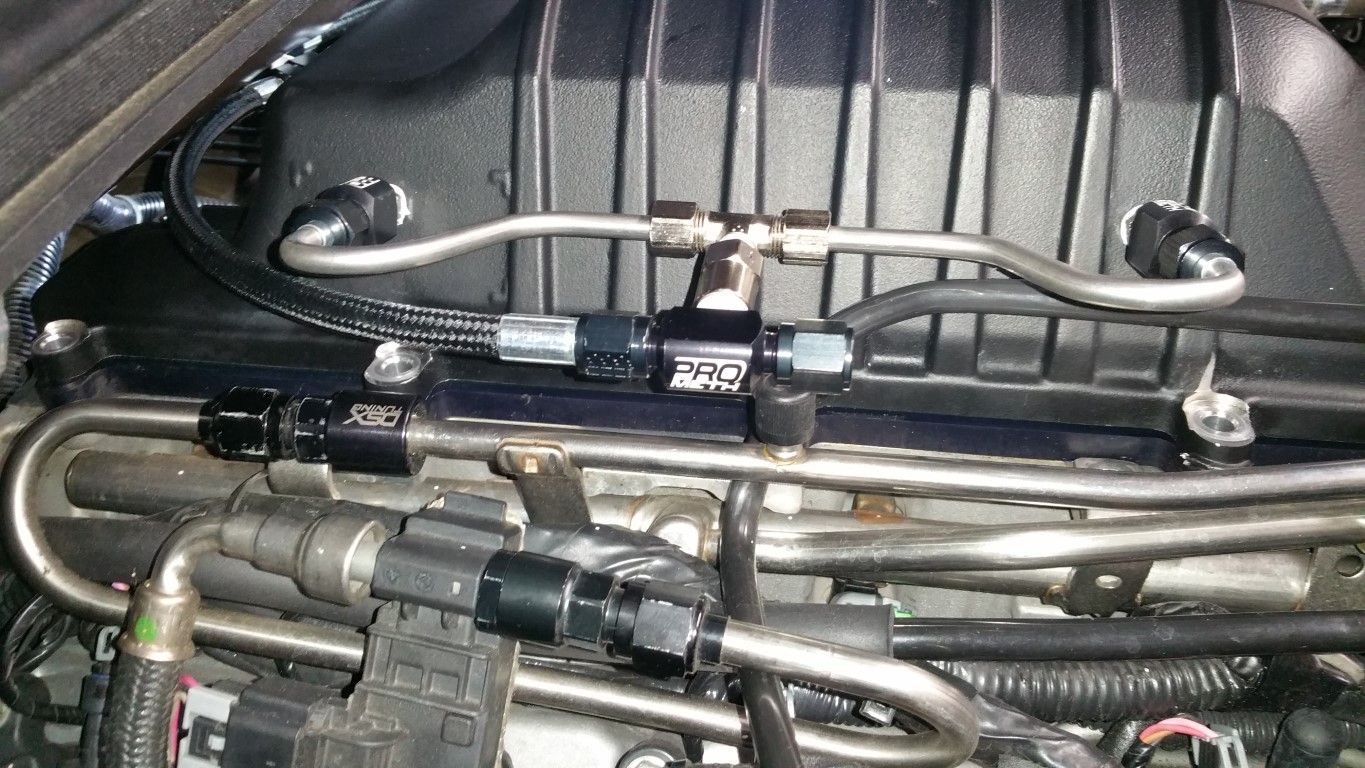 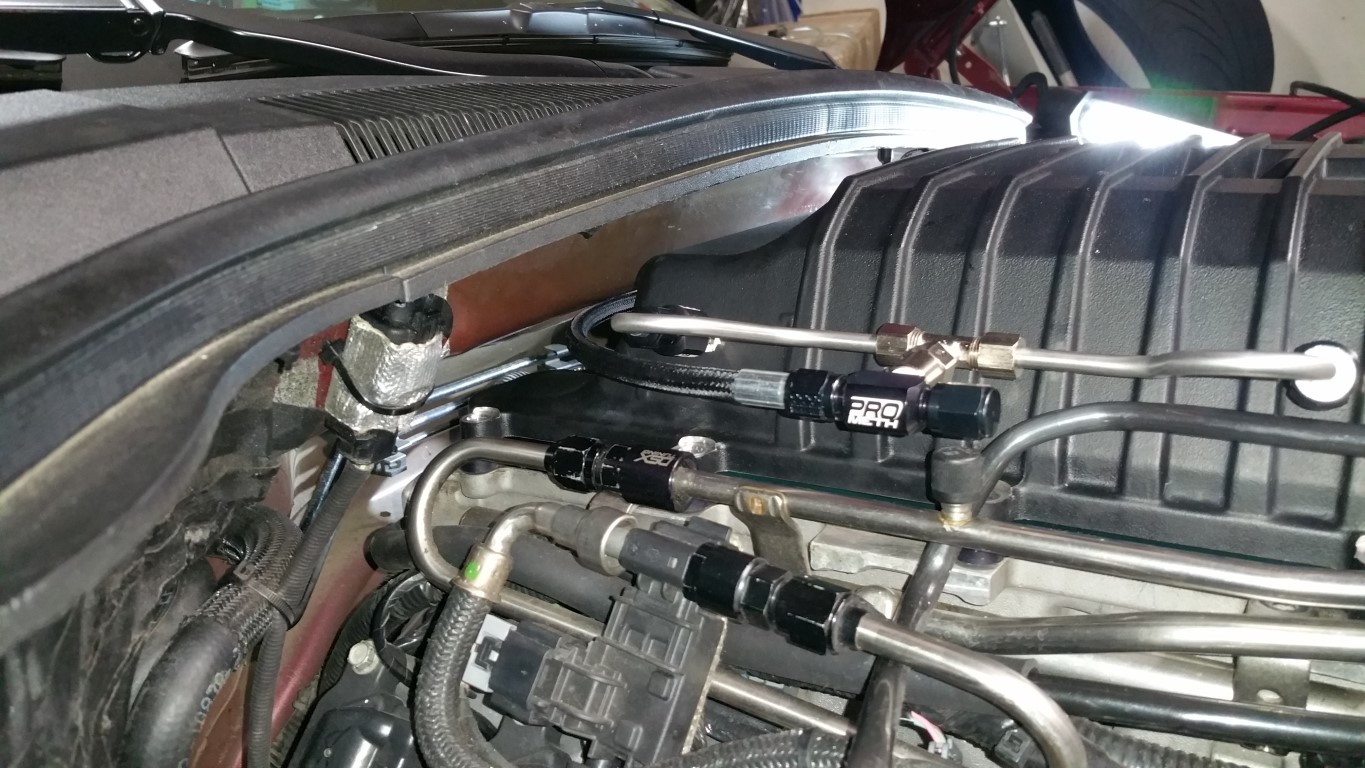 After test -- cleanup and let it dry out: 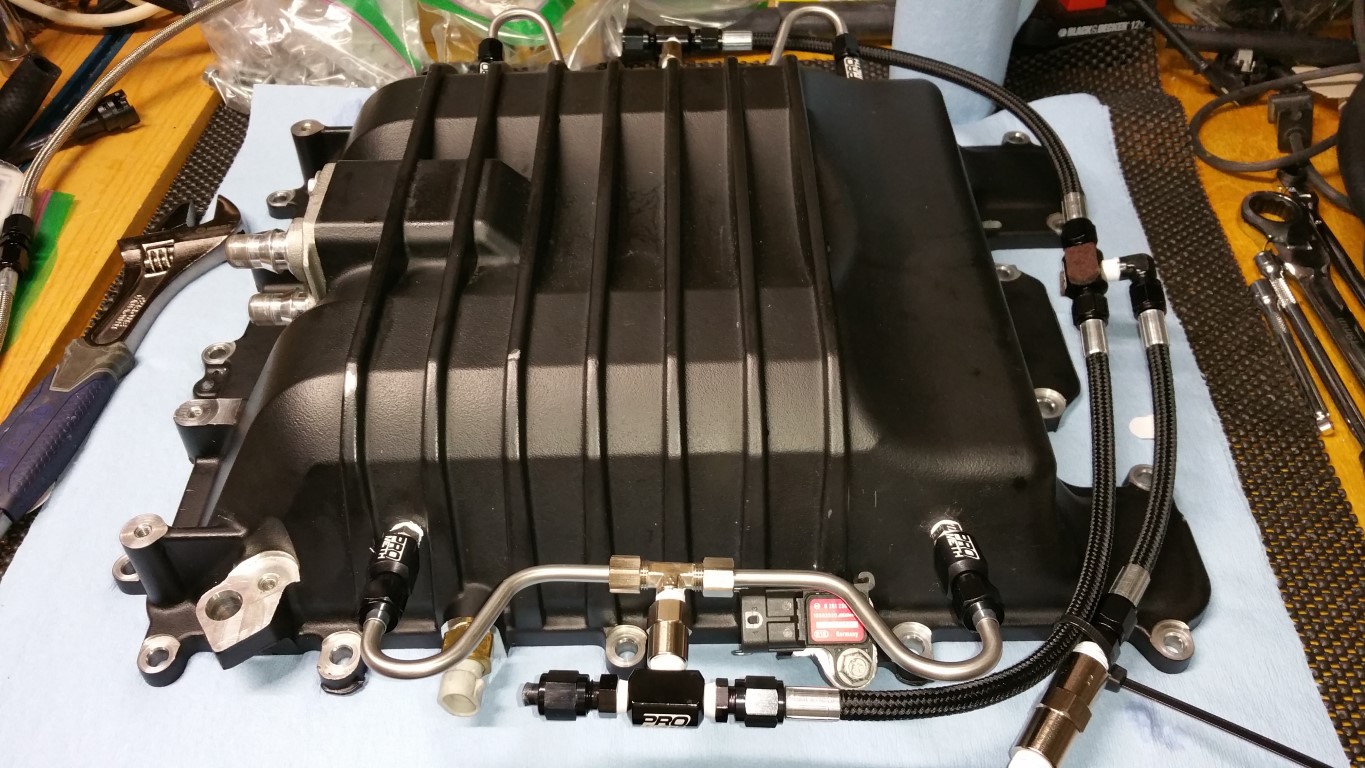 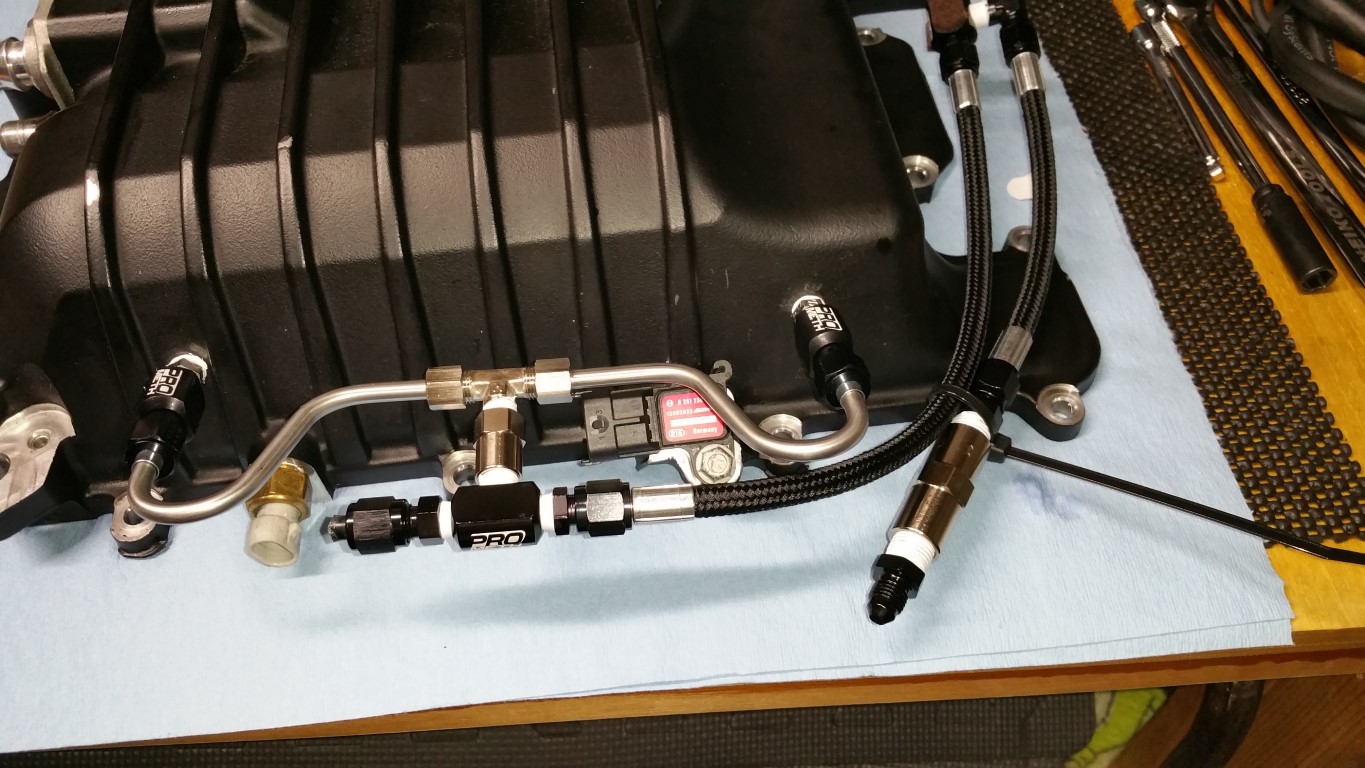 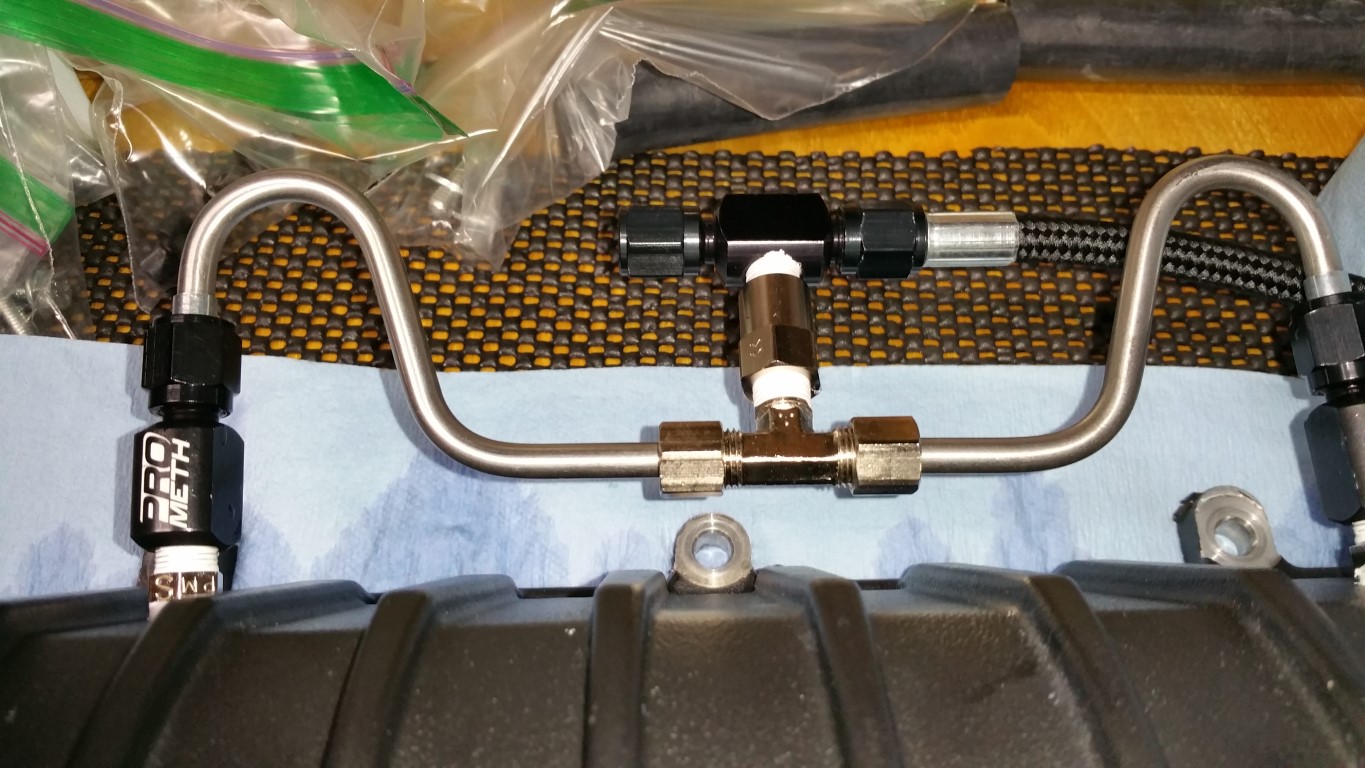 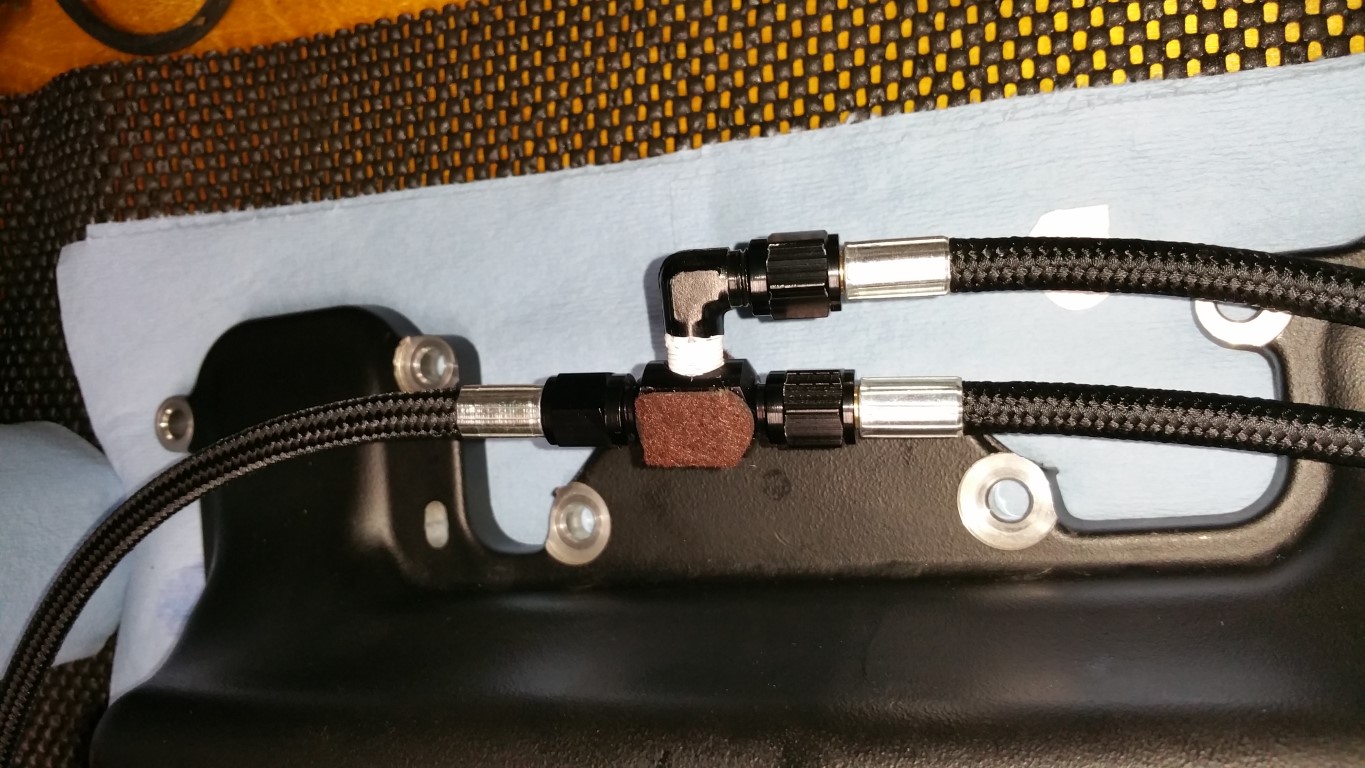 Testing the nozzles! Yea Baby! I'll let it sit overnight to dry out then, install the lid! -Don
__________________
747 RWHP 794 RWTQ
"Horsepower sells cars, torque wins races." - Enzo Ferrari See My Build: http://www.camaro5.com/forums/showthread.php?t=385577 |
|
|
|
|
|
08-26-2018, 01:09 PM
|
#2193 | |
|
'It's an experiment'
Drives: [COTW 2/09/15] '11 GPI LSA SC Z/LE Join Date: May 2014
Location: Dallas TX
Posts: 8,693
|
LSA ProMeth Setup Installed and Running!
Finally, the lid is on -- I made sure I had new gaskets and that everything cleared. I do have a tight area and I added some 'felt' buffer to keep it from hitting but, outside of that, success!
Installing (before raising the cradle): 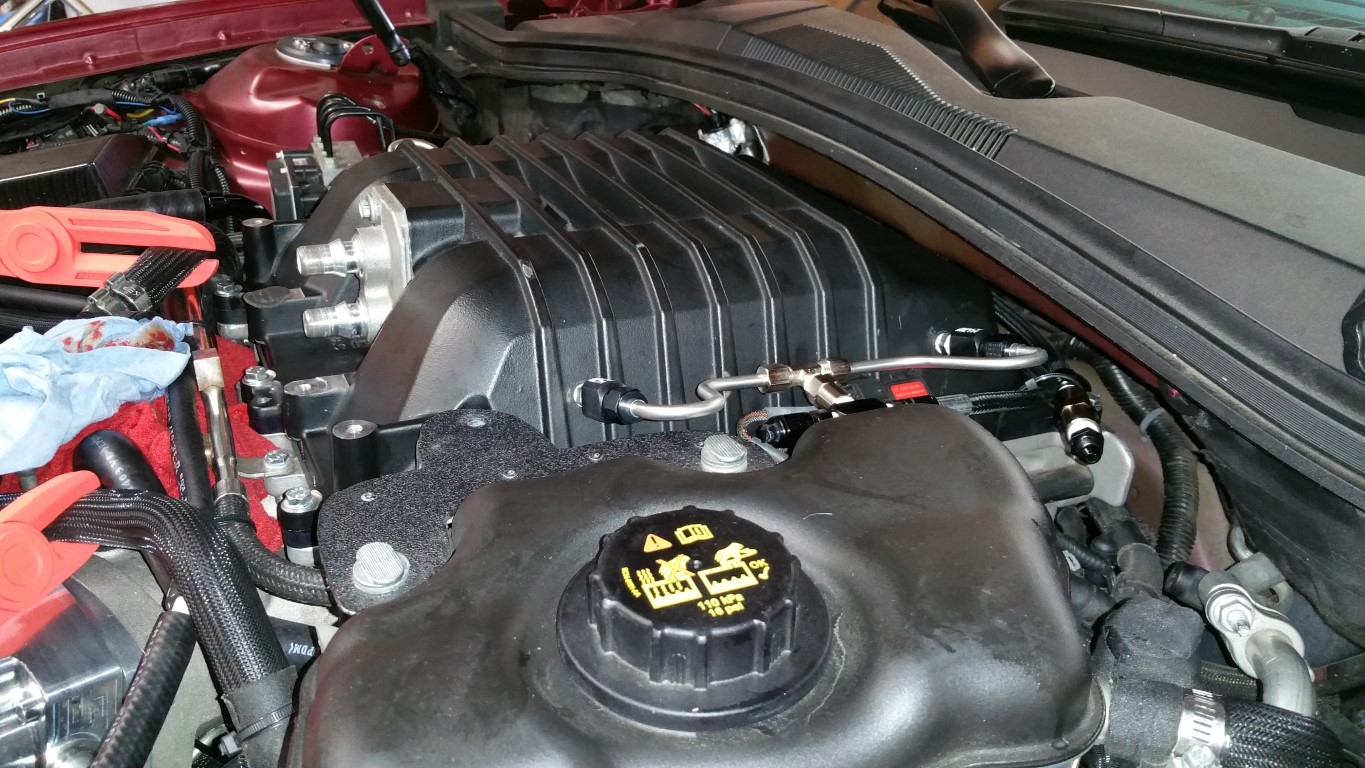 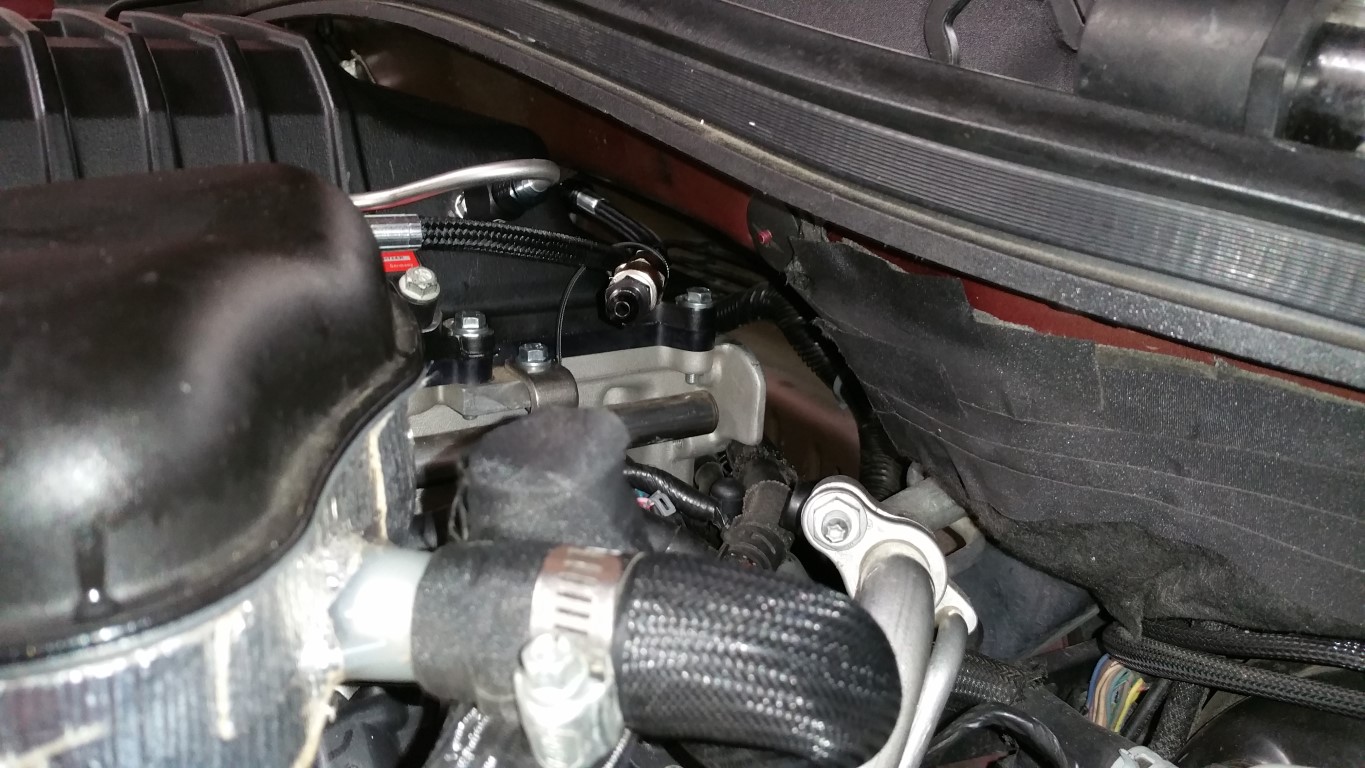 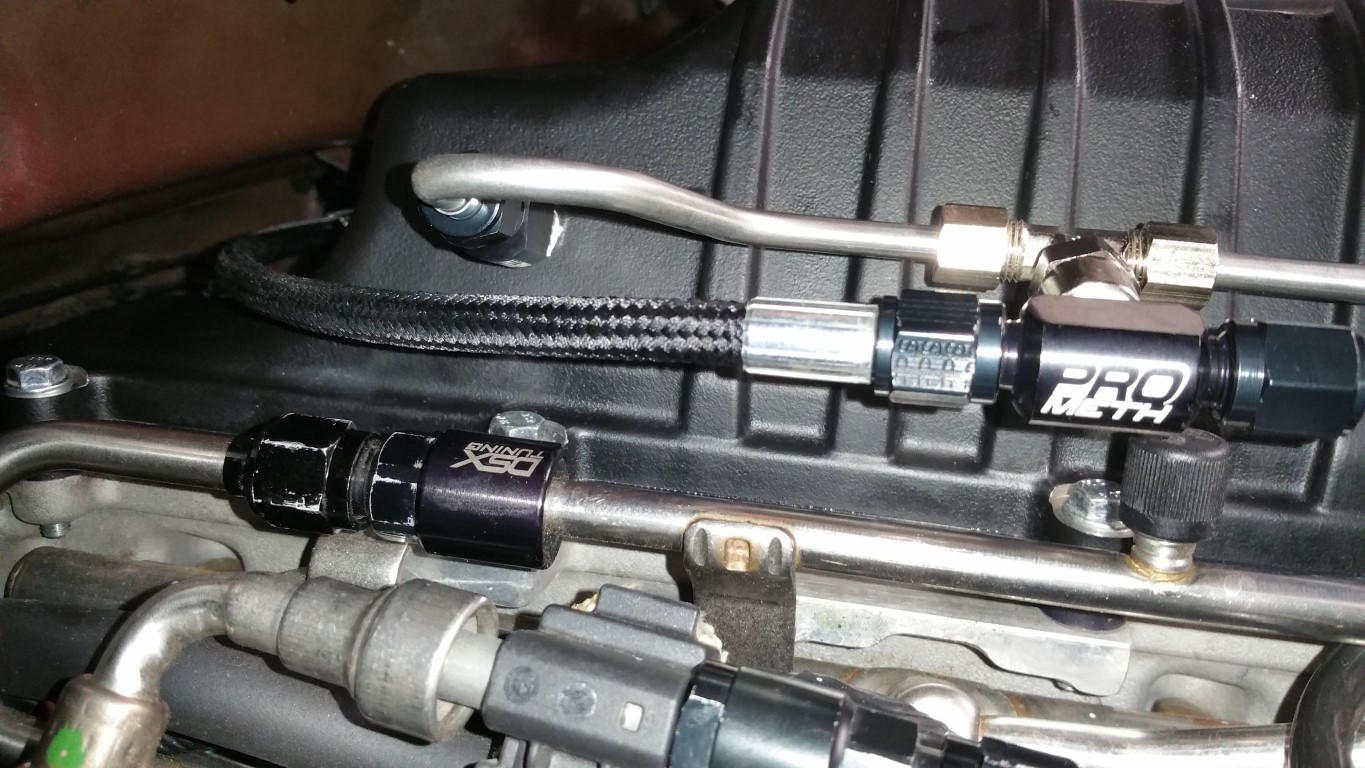 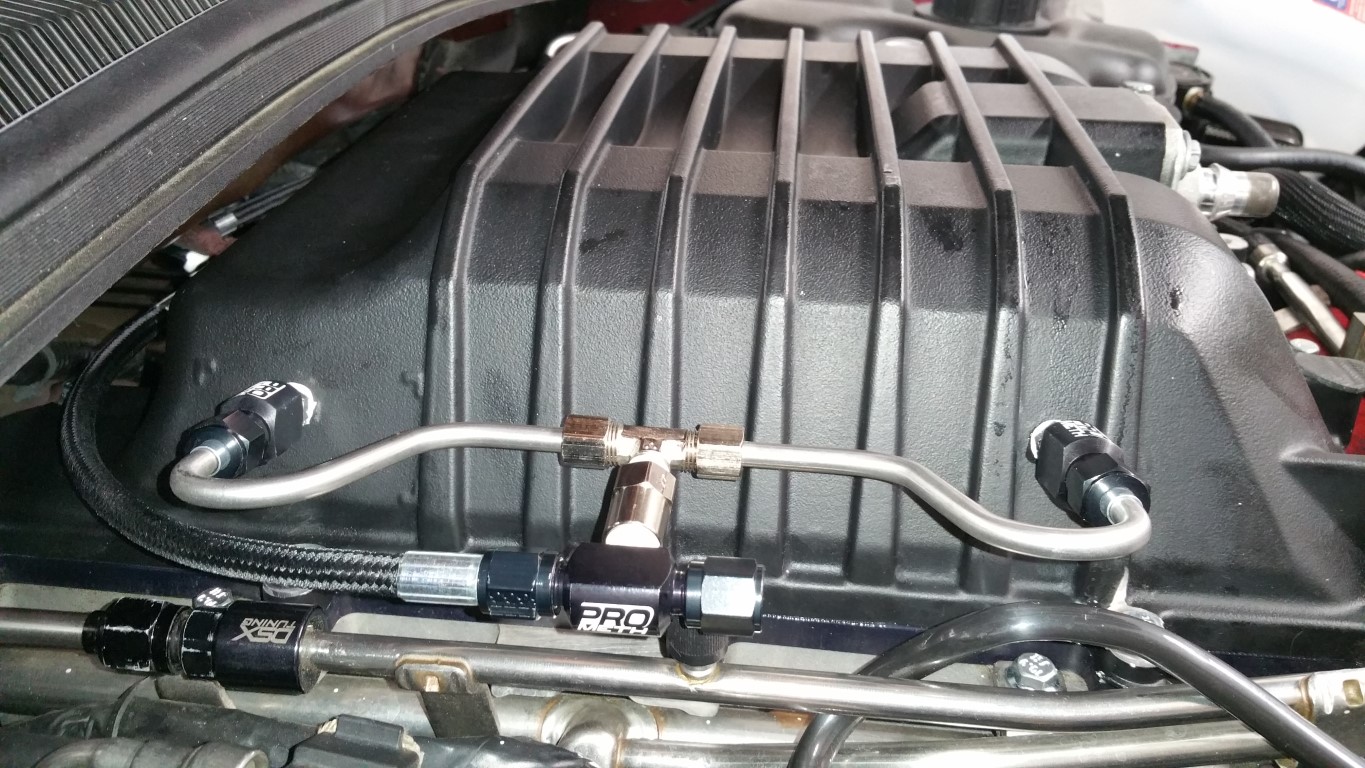 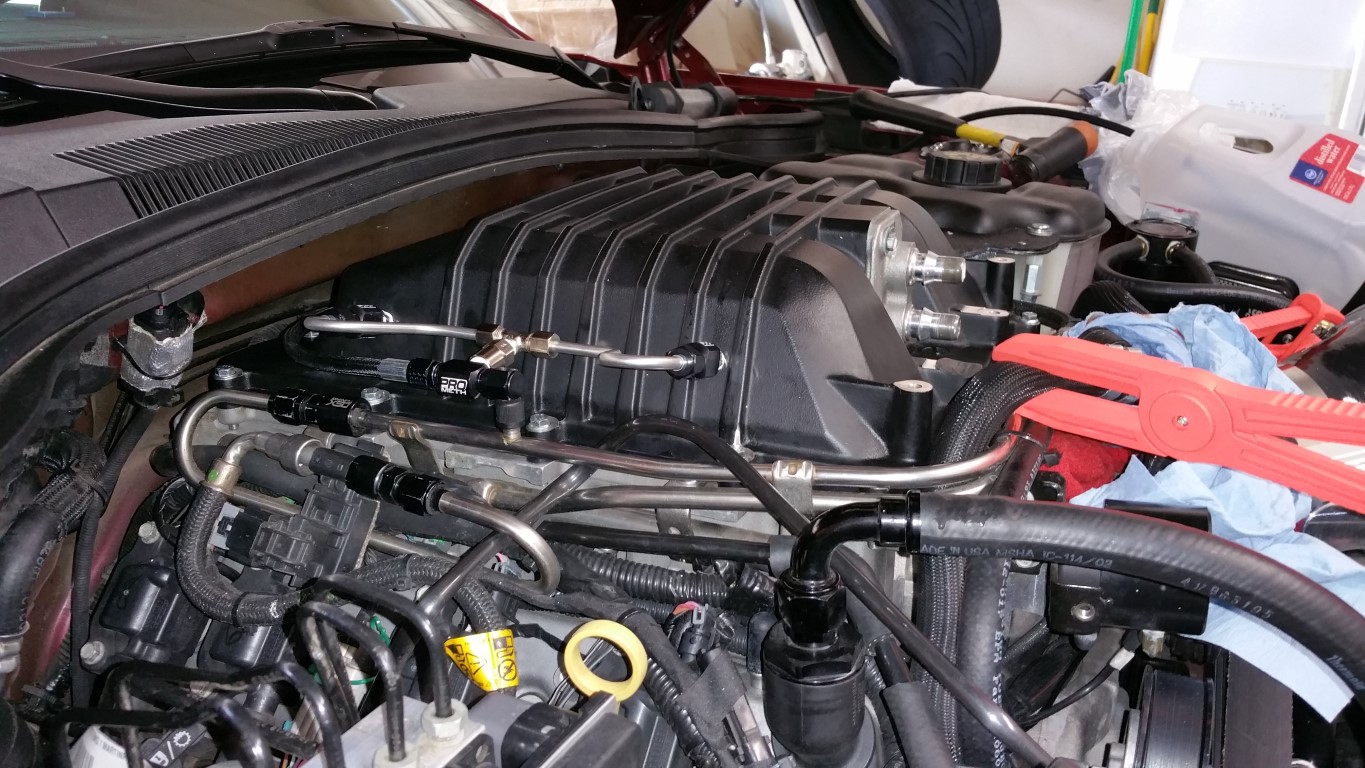 Cradle raised: 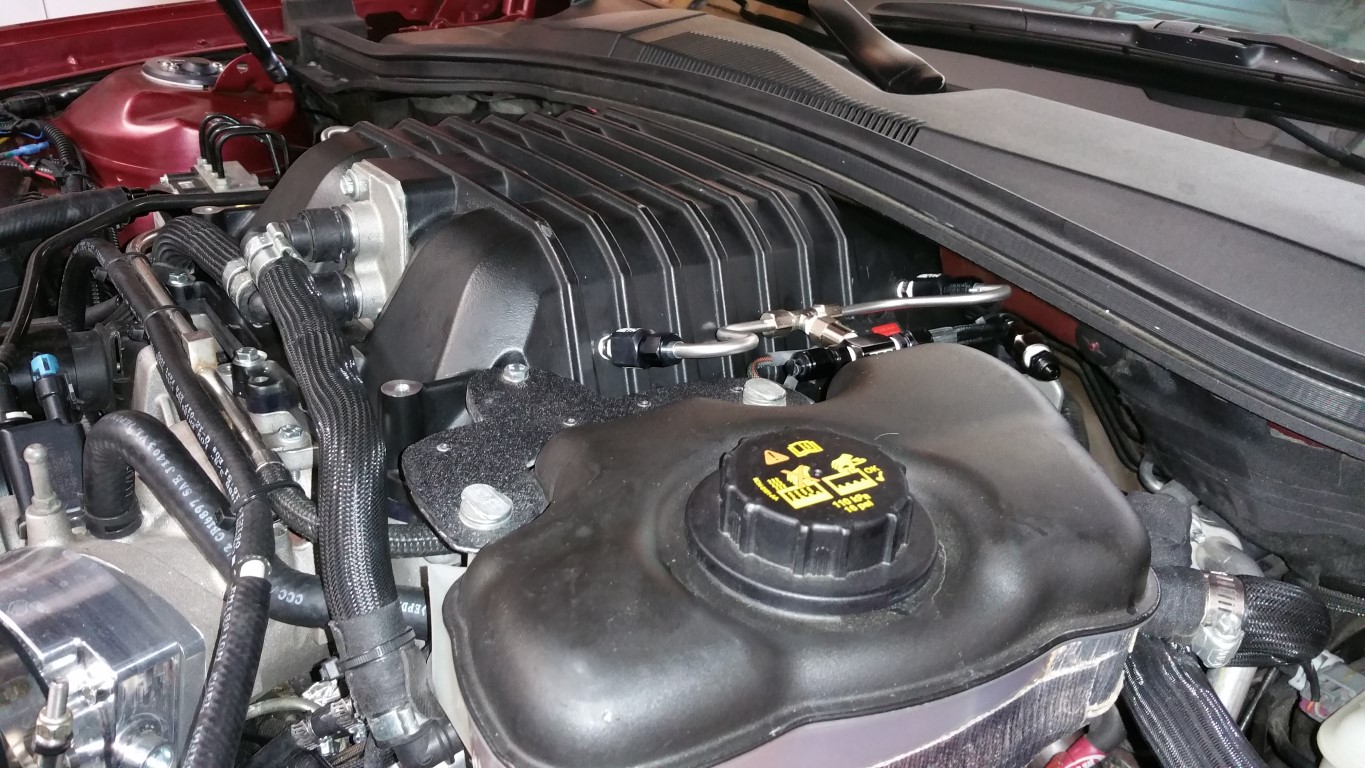 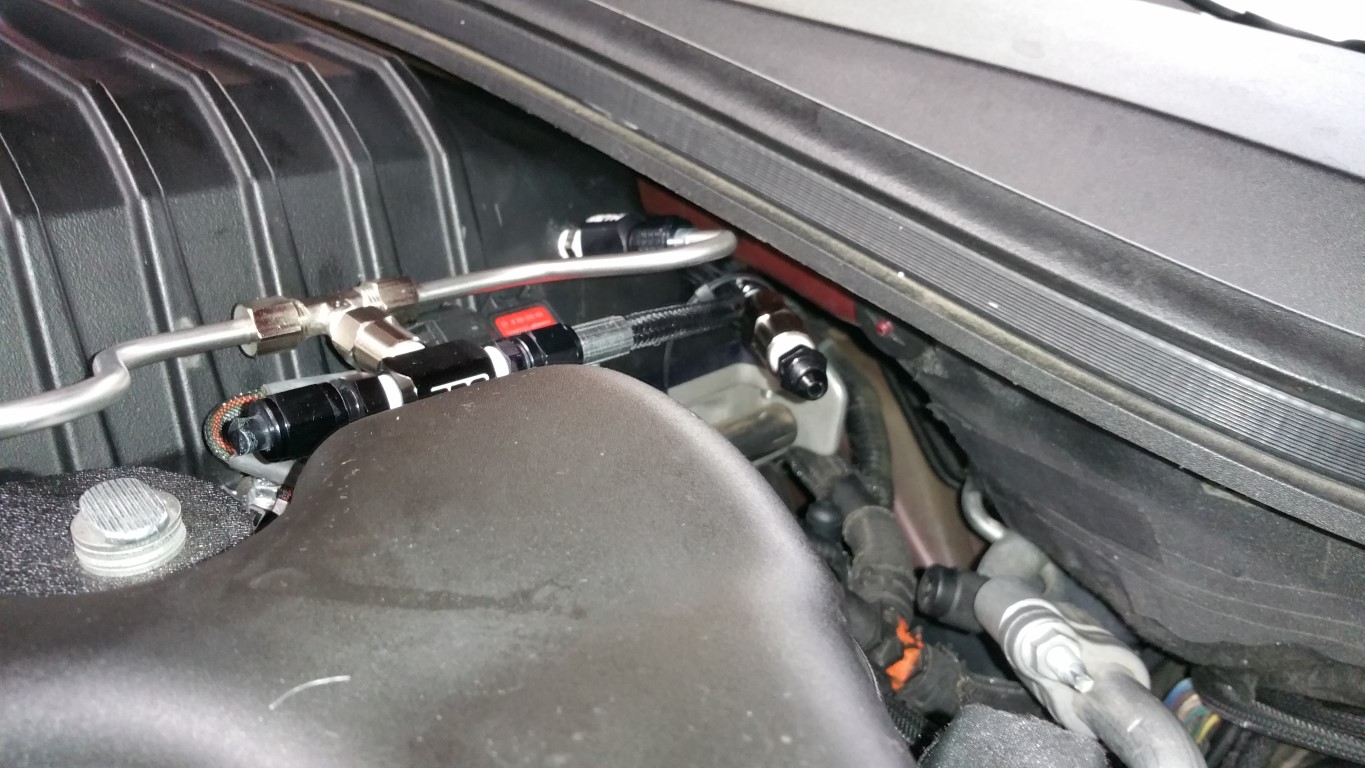 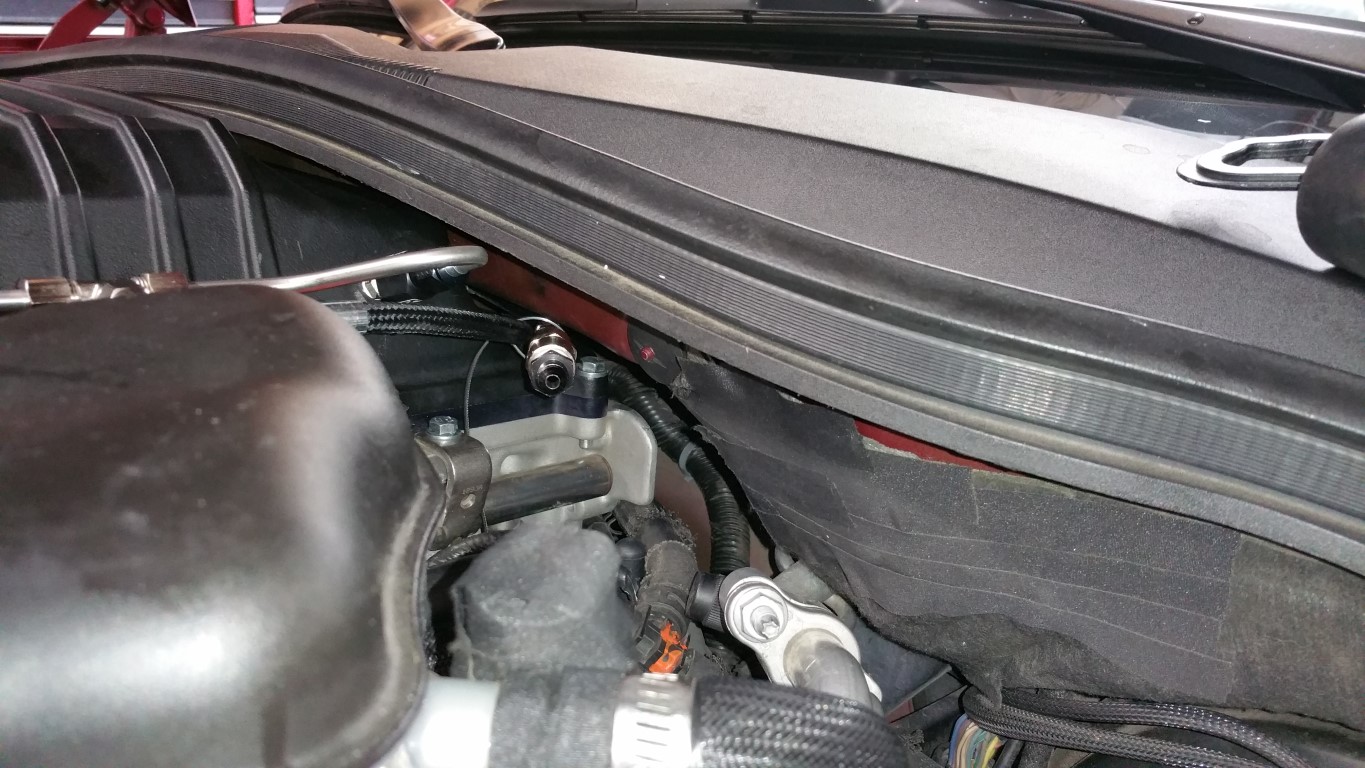 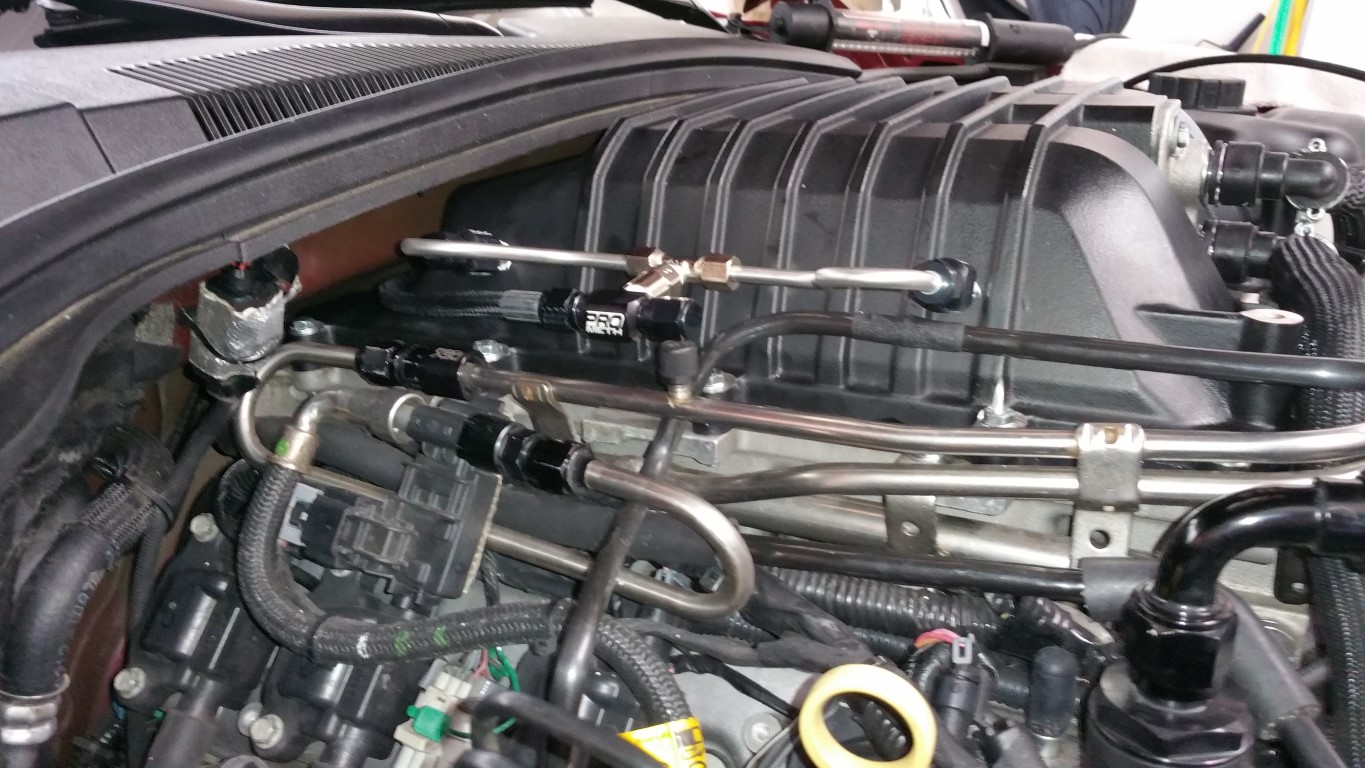 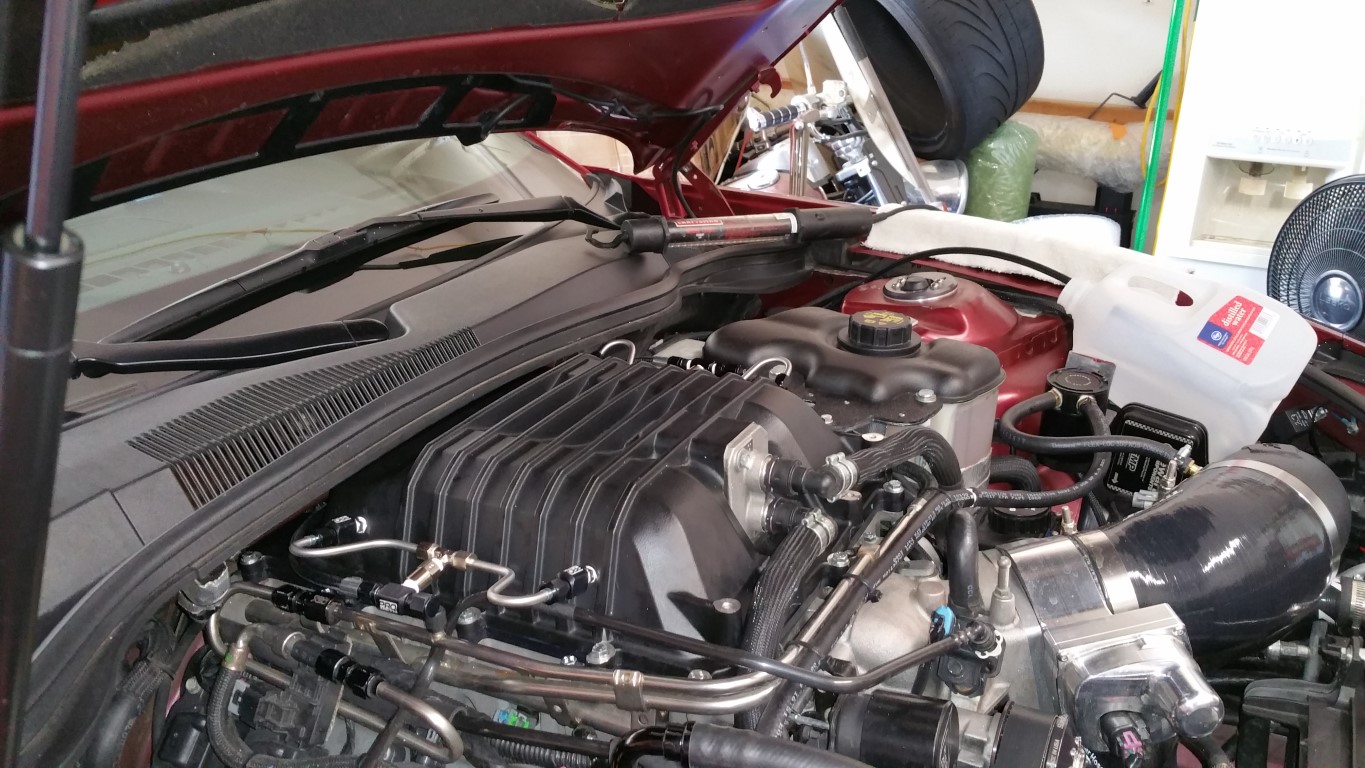 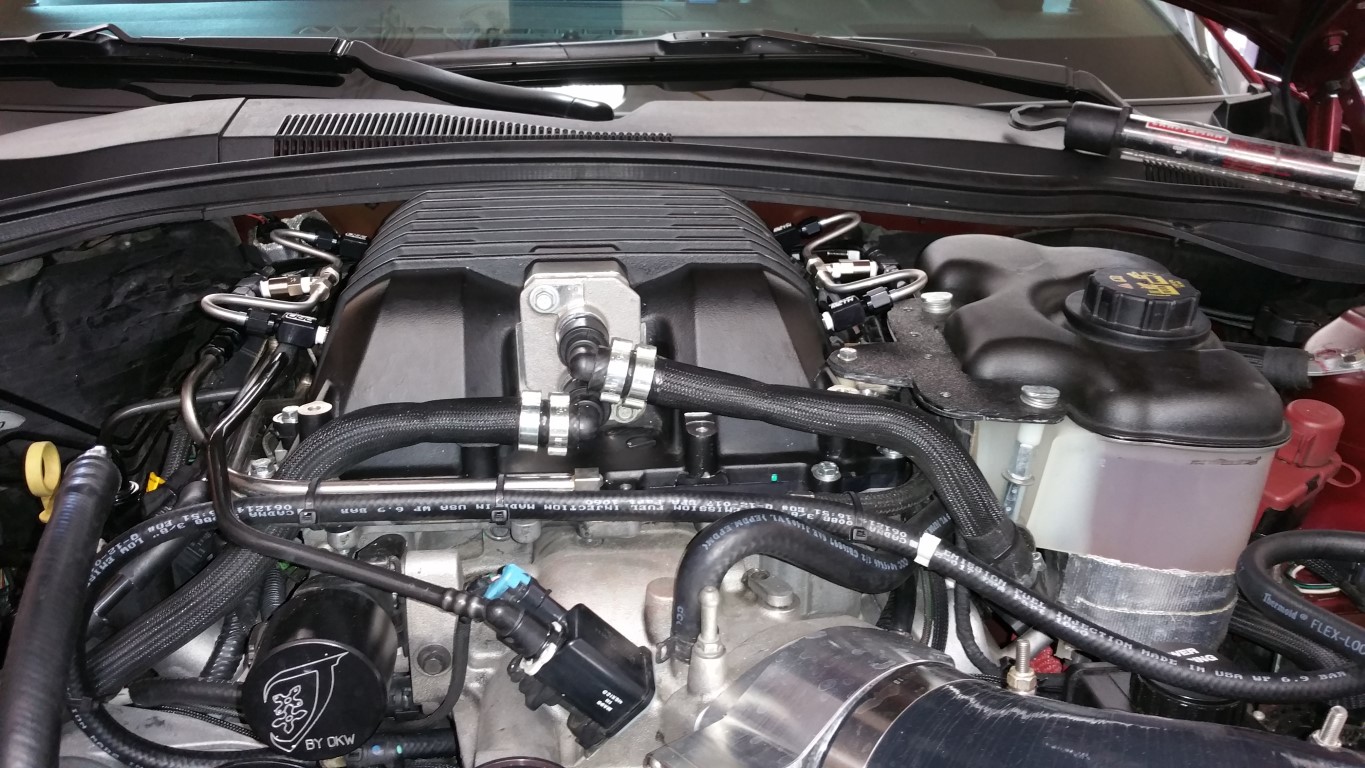 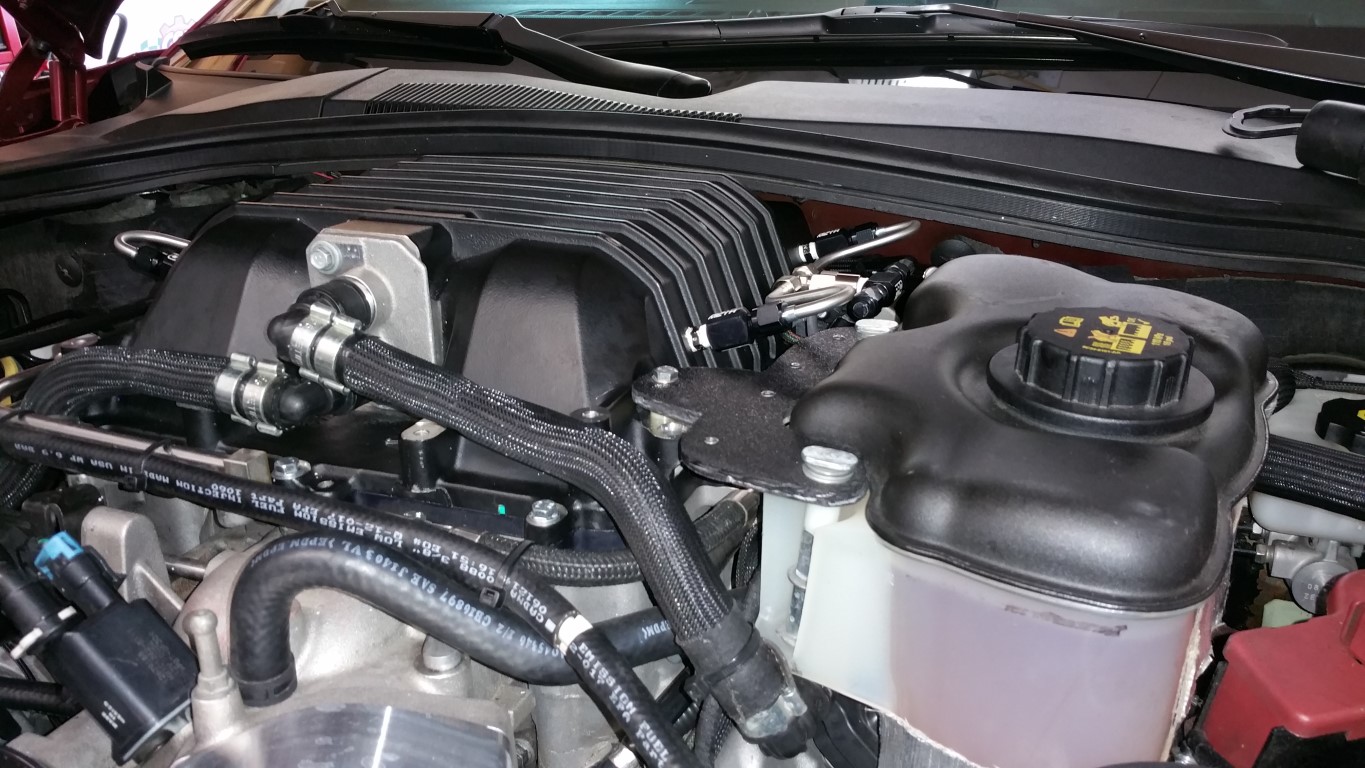 Test -- ran 4 gallons of distilled though before hooking up the line to the lid: 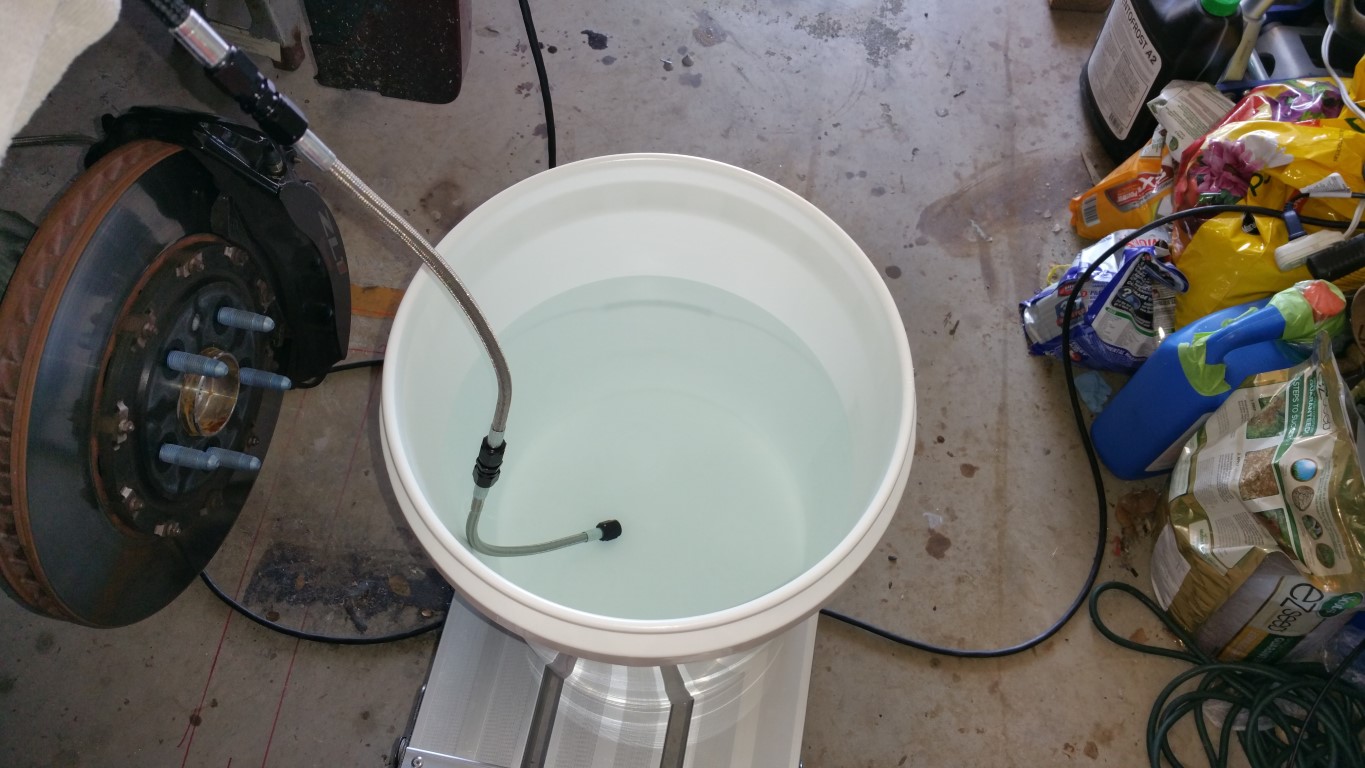 4 gallons of boost juice: 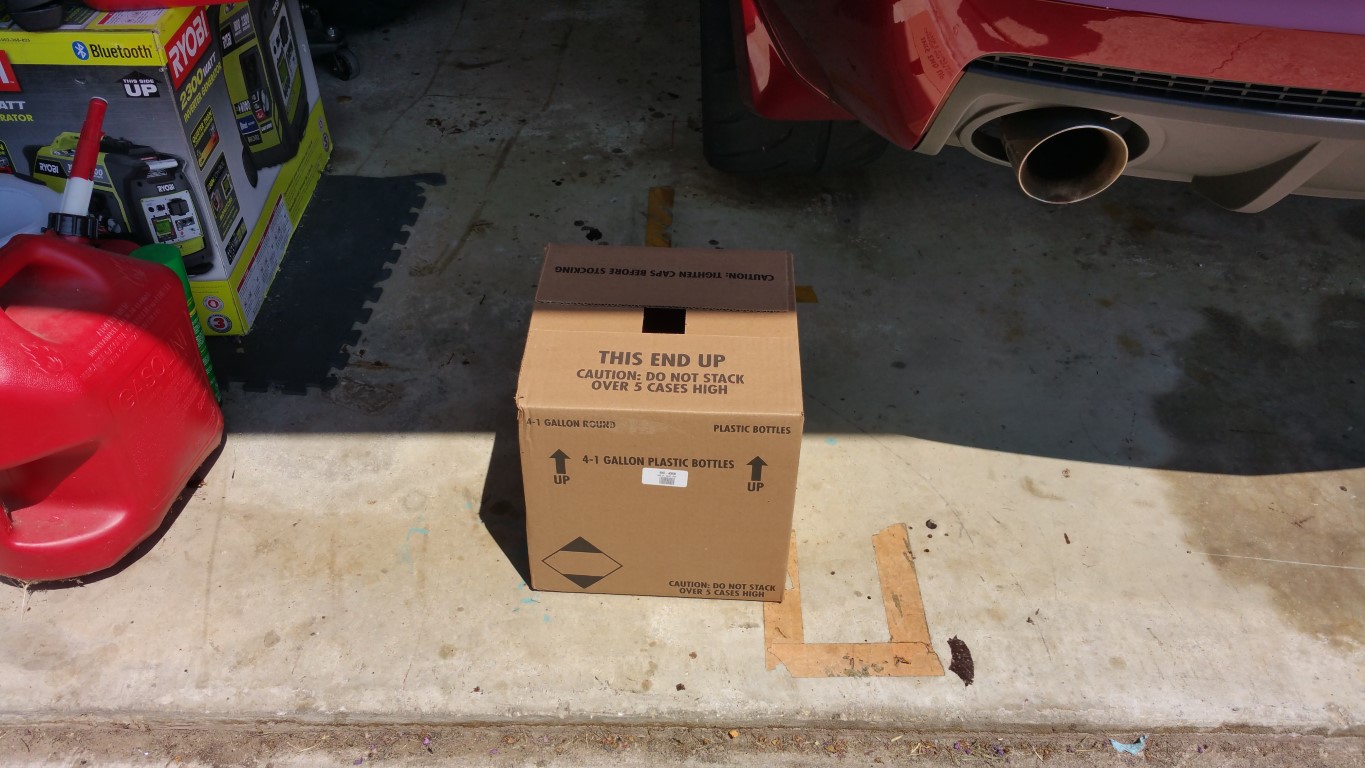 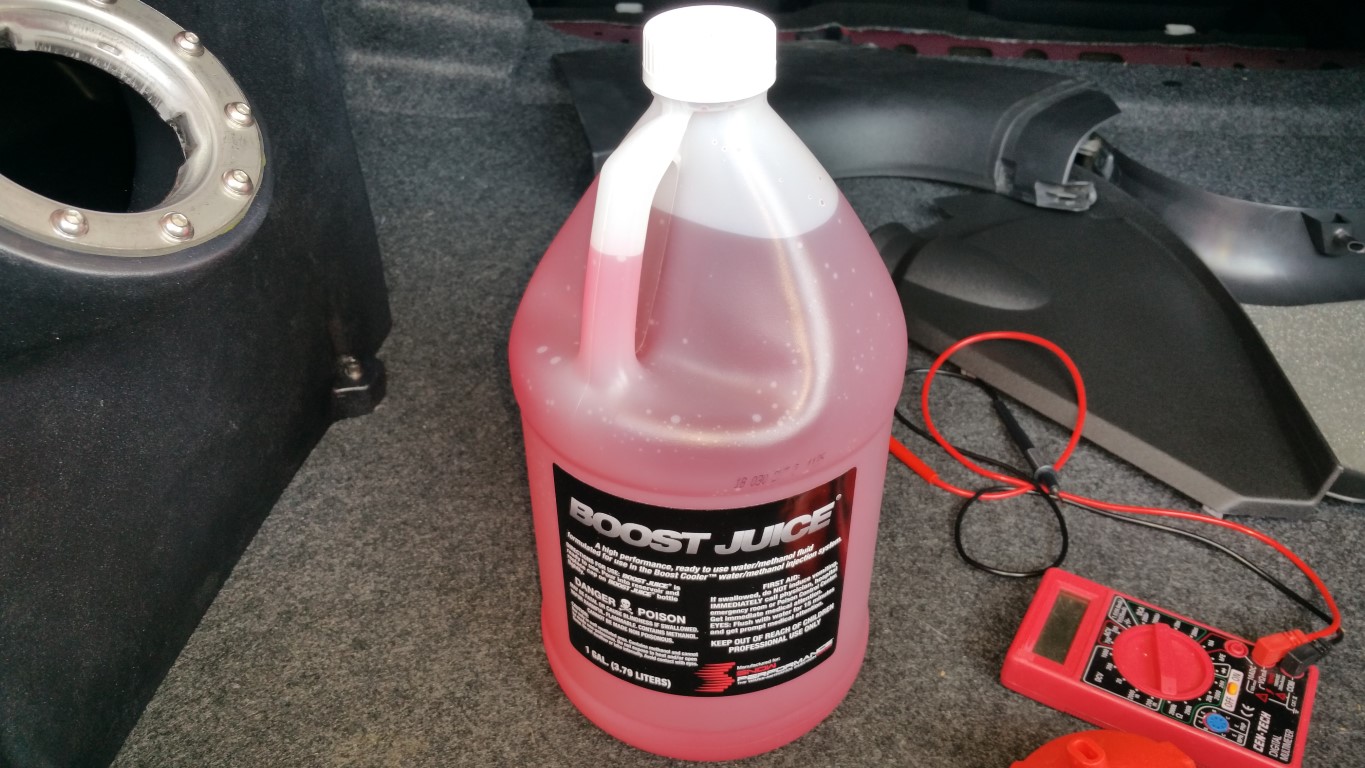 Sight Gauge: 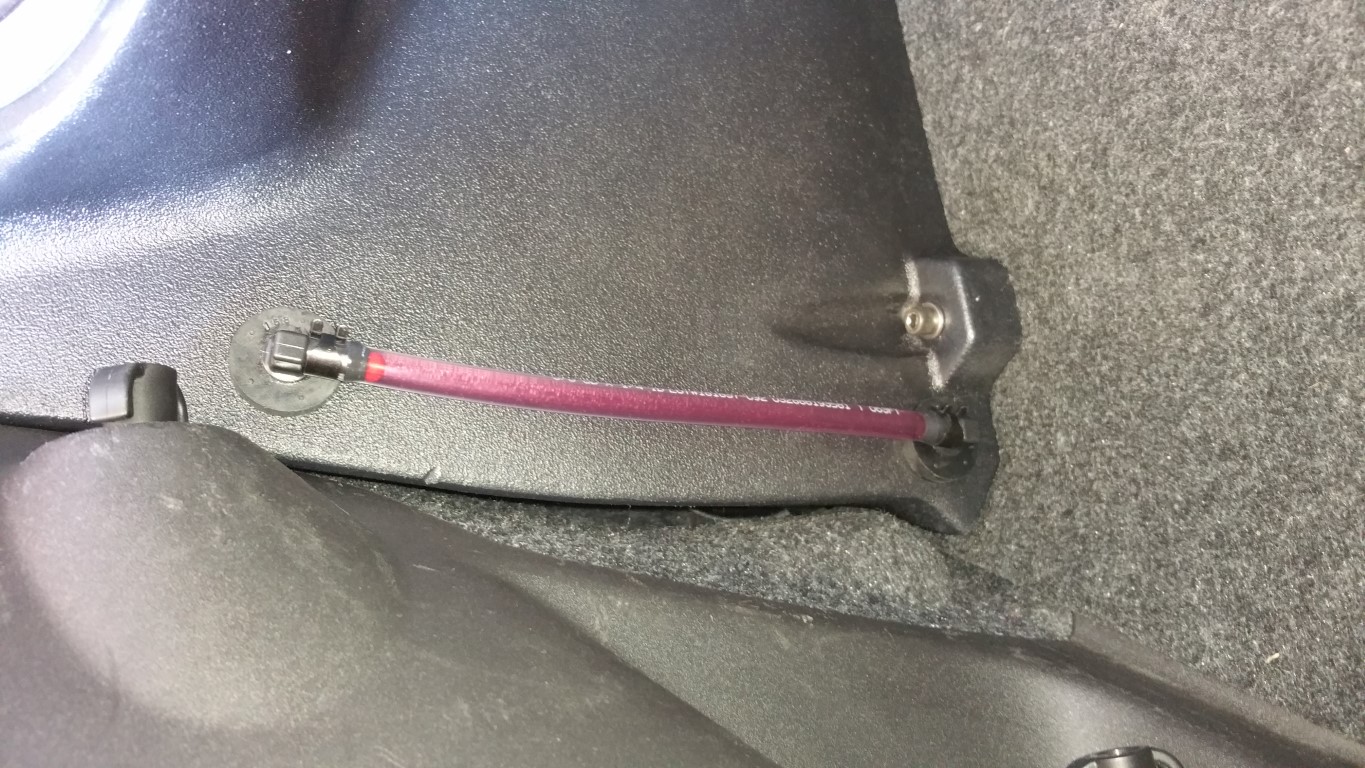 Line hooked up and ready for testing! 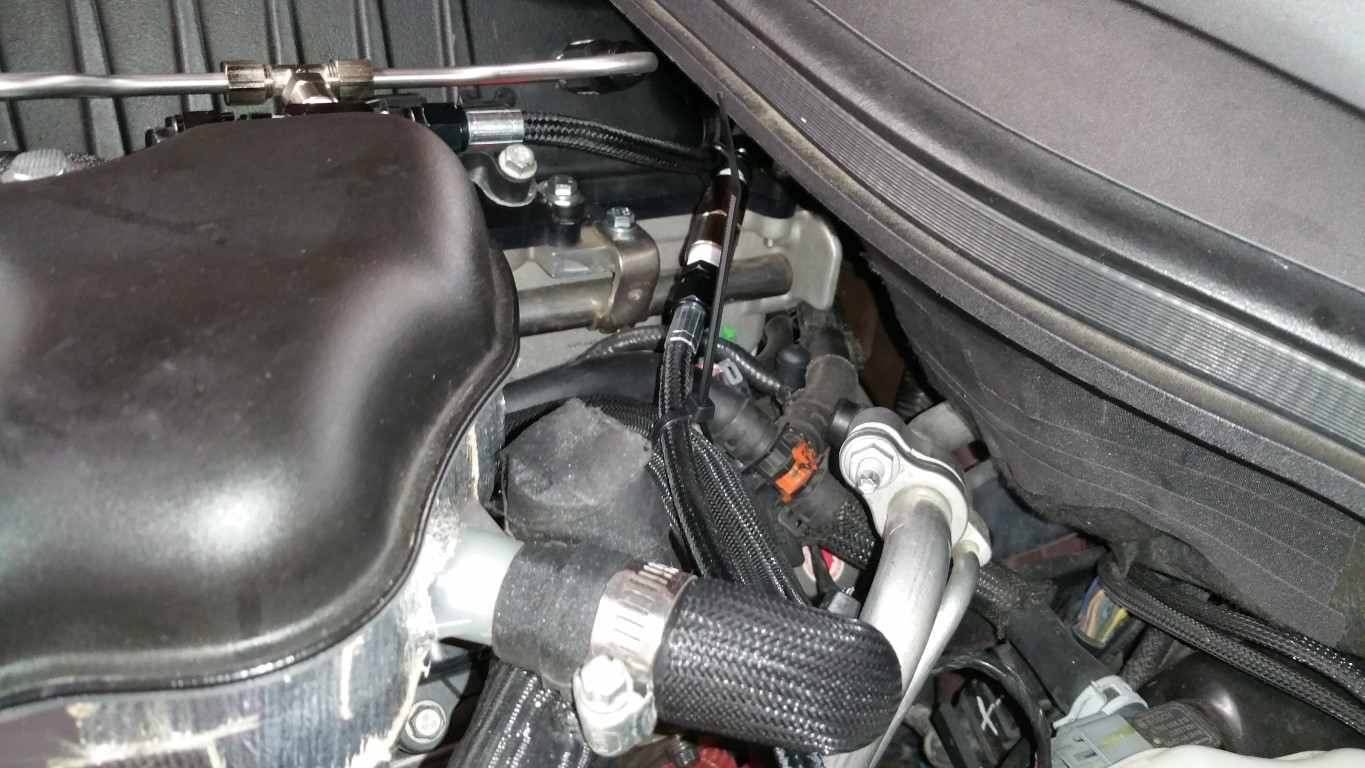 Car running after all put back together: The whole point of this install is I don't need the octane (E85 has me covered) but, I do want to 'cool' IAT2 temps while racing -- gonna see just how long 4 gallons goes... So, before I button up the interior, picked up some 3M sound proofing material (like the factory stuff). Just for the rear seat area to 'calm' down the Hendrix bushings ;o) 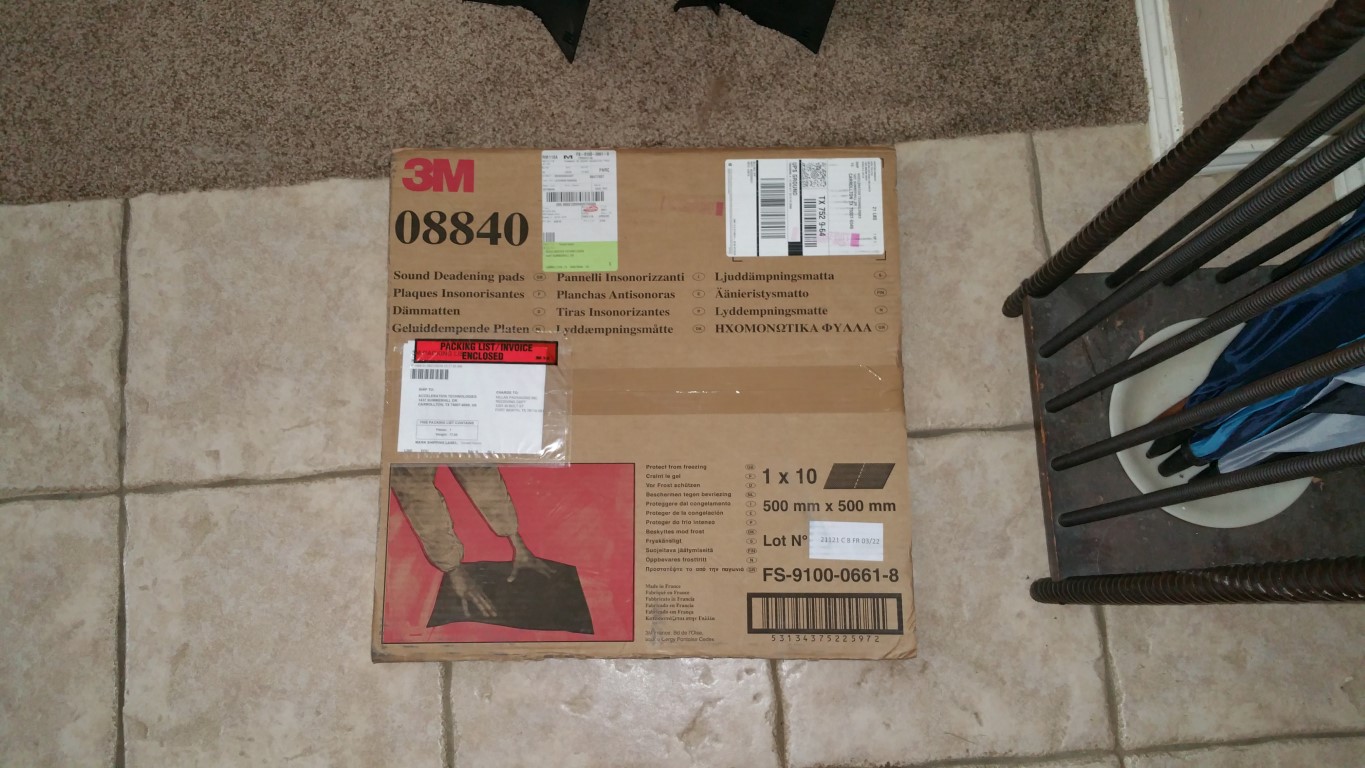 -Don
__________________
747 RWHP 794 RWTQ
"Horsepower sells cars, torque wins races." - Enzo Ferrari See My Build: http://www.camaro5.com/forums/showthread.php?t=385577 Last edited by hammdo; 08-26-2018 at 01:28 PM. |
|
|
|
|
|
08-26-2018, 01:31 PM
|
#2194 |
|
CamaroFans.com

|
WoW... VERY nicely done!!
__________________
 |
|
|
|
|
08-26-2018, 01:36 PM
|
#2195 |
|
'It's an experiment'
Drives: [COTW 2/09/15] '11 GPI LSA SC Z/LE Join Date: May 2014
Location: Dallas TX
Posts: 8,693
|
Thanks! It’s been fun...
Lines couldn’t go up any higher on the lid.. measured a lot! Now let’s see how it cools while racing and how long it last per session... That’ll be expensive ;o) Ran it for 20 minutes, Lambda was spot on at idle, so that is a good sign... This is Rodney’s tuner kit (has the gauge) but I need to remote mount that if I use it. Very nice kit! -Don
__________________
747 RWHP 794 RWTQ
"Horsepower sells cars, torque wins races." - Enzo Ferrari See My Build: http://www.camaro5.com/forums/showthread.php?t=385577 |
|
|
|
|
08-26-2018, 01:50 PM
|
#2196 |
|
CamaroFans.com
|
Looks to me like you nailed it. Can't wait to hear the results.
__________________
|
|
|
|
|
08-26-2018, 02:39 PM
|
#2197 |
|
'It's an experiment'
Drives: [COTW 2/09/15] '11 GPI LSA SC Z/LE Join Date: May 2014
Location: Dallas TX
Posts: 8,693
|
Me too! I'm going to data log tonight to see how things go...
-Don
__________________
747 RWHP 794 RWTQ
"Horsepower sells cars, torque wins races." - Enzo Ferrari See My Build: http://www.camaro5.com/forums/showthread.php?t=385577 |
|
|
|
|
08-26-2018, 04:52 PM
|
#2198 |
|
ZL1 Pilot

|
Did Rodney give you any kind of a nominal volume or amount to start with?
__________________
 GP Tuning 2.5 Cam, RPS Carbon Twin Clutch, Ported Blower, Kook's Headers, Cold Air Inductions CAI, ID850's, 9.17 Lower, 2.5 Upper, JMS BAP, Pedders Front Radius Arm Inserts, Whiteline Subframe Inserts, Tuned by me with HP Tuners Idle Clip Link...........https://www.youtube.com/watch?v=gTL8S9eHwbs |
|
|
|
|
|
|
|
 |
|
|


