You are browsing camaro5 

|
 02-02-2014, 03:07 PM
|
#57 |
|
Geek
|
I am planning on removing mine off-season if possible. I think once it has been installed the first time, it could be removed or reinstalled in less than 3 hours. We'll see.
__________________
01000111011011110110111101100100001000000110110001 11010101100011011010110010000001110111011010010111 01000110100000100000011101000110100001101001011100 110010000001101111011011100110010100100001
x = ac97968bd3df8f968c8cd3df998a9c94d3df9c8a918bd3df9c 909c94df8c8a9c949a8dd3df92908b979a8ddf998a9c949a8d d3df8b968b8cd1 x = ~x |

|

|
|
02-02-2014, 03:10 PM
|
#58 | |
|
Geek
|
Quote:
I'll cut a few more for your cage while we're at it. They were really easy to make.
__________________
01000111011011110110111101100100001000000110110001 11010101100011011010110010000001110111011010010111 01000110100000100000011101000110100001101001011100 110010000001101111011011100110010100100001
x = ac97968bd3df8f968c8cd3df998a9c94d3df9c8a918bd3df9c 909c94df8c8a9c949a8dd3df92908b979a8ddf998a9c949a8d d3df8b968b8cd1 x = ~x Last edited by thahemp; 02-02-2014 at 03:24 PM. |
|
|
|
|
|
02-02-2014, 03:50 PM
|
#59 | |
|
WICKDSS

Drives: 2011 1SS/RS IOM LS3 Join Date: May 2010
Location: Wichita, Kansas
Posts: 1,111
|
Quote:
__________________
2011 IOM SS/RS, M6. Look up our all generation Camaro club website at Heartland Camaros
Gforce Engineering Drivetrain, ECS 1500 Supercharger, TSP Cam, Alky Controls Meth single nozzle. 91 octane, 698 RWHP 625 rwtq. 4200#+, Tuned by Justin "Justune" Kalwei 11.57 @ 126.8 mph with a crappy 1.80 60'.....still learning to drive....M&H DR's and skinnies on 17" Welds. |
|
|
|
|
|
02-02-2014, 04:01 PM
|
#60 |
Drives: 08' F250 Diesel & 10' Camaro 2SS Join Date: Nov 2010
Location: Gainesville,Fl
Posts: 1,362
|
I didn't read the thread but a heads up you need to put some type of spacer between the floors under the front feet in not when opening the door bars it will flex the floorboards and eventually crack you floor. I used some 1" thick wall tubing and sandwiched them between the 2 floor boards so it makes it a solid piece instead of just a sandwich plate with nothing in the middle.
If I had it to do over again I would have went to a shop and had it put in. This is a nice bolt in but it has many small fitment issues.
__________________
08' F250 CCSB 6.4L Diesel White & Black, Blacked out, 580RWHP @ 55psi 13.21 @ 101mph
10' Camaro 2SS LS3 M6 White & Black, Blacked out, 684 RWHP & 633 FT.LBS @ 10psi 10.82@130mph TVS2300 ,Hendrix Street Slayer Twin Carbon Clutch, Dana 60 3.73, DSS 1400HP Axles,JRe cam & LaMotta Performance tuned,LPE Fuel, AI Super Chiller,MT ET Streets |
|
|
|
|
02-02-2014, 05:36 PM
|
#61 |
|
Master ASE, GM, LSX Tech.

Drives: 2010 Camaro SS Join Date: Oct 2012
Location: Austin, TX
Posts: 1,034
|
I have installed 2 of these bars. It does take some time and patience to get it right. As stated before the instructions are useless. One recommendation I have is to wrap the mounting plates with some tape. The square plates are sharp and will scratch the interior when trying to get the bar inside. Removing the passenger door makes things a lot easier. It's a tight fit even with all the interior removed.
I found it better to cut the holes in the carpet a little smaller, this gave it a clean, snug fit around the bars. If you cut the holes to big you are going to see the insulation under the carpet. Cutting the holes in the rear panels can be a challenge to get them aligned right. Measure and remeasure. When you are drilling the holes in the swing out bars keep in mind they pivot on the bolt. There needs to be a gap in the swing joint so the bar does not hit the mounting bracket.
__________________
2010 2SSRS A6, Custom Pat G. Cam, WCCH Cylinder Heads, Kooks Headers/Exhaust, BTR Valvetrain, Fluidampr 25% UDP, All Engine ARP bolts, Flex-a-lite radiator/Trans cooler, Yank converter, PFADT Suspension, ADM Race Intake/Scoop, Torq tow hook, CFD auto shifter, Dynojet AFR gauge, Aeroforce scan gauge, Brake Performance rotors/pads
Prothane bushings, ZL1 wheels, spoiler, Z/28 wickerbill, 1LE Aero/Suspension Package, Anderson Composites COPO Carbon Fiber Hood, LED lighting, Elite Catch Can, Improved Racing oil pan baffle, crank scraper, windage tray 480 RWHP 452 RWTQ + Nitrous Express 150 Shot |
|
|
|
|
02-02-2014, 10:17 PM
|
#62 |
|
Geek
|
Lots of good info. Not sure what is meant about cracking the floor, but i'll watch out for it. Just like any mod... Slow and steady.
__________________
01000111011011110110111101100100001000000110110001 11010101100011011010110010000001110111011010010111 01000110100000100000011101000110100001101001011100 110010000001101111011011100110010100100001
x = ac97968bd3df8f968c8cd3df998a9c94d3df9c8a918bd3df9c 909c94df8c8a9c949a8dd3df92908b979a8ddf998a9c949a8d d3df8b968b8cd1 x = ~x |
|
|
|
|
02-02-2014, 10:32 PM
|
#63 |

Drives: 62 Chevy & 2021 1SS/1LE manual Join Date: Aug 2010
Location: Kentucky
Posts: 893
|
ok im done for the night. no really new pics. i got the 16 holes drilled in the car and ive marked and drilled the backing plates for the rear wheel wells. ive got the sub frame connectors off, the car jacked up and the rear tires and rear inner fenders removed.
tomorrow i have to scrape a little more goo off, modify and drill the main hoop backing plates, and bolt in the four point. after that, im going to start on my seat brackets. they are going to be a job as well. those sparco seats set soo low, im going to have to raise them up (im short. 5'6"). the seat brackets will also incorporate the lap and sub belt mounts so they have to be super strong. i hate to add weight to the car but these seat brackets have to be safe. |
|
|
|
|
02-03-2014, 05:22 AM
|
#64 |
Drives: 2010 2ss ss/rs abm, 2016 2ss/rs hbm Join Date: Feb 2009
Location: N. Phx, Az
Posts: 1,332
|
This is the article some of you are referring to, we installed in in my car back in July 2011. 20 hours with 2 very skilled technicians working on it, 1 a GM Master tech that knew exactly how that car came apart.
Measure and re-measure is the best advise I can give you guys. The plastic panels will scratch/mar very easily, but at least they are easy to cut. We did this install for Drag Racer Magazine so we kept close tabs on the time, it actually took us over week because we first gutted the interior, test fitted it, marked and drilled all the holes, and then sent it out to have it custom painted to match the accent color on the car and the seat covers. While it was being painted, we cut all the carpet holes and and plastic panels, sent the headliner out to be recovered to match the seats and I added Cascade Audio Electronics sound deadening mat, its like Dynamat but 1/3 the weight and easier to work with. I did the entire interior. All this additional work is not included in the 20 hours. The RPM cage is awesome and very user friendly to live with on a daily basis but it is a job that requires a lot of patience to do a clean quality install.
__________________
URR2SLO - If you're not going fast enough, get out the way......
|
|
|
|
|
02-03-2014, 06:13 AM
|
#65 | |
|
WICKDSS
Drives: 2011 1SS/RS IOM LS3 Join Date: May 2010
Location: Wichita, Kansas
Posts: 1,111
|
Quote:
__________________
2011 IOM SS/RS, M6. Look up our all generation Camaro club website at Heartland Camaros
Gforce Engineering Drivetrain, ECS 1500 Supercharger, TSP Cam, Alky Controls Meth single nozzle. 91 octane, 698 RWHP 625 rwtq. 4200#+, Tuned by Justin "Justune" Kalwei 11.57 @ 126.8 mph with a crappy 1.80 60'.....still learning to drive....M&H DR's and skinnies on 17" Welds. |
|
|
|
|
|
02-03-2014, 05:53 PM
|
#66 |
|
Drives: 62 Chevy & 2021 1SS/1LE manual Join Date: Aug 2010
Location: Kentucky
Posts: 893
|
got the four point and the connectors back in and torqued. i had to just cut the main hoop backing plates. they did not even come close to fitting the contour of my car. other than that, everything bolted down good and tight, one bolt on each side was very close to the sub frame connector. its all good though. its square in the car and all the gaps are even side to side. its level to the roof of the car. ill leave the inner fenders out til i finish the six point and torque everything one moe time. im going to start on my seat brackets wednesday. im not going to be able to do anything tomorrow.
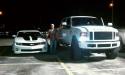
some more pics and one of my crew!!! |
|
|
|
|
02-03-2014, 06:00 PM
|
#67 |

|
Rear section almost done.
__________________
 |
|
|
|
|
02-03-2014, 06:13 PM
|
#68 |
|
WICKDSS
Drives: 2011 1SS/RS IOM LS3 Join Date: May 2010
Location: Wichita, Kansas
Posts: 1,111
|
I'll be curious on the carpet cutting, how you guys did it. Still waiting for my rollbar...
__________________
2011 IOM SS/RS, M6. Look up our all generation Camaro club website at Heartland Camaros
Gforce Engineering Drivetrain, ECS 1500 Supercharger, TSP Cam, Alky Controls Meth single nozzle. 91 octane, 698 RWHP 625 rwtq. 4200#+, Tuned by Justin "Justune" Kalwei 11.57 @ 126.8 mph with a crappy 1.80 60'.....still learning to drive....M&H DR's and skinnies on 17" Welds. |
|
|
|
|
02-03-2014, 06:28 PM
|
#69 | |
|
|
Quote:
I have a guy that is going to re-hem my floor mats once I cut them. Should be a nice touch. Especially since I just got a brand new set of Lloyd customs.
__________________
|
|
|
|
|
|
02-03-2014, 07:19 PM
|
#70 | |
|
WICKDSS
Drives: 2011 1SS/RS IOM LS3 Join Date: May 2010
Location: Wichita, Kansas
Posts: 1,111
|
Quote:
__________________
2011 IOM SS/RS, M6. Look up our all generation Camaro club website at Heartland Camaros
Gforce Engineering Drivetrain, ECS 1500 Supercharger, TSP Cam, Alky Controls Meth single nozzle. 91 octane, 698 RWHP 625 rwtq. 4200#+, Tuned by Justin "Justune" Kalwei 11.57 @ 126.8 mph with a crappy 1.80 60'.....still learning to drive....M&H DR's and skinnies on 17" Welds. |
|
|
|
|
|
|
|
|
 |
|
|


