You are browsing camaro5 

|
 12-31-2012, 10:13 PM
|
#1 |
 
Drives: 2013 Blue Ray Metallic 2LT RS Join Date: Dec 2012
Location: Indiana
Posts: 98
|
Sub, Amp, and Footwell Lighting Install Pics
Just purchased a 2013 Blue Ray Metallic 2LT/RS; I've had it two weeks today and so far this is what I've done.
I have the Boston Acoustics system so I started with this amp harness and the recommended ground loop isolator. The factory amp is located on the drivers side, in the trunk, next to the brake lights. It took about 2 minutes to plug in the harness, what a time saver! Well worth the money. I ran the amp turn on lead and one set of RCA's hooked to the rear channels to the back seat area. *** Amp Wiring Harness *** http://********.com/Chevrolet-GMC-Su...-Channels.html Next I ran 4 Gauge power and ground wire from the battery to the back seat area so they would be in place once I have the speaker box placed. The power wire is fused about 8 inches from the battery. Next I installed the following box. The installations instructions are pretty straight forward. The box is a tight fit and looks great! I installed the box empty, then installed the wiring, and then the subs and grilles. I'm not sure if it was just my box or the speaker choice but the speakers were very tight. I ended up having to start all eight screws on each speaker and work my way around them tightening them a turn or so each time around until everything was fully tightened. FYI: When the box is installed you can still pull the carpet up enough to access the battery without any issues. *** Triple 10" Rear Firing Sub Box *** http://********.com/Chevrolet-GMC-Su...ler-clone.html Next I wired up the Subs, Kicker CVR10 COMPVR 10" 4-Ohm *** Speakers 3 10" Kickers *** http://www.kicker.com/CompVR_Aluminized    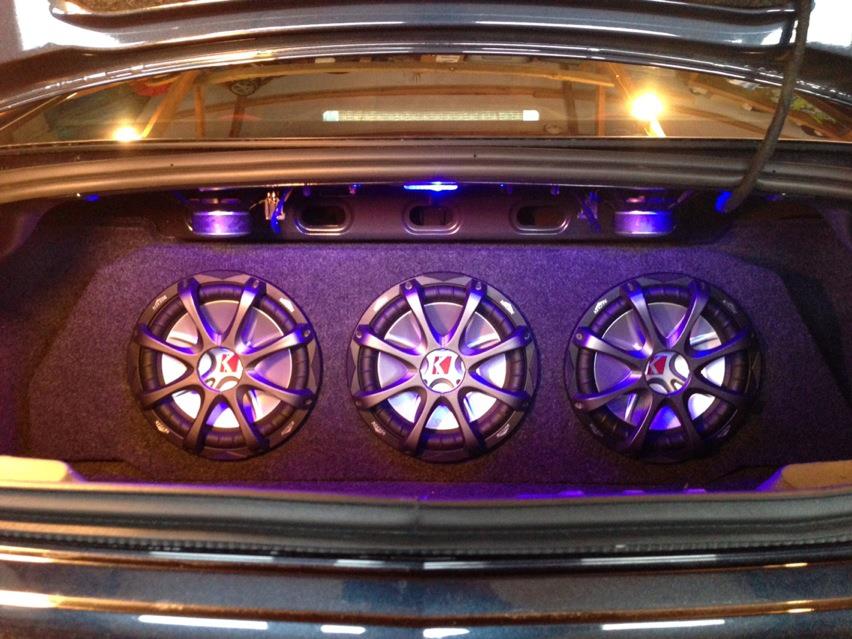 I wired in 4 LED strips in the trunk; two fit perfect in the groove on both sides of the factory light.  Time to squeeze into the back seat and wire up the amp. I ended up choosing the Alpine MRX-M110 with the Remote level knob *** Alpine Amp *** http://www.crutchfield.com/p_500MRXM....html?tp=35834 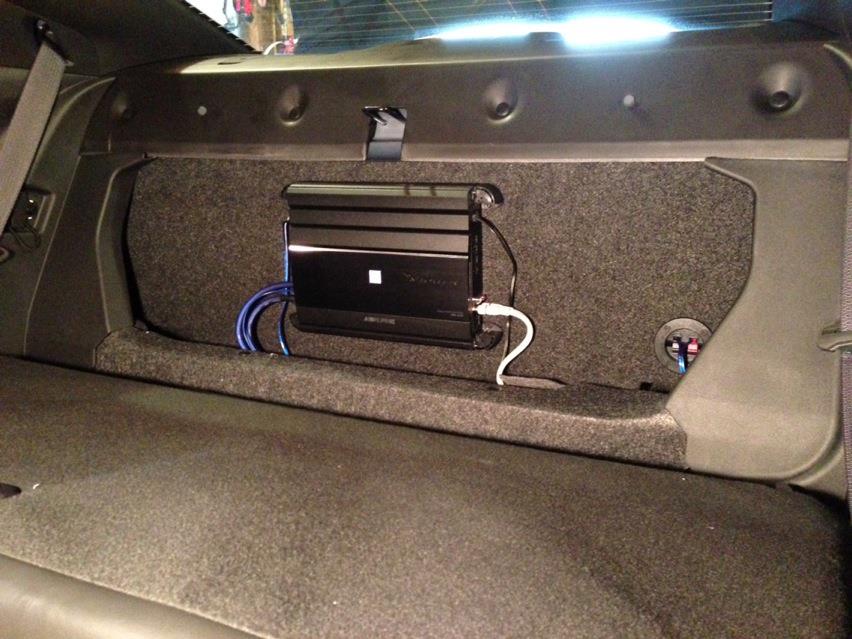 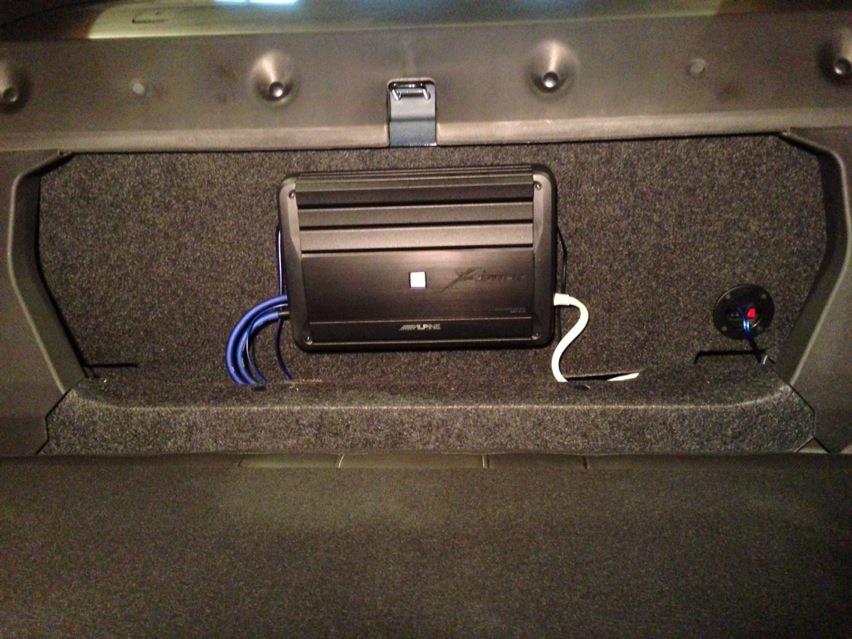  I have to say, it sounds great. When I was building the car I was looking at doing the factory sub upgrade, I couldn't see spending $1,200+ on a box that sits in the trunk and looks totally out of place. I done everything above for less than $1,000 and it looks a lot better than the factory option! I'm sure it hits a lot harder too. Now for lighting... I wanted the "daytime running lights" to be on at night as well so I installed the DRL Light Harness from Gen5DIY. It was a very simple install. http://www.gen5diy.com/PnP_harnesses...ts/drl-harness All of the lighting is Blue, I purchased replacement Dome and trunk lights from Gen5DYI; http://www.gen5diy.com/Lighting/cour...s/5-chip-led-2 as well as the Footwell Lighting Kit, http://www.gen5diy.com/interior_mods...Foot_well_kits This wasn't exactly what I expected. I expected to be able to unplug a harness on the car and add this in line with it, just like the DRL harness and the Amp harness. With this kit the LEDs are each wired to a connector that allows you to unhook it from the footwell harness. The harness itself has to be spliced into the cars wiring. If you can splice into the cars wiring, using T-Taps, etc, then save your money and just purchase the LED strips and do all of the wiring yourself. I purchased 10 additional LED Strips on eBay for only $16, they are 30CM long and have 15 LEDs in each strip, they are also pre-wired. I used the additional LEDs to wire up the rear footwells and the trunk lighting. http://www.ebay.com/itm/180995002121 Here's the rear seat; lift up on the front of each side of the seat to release it, then push down on the back of the seat and pull it forward. The seat pops right out making it a lot easier to attach and wire the lights.  The LEDs have adhesive on the back and then I used small cable ties to secure them as well.     Any questions just ask! Hopefully this helps someone out. |

|

|
|
12-31-2012, 10:27 PM
|
#2 |
 
Drives: 45th Anniversary Join Date: Jul 2012
Location: Chico Ca
Posts: 462
|
So how much did the speaker system setup cost you?
__________________
45th Anniversary
MRT v2.0 CAI |
|
|
|
|
12-31-2012, 10:30 PM
|
#3 |
|
Drives: 2013 Blue Ray Metallic 2LT RS Join Date: Dec 2012
Location: Indiana
Posts: 98
|
All of the sound was less than $1,000; harness, amp wiring, sub box, subs, grilles, amp, amp remote level knob
|
|
|
|
|
12-31-2012, 11:01 PM
|
#4 |
    
|
I've been delaying doing this myself....
Yours looks great! You say you can get to the battery ok? Do you have a spare tire back there? And would you be able to get to it? Not that I've ever needed it - knock on wood...
__________________
|
|
|
|
|
12-31-2012, 11:10 PM
|
#5 |
|
Drives: 2013 Blue Ray Metallic 2LT RS Join Date: Dec 2012
Location: Indiana
Posts: 98
|
Getting a spare out should be fine. Mine has nitrogen in the tires and came with a pump/seal kit; no spare.
__________________
 |
|
|
|
|
12-31-2012, 11:38 PM
|
#6 |
 
Drives: 2015 1SS 1LE MPP Join Date: Nov 2012
Location: Duluth, GA
Posts: 207
|
This is awesome information!! Thanks for sharing!
|
|
|
|
|
01-01-2013, 12:28 AM
|
#7 |
 
|
Very nice and clean looking. Awesome!
|
|
|
|
|
01-01-2013, 12:35 AM
|
#8 |
      
Drives: '13 camaro zl1 '08 daytona charger Join Date: Dec 2012
Location: san diego
Posts: 3,176
|
when you put on your turn signal is it very loud when you use it mine is don't know what the problem is.
|
|
|
|
|
01-01-2013, 07:20 AM
|
#9 |
|
old school chevy rodder

Drives: 2013 2SS/RS Manual,DM exhaust,CRT Join Date: Jul 2012
Location: Oregon
Posts: 5,587
|
The stock footwell lighting is a four wire red black blue green running to a single LED on each side so if this kit helps splice into it to get more power without tearing apart the dash thats good, as I tried getting power from the low volt four wire system and nada..... SO does it work to go off the four wire? or is a person stuck taking the dash apart?
|
|
|
|
|
01-01-2013, 07:47 AM
|
#10 |
|
Drives: 2013 Blue Ray Metallic 2LT RS Join Date: Dec 2012
Location: Indiana
Posts: 98
|
There isn't any noise in the system, I'm not sure where your turn signal issue is coming from, sorry.
I didn't get the factory footwell lighting so I'm not sure about those wires. However, I have all of the footwell LEDs running off of the same circuit as the dome light. Go to the front passenger side footwell and take off the sill and then the vertical cover at the front end of the sill. The connector closest to the door has a grey wire in it that you can tap in to, there's also a ground in there you can use. There is plenty of power there to run the five LED Strips I used. Sent from my iPad using Tapatalk HD
__________________
|
|
|
|
|
01-01-2013, 08:41 AM
|
#11 |
|
Montani Semper Liberi

Drives: 2011 Black 2SS/RS w/ IOM stripes Join Date: Feb 2010
Location: Masontown, WV
Posts: 4,841
|
damn that is alot of base....LOL
__________________
 Stainless Works 1 7/8 Long Tude Headers, Stainless Works High Flow Cats, Stainless Works Retro Chambered Catback, Z/28 Air Intake, RDP Tuned, FR41 Chrome Rims, 1100W stereo, 35% Tint |
|
|
|
|
01-01-2013, 10:42 AM
|
#12 |

|
Looks great. Good job.
__________________
 |
|
|
|
|
01-01-2013, 06:12 PM
|
#13 |

Drives: 2011 2ss Black/inferno orange Join Date: Sep 2012
Location: WI
Posts: 74
|
thats awesome! something ive been heavily considering doing, you were able to wire it to your stock radio?
|
|
|
|
|
01-01-2013, 07:27 PM
|
#14 |

Drives: 2013 Camaro 2LT RS Join Date: Apr 2012
Location: Phoenix Arizona
Posts: 75
|
Very clean
|
|
|
|
|
|
|
|
 |
| Tags |
| amp install, drl harness, footwell lighting, led lights, subs |
|
|


