You are browsing camaro5 

|
 12-27-2011, 09:42 PM
|
#57 |
|
Drives: G5.R Join Date: Sep 2010
Location: SoCal
Posts: 2,377
|
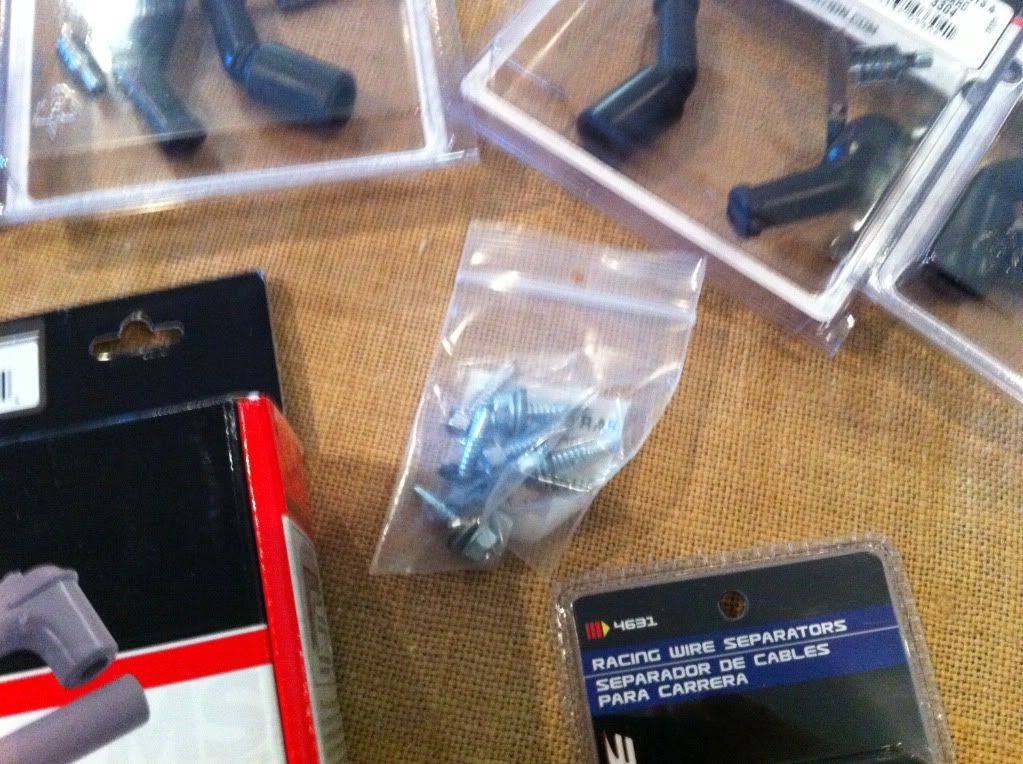
On a different note; the replacement radiator hoses I ordered were larger in diameter than whats call for. FYI, the hose are 1 1/4 inches not 1 3/4, LOL. I thought when The guy asked me how thick they were, that he was asking me to measure the outside.
 Oh well, live and learn. Oh well, live and learn. So while I'm waiting for new hoses, I figure I'd modify the factory lines. For those who are wondering why I would want to redo the radiator hose, when installing a Vararam intake, the radiator need to be push forward to make space for the intake. This pushes the hose to were it's very close to the pulley. Plus it crimps the hose were it bends which obstructs the flow. See picture below. I'm sure that it's not a problem running it this way but I figure, If I was going to freshen up the look in there, I should also address this area. The first thing I did was to clean up the hose a little bit. I took some nail polish remover and proceed to remove all the factory markings. Than I used Mothers "Back to Black" to bring the luster back. Hey, that rhymes,  . . 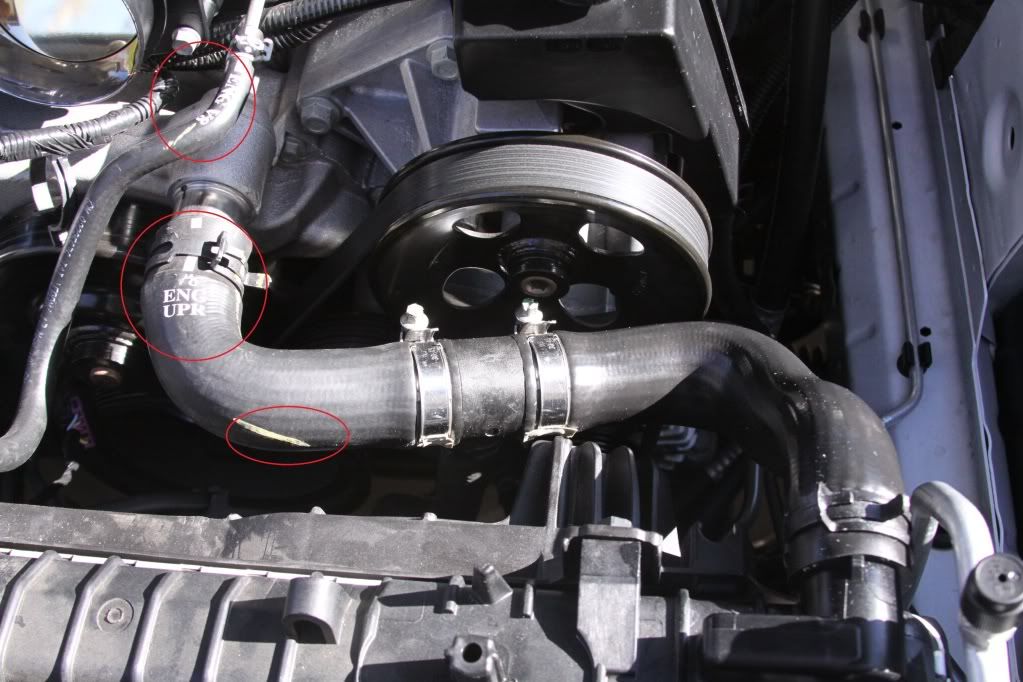 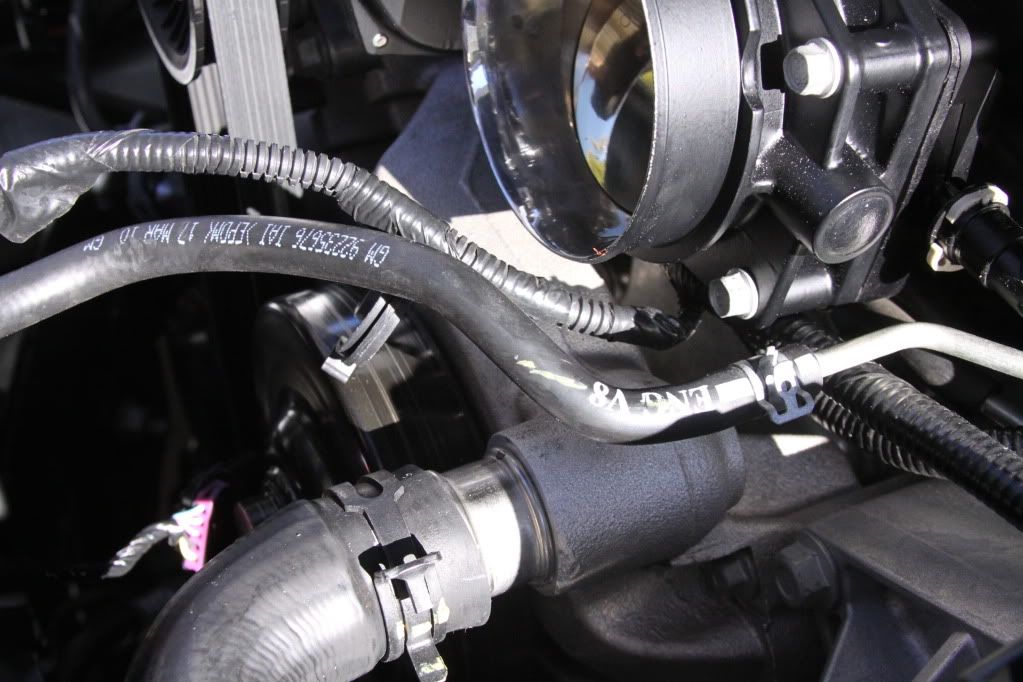 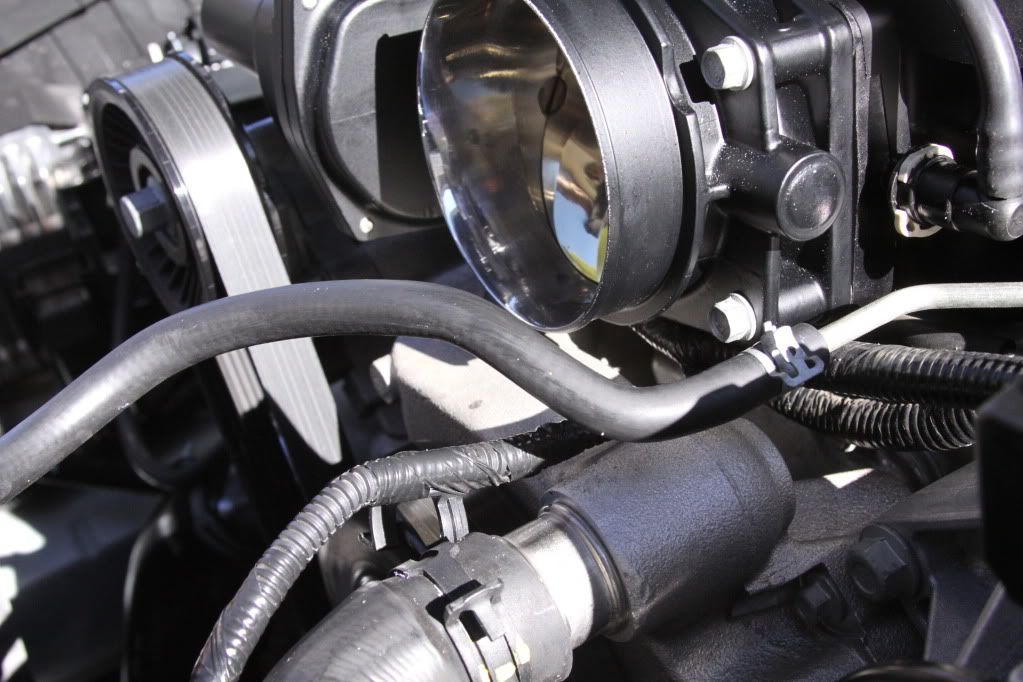 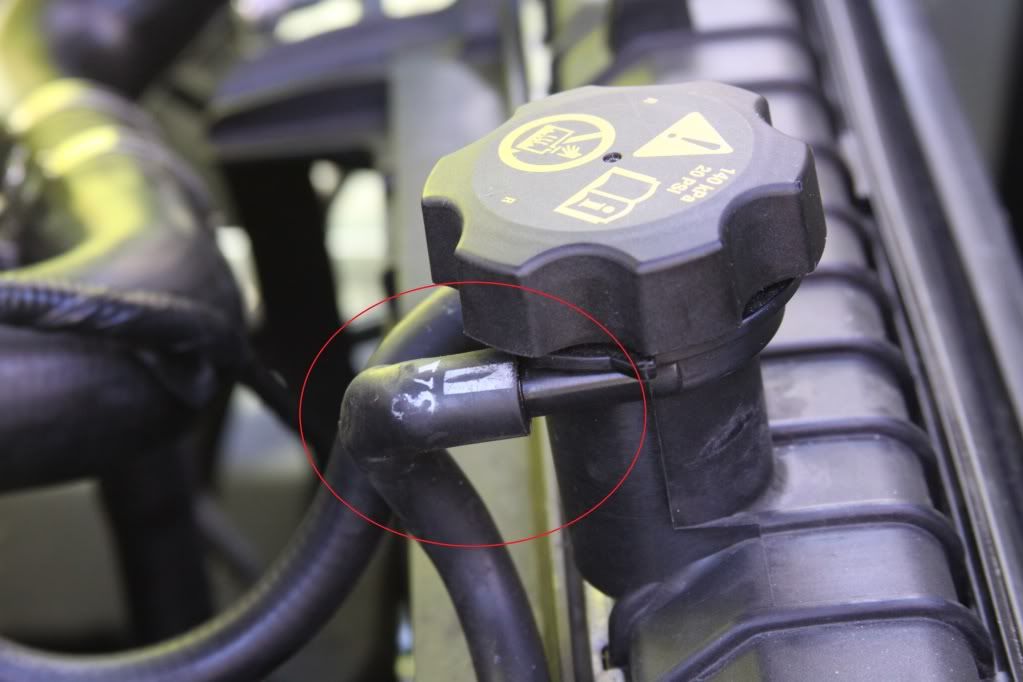 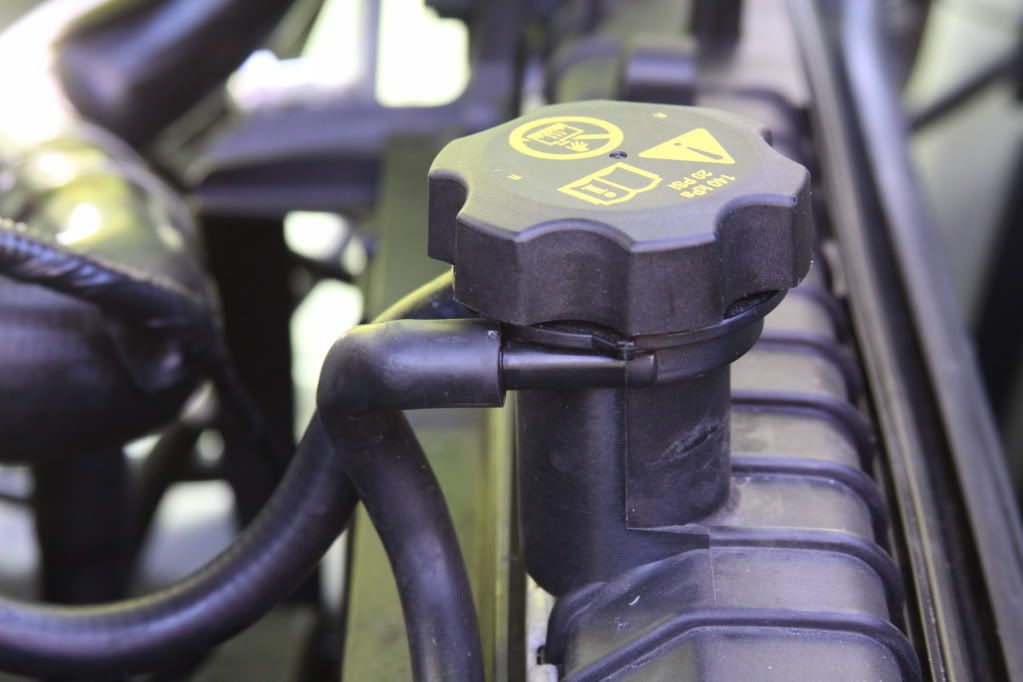 Well, you get the idea. One tip I can pass along... nail polish remover doesn't sit well with open flesh wound  just sayin'... just sayin'...Next, I removed the hose to the radiator. I inserted a piece of 1 1/4" PVC pipe and clamp it it down. 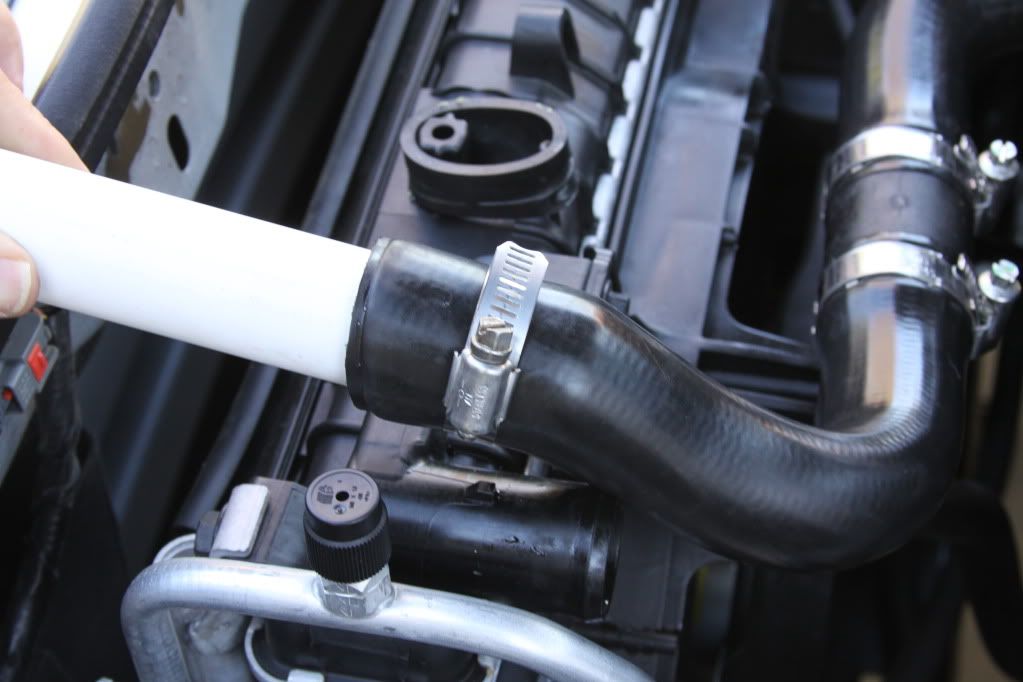 I used the clamp as a guide to run my utility knife and get a clean cut. By pulling on the tube, I could also measure how much I would need to remove. To get rid of any little strings, I just lightly burned them off with a lighter. 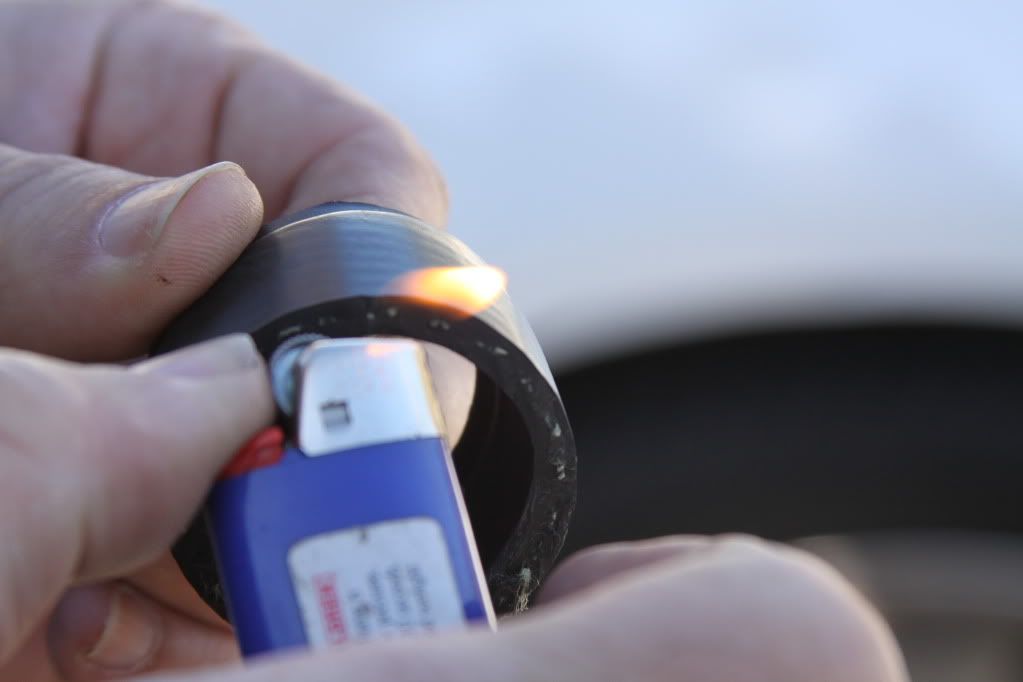
Last edited by Moreno1; 12-27-2011 at 10:52 PM. |

|

|
|
12-27-2011, 10:09 PM
|
#58 |
|
Drives: G5.R Join Date: Sep 2010
Location: SoCal
Posts: 2,377
|
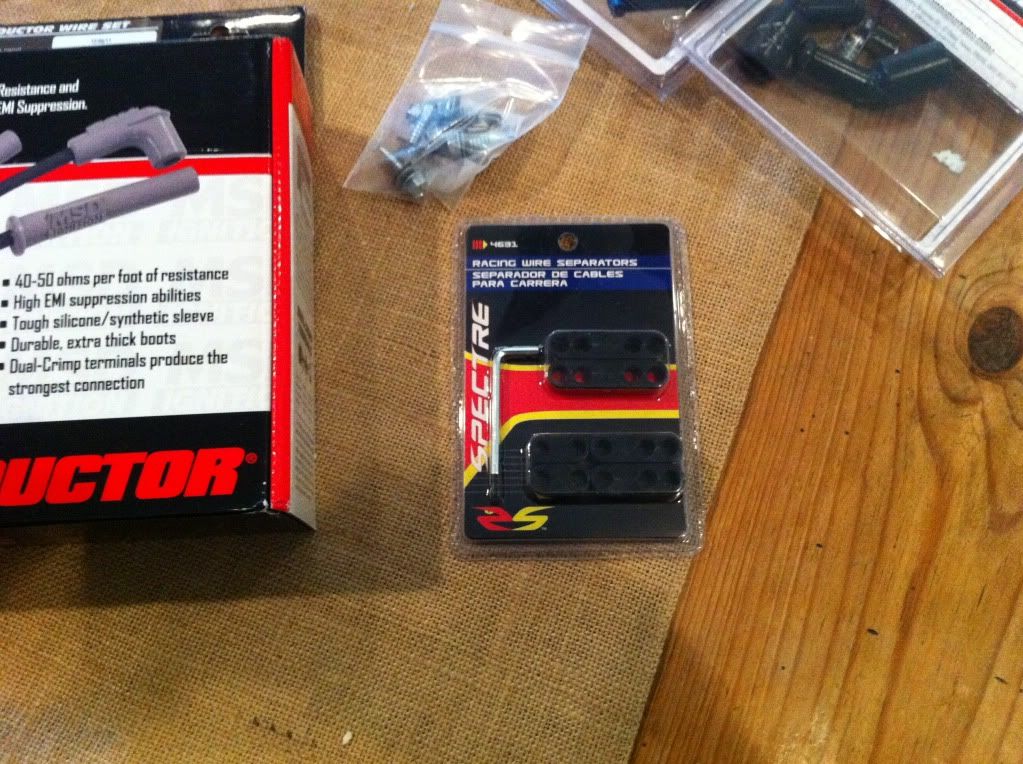
While I was at it, I figure I'd replace the clamps also. These are constant tension clamps which I got from http://www.watermanracing.com/Pages/indy2.html
Things were rolling pretty smoothly but somehow Old Murphy had to come into the picture.  Removing the clamp that goes to the water pump was a P.I.T.A to say the least. If it weren't that I was keeping the factory hose, I would have the cut the hoses off and remove the clamp. But because I didn't have the new hoses, I needed to save it. I tried to using pliers to pry open the clamps and pull the hose but the hose was FUSED to the water pump and not coming off. 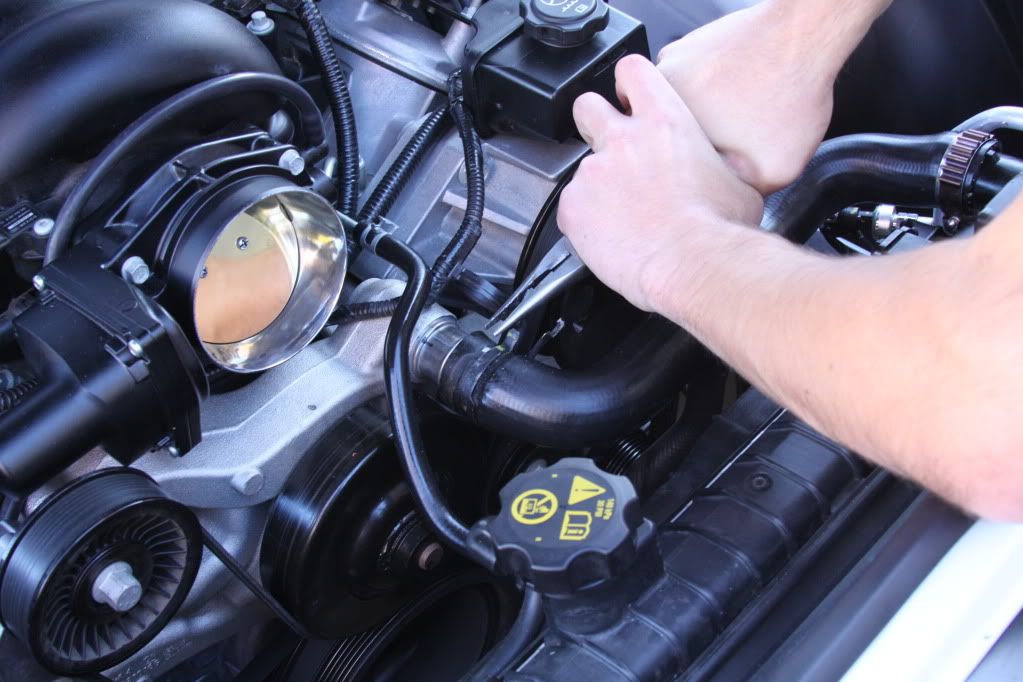 I pulled on that piece of S#@! every which way but loose. No pun intended. I tried twisting them apart and no can do. You can see how that thing is all twisted but not coming off! 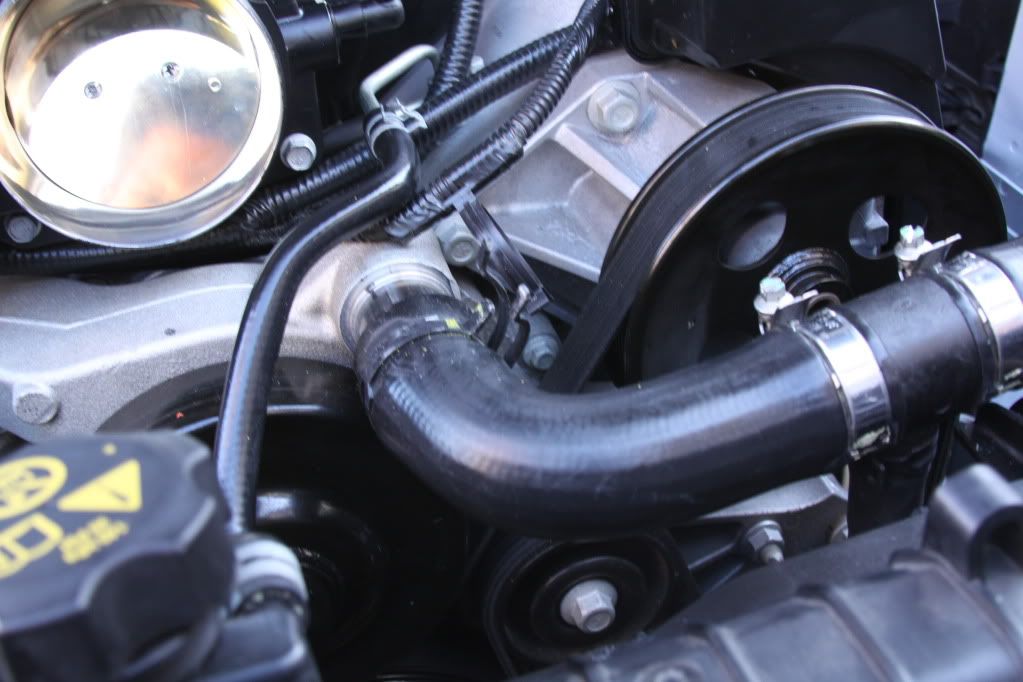 So I figured I'd just hack saw the freaking thing off. 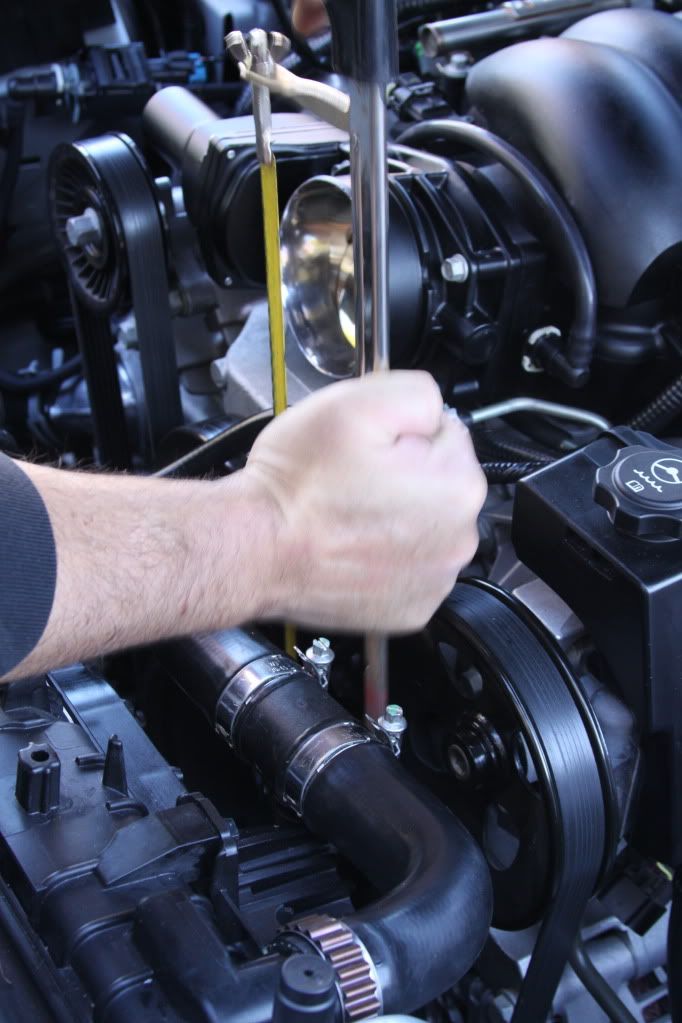 and finally, SUCCESS  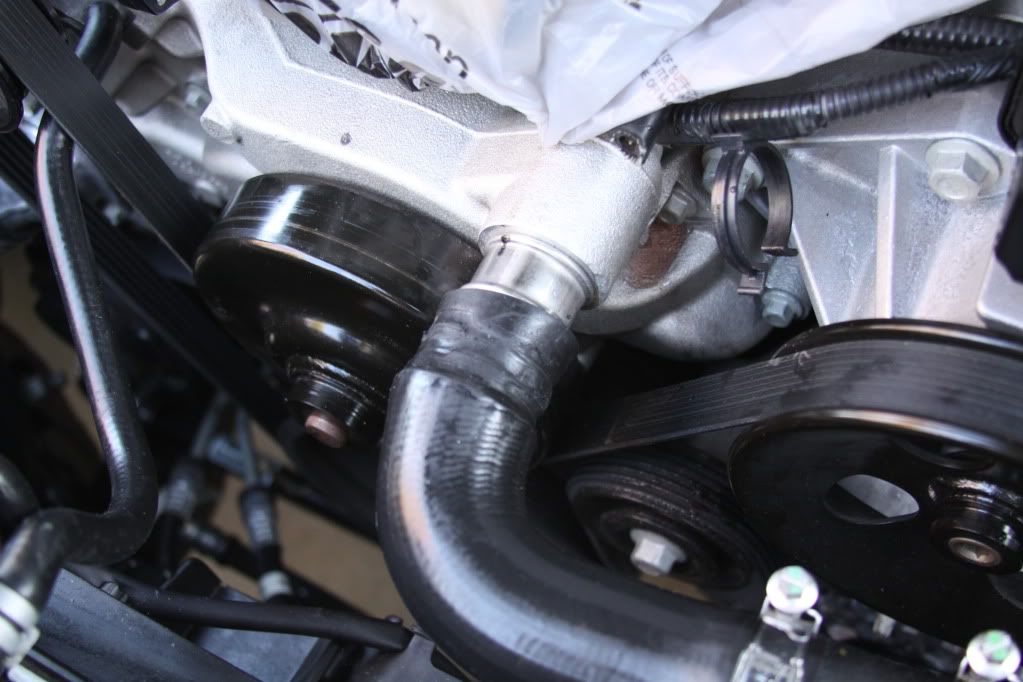
Last edited by Moreno1; 12-27-2011 at 10:54 PM. |
|
|
|
|
12-27-2011, 10:15 PM
|
#59 |
|
Blessed

Drives: 2013 Sonic RS MT Join Date: Dec 2007
Location: Saint Augustine FL
Posts: 28,444
|

__________________
Click image to see build thread. PQ - "the love of cars. It's a boys first step toward manhood and a mans last hold on boyhood." Fbodfather - "We do not want to use the Z28 moniker on a car that does not deserve this hallowed name." The_Blur - "Let's not confuse competitors with equals." |
|
|
|
|
12-27-2011, 10:27 PM
|
#60 |
|
Drives: G5.R Join Date: Sep 2010
Location: SoCal
Posts: 2,377
|
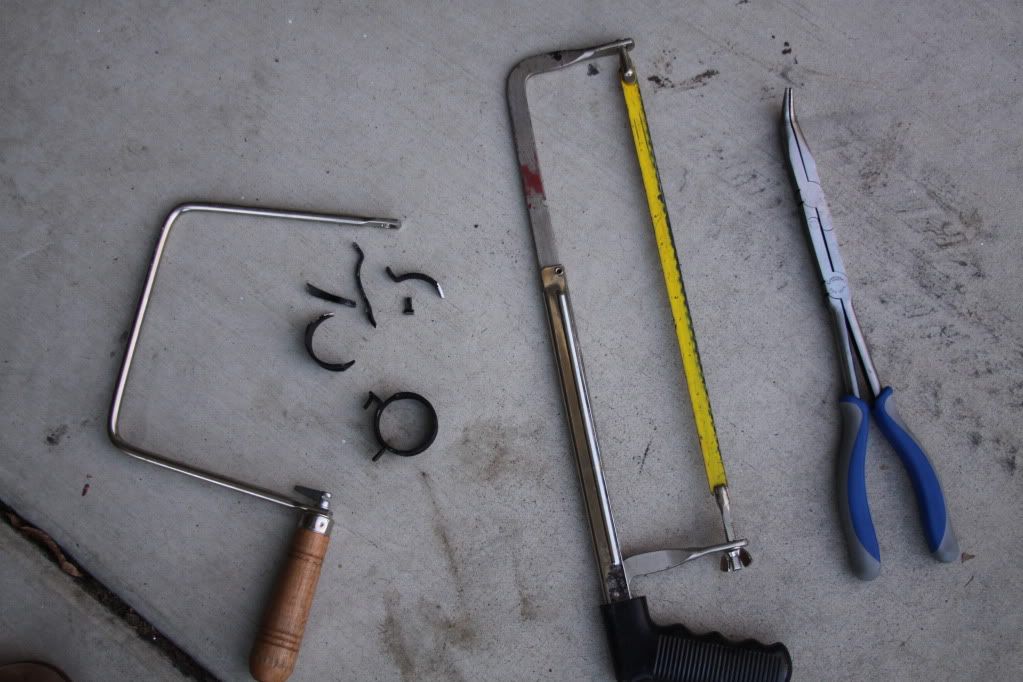
Here the evidence of the carnage.
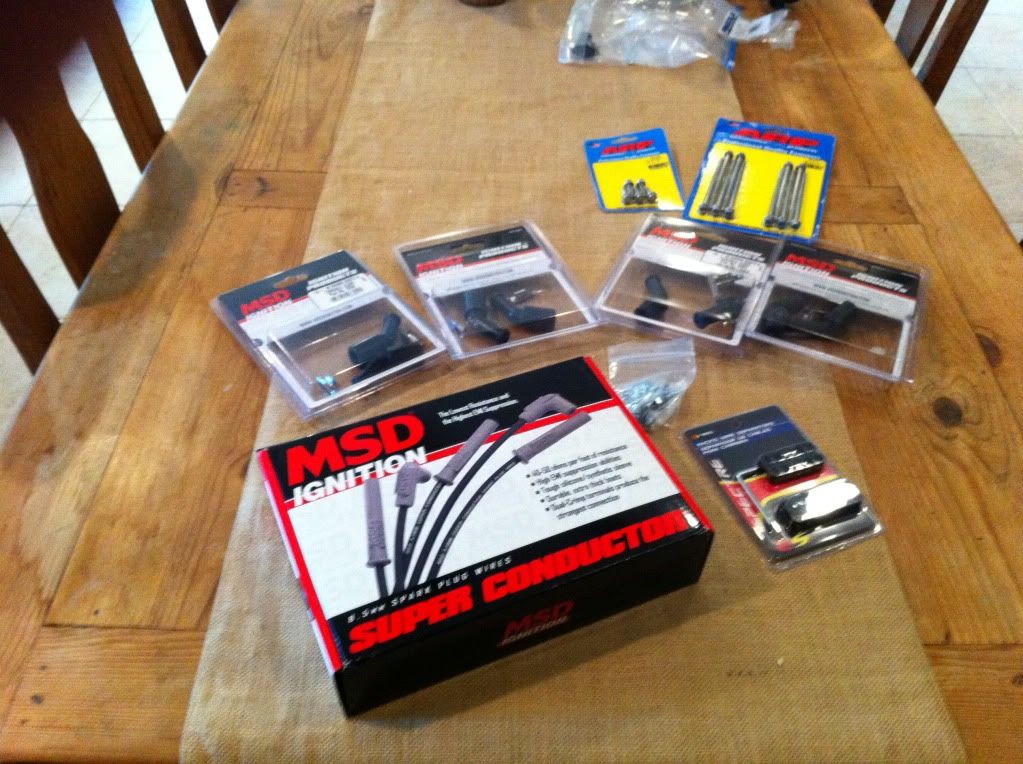
 End product for now. Much more clearance between the pulley and hose and a little more appealing to look at. 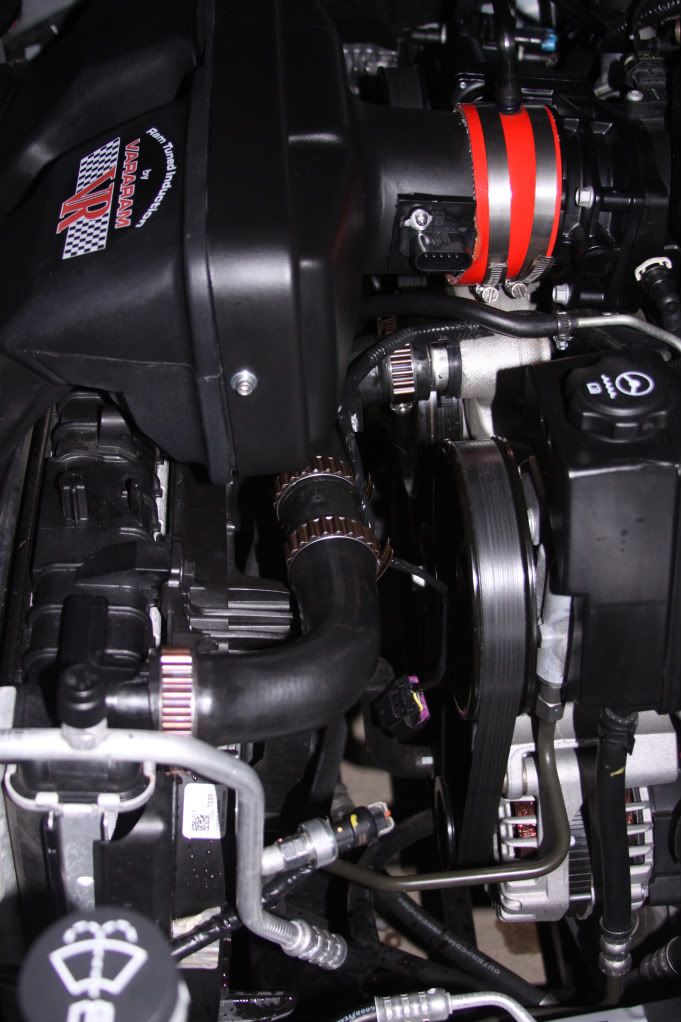 I'm still planning on replacing the hoses. So stay tuned because the end results will look a million times better. A couple of tips for those running Vararam. Make sure you take this clamp that on the hose by the radiator cap (similar to the clamp on the picture below) and twist it to where the sharp edges are on the bottom of the hose. 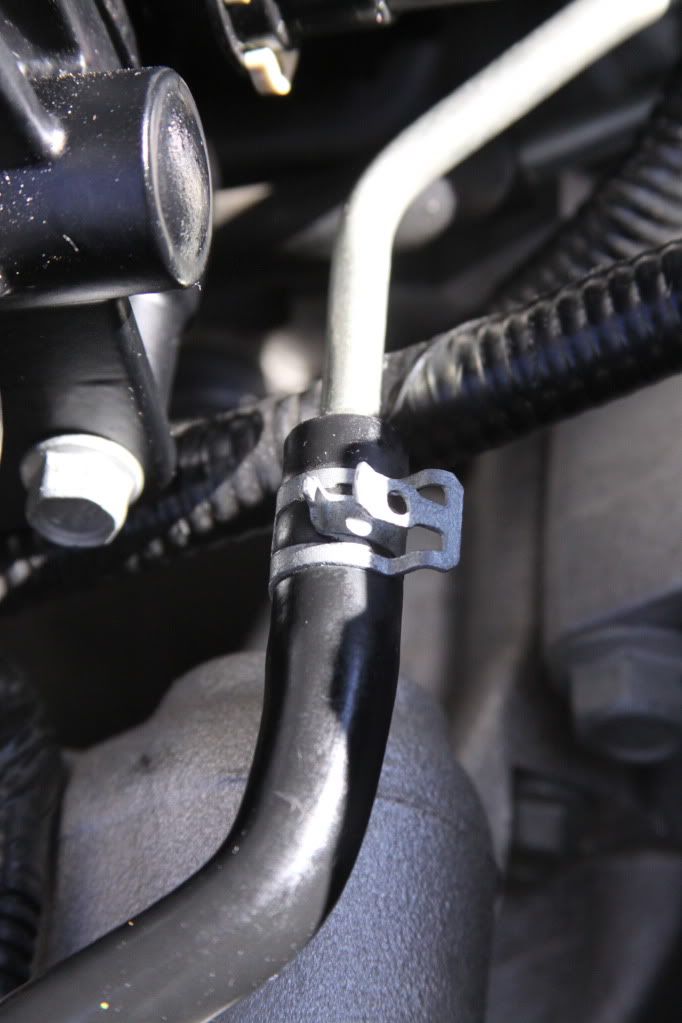 Because if don't, you're clamp will end up eating into your box. Not a good thing. 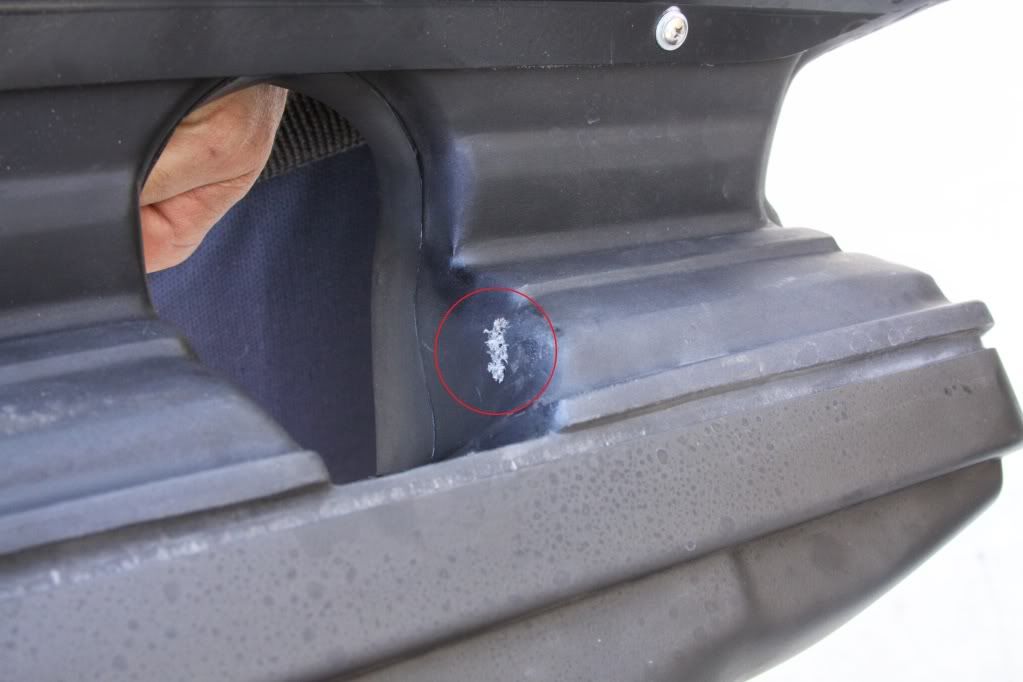 I plan on redoing the finish on the intake, so I'll fix that later but I figure I'd give you guys a heads up. Well, now back to waiting for more parts, Mallory cables, fuel lines, etc....Hope you enjoyed. Last edited by Moreno1; 12-27-2011 at 11:12 PM. |
|
|
|
|
12-27-2011, 11:12 PM
|
#61 |
 Drives: 2010 2ss Join Date: Oct 2010
Location: Brownstown Mi
Posts: 101
|
Your doing a great job. Keep it up
|
|
|
|
|
12-30-2011, 06:54 PM
|
#62 |
|
Drives: G5.R Join Date: Sep 2010
Location: SoCal
Posts: 2,377
|
Guess what I'll be doing this weekend? Because of the lack of space, the biggest challenge is going to be drilling of the holes into the frame. I did purchase a right angle drill. Hopefully it will make things a little easier. For those who have relocated their coils, any preliminary advice would be greatly appreciated.
|
|
|
|
|
01-02-2012, 11:48 PM
|
#63 |
|
Drives: G5.R Join Date: Sep 2010
Location: SoCal
Posts: 2,377
|
Well, I started on project "relocating the coils" today. The first thing on the agenda was freeing up some much-needed space.
Started by removing the radiator fans and shroud assembly. First I had to undo the hose that goes into the overflow tank. Just pull on it and it comes right off.  Second step; there's two bolts that hold the fan shroud that need to be removed. 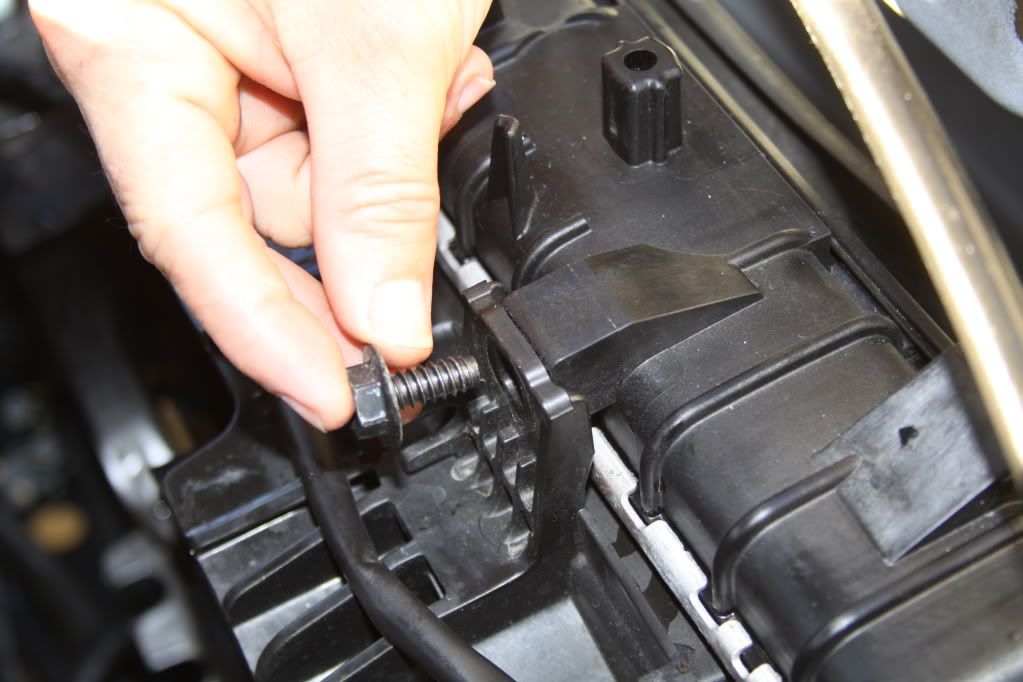 Next, you'll need to disconnect the plug for the fans. 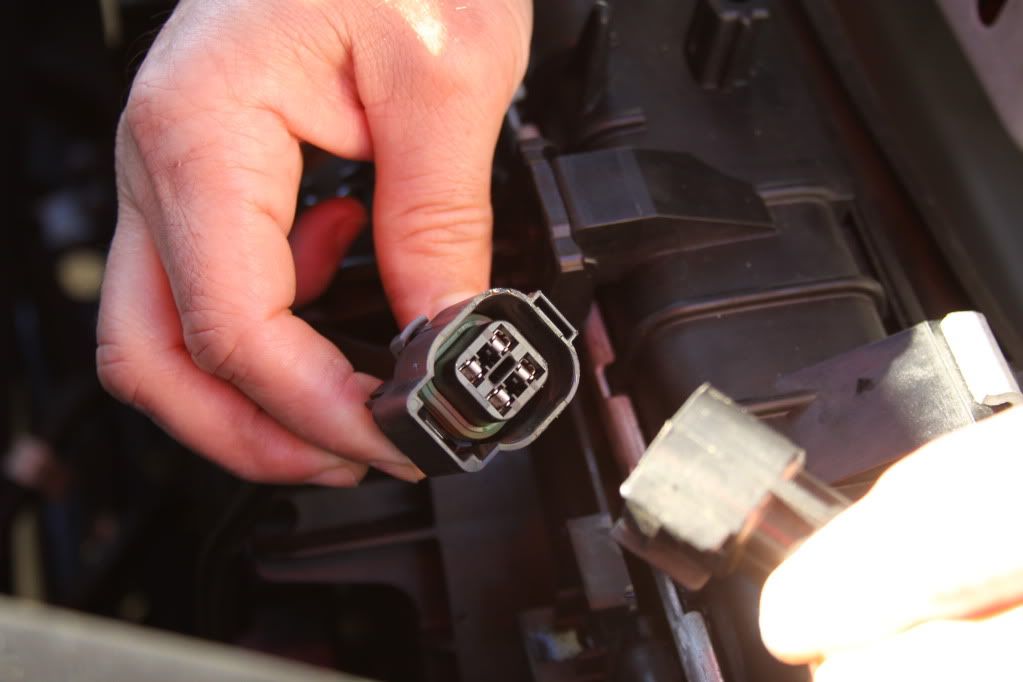 Next came disconnecting the water pump thermostat hose. I also disconnected the upper radiator hose. Finally you'll just pull the entire assembly up and out of the way. With the space to work now, I proceed to mark the area where I will drill the hole. 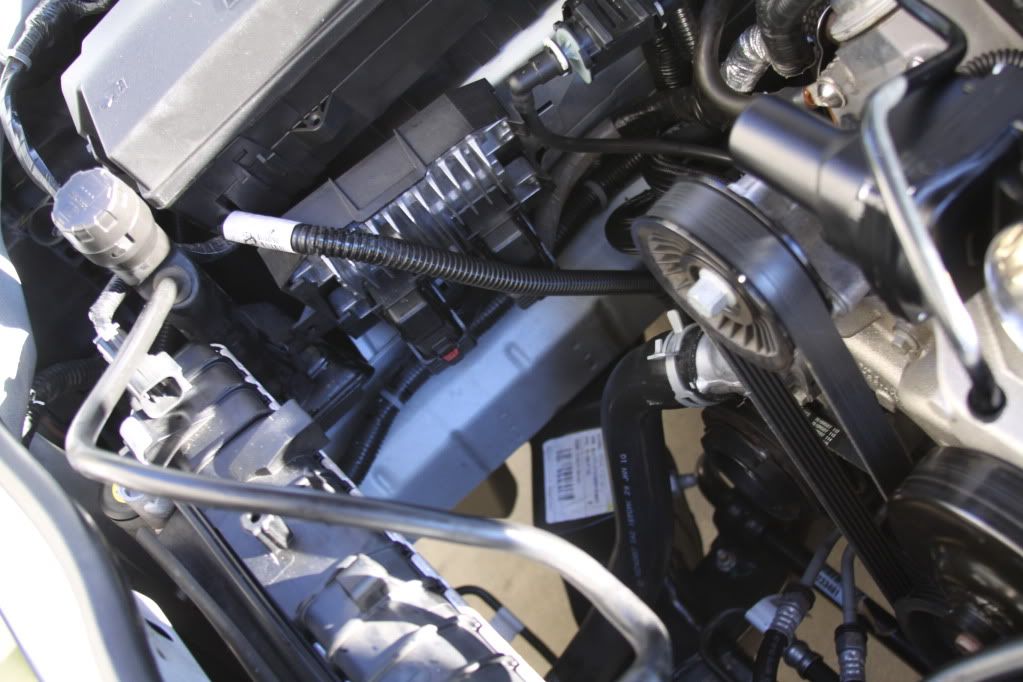 Finally had enough space to start drilling the hole in the frame rails. To make it easier to make my mark, I put a piece of tape on the frame. With the bracket positioned were I wanted, I drew in the marks for drilling. 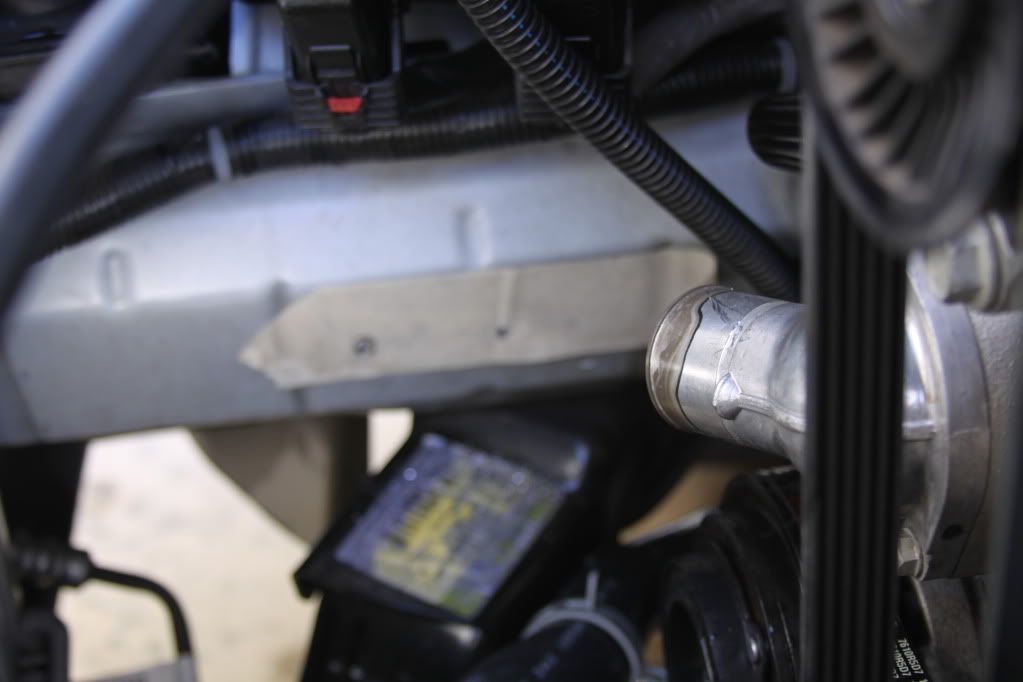 Drilling the hole was actually the easiest part of the whole project. I used a titanium drill bit which I'm sure helped. Picked it up at Ace for under $5.00. I also use a right angle drill which was much more compact to get in there. In order to make sure the the screws would bite, I made sure to use a smaller bit than the self tapping screw I was using. This made it tough to get the screw started, so I had to use a little motivation.  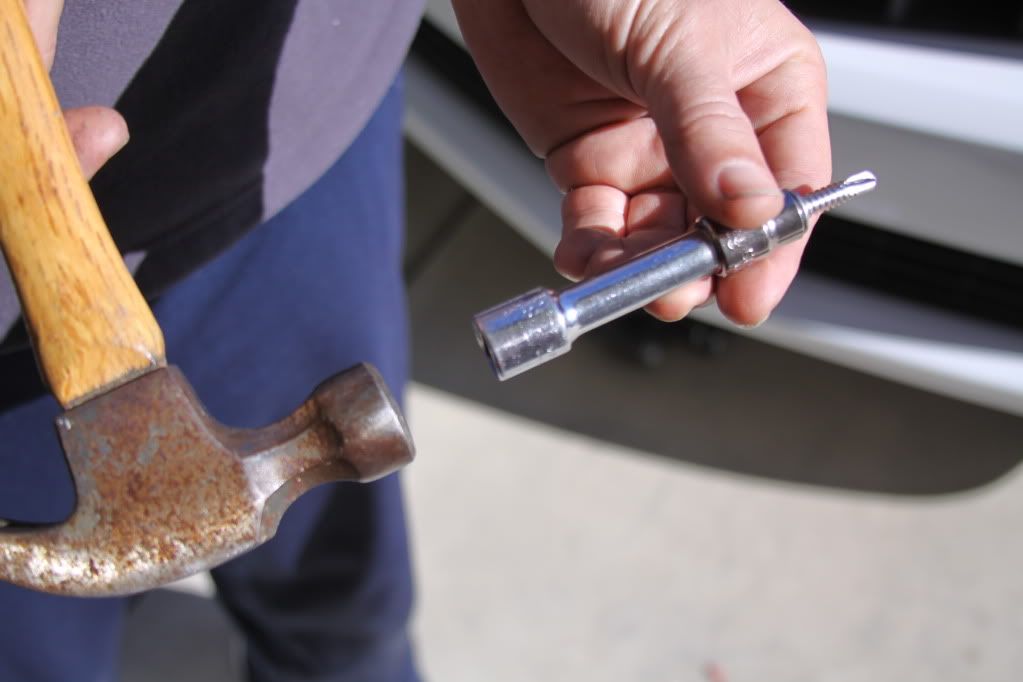 Tip: Using the socket and extension made it a lot easier than just trying to hold the screw with my hand while tapping it in. 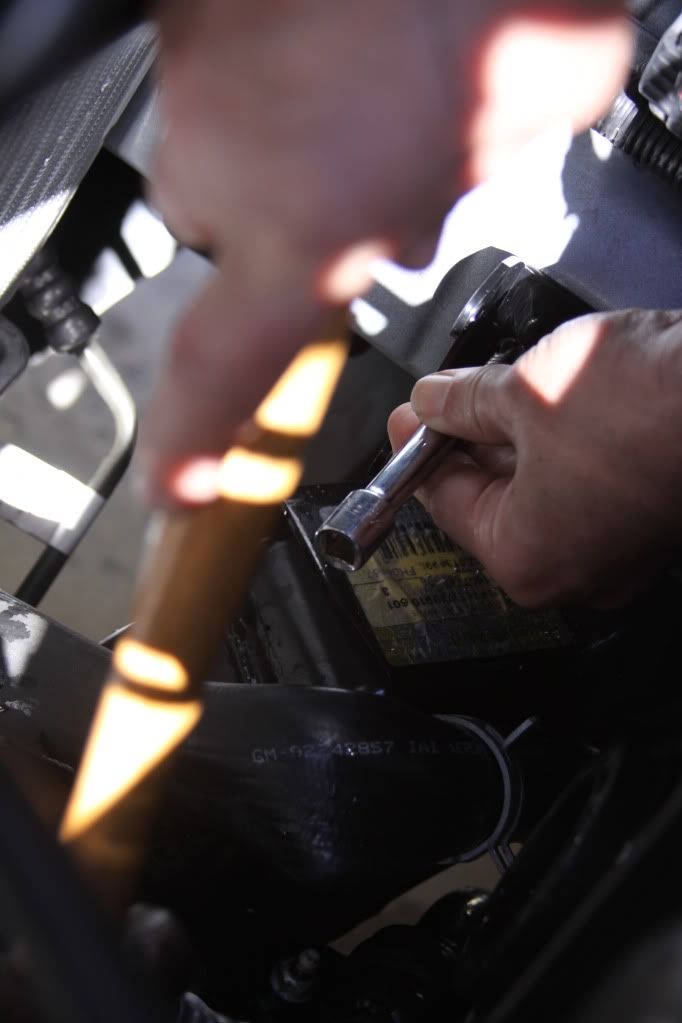
Last edited by Moreno1; 01-03-2012 at 12:39 AM. |
|
|
|
|
01-03-2012, 12:31 AM
|
#64 |
|
Drives: G5.R Join Date: Sep 2010
Location: SoCal
Posts: 2,377
|
The next step was removing the five bolts that hold down the Coil bracket assembly. Two of the bolts are under this wiring harness clamp. You'll pull on the clamp to get access to it.
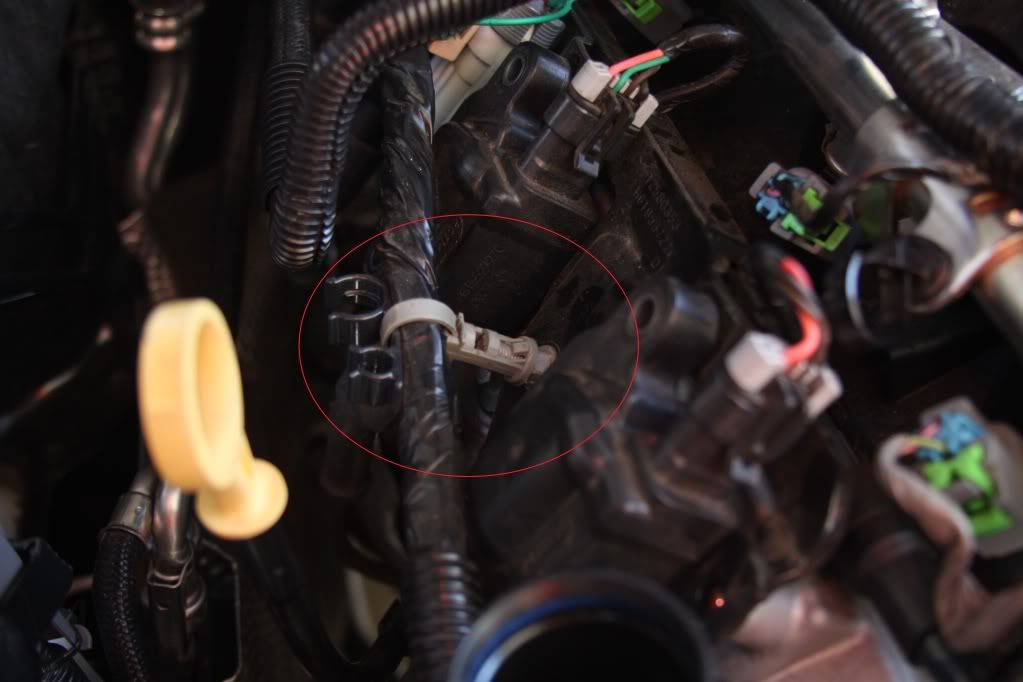 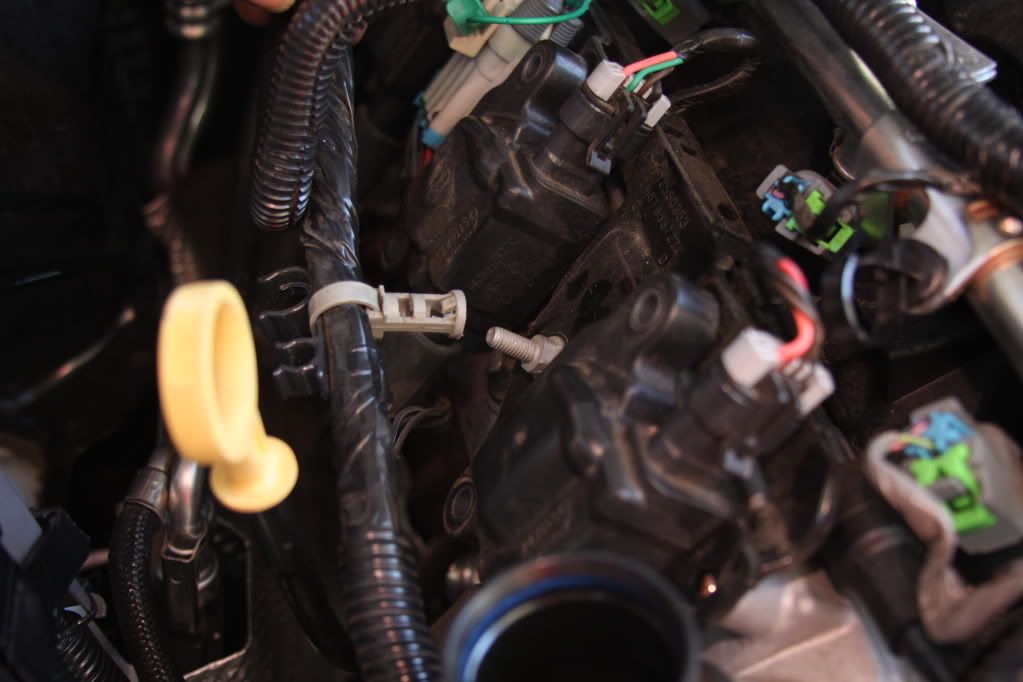 TIP: The screw closes to the firewall is tough to get to. To gain some clearance, I removed the two bolts that hold the coil to the bracket and move the coil aside. 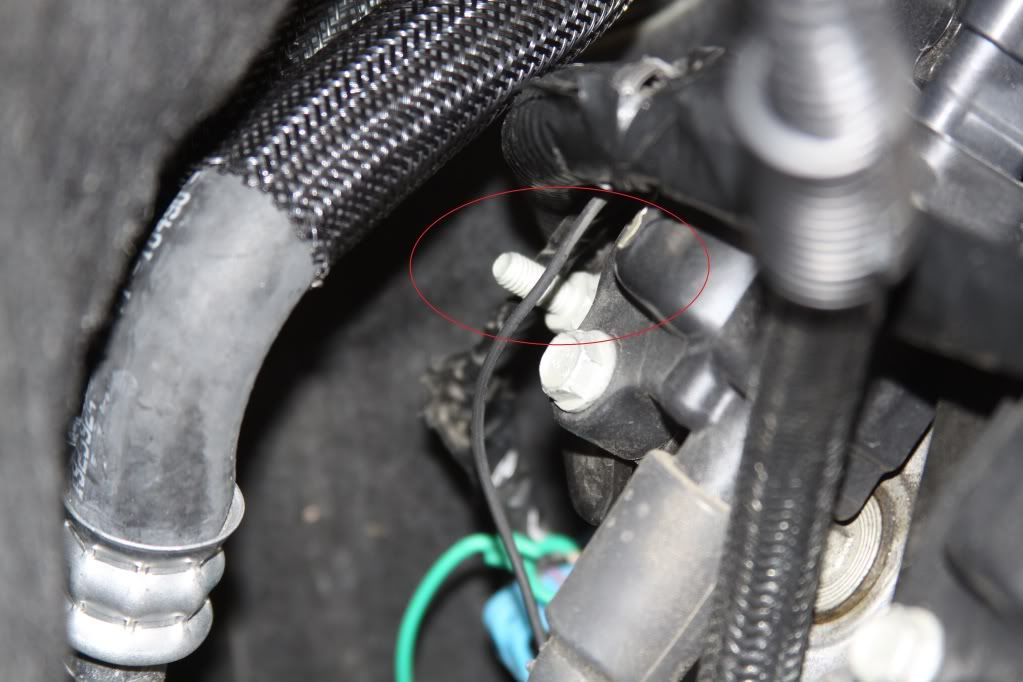 lastly, you'll need to unplug the coil harness. You will need to remove the green plastic thingamajig by pulling on it. 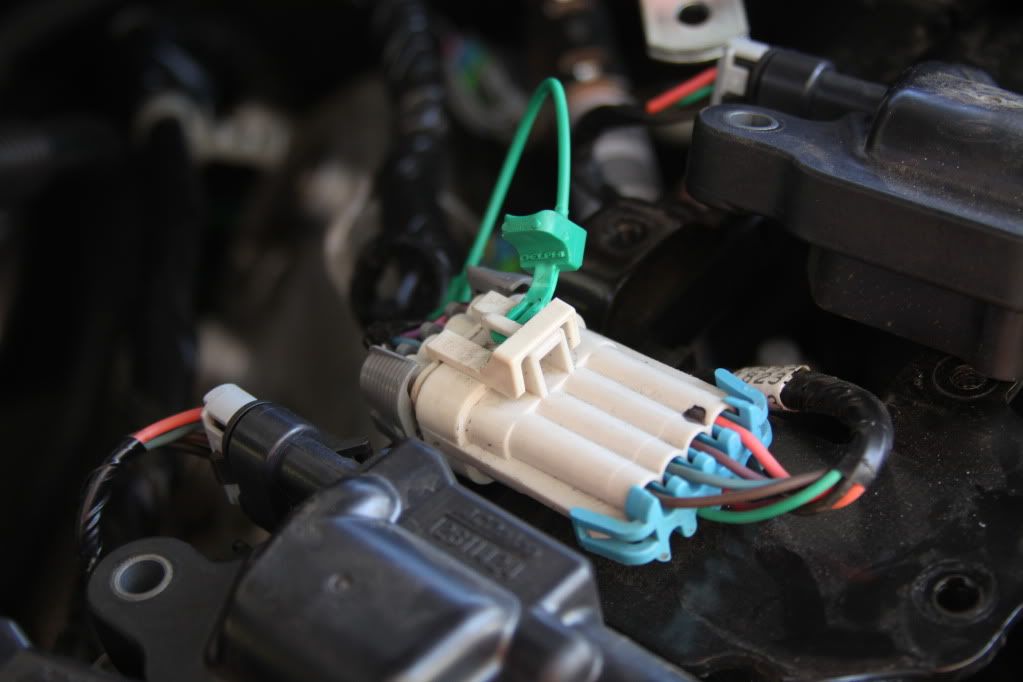 Before you removed them from the clamp, Make sure you mark each coil.  Once you unbolt the coils from the bracket, you will need to remove the plastic harness retainer thingamajig, LOL. 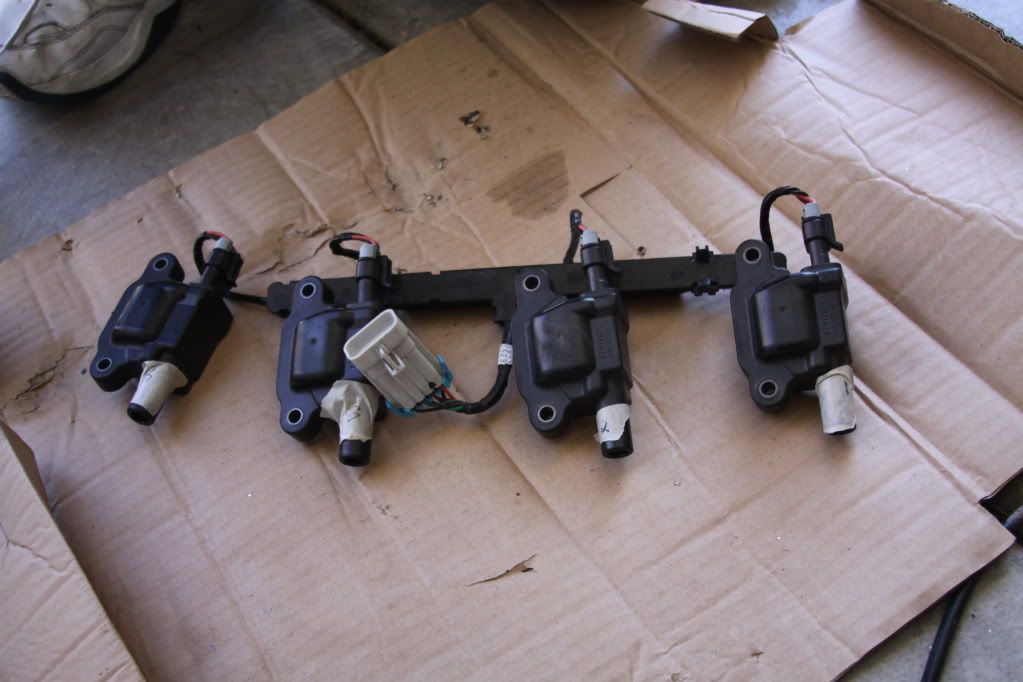 I used a falt head screw driver for this task. 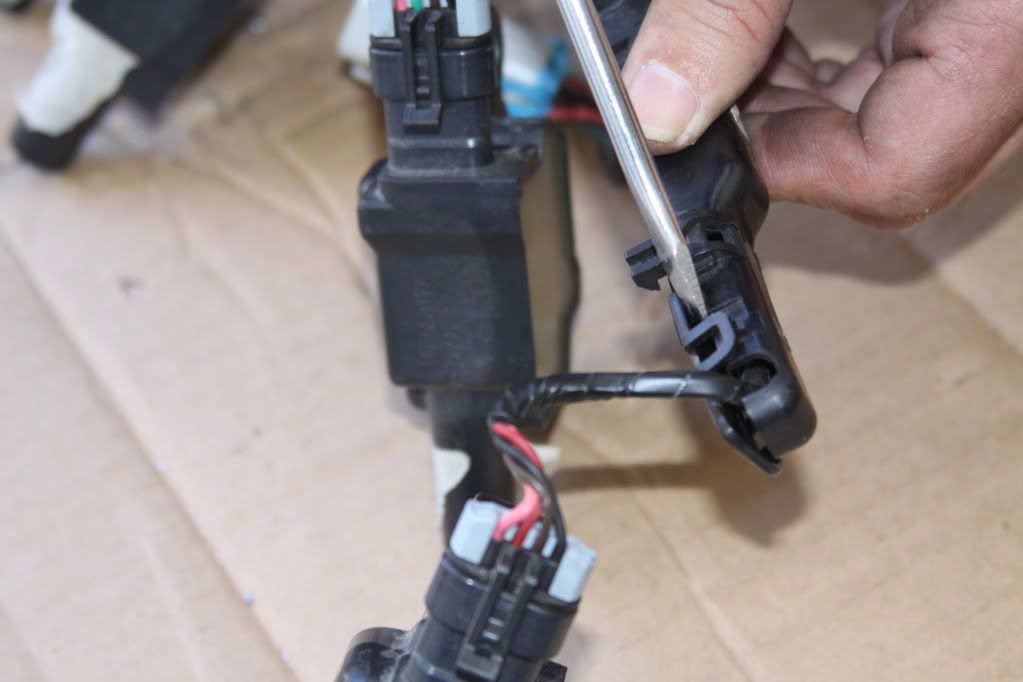 With the harness freed, I also labeled the harness to match the cylinders. 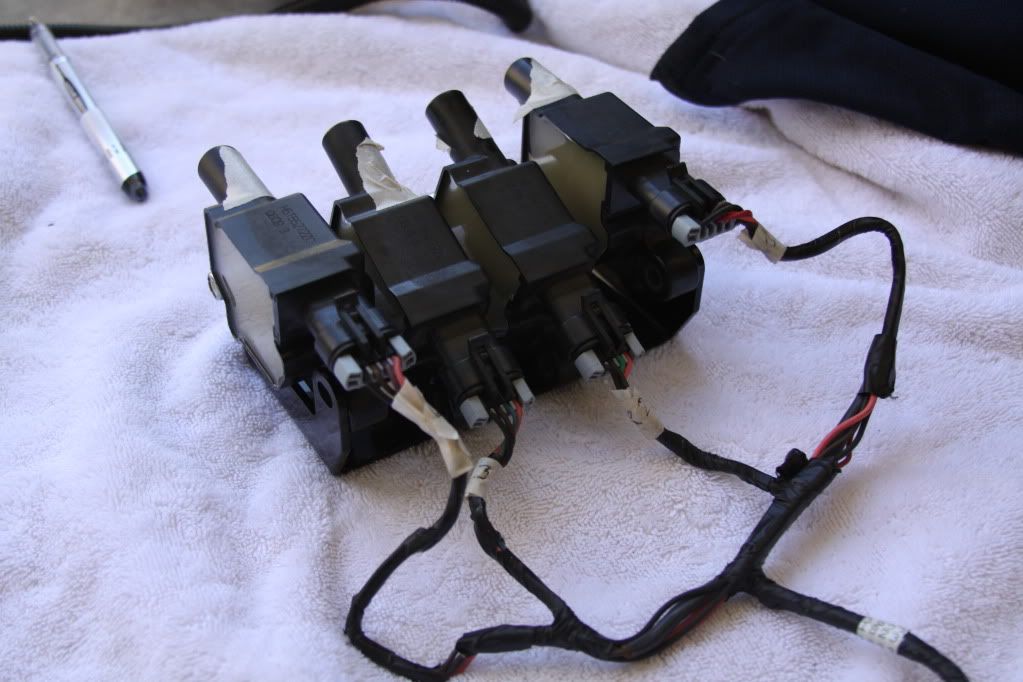 Since I was going to redirect the wires, I removed all the factory tape. 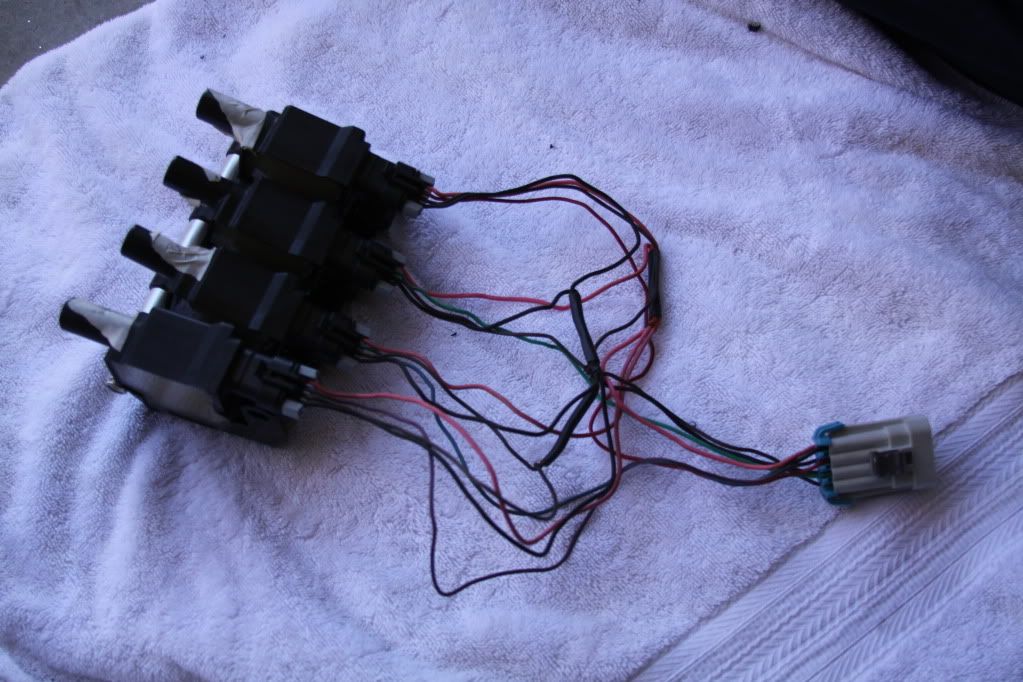 This will give you an idea of how I re-taped them.  This is the final product. 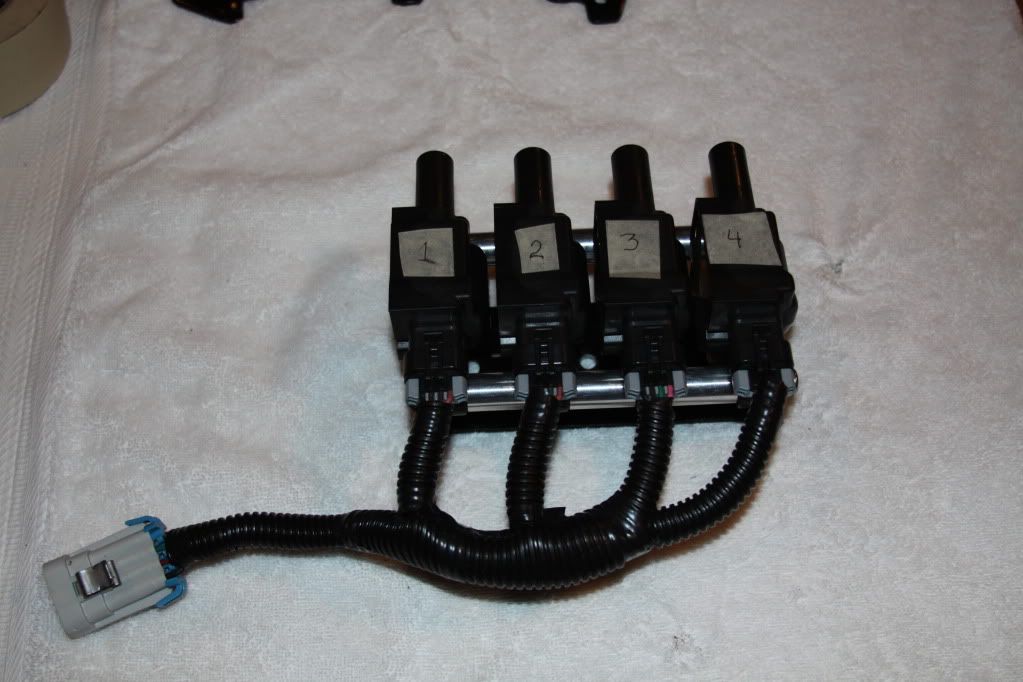 I found it easier to assemble the hole unit and than mount it. As oppose to only mounting the bracket and trying to assemble it in the car. Trust me, I tried and only had frustration for my effort. Hers the unit mounted. 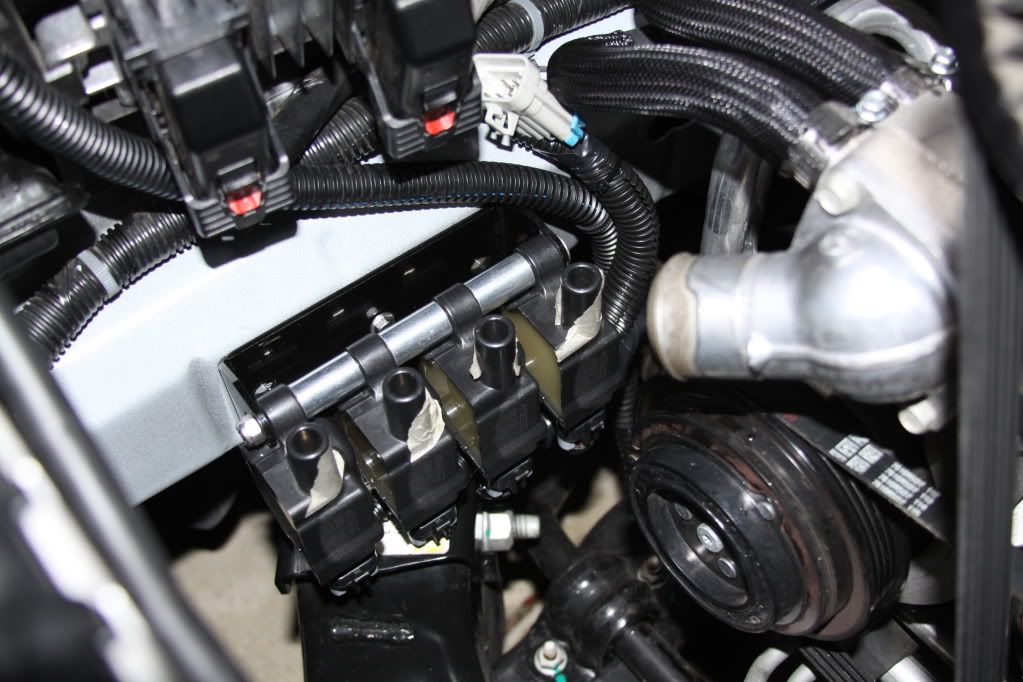 I ran out of time...... will continue tomorrow.  It's amazing how much cleaner it looks and I'm not evening getting started. Stay tune. Any questions or suggestions, feel free to fire away. Last edited by Moreno1; 01-03-2012 at 09:07 AM. |
|
|
|
|
01-03-2012, 08:51 AM
|
#65 |
|
RIP JoePa

Drives: 2010 2SS/RS & 2001 Audi S4 Join Date: Apr 2010
Location: Central PA
Posts: 644
|
Subscribed...when you're done you should copy the relocation stuff and put it in it's own DIY

__________________
 |
|
|
|
|
01-03-2012, 10:08 AM
|
#66 |
|
Blessed
Drives: 2013 Sonic RS MT Join Date: Dec 2007
Location: Saint Augustine FL
Posts: 28,444
|
Let me know if you want to recreate this in a new thread as a DIY. I'll be glad to help move posts around if needed.
Looks great so far!
__________________
Click image to see build thread. PQ - "the love of cars. It's a boys first step toward manhood and a mans last hold on boyhood." Fbodfather - "We do not want to use the Z28 moniker on a car that does not deserve this hallowed name." The_Blur - "Let's not confuse competitors with equals." |
|
|
|
|
01-03-2012, 08:58 PM
|
#67 |
|
Drives: 2010 2ss Join Date: Oct 2010
Location: Brownstown Mi
Posts: 101
|
It looking good. I cant wait to do this myself. Thanks for pioneering this procedure lol
|
|
|
|
|
01-03-2012, 09:45 PM
|
#68 | |
|
Drives: G5.R Join Date: Sep 2010
Location: SoCal
Posts: 2,377
|
Quote:
Last edited by Moreno1; 01-04-2012 at 12:10 AM. |
|
|
|
|
|
01-03-2012, 09:47 PM
|
#69 | |
|
Drives: G5.R Join Date: Sep 2010
Location: SoCal
Posts: 2,377
|
Quote:

|
|
|
|
|
|
01-03-2012, 10:11 PM
|
#70 |
|
Drives: G5.R Join Date: Sep 2010
Location: SoCal
Posts: 2,377
|
Well, here is were I started today. What a mess of wires. Putting back the plastic cover is looking like a really good idea..... just about now, LOL.
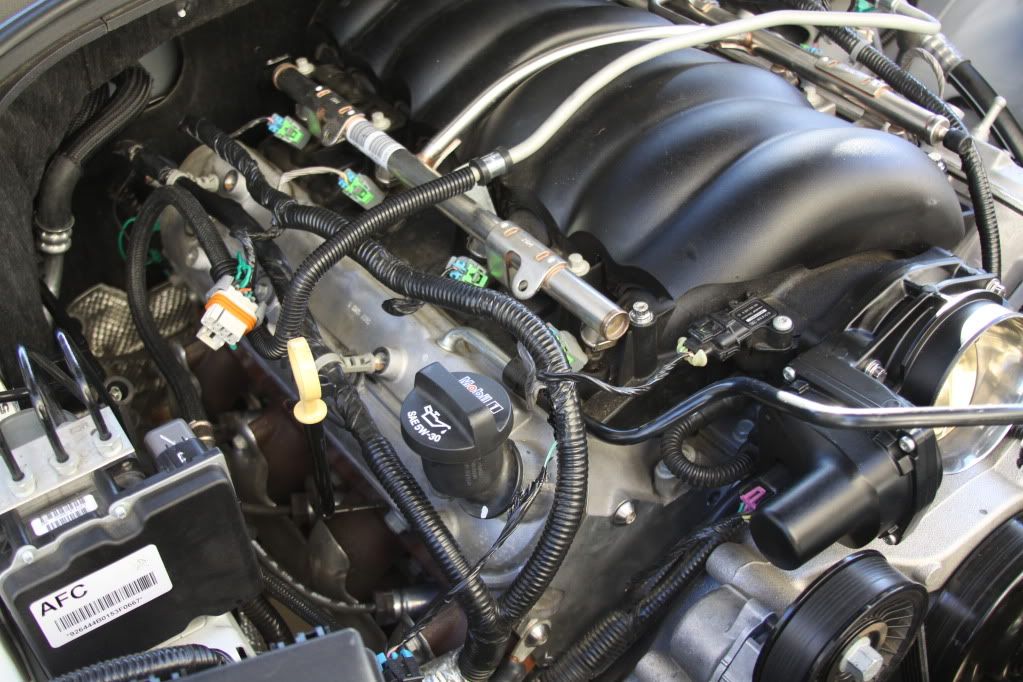 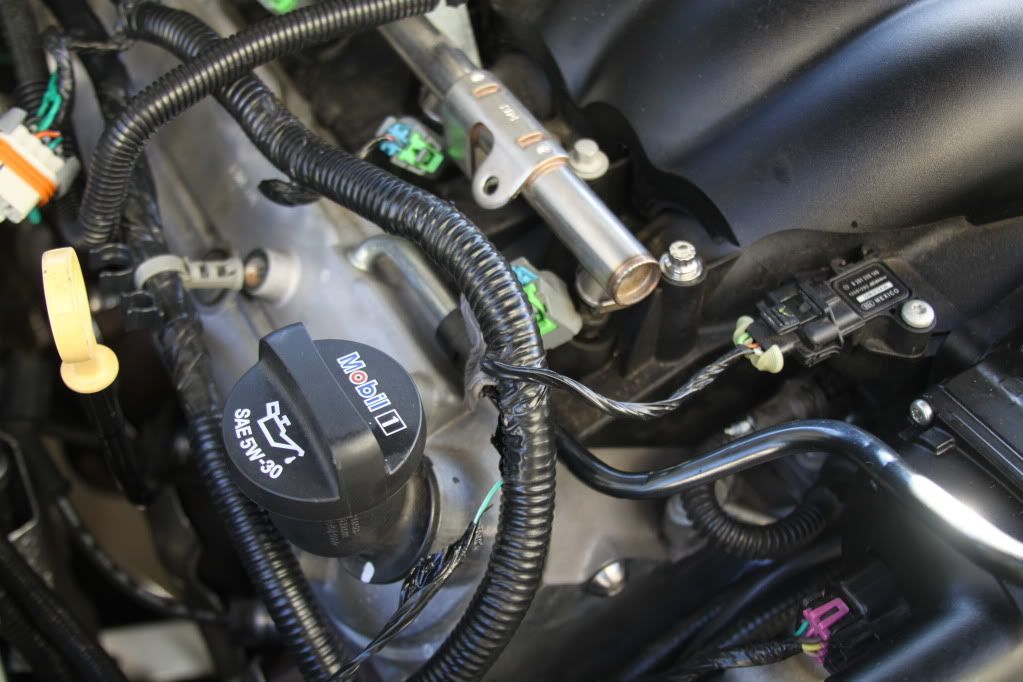 The first thing on the agenda was to extend the coil harness plug to reach the new location. 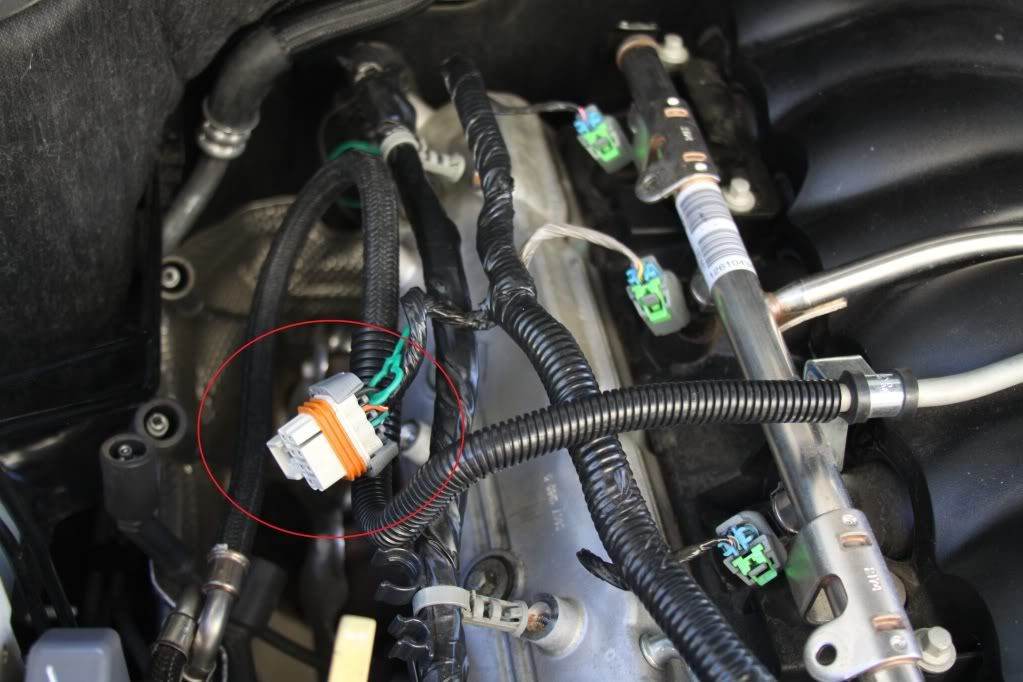 To do this, I needed to split the harness. 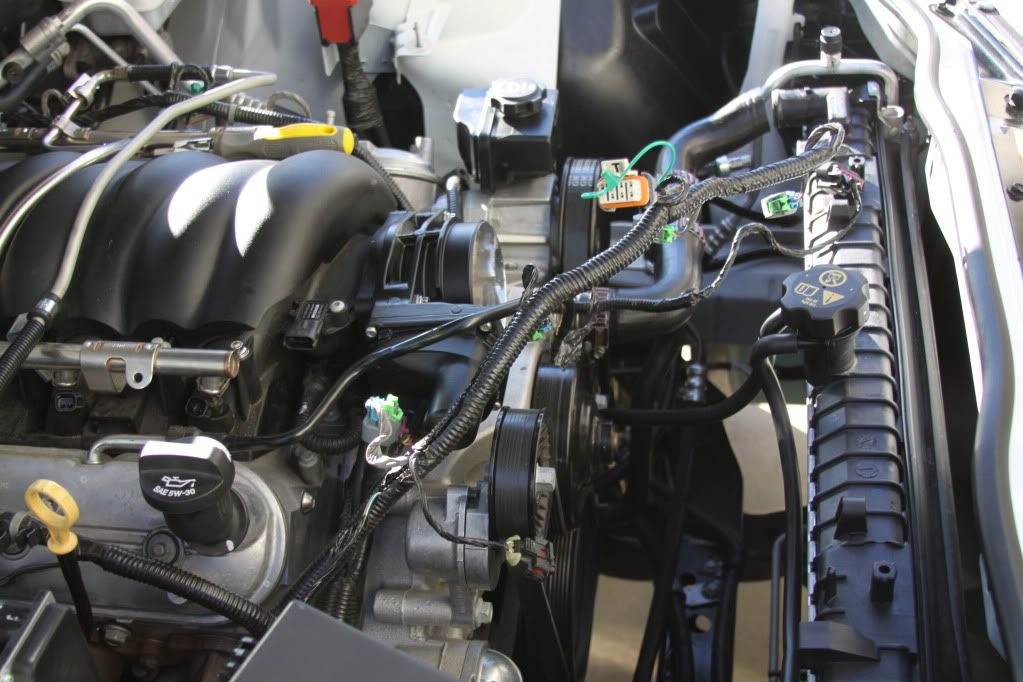 I used a box cutter knife for the job. I also labeled each injector plug. 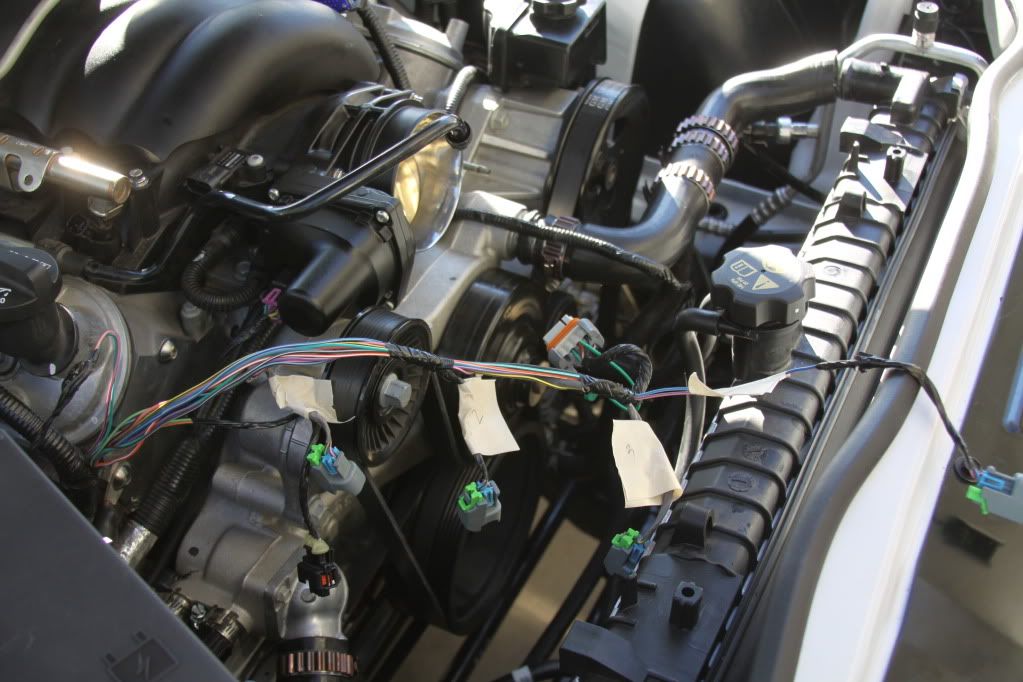 Here is were it gets a little tricky. You have a single 12 volt wire that feeds each of the injectors and the coil harness. 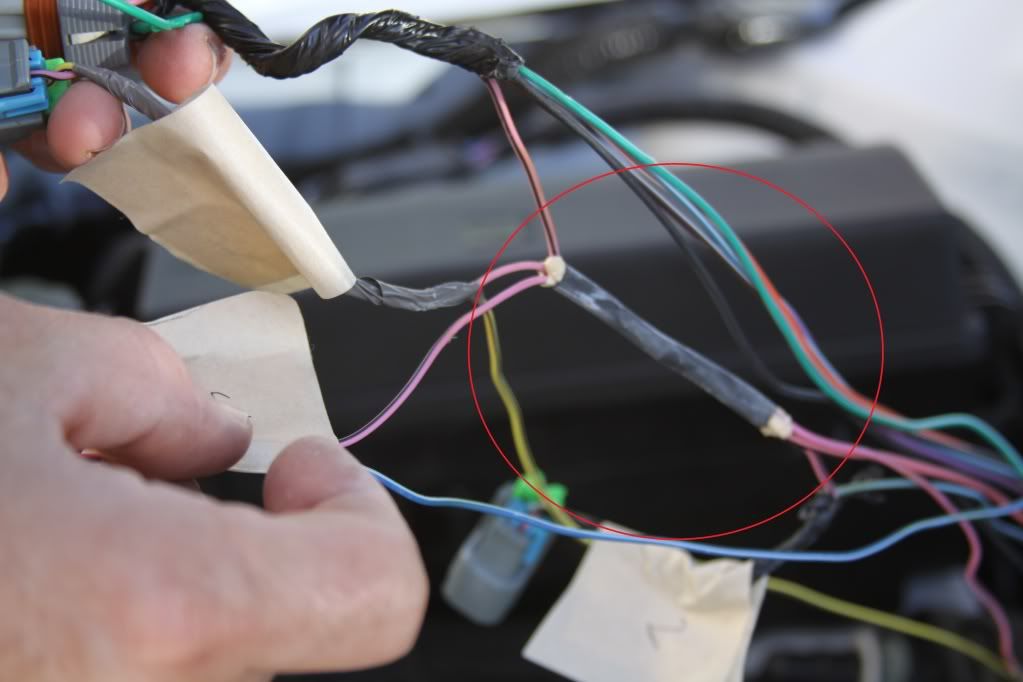 Opening the factory splice was a P.I.T.A. to say the least! You'll need to take your time. 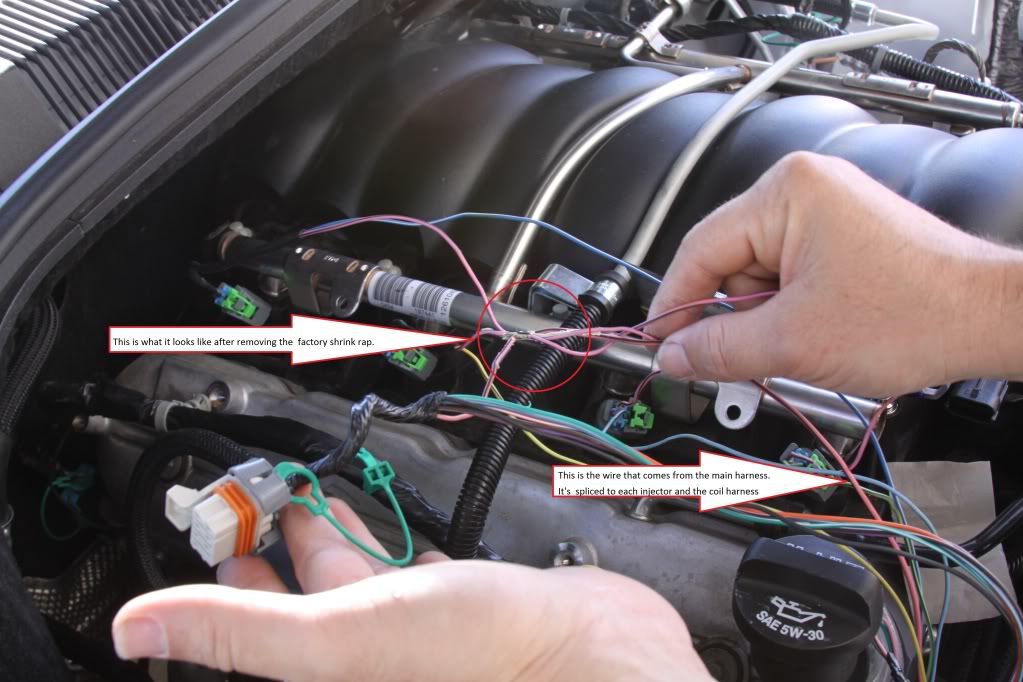 I'm also re-making and re-routing the fuel injector harness. IT will no longer run up the front of the engine. 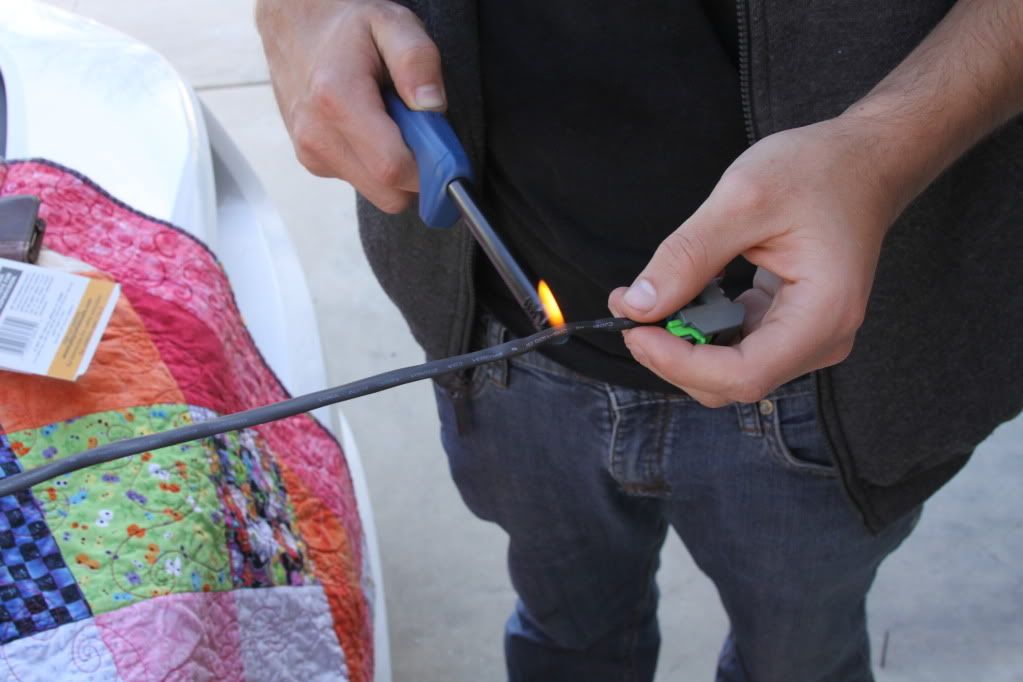 I used a single 14 gauge wire and spliced the injector 12 volt wire. I ended with 5 wires out the back instead of eight. 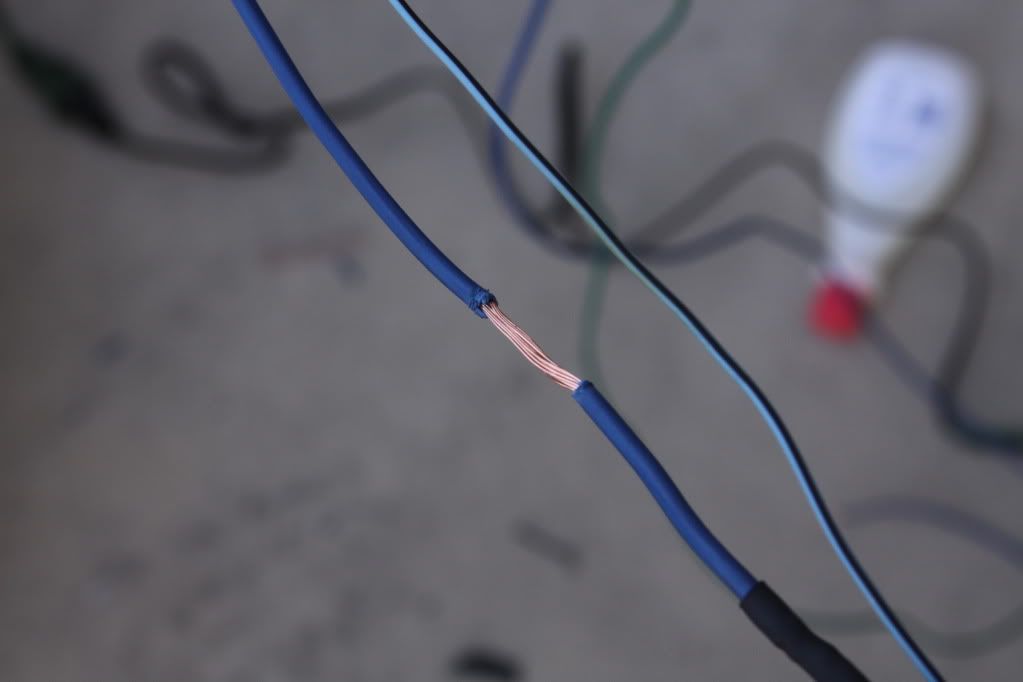
Last edited by Moreno1; 01-03-2012 at 10:35 PM. |
|
|
|
|
|
|
|
 |
|
|
 Similar Threads
|
||||
| Thread | Thread Starter | Forum | Replies | Last Post |
| Roto-Fab | Engine Covers - S/C | Fuse Relay Cover | Radiator Cover | Billet Oil Cap+ | AutoAgenda | Exterior Parts & Accessories | 14 | 02-06-2013 08:43 PM |
| New Texas Speed & Performance Engine Machining Center! | Trevor @ Texas Speed | Camaro V8 LS3 / L99 Engine, Exhaust, and Bolt-Ons | 18 | 01-16-2013 03:46 PM |
| Hawk Performance Brake Pads part HB247Z.575 $85.00 | Rogan | USA - Florida | 2 | 10-07-2011 12:10 PM |
| Acronyms? | KEEP RT | Camaro V8 LS3 / L99 Engine, Exhaust, and Bolt-Ons | 20 | 03-11-2011 08:57 PM |
| Great Read and Info on Oil Weight | Banshee | Mechanical Maintenance: Break-in / Oil & Fluids / Servicing | 1 | 11-23-2009 09:03 PM |


