You are browsing camaro5 

|
 02-01-2010, 09:12 PM
|
#1 |
 
Drives: All Blacked Out 2010 2LT Camaro Join Date: Dec 2009
Location: Las Vegas
Posts: 57
|
Blacking out my tail lights bezels.
After blacking everything else out, I decided to finally get around to blacking out my tail light bezels. From what I heard the task of taking them out was very hard and tedious, but this wasn't quite the case; it was easy and took about 10 minutes to take them out.
To take out the bezels, all I had to do was first take off the panel located in the trunk over the top of the bezels. To do this, I just took a screw driver and popped off the circular tabs. Once the panels were off, I took a flat head screw driver, covered it with a thin dish towel, and lightly pried out the bezels. To do this carefully enough to not break the tabs, I first pried on the upper side corner, then the opposite side, then the top and bottom sides. Easy enough. Once the bezels were out, it was time to get supplies. I headed over to home depot. I picked up: One can of premium enamel gray valspar spray primer. 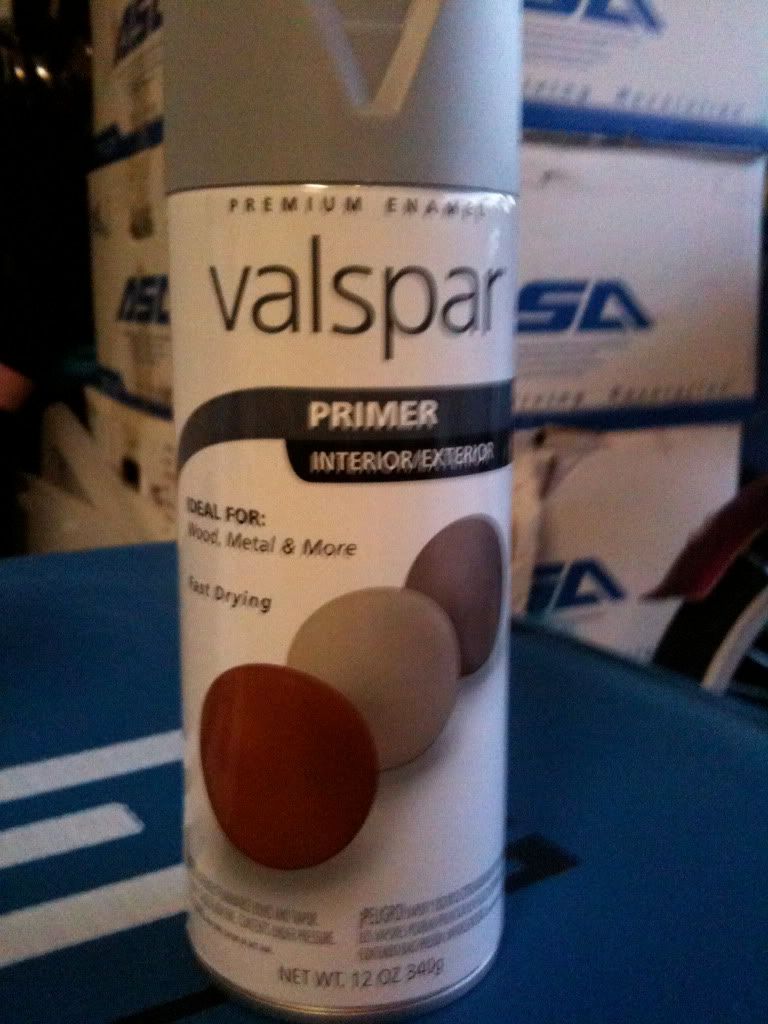 One can of premium enamel valspar flat black spray paint. 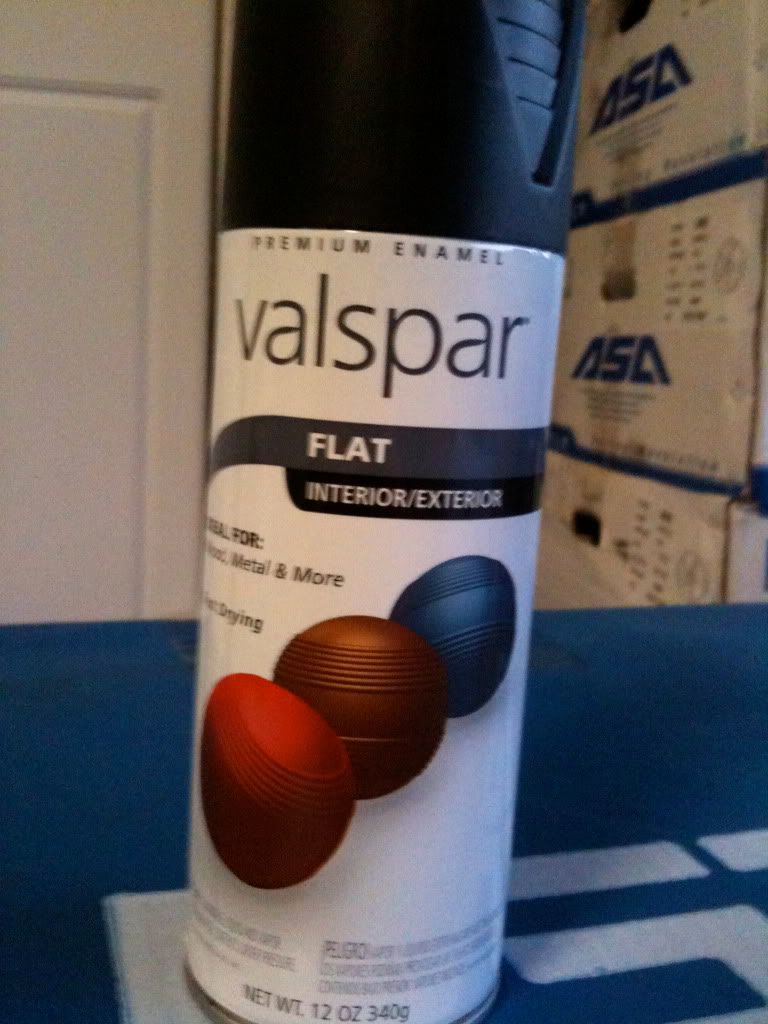 A few pieces of 3M wet/dry 400 grit sandpaper.  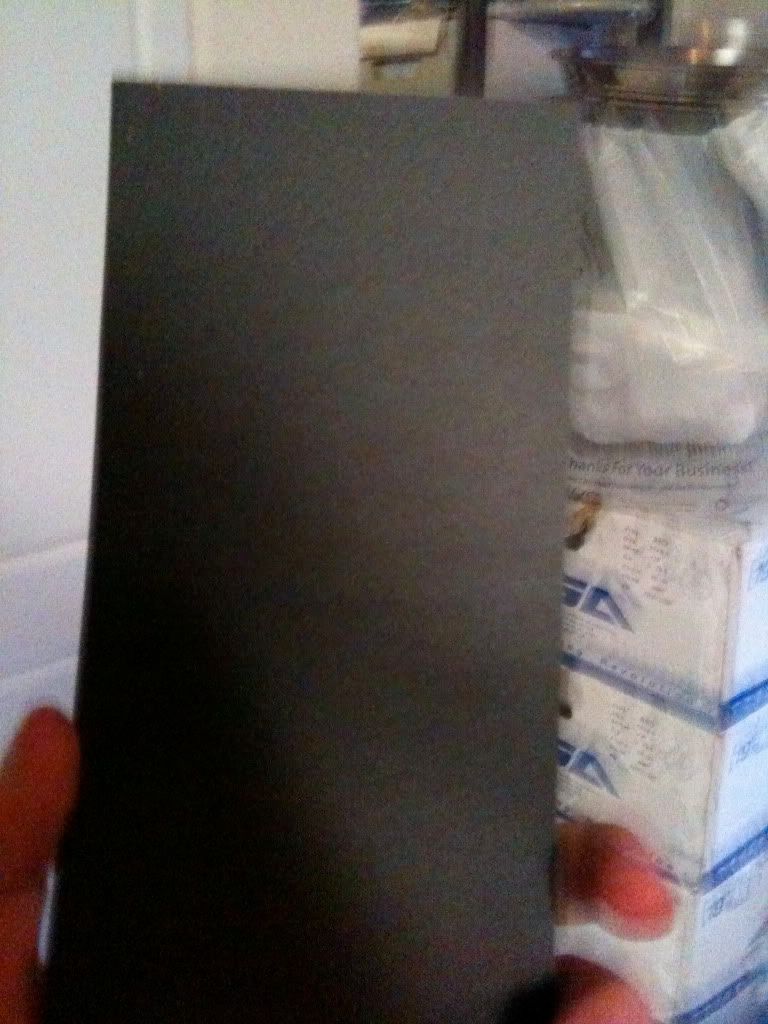 Once I gathered the supplies, I then used the 400 grit sandpaper to sand all four bezels down until all the chrome(excluding the tabs) had a scratched and sanded look and the shininess of the chrome was brought much down. The bezels looked dirty for a comparison of the shiny chrome. I then cleaned the bezels with a wet dish towel. After sanded, I masked(taped up with masking tap) all of the tabs on the bezels. If the bezels became painted, they would have a chance of not fitting correctly back in place, giving the need to mask them off.  Once masked off, I needed a surface large enough to hold all four bezels. I found one of my old boxes that my rims came in; perfect size and good height. The box had some dirt on it so I used the dish towel and once I dampened it, I wiped of the surface of the box, then dried it. I placed the four bezels on top of the box, shook up the gray primer for a good 45 seconds, and applied my first light coat of primer. I used a stroking pattern, as with a paint brush, from a close enough distance to cover all of the area I needed to. The strokes were fast and overlapped eachother(from left to right to left). I didnt use one long stroke around the whole frame; I sprayed one of the four sides at once. I waited 15 minutes, and applied a second, slightly heavier coat of primer. I used the same technique as the first. After waiting one hour, I applied my first light coat of the flat black spray paint. Same technique as the primer, and for this first coat, I applied lightly. I wasn't too worried about unevenness yet because there are more coats to come. After a half hour, I applied my second coat of flat black. I made sure to go over any unevenness and and go over the previous coat, lightly of course. Finally, 45 minutes later, I applied a third and final light coat. They looked very good already so I didn't want to blotch more paint on than needed. Again, same technique, covering all of the previous coat. This is what they looked like after the third coat an hour later. 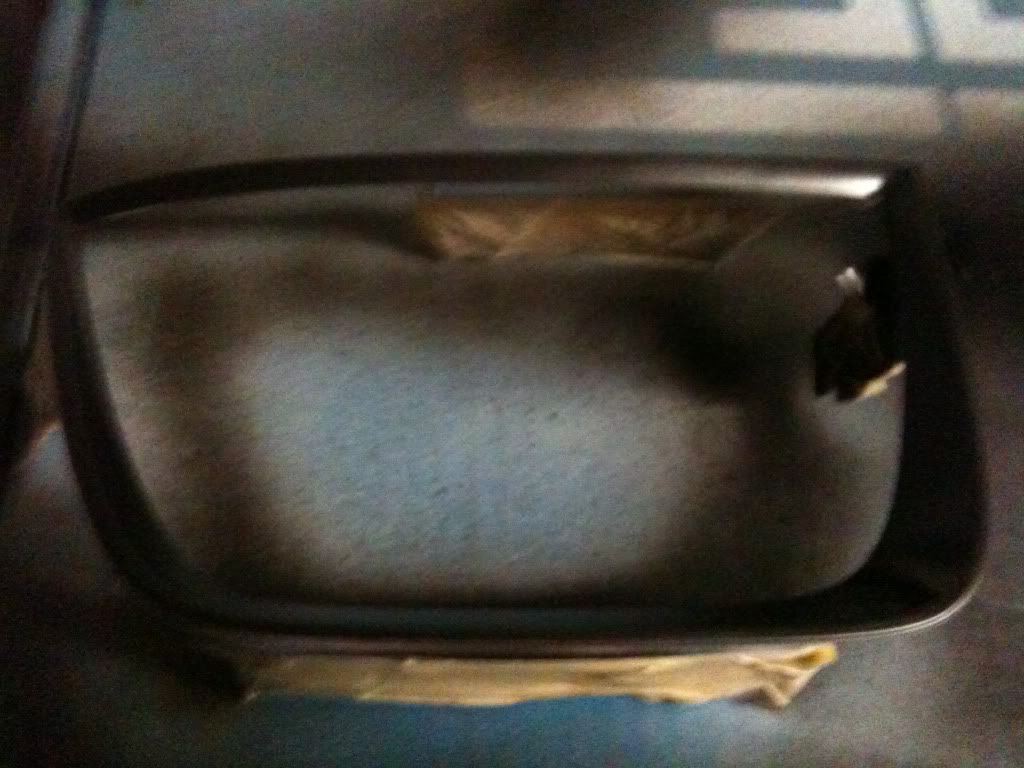 So I let them sit out and dry over night, which was about 12 hours in time. Once morning came, I made sure they were fully dry, and put them back in their slots, put the panels back on and enjoyed the final product! I like the look a lot and was very satisfied. Here is the final product: 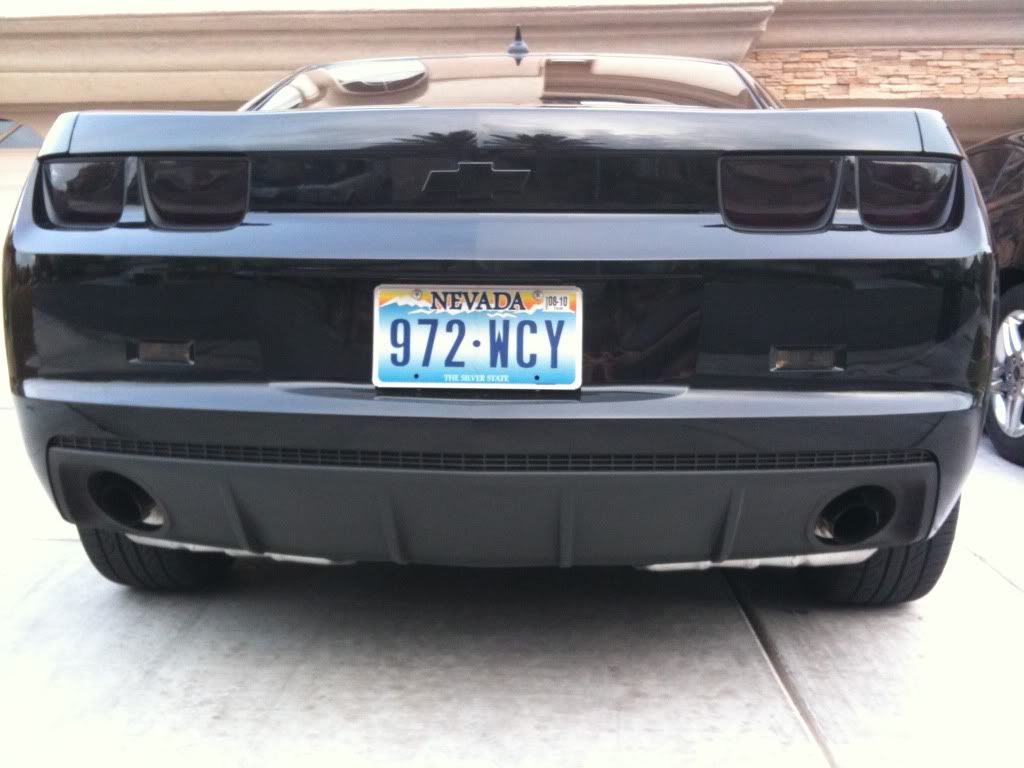 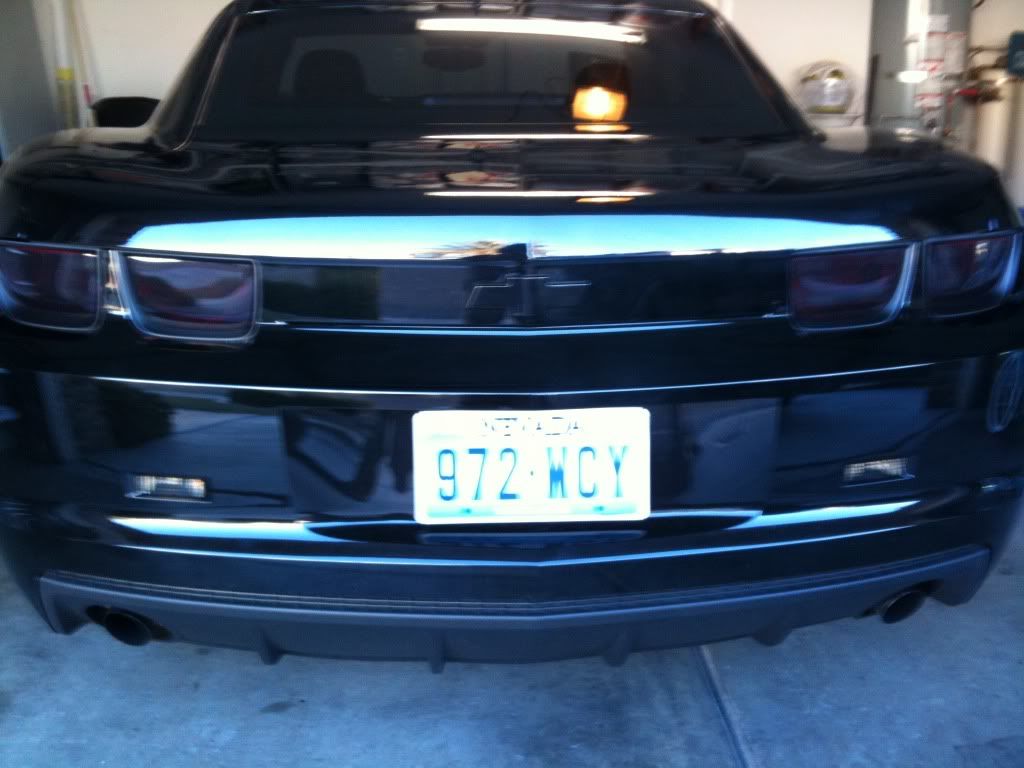 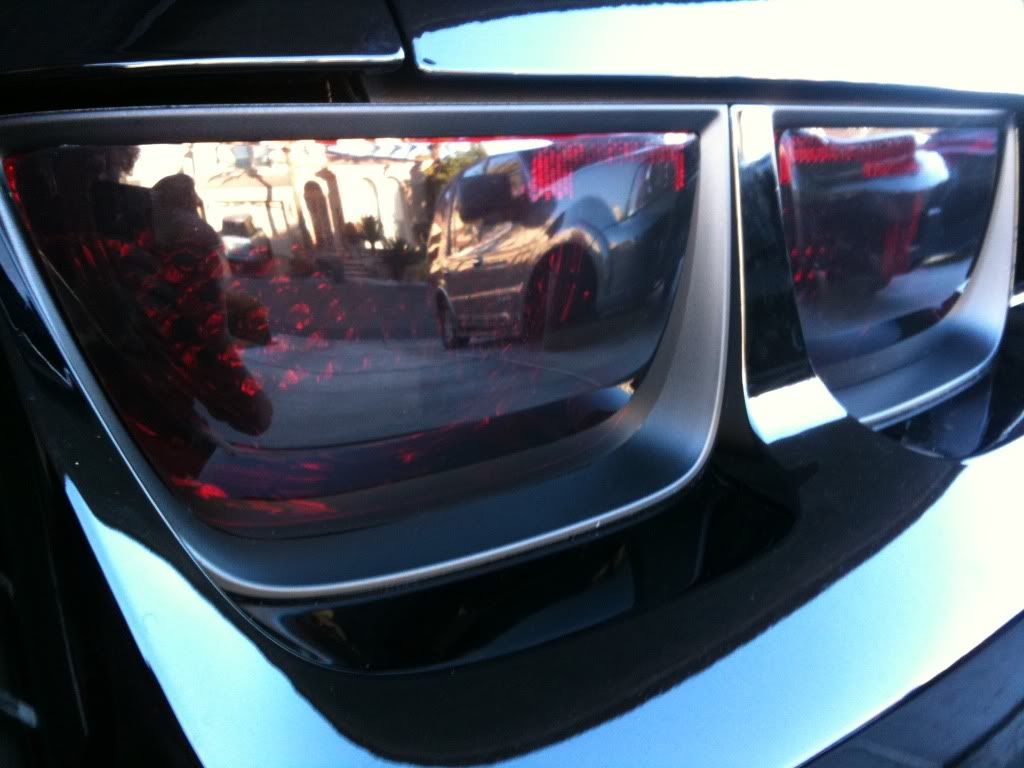 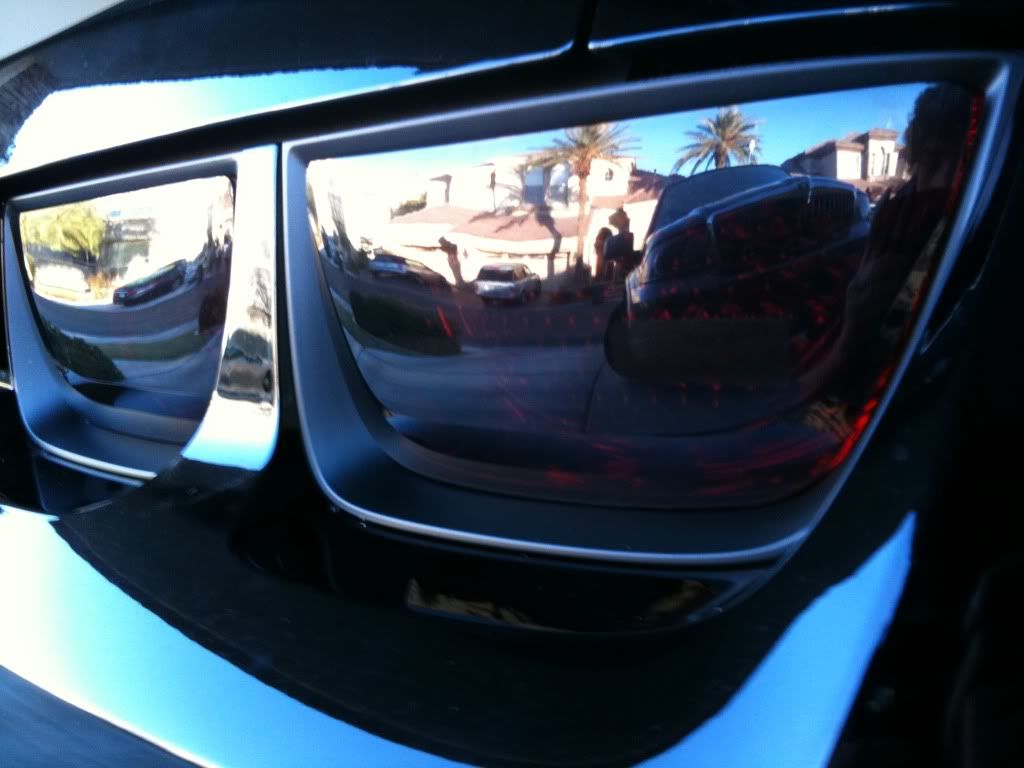 Feel free to post some pictures of your bezels too! 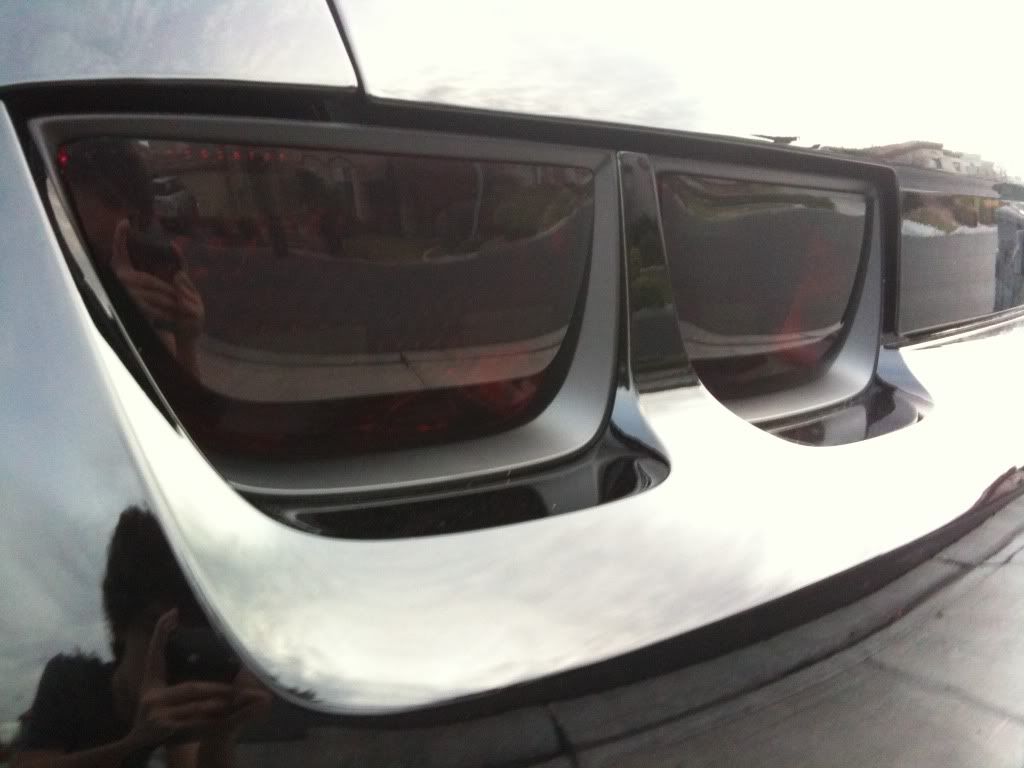
Last edited by zsuns; 02-01-2010 at 10:44 PM. |

|

|
|
02-01-2010, 09:15 PM
|
#2 |
|
Drives: none yet Join Date: Jan 2010
Location: Richmond, VA
Posts: 54
|
very cool. looks nice

|
|
|
|
|
02-01-2010, 09:24 PM
|
#3 |
|
Drives: All Blacked Out 2010 2LT Camaro Join Date: Dec 2009
Location: Las Vegas
Posts: 57
|
Thanks!!
|
|
|
|
|
02-01-2010, 09:39 PM
|
#4 |
 
Drives: 2010 1SS Join Date: Dec 2009
Location: Livermore, CA
Posts: 139
|
Depending on your automotive paint store... you might even be able to find SEM Trim Paint... in flat/semi gloss black.
It's really good stuff... and is made specifically to paint automotive trim parts. Sam |
|
|
|
|
02-01-2010, 09:47 PM
|
#5 |
|
Drives: All Blacked Out 2010 2LT Camaro Join Date: Dec 2009
Location: Las Vegas
Posts: 57
|
Yeah i've seen it around but i've never used it, plus I've had experience with this spray paint before and liked the look of it so decided to use it again.
|
|
|
|
|
02-01-2010, 09:50 PM
|
#6 |
|
Virologist in the making

Drives: 2010 VR SS/RS LS3 Join Date: Aug 2009
Location: El Paso TX
Posts: 2,865
|
Looks good, I'm glad I did mine. Looks much better imo.
__________________
Victory Red 1SS/RS Ordered - 8/4/09 & Joined Camaro5.com family
6000, Delivered to the customer - 12/21/09   |
|
|
|
|
02-01-2010, 09:57 PM
|
#7 |
|
Drives: All Blacked Out 2010 2LT Camaro Join Date: Dec 2009
Location: Las Vegas
Posts: 57
|
Thank you very much. It was easier than I thought from what I heard it was hard to take out the bezels but for me atleast it was easy.
|
|
|
|
|
02-02-2010, 11:24 AM
|
#8 |
|
2SS RJT OWNER/OPERATOR

Drives: 2010 2SS LS3 RJT Join Date: Jan 2010
Location: Currently on the 3rd Rock. Temporarily
Posts: 540
|
The Black on Black looks reall cool. Nice job!
__________________
Fly low and Avoid the radar!
|
|
|
|
|
02-02-2010, 11:28 AM
|
#9 |
 
Drives: 1968 Bronco,2001 Fatboy,2010 SS Join Date: Jan 2010
Location: Southeast
Posts: 713
|
Killer! Black on Black with everything Black. I LOVE this look.
|
|
|
|
|
02-02-2010, 01:00 PM
|
#10 |
 Drives: 2010 2LT CHEVY CAMARO BABY!!!! Join Date: May 2009
Location: Glencoe
Posts: 394
|
Great write up and fantastic pics! I've been wanting to paint my bezels for the longest time but I could never find any definitive instructions to do it. As a half- ass kinda way, I just wrapped them up in flat black vinyl, but thanks to your write up, I feel confident to finally do this the right way! Thanks!
|
|
|
|
|
02-02-2010, 06:19 PM
|
#11 |
        
Drives: 2016 Challenger Hellcat, 2018 ZL1LE Join Date: Dec 2009
Location: Northern NJ
Posts: 3,003
|
excellent write up man. thanks for this. as soon as i get my car i will be doing this.
looks killer. |
|
|
|
|
02-02-2010, 06:40 PM
|
#12 | ||||
|
Drives: All Blacked Out 2010 2LT Camaro Join Date: Dec 2009
Location: Las Vegas
Posts: 57
|
Quote:
Quote:
Quote:
Quote:
|
||||
|
|
|
|
02-02-2010, 08:39 PM
|
#13 |

|
Looks good!... this is the one thing that I think made a big difference with the look of mine. The black on black of yours just enhances it more.
The only thing I would have suggested doing different is using a good plastic adhesion promoter instead of the primer. As SamIyam stated, the SEM is an excellent product for these kinds of projects.
__________________
 CAI intake | OBX LT Headers | Flowmaster AT Exhaust | Trifecta Tune | SS Rear Diff, Axles & Driveshaft Zex 100 Shot Nitrous | Konig Airstrike Wheels | Custom Engine Cover, Fuse Box & Underhood Bowtie Eibach Springs & SS Sway Bars | BMR Strut Brace | Drake Shifter | Vitesse Paddles | 13.26 @ 105.88 mph |
|
|
|
|
02-02-2010, 08:56 PM
|
#14 |
|
Drives: All Blacked Out 2010 2LT Camaro Join Date: Dec 2009
Location: Las Vegas
Posts: 57
|
Yeah when I went in the store I actually did ask for an adhesion promoter but the worker said all they had was primer.
|
|
|
|
|
|
|
|
 |
|
|
 Similar Threads
|
||||
| Thread | Thread Starter | Forum | Replies | Last Post |
| Clear Lens Tail Lights - smoked | kdoske | Cosmetics and Lighting Modification Discussions | 13 | 04-24-2011 01:55 AM |
| Removal of tail lights | Germann | Camaro DIY & HOW-TO instructions & discussions | 8 | 12-14-2010 09:43 PM |
| Blacked out my tail light bezels... | scythezo6 | Cosmetics and Lighting Modification Discussions | 9 | 05-10-2010 09:47 PM |
| New tail lights? | 2000v6 | 4th Generation Camaros | 40 | 03-17-2010 03:07 AM |
| black out tail lights, vinyl or stickers? | Darth_Emma | Cosmetics and Lighting Modification Discussions | 3 | 12-14-2009 12:03 AM |


