You are browsing camaro5 

|
 05-19-2011, 12:27 PM
|
#1 |

Drives: 2014 Z/28 #82+#192, 18ZLE 66Nova Join Date: Oct 2008
Location: By the lake in AZ
Posts: 15,719
|
Making your own LED side markers DIY
I wanted to make some side markers using 5050 SMD's, At the same time they needed to be a running light and a turn signal, There was one more thing that they need to do and that was not to lose any of the LED's as some have.
Firs is get a set of OEM side markers and cut them open, Use a dremel tool with a fin cutting wheel on, cut as close to the white plastic all the way around. 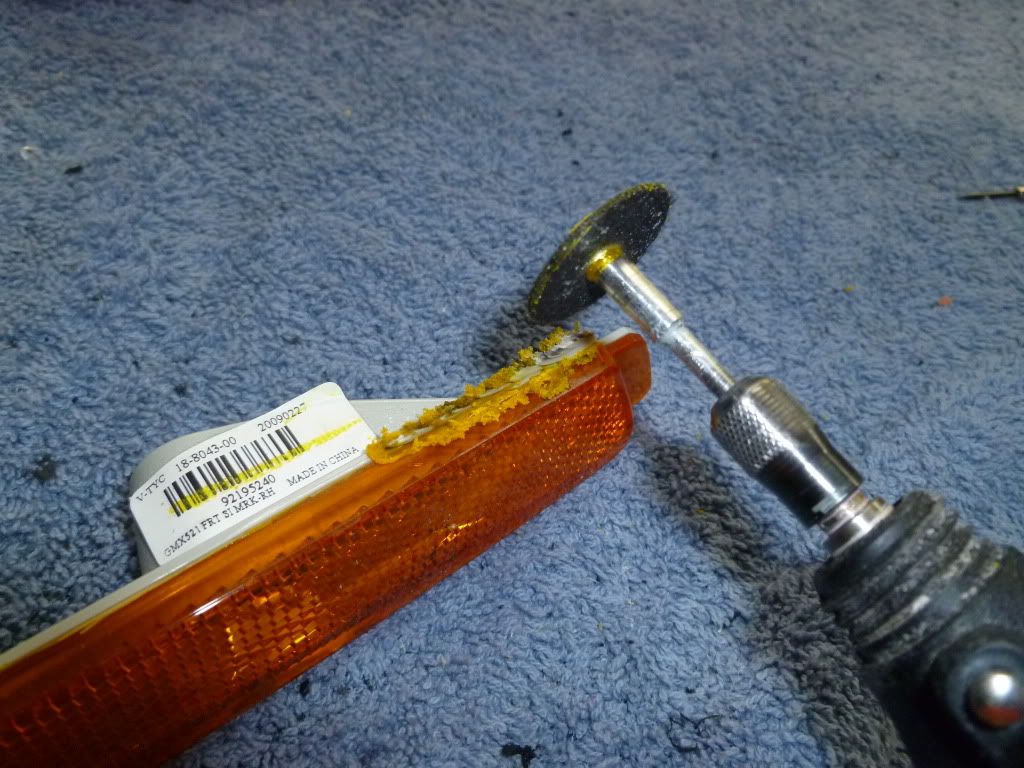 And this is all the way around and remove all the slog. 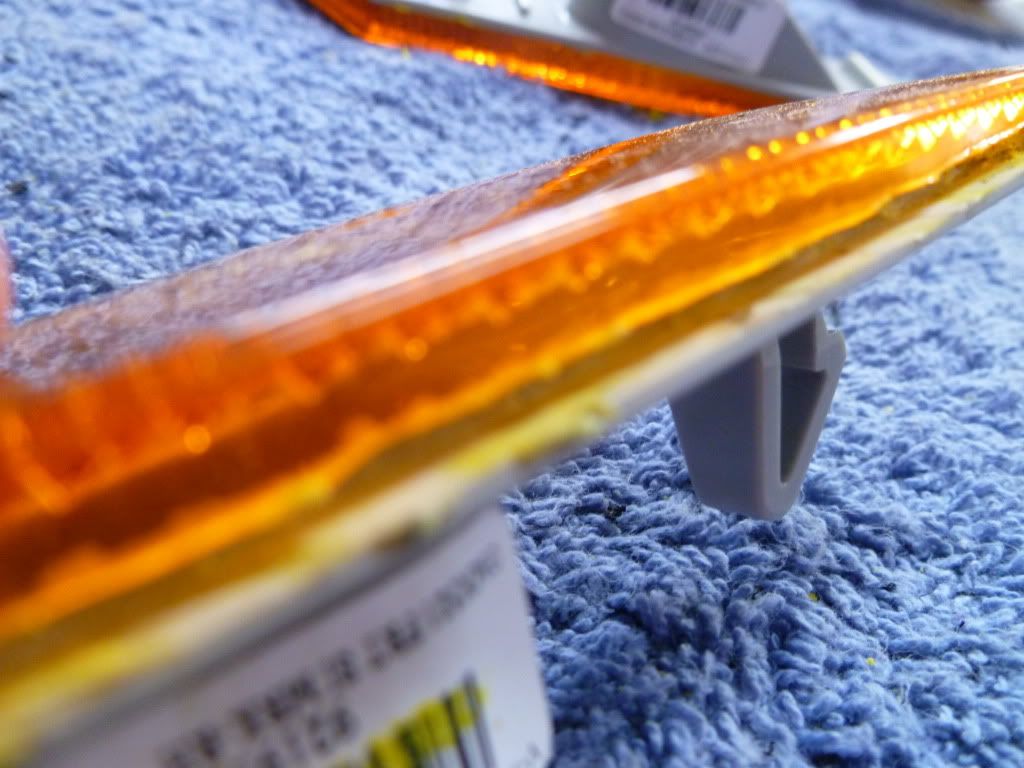 Next was the right Circuit board for the LED's, Was thinking of etching the boards and got all the parts to do so, Was thinking of sale them but went a different way and found an old computer board that will work. The new board is a radio shack the was for building your own sound card, it had the right spacing to put to SMD's 5050 every 5 soldering pads, so it placed 2 LED's in Series, so that make them 11x2 in Series for the rear and 9x2 in Series for the front, (Series is one + to - to + to - ) Here is a pic of the board after it was cut to fit in the side marker housing. 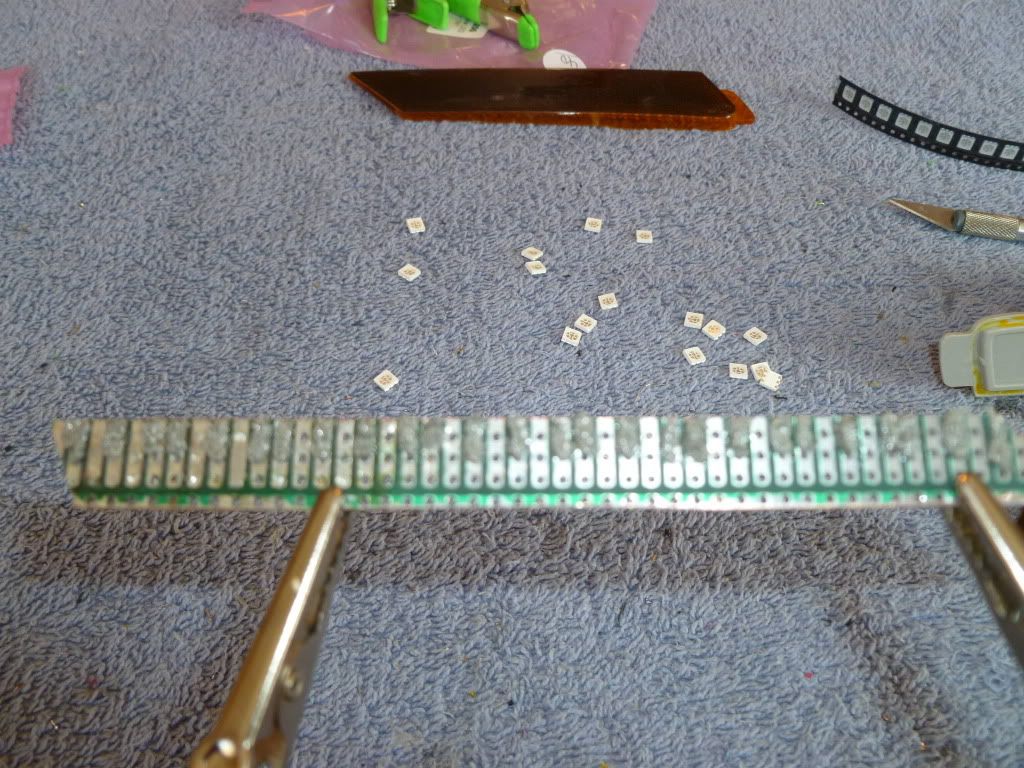 In that pic you see solder past on the board, it can be ordered and makes soldering SMD's so much fast and better looking, So now we add the SMD's to the board, Got this tool to help it holds the board in place and give you a magnifying glass, It help a lot. 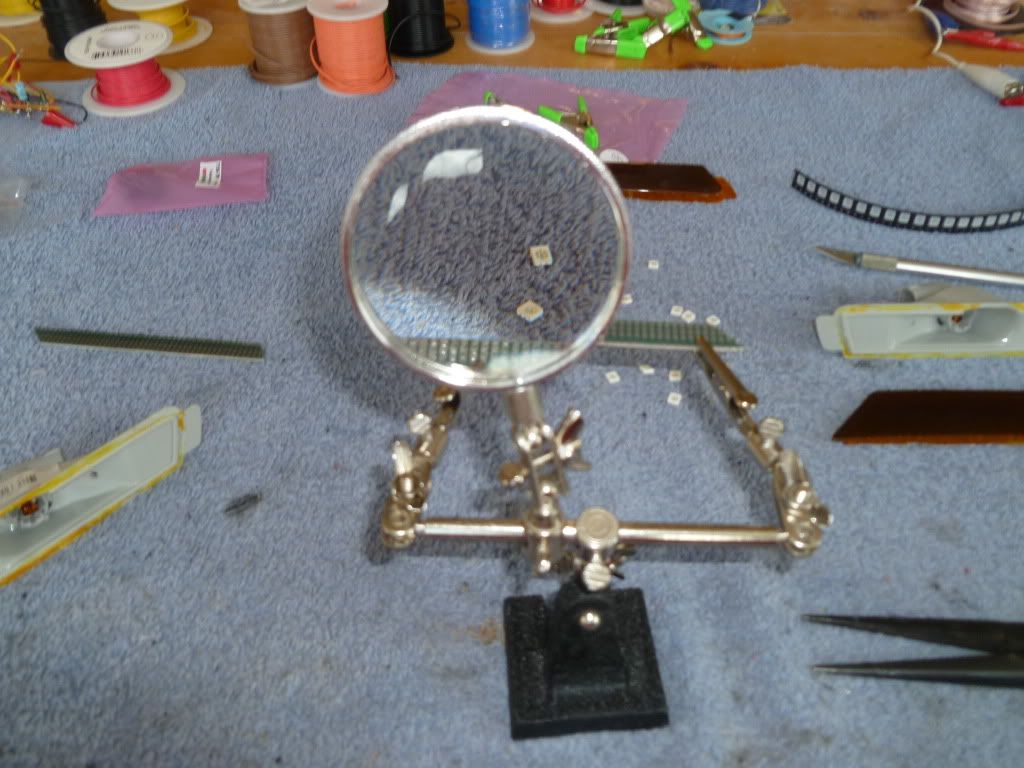 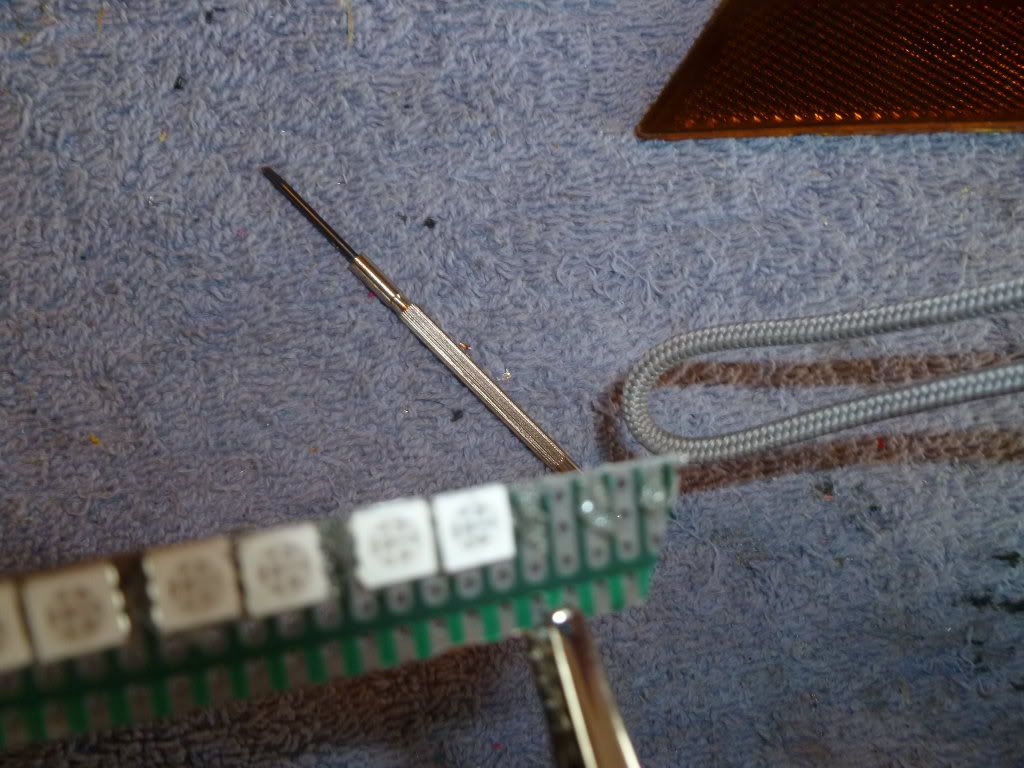 And this is the soldering past.  Next you get you wife out of the hose for some time, you need to use your toaster oven, The past melts at 450 degrees so preheat the oven to that and do not bump the board or you will move the LED's on the board, set the board in there and live it for 10 min at most, There is a way to see if is melted and adhered to the board, Look at the solder and see if its silver. Here are some pics of how to moved it to and out of the oven. 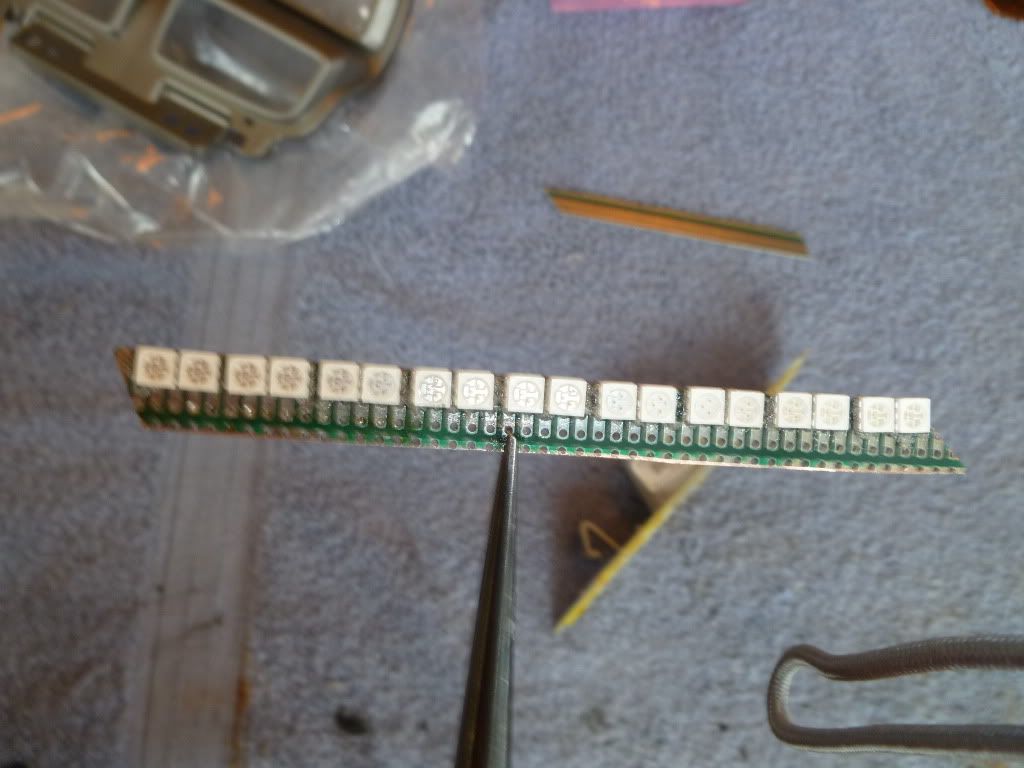 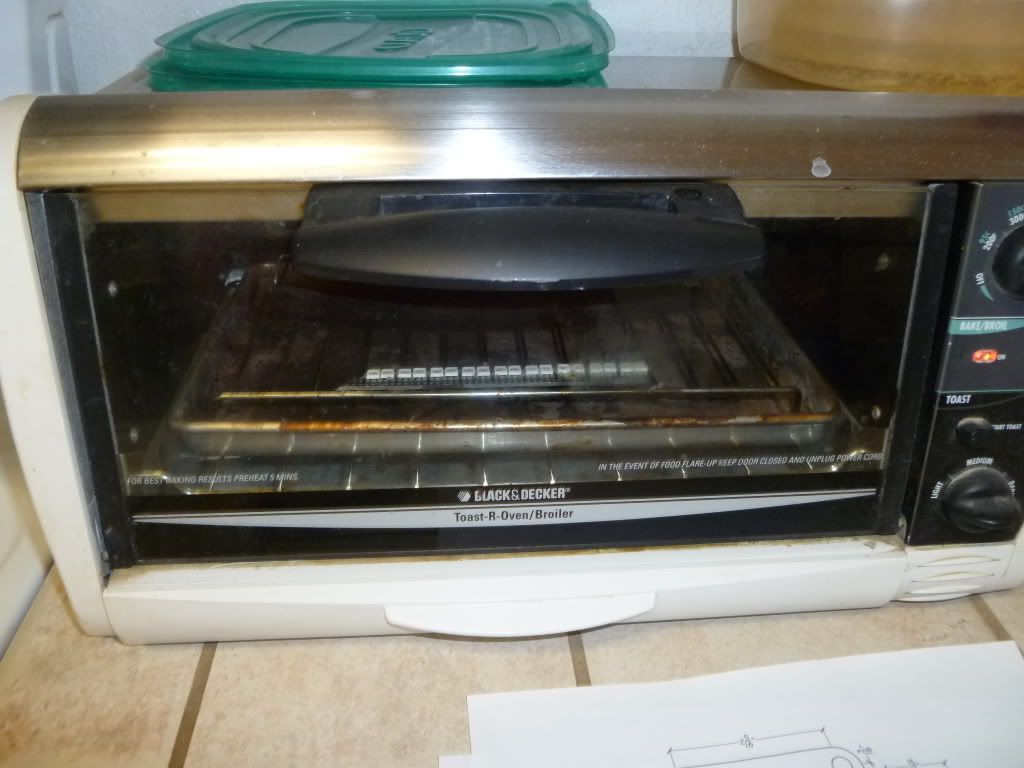 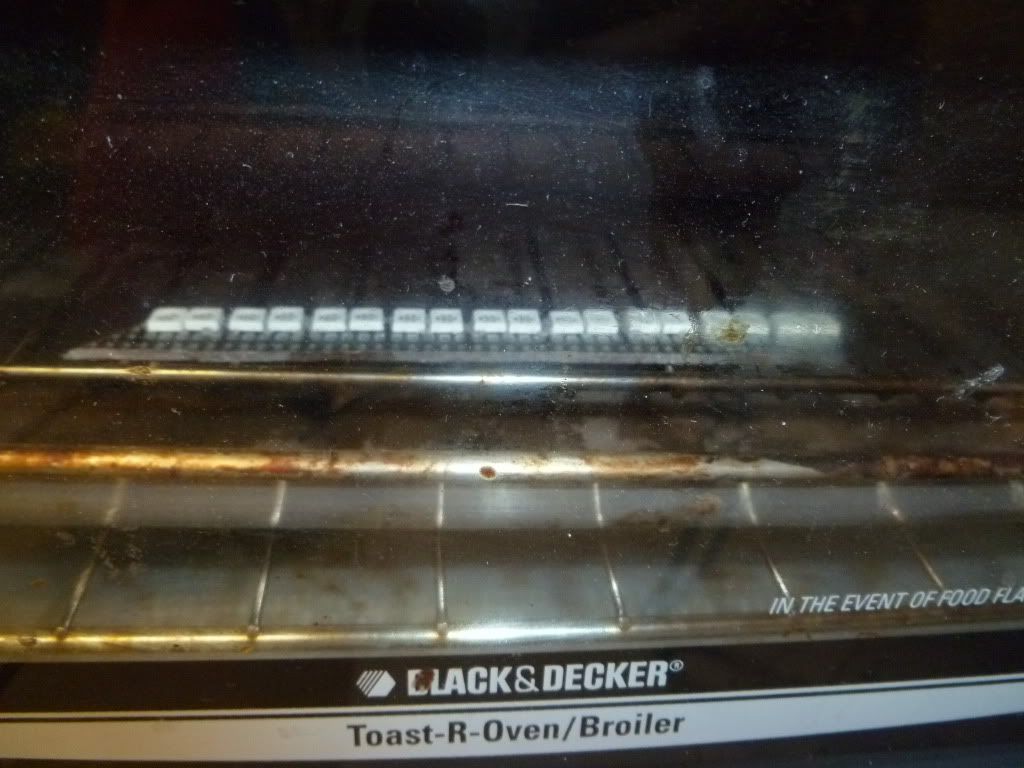 And this is what it looks like after the oven. ( by the way after you remove it from the oven let it sit for 20 min to let it cool and the LED's to set) 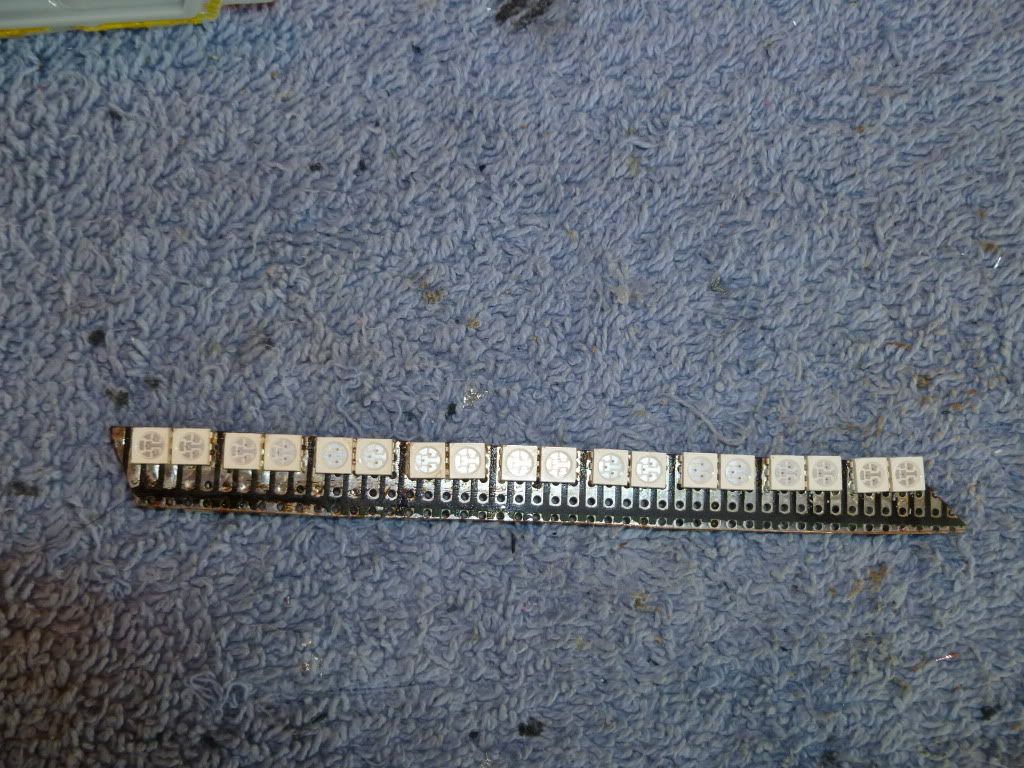 Next its time to work on the out side housing so it can be made in to a turn signal, Start by drilling a 1/8" hole in the housing that way you can add a second wire to power the turn signal, after you drill the hole cut a 3ft 20 gauge wire and put a knot in it so it cant be pulled out, then cut the wire 6" back and add a diode and 1 resister, the value will depend on the SMD's your using. 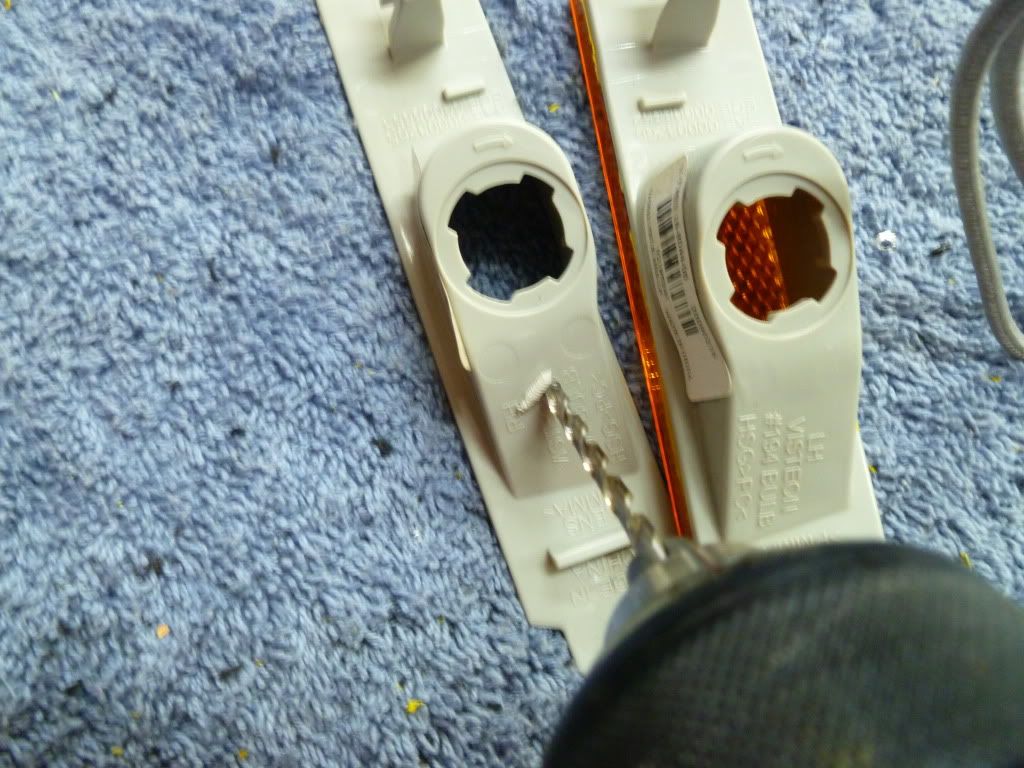 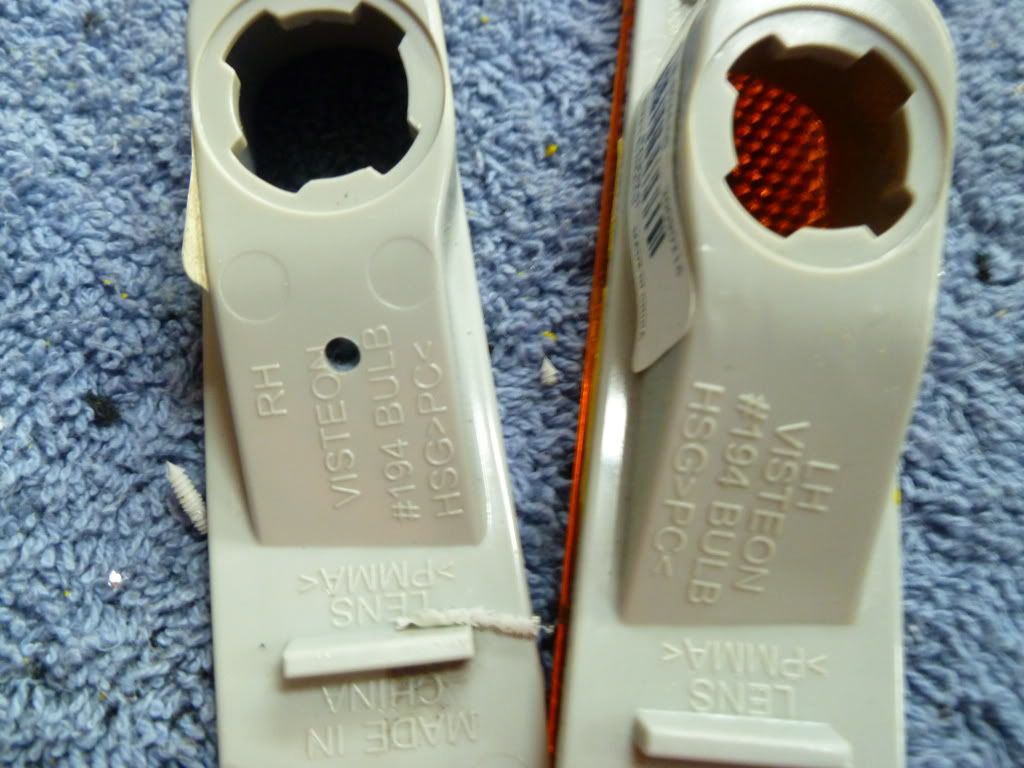 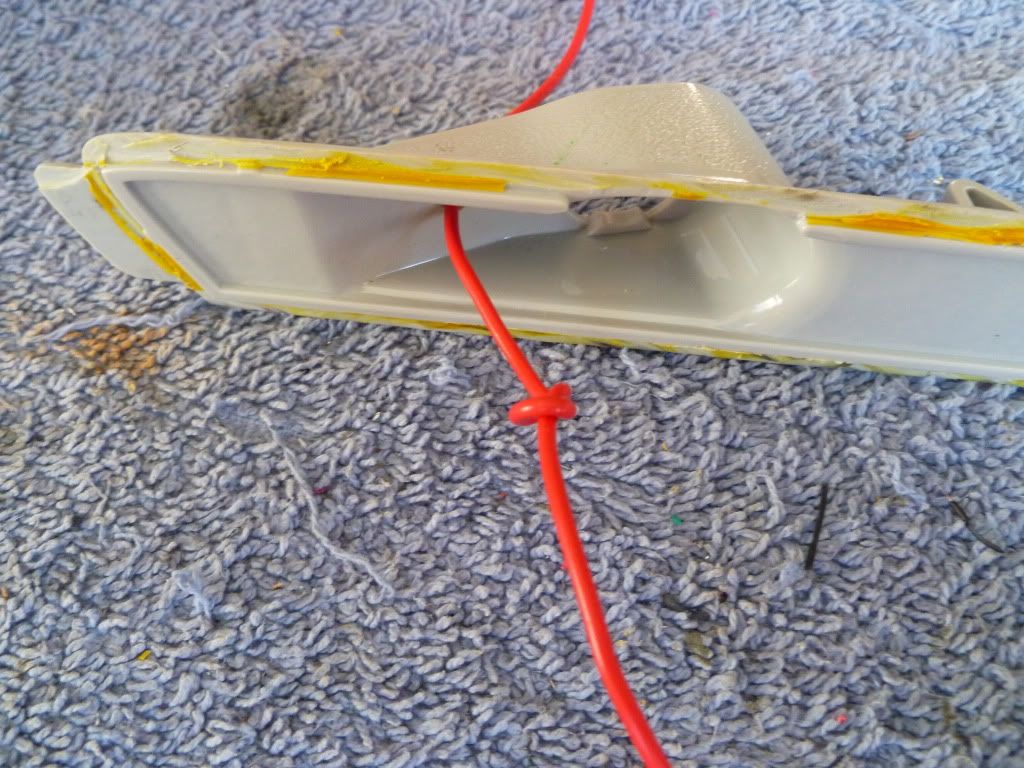 Now for the LED board, You need the info on the SMD's LED your using, But for this DIY will go with the ones that where used here, Here is a link to help you calc out what resister to use. http://led.linear1.org/led.wiz 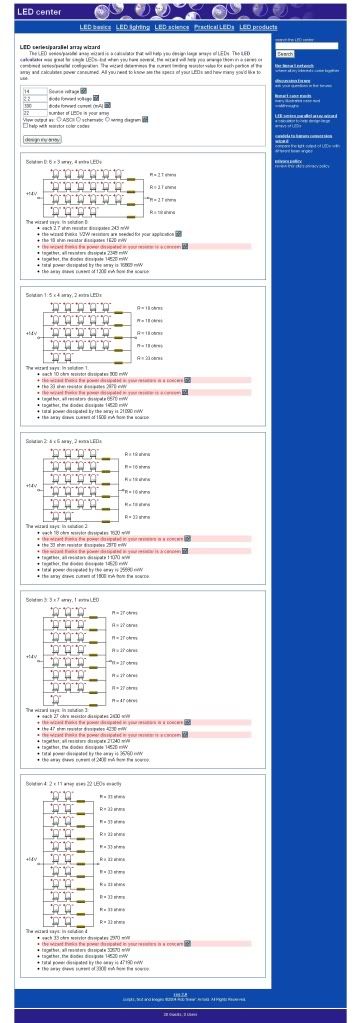 So you can see that in a two row set the resister is 33 ohm's that worked but got to hot, it was only a mater of time till something was going give up, so how to fix it? what was done, was add more resister inline, you remember that we added a resister to the turn signal wire right? so we need to do the same for the running light, will get back to that in a min. You will need to solder 1 33 ohm's resister per set of LED's live room to move it in there, do the same to all 9 for the front and 11 for the rear markers, you nee to connect them all to one wire going to the ground. Then you need to solder all the positive to one wire and that needs to have a diode and 3 more resister on the running light side, that will take care of heat so no LED's go out, (by the way its not the LED's that go out, its the heat from the resister that kills it). Now last is you need to get some blank 914 Empty Socket to fit in the OEM connecter, looks like this, then you hot glue the board donw to the OEM housing and seal the lens to the housing let it seat over night and if you like paint and tint.  I will post pics on the car in a day need to install on the car. |

|

|
|
05-19-2011, 01:24 PM
|
#2 |
            
|
Awesome. Can't wait for pics. Wish I was smart enough to do this.
|
|
|
|
|
05-19-2011, 04:23 PM
|
#3 |

Drives: 2010 CAMARO 1SS/M6 BLACK ON BLACK Join Date: Oct 2010
Location: ORANGE COUNTY CA
Posts: 542
|
That's a great idea. Thanks! Do you think it would look as good it you use a LED strip? To avoid all the soldering ?
|
|
|
|
|
05-19-2011, 05:21 PM
|
#4 |
|
Drives: 2014 Z/28 #82+#192, 18ZLE 66Nova Join Date: Oct 2008
Location: By the lake in AZ
Posts: 15,719
|
The soldering of the LED was nothing to do, If you use past its fun to use, As for strips i think you will have problems in the long run.
|
|
|
|
|
05-19-2011, 07:18 PM
|
#5 |
|
Drives: 2010 CAMARO 1SS/M6 BLACK ON BLACK Join Date: Oct 2010
Location: ORANGE COUNTY CA
Posts: 542
|
Good point. Thanks again buddy. Can't wait to see the finished product.
|
|
|
|
|
05-19-2011, 08:35 PM
|
#6 |
|
knows 2 facts about ducks

Drives: ...and they're both wrong Join Date: Aug 2009
Location: The HMS Invincible
Posts: 25,072
|
Need pics
__________________
 |
|
|
|
|
05-19-2011, 08:56 PM
|
#7 |
|
Drives: 2014 Z/28 #82+#192, 18ZLE 66Nova Join Date: Oct 2008
Location: By the lake in AZ
Posts: 15,719
|
Did i not put up more then you need to do this?
|
|
|
|
|
05-19-2011, 10:12 PM
|
#8 |
|
Drives: 2014 Z/28 #82+#192, 18ZLE 66Nova Join Date: Oct 2008
Location: By the lake in AZ
Posts: 15,719
|
Here are two pics first is running light and second is turn signal light, its on my bench for tonight as the paint is drying.
|
|
|
|
|
05-19-2011, 10:16 PM
|
#9 |
|
|
Looks great. When do you start production.

|
|
|
|
|
05-19-2011, 10:21 PM
|
#10 |
|
Drives: 2014 Z/28 #82+#192, 18ZLE 66Nova Join Date: Oct 2008
Location: By the lake in AZ
Posts: 15,719
|
So you know this set cost more in the time then if i orderd from one of the vender that sale them, I f... up more parts then any outer mod i have done, and gas to go get parts don't ask, But one day at CF2 i went to fry's and got the last parts and tools i needed.
|
|
|
|
|
05-19-2011, 10:53 PM
|
#11 |
|
|
I hear ya, but it's nice to do things yourself. I will buy some in time but nice job. I have read allot of your threads and you do great work.

|
|
|
|
|
05-19-2011, 10:54 PM
|
#12 |
|
Drives: 2010 CAMARO 1SS/M6 BLACK ON BLACK Join Date: Oct 2010
Location: ORANGE COUNTY CA
Posts: 542
|
Looks bad A$$ great job ima get on it ASAP. Big fan no lie.
|
|
|
|
|
05-19-2011, 11:17 PM
|
#13 |

Drives: 2016 2SS, SW Join Date: Oct 2009
Location: Chicago Suburbs
Posts: 1,079
|
Good going!
|
|
|
|
|
05-19-2011, 11:27 PM
|
#14 |
 
|
ok , so first I tear up my factory lights,then take sound card out of my 2 computers,then buy a toaster oven.....total cost $1200 plus my time and replace light if dont work .......or buy the junk lights from AAC for $260....wow your a genius
|
|
|
|
|
|
|
|
 |
|
|
 Similar Threads
|
||||
| Thread | Thread Starter | Forum | Replies | Last Post |
| DIY: Halo as DRL on Eagle Eyes | MagnumForceGB | Camaro DIY & HOW-TO instructions & discussions | 15 | 03-25-2014 05:54 PM |
| Would you guys Install your own side Stripes? Take 15mins DIY | dxy2jbaby | Cosmetics and Lighting Modification Discussions | 11 | 04-07-2011 10:23 AM |
| Would you guys Install your own side Stripes? Take 15mins DIY | dxy2jbaby | Camaro DIY & HOW-TO instructions & discussions | 3 | 04-06-2011 04:38 PM |
| Led Side marker turn signals? | 1138 | Cosmetics and Lighting Modification Discussions | 0 | 01-21-2011 12:11 AM |
| LED side markers | SSuper SSexy | Off-topic Discussions | 8 | 10-11-2010 08:17 PM |


