You are browsing camaro5 

|
 07-22-2013, 07:42 PM
|
#15 | ||
|
I like teeth.

Drives: #198 Join Date: Oct 2009
Location: Ft. Lauderdale, Florida
Posts: 4,817
|
Quote:
I use them here to correct hard camaro paint on a Griot's Garage 3 inch:
__________________
.
Please check out my youtube detailing channel: http://www.youtube.com/user/roshan517 "When you want to succeed as bad as you want to breathe, then you will be successful." |
||

|

|
|
07-22-2013, 08:39 PM
|
#16 | |
|
Search Ninja

Drives: 2010 Black 2SS/RS A6 Join Date: Oct 2009
Location: Central Ark
Posts: 7,183
|
Quote:
__________________
2010 Black 2SS/RS A6
Halltech CF 102 fed GPI modded intake manifold Bo (knows) White ported TB Kooks LT's/ Dynomax VT Pfadted (springs/sways) Dyno tuned by Rhino and GPI I once parallel parked a train. |
|
|
|
|
|
07-23-2013, 07:07 AM
|
#17 | |
|
2010RS/SS RUMBLEBEE

Drives: Drives a 2010 2SS/RS Camaro Join Date: Aug 2010
Location: Great White North*****
Posts: 2,435
|
Thanks for the advice ,how do you like the different handle feature compare to PC,it looks like you would have better control of the polisher versus the PC model.
Theirsno Griots dealers here in my area and getting the pads would be difficult unless I order online and then Revenue Canada and the border people wants your arm and a leg for duty fees.lol. Quote:
__________________
2010RS/SS RUMBLEBEE
|
|
|
|
|
|
07-23-2013, 07:20 AM
|
#18 | ||
|
2010RS/SS RUMBLEBEE
Drives: Drives a 2010 2SS/RS Camaro Join Date: Aug 2010
Location: Great White North*****
Posts: 2,435
|
It looks like you are applying quite a bit of force against the paint,I have seen reviews on here where to not apply to much force and let the polisher do it's job.By the way it must take you a week to do the job.
 Quote:
__________________
2010RS/SS RUMBLEBEE
Last edited by STINGER BEE; 07-23-2013 at 07:32 AM. |
||
|
|
|
|
07-23-2013, 07:51 AM
|
#19 | ||
    Drives: 2012 AGM SS Join Date: Jun 2012
Location: Las Vegas
Posts: 1,407
|
Quote:
Quote:
__________________
|
||
|
|
|
|
07-23-2013, 08:25 AM
|
#20 | |
|
I like teeth.
Drives: #198 Join Date: Oct 2009
Location: Ft. Lauderdale, Florida
Posts: 4,817
|
Quote:
The 3 inch GG is the slowest machine I have at paint correction. For it to work correctly, you must use a bit of force while making sure the pad is still rotating. That's also true for any entry level D/A: Porter Cable, Griot's, or Meguiar's. It's when you get to higher level D/As that you can really just let the weight of the machine do the job for you.
__________________
.
Please check out my youtube detailing channel: http://www.youtube.com/user/roshan517 "When you want to succeed as bad as you want to breathe, then you will be successful." |
|
|
|
|
|
07-23-2013, 05:44 PM
|
#21 | ||

Drives: 2010 SS Join Date: Aug 2006
Location: Mi./Al.
Posts: 829
|
Quote:
__________________
POW/MIA - YOU ARE LOST BUT NOT FORGOTTEN IN SOUTHEAST ASIA
|
||
|
|
|
|
07-23-2013, 07:44 PM
|
#22 | |
|
Smoke Alotapotomous

Drives: 2010 Camaro SS Join Date: Jun 2011
Location: Brechin, Ontario
Posts: 955
|
Quote:
__________________
2010 Camaro TT SS. AGP twin Turbo
 |
|
|
|
|
|
07-23-2013, 08:43 PM
|
#23 |
|
LongTimeLurker

Drives: 2011 SIM 2SS/RS Convertible L99 Join Date: Dec 2012
Location: Napanee, Ontario
Posts: 434
|
Virgin clay and buff
OK. So I had some time tonight .. well not really I should have been getting ready for my work trip to Ottawa and detailed my Camaro! .. but my wife was at work so I decided I would get out the clay and my new toy.
My PT has sat in that same spot since at least Nov 2012. This is my winter beater that I basically let sit. I am not sure if I am going to sell it or keep it. I want an old truck as a winter beater. Something a kin to a rat rod truck. So the PT is my paint correction test lab. First I used the 3M light treatment on my headlights. The pictures really don't do it justice. They were in MUCH worse condition in real life and they look 95% of brand new in real life. Not sure if the picture do it justice or not. That took me about 45 to do both. It comes in a kit with sanding pads and some buffer pads. Just follow the instructions and take your time. CHANGE the sanding pads frequently. If you start leaving plastic over burn on the headlights its time to change pads. I really recommend just splitting the 500/800 grit pads into two a pile for left and pile for right. use them all and you will get the best results. If you try and cheap out and do more then 1 car, trust me it will only be 50% as good. Boom head lights done. Gave the Pt a bath with water and Dawn ultra. Now the clay. The clay I used was the only clay bar kit I could find in my area that was not over $60. Sorry but **** that I am not spending $60 on clay for my PT cruiser and my first time with clay. I used Simonizer clay bar kit. It's junk! The kit came with 2 bars, detail spray and a microfibre towel for $22. I have used their detail spray a long time ago. Its mostly water, not something I would ever use on my car, I am pretty sure I gave it away. Its just lube so I used it. It was VERY VERY stiff and was more like a combo of rubber and stale clay. It was very hard to fold. Once you got it wet enough, it was so so. But by the end of the PT claying, the clay was a soaking pile of goo. Just barely enough left to get through the car. Not like anyone here would use that shit. but I did. I used one bar in the kit for the whole car, if this was my camaro i would have used both bars. well honestly this clay would never touch my clear coat! This is my practice run with my polisher and I just could not bring myself to play with a polisher without at least claying the car first. The clay did a decent job of getting the clear coat clean, it just felt cheap and fell apart. Maybe all clay is like this, I don't know. But I would clay a section until it felt slick and smooth. I would give it one more once over and then use a glad bag method Junkman uses before I moved on. The trunk was the longest and for some reason the passenger side door just had more junk and took at least 3-4 times longer then every other section. I would say it took me about 2 hours to clay the car. I did not rush this. I was not trying to "speed" clay, but I was pretty confident that i got every inch as clean from the clay as i could. Now on to the Meguiar's polisher. I used their pads and again the only polishing compound i could find was meguiar;s #9 compound and meguiar's #1 polish. I got the compounds from the Napa store. The pads i used were black and then their yellow and came with the polisher. I was not happy with any of the compounds or the pads. The medium cut #9 (professional series) I giwas basically a thick liquid. And this was slinging product all over the place and I used 5 dots, then pressed it into the hood, and used detail spray on the pad. STARTED the polisher while it was ON the hood, and it still slung product all over. Sure I would expect some cause I am a noob, but it seemed like a LOT. I am going to take this shit back and get my money back. The next part could be my fault, it did not cut at all. It seemed more like a POLISH then a cut. I tried to do my best to follow junkman's technique. It seemed to just take out very minor swirls. Again. this could be my noobness. Next was the #1 polish. its hard to say how this worked because I was so unimpressed with the medium cut. The only good news was this was more like the paste consistency I expected. tried to give it a good go, but I did not really notice any major pop to the paint from the medium #9 cut. I will say that I was happy with the preformance of the polisher itself it seemed very high quailty and it was easy to control. I felt comfortable with it, I did not fell like I had to fight it to much. I am sure with more time behind me this will only get better. below are my pictures. 1. Dirty and blind! No wash, no headlight treatment! 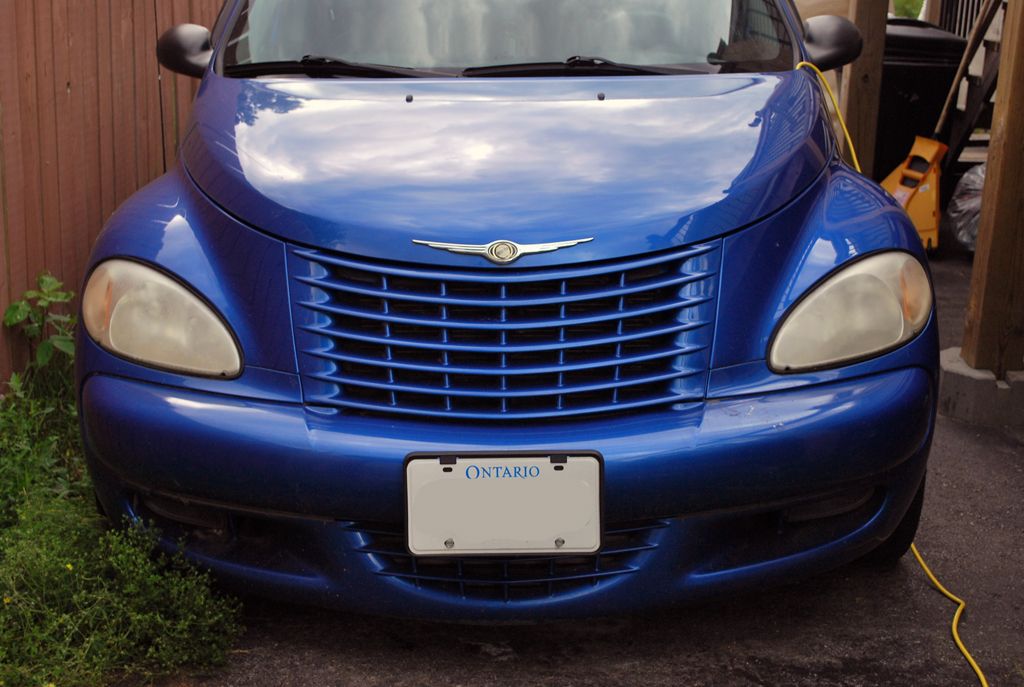 2. Passenger side treated and finished. Driver side left o'natural! 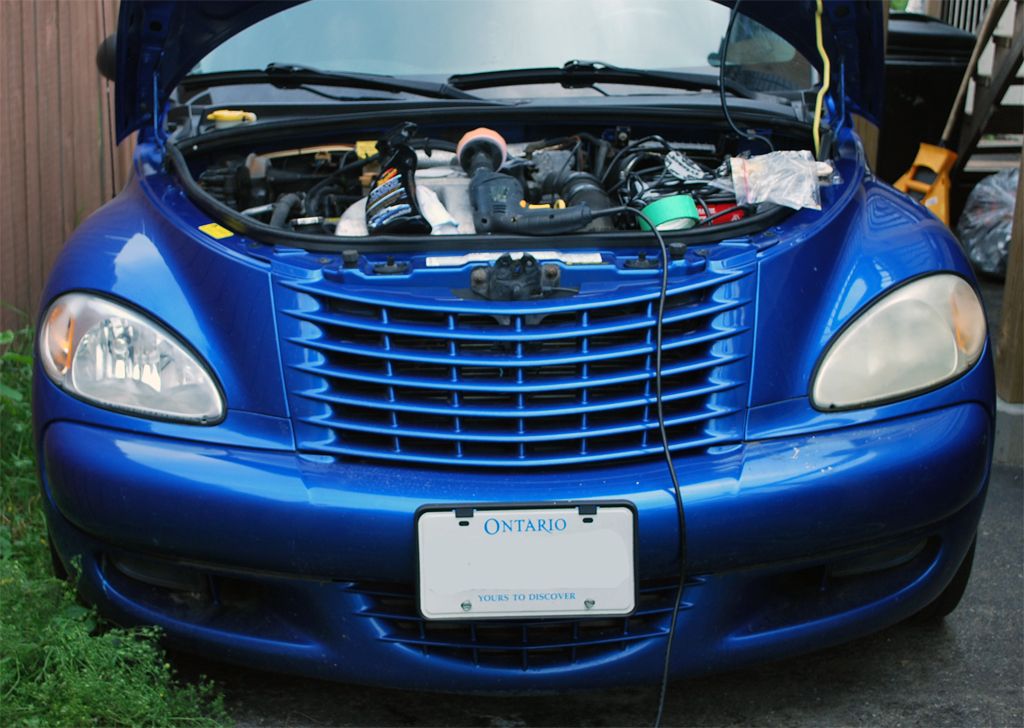 3. Close up of the passenger side. 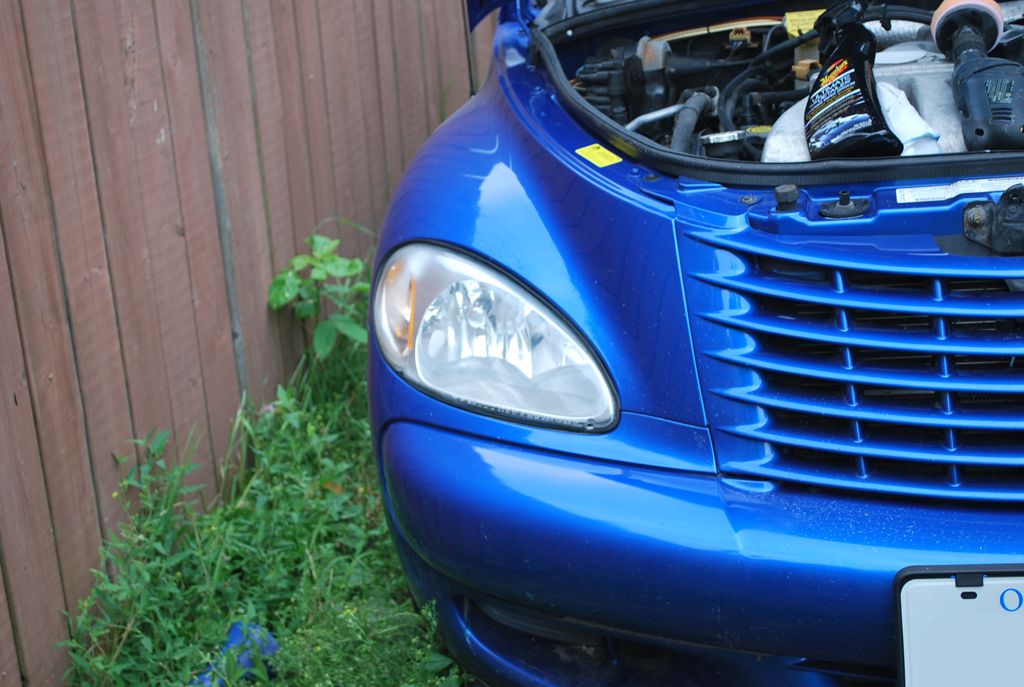 4. Headlights done, washed, dried and clayed! 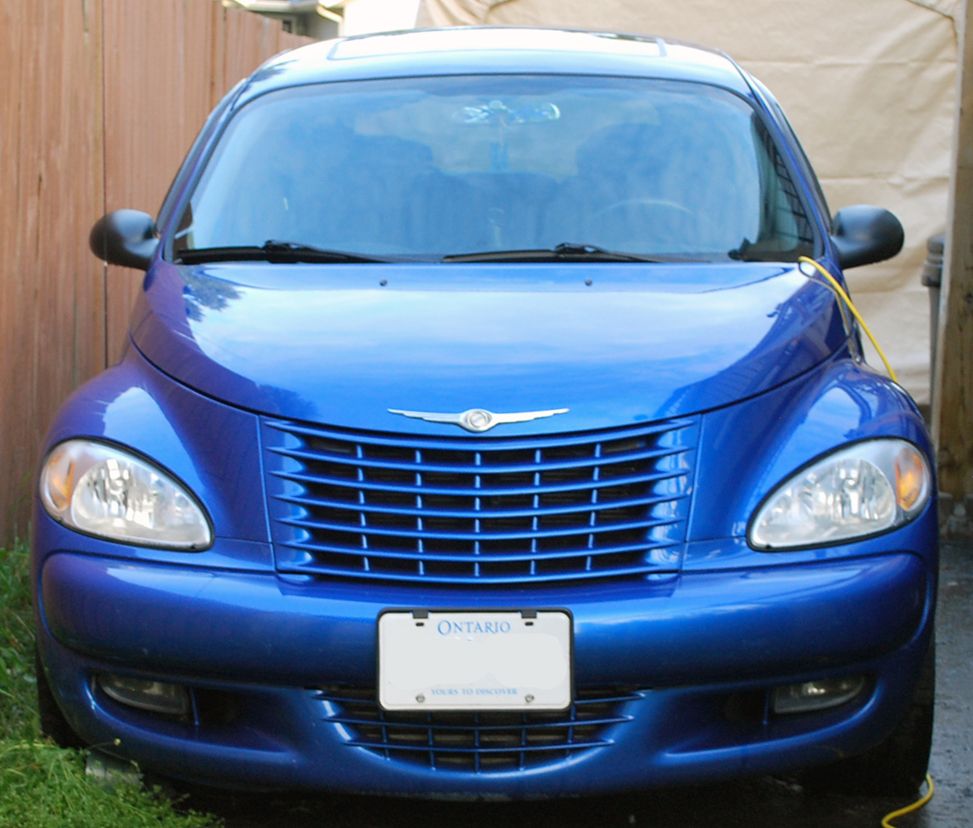 5. Cut, polished and detail quick sprayed 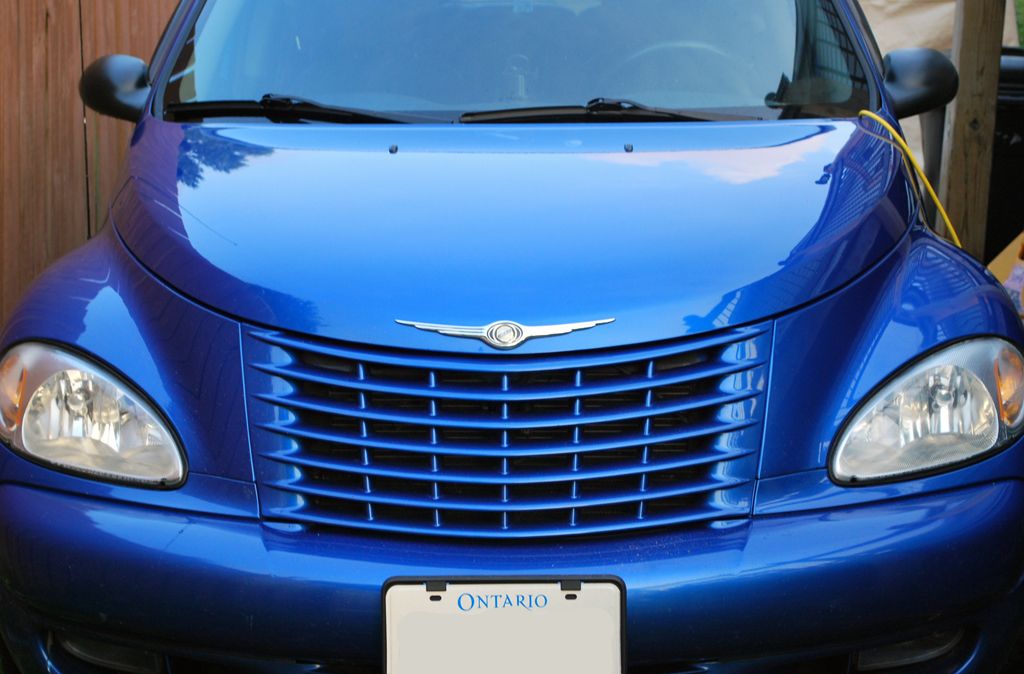
__________________
2011 2SS/RS  |
|
|
|
|
07-23-2013, 08:57 PM
|
#24 |
|
Drives: 2012 AGM SS Join Date: Jun 2012
Location: Las Vegas
Posts: 1,407
|
That's a crazy amount of clay! Usually for one bar I'll split it into 3 and use each bar 2-3 times before it's trashed.
For the polisher, next time put it on your panel and spread it around on your working area on no speed, working down any globs, this will reduce slinging of product. Also you may have to work it longer, how were you doing section passes and how many on what speed? As for not getting enough cut you may have to increase pressure applied, each paint is different and will require different amounts of pressure and arm speed. Aim for about 1 rotation per second (mark the backing plate if able with a permanent marker) and moving 1" per second.
__________________
|
|
|
|
|
07-23-2013, 10:54 PM
|
#25 |
|
.

Drives: ... Join Date: Apr 2009
Location: Colorado
Posts: 1,380
|
On your claying, if the bar is hard like your describing the thing to do is get a cup of warm water and stick it in there a couple minutes. It also seems that you used way to much detail spray as clay shouldn't break down as you stated. Also always split your bar to 2 or 3 pieces. I know someone else uses an entire bar not very logical.
Mequiars #9 is meant to be used on single stage paint and has a very long working time and will most likely introduce micro marring. Honestly, with your polisher and what your polishing I would go with something else. You can still use this but you will have follow it up with something else. Mequirses #1 is meant to be used on rotary. Also I would suggest looking on YouTube for other videos on polishing than just looking at one persons videos it will help in the long run. |
|
|
|
|
07-24-2013, 03:23 AM
|
#26 |
|
Search Ninja
Drives: 2010 Black 2SS/RS A6 Join Date: Oct 2009
Location: Central Ark
Posts: 7,183
|
What pads did you use for each process. Black pads have no cutting ability which means they are used for glazes, waxes, and sealants. The yellow pad is your cutting pad so it's the one that should be used with the compound. Do any of the local stores carry the Meguiars Ultimate compound and Ultimate polish? They are very good OTC products for compounding and polishing.
__________________
2010 Black 2SS/RS A6
Halltech CF 102 fed GPI modded intake manifold Bo (knows) White ported TB Kooks LT's/ Dynomax VT Pfadted (springs/sways) Dyno tuned by Rhino and GPI I once parallel parked a train. |
|
|
|
|
07-25-2013, 10:06 PM
|
#27 |
|
LongTimeLurker
Drives: 2011 SIM 2SS/RS Convertible L99 Join Date: Dec 2012
Location: Napanee, Ontario
Posts: 434
|
Axis I will look. But the only OTC Meguairs products i could find were #9 to #1. #9 had the highest CUT index on the bottle.
I might have used the wrong pads, but they are POORLY labeled. Its partly why I wanted to try and post what I used with what. I just did the hood so, its not like I invested HOURS on the car. I have the wife factor to deal with when spending money on detailing, my next step was to order some pads and compounds from Adamspolishing.ca but I have had nothing but problems with that website.
__________________
2011 2SS/RS |
|
|
|
|
07-25-2013, 10:41 PM
|
#28 | |
|
Drives: 2012 AGM SS Join Date: Jun 2012
Location: Las Vegas
Posts: 1,407
|
Quote:
__________________
|
|
|
|
|
|
|
|
|
 |
|
|


