You are browsing camaro5 

|
 10-16-2014, 10:46 PM
|
#1 |
|
'It's an experiment'

Drives: [COTW 2/09/15] '11 GPI LSA SC Z/LE Join Date: May 2014
Location: Dallas TX
Posts: 8,690
|
DIY: BMR Toe Rods and 'Street Pro' Cradle Bushings w 1LE upgrades
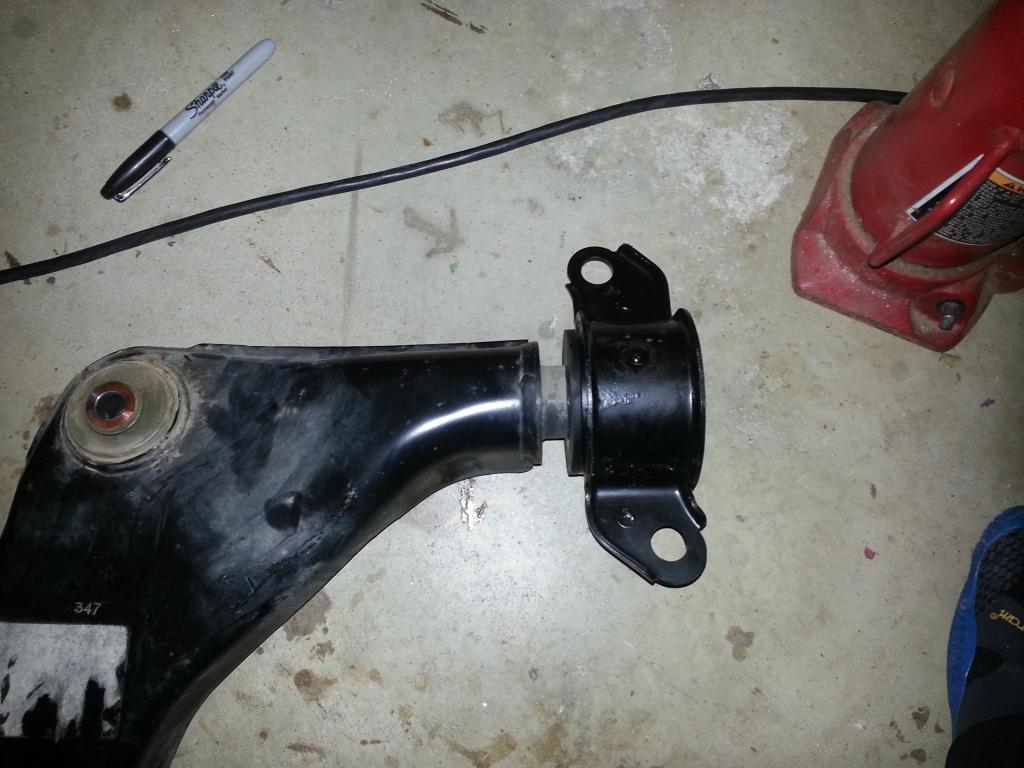
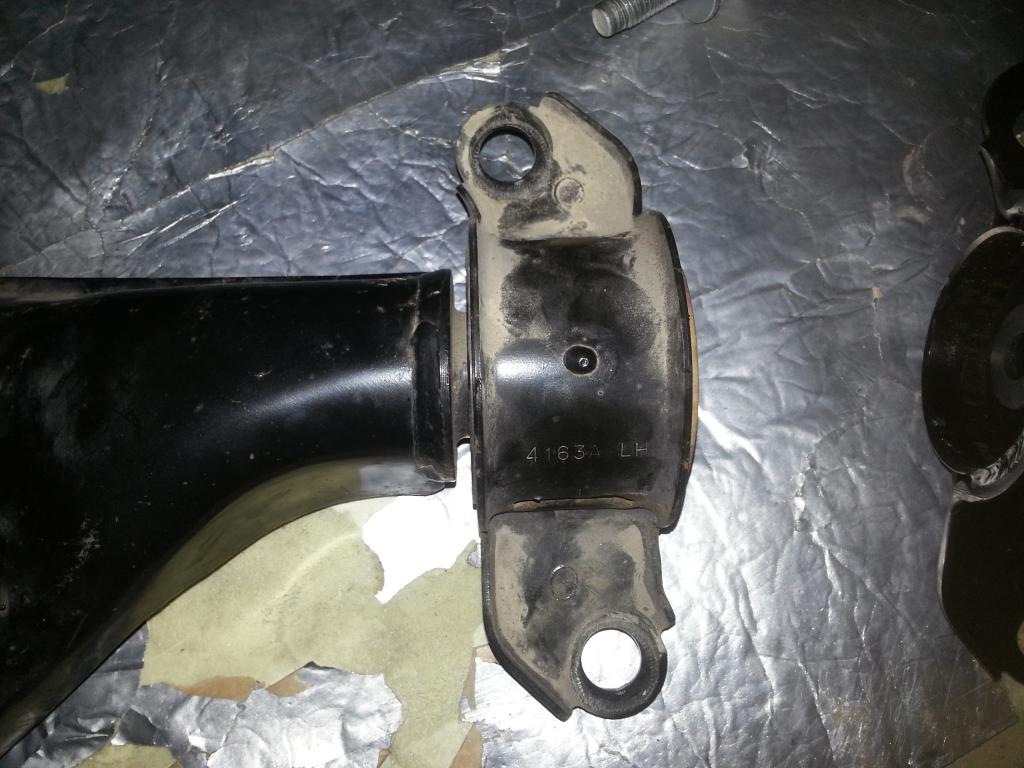
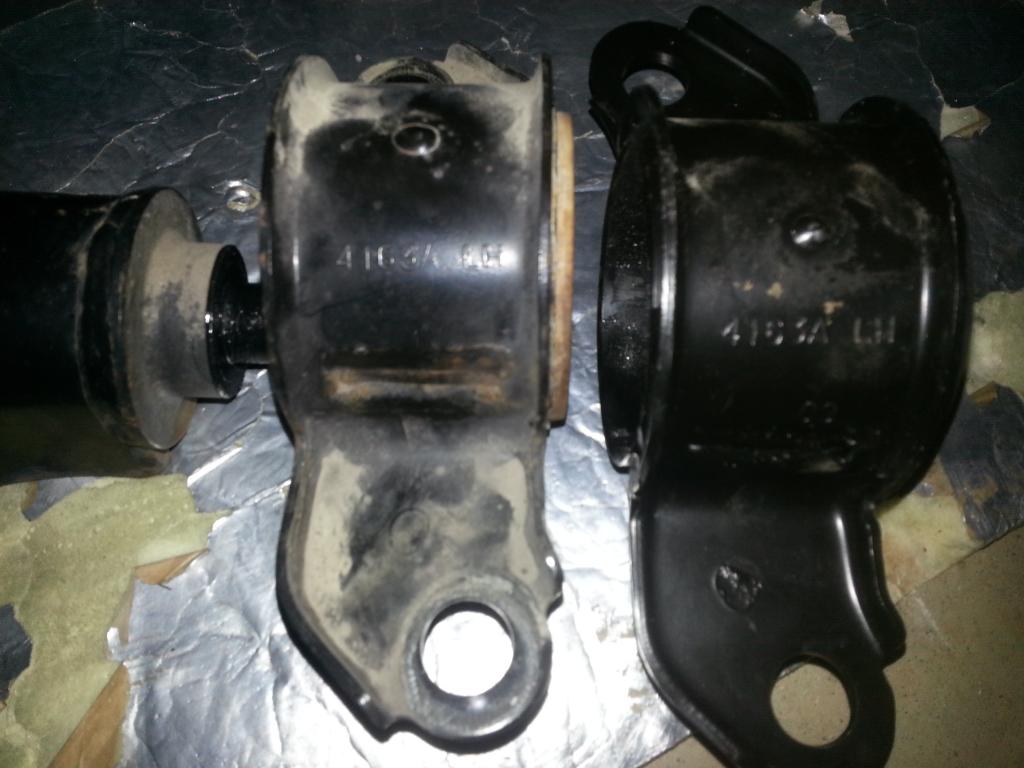
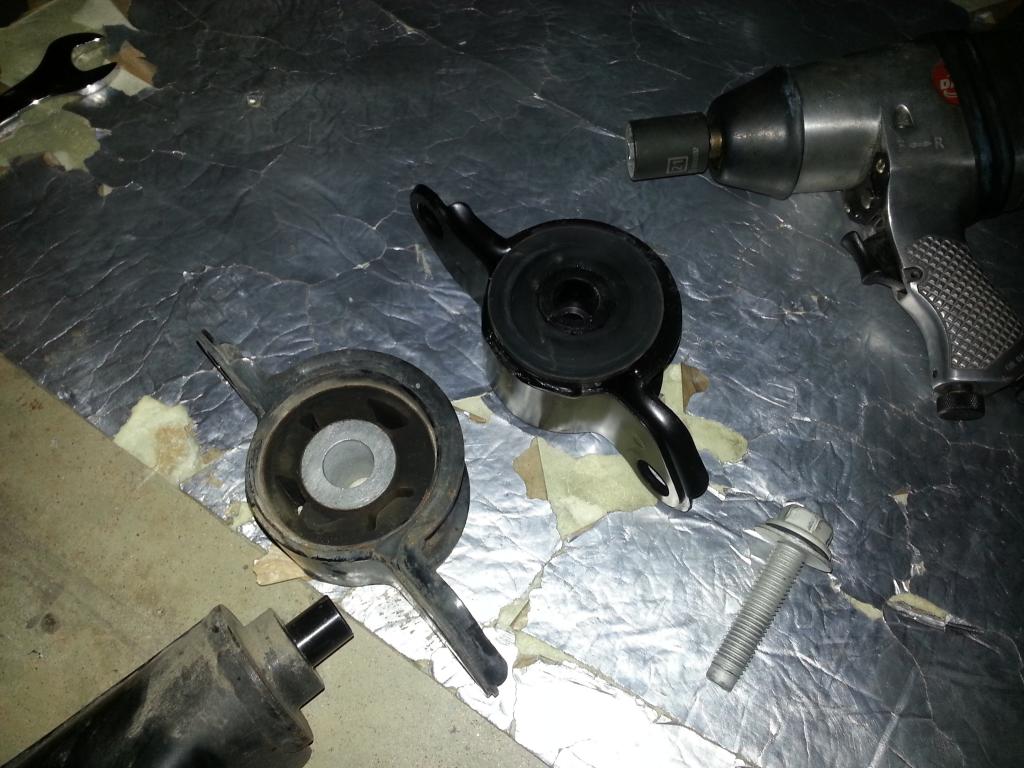
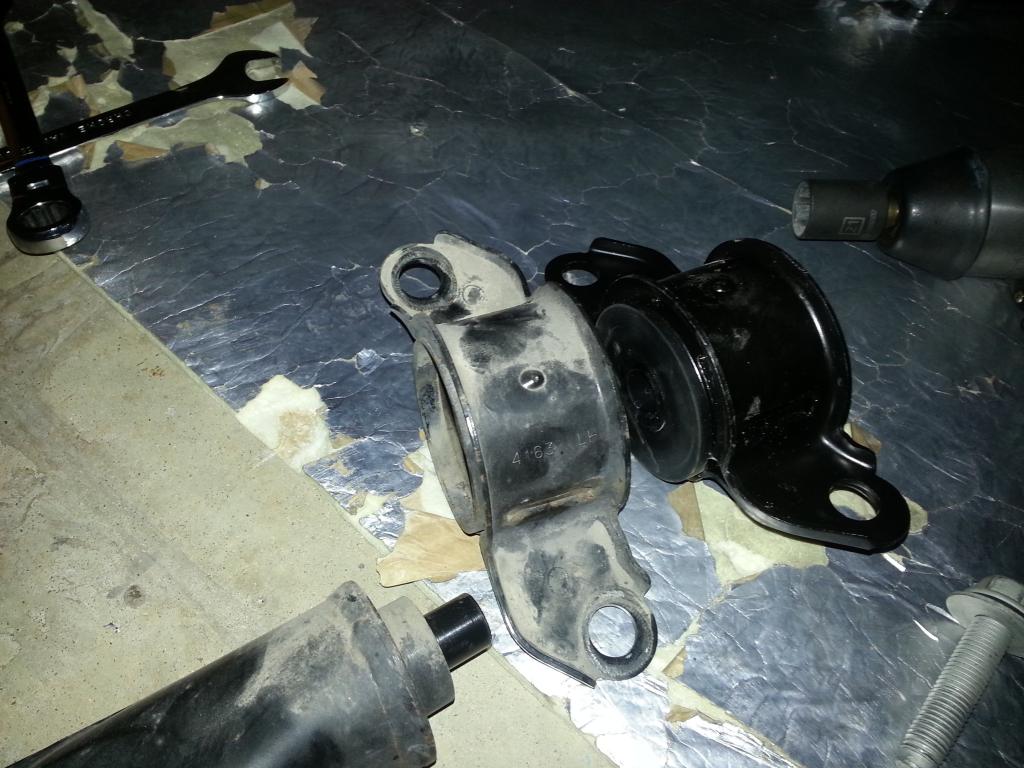
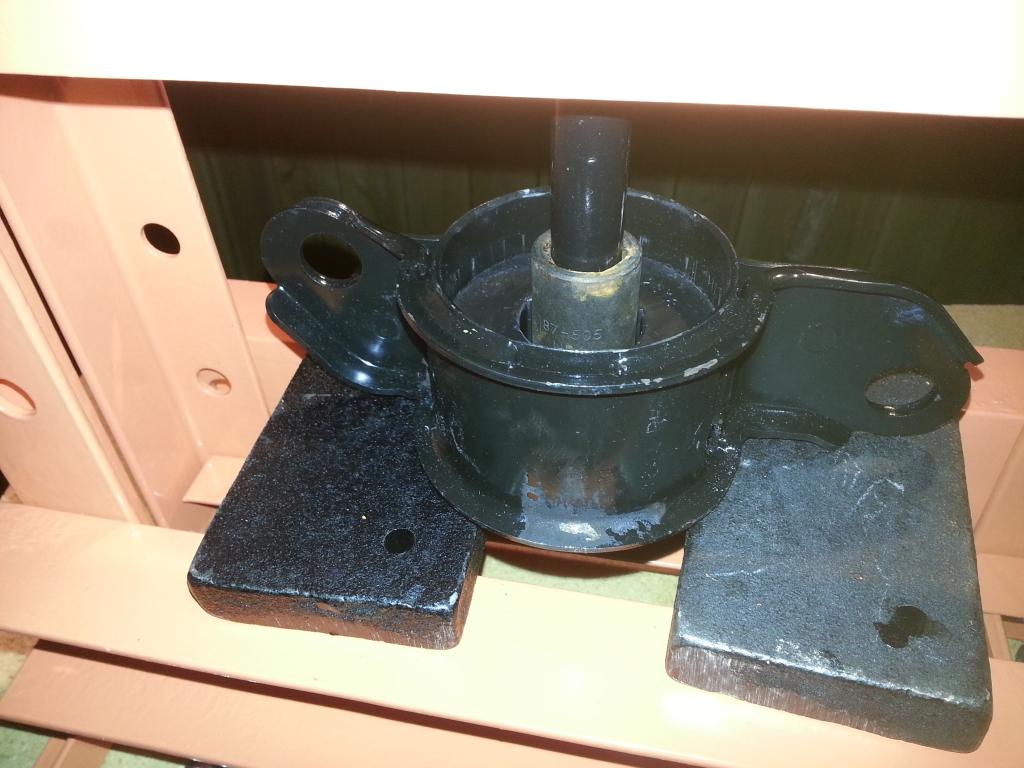
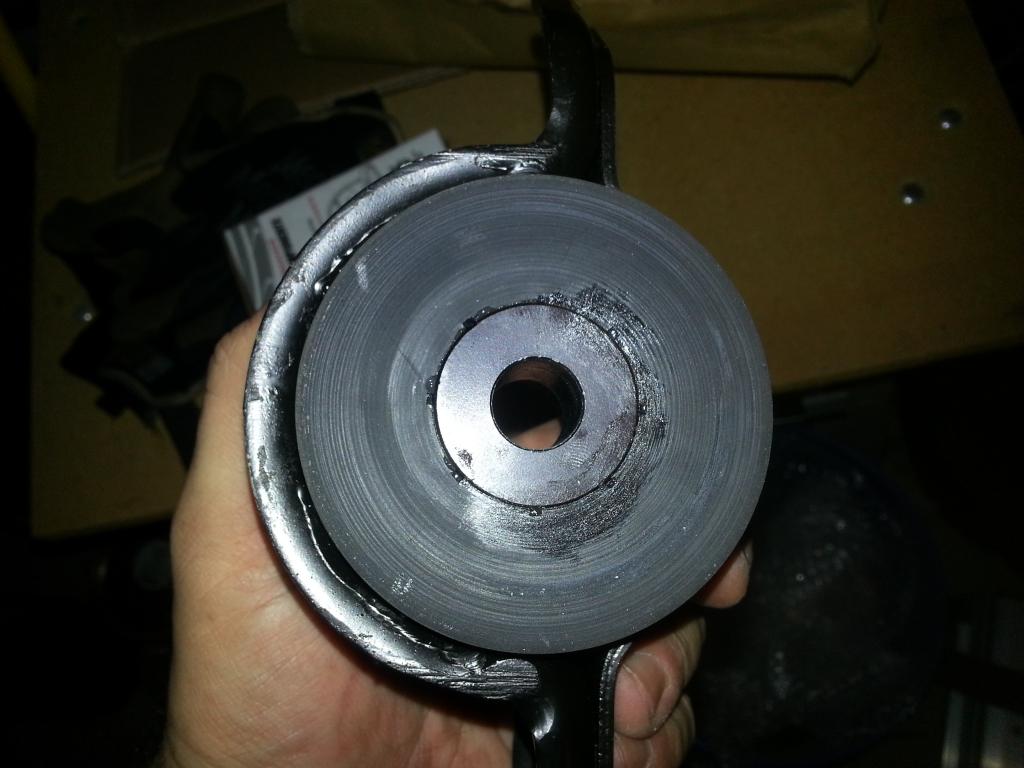
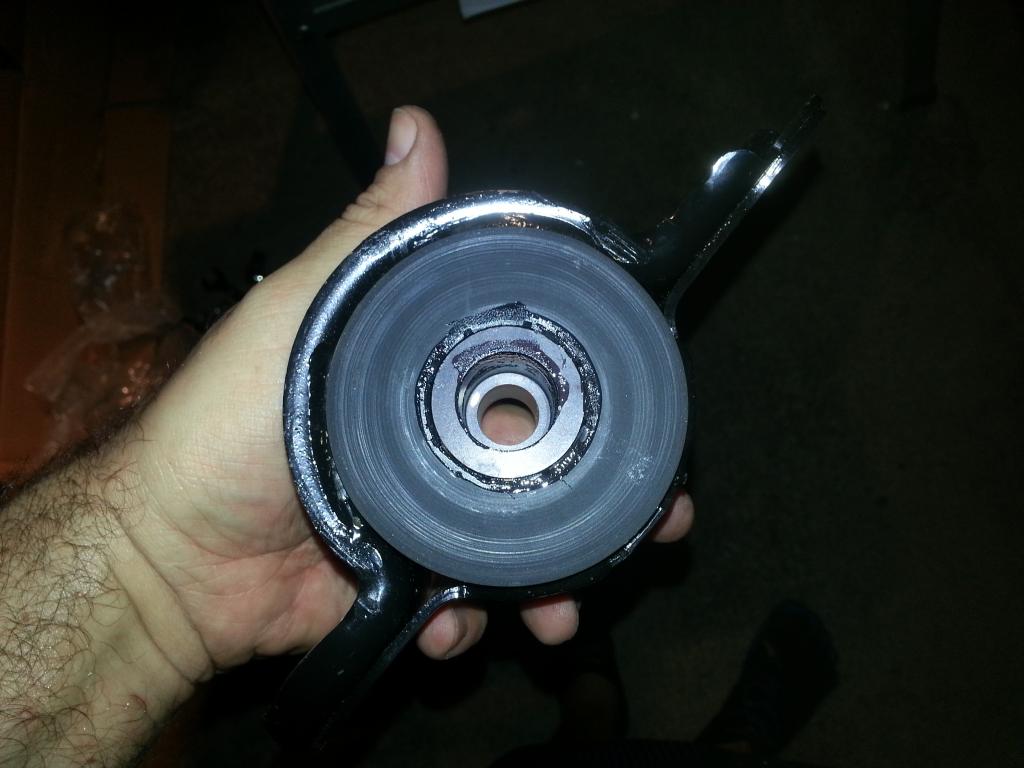
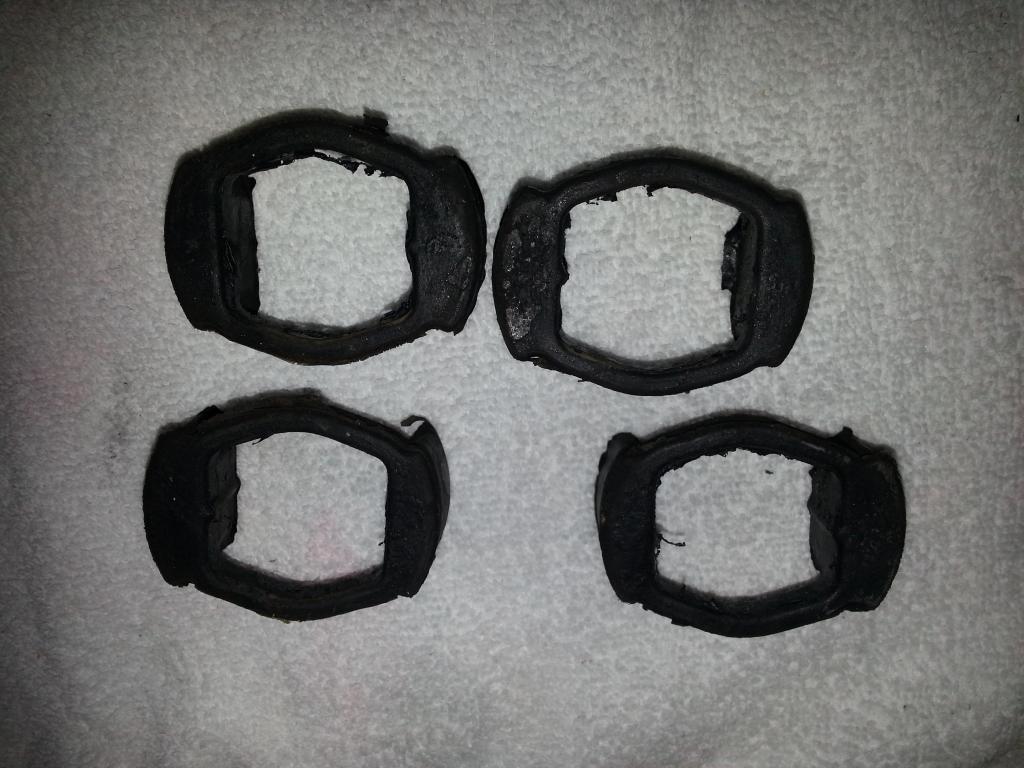
So, I picked up BMR Adjustable Toe Rods and 'Street Pro' Bushings to finish out the rear suspension mods on my list.
I purchased the toe rods from a member (want to help them out) and the bushing from Tyler @ JDP (Tyler has really helped me get my suspension in sync with what I wanted to do -- awesome!). So, the first order of business was to jack up the car, support the cradle, and remove the bushing bolts, hats, then inner/outer toe rod bolts. After jacking up the car and removing those awesome ZL1 wheels, I 'marked' the current toe rod setting using paint pens (@ 40% off thanks to my wife!) from Michaels: 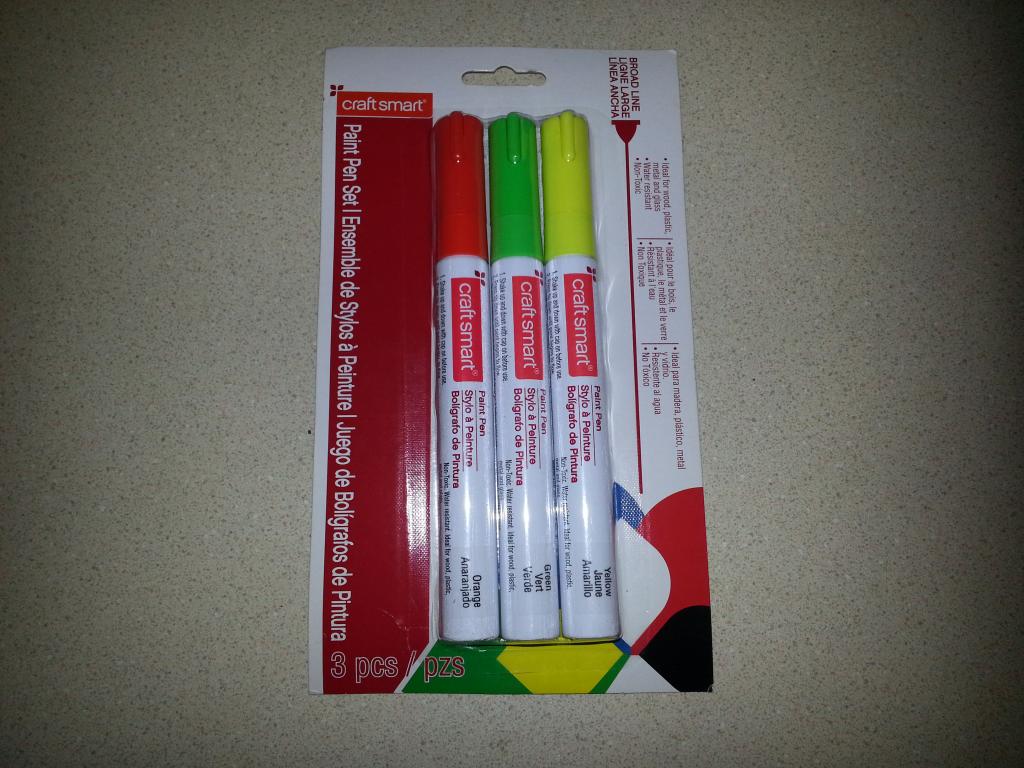 Yellow mark left on cradle (center upper part of the picture): 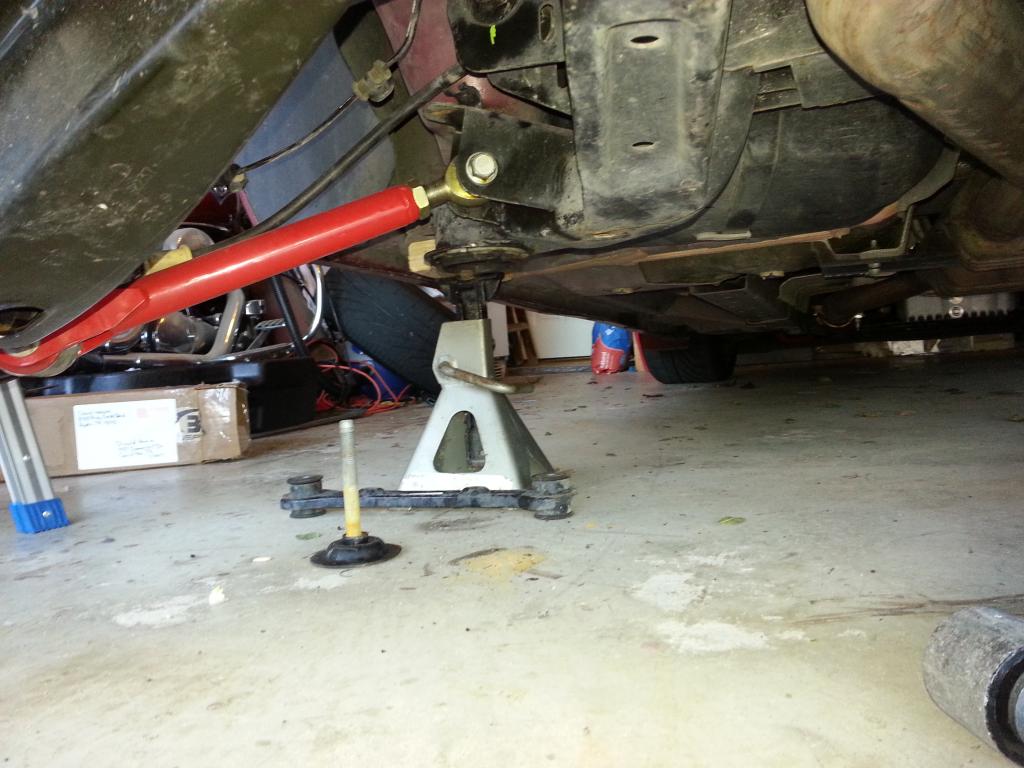 Worked like a charm. The next thing was to loosen the toe rod bolts. Since the driver's side will not come out (and since I'm doing the bushings @ the same time), support the differential and remove the cradle bolts (these are tight @ 110 ft lbs!). I chose to loosen them in sequence (left front, right rear, right front, left rear) in order to lower it in sync -- this was pretty easy. Then, when those bolts were out, I began to remove the 'hats' on the bushings. What I found out is using WD40, a tire iron, and a brass hammer, I could wedge the tire iron end in, turn it 90* and tap on the hat with the brass hammer. 3 out of the 4 came right out! The hardest one (left front) required about 10 more minutes. I called Tyler @ JDP to make sure exactly how to get it out (the instructions from BMR were not real clear). So, that was what I did and it work fine (continually taping around the edges -- not real hard, just enough to 'vibrate' the hats loose). Here is one out and the tools used: 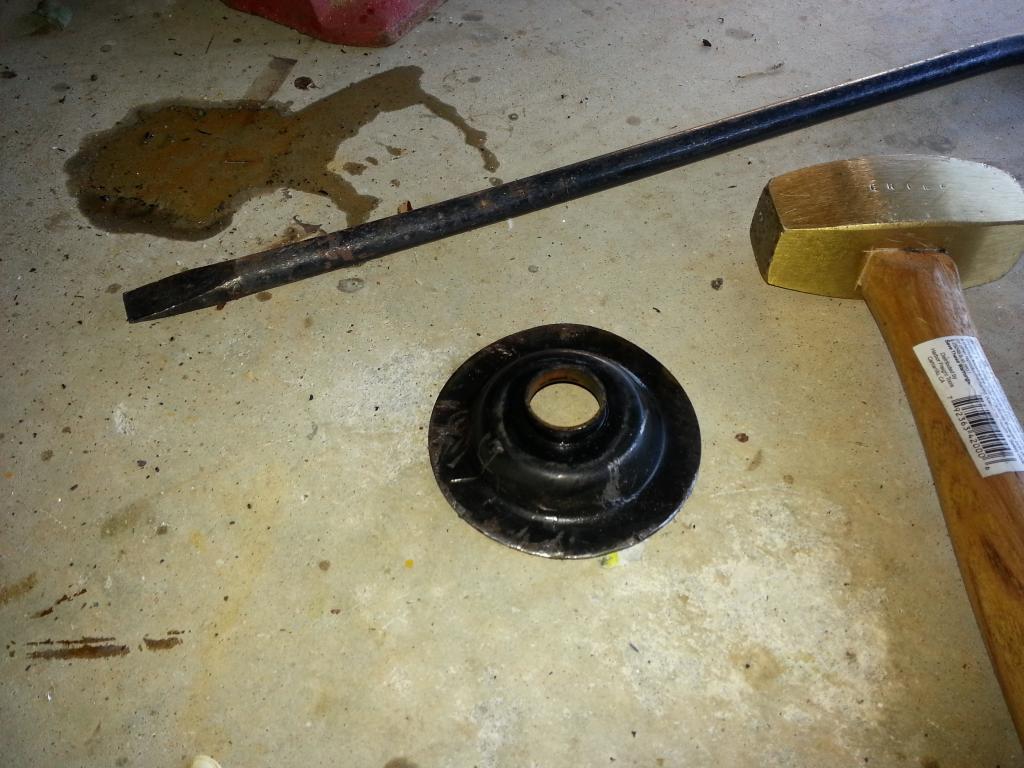 The brass hammer was used because: 1) its softer than the hats and won't bend them 2) it won't cause a spark -- remember we're near the fuel tank and I also sprayed on WD40 I've always used brass or plastic hammers anytime I'm near 'flammable' materials... After the hats are off, you'll need to unbolt the upper shock cap on both sides. Support the differential and unbolt all 8 bolts (4 on each side). I used a socket and long extension for one, and then a 15mm ratchet wrench that tilts on the others (from lowes): Bolts on shock: 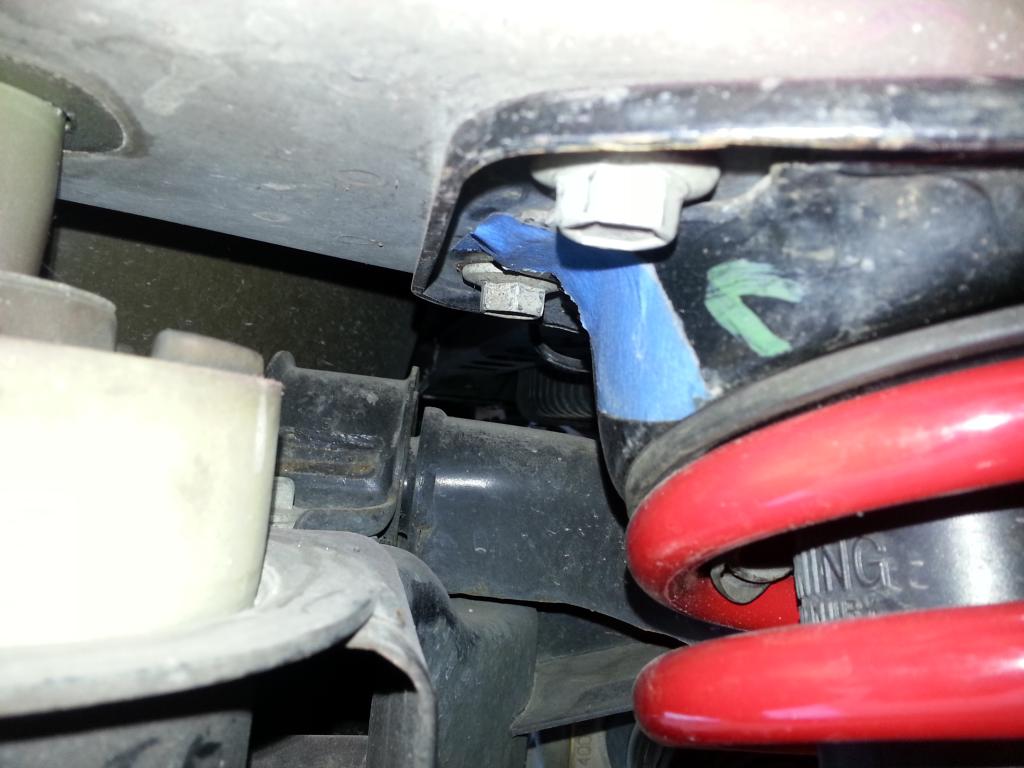 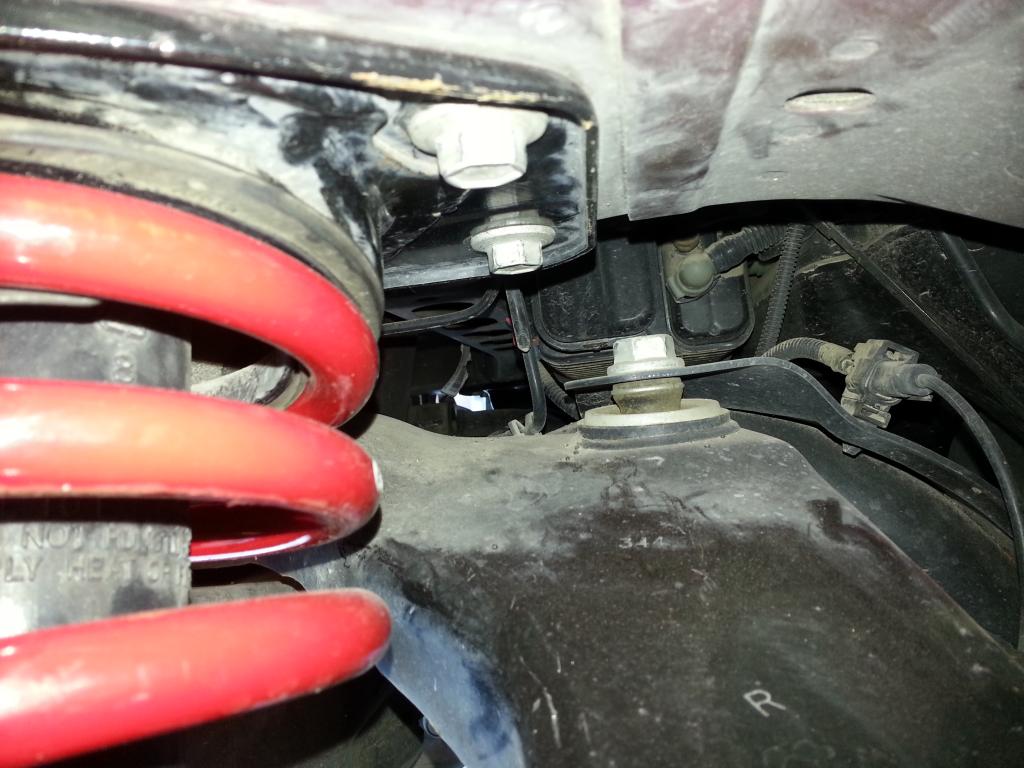 Once this is done, you'll be able to lower the cradle enough. THEN, to install the bushings, I used a 'second' jack to 'raise the body' up enough to insert the new bushings: 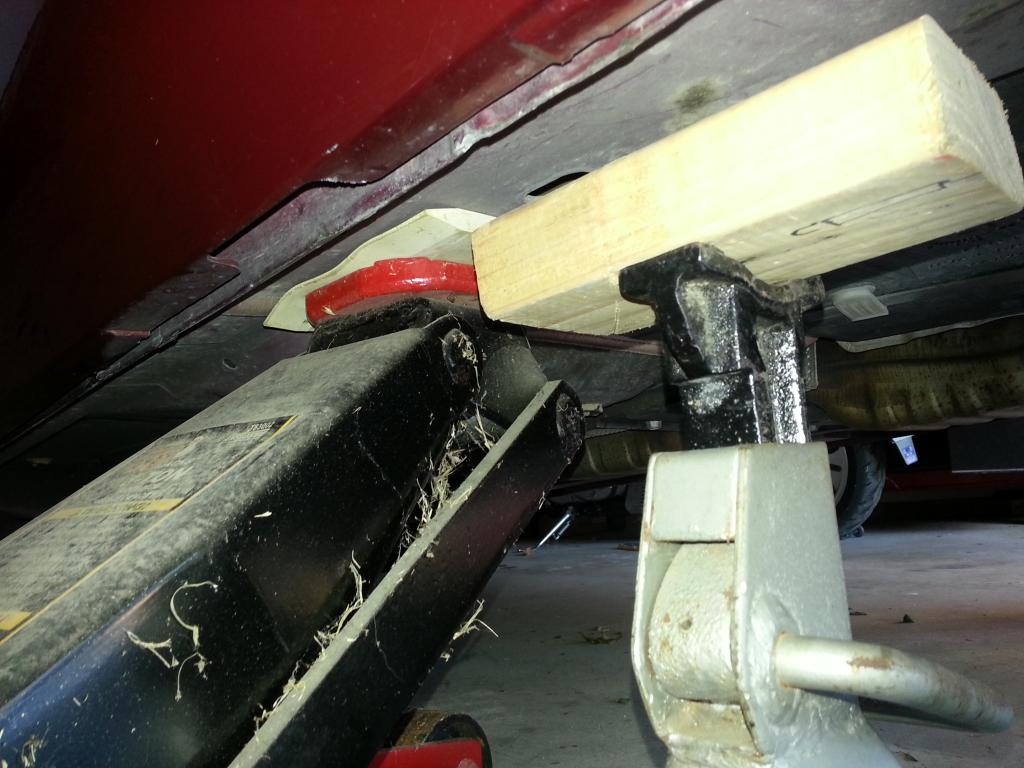 Gives you a nice gap to work with (I did each side one @ a time. You may have to 'wiggle' the cradle a bit but not much -- its forgiving! Rear (with Guides): Before, lifting body and remove shock cap: 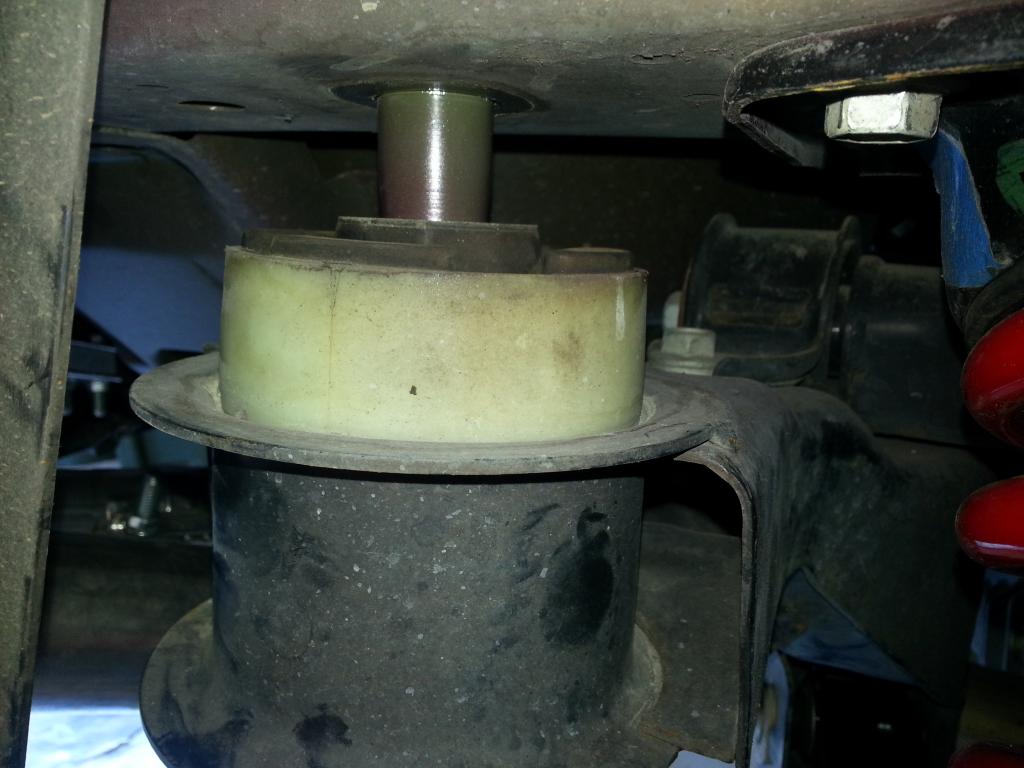 After (each side): Front: 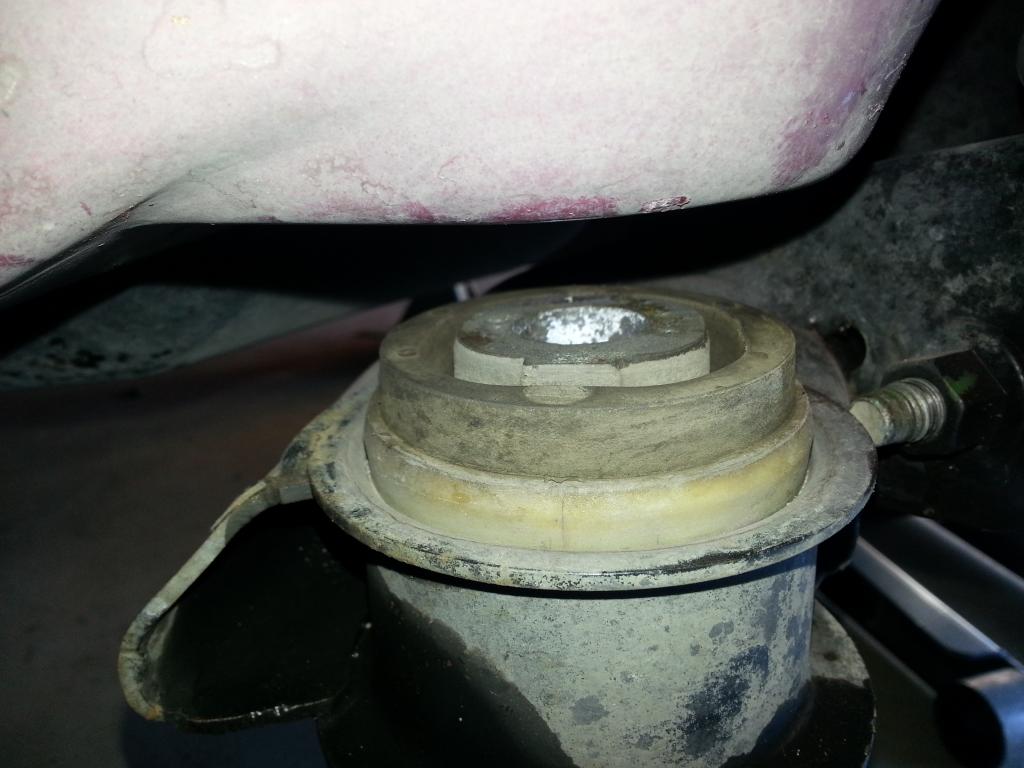 Rear: 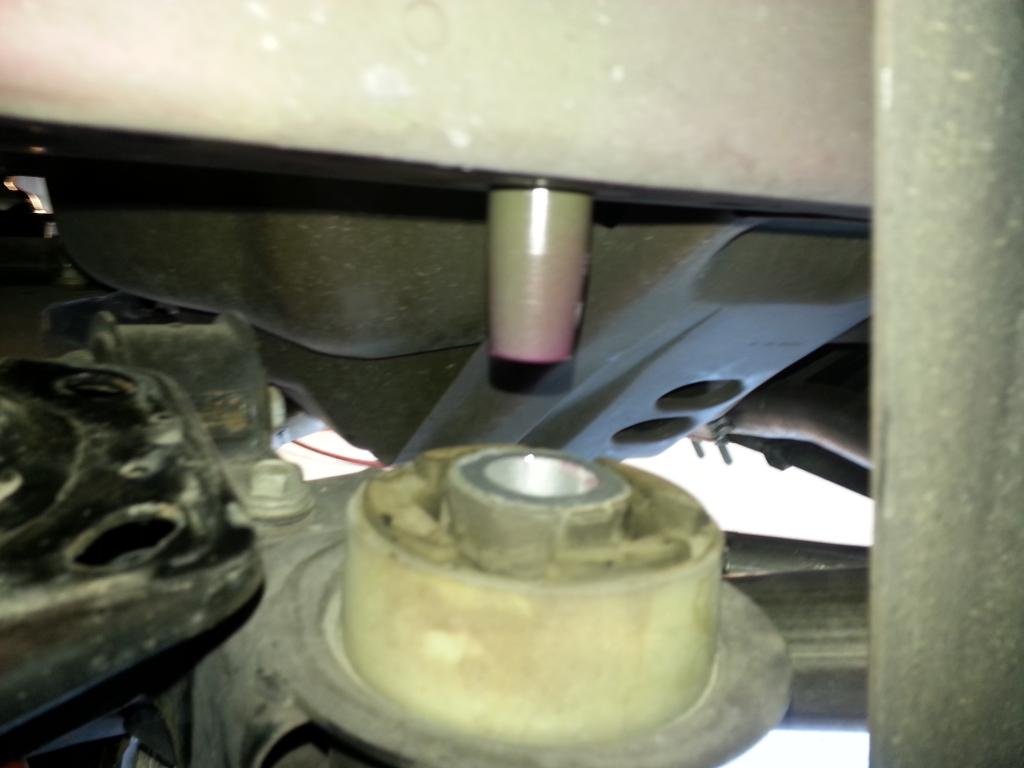 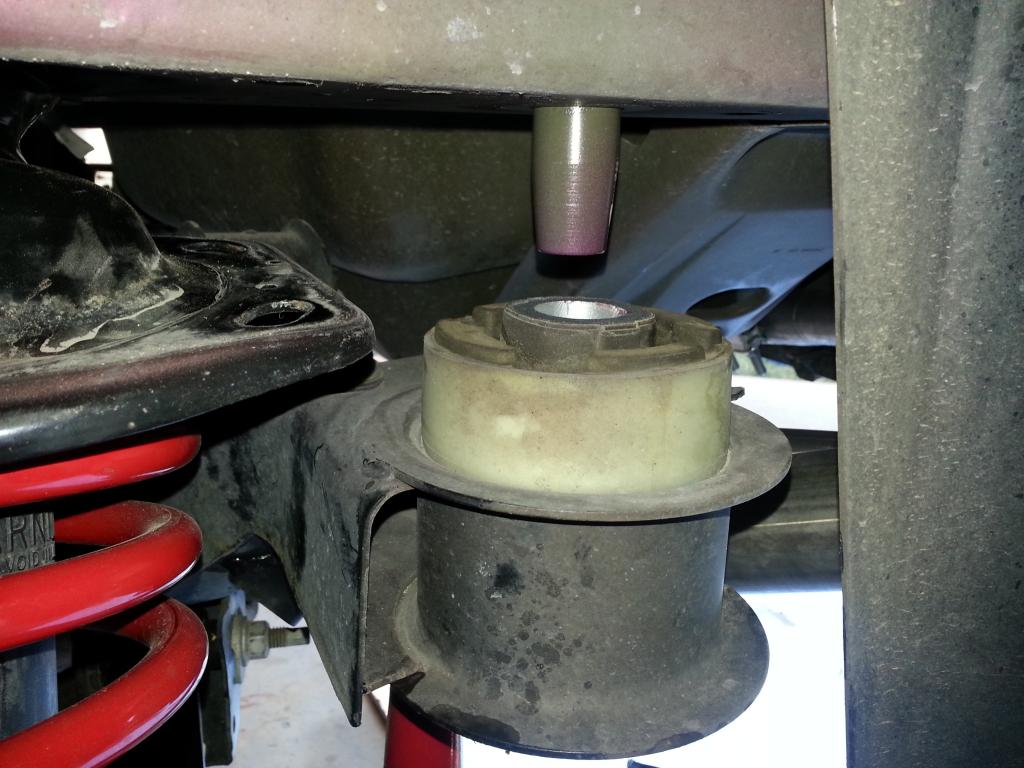 BUT... So, now that the hats were out, I began to look to installing the bushings. OPPS, they have feet on them and my car does not have those!: Bushings: 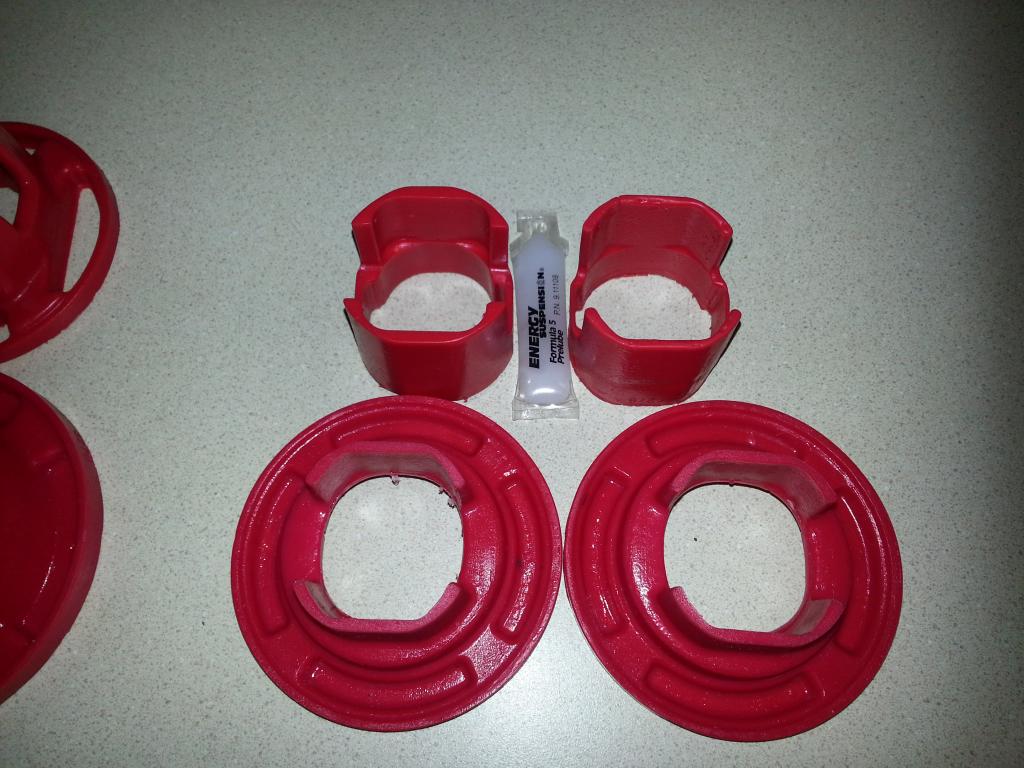 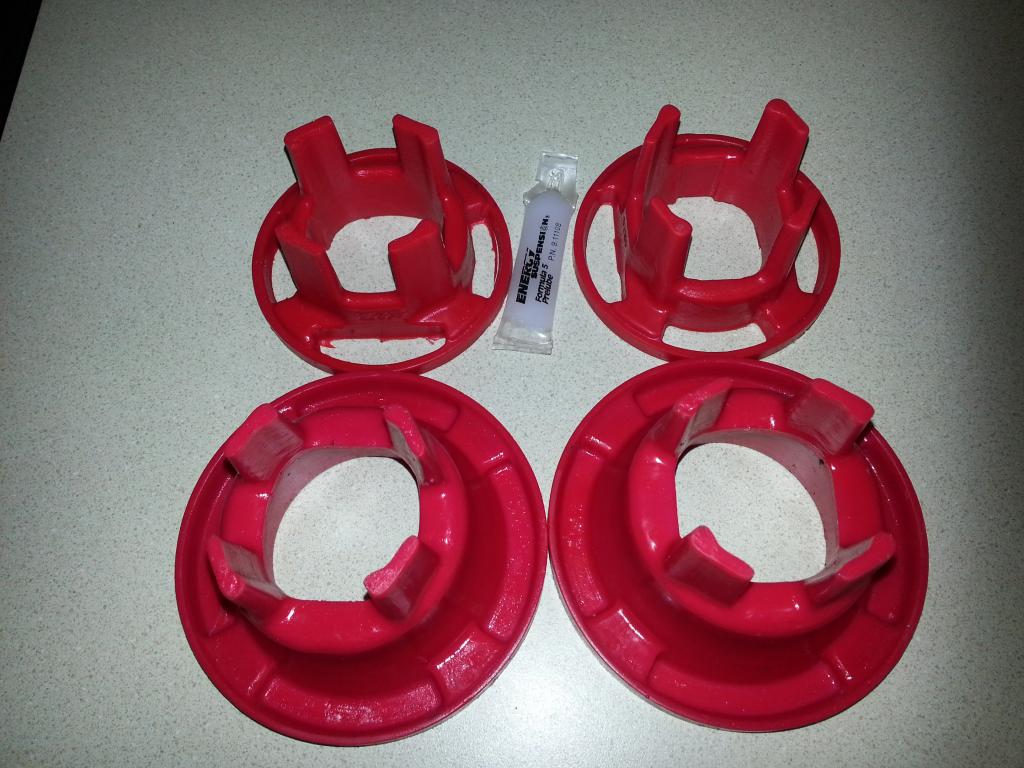 Cradle: 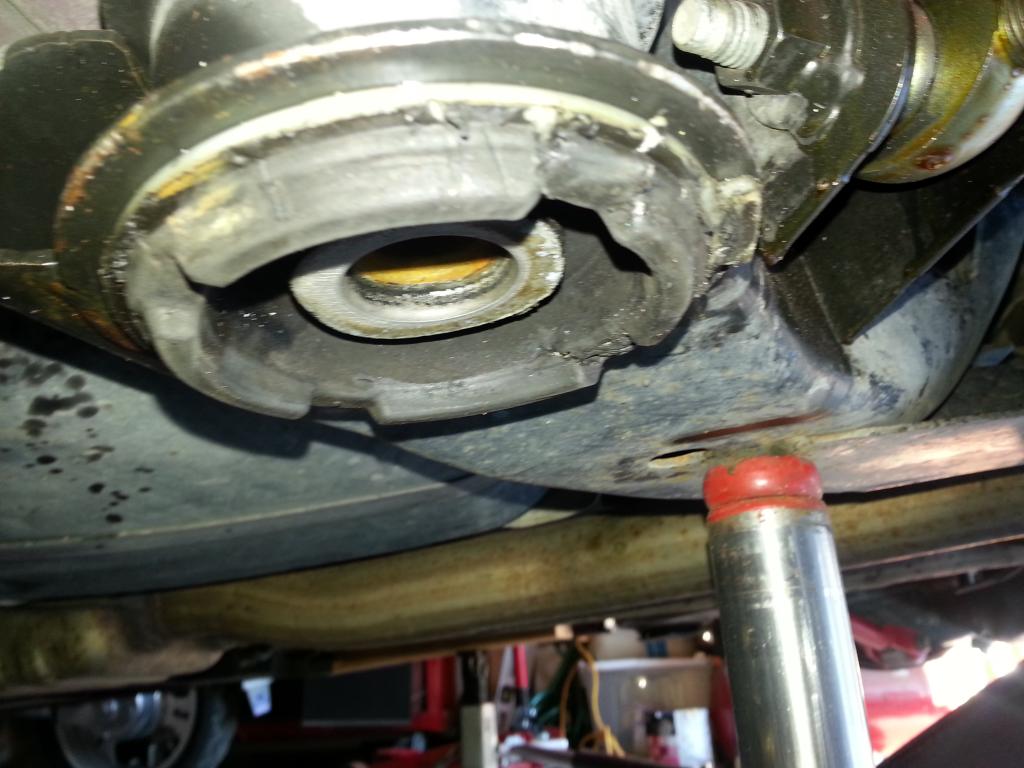 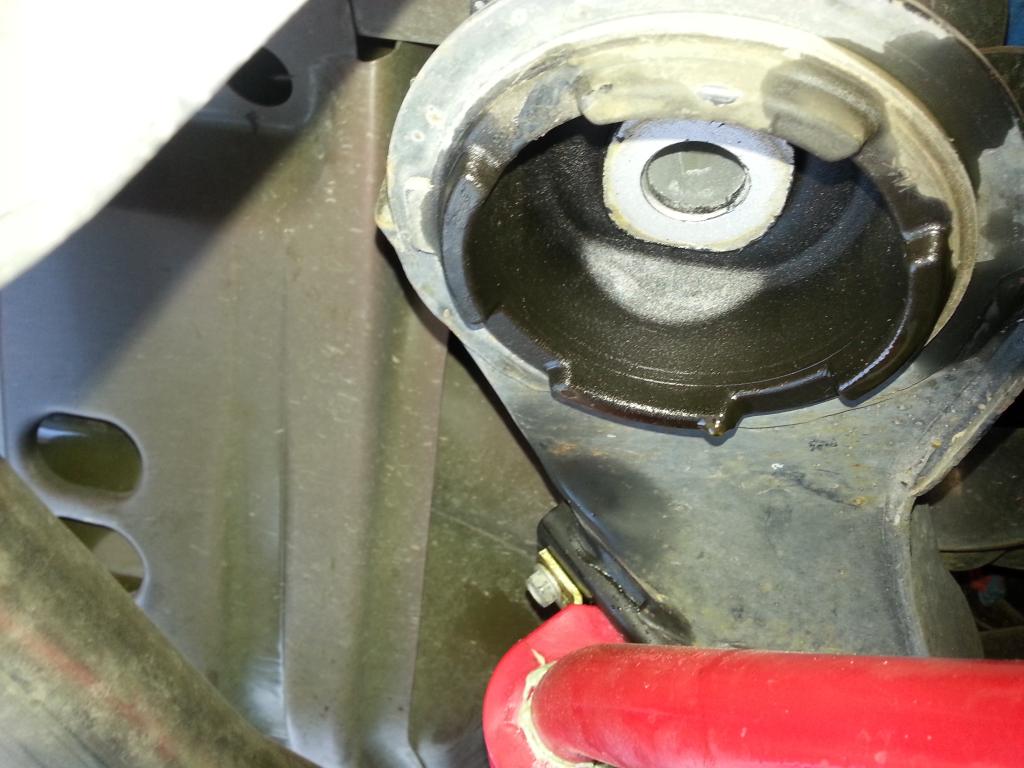 SO, called Tyler @ JDP and he said 'yep, some Camaro's have them, other's don't, just trim them' so that is what I did (the front cradle bushing required trimming the feet too): 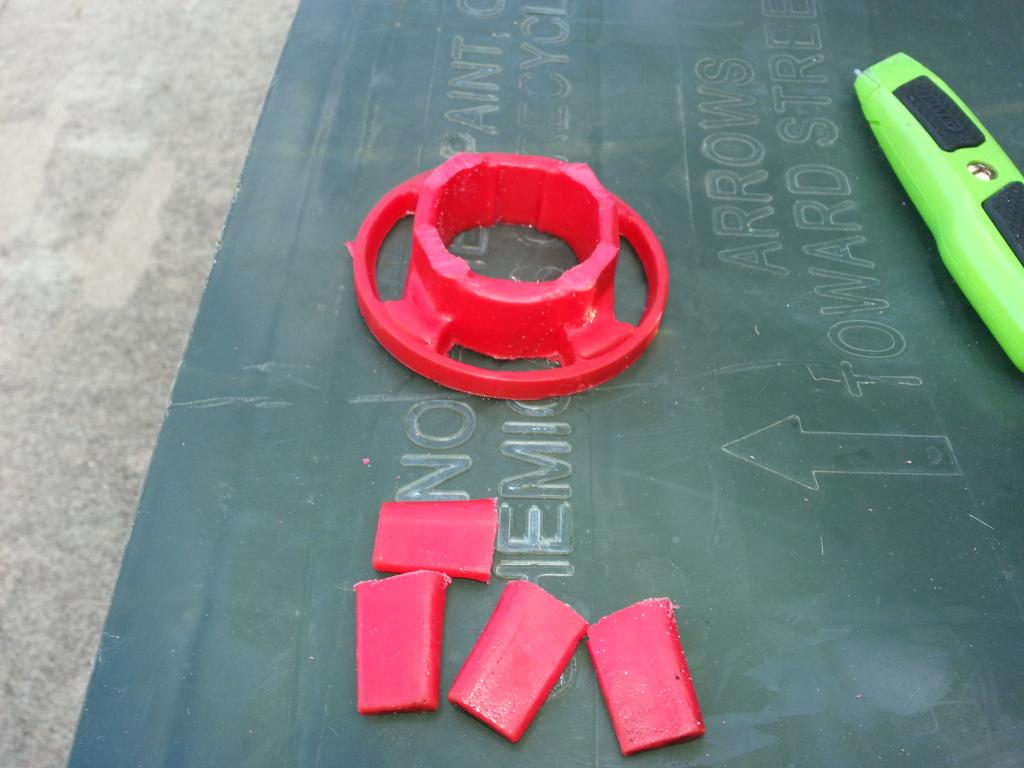 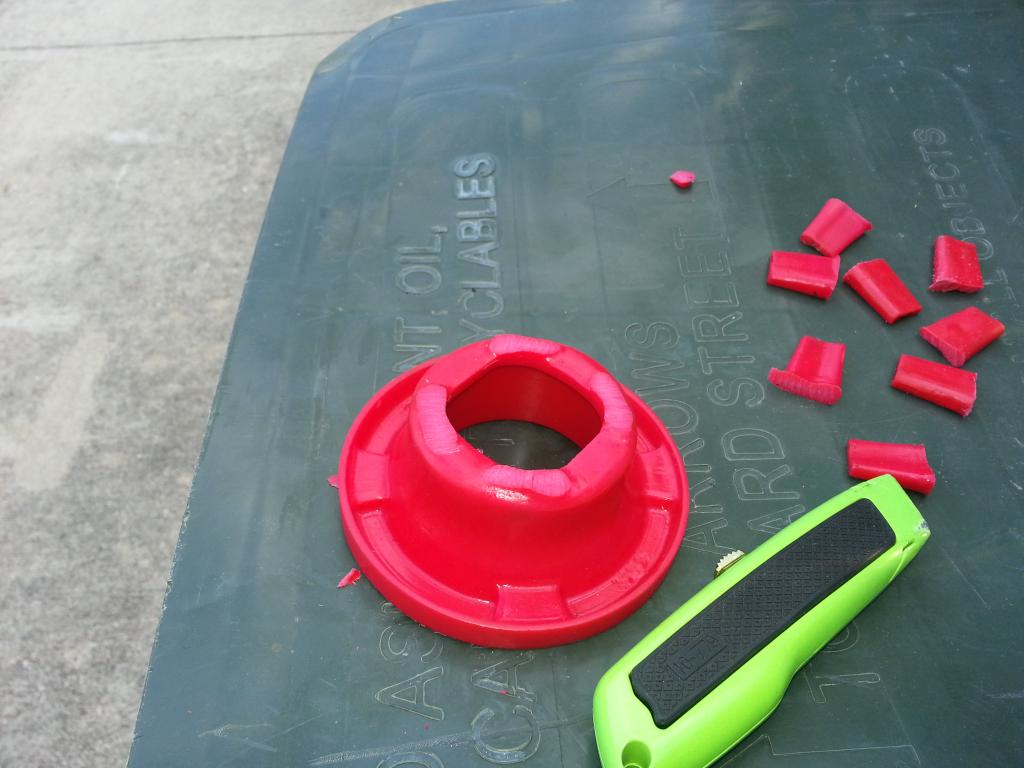 I kept trimming them until they were 'level' -- And now they fit!: 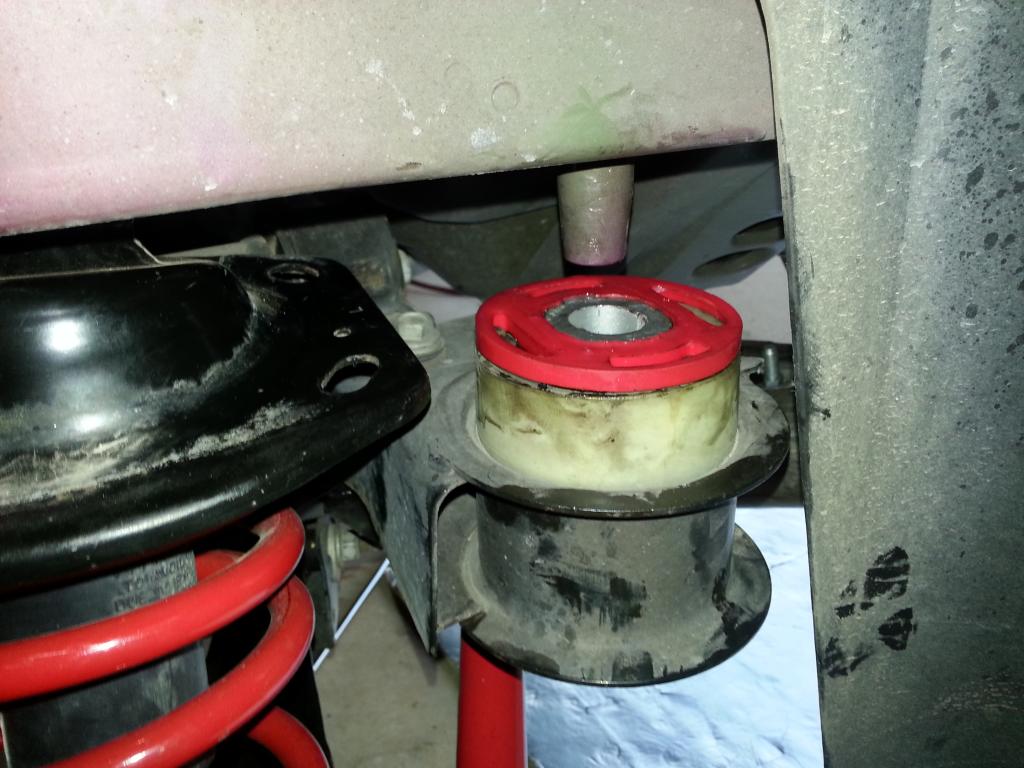 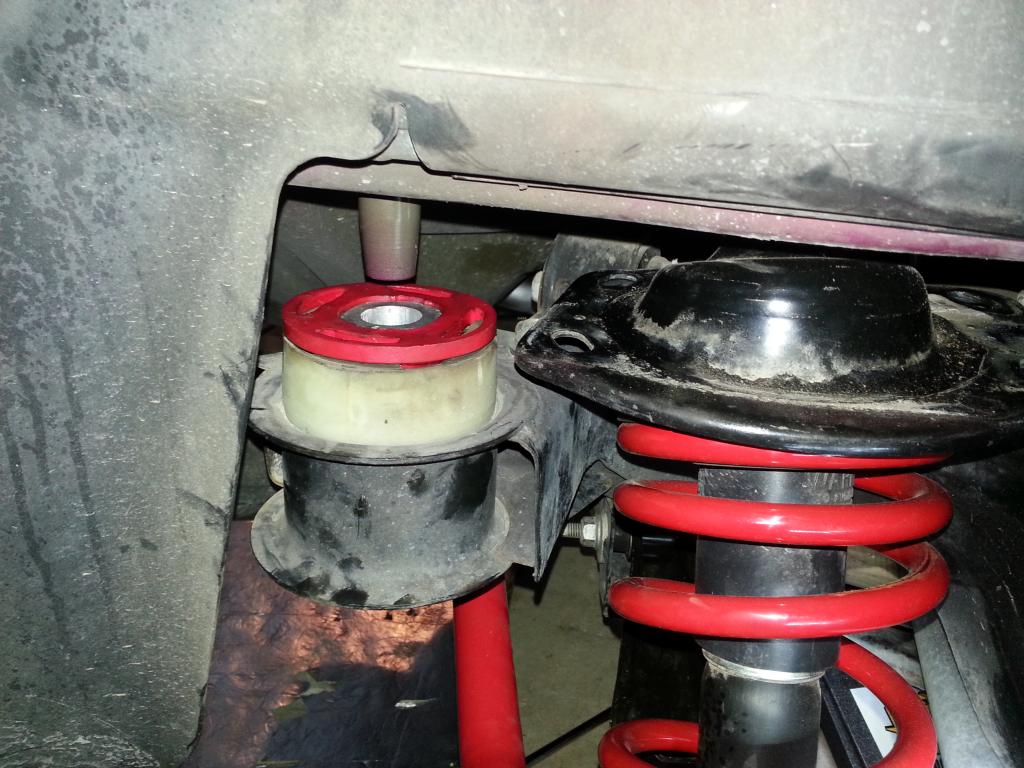  So before I 'bolted up' the bushings, I installed the toe rods -- this was easy! I followed the 'measure' instructions from BMR, and then installed them. Zip Tied thing up and torqued it per spec! DO THIS BEFORE you bolt up the bushings or you'll NEVER get the drivers side inner toe rod bolt on!: Driver's side before dropping cradle:   Ready to go!:  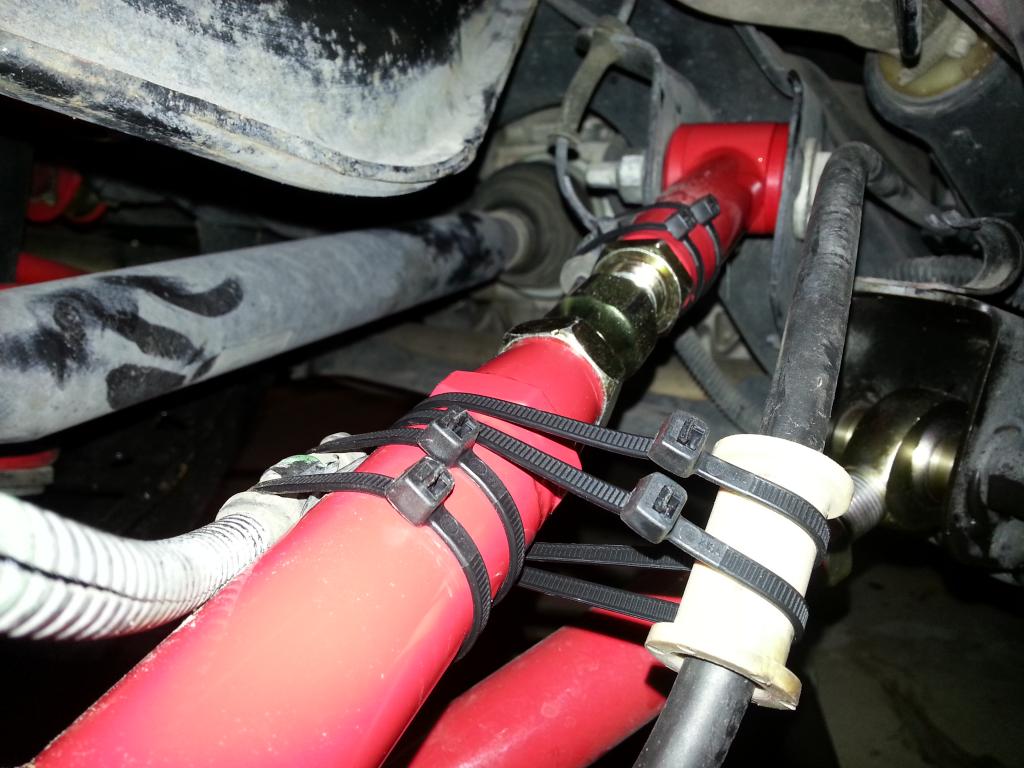 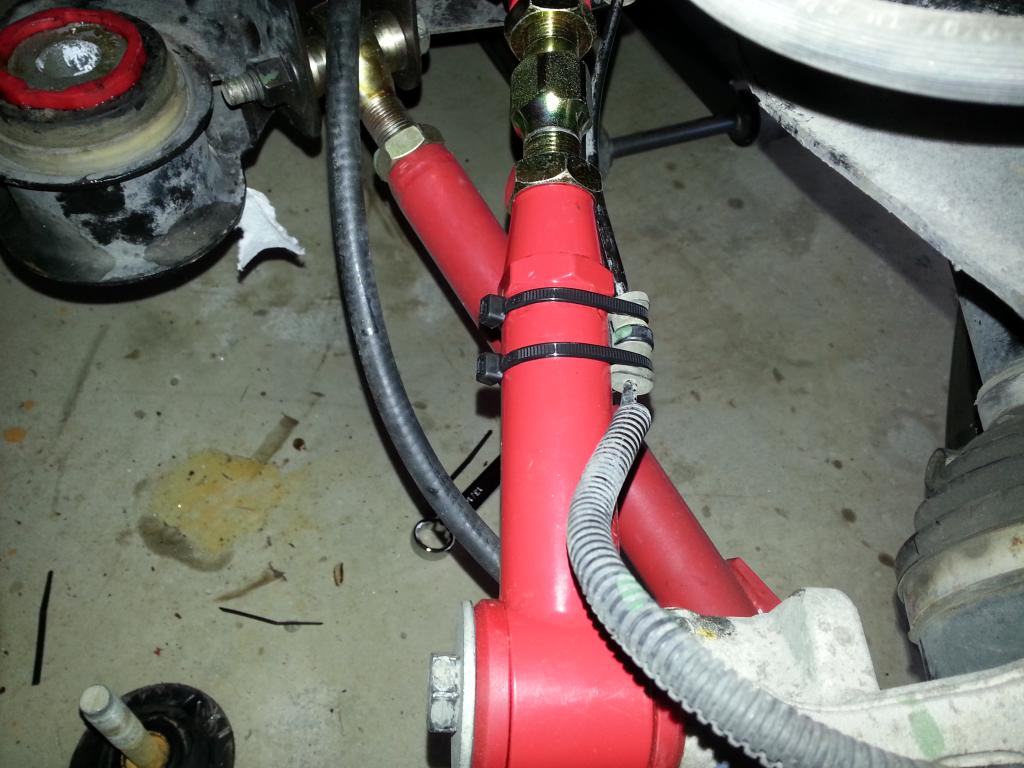 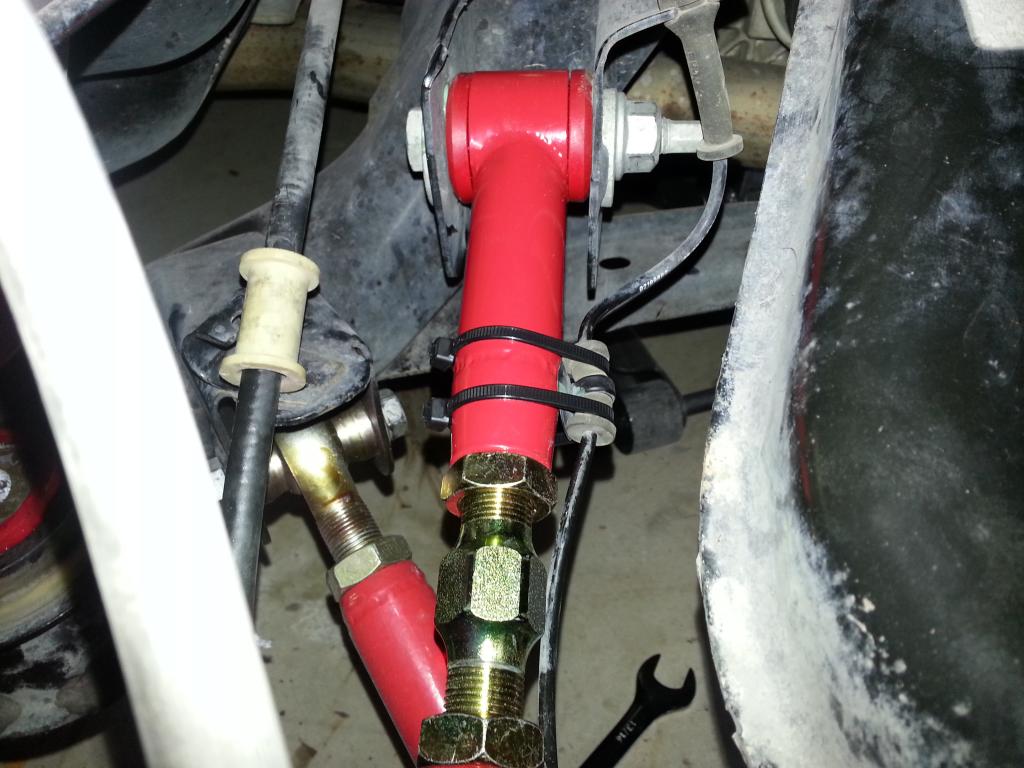 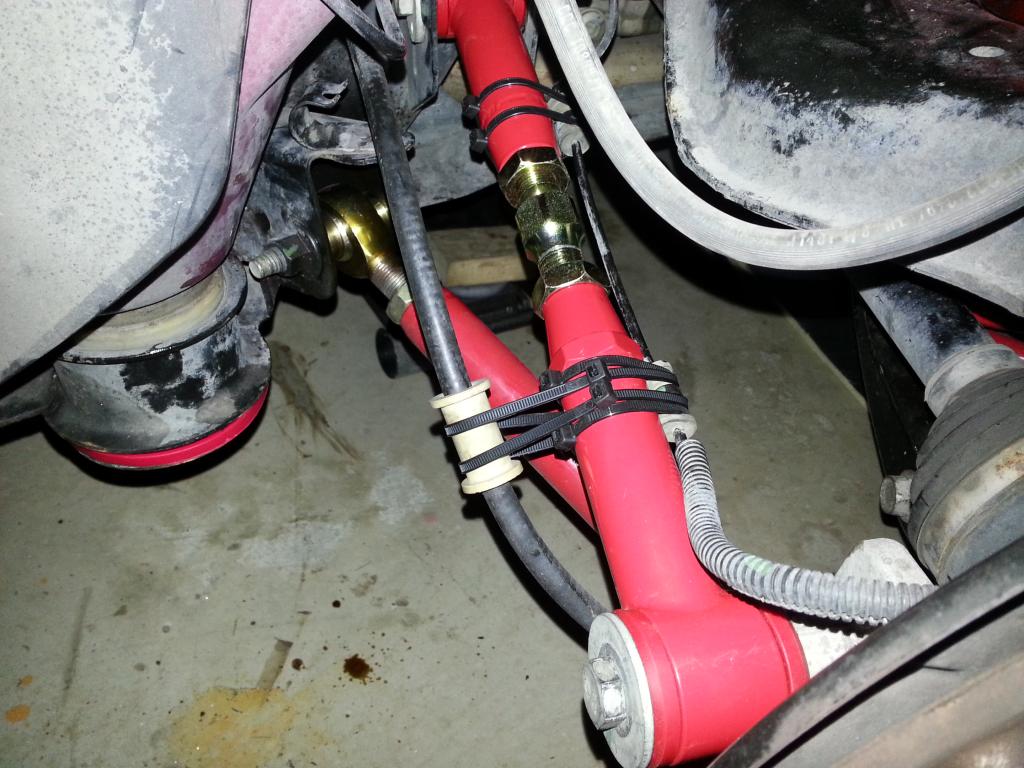 Once these are on, grease them up and torque them per spec (inner is different than the outer bolt!) Now the bushings are read to go. You'll notice the 'guide' in the back, you'll want to line this up (take your time). Remember the guides in the rear: What I did was 'ease' the cradle up near the guide and start a bolt on the left front and left rear. Got that started and then did the right side. You'll need to wiggle the cradle some to get those to line up. Take your time and once you have all 4 bolts in, reverse the sequence on how you 'unbolted' the cradle (that way, nothing will 'bind'). Do a little @ a time. Remember, I did these on jack stands so that was way fun ;o). Differential support so I could 'drop' and 'raise' the cradle to help 'guide' it in place: 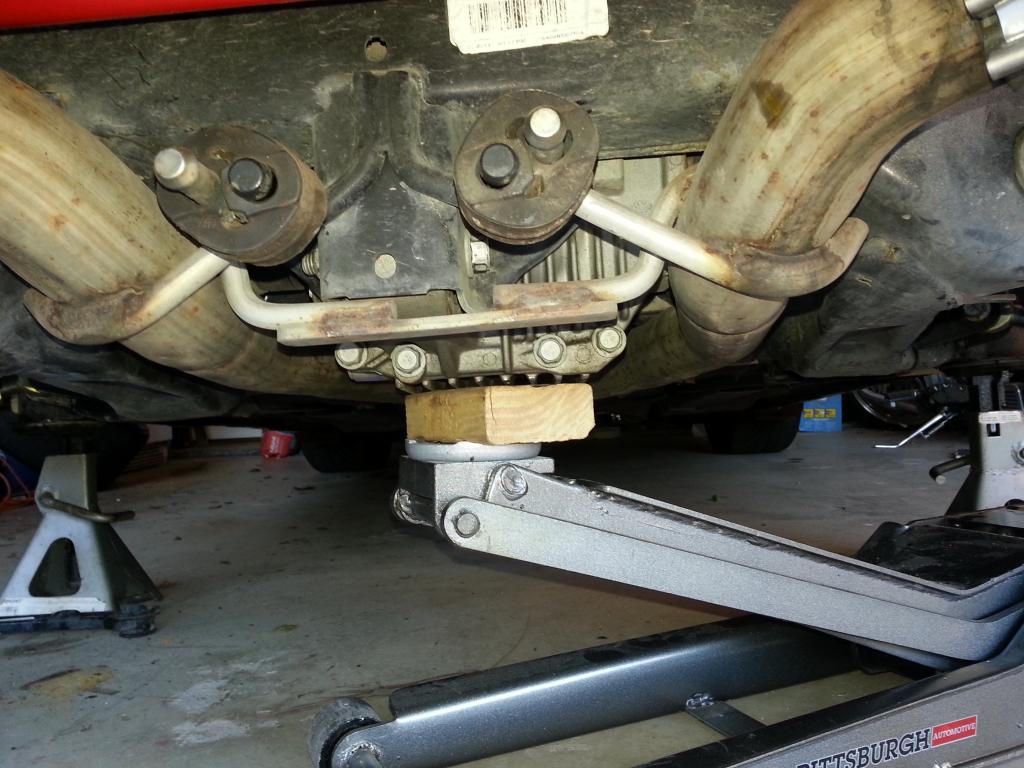 Bolted up:! 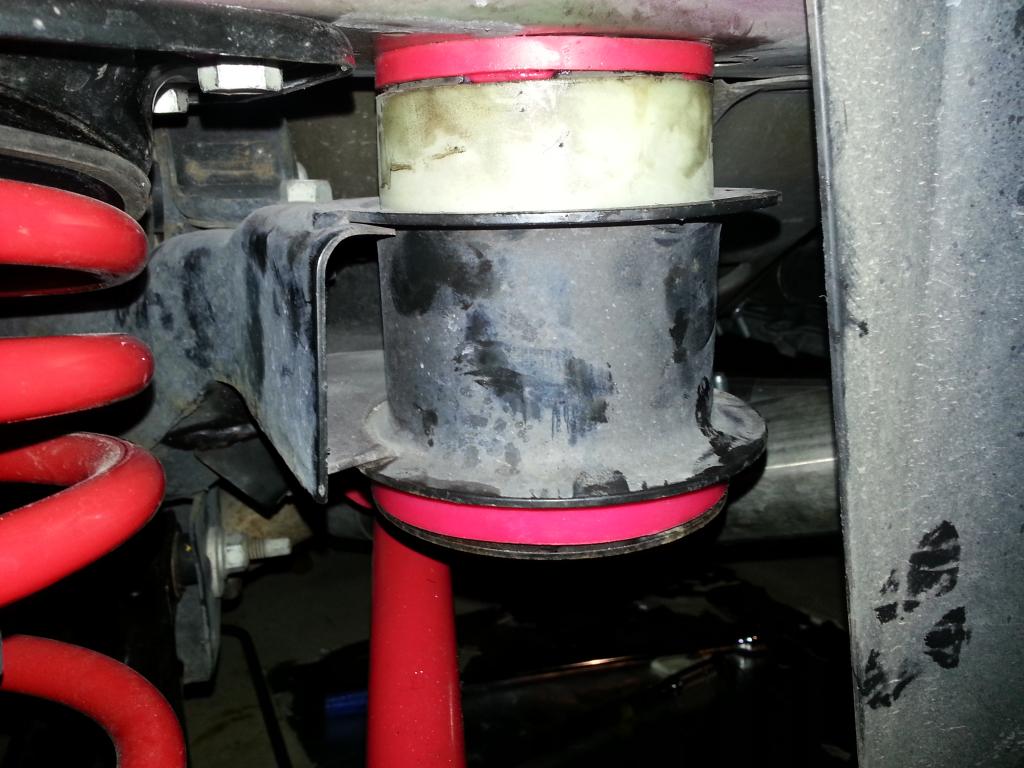 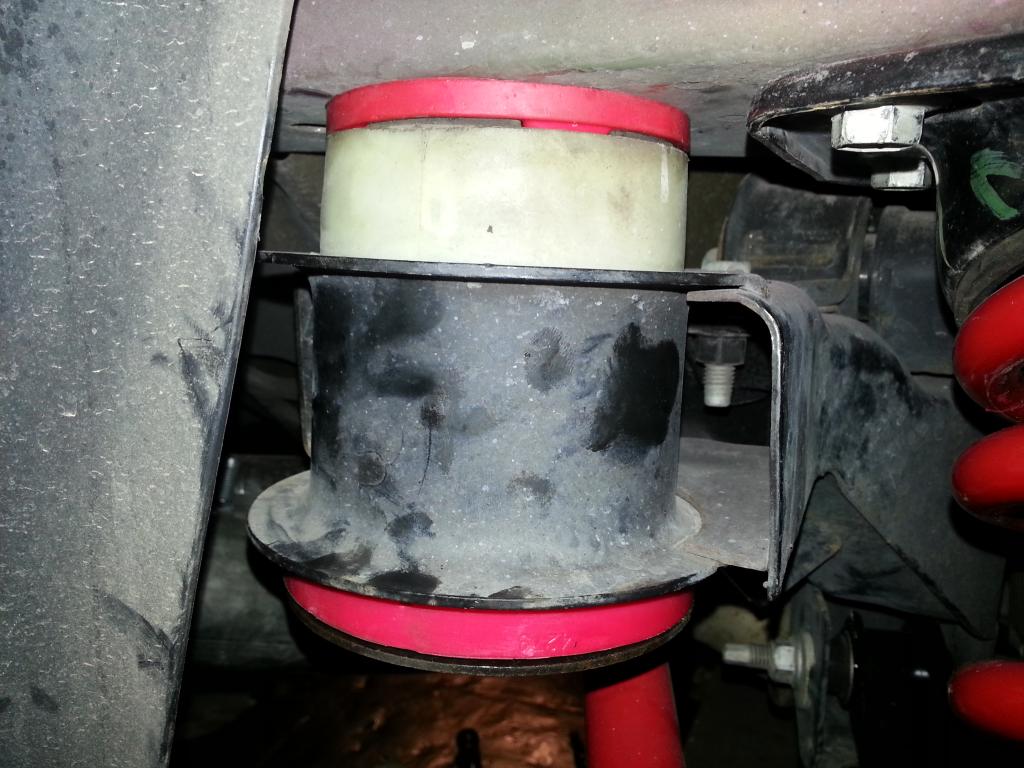 The front -- before final tightening... 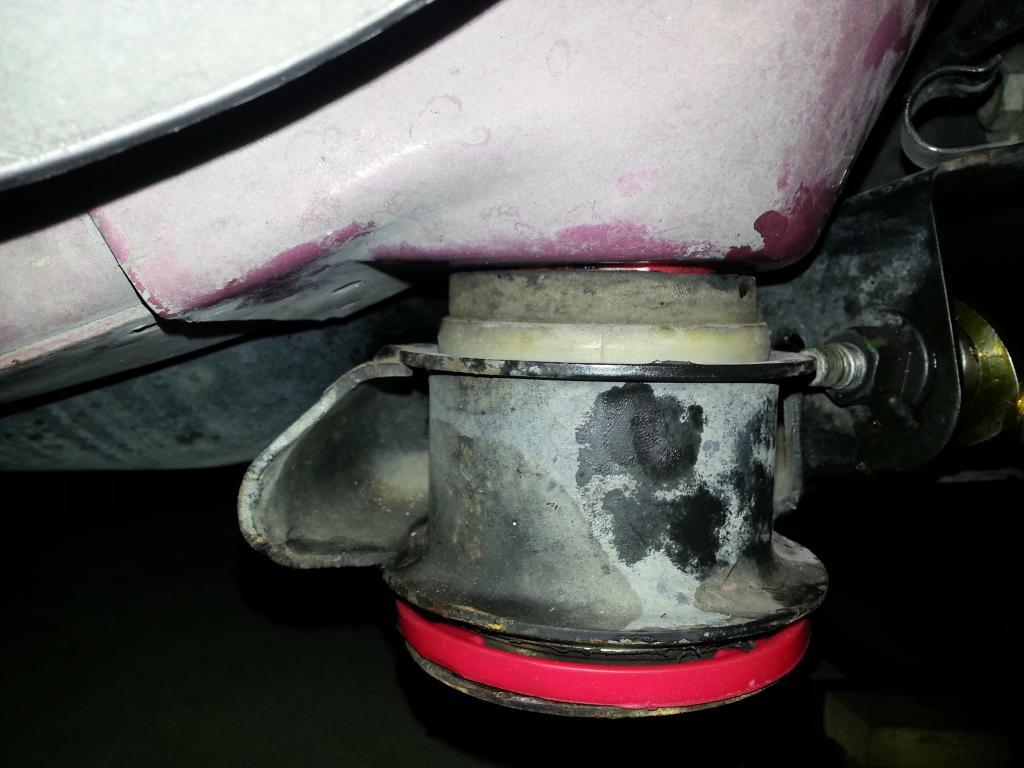 So, once the cradle is bolted up (per spec 110 ft lbs), I then installed the shock cap (you may have to 'tap' it around to get it to line up again -- not hard @ all). Torqued those and then re-checked all torque settings on all bolts before putting on the wheels (those were torqued too!). Put her down and test drive -- I really noticed the 'one with the road' feel. Very subtle vibration (due to the bushings) and a very 'tight' feel to the car -- like its on rails! Took about 3.5 hours total time -- I didn't rush and wanted to 're-check' everything. -Don Last edited by hammdo; 07-01-2017 at 04:11 PM. |

|

|
|
10-16-2014, 11:19 PM
|
#2 |
|
'It's an experiment'
Drives: [COTW 2/09/15] '11 GPI LSA SC Z/LE Join Date: May 2014
Location: Dallas TX
Posts: 8,690
|
BTW, there is a DIY where you 'fill in' the gaps with a resin, and the filler is around $30 but the GUN is $300! So, if you don't have the gun, you're better off using the 'street' version of the bushings. I didn't want to do the solids or full replacement as I'm not going to 'track' or 'race' this all the time -- just once in a while and for fun.
I do have the 1LE struts and shocks on order (Tyler from JDP helped out on those GREAT deal!) -- should have gotten them @ the same time as the bushing/toe rods but oh well ;o) -Don |
|
|
|
|
10-17-2014, 08:18 AM
|
#3 |
|
What's this button do?

Drives: 2019 Black 2SS Join Date: Apr 2013
Location: Wylie, Texas
Posts: 1,364
|
 Great job Don. You are an ambitious soul!
__________________
2019 Black & Red & Silver 2SS - Bone Stock
 |
|
|
|
|
10-17-2014, 08:41 AM
|
#4 |
|
'It's an experiment'
Drives: [COTW 2/09/15] '11 GPI LSA SC Z/LE Join Date: May 2014
Location: Dallas TX
Posts: 8,690
|
Thanks! I've always loved doing these types of upgrades...
Considering I used to do this a LONG time ago, I still really enjoy it. Just couldn't do it for a daily living anymore. Now, its slow and steady (and recover from the pain ;o)! The changes though are amazing -- the car just holds true really can tell the difference... Are you able to get back to 'modding' yours? -Don |
|
|
|
|
10-17-2014, 09:40 AM
|
#5 |
|
KaBoom1701

Drives: 13' ZL1 Red M6 Join Date: Dec 2012
Location: I.E. SoCal (Yucaipa)
Posts: 8,630
|
Holly crap!
What's the odds...I'm going into my garage to do this exact mod tight now. Thx for the pics and info. I may be back here if I need help. lol
__________________
Mods:
Roto-Fab Intake, WW Res. kit & Big Gulp Air Scoop, Elite Catch Can, ATI Super Damper & 18% OD Pulley, LF Idler pulley bracket, Metco CC breather, ID850 Injectors, Stainless Power Headers w/ ceramic coating, TR71X Spark Plugs, JMS Fuel Pump Booster, Bo White TB, Tuned by Ted @ Jannetty Racing, Ron Davis HX, D3 Reservoir, Pfadt 1" Springs, Moreno Camber Plates, ZL1 Addons Splitter guard washers, Tow Hook kit & rock guards, Hurst Shifter Billet Plus 6 Speed Short Shifter, ZL1 DRL lighting harness, ZL1 Recaro Seats. |
|
|
|
|
10-17-2014, 09:44 AM
|
#6 |
|
'It's an experiment'
Drives: [COTW 2/09/15] '11 GPI LSA SC Z/LE Join Date: May 2014
Location: Dallas TX
Posts: 8,690
|
No problem! It was a lot less work than I thought. I hear all the horror stories about the bushings, but, outside of the hats and cutting off the 'feet', it was really easy (of course, I just did the bushing inserts and not the replacements). So were the toe rods. Tyler from JDP laughed when I told him how I got the 'hats' off -- really worked for me and I had one that was ON there ;o)...
-Don |
|
|
|
|
10-17-2014, 09:47 AM
|
#7 |
|
'It's an experiment'
Drives: [COTW 2/09/15] '11 GPI LSA SC Z/LE Join Date: May 2014
Location: Dallas TX
Posts: 8,690
|
|
|
|
|
|
10-20-2014, 12:53 PM
|
#8 |

Drives: Chevys at the limit Join Date: Nov 2010
Location: SLC, UT
Posts: 9,621
|
Looks good, Don! looks like you're just about dialed in! Thank you for your business and support!
Best regards, Tyler 888-308-6007 |
|
|
|
|
10-20-2014, 06:12 PM
|
#9 |
|
'It's an experiment'
Drives: [COTW 2/09/15] '11 GPI LSA SC Z/LE Join Date: May 2014
Location: Dallas TX
Posts: 8,690
|
And then there will be struts/shocks from ya! So glad I did the suspension before adding anymore power. Thanks Tyler!
-Don |
|
|
|
|
10-25-2014, 12:31 PM
|
#10 |
|
'It's an experiment'
Drives: [COTW 2/09/15] '11 GPI LSA SC Z/LE Join Date: May 2014
Location: Dallas TX
Posts: 8,690
|
So, did the 1LE shocks and struts this weekend. Wow, I didn't realize @ 39k miles, how poorly the current shocks/struts were. Tyler (JDP) got these for me and what a difference in performance! Tyler is awesome to deal with and all I have left are a couple of 'smaller' suspension mods and then my new shoes (GoodYears -- sticking with them for now)...
Here are some pics: 1LE Strut:  1LE Shock with upgraded shock cap: 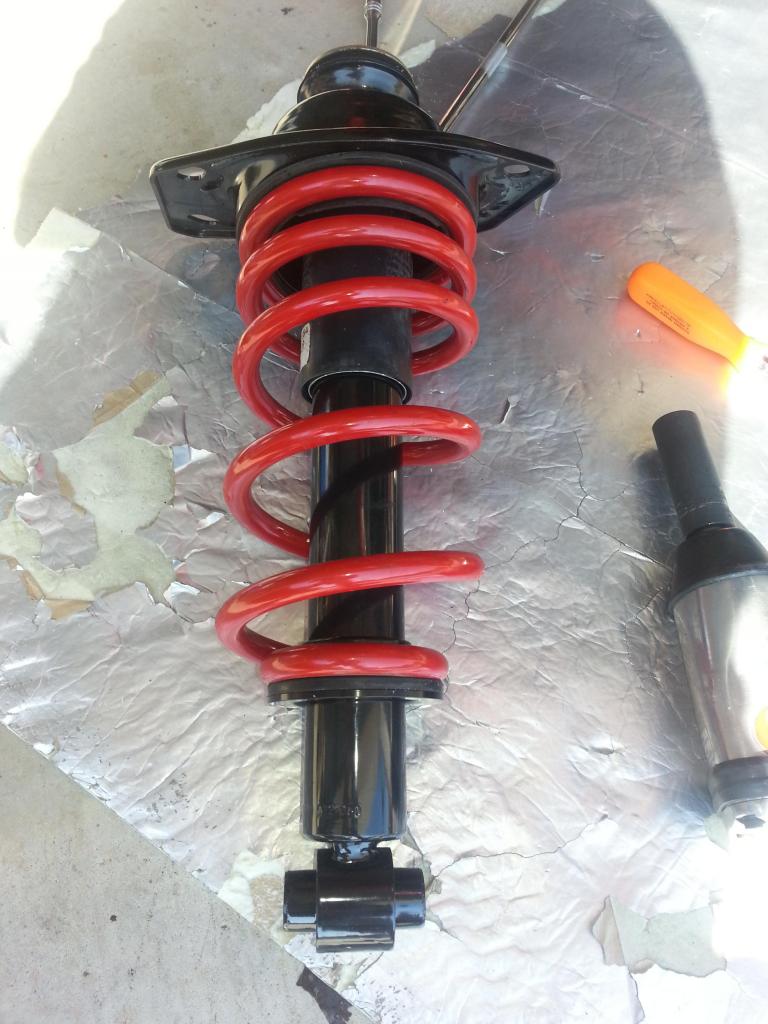 Original shock with cap: 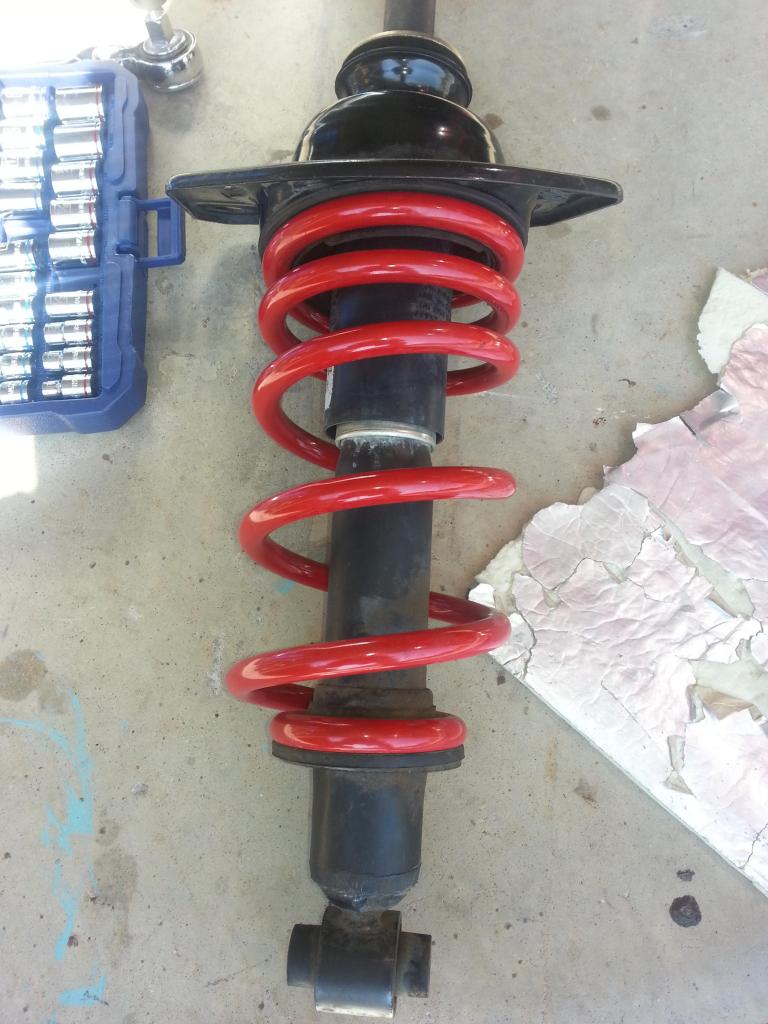 Notice on the 1LE shock the spring sits 'higher' on the shock. That was one of the biggest difference along with the 'stronger' shock cap (out side of the performance difference of course ;o). Installed: Shock:  Strut:  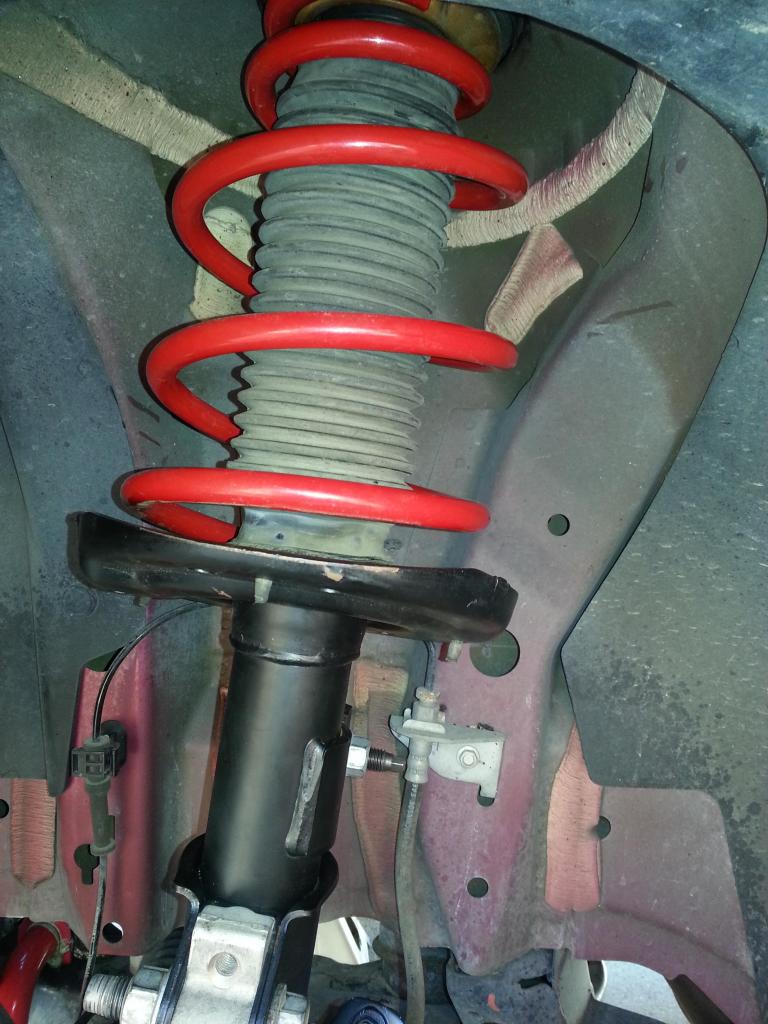 -Don Last edited by hammdo; 07-01-2017 at 04:12 PM. |
|
|
|
|
10-26-2014, 06:24 PM
|
#11 |
|
'It's an experiment'
Drives: [COTW 2/09/15] '11 GPI LSA SC Z/LE Join Date: May 2014
Location: Dallas TX
Posts: 8,690
|
So, I have the upper control arms bushings for the rear coming from JDP along with the radius rods (front) bushings to do. Once those are on and I have my new 'shoes' on it, I'll need to 'index' (clock or time as it where) the bushings -- BMR has a good doc (from installing the springs) that tells you how to do that -- obviously, I don't have a way to do that without a lift so I'll probably have the alignment shop do it (I have figured out 'how' to make that work, but it requires some 2x10s to do it ;o)...
Direct Link (read the 'end' of the doc for the re-indexing/clocking/timing etc...): http://www.bmrsuspension.com/siteart/install/SP019.pdf I'll update this thread on the installs for that when I'm get to it this weekend... -Don Last edited by hammdo; 10-27-2014 at 05:17 PM. |
|
|
|
|
10-31-2014, 03:57 AM
|
#12 | ||
|
'It's an experiment'
Drives: [COTW 2/09/15] '11 GPI LSA SC Z/LE Join Date: May 2014
Location: Dallas TX
Posts: 8,690
|
So, tonight I started on the 'rear' upper control arm bushings. Got them from JDP and took to the task.
I had to undo the cradle again along with the 'just' installed 1LE shocks. Hated to do it, but I forgot to order the bushing. So, following the same procedures above, I got to the point where I could unbolt, the upper control on in the rear. I had to use a 'flexible' ratchet wrench from Lowes to unbolt the two 'bushing' bolts: 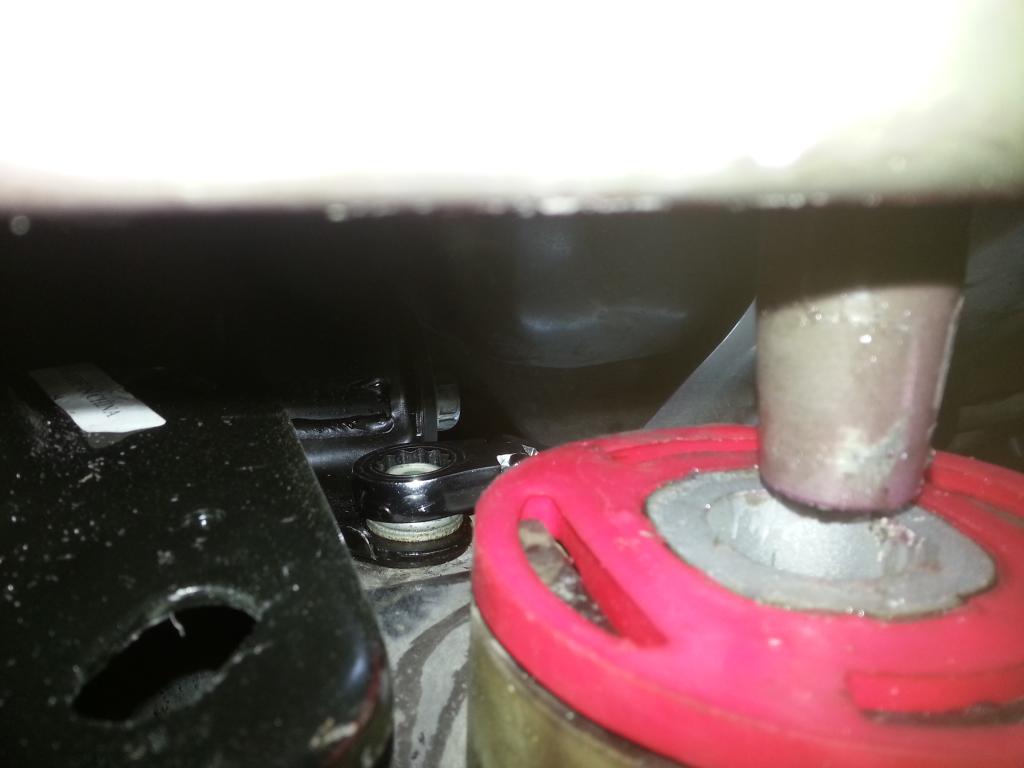 Then, unbolted the 'other' bolt that holds the arm in place: 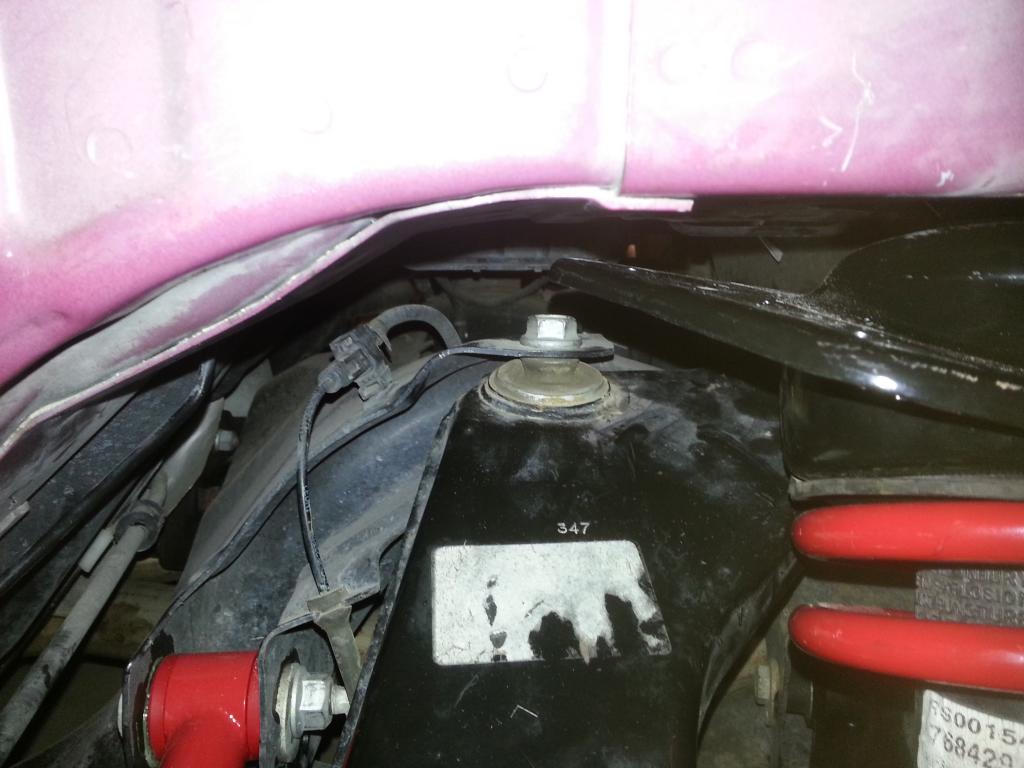 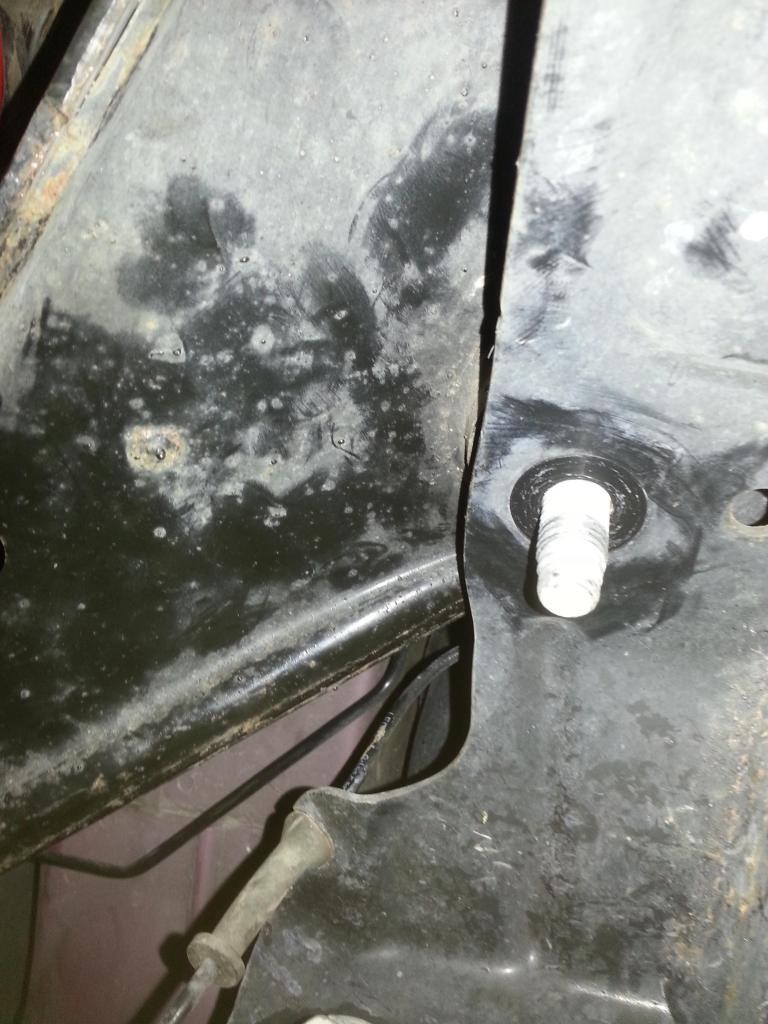 Then unbolted the upper control arm bolt: 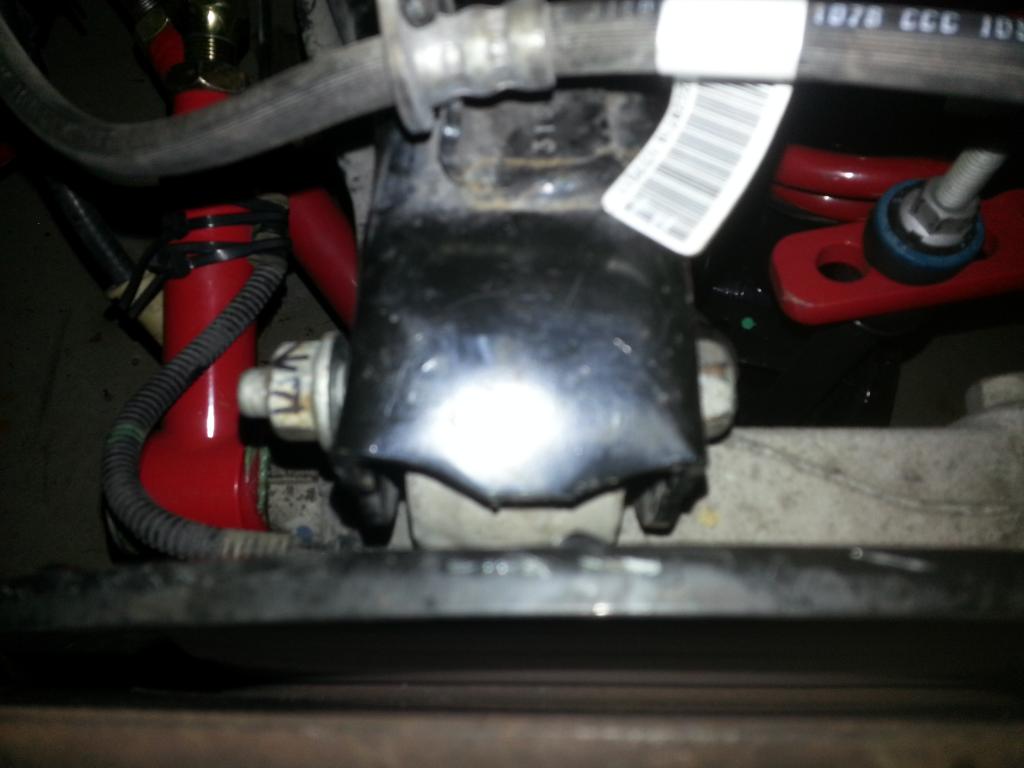 Took off the brake line:  I then 'rotated' the arm around the shock and out it came: 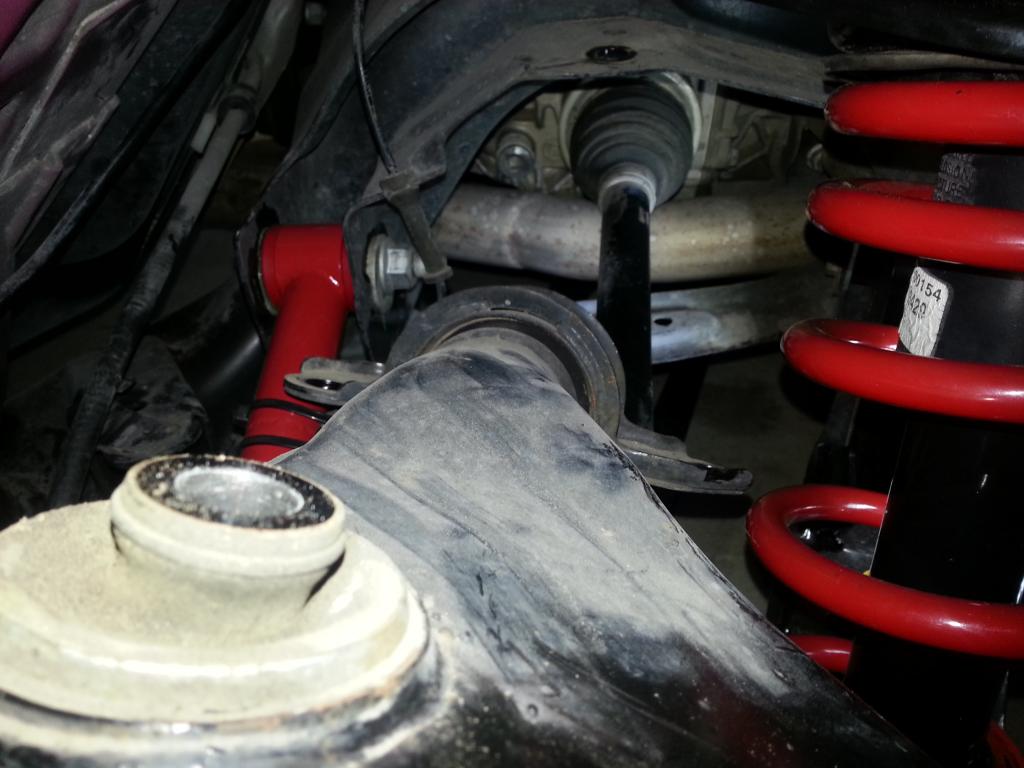 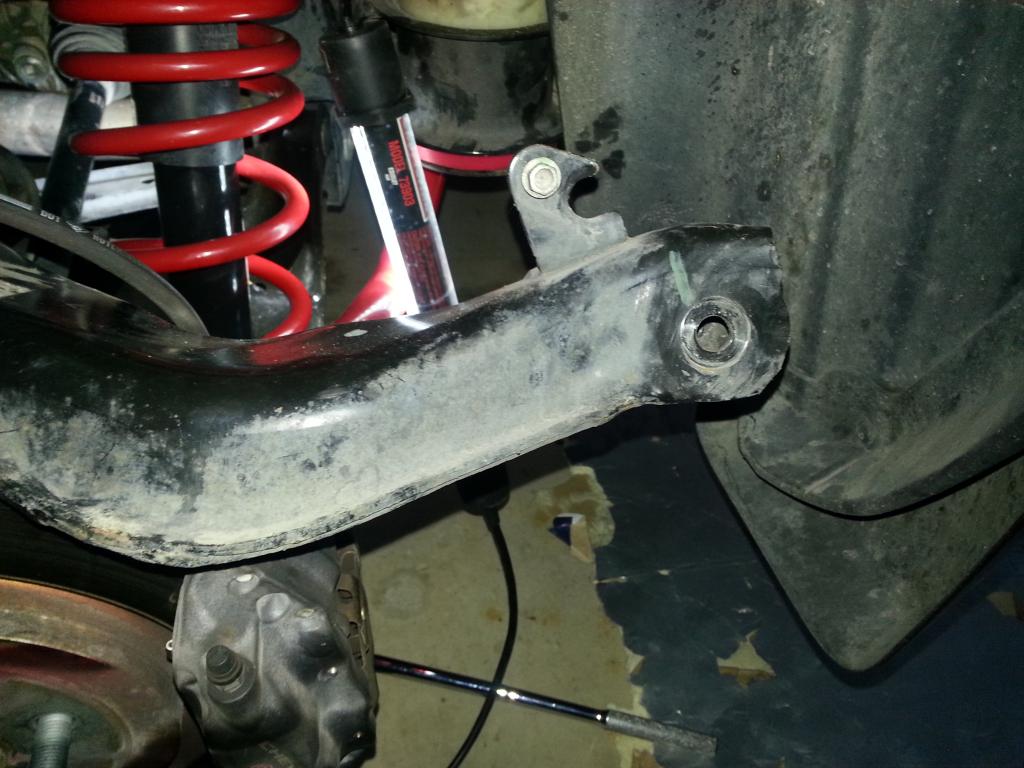 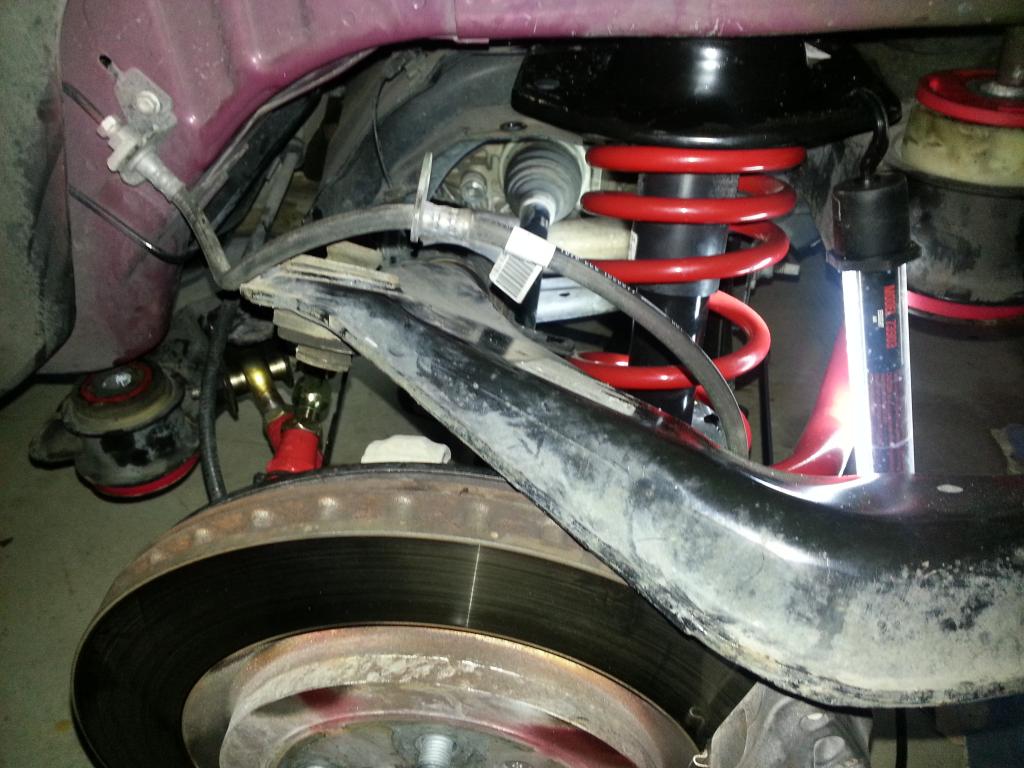 I pretty much followed BMR's instructions for R&R (although these are JDP versions): http://www.bmrsuspension.com/siteart/install/BK039.pdf So, now that they are off, taking off the bushing was easy. Just unbolted the bolt and slide on the new one: 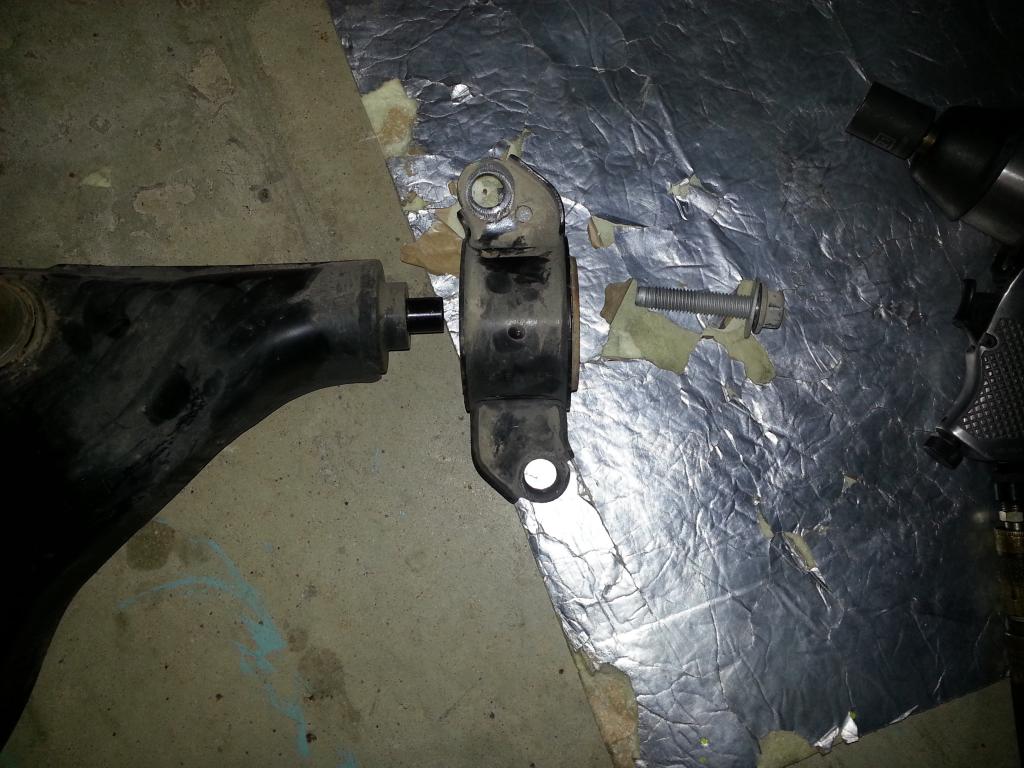 Put the new on one and ... OPPS, something was amiss! So, contacted JDP and this is what I told them: Quote:
Quote:
Bolting up: Corrected bushing in arm: 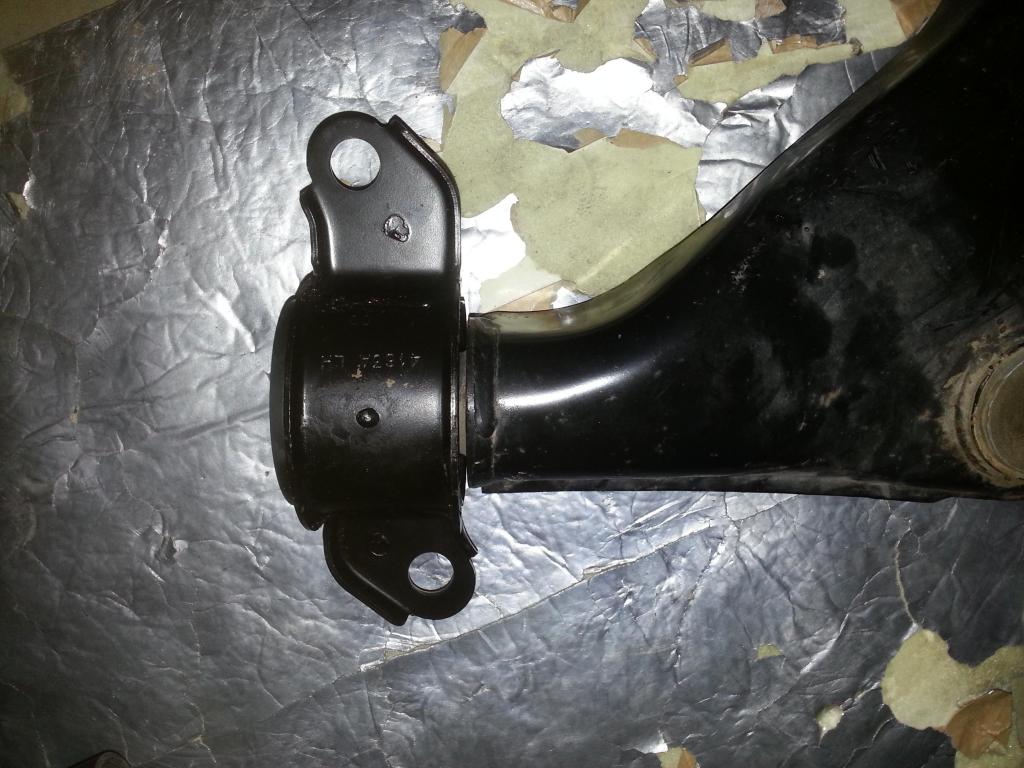 Assembly: 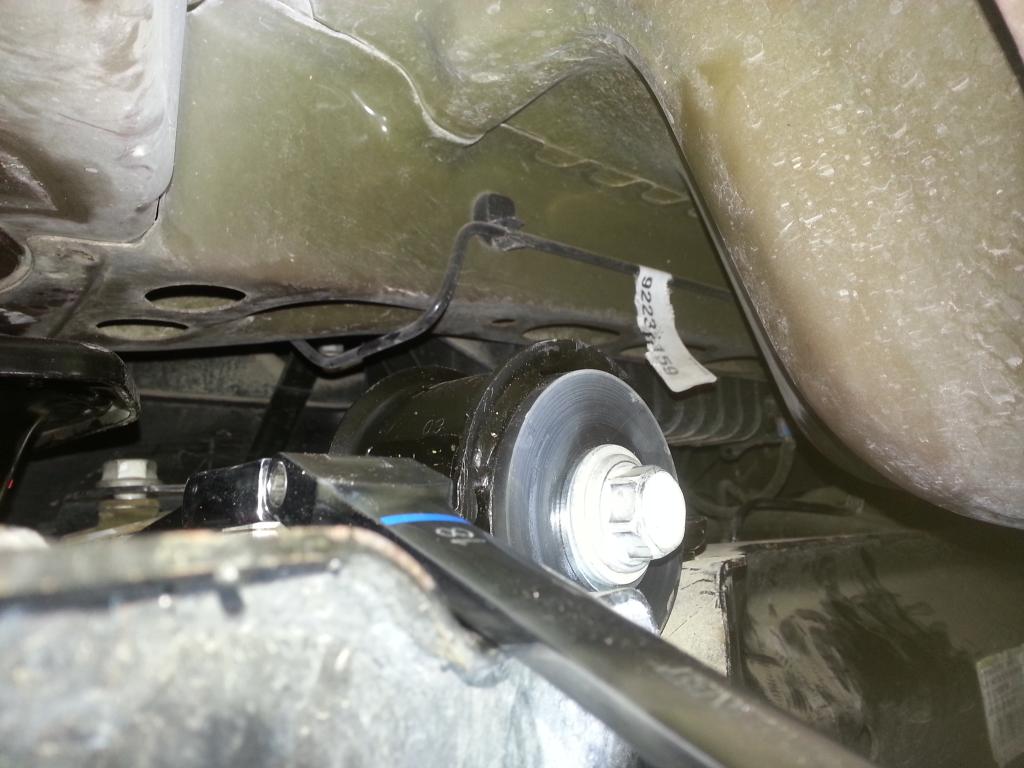 So, the rear is bolted up. I'm heading out in the AM to get the 'new' shoes for the ZL1 Wheels! I'll also update this thread when I do the 'radius' inserts on the front... Of special note: I left the 'bolt' on the bushing (the one horizontal) a bit loose in order to line up the 2 bushing bolts. Once those were in and things aligned, I then torqued everything up. I loctited all the bolts just to be safe (blue loctite). Here is the image to the bushing on JDP site. This is how I verified the sleeve was in wrong. You'll see the 'larger' opening is extended out of the bushing that is supposed to slide on towards the control arm -- that was my clue:  -Don Last edited by hammdo; 07-01-2017 at 04:13 PM. |
||
|
|
|
|
10-31-2014, 10:19 AM
|
#13 |
|
'It's an experiment'
Drives: [COTW 2/09/15] '11 GPI LSA SC Z/LE Join Date: May 2014
Location: Dallas TX
Posts: 8,690
|
OK, just finished the Radius Arm Inserts. Pretty much followed this:
http://www.camaro5.com/forums/showthread.php?t=156879 My bolts were on like the others -- TIGHT! Before I could get the bolt out on the driver's side, I had to loosen the 2 washer bottle bolts: 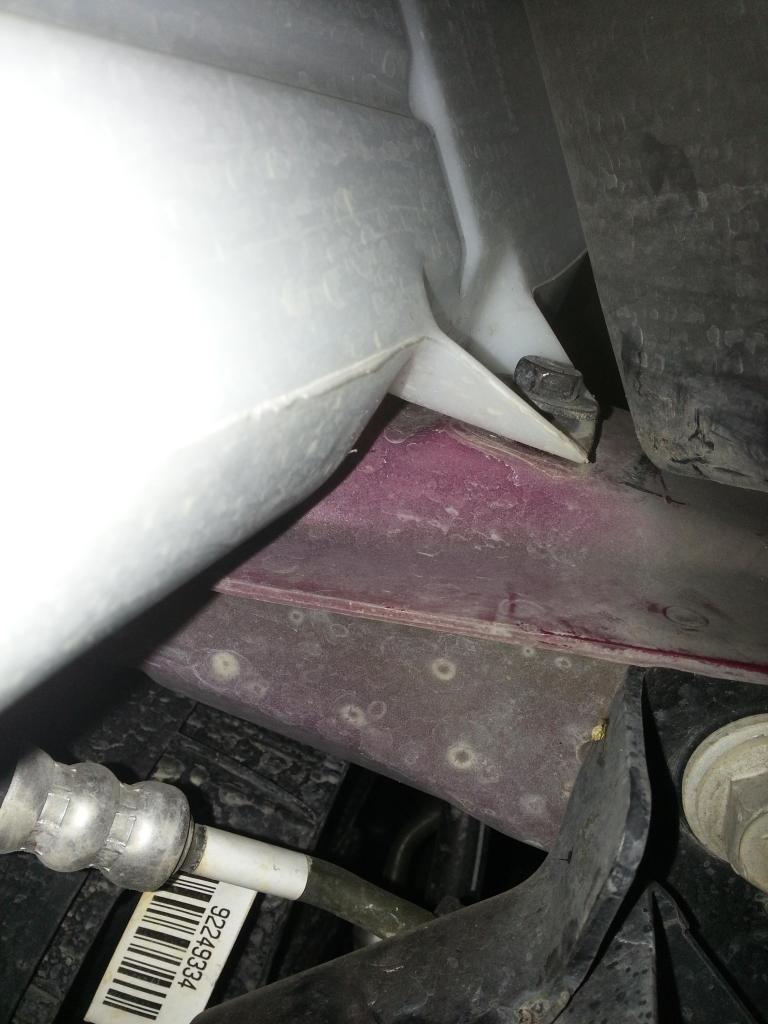 One on each side. Then... Got the main bolts loose. Here is the progression: Once loose, took out the 'rubber' inserts: 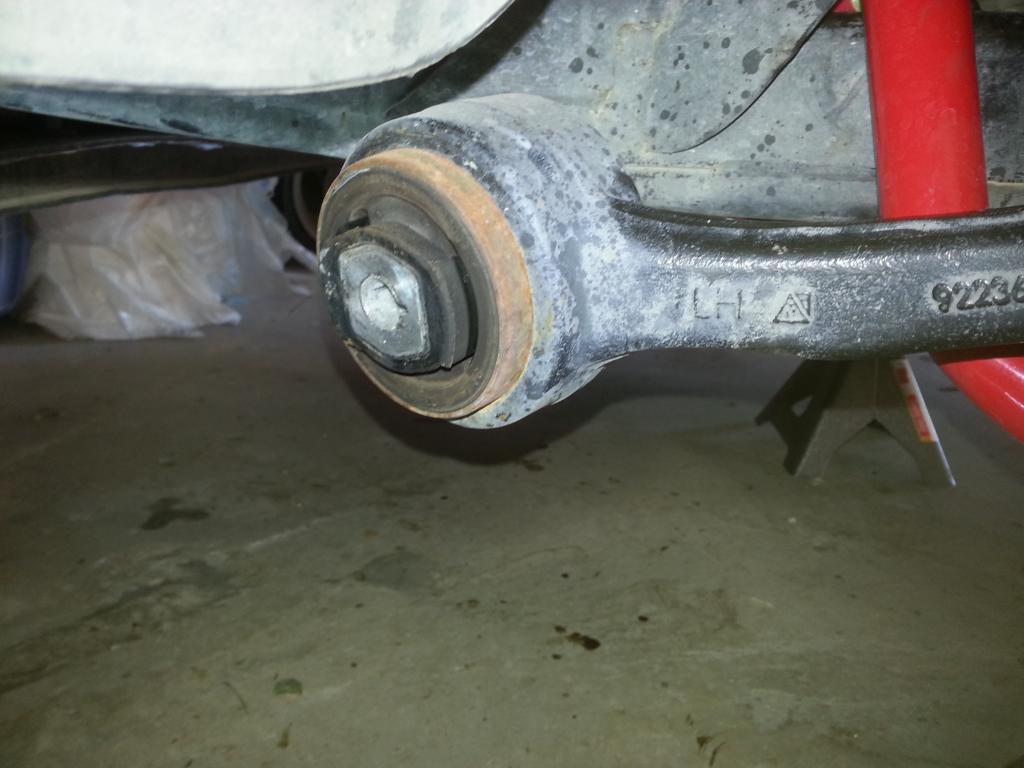 Remove the old rubber bushing:  New inserts on both ends!: 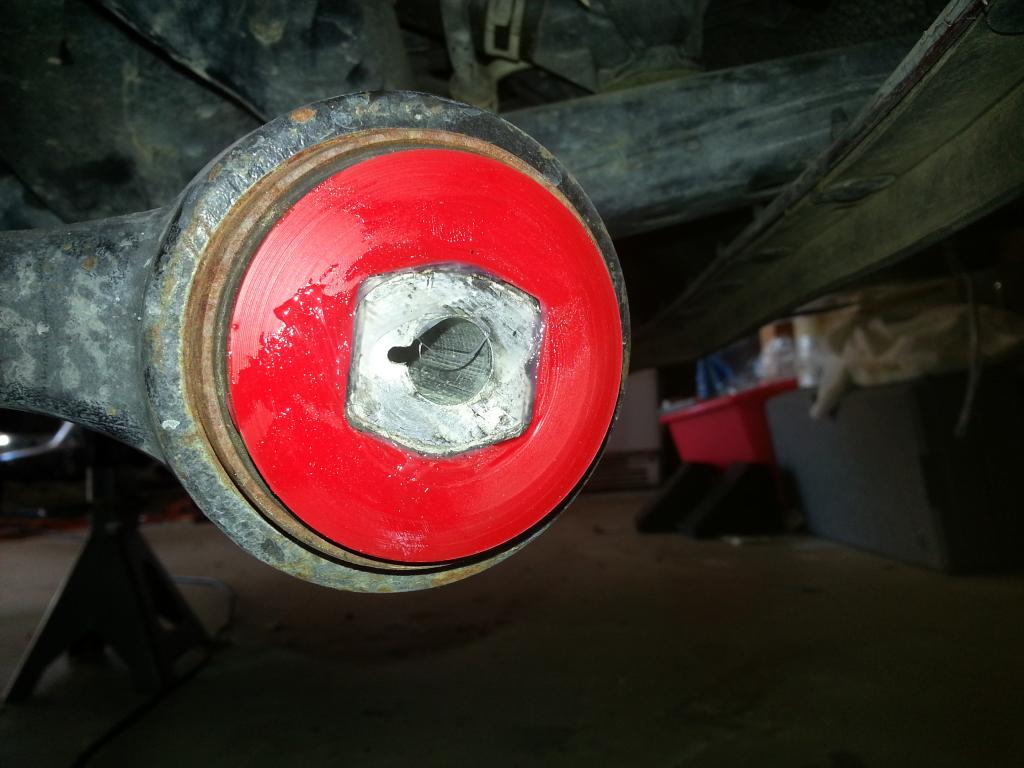 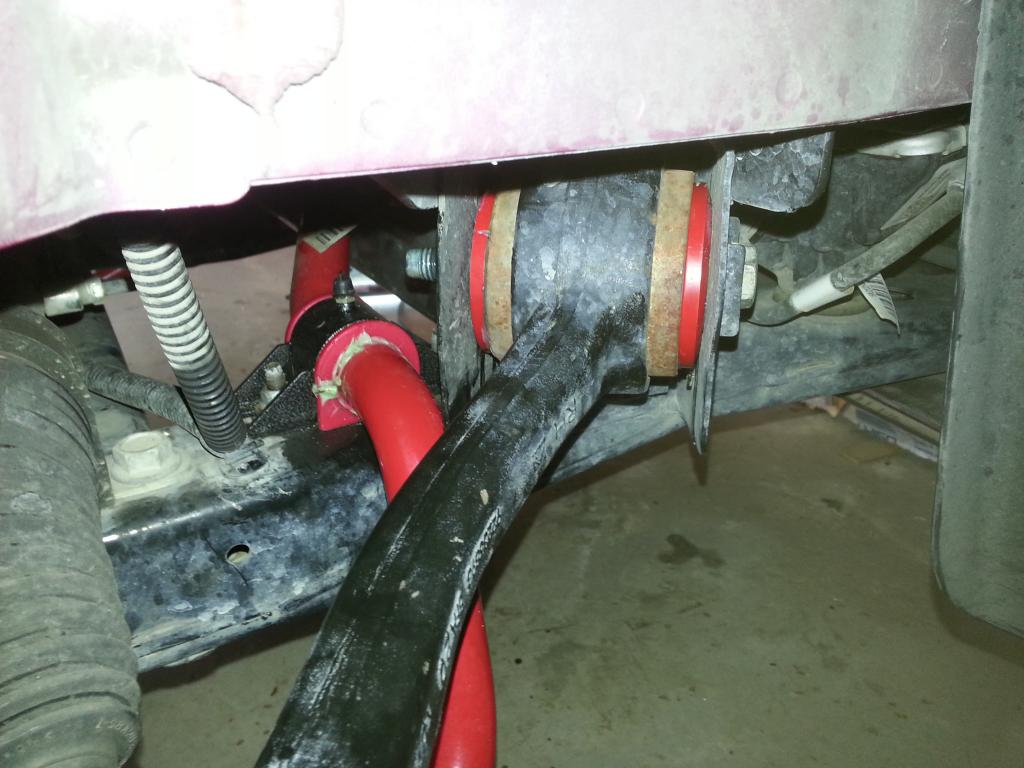 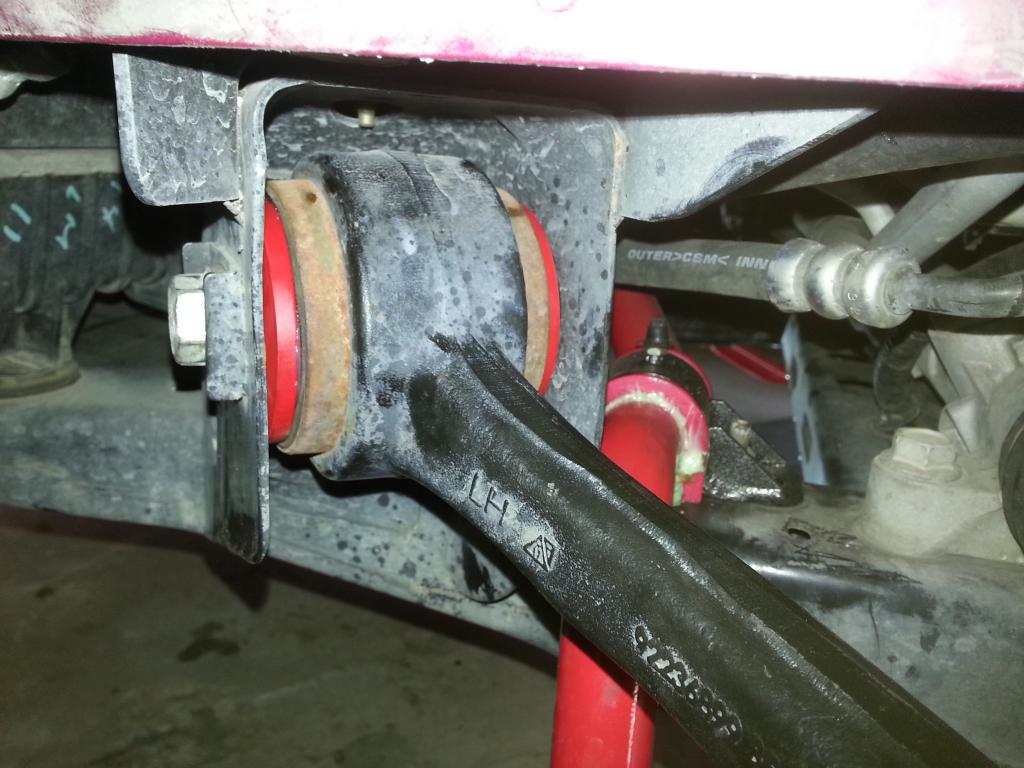 These were tighter so I had to 'tap' them up with a brass hammer and then use a screwdriver (small) to line up the bolt hole. Loctite and torque them down! Took about 30 minutes to do both sides... -Don Last edited by hammdo; 07-01-2017 at 04:13 PM. |
|
|
|
|
10-31-2014, 05:28 PM
|
#14 |
|
'It's an experiment'
Drives: [COTW 2/09/15] '11 GPI LSA SC Z/LE Join Date: May 2014
Location: Dallas TX
Posts: 8,690
|
I forgot to post the 'stock' radius arm inserts:
 Not much too them. Now, the new shoes! 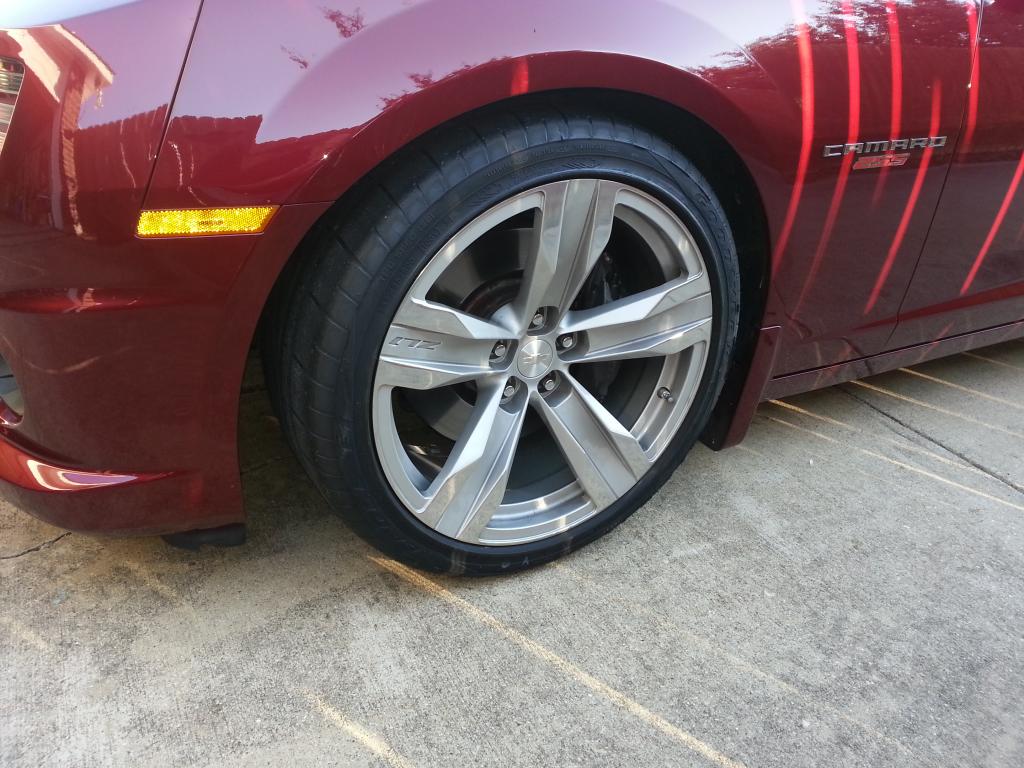 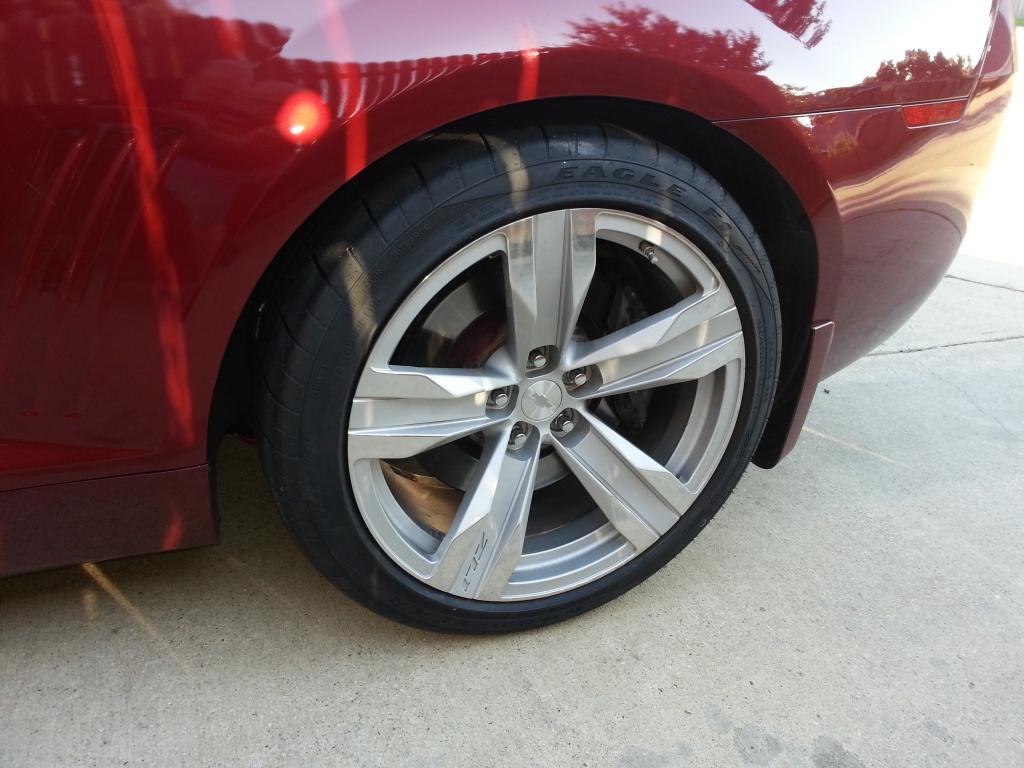 Stayed with the Good Years. BTW, went to NTB in Carrollton to have the tires put on and balanced -- they did a great job -- I have to 'clean them', but no scratches added. I took the wheels to them -- and put them on my car myself. If you go there, (Carrollton off Trinity and George Bush), Ask for Soran (So Ron). Tell him the dude with ZL1 wheels and Red SS sent ya! Now, the alignment! -Don Last edited by hammdo; 07-01-2017 at 04:14 PM. |
|
|
|
|
|
|
|
 |
| Thread Tools | |
|
|