You are browsing camaro5 

|
 11-07-2021, 03:11 PM
|
#1 |
 Drives: 2014 Camaro 2SS Join Date: Oct 2017
Location: Brooksville, FL
Posts: 181
|
Added NPP to your car? Here's how to make them work with a flip of a switch!
Okay I know some of you are thinking this is nothing new and it's been done before. Yes, BUT no one has described in detail and show step by step instructions how to do the install.
In fact I've seen most hook it up like a true NPP from the factory with the vacuum from the back of your intake manifold. I see a few flaws with this approach. 1- Hooking up the vacuum line with the intake still on your car is a PITA! 2- You don't have FULL control of when the valves are open or closed. 3- You can't have the valves closed on start-ups. This install isn't that difficult if you have basic electrical knowledge and some hand tools you should be good to go. PARTS LIST (almost everything I ordered was from Amazon) 1- Dorman Electrical Vacuum Pump- $56.00 https://www.amazon.com/gp/product/B0...?ie=UTF8&psc=1 2- Dorman Vacuum Pump Pigtail- $11.79 https://www.amazon.com/gp/product/B0...?ie=UTF8&psc=1 3- 18 Gauge Wire (you really don't need 40ft, more like 15ft. But this is what I got.)- $13.99 https://www.amazon.com/gp/product/B0...?ie=UTF8&psc=1 4- Gates Vacuum Hose- $20.33 https://www.amazon.com/gp/product/B0...?ie=UTF8&psc=1 5- 1/8 NPT Male Barb House Connector (order 2)- $14.44 (for the pair)https://www.amazon.com/gp/product/B0...0?ie=UTF8&th=1 6- Dorman Vacuum Tubing Connectors- $7.42 https://www.amazon.com/gp/product/B0...?ie=UTF8&psc=1 7- MAC Boost Solenoid Valve (Part number: 35A-AAA-DDBA-1BA) I got this off eBay- $57.98 https://www.ebay.com/itm/331151768803 8- Toggle Switch SPST (I like to use any with a built in 20A fuse here's an example)- $6.95 https://www.ebay.com/itm/382783616216 Total - $188.90 (not including electrical tape, zip-ties, teflon tape, hand tools, etc.) Now after the initial sticker shock I'm sure this can be done cheaper. I just wanted to stick with quality parts for my install. STEP 1 Disconnect the negative battery cable in your trunk. This area is also going to be the home of your new vacuum pump and boost solenoid so get a good visual look were you'd like to mount it. Here is a pic of mine set up the way I wanted it (also note the pump can be a little noisy when first engaged to close the valves, but it goes away in a few seconds. So I decided to mount it here to keep it away from the cabin a bit).  STEP 2 Time to wire up the vacuum pump and boost solenoid. Grab the spool of wire and connect the red power wire to the green wire on the vacuum pump and then connect your ground wires (black wires) together. See pic:  The wiring from the boost solenoid are both black (don't worry they both work the same way). Hook one up to the red power wire from your spool by splicing into it and the other to your black ground wire from the spool. At this time I also spliced into the ground wire with another black wire to make my ground for the negative battery terminal. (Also note that in this pic you can see I put teflon tape on the male barb hose connectors on the boost solenoid) See pic:  I also put electrical tape around the wiring to make it a bit cleaner. See pic: 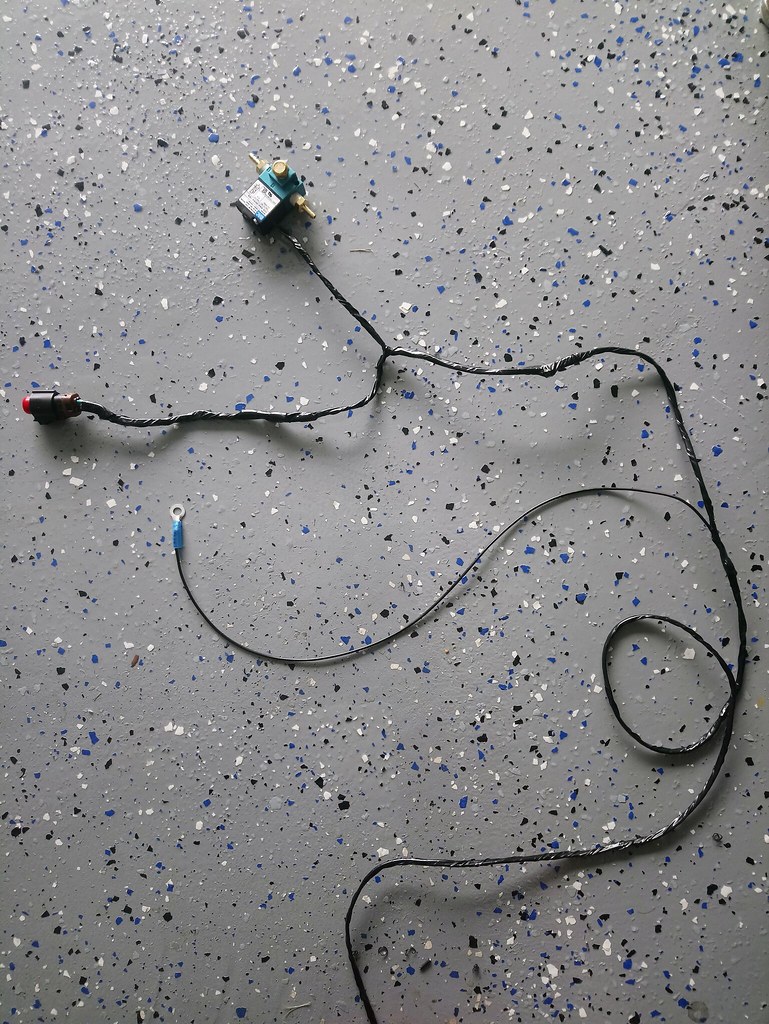 STEP 3 Run that spool of wire up to the cabin and hide it all the way up to the shifter. The silver trim/4-pack gauge cluster is held in by clips. Use a plastic trim panel tool or literally lift up with light pressure to relieve the clips. You'll see the cig lighter has a RED power wire. Splice into this and attach a piece of wire and run it to your toggle switch for main power. The one I used has a 20amp fuse built in and also has 3 terminal connections. The main power wire I attached to the terminal in the middle (see pic) then the power and ground from the long spool of wire you ran up to the shifter connects one on each side of the toggle switch terminals. I decided to mount my switch on the side panel by the shifter (which is also just held in by clips) See pics:     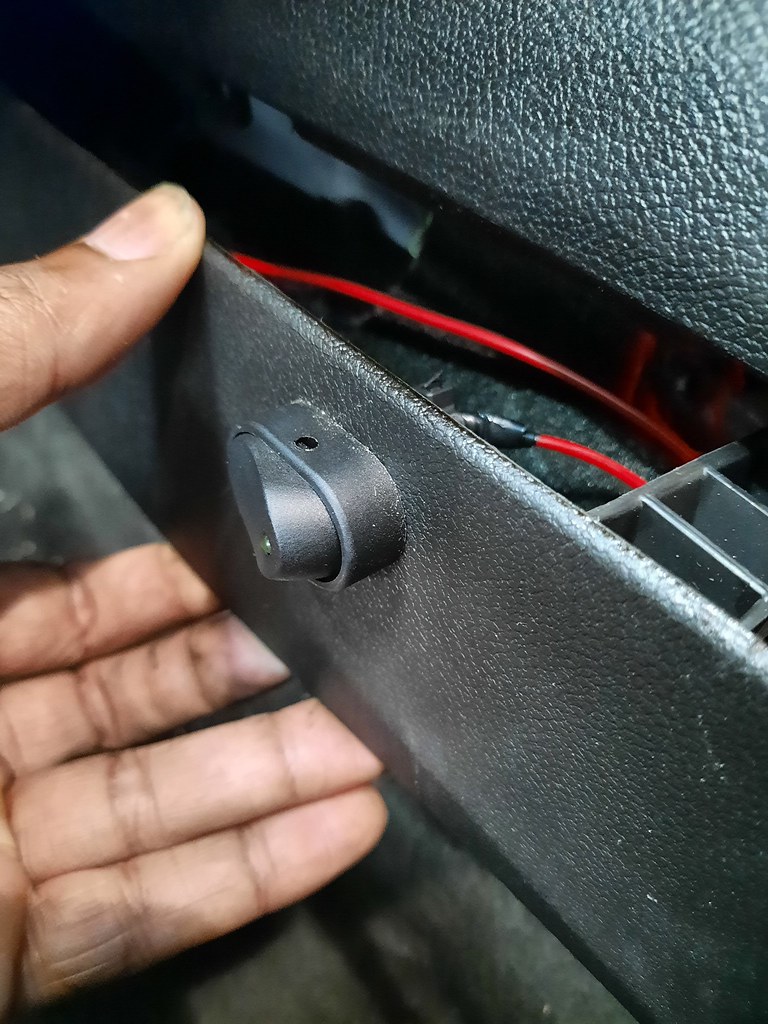 STEP 4 Now that the wiring is complete it's time to focus on the vacuum lines. This is the easiest part. Once your vacuum pump is mounted in your preferred location run a line from it to the boost solenoid, then another from the solenoid to the vacuum tee connector, and from the tee connector to the NPP vacuum ports on the mufflers. In the trunk you'll see two black plastic grommets (one on each side of the trunk). I drilled a hole just big enough to run the vacuum lines down to the exhaust. You will notice you have to give the vacuum hose a good few pushes to get them connected (it's really a good tight fit, no air leaks). See pics for hose connections:     STEP 5 Time to reconnect the negative battery terminal and give it a test before you get your trunk put back together. Turn the key to the ON position and flip the toggle switch and you should hear the pump turn on. It should turn off in a few seconds, if it continues to run longer than a minute you probably have a pinched vacuum line somewhere. Congrats you now have a fully controllable NPP exhaust! I've had mine set up this way for over a year now with no issues! I hope this helps someone looking to do the conversion! Here are a few misc pics:      
__________________
Mods: GPI SS1 VVT cam, TSP long tube headers, LSA conversion, ZL1 fuel pump, ADM FPCM, DW 700cc injectors, Lingenfelter solid isolator, Dedicated Motorsports ZL1 reinforced brick, ADM Griptech 2.5 pulley, JLT CAI, Phastek intake scoop, NPP cat-back, GM 3.91 gears, Eaton Truetrac, Tuned by Chris @ CHenry Motorsports.
|

|

|
|
11-10-2021, 09:49 AM
|
#2 |
 
|
that is a great write up, I installed just a three way switch that had Factory/open/closed and wired it to the back. i used this thread to do mine, was very simple.
https://www.camaro5.com/forums/showthread.php?t=318683
__________________
-------------------------------------------------------
Custom TSP Stage 2 Cam/GPI intake Ported Rod Mod /VARARAM CAI/Mishimoto Catch Can/1 LE front & rear sway bars/ engine cover/fuse box custom painted, strut tower brace, Texas Speed LT, Hi Flo Cats, Magnum Tru-X pipe, NGK Spark Plugs, PCM Spark Plug Wire, Painted Calipers, CF Spoiler w/wicker bill.  |
|
|
|
|
11-10-2021, 12:19 PM
|
#3 | |
|
Drives: 2014 Camaro 2SS Join Date: Oct 2017
Location: Brooksville, FL
Posts: 181
|
Quote:

__________________
Mods: GPI SS1 VVT cam, TSP long tube headers, LSA conversion, ZL1 fuel pump, ADM FPCM, DW 700cc injectors, Lingenfelter solid isolator, Dedicated Motorsports ZL1 reinforced brick, ADM Griptech 2.5 pulley, JLT CAI, Phastek intake scoop, NPP cat-back, GM 3.91 gears, Eaton Truetrac, Tuned by Chris @ CHenry Motorsports.
|
|
|
|
|
|
11-11-2021, 08:10 AM
|
#4 | |
|
|
Quote:
__________________
-------------------------------------------------------
Custom TSP Stage 2 Cam/GPI intake Ported Rod Mod /VARARAM CAI/Mishimoto Catch Can/1 LE front & rear sway bars/ engine cover/fuse box custom painted, strut tower brace, Texas Speed LT, Hi Flo Cats, Magnum Tru-X pipe, NGK Spark Plugs, PCM Spark Plug Wire, Painted Calipers, CF Spoiler w/wicker bill. |
|
|
|
|
|
05-11-2022, 04:21 PM
|
#5 |
 Drives: 2010 Camaro V6 LS Join Date: May 2022
Location: Louisiana
Posts: 12
|
Can this be done on a v6
|
|
|
|
|
05-16-2022, 01:26 PM
|
#6 | |
|
Drives: 2014 Camaro 2SS Join Date: Oct 2017
Location: Brooksville, FL
Posts: 181
|
Quote:
__________________
Mods: GPI SS1 VVT cam, TSP long tube headers, LSA conversion, ZL1 fuel pump, ADM FPCM, DW 700cc injectors, Lingenfelter solid isolator, Dedicated Motorsports ZL1 reinforced brick, ADM Griptech 2.5 pulley, JLT CAI, Phastek intake scoop, NPP cat-back, GM 3.91 gears, Eaton Truetrac, Tuned by Chris @ CHenry Motorsports.
|
|
|
|
|
|
|
|
|
 |
|
|


