You are browsing camaro5 

|
 08-14-2018, 05:11 AM
|
#2171 |
|
ZL1 Pilot

|
Wood alcohol @ lowes or home depot is an option. Probably cost more tho. Comes in a gallon can. Might be better just getting it from a speed shop tho. Some drag strips or tracks sell M1
__________________
 GP Tuning 2.5 Cam, RPS Carbon Twin Clutch, Ported Blower, Kook's Headers, Cold Air Inductions CAI, ID850's, 9.17 Lower, 2.5 Upper, JMS BAP, Pedders Front Radius Arm Inserts, Whiteline Subframe Inserts, Tuned by me with HP Tuners Idle Clip Link...........https://www.youtube.com/watch?v=gTL8S9eHwbs |

|

|
|
08-14-2018, 06:51 AM
|
#2172 |
|
'It's an experiment'

Drives: [COTW 2/09/15] '11 GPI LSA SC Z/LE Join Date: May 2014
Location: Dallas TX
Posts: 8,693
|
Yep, VP has distributors here. I’ll be looking for sure - probably call VP to see who locally has it...
-Don
__________________
747 RWHP 794 RWTQ
"Horsepower sells cars, torque wins races." - Enzo Ferrari See My Build: http://www.camaro5.com/forums/showthread.php?t=385577 |
|
|
|
|
08-18-2018, 03:33 PM
|
#2173 |
|
'It's an experiment'
Drives: [COTW 2/09/15] '11 GPI LSA SC Z/LE Join Date: May 2014
Location: Dallas TX
Posts: 8,693
|
LSA ProMeth Setup cont.
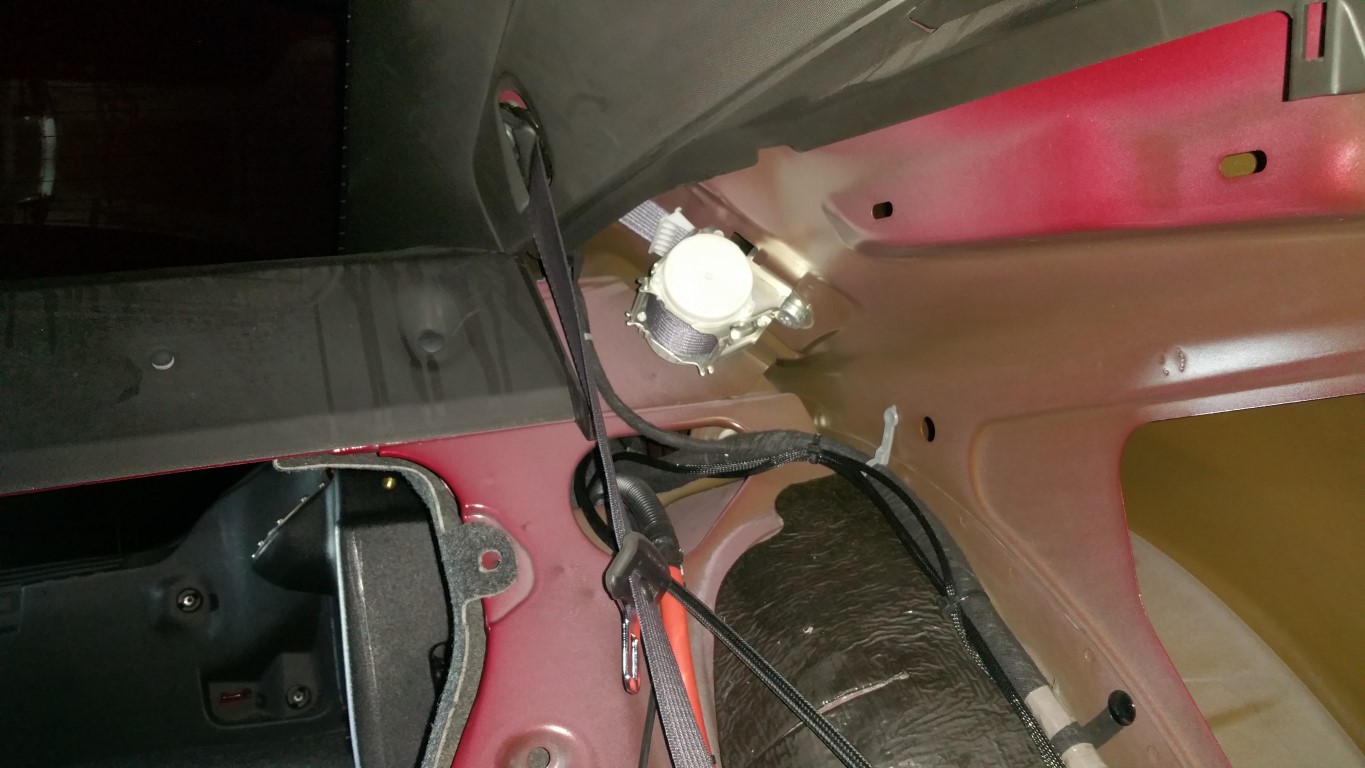
OK, removed the back seat and panels to gain access for routing the wiring:
  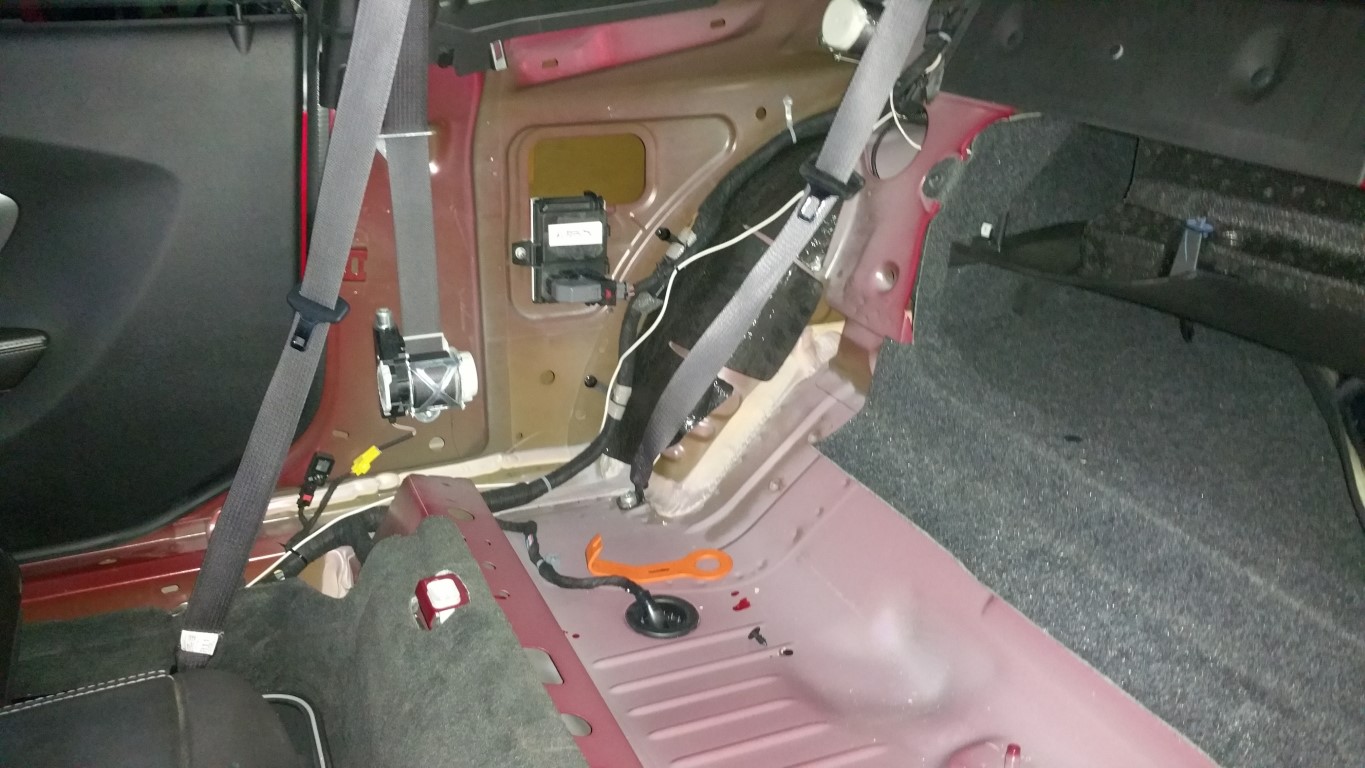 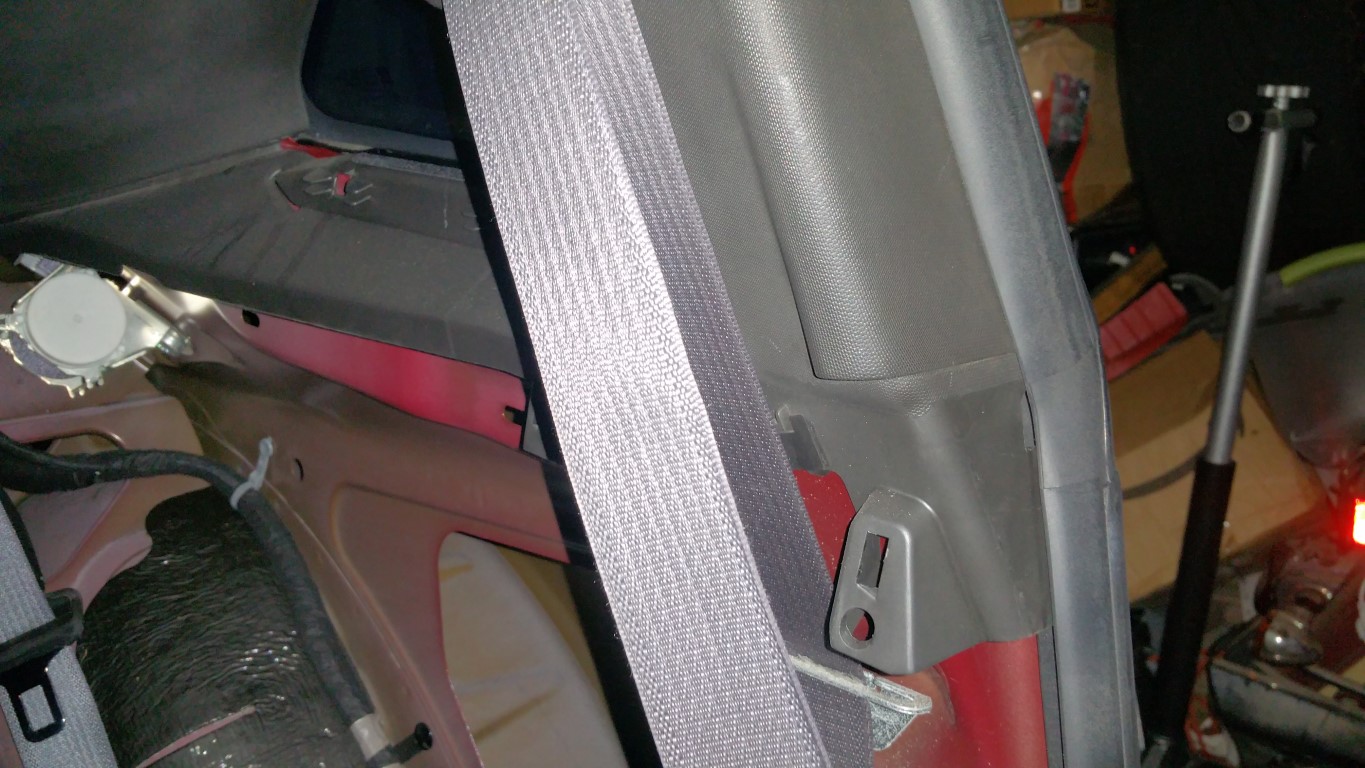 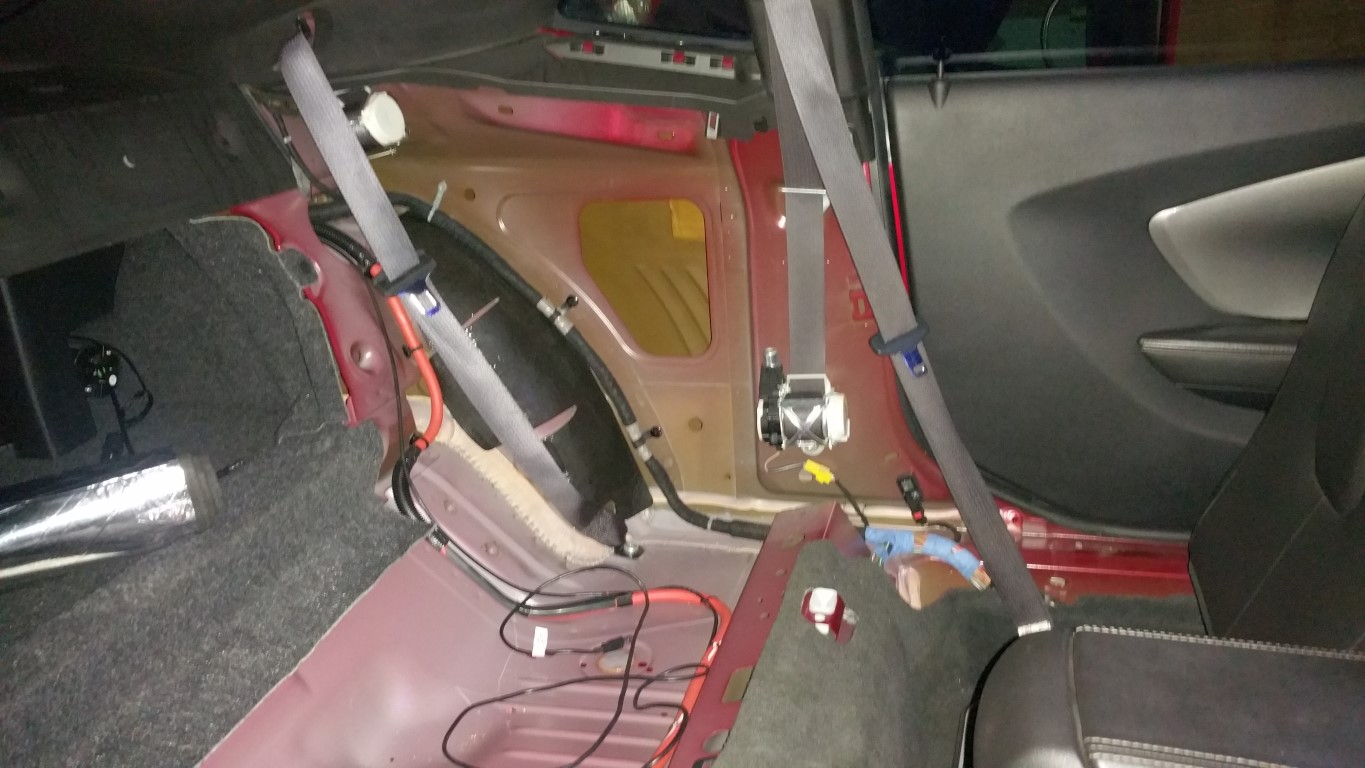 It was just easier to unbolt the upper section of the rear seat than line up and remove. I have the rest of the harness wired up ready to go. Found a location for the controller, and have some rivnuts ordered for the smaller size. Gonna look nice! I plan on routing the hose on the inside but before I do that, I want to do a test of the electronics and make sure they work as expected. Once I've confirmed that, then I'll route the fuel line and tap the lid... -Don
__________________
747 RWHP 794 RWTQ
"Horsepower sells cars, torque wins races." - Enzo Ferrari See My Build: http://www.camaro5.com/forums/showthread.php?t=385577 Last edited by hammdo; 08-18-2018 at 03:46 PM. |
|
|
|
|
08-19-2018, 06:19 PM
|
#2174 |
|
'It's an experiment'
Drives: [COTW 2/09/15] '11 GPI LSA SC Z/LE Join Date: May 2014
Location: Dallas TX
Posts: 8,693
|
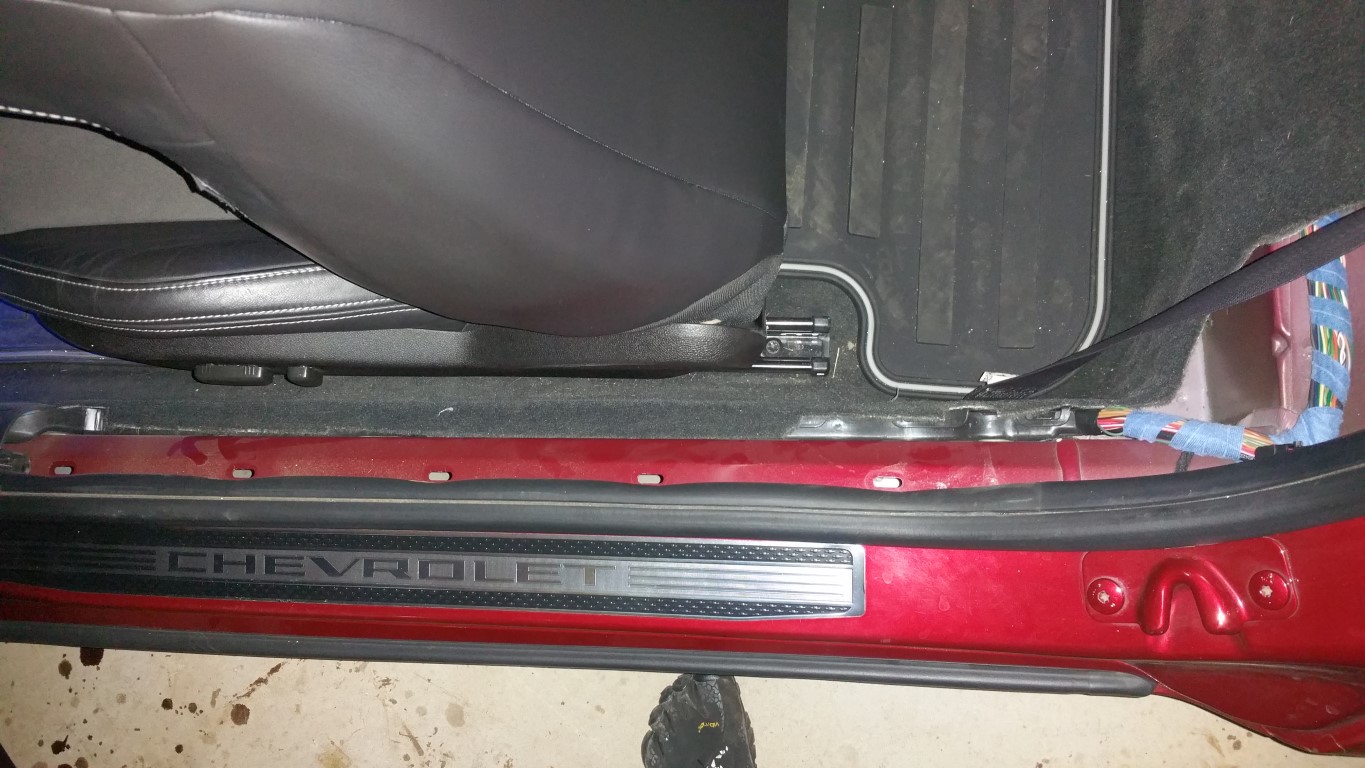
LSA ProMeth Setup cont.
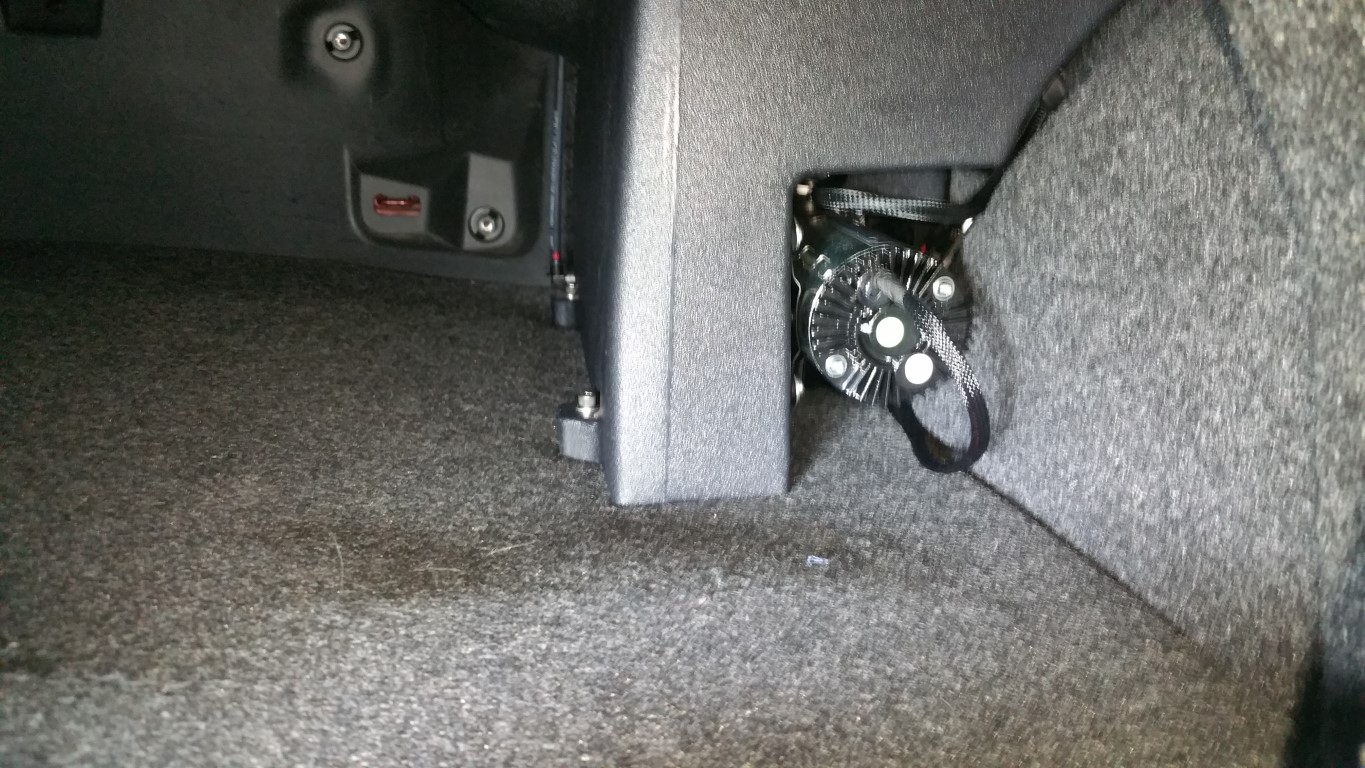
Got the controller ready to go. I'm putting it behind the drivers panel to keep it 'handy' but out of the way:
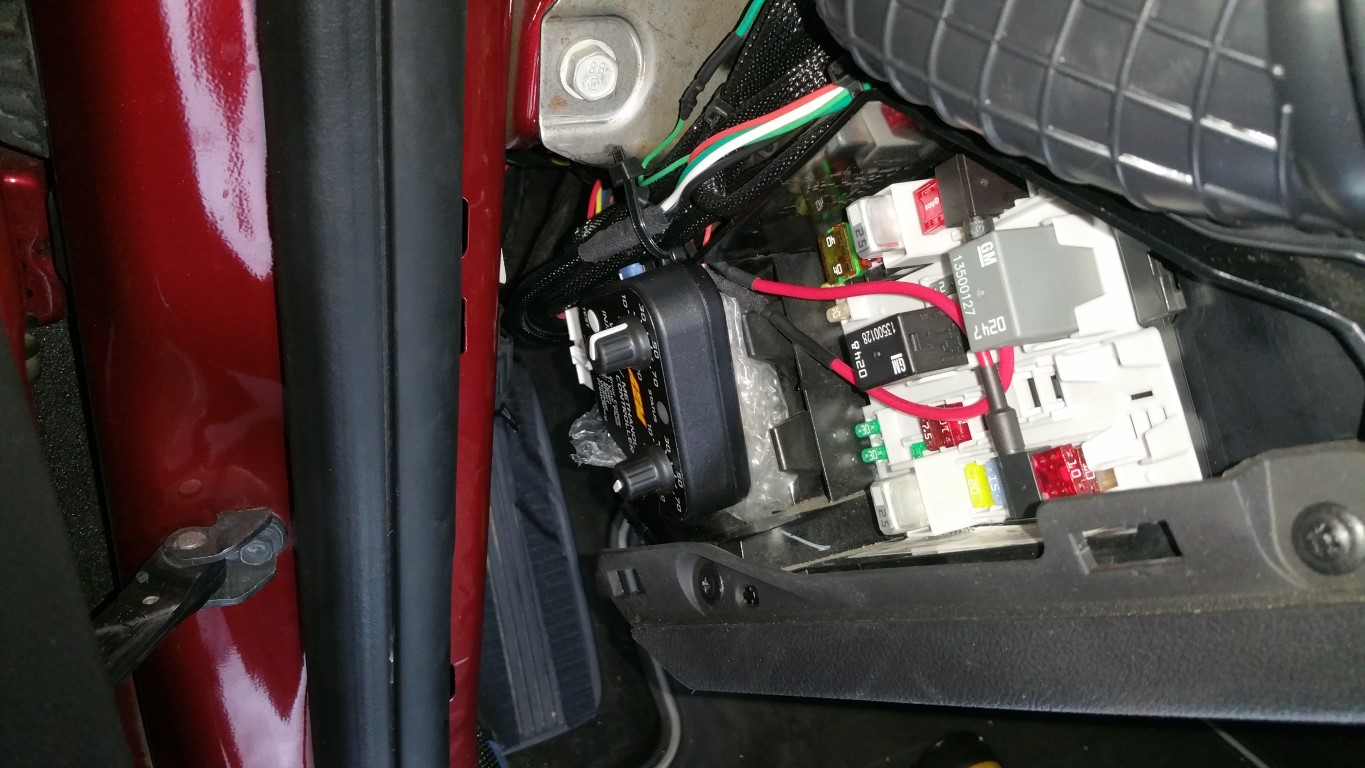 Then, ran the wiring along the drivers' side: 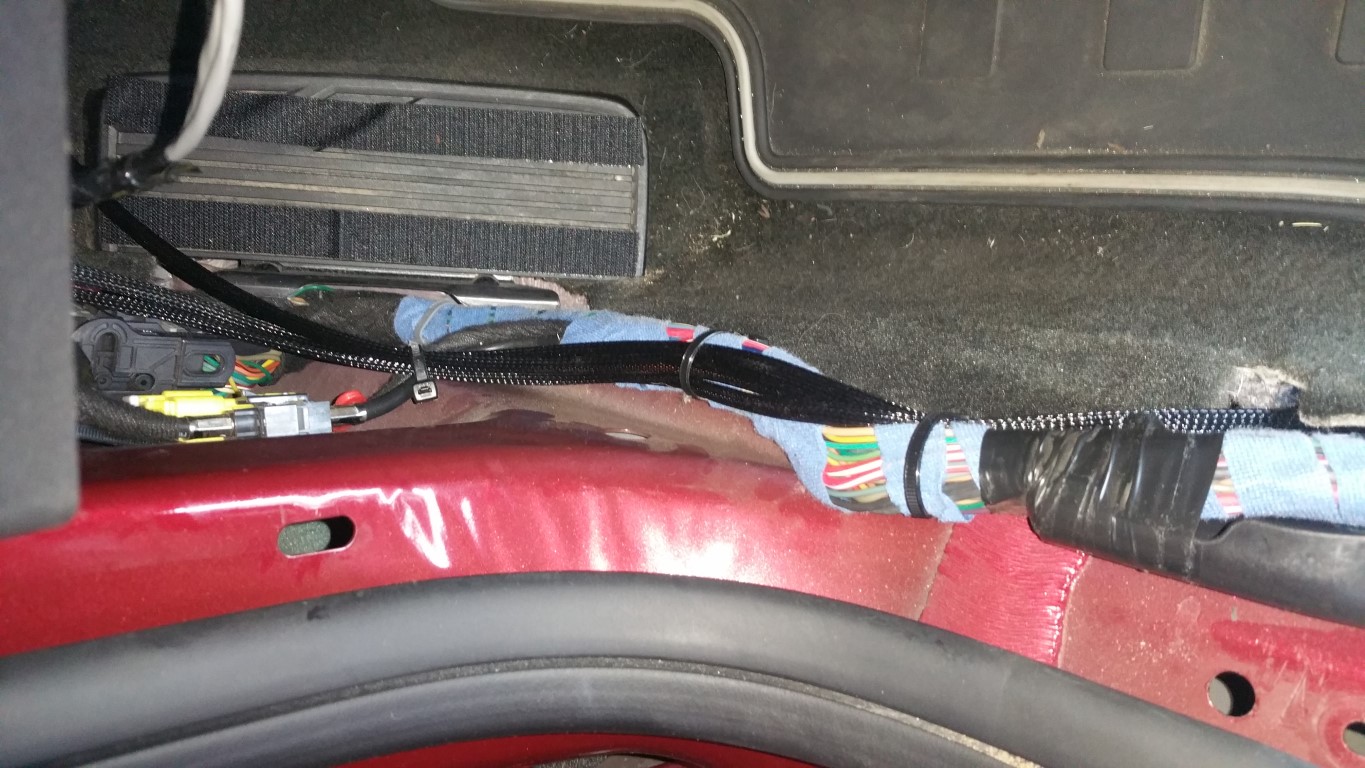 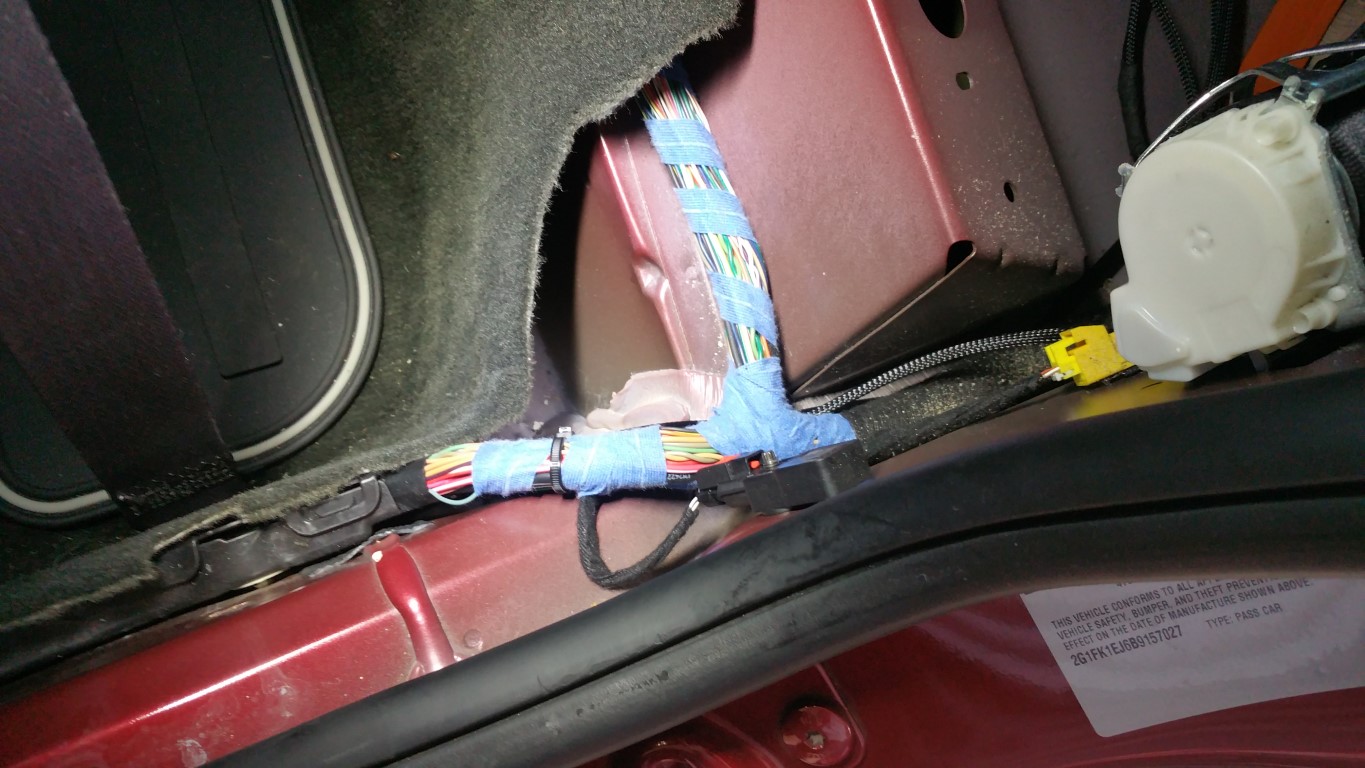 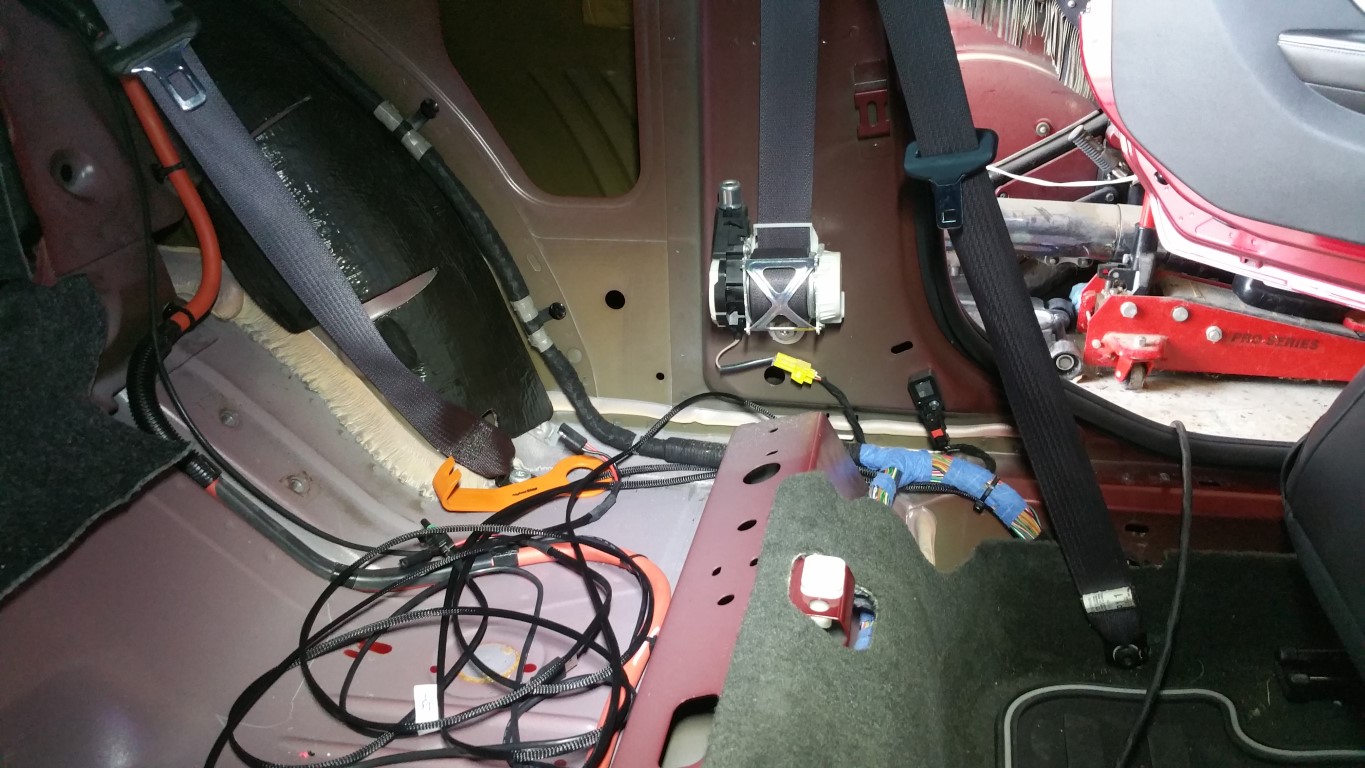 Next, I'll be routing up to the trunk and then, run the wires in the front to the switched power, MAP boost 0-5v signal, and the led light... -Don
__________________
747 RWHP 794 RWTQ
"Horsepower sells cars, torque wins races." - Enzo Ferrari See My Build: http://www.camaro5.com/forums/showthread.php?t=385577 |
|
|
|
|
08-19-2018, 08:20 PM
|
#2175 |
|
'It's an experiment'
Drives: [COTW 2/09/15] '11 GPI LSA SC Z/LE Join Date: May 2014
Location: Dallas TX
Posts: 8,693
|
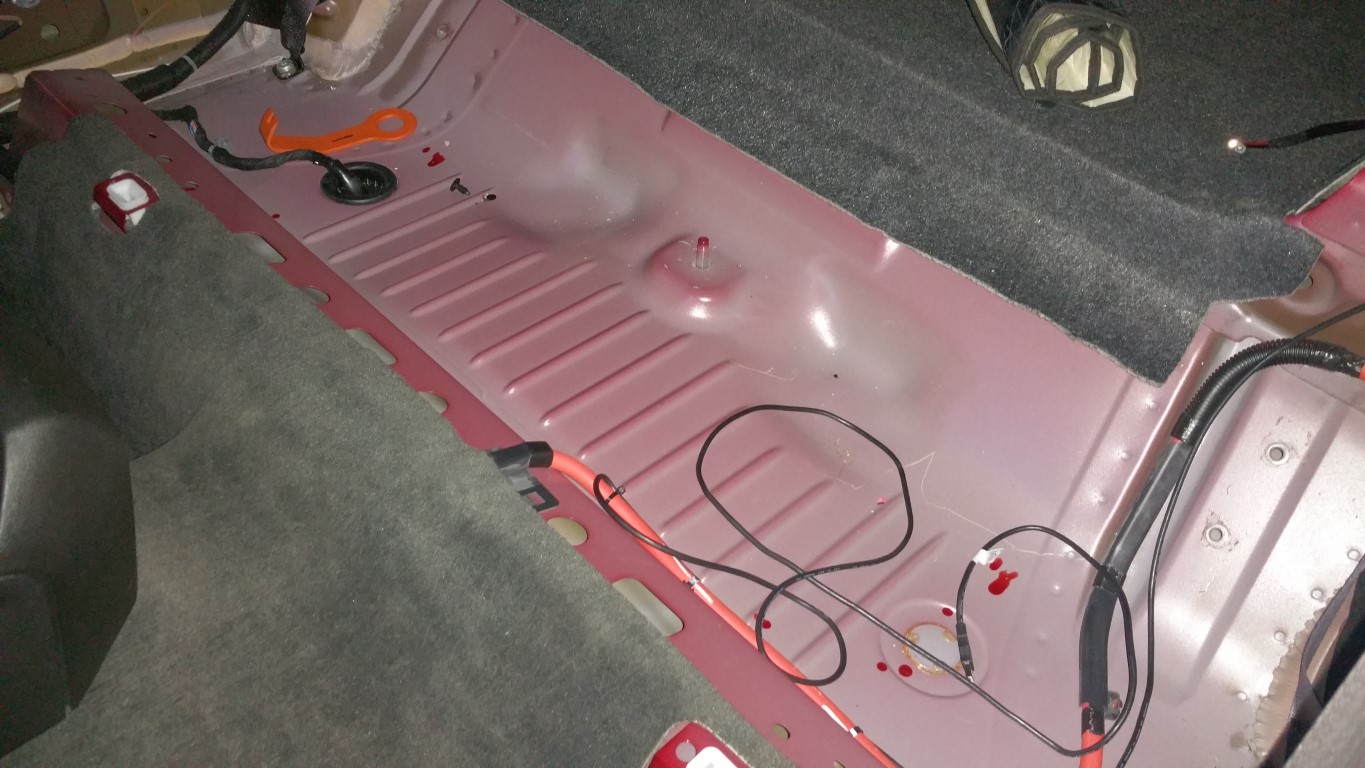
LSA ProMeth Setup cont.
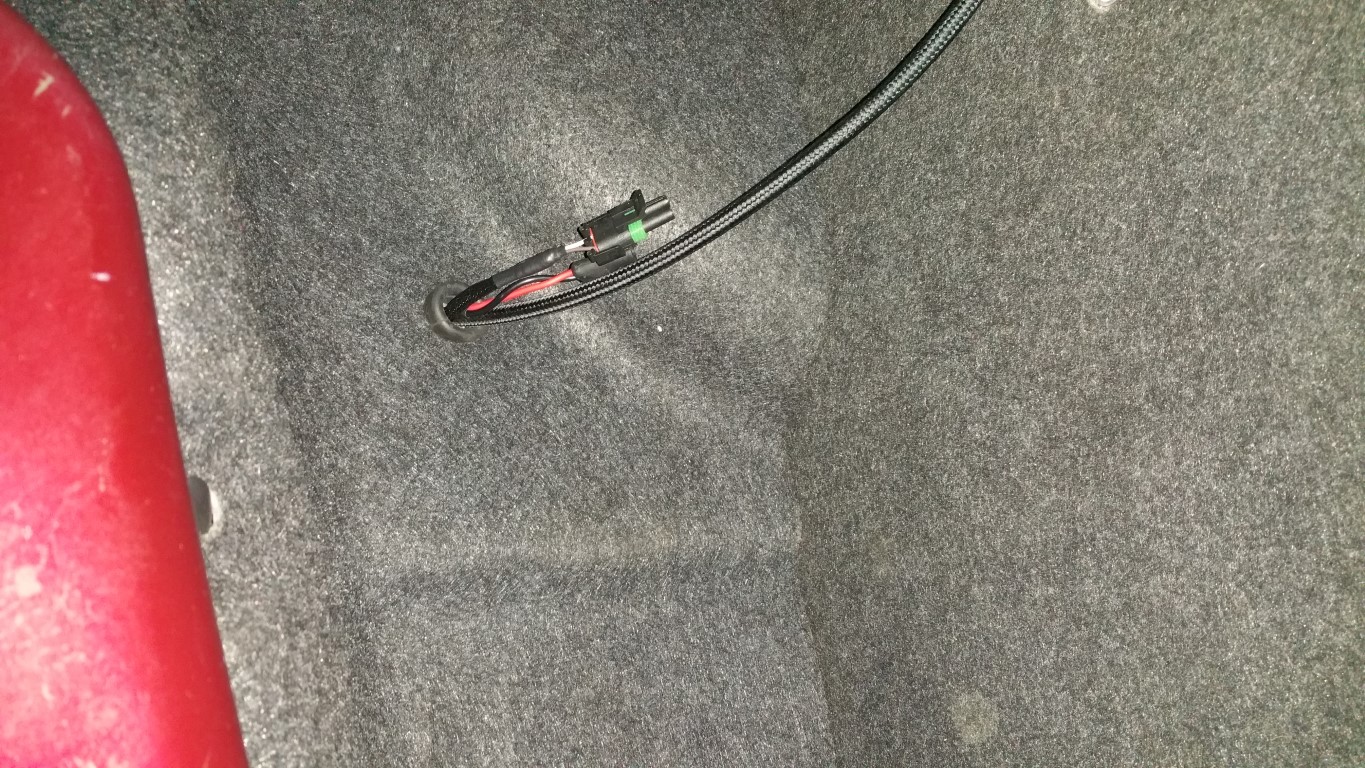
Continued to route the wiring to the trunk. This is the 12v fulltime power:
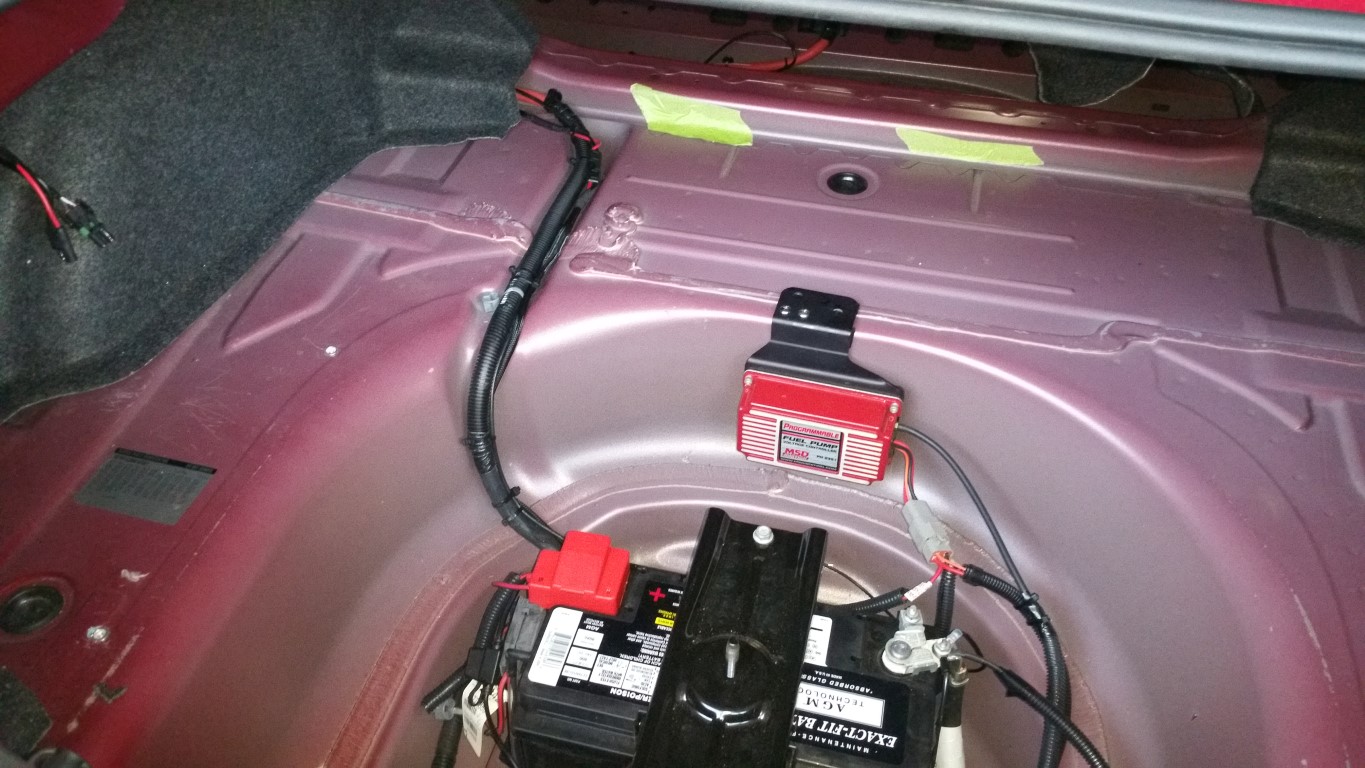 Pump and fuel level wiring: I cut a rubber grommet and will be using that to route the wiring and hose: 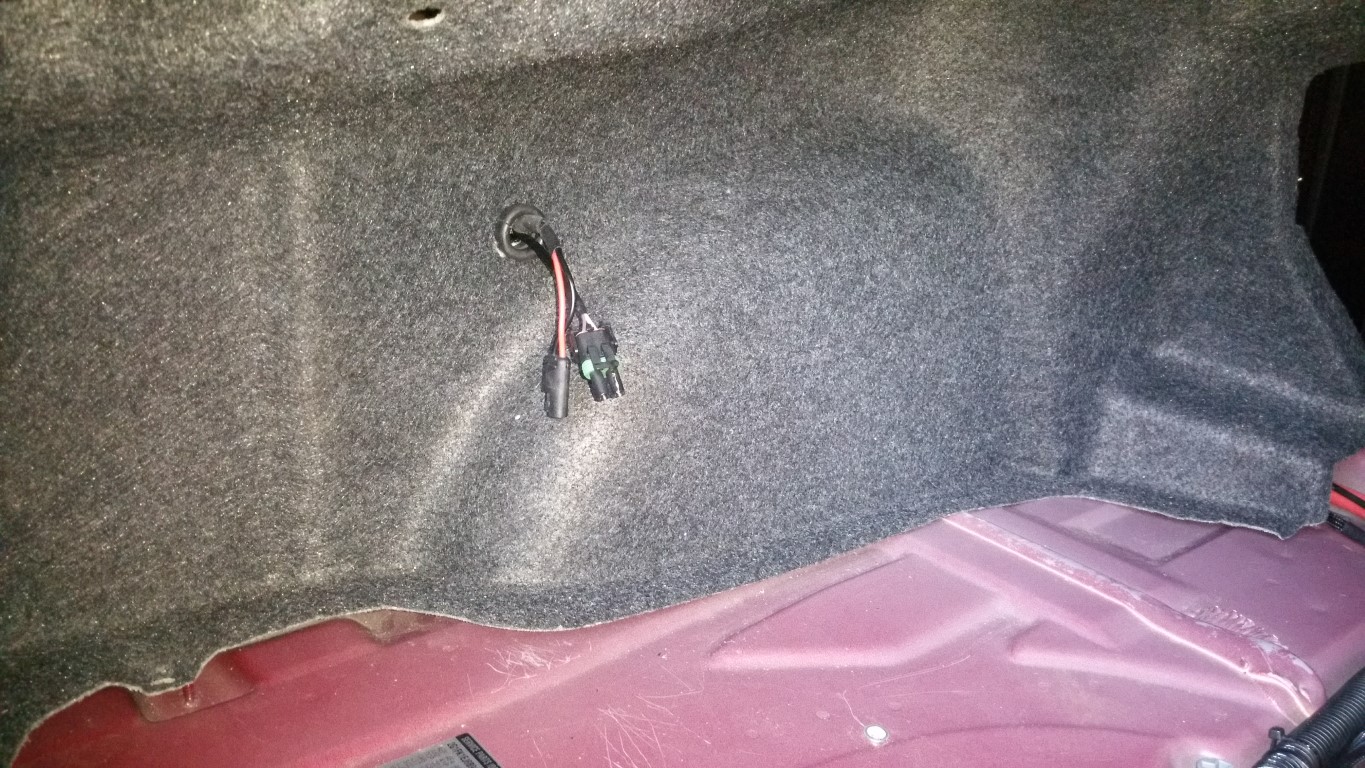 Cleaned up the wiring routing: 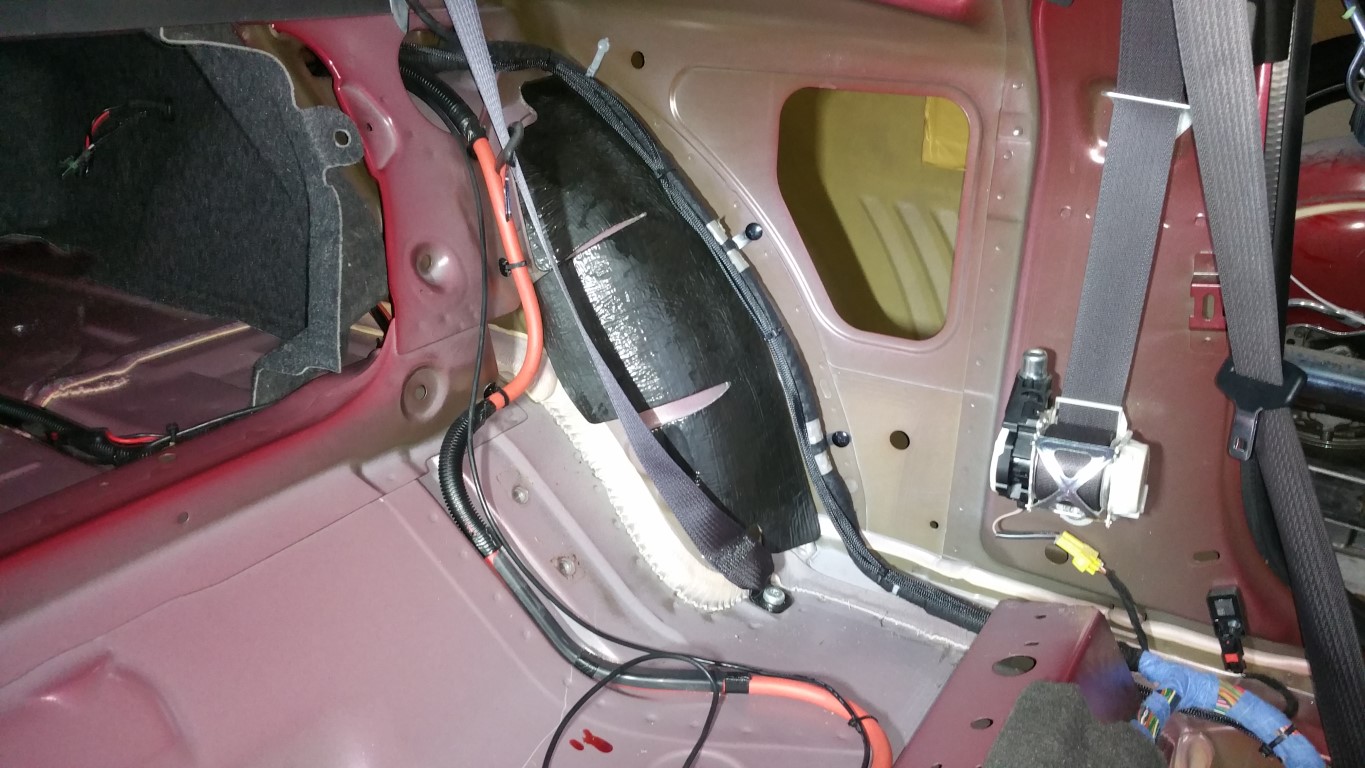 I'll probably just go ahead and run the hose next just so I can cleanup the trunk area and have it ready for testing. That will be next... -Don
__________________
747 RWHP 794 RWTQ
"Horsepower sells cars, torque wins races." - Enzo Ferrari See My Build: http://www.camaro5.com/forums/showthread.php?t=385577 Last edited by hammdo; 11-10-2018 at 02:58 PM. |
|
|
|
|
08-19-2018, 11:00 PM
|
#2176 |
|
'It's an experiment'
Drives: [COTW 2/09/15] '11 GPI LSA SC Z/LE Join Date: May 2014
Location: Dallas TX
Posts: 8,693
|
LSA ProMeth Setup cont.
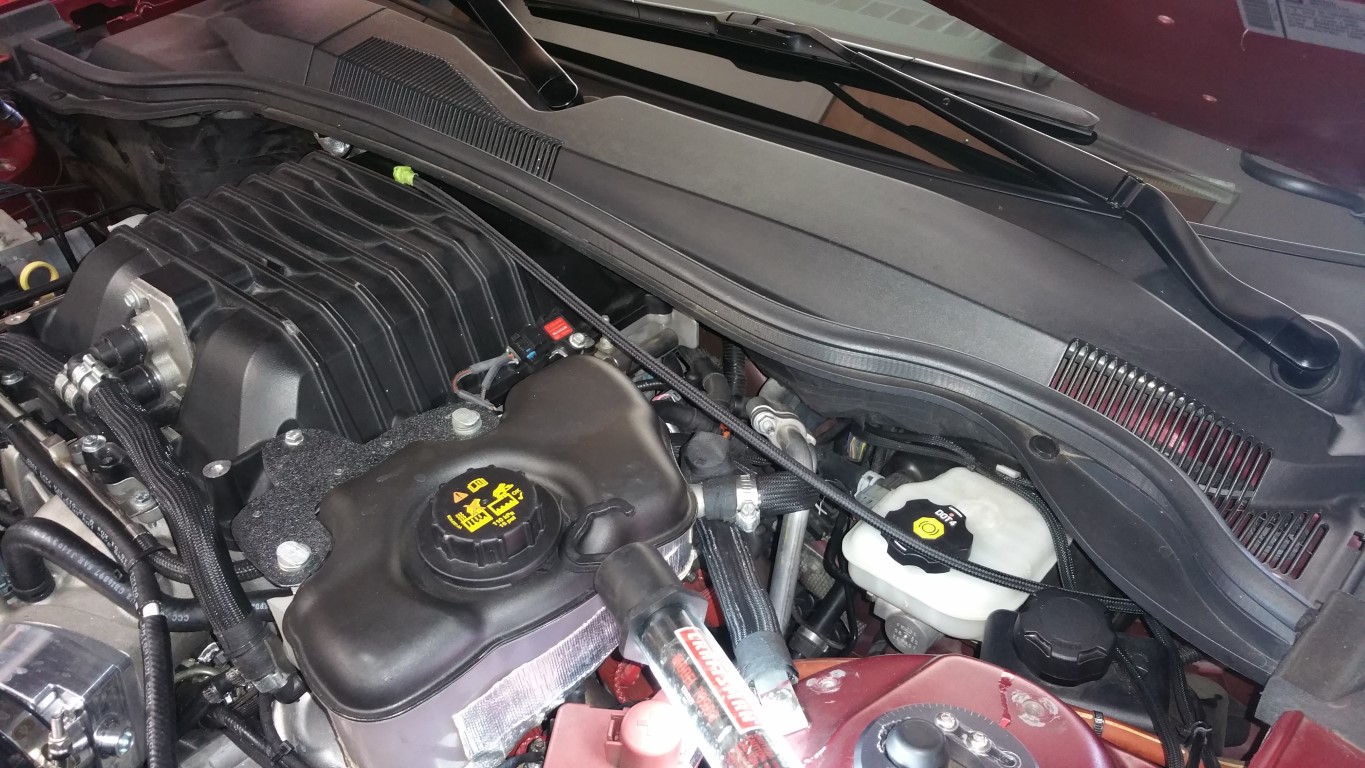
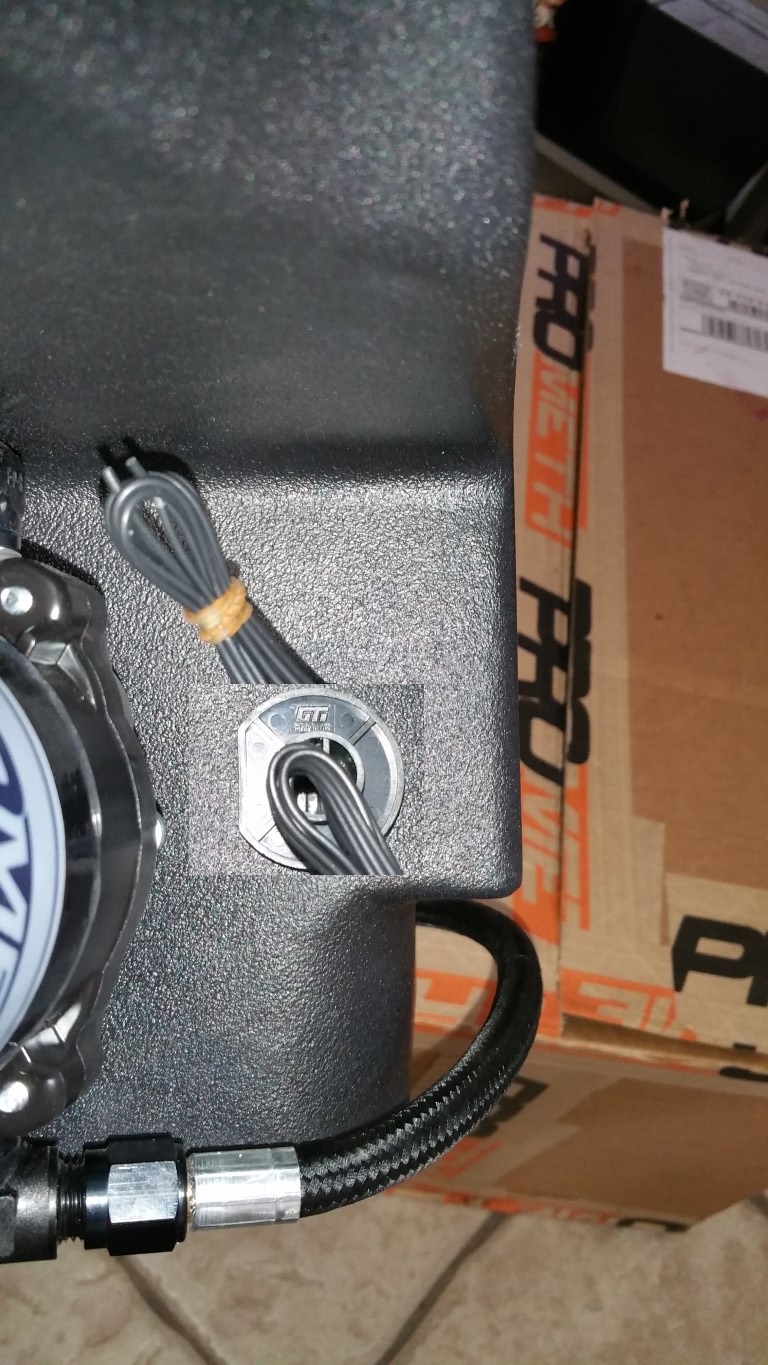
Routed the hose, plugged in the wiring, fitted the tank in place:
 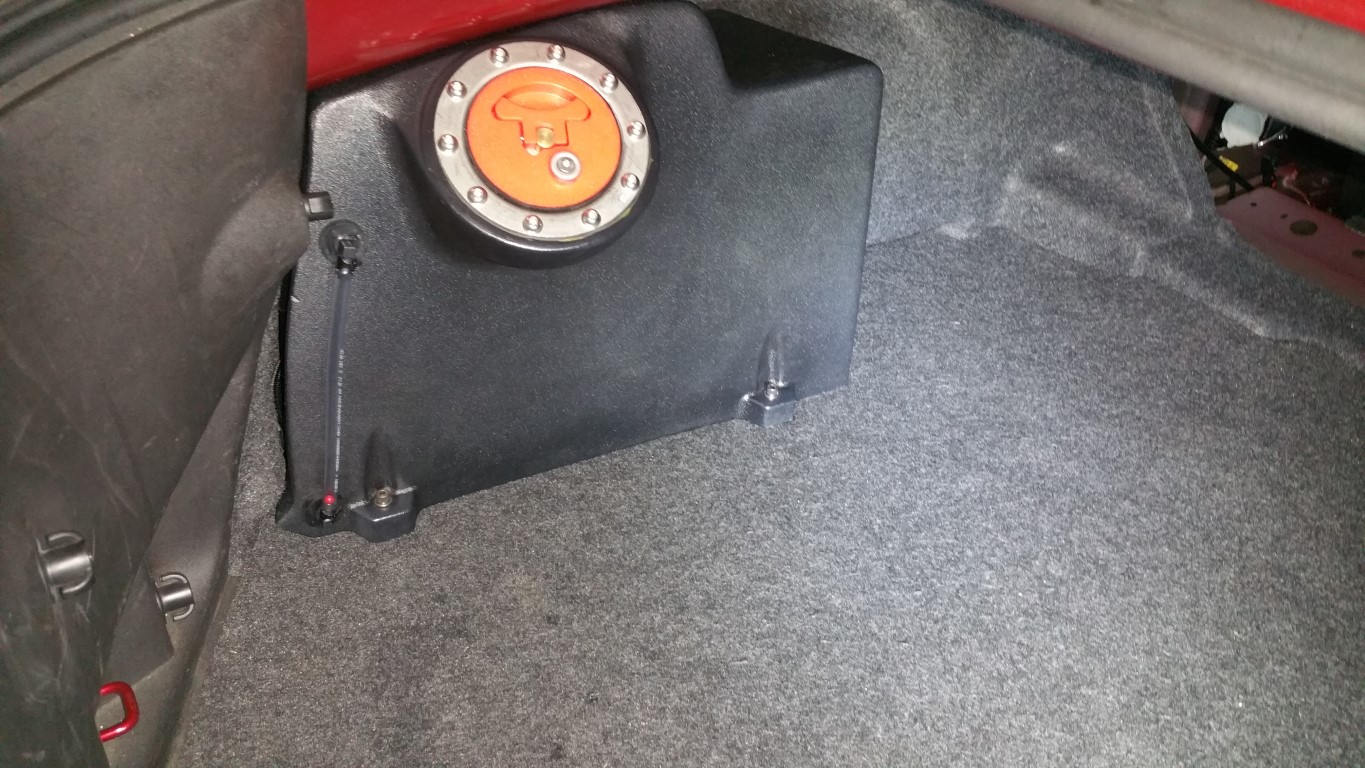   Next will be the hose routing to the engine bay, then wiring for led, switched power, 0-5v signal... -Don
__________________
747 RWHP 794 RWTQ
"Horsepower sells cars, torque wins races." - Enzo Ferrari See My Build: http://www.camaro5.com/forums/showthread.php?t=385577 |
|
|
|
|
08-20-2018, 06:13 PM
|
#2177 |
|
'It's an experiment'
Drives: [COTW 2/09/15] '11 GPI LSA SC Z/LE Join Date: May 2014
Location: Dallas TX
Posts: 8,693
|
LSA ProMeth Setup cont.
Continuing on with the hose routing, I found the other body plug right above the main positive cable and set it up to allow the hose to fit:
 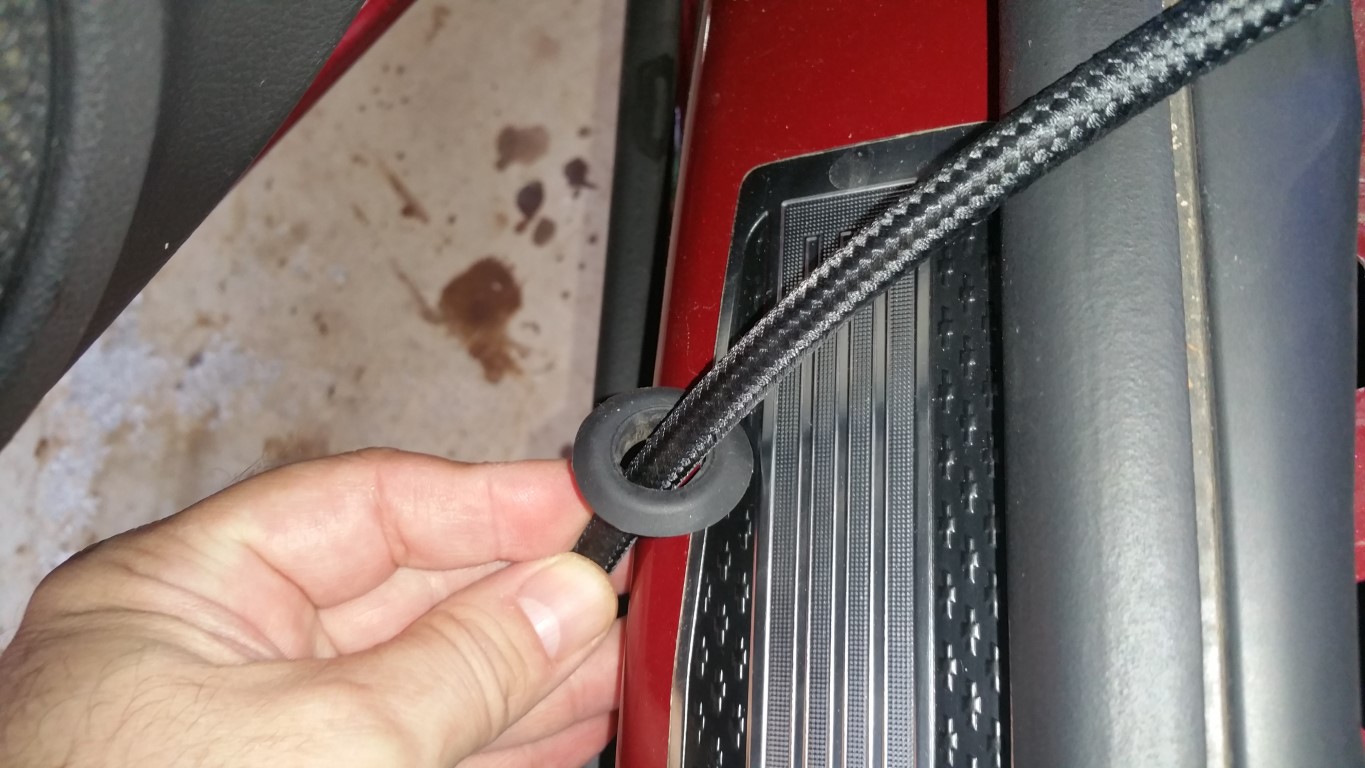 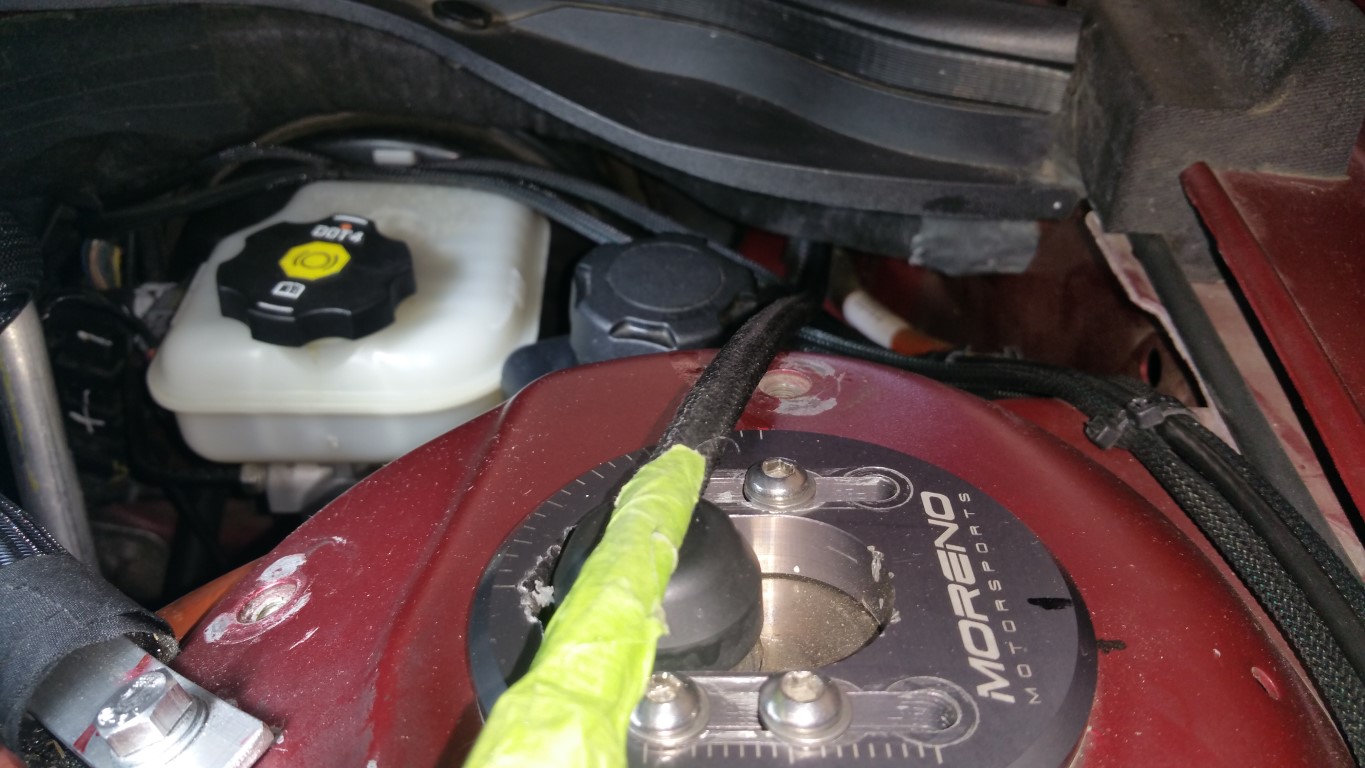  Pulled the hose so I have a little extra for routing. Then, ran the hose inside and protected it: 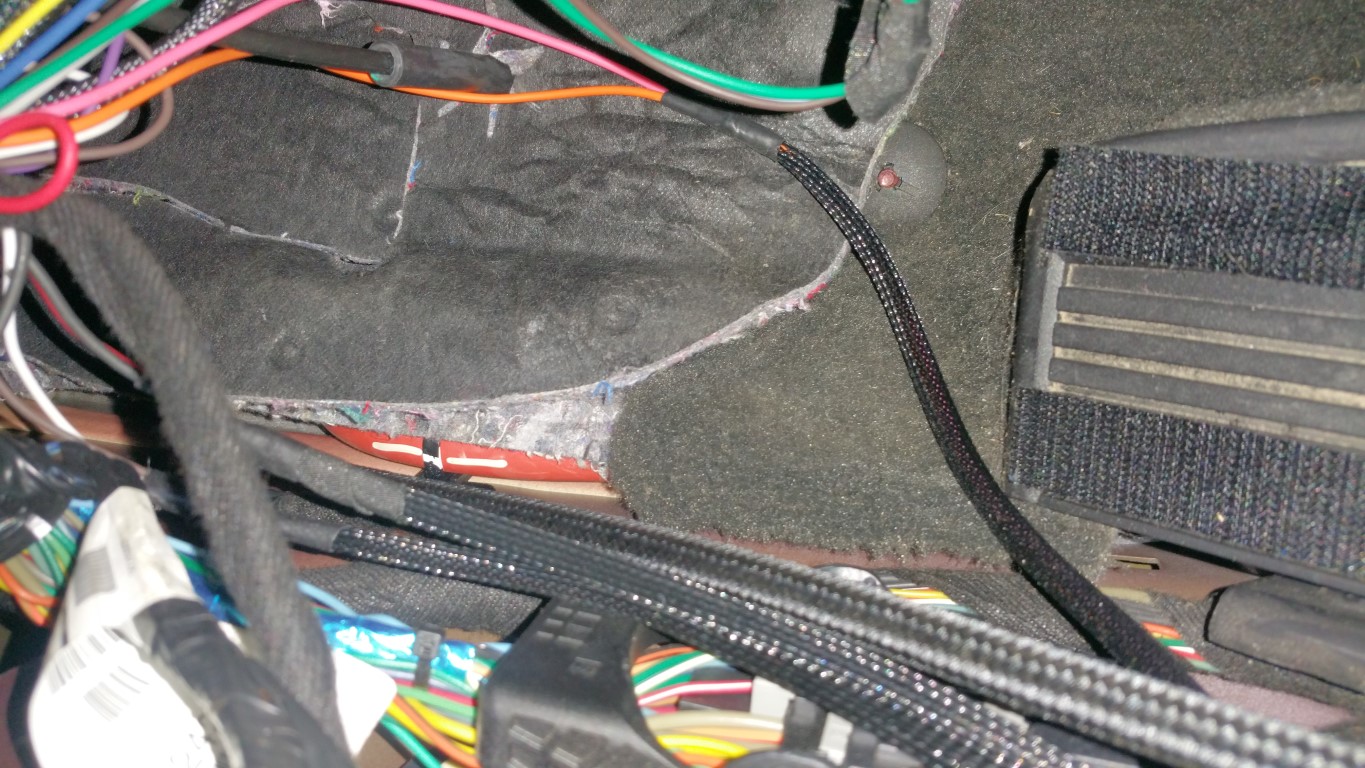 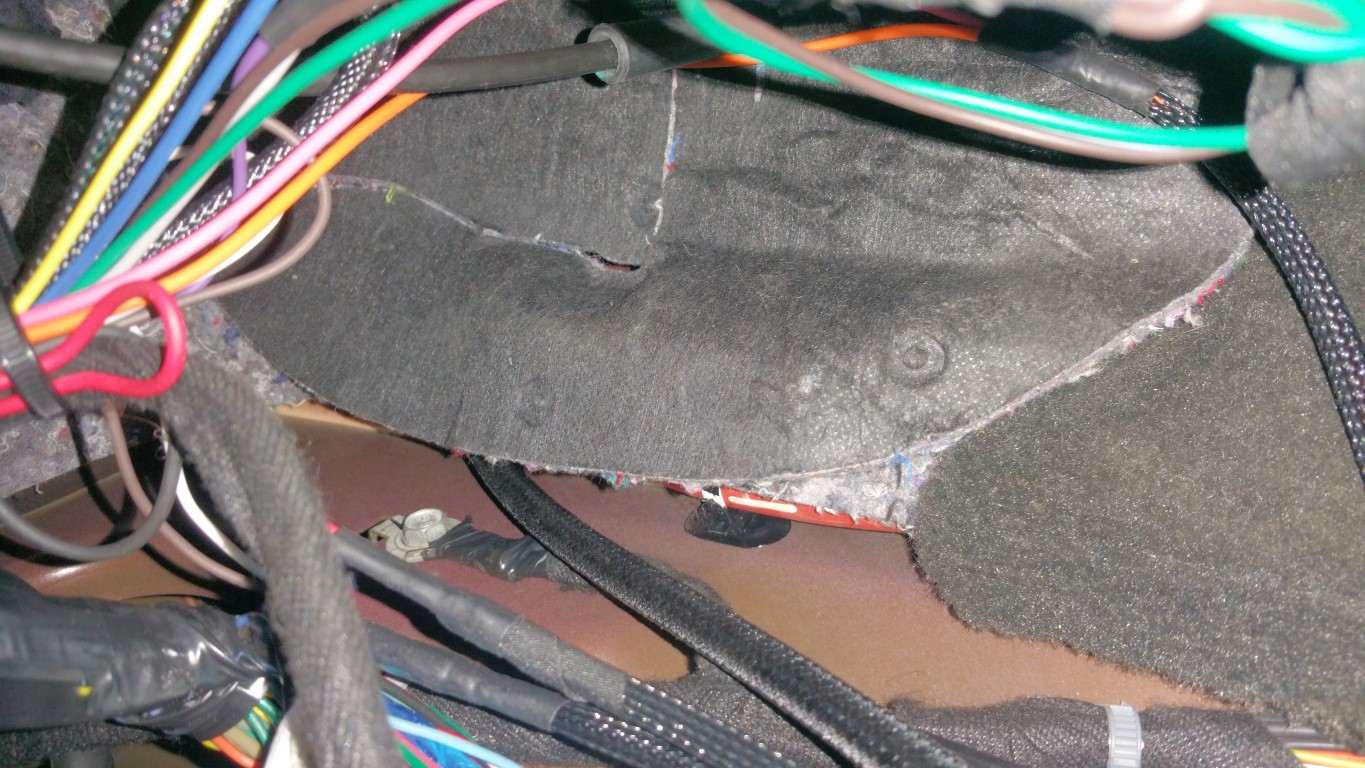 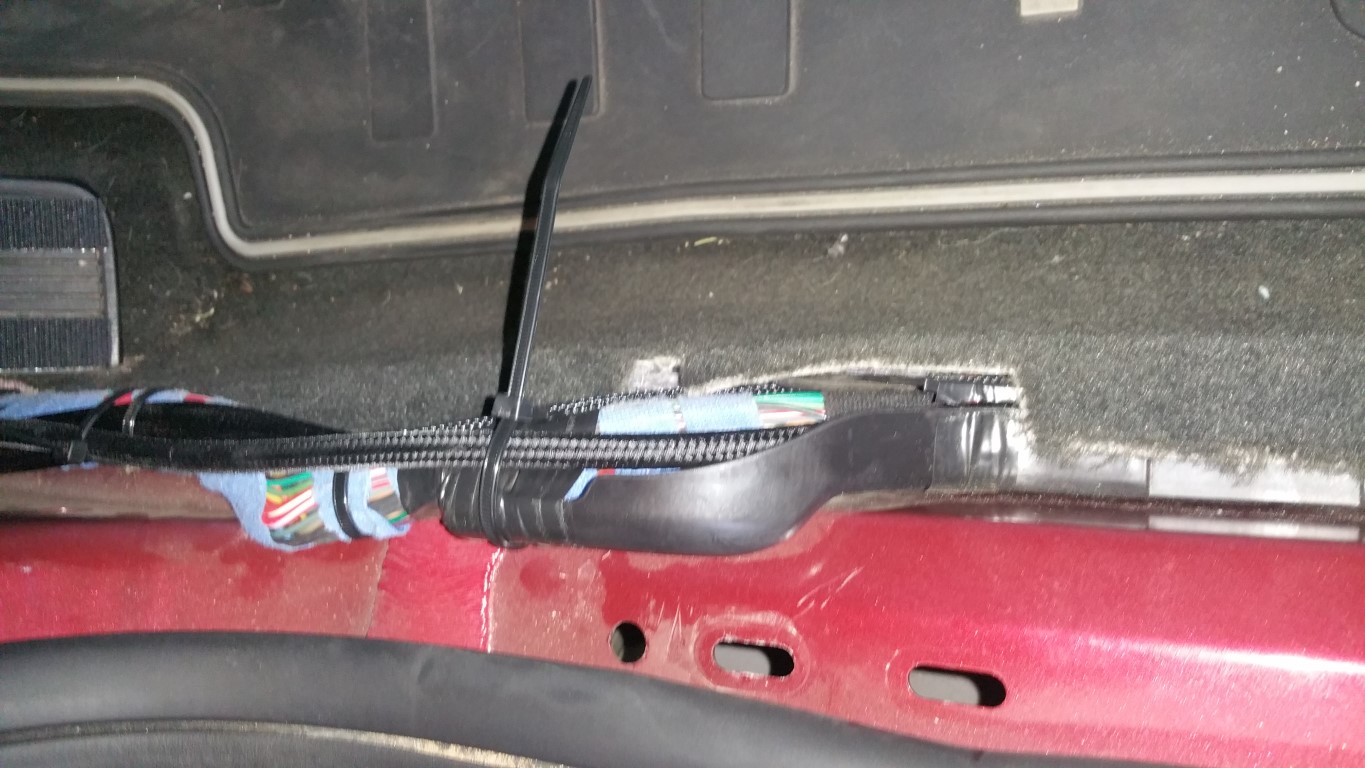 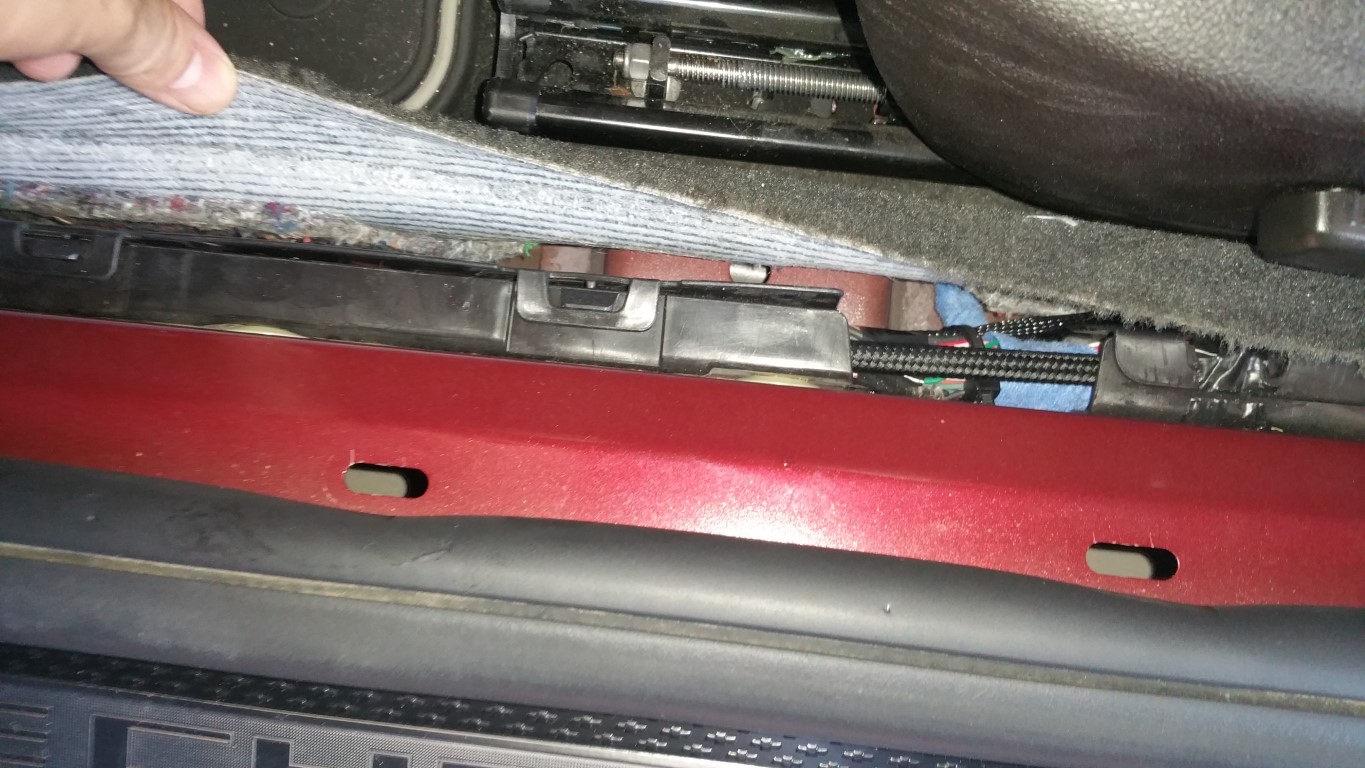 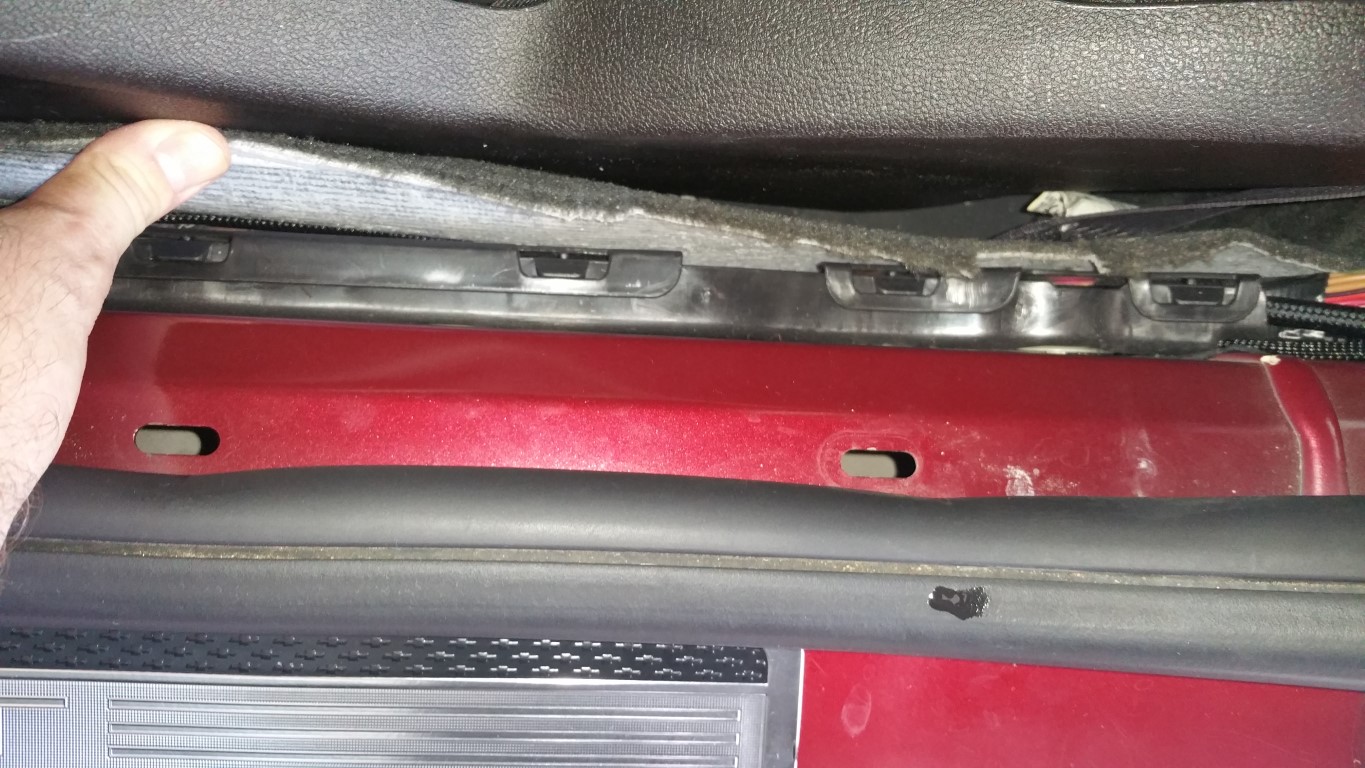 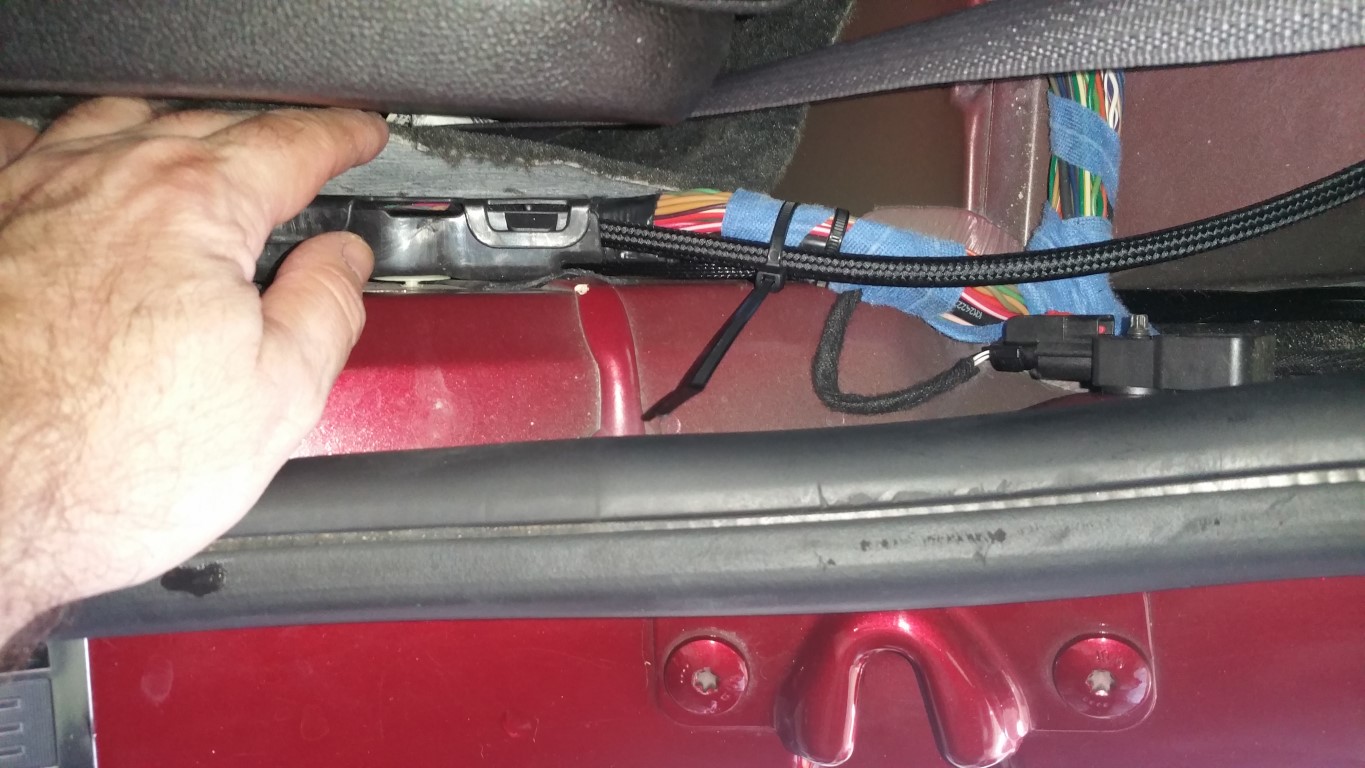 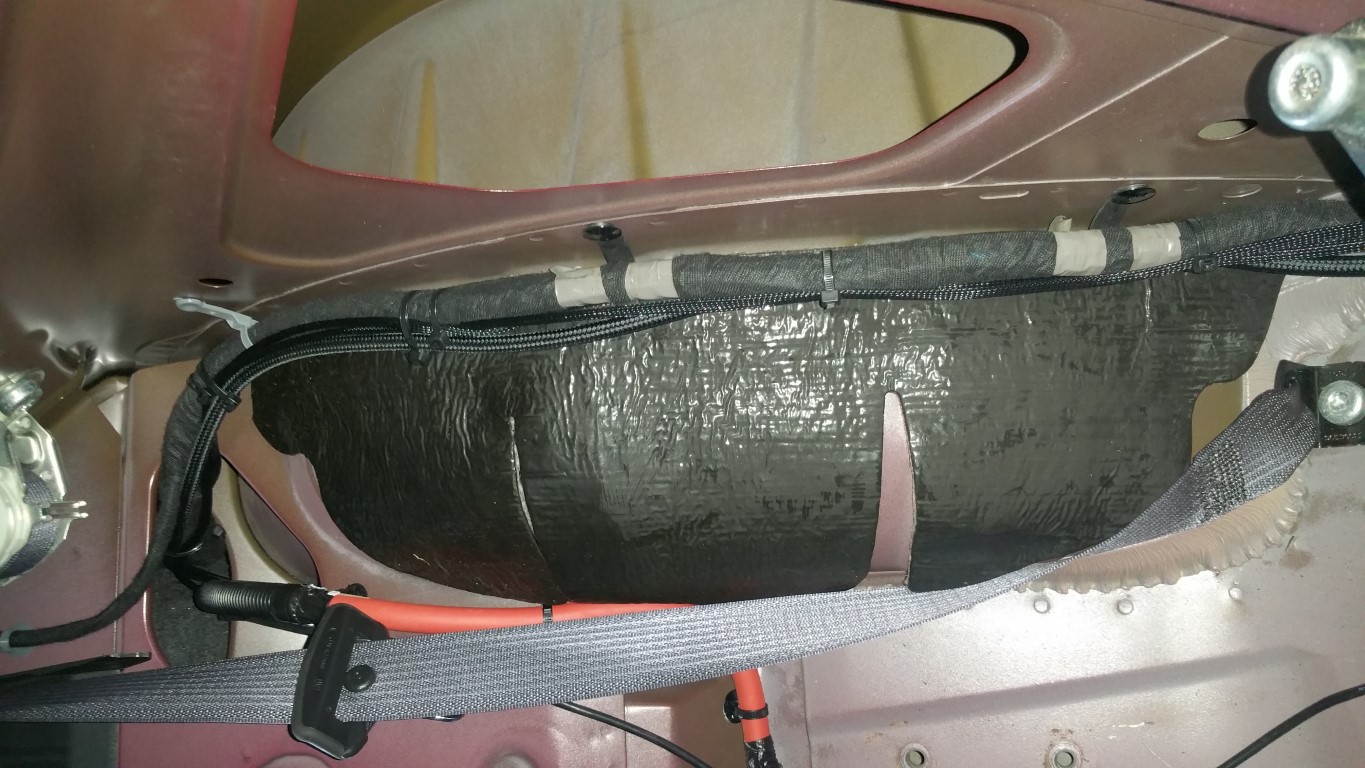 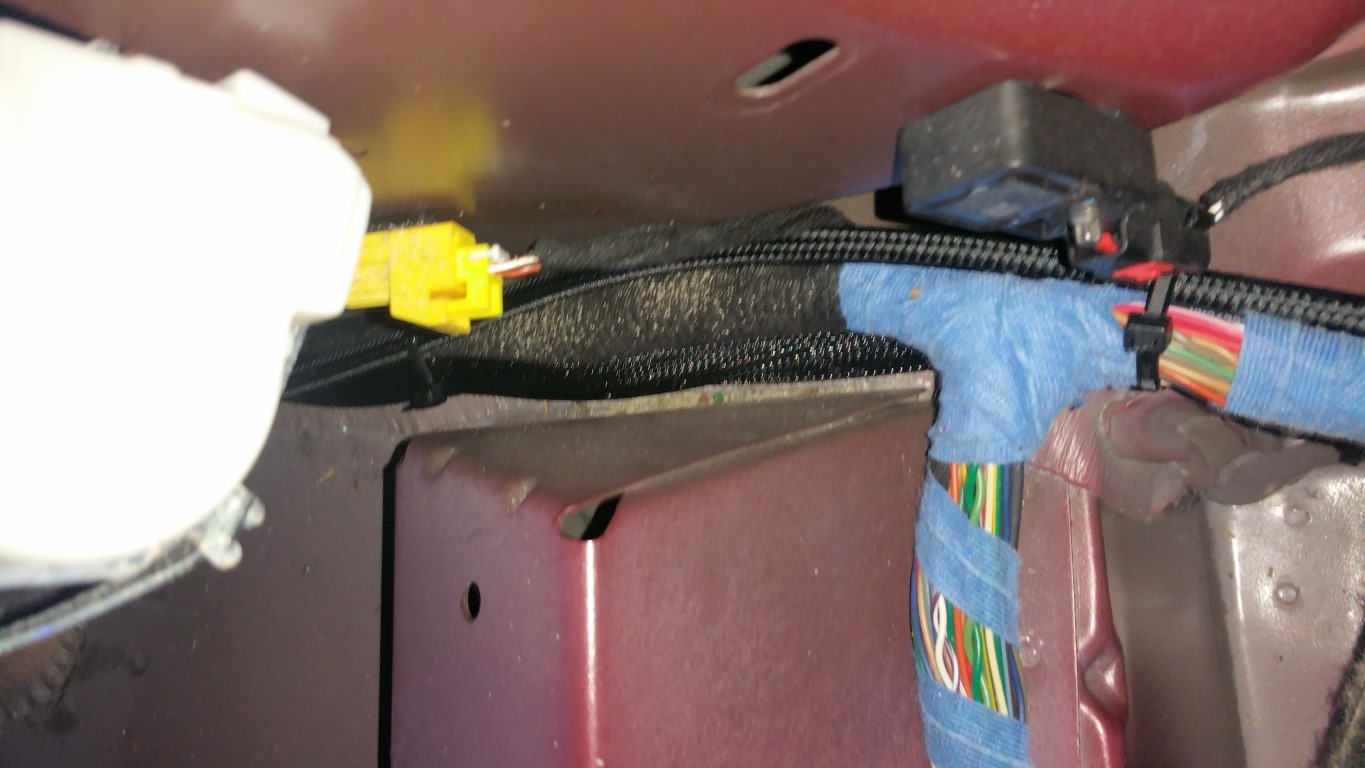 The excess hose is rolled up next to the tank behind the cover. Next, I'll run the LED and then the switched/0-5v wires! -Don
__________________
747 RWHP 794 RWTQ
"Horsepower sells cars, torque wins races." - Enzo Ferrari See My Build: http://www.camaro5.com/forums/showthread.php?t=385577 |
|
|
|
|
08-21-2018, 12:50 AM
|
#2178 | |
|
'It's an experiment'
Drives: [COTW 2/09/15] '11 GPI LSA SC Z/LE Join Date: May 2014
Location: Dallas TX
Posts: 8,693
|
LSA ProMeth Setup cont.
Test time!
I ran the last couple of wires (Blue for the MAP 0-5v, yellow for switched power) and did a test! Wired up: 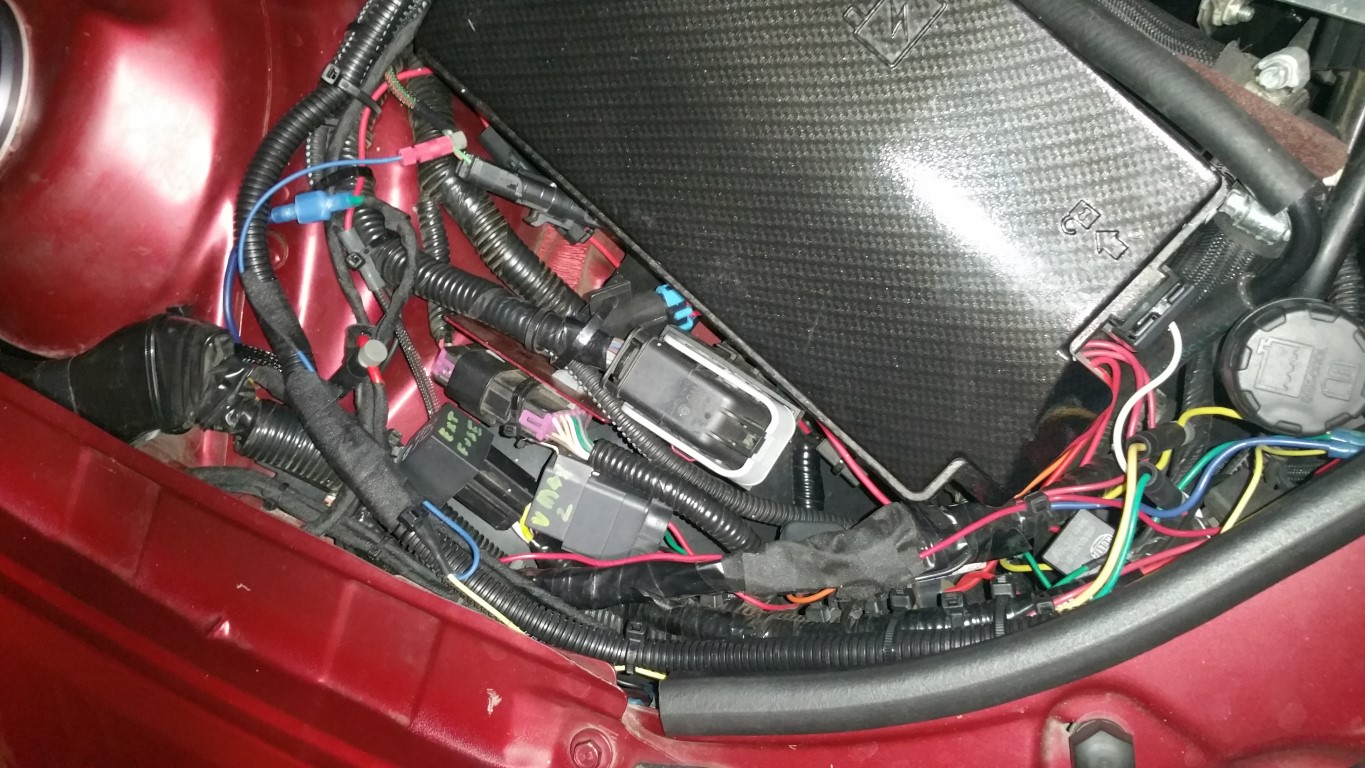 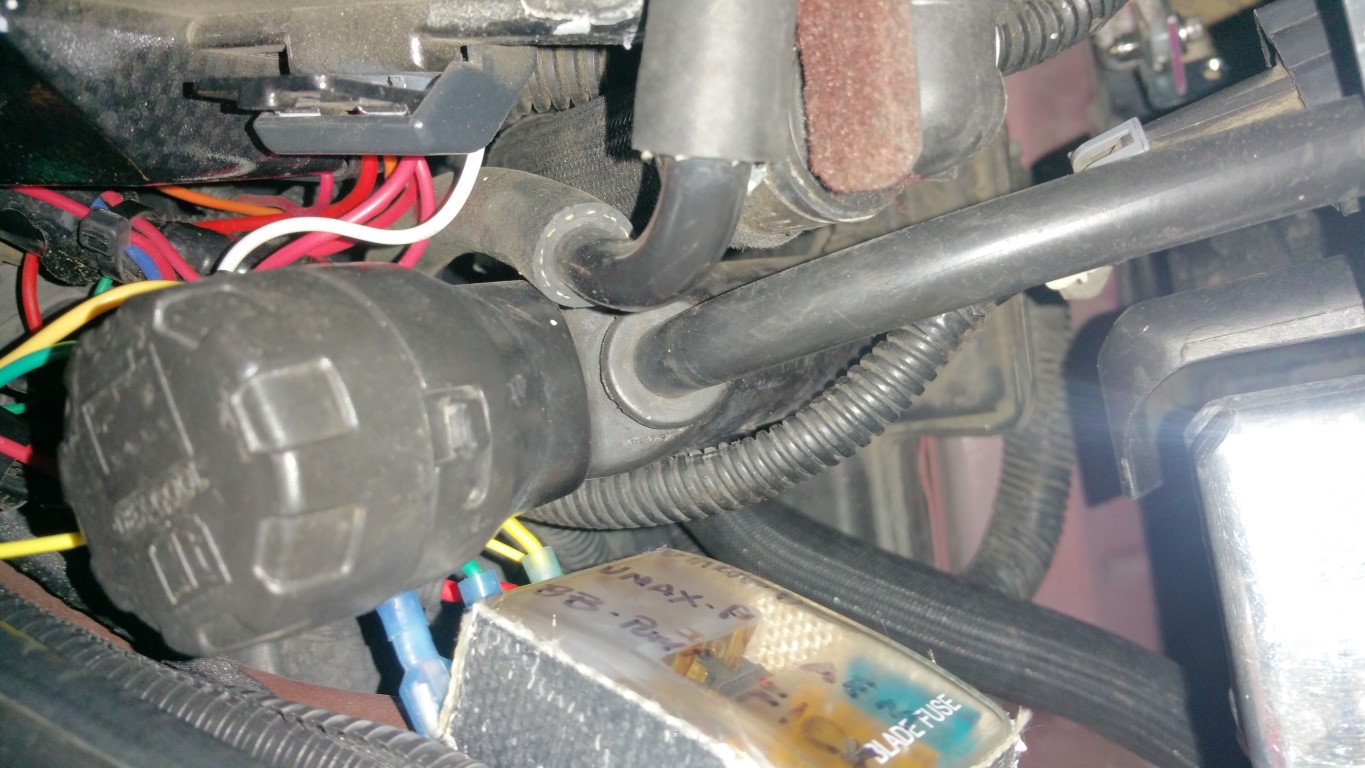 Operate the test with the hose un-hooked from the nozzles -- the way I tested is the recommend procedure. Next, I'll need to confirm with AEM a couple of things (level is low but not flashing and the LED is on low even though pump is not running but, the green LED is lit). Once I have the wiring good, I'll do a boost test to verify the pump runs as expected THEN I'll do the lid... -Don
__________________
747 RWHP 794 RWTQ
"Horsepower sells cars, torque wins races." - Enzo Ferrari See My Build: http://www.camaro5.com/forums/showthread.php?t=385577 Last edited by hammdo; 08-21-2018 at 07:14 PM. |
|
|
|
|
|
08-21-2018, 12:43 PM
|
#2179 |
|
'It's an experiment'
Drives: [COTW 2/09/15] '11 GPI LSA SC Z/LE Join Date: May 2014
Location: Dallas TX
Posts: 8,693
|
LSA ProMeth Setup cont.
Because I'm using the AEM Controller with the V1 Low Level Sensor, it requires the sensor be flipped 180°:
 This is due to the AEM controller normally using a 'V2' resistance sensor -- SO remember that if you're using the V1 low level sensor (both wires are black) with AEM. Also, when the controller starts up, it will flash green once and then 'dimly' light the LED -- this is normal and does not mean the pump is running -- just the unit is operating. 1 flash meaning in controller is in mode setting 1 (MAP 0-5V) I called AEM, spoke with Matt in tech support -- he confirmed the above for me... So, I just need to install the remote LED, THEN the nozzles! -Don
__________________
747 RWHP 794 RWTQ
"Horsepower sells cars, torque wins races." - Enzo Ferrari See My Build: http://www.camaro5.com/forums/showthread.php?t=385577 Last edited by hammdo; 08-26-2018 at 07:36 PM. |
|
|
|
|
08-21-2018, 02:21 PM
|
#2180 | |
|
'It's an experiment'
Drives: [COTW 2/09/15] '11 GPI LSA SC Z/LE Join Date: May 2014
Location: Dallas TX
Posts: 8,693
|
LSA ProMeth Setup cont.
After re-orienting the low level sender, did a test!
working as it should... Notice I used a BIG LED -- no missing that thing... Wiring is pretty much done. Next is the MAP test to ensure it comes on under boost, then, the LID! -Don
__________________
747 RWHP 794 RWTQ
"Horsepower sells cars, torque wins races." - Enzo Ferrari See My Build: http://www.camaro5.com/forums/showthread.php?t=385577 |
|
|
|
|
|
08-21-2018, 10:43 PM
|
#2181 |
|
'It's an experiment'
Drives: [COTW 2/09/15] '11 GPI LSA SC Z/LE Join Date: May 2014
Location: Dallas TX
Posts: 8,693
|
Taking with Aaron at GPI, he suggested I use the MAF Hz 2k to 14k range as it works better with a PD supercharger. He suggested setting the start range around 6k Hz with full on at 8k Hz...
I have an Hz multi-meter coming just so I can validate the yellow wire in the breakout is really the MAF signal... -Don
__________________
747 RWHP 794 RWTQ
"Horsepower sells cars, torque wins races." - Enzo Ferrari See My Build: http://www.camaro5.com/forums/showthread.php?t=385577 Last edited by hammdo; 08-22-2018 at 04:51 PM. |
|
|
|
|
08-22-2018, 12:22 PM
|
#2182 |
|
'It's an experiment'
Drives: [COTW 2/09/15] '11 GPI LSA SC Z/LE Join Date: May 2014
Location: Dallas TX
Posts: 8,693
|
LSA ProMeth Setup cont.
OK, I extended the wire so I can tap into the MAF Hz wire:
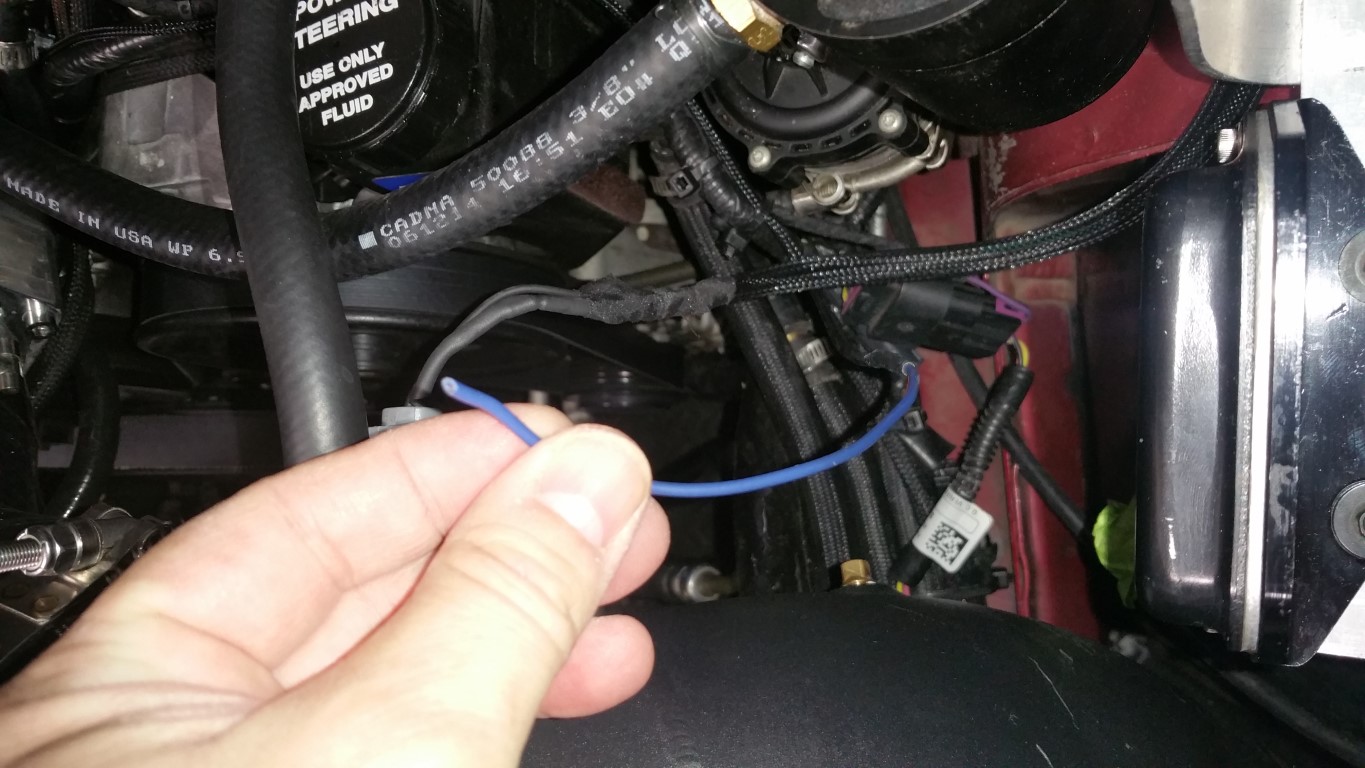 Now, normally the 'yellow' wire on the MAF is the Hz signal: 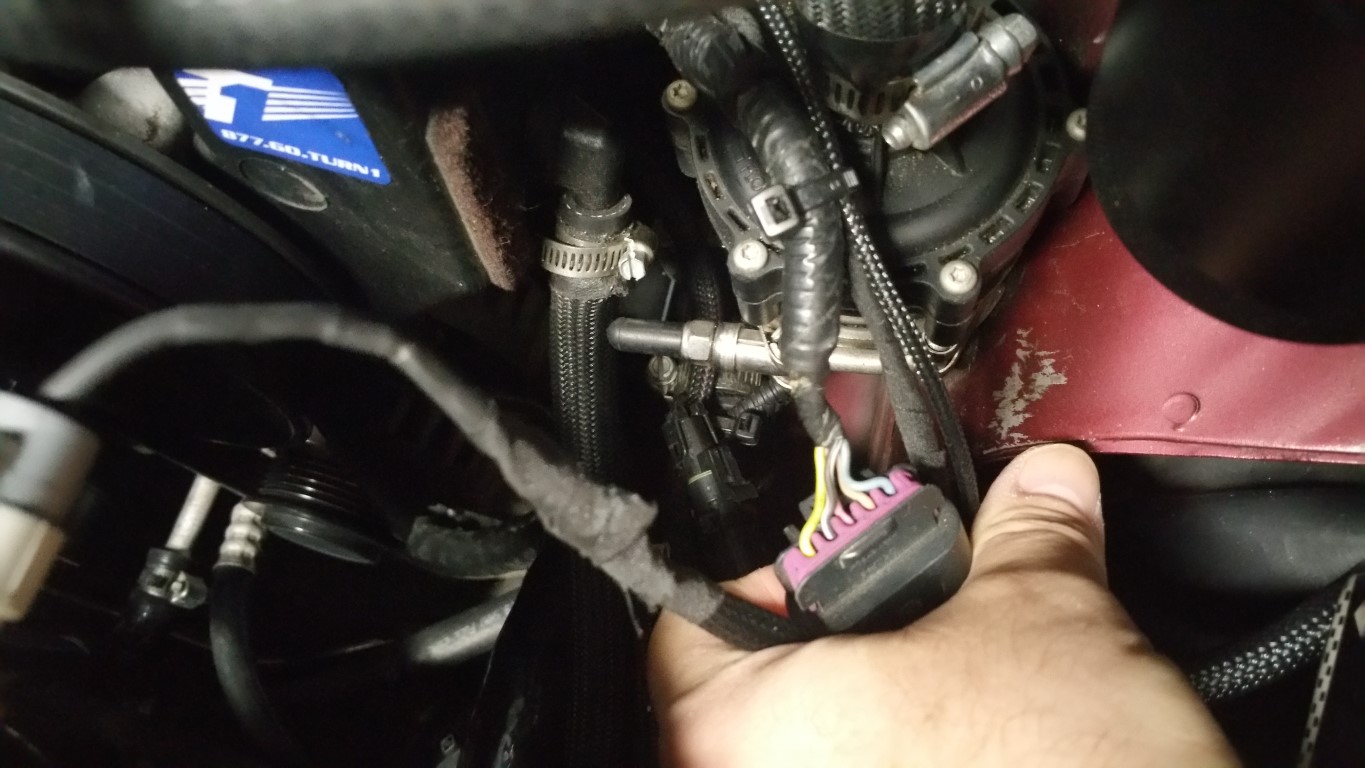 I have an Hz test meter coming in today to confirm that but, that is the wire I intend to tap into. So, I had to reset the controller to use the 2k Hz to 14k Hz settings: 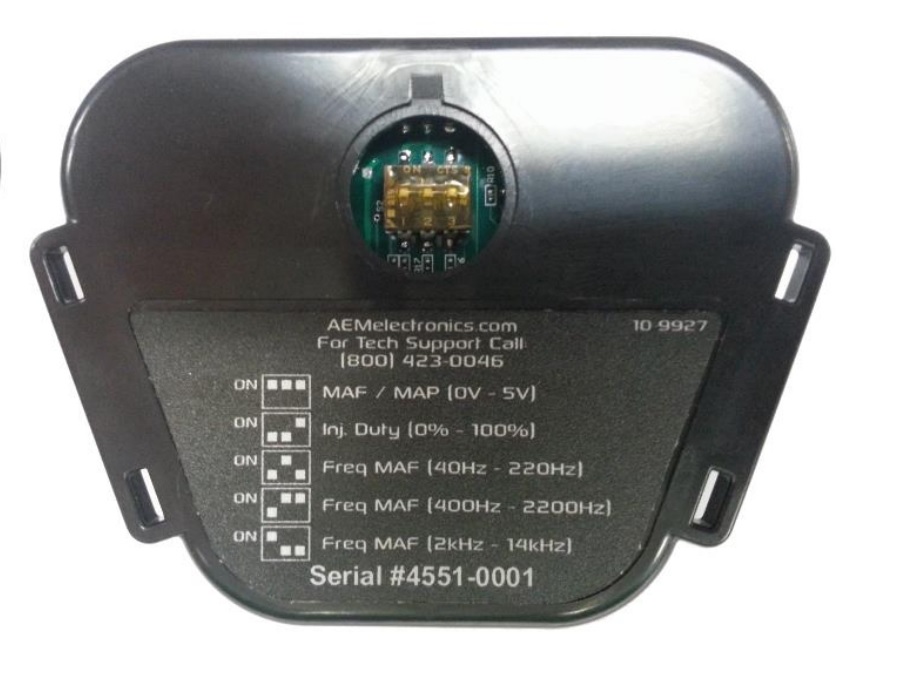 Manual here: http://www.aemelectronics.com/files/...ller%20Kit.pdf Based on math, the 'Start' % is 39% (6k) and the 'Full On' % is 50% (7k). I came to those settings after reviewing my WOT runs: 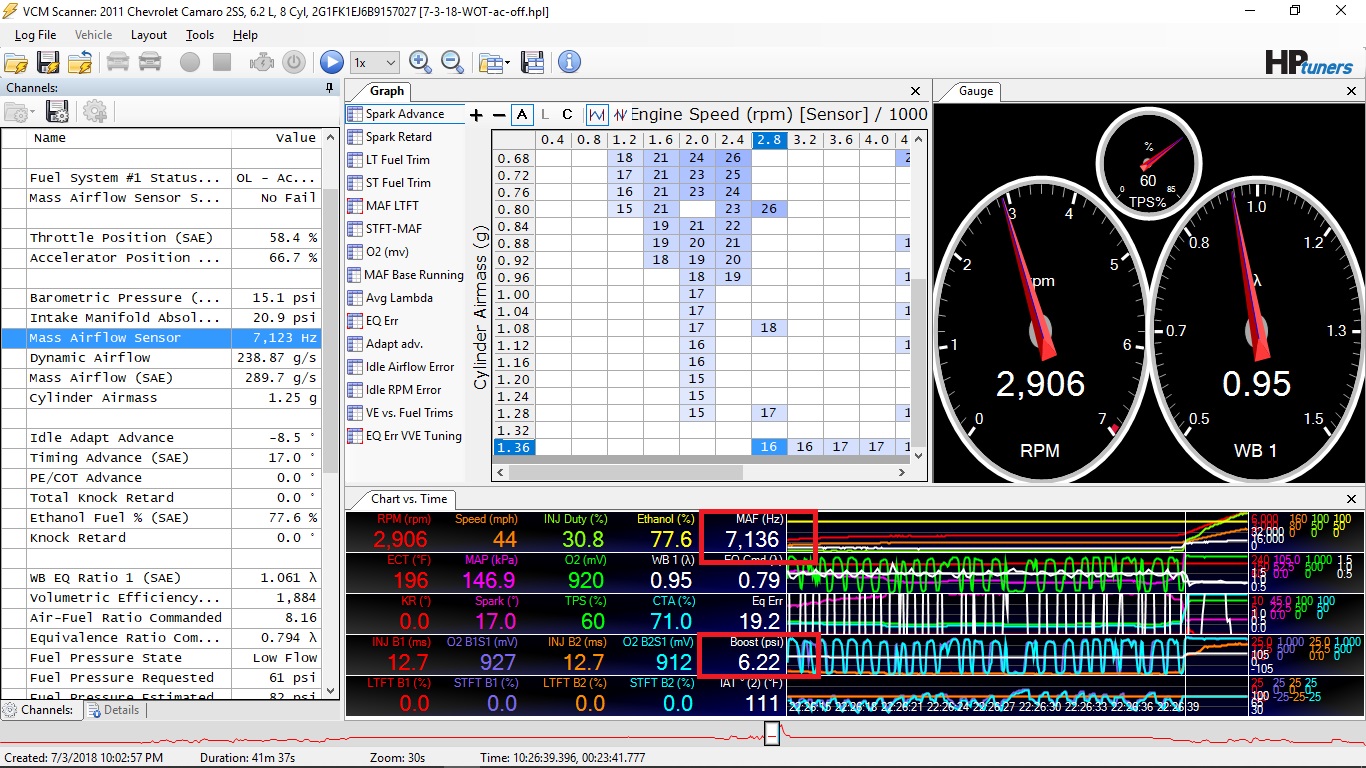 Note the 2 red boxes. One for Hz and One for Boost I needed to be full on meth @ 6 PSI Boost so I set the 'Hertz' scale to 7k. Since the ranges are: 6K Hz start, 7K Hz full on, I need to know the 'percentage' of scale for the dials. Start: 6000/14000 (14k Hz max signal) is ~42% so, I started the meth about 39% to give it room to start (~5.5k Hz). Full On: 7000/14000 is obviously 50% so that is where I have the meth set to full on. Once I confirm the Yellow wire is the Hz signal, I'll do a test to verify spray works and is 'off' when I'm below the start range... At least that is the 'theory' behind my settings now ;o) -Don
__________________
747 RWHP 794 RWTQ
"Horsepower sells cars, torque wins races." - Enzo Ferrari See My Build: http://www.camaro5.com/forums/showthread.php?t=385577 Last edited by hammdo; 08-22-2018 at 04:23 PM. |
|
|
|
|
08-22-2018, 07:49 PM
|
#2183 | |||
|
'It's an experiment'
Drives: [COTW 2/09/15] '11 GPI LSA SC Z/LE Join Date: May 2014
Location: Dallas TX
Posts: 8,693
|
LSA ProMeth Setup cont.
Alright! Tapped into the Hz now that I've verified the Yellow Wire is Hz output:
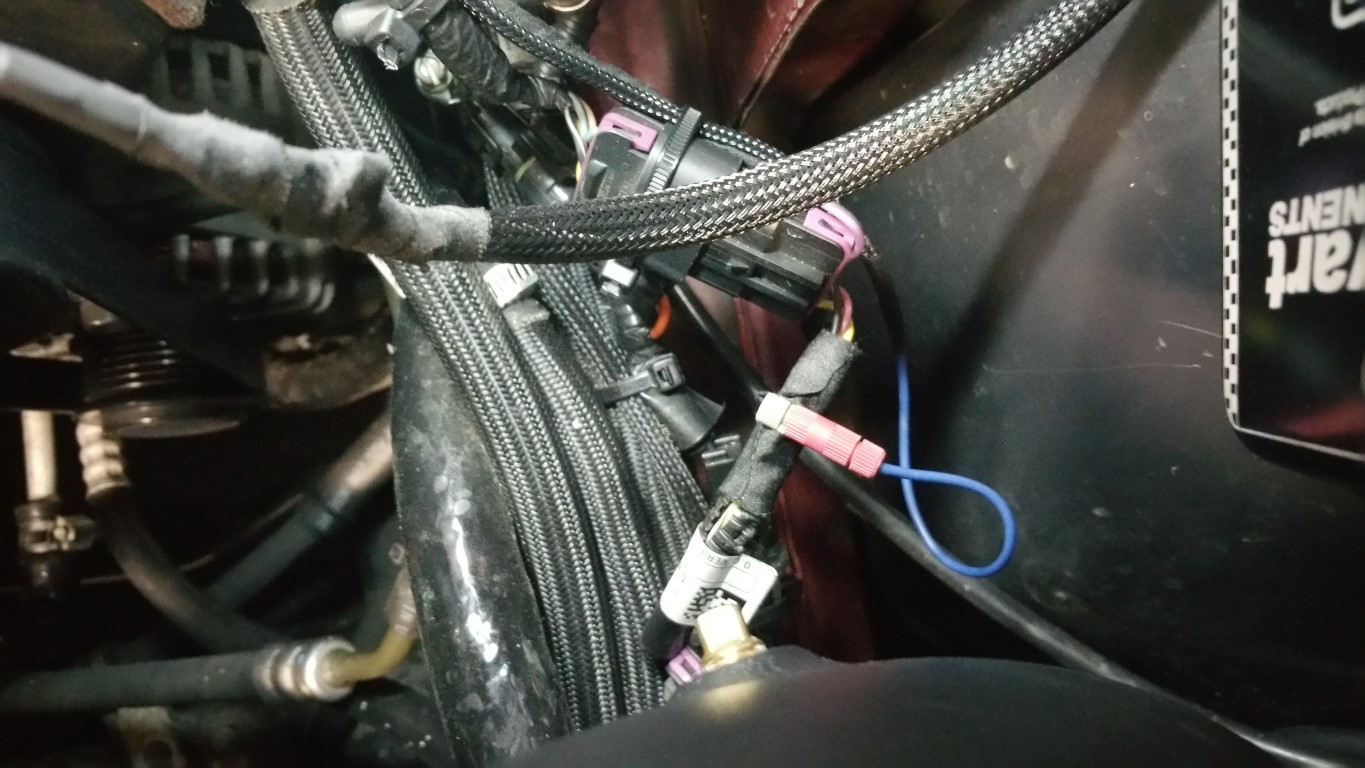 Here is how I validated I had the right wire: Prep and Test! LED and status on the controller now flash 5 times (mode 5)... Now, onto the LID! -Don
__________________
747 RWHP 794 RWTQ
"Horsepower sells cars, torque wins races." - Enzo Ferrari See My Build: http://www.camaro5.com/forums/showthread.php?t=385577 Last edited by hammdo; 08-26-2018 at 07:38 PM. |
|||
|
|
|
|
08-23-2018, 02:08 AM
|
#2184 | |
 
Drives: 2013 Camaro 2SS Inferno Orange Join Date: Apr 2015
Location: Utah
Posts: 174
|
Quote:
|
|
|
|
|
|
|
|
|
 |
|
|


.jpg)
.jpg)
.jpg)
.jpg)
.jpg)
.jpg)
.jpg)
.jpg)
.jpg)
.jpg)
.jpg)
.jpg)
.jpg)
.jpg)
.jpg)
.jpg)
.jpg)
.jpg)
.jpg)
.jpg)
