You are browsing camaro5 

|
 10-24-2014, 08:40 PM
|
#1 |
|
'It's an experiment'

Drives: [COTW 2/09/15] '11 GPI LSA SC Z/LE Join Date: May 2014
Location: Dallas TX
Posts: 8,693
|
DIY: 2011 SS A6 Steering Wheel to 2013 ZL1 (Leather)
So, let me get this out of the way:
Yes, ZL1 Steering wheel in a 2011 2SS -- I bought it from a member here and I liked the style (goes with my ZL1 wheels). Why Change:
I know some don't like the 'bow-tie' -- I'm ok with it. So here is what I did to install: Before I started, I opened the drivers door before I disconnected the battery (in the trunk): 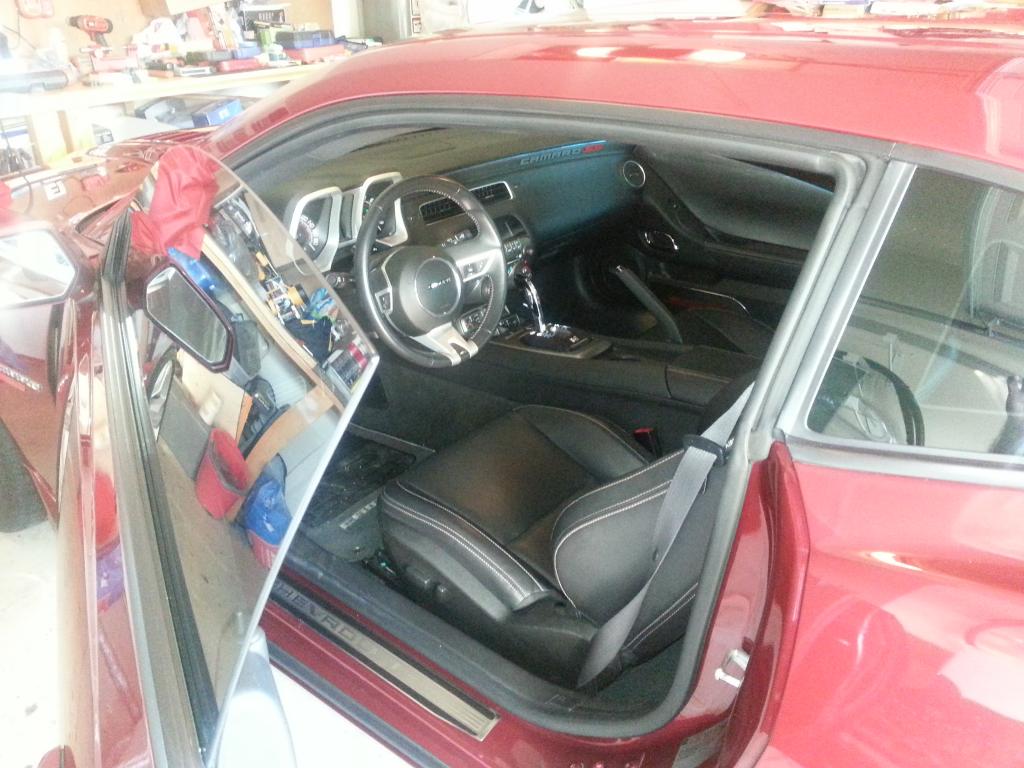 This was so I could open/close the door without worrying about the window. I then disconnected the battery terminals (both) -- I found the terminals were 'white dusted' so I figured I'd clean them off: 10mm socket: 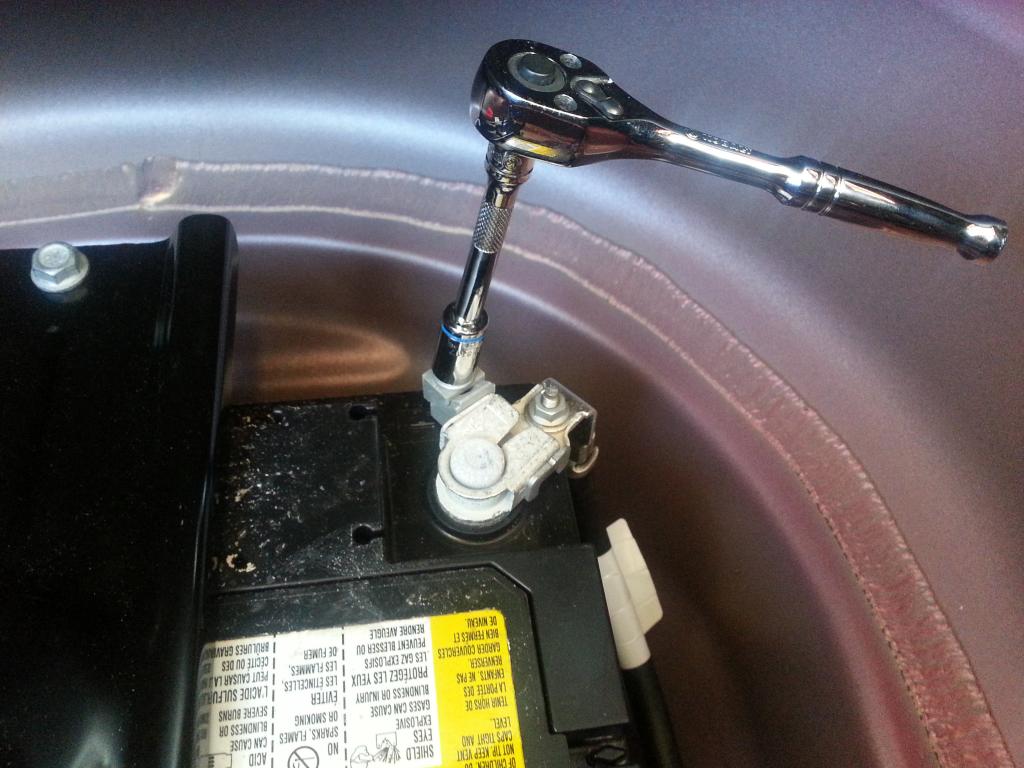 notice the 'white' dusting on the terminal 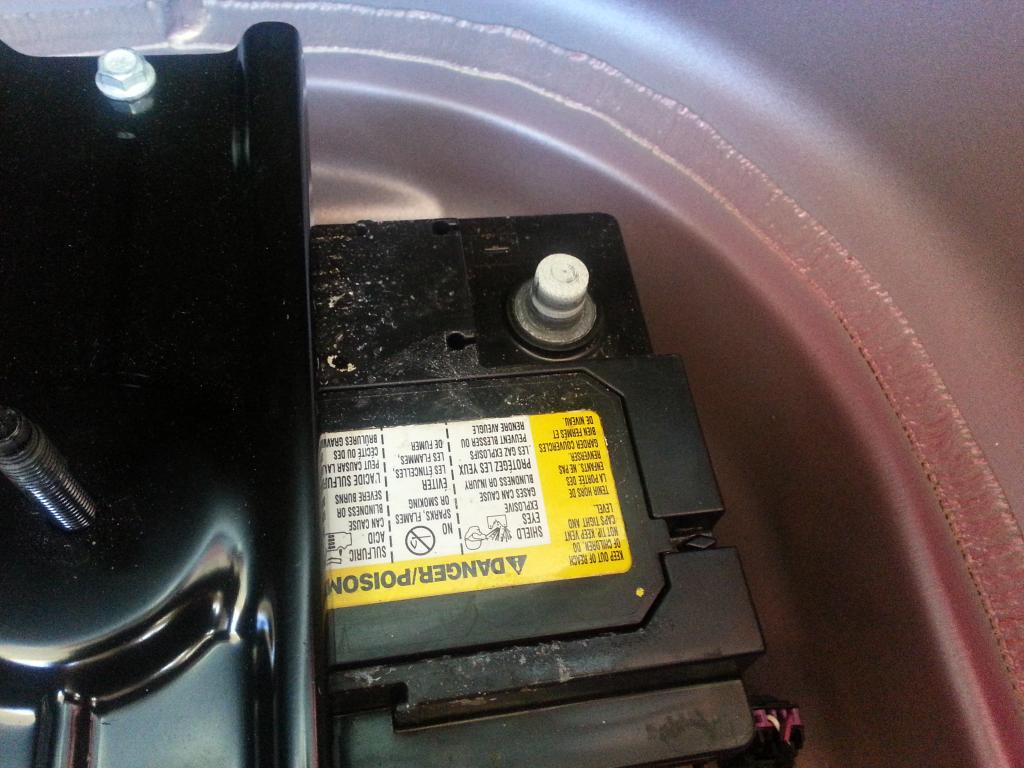 now cleaned: 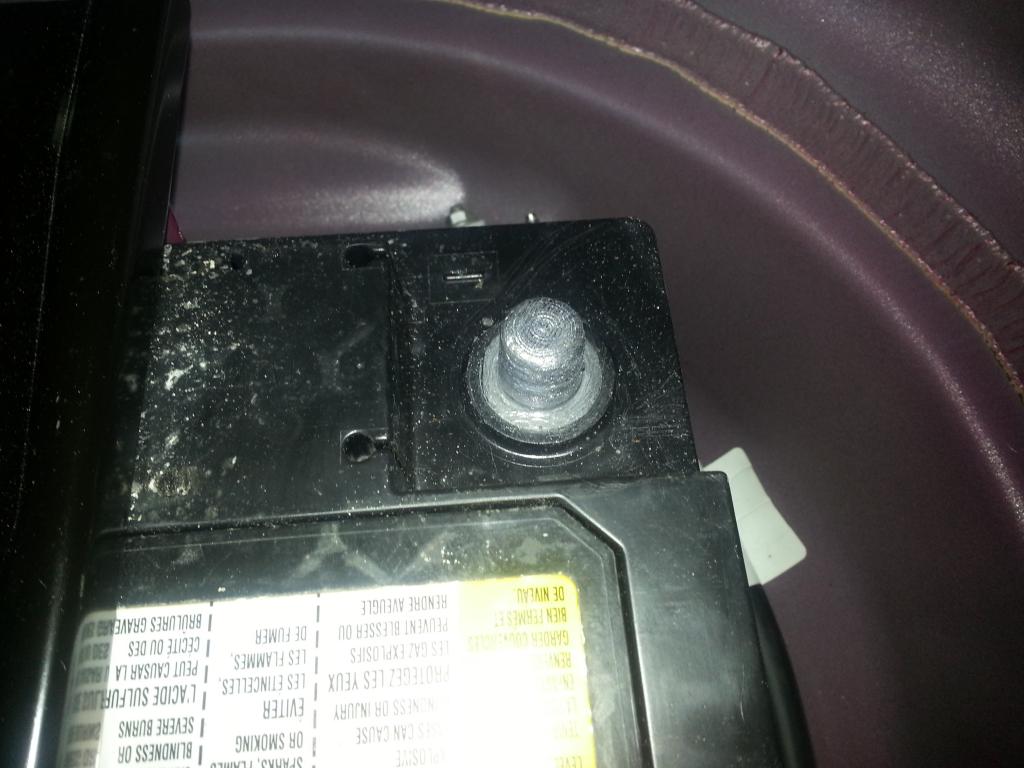 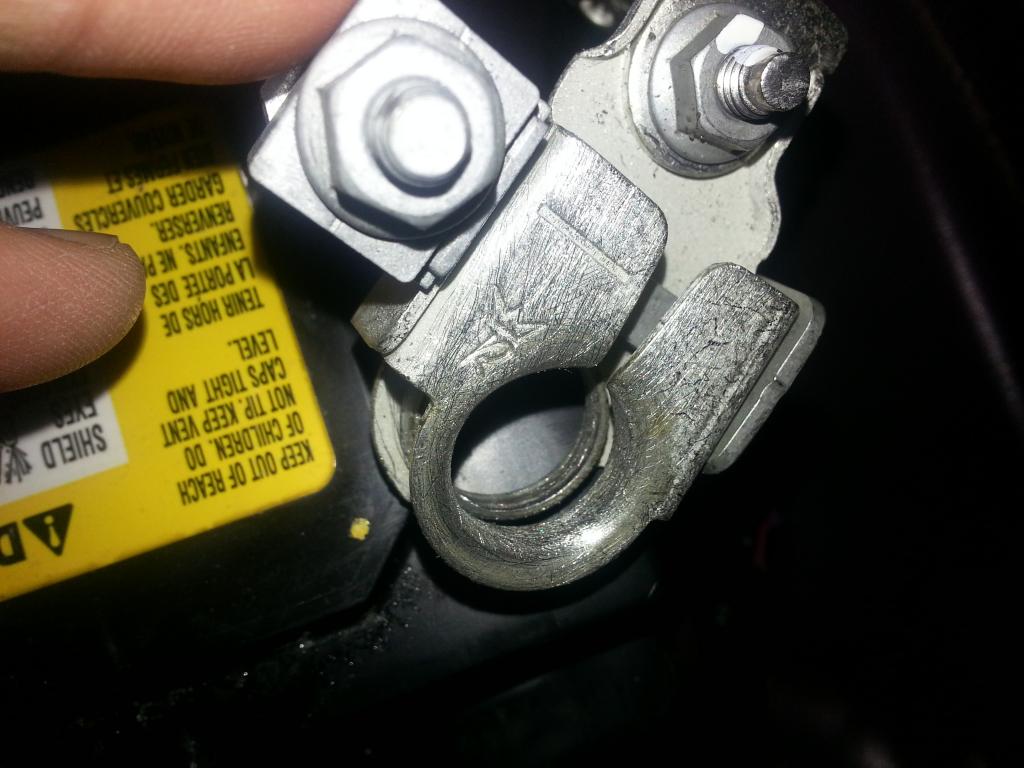 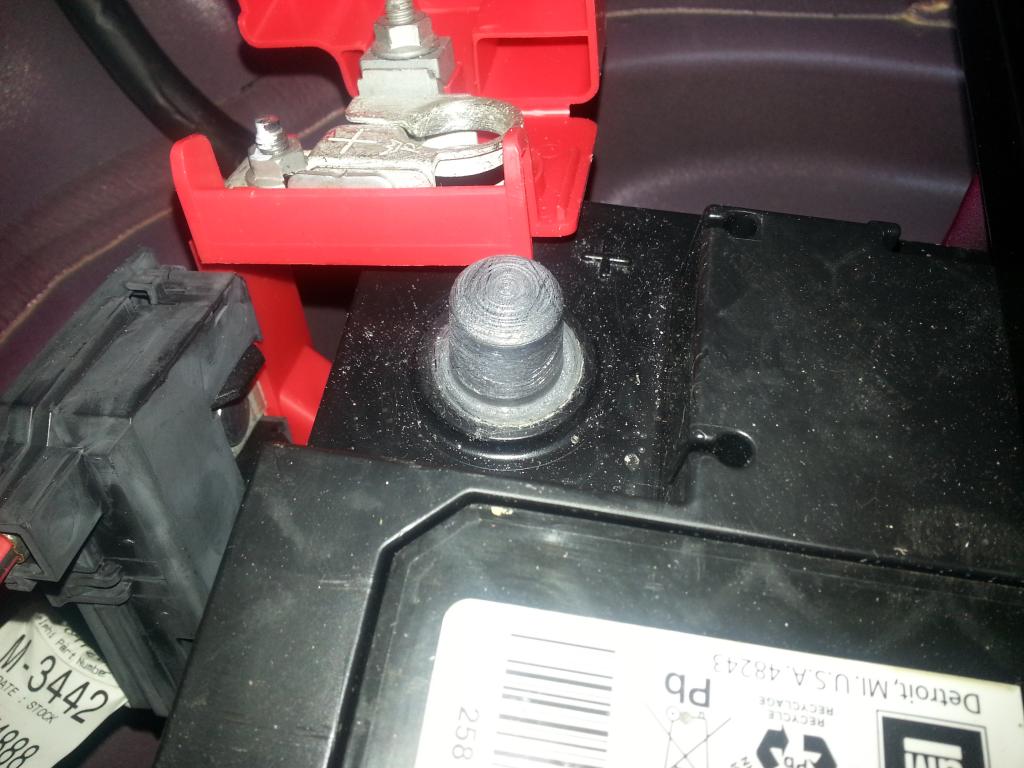 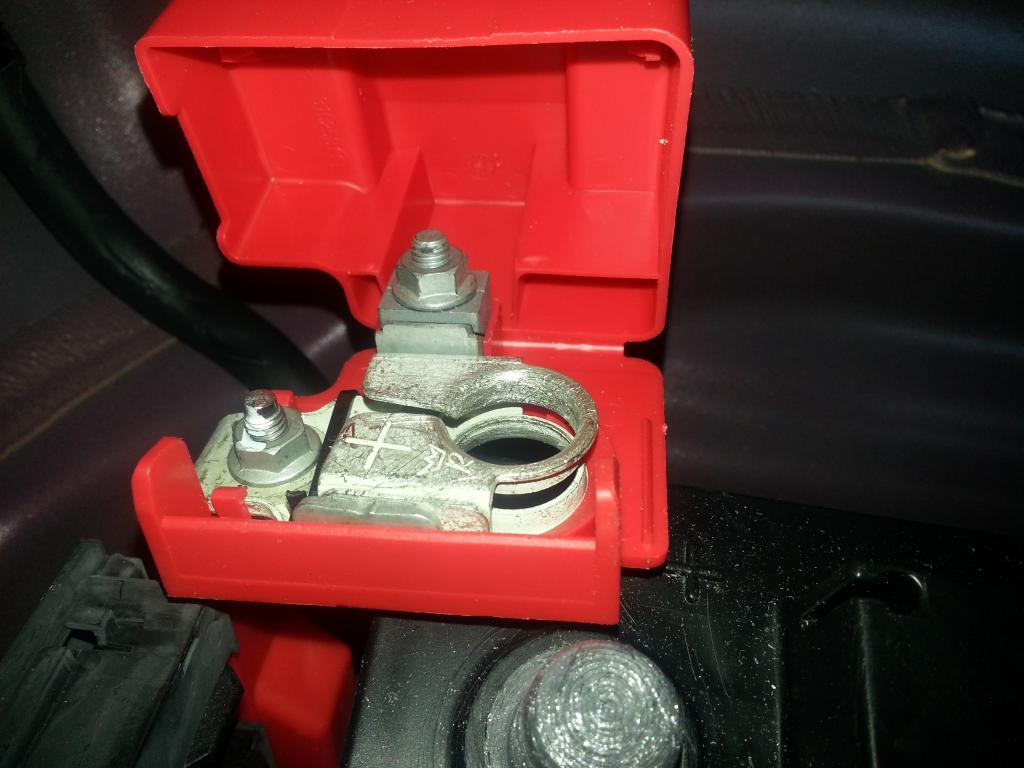 Have to do this to avoid 'issues' later -- need to know 'why' this happened too. I waited 30 minutes before I attempted to remove the air bag (just to be SURE)... Now, I followed this great post to take off the air bag on the older style steering wheel: http://www.camaro5.com/forums/showpo...20&postcount=6 Great guide and great pictures. Once I had the air bag off, I was then able to follow these steps: Located the bolt on the existing wheel, used a T50 to take it off but I did remove the air bag first. I have some shots of the 'removal' of the air bag so you'll see what I did: 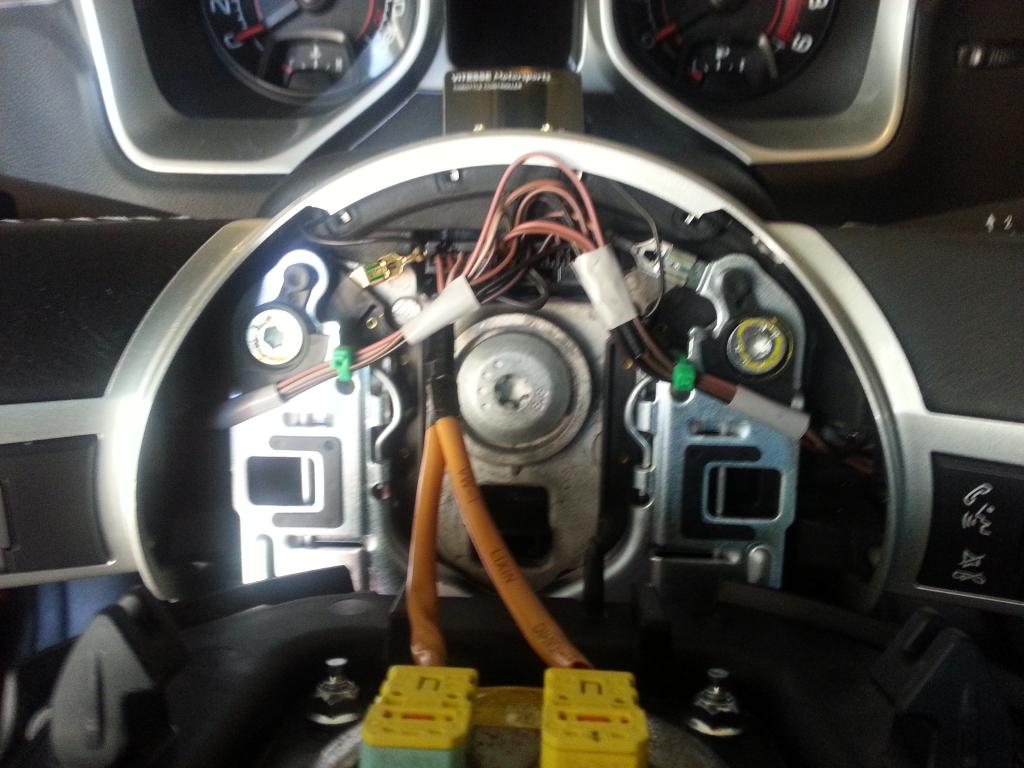 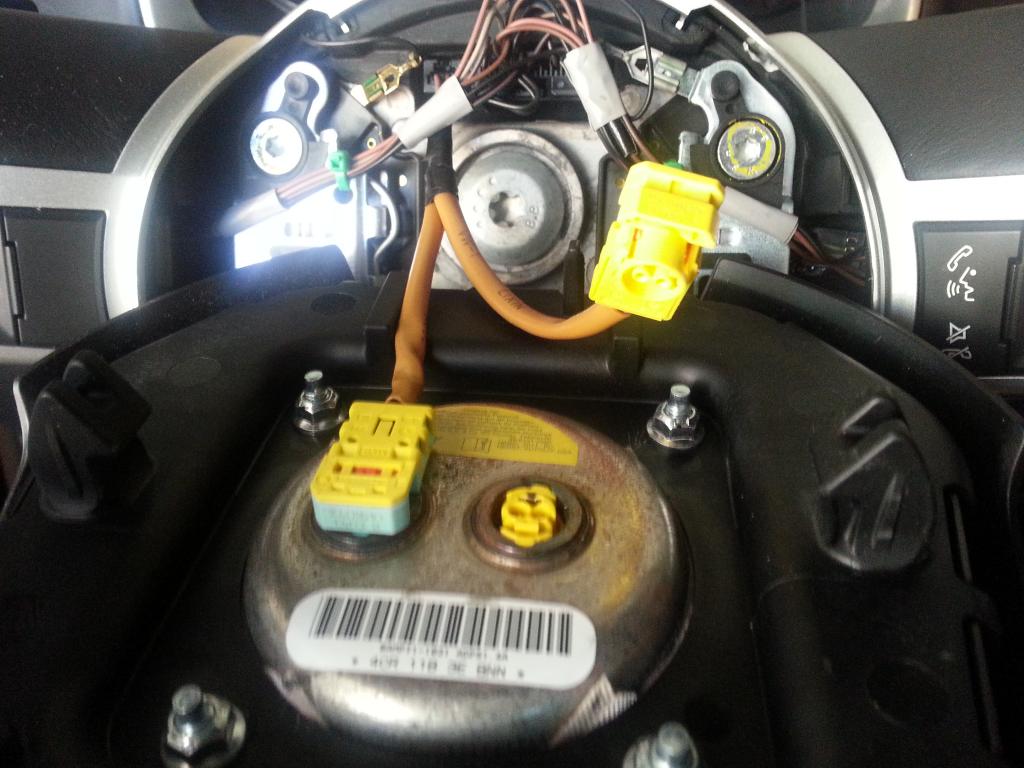 Now its time to disconnect the air bag. I wanted to show this just so folks are aware of the need to 'raise' the clip: 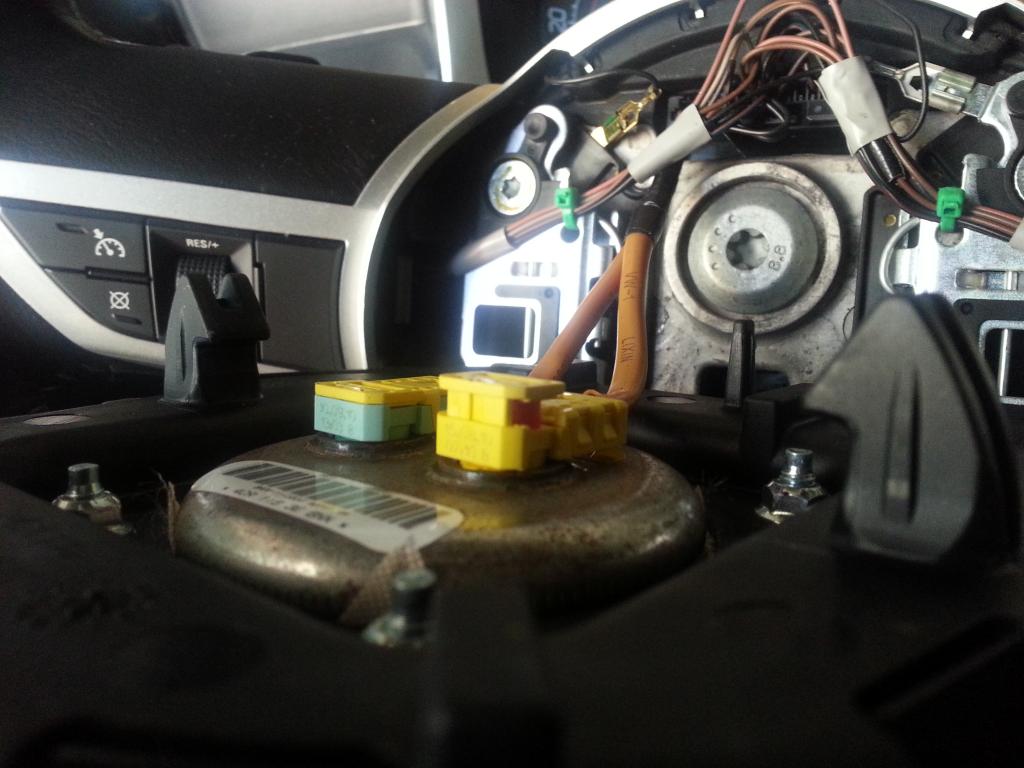 Note the colors on the 'older style bag too... 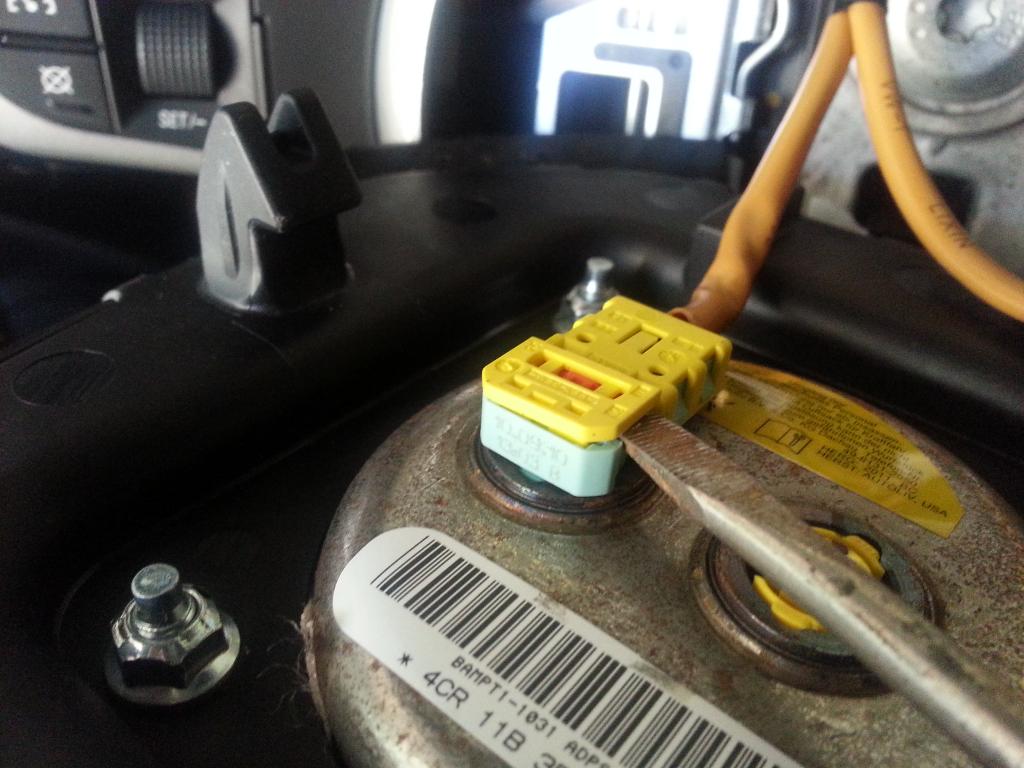   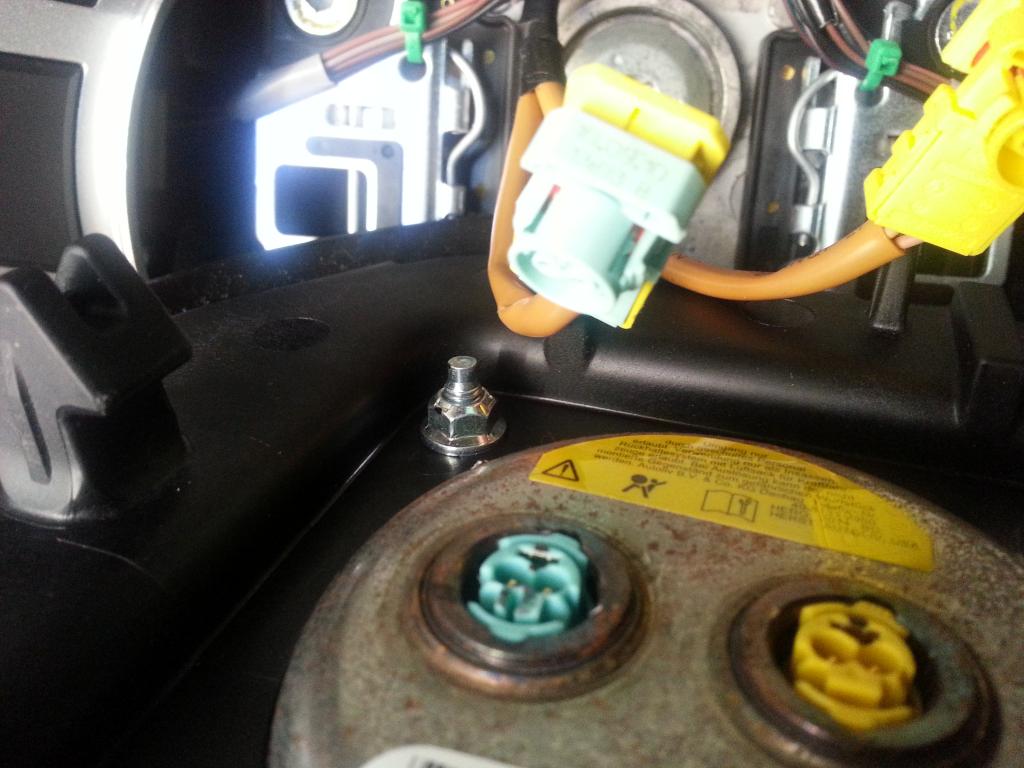 Air bag off and 'up' per directions from other sources: 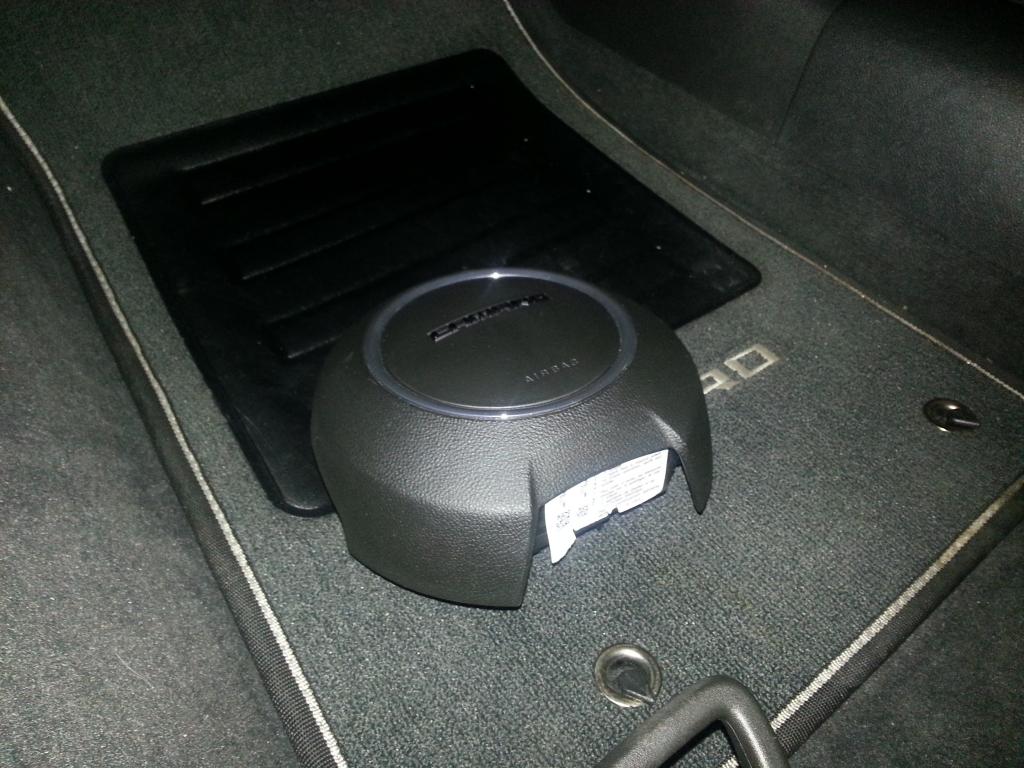 Now, disconnecting the wiring harness: Note, press in the 'tab' in the middle to remove it: 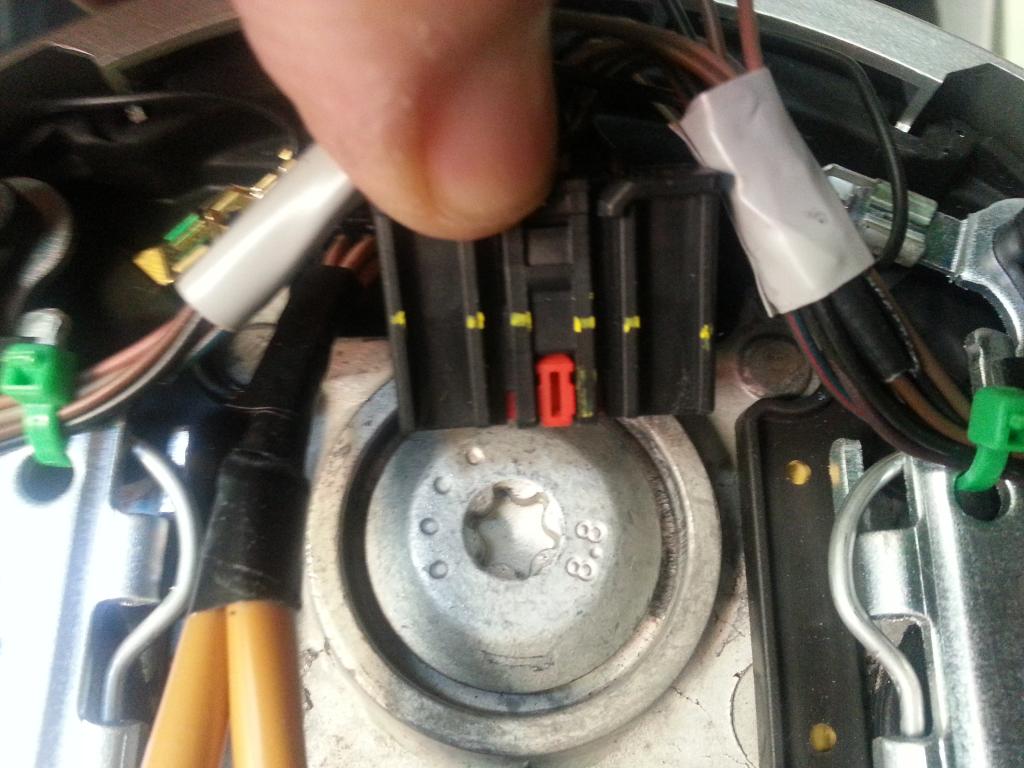 Dis-connected and bolt removed: 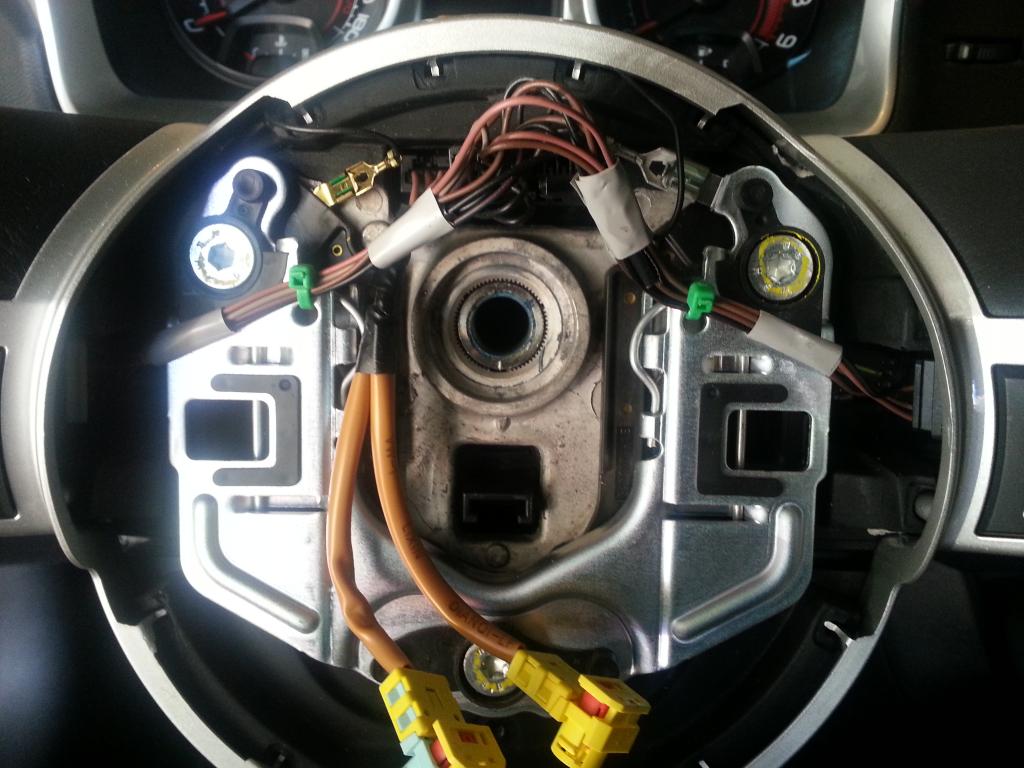 Note the blue locktite: 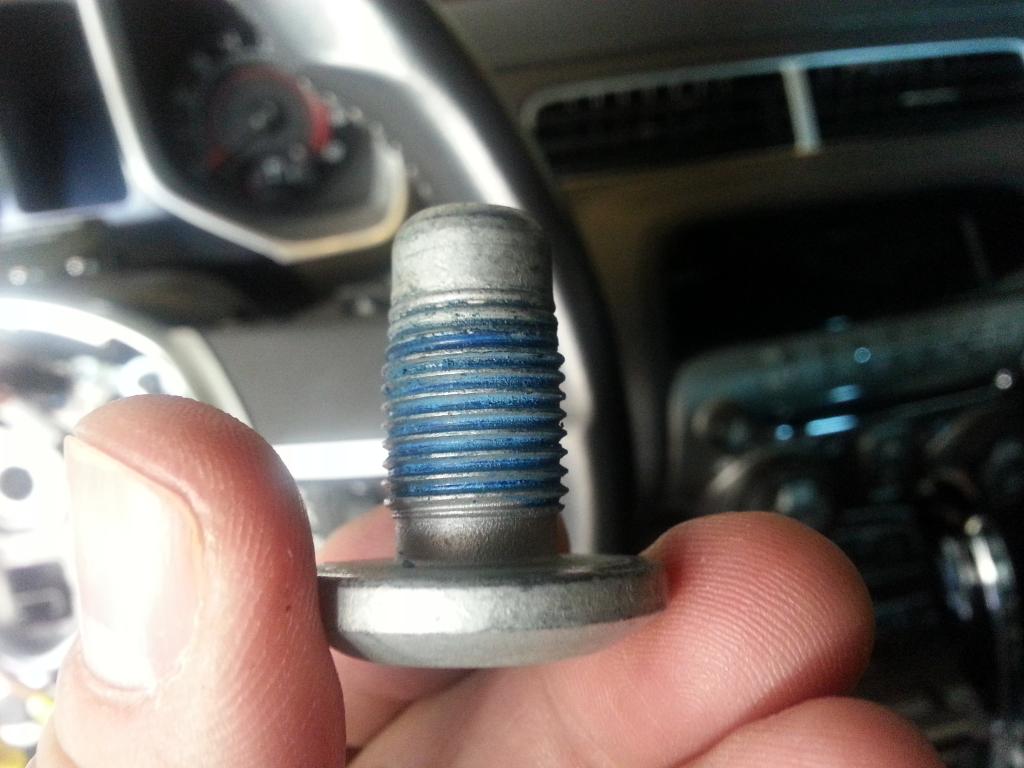 Clean this and remember to 'add' blue locktite when you install the bolt... Steering wheel removed -- note the alignment of the clock spring! It moves a little but line it up and keep it there... 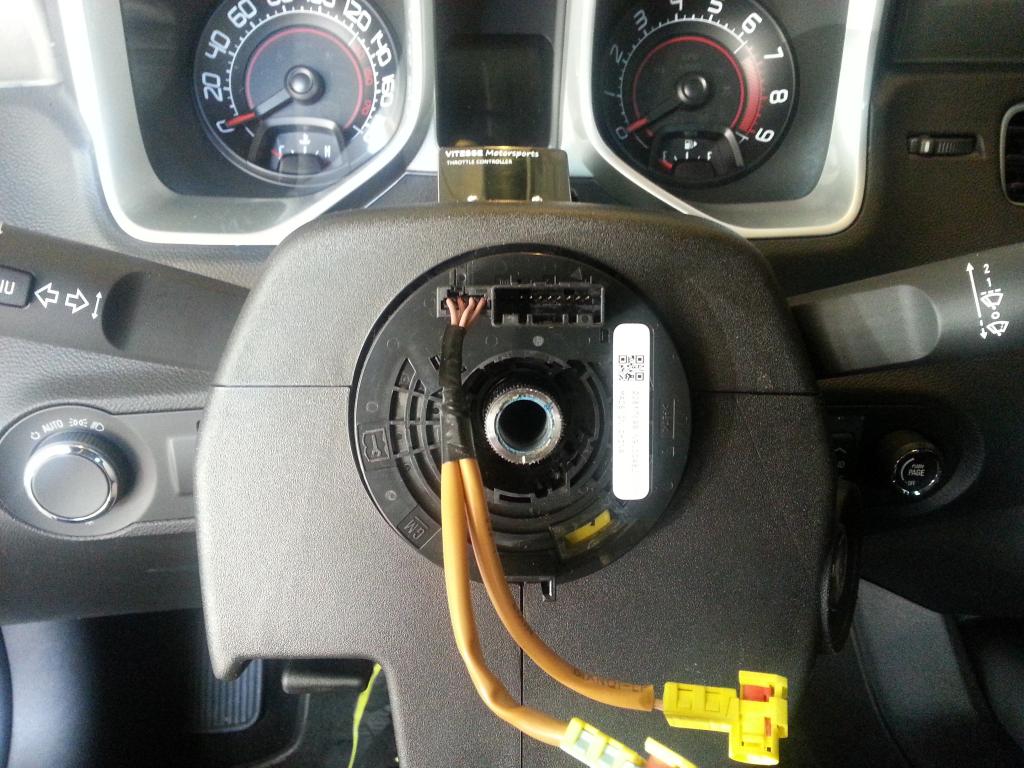 Back of 'older style' steering wheel: 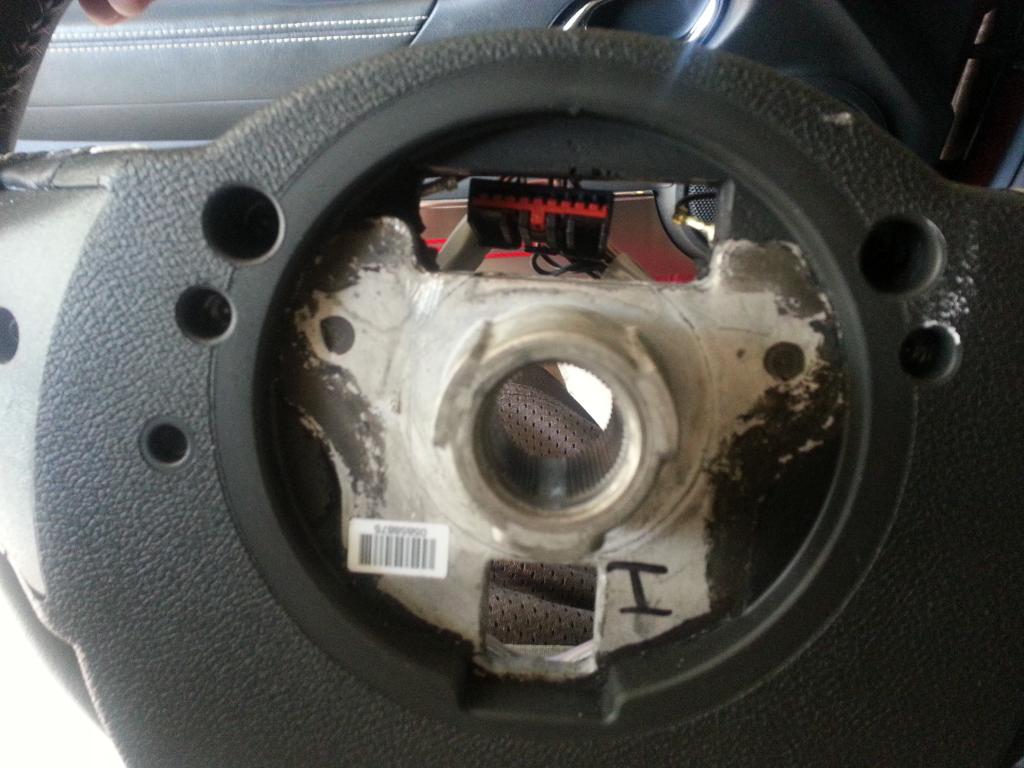 Now the new one -- slide on the wheel -- it ONLY goes on one way. Keep the clock spring lined up and also fish the air bag wires through the opening: 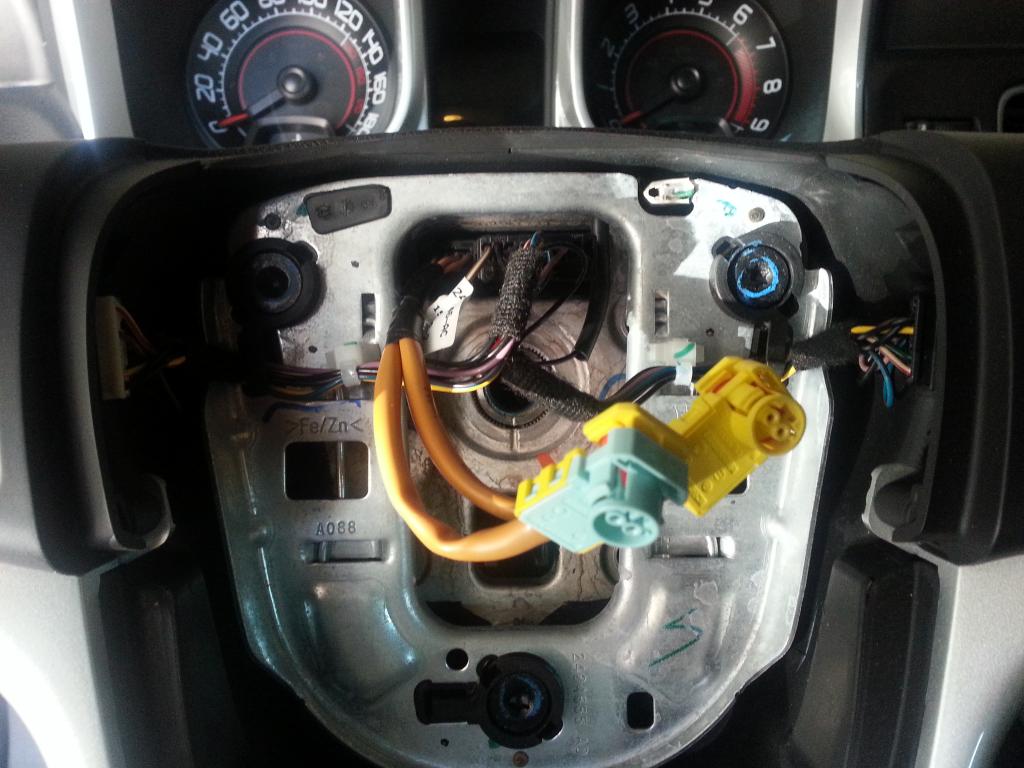 Aligned: 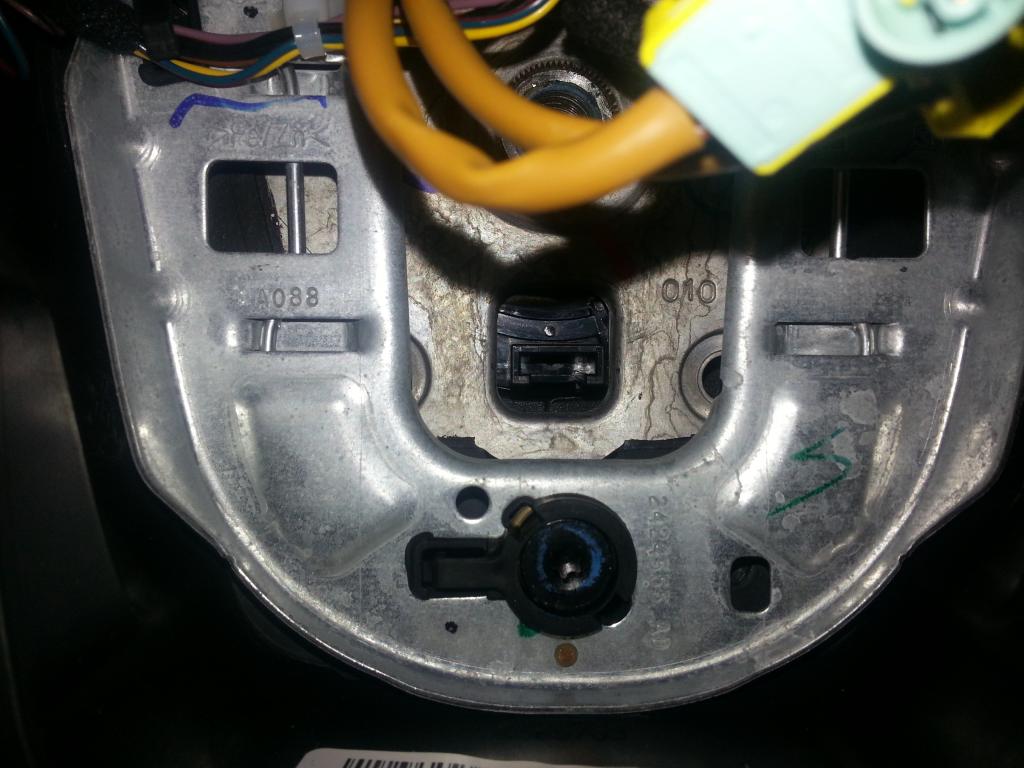 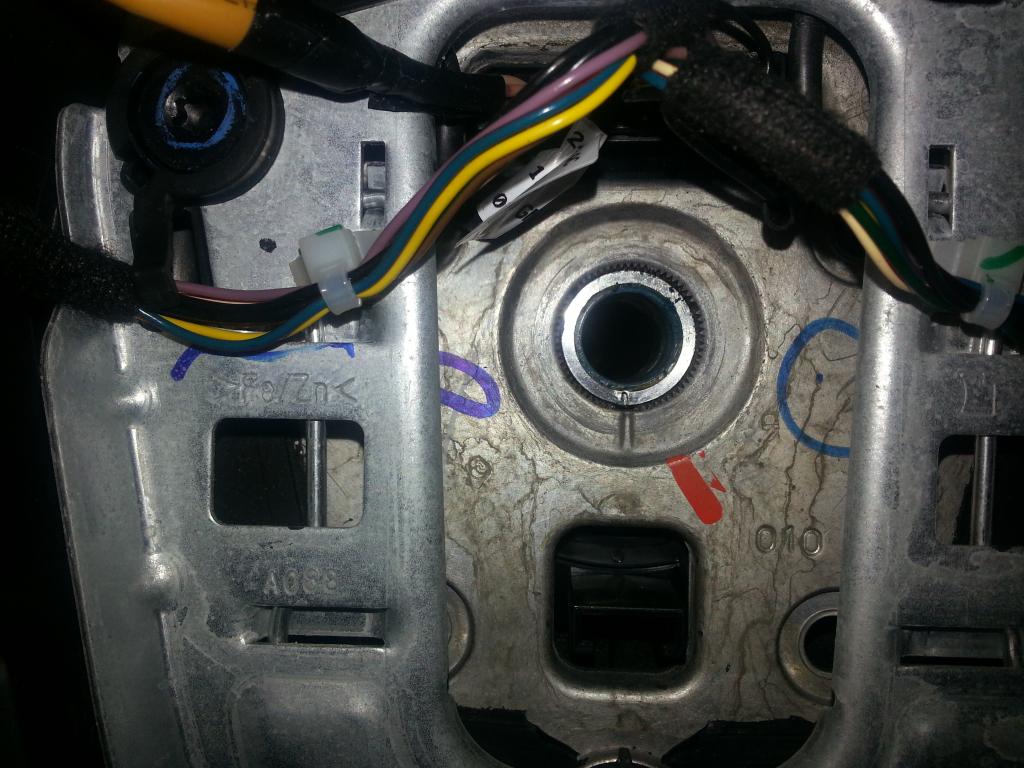 Wheel on: 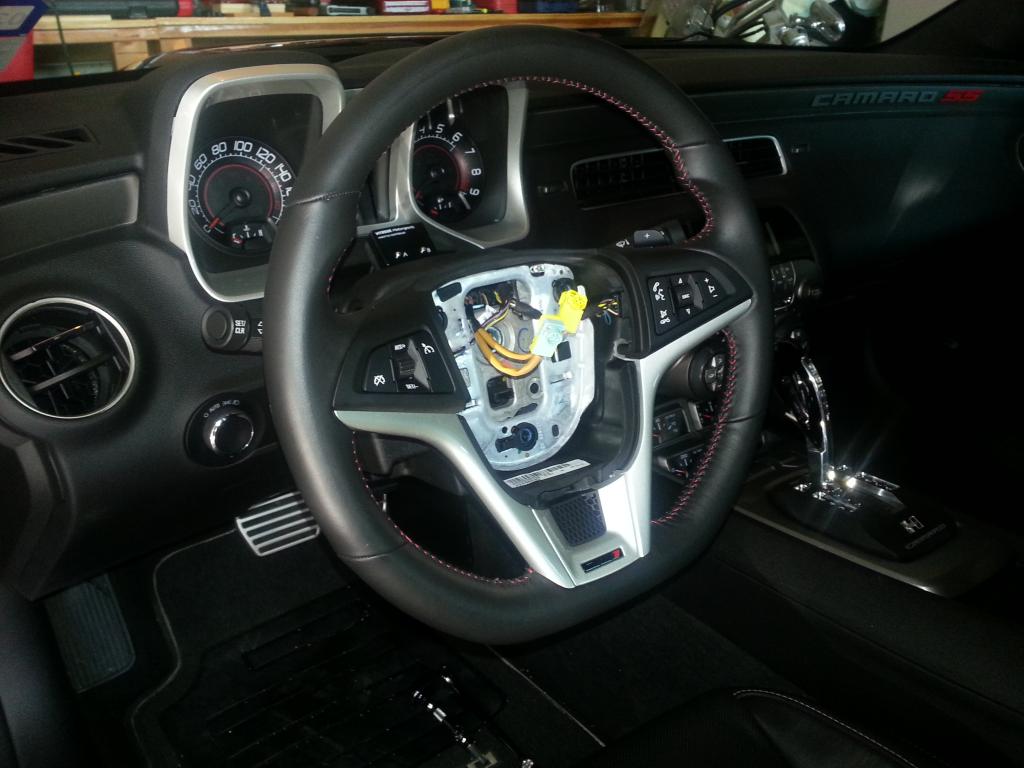 Locktite, then bolted and torqued (22 ft lbs): 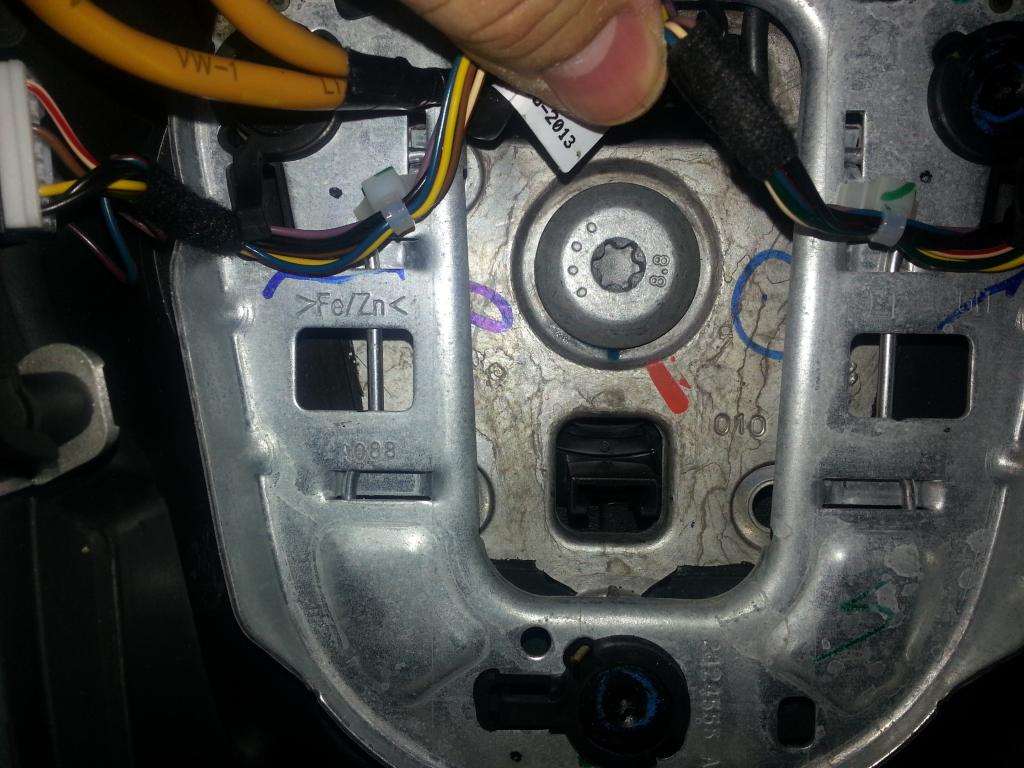 Now, notice the 'difference' in the older style air bag vs new: 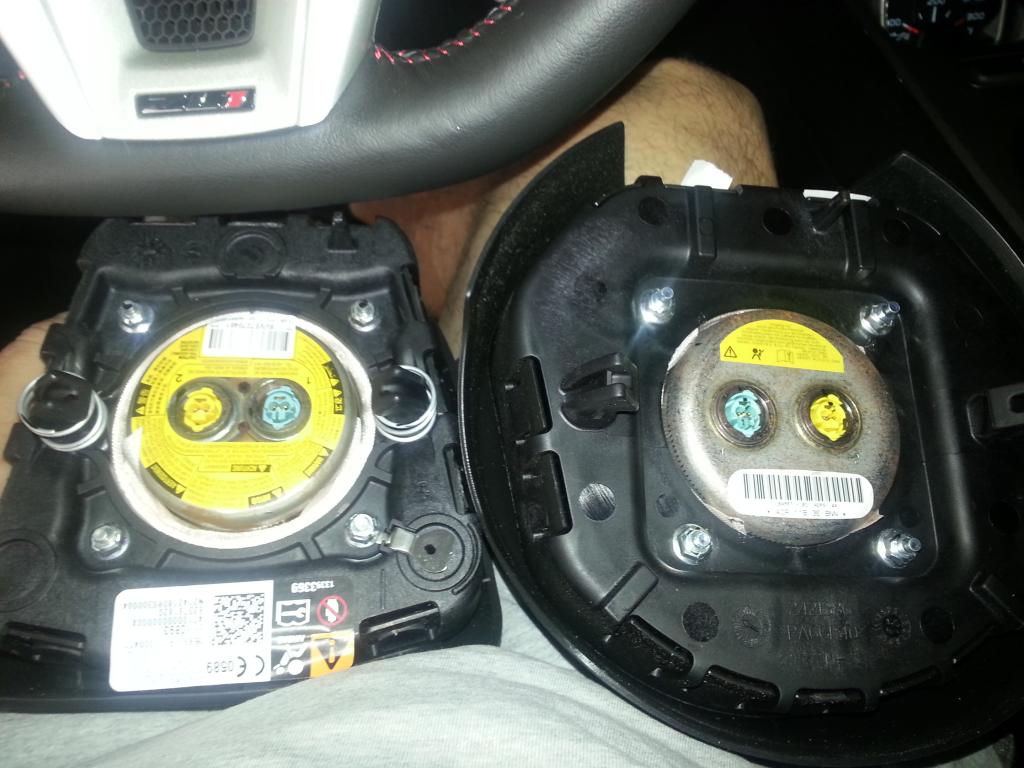 The 'blue' connector is on the right on the newer one, and the 'left' on the older one! Wires before switching: 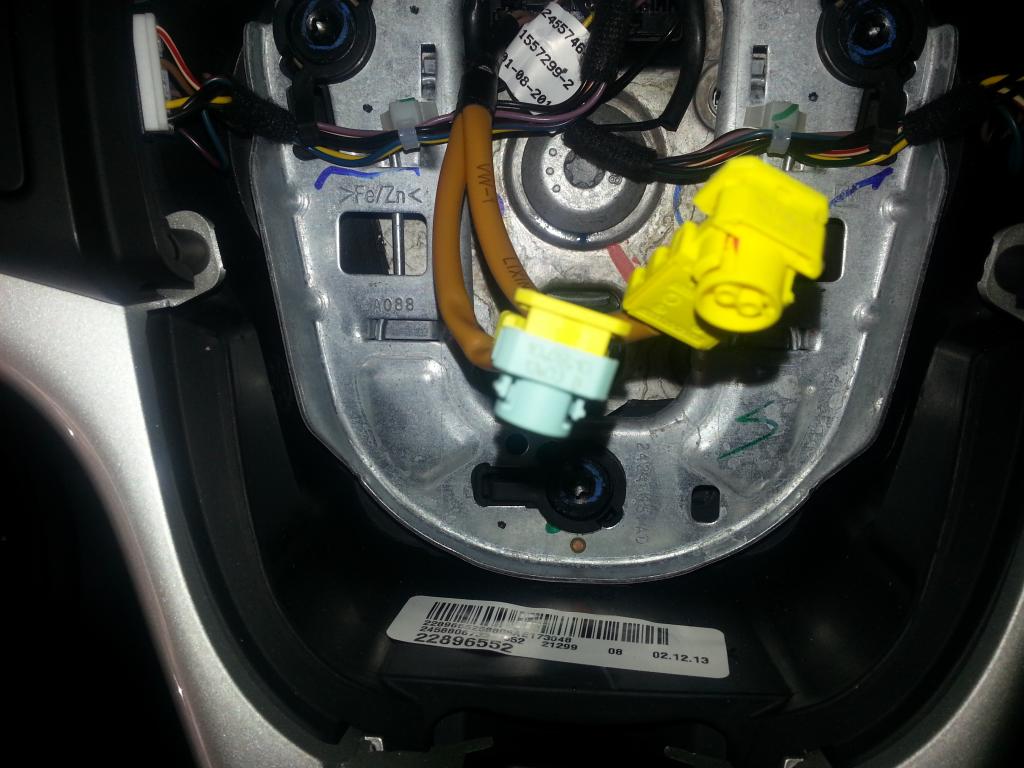 After: 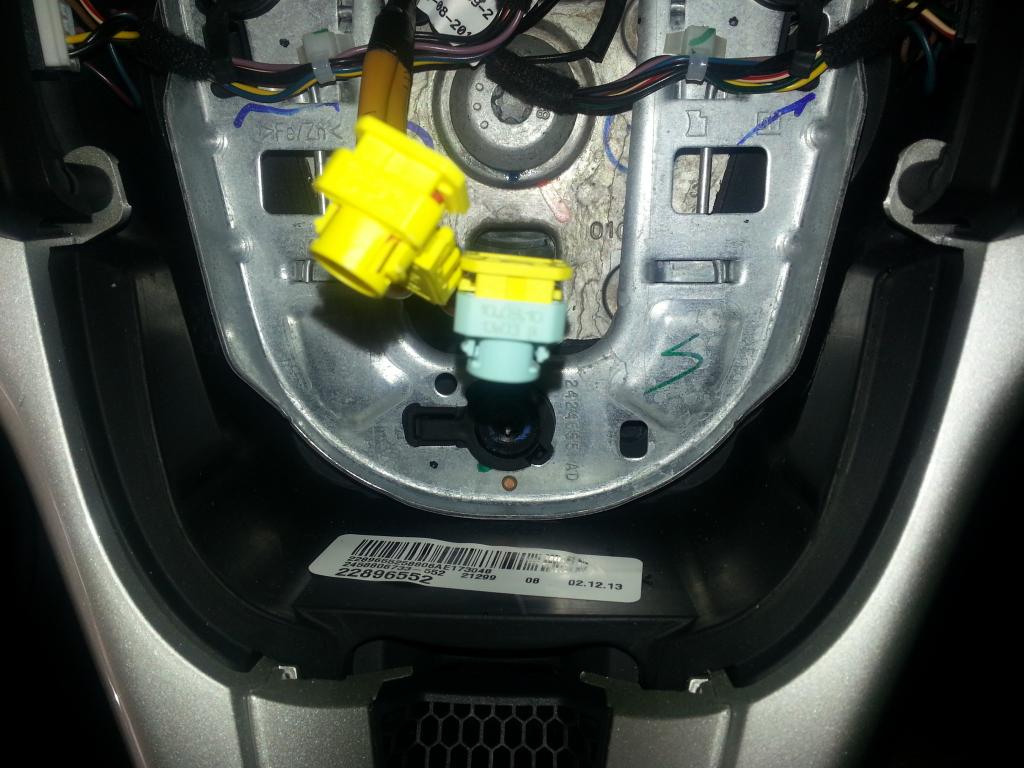 Connected: 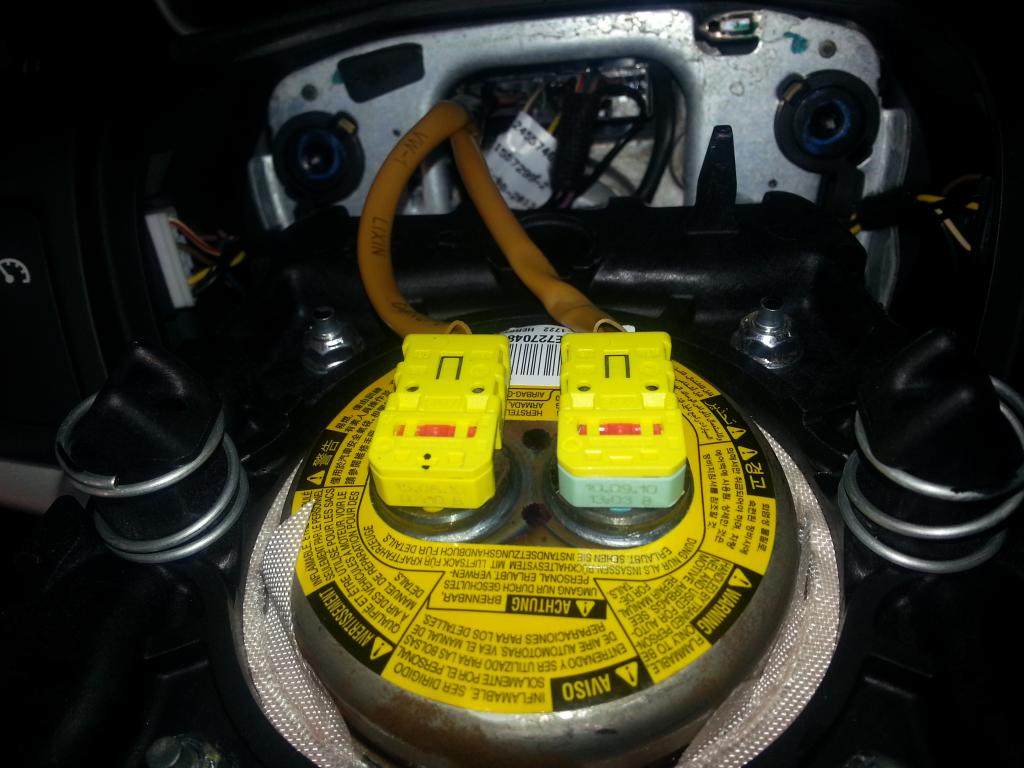 So, you push these on and then 'press down' the clips. This locks it in... Now, press on the air bag -- gently but firmly' and you'll feel the air bag 'lock' in. Here it is installed: 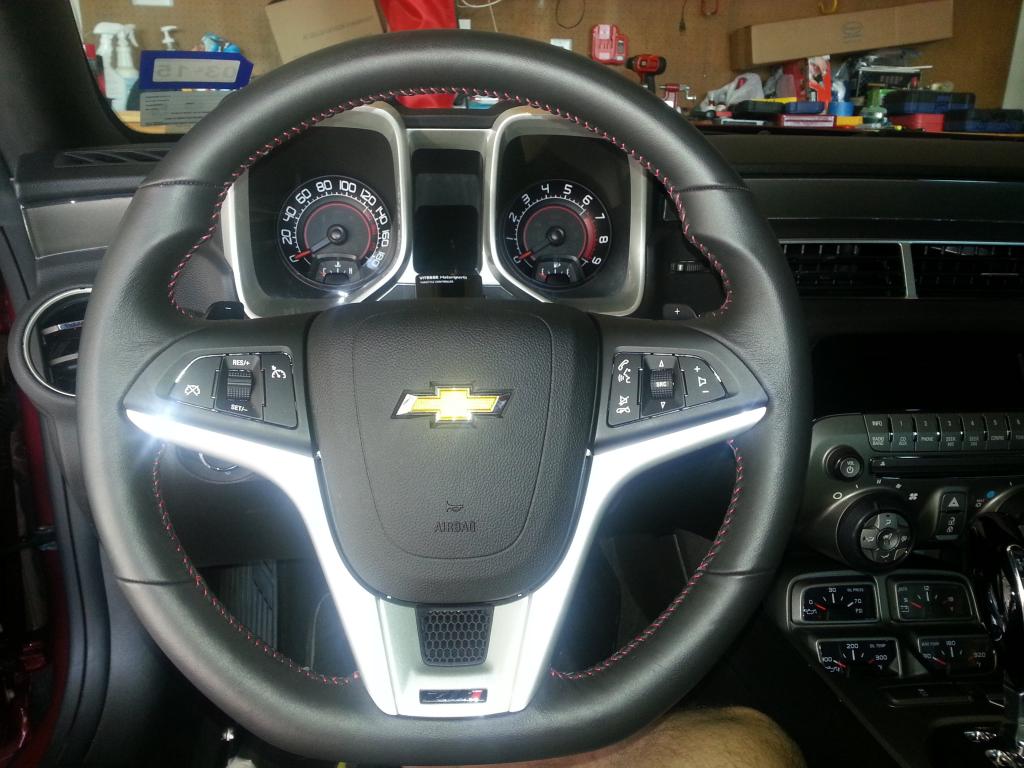 Now to test. Turn the car 'on' but don't start. You'll see the air bag indicator flash and then turn off. Mine is now off and this means all is well (you have to see it flash -- its really quick though): 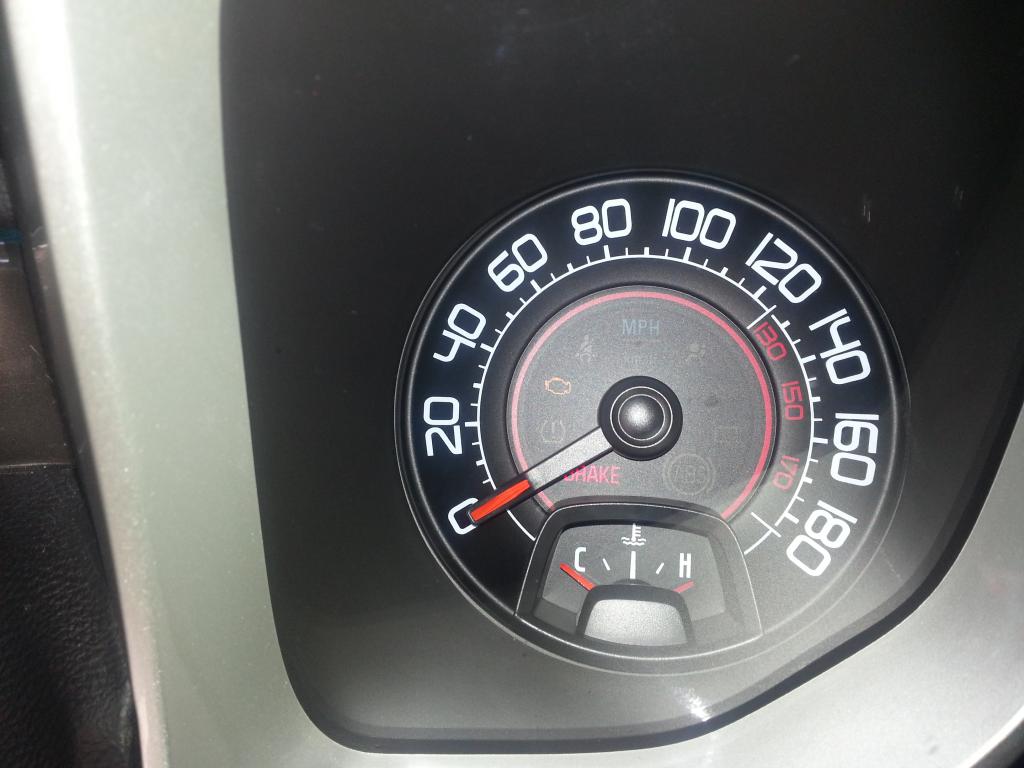 Now, you can test the controls and horn! Here it is all done! 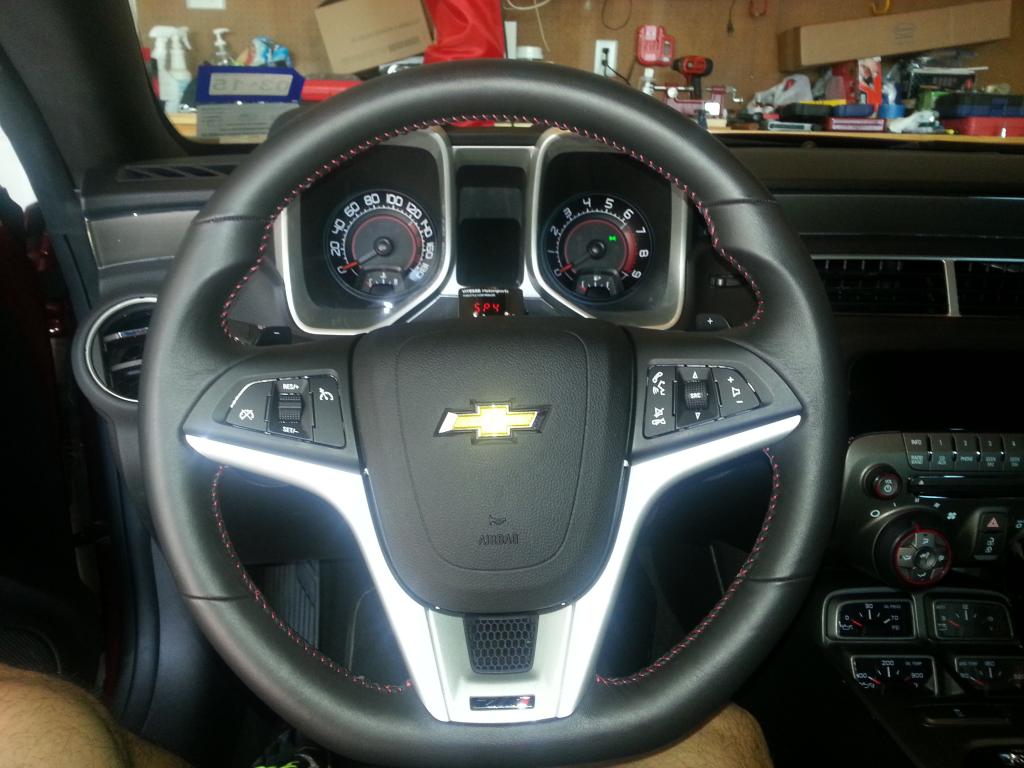  Reprogrammed the clock and speed limit warning (those were off due to disconnecting the battery). Took it for a drive and I really like the way this steering wheel feels! Love the 'flat bottom' and I think it looks great too... Overall (outside of the wait time) took about 25 minutes to do... Hope this helps! -Don Last edited by hammdo; 07-01-2017 at 04:04 PM. |

|

|
|
10-24-2014, 08:49 PM
|
#2 |
         
Drives: 2010 RS Inferno Orange Metallic Join Date: Mar 2010
Location: Albany, Ga.
Posts: 3,399
|
Glad you like it, but you could have gotten a sterring wheel out of a Malibu
__________________
PCP Hideaway Headlight Covers, BBK Headers & High Flow Cats, ZL1 Add-ons Wicker Bill, TL1/ZL1 Hood Insert, Gen5 DIY Frameless Mirror, ABL Dash Lighting an My link Navigation, Blacked out Rear Bowtie, all Sylvania led Turn Signals, Ceramic Window Tint By Nicks, MBRP Exhaust tips, GEN5 DIY Virginia Legal DRL Harness, Painted Brake Calipers, Vittesse Throttle Controller, Heritage Grill, Diode Dynamics Led Lighting, Manual Shifter Boot, Paddle Shifters, CNC Throttle Body, Trifecta Tune, RX Catch Can & Breather, Trunk Black out and Side Grills, Chevorlet door Sills.
 |
|
|
|
|
10-24-2014, 08:54 PM
|
#3 | |
|
'It's an experiment'
Drives: [COTW 2/09/15] '11 GPI LSA SC Z/LE Join Date: May 2014
Location: Dallas TX
Posts: 8,693
|
Quote:
Thanks! -Don |
|
|
|
|
|
10-25-2014, 04:27 AM
|
#4 |
|
CamaroFans.com

|
Nice DIY thread. Thanks for posting...

__________________
 |
|
|
|
|
10-25-2014, 08:32 AM
|
#5 |
|
'It's an experiment'
Drives: [COTW 2/09/15] '11 GPI LSA SC Z/LE Join Date: May 2014
Location: Dallas TX
Posts: 8,693
|
Glad to do it. Some folks may wonder what it took to do that conversion so, here it is. The ZL1 is an awesome car (see you have one -- I'm jealous!). I like many features they have, so I've taken a few of them and 'installed' them. Some folks will like it, others won't -- that's ok. I'm more into 'helping educate' those who may 'think' about doing it and giving them some idea of what it takes.
So now, I'm gonna finish up my 1LE upgrade today (struts). The gen 5's are amazing cars and I like how I can 'finally' work on one again! Thanks! -Don Last edited by hammdo; 10-26-2014 at 10:24 AM. |
|
|
|
|
10-25-2014, 12:27 PM
|
#6 | |
Drives: 2013 ZL1 416 Join Date: Feb 2013
Location: Langley B.C
Posts: 2,619
|
Quote:
when u can put a zl1 in |
|
|
|
|
|
10-25-2014, 01:36 PM
|
#7 | |
|
'It's an experiment'
Drives: [COTW 2/09/15] '11 GPI LSA SC Z/LE Join Date: May 2014
Location: Dallas TX
Posts: 8,693
|
Quote:
 -Don |
|
|
|
|
|
10-24-2015, 01:14 AM
|
#8 |

Drives: 2015 Black 2LT RS M6 Join Date: Aug 2015
Location: Cali
Posts: 2,033
|
Good info
|
|
|
|
|
12-08-2016, 04:34 PM
|
#9 |
 
Drives: 2010 Camaro SS (RS LS3) Join Date: Dec 2015
Location: Jo
Posts: 303
|
Thanks for the great write-up!
Can you please share the steering wheel airbag part number? I think the camaro has a different airbag part number compared to the Malibu and Cruze tho they are the same size and look. Would appreciate any input Sent from my ONEPLUS A3000 using Tapatalk |
|
|
|
|
12-08-2016, 07:03 PM
|
#10 |
|
'It's an experiment'
Drives: [COTW 2/09/15] '11 GPI LSA SC Z/LE Join Date: May 2014
Location: Dallas TX
Posts: 8,693
|
I'll see if I still have it...
-Don
__________________
747 RWHP 794 RWTQ
"Horsepower sells cars, torque wins races." - Enzo Ferrari See My Build: http://www.camaro5.com/forums/showthread.php?t=385577 |
|
|
|
|
12-10-2016, 01:12 AM
|
#11 | |
|
Drives: 2010 Camaro SS (RS LS3) Join Date: Dec 2015
Location: Jo
Posts: 303
|
Quote:
 Sent from my ONEPLUS A3000 using Tapatalk |
|
|
|
|
|
12-10-2016, 05:44 PM
|
#12 |
|
'It's an experiment'
Drives: [COTW 2/09/15] '11 GPI LSA SC Z/LE Join Date: May 2014
Location: Dallas TX
Posts: 8,693
|
This is the only number I have and its for a 2012-2015 Camaro:
23170890 Don't go by what the 'pics' on the parts websites -- those are wrong -- go by the year 2012-2015 ZL1 and this will get you the part number for sure... http://www.chevypartscentral.com/p/C...wd=&origin=pla -Don
__________________
747 RWHP 794 RWTQ
"Horsepower sells cars, torque wins races." - Enzo Ferrari See My Build: http://www.camaro5.com/forums/showthread.php?t=385577 |
|
|
|
|
12-11-2016, 12:01 AM
|
#13 | |
|
Drives: 2010 Camaro SS (RS LS3) Join Date: Dec 2015
Location: Jo
Posts: 303
|
Quote:
Sent from my ONEPLUS A3000 using Tapatalk |
|
|
|
|
|
12-23-2016, 10:00 AM
|
#14 |
 Drives: 2010 Inferno Orange 2SS/RS Join Date: Dec 2016
Location: Tempe, AZ
Posts: 32
|
Solid write up and excellent pics, Thank you! I'm about to tackle the 1LE wheel upgrade in my '10 and I'm hopeful it goes this smooth. Well done, Sir, well done.
|
|
|
|
|
|
|
|
 |
|
|


