You are browsing camaro5 

|
 02-11-2019, 12:32 PM
|
#1 |
 
Drives: 2010 Camaro 2SS/RS M6 Join Date: May 2009
Location: Idaho
Posts: 726
|
DIY AEM Wideband Guage Install on 2010 SS
I finally got around to installing the AEM wideband gauge that I've had since September. It is an AEM 30-4110 Gauge Type UEGO Controller. It uses a Bosch LSU4.9 O2 Sensor. The kit includes the gauge/controller, O2 sensor, sensor wire harness, power and data wire harness, and a weld in bung for the O2 sensor.
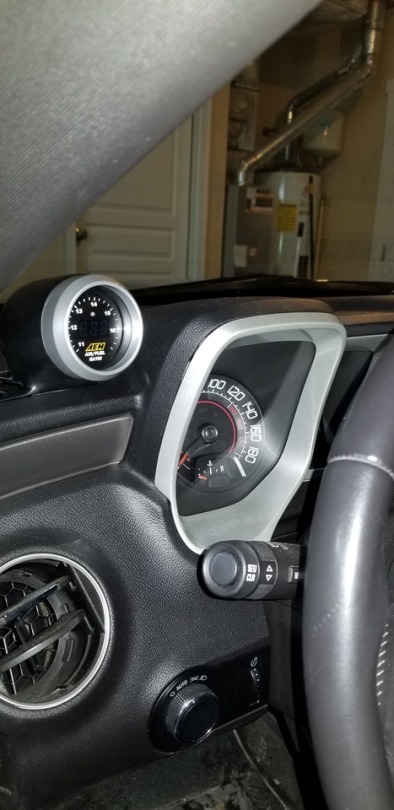
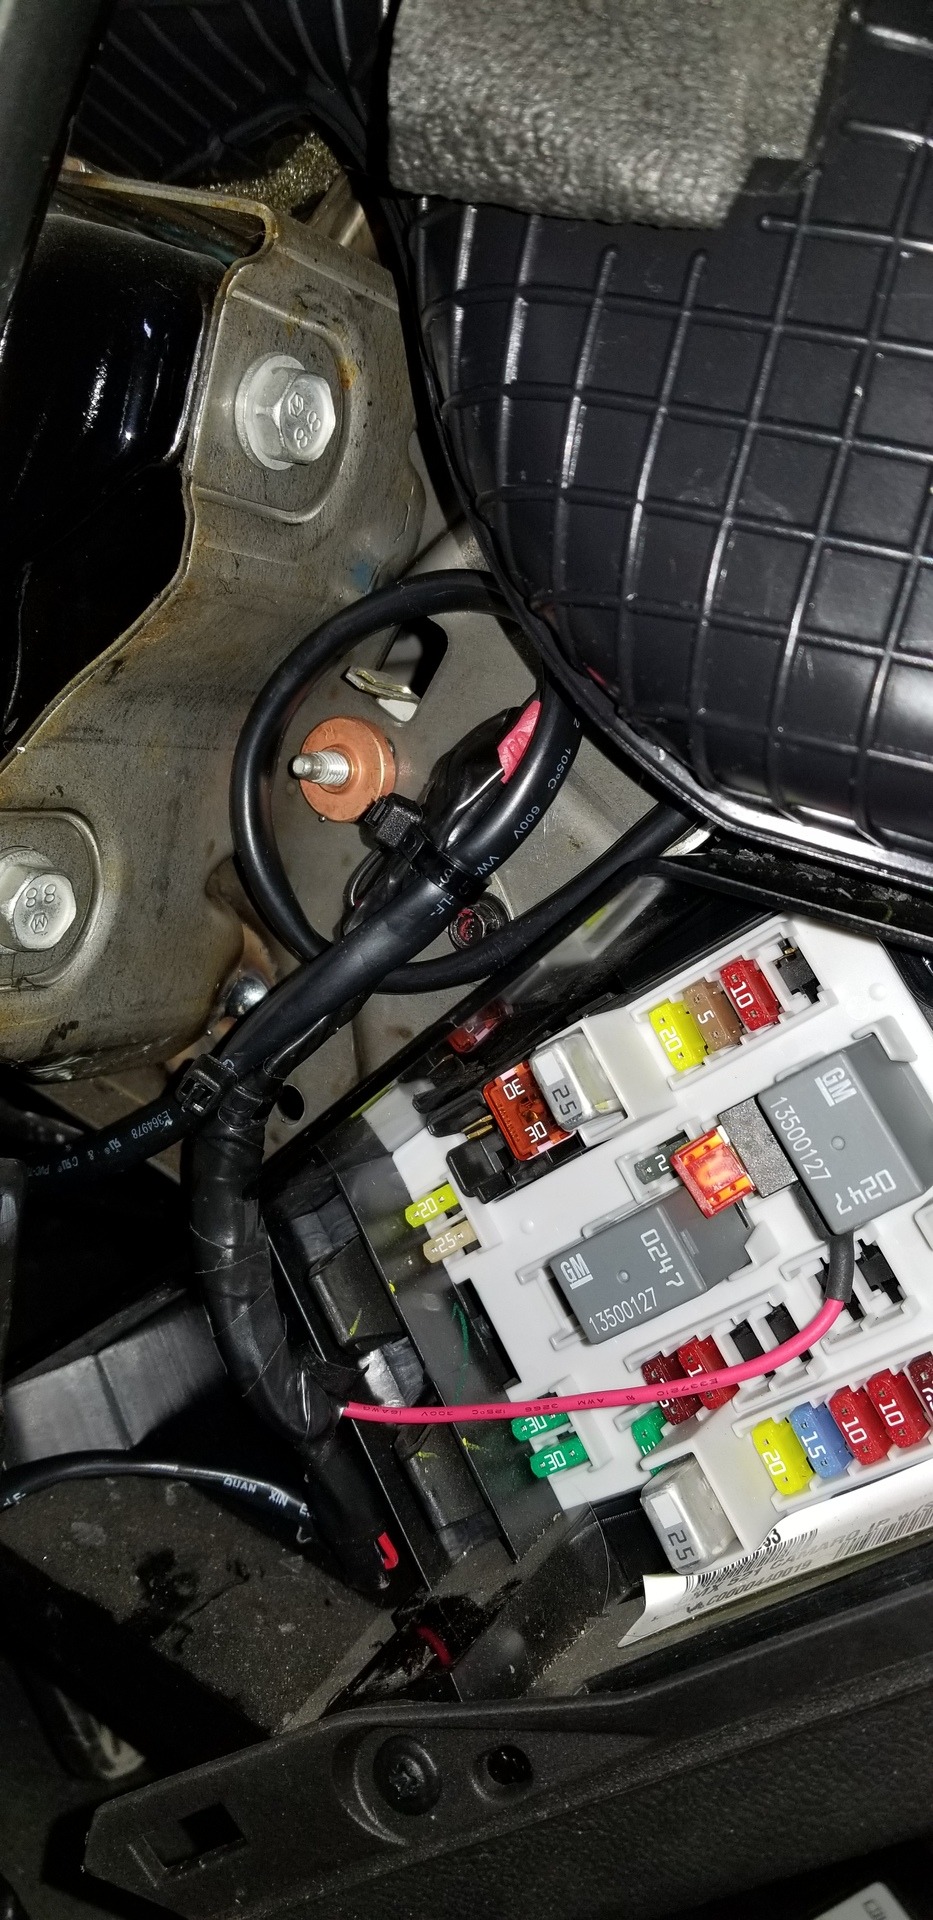
In addition to the AEM gauge/controller, I used the following parts: Aeroforce Gauge Pod Littlefuse FHM200BP "add a fuse" 12V power source DB-9 Connector & Serial to USB converter (for datalogging straight to laptop) To get started, I had to remove the driver side header. My son helped me pull the header off. 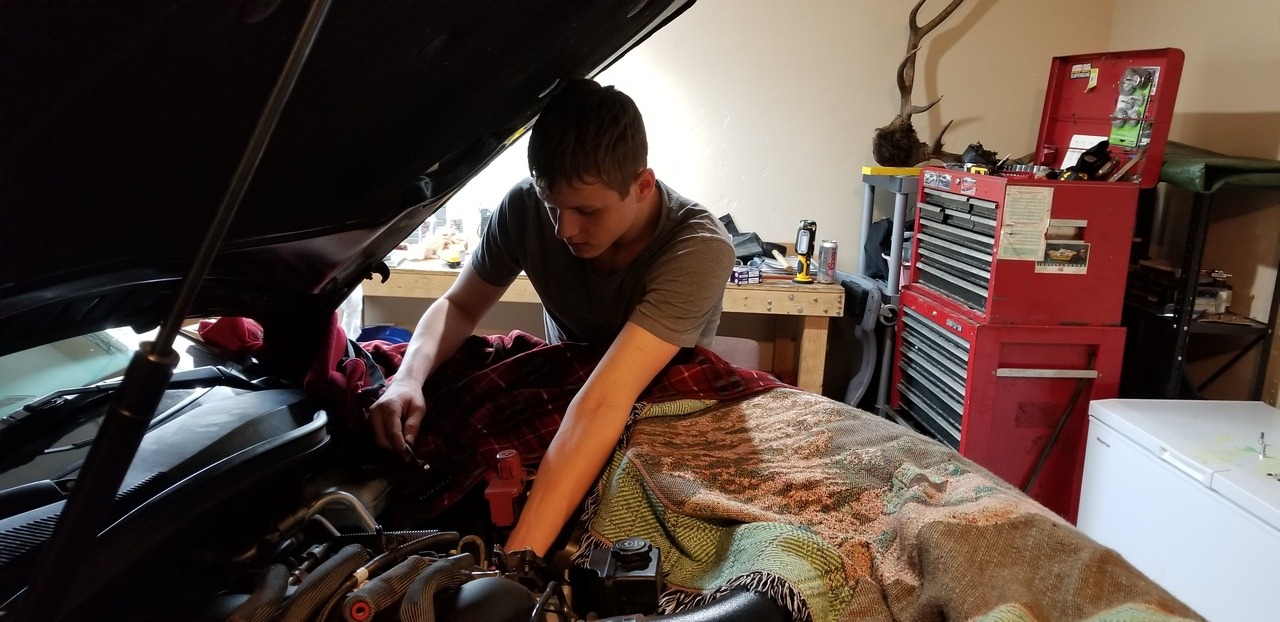 The car has Stainless Power 1 7/8 LT w/ cats. I wanted to put the sensor before the cat, which meant it had to go in the header collector. There wasn't a lot of real estate to work with, especially since the sensor needs to be mounted at least 10* incline to shed condensation and there is already an O2 sensor (ECU) mounted vertically on the collector. I took the header over to a friend's shop and he welded the bung in for me. We had to put a 7/8" hole in the header collector so the shoulder on the bung is flush with the surface. I didn't get a picture, but we used a drill press and a end mill type hole cutter. We had a little trouble with the cutter walking on us, as you can see from the scratches but it worked. Cutting a 7/8" hole in stainless on an uneven surface is tough. If it wasn't for my buddy Mark Collins, I would have made a mess of this. His cutter made all of the difference. Sorry for not getting a pic of that process. The bung is in the hole up to the shoulder and ready to be welded in: 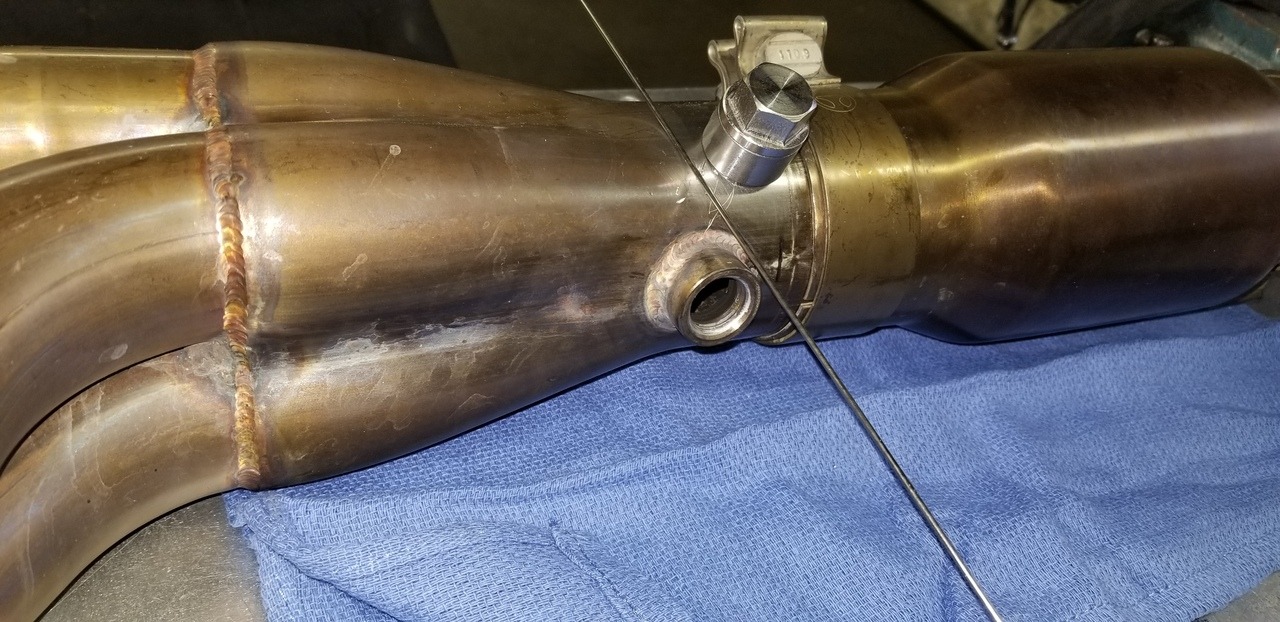 TIG welded: 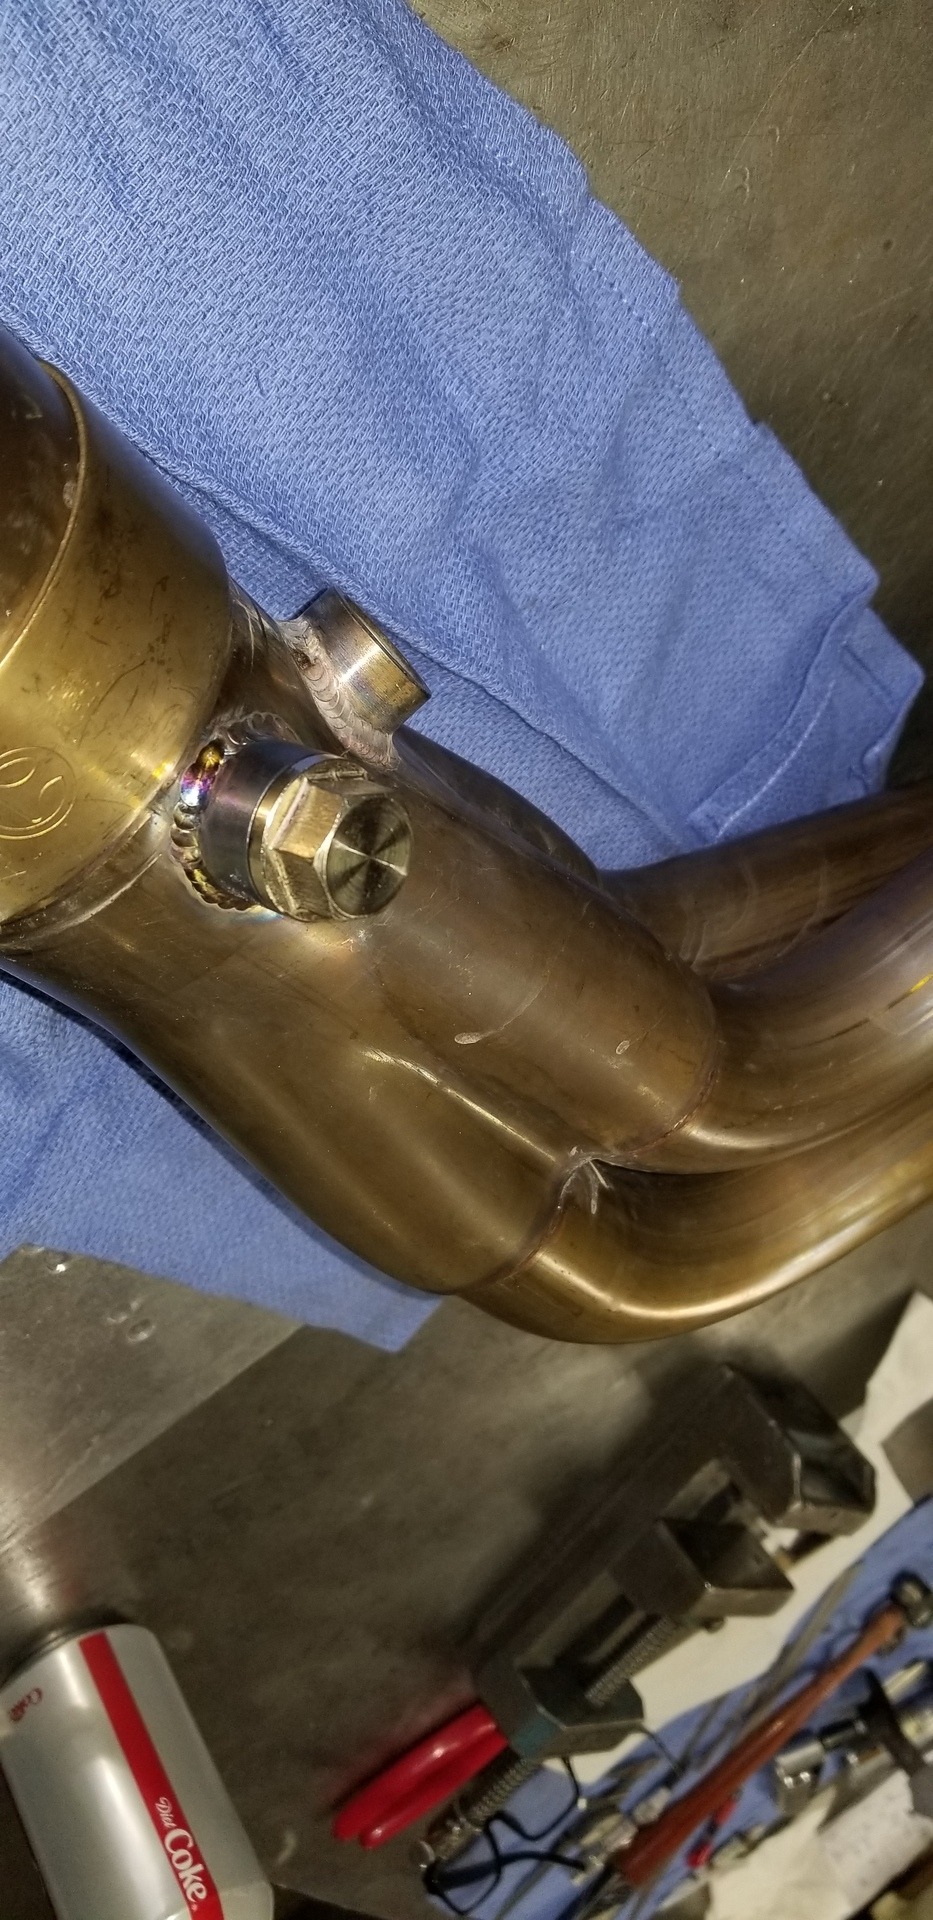 Sensors test fitted: 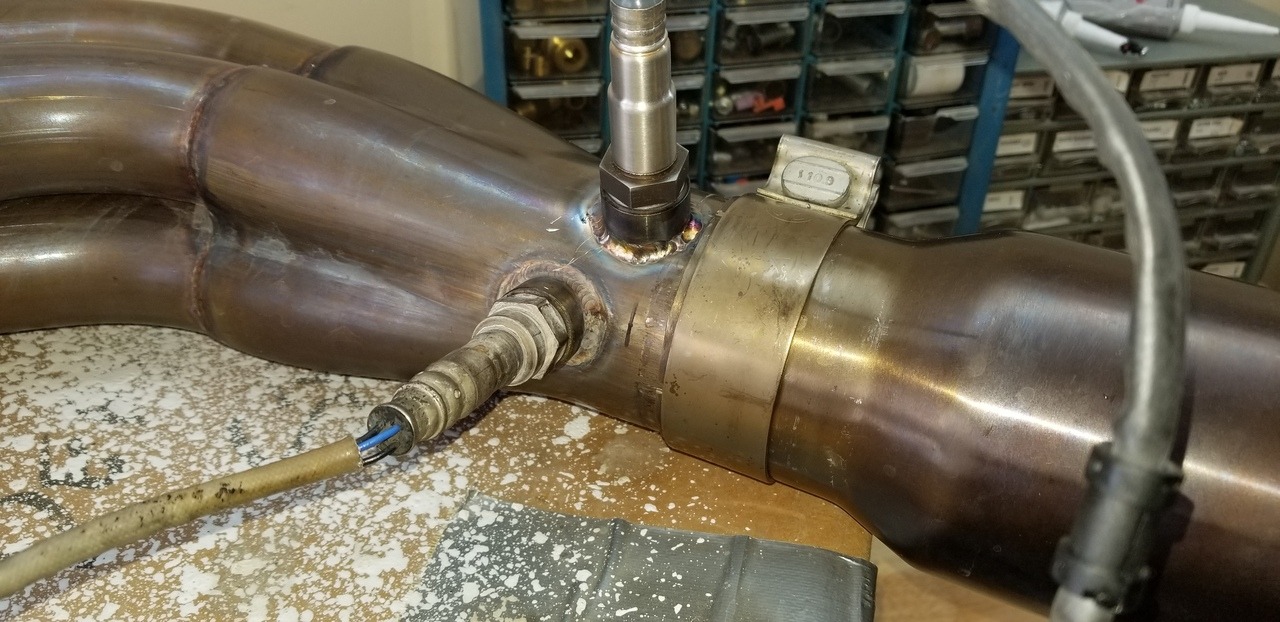 Header back in with sensors installed: 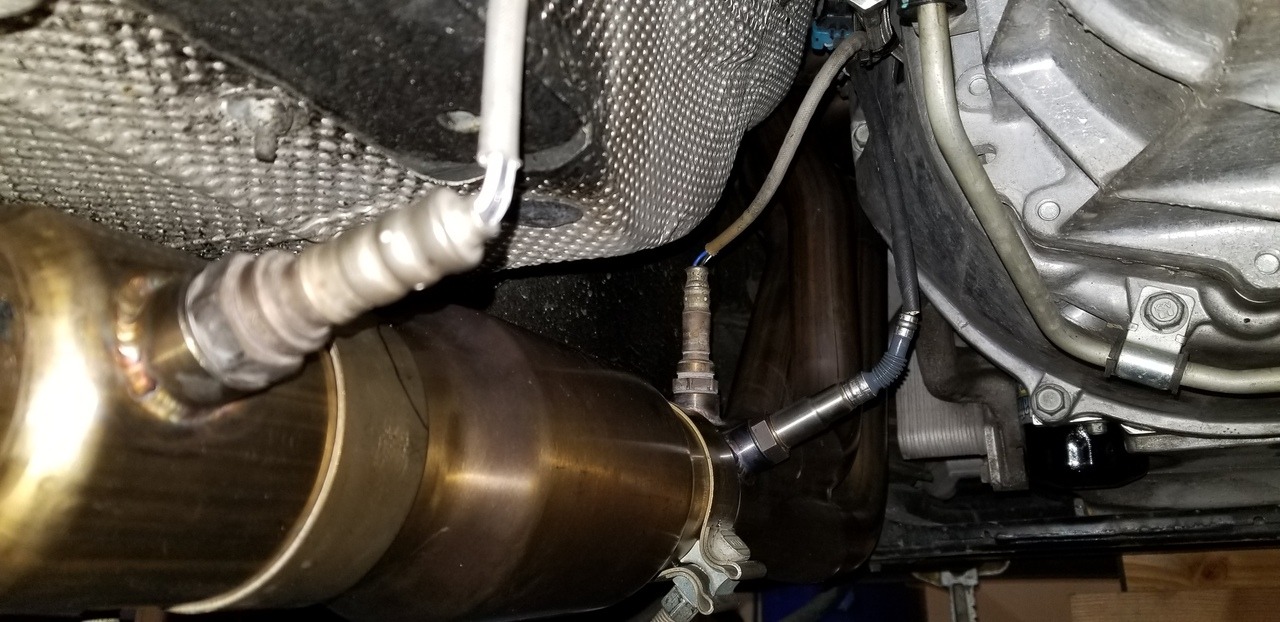 I ran the wires through the hole in the cabin filter housing. I lost the factory grommet, so I need to pick one up from the part store:  Routed along another wire loom across the passenger side footwell and across the tranny hump to the driver side. Oops, looks like I forgot to snip a ziptie tail: 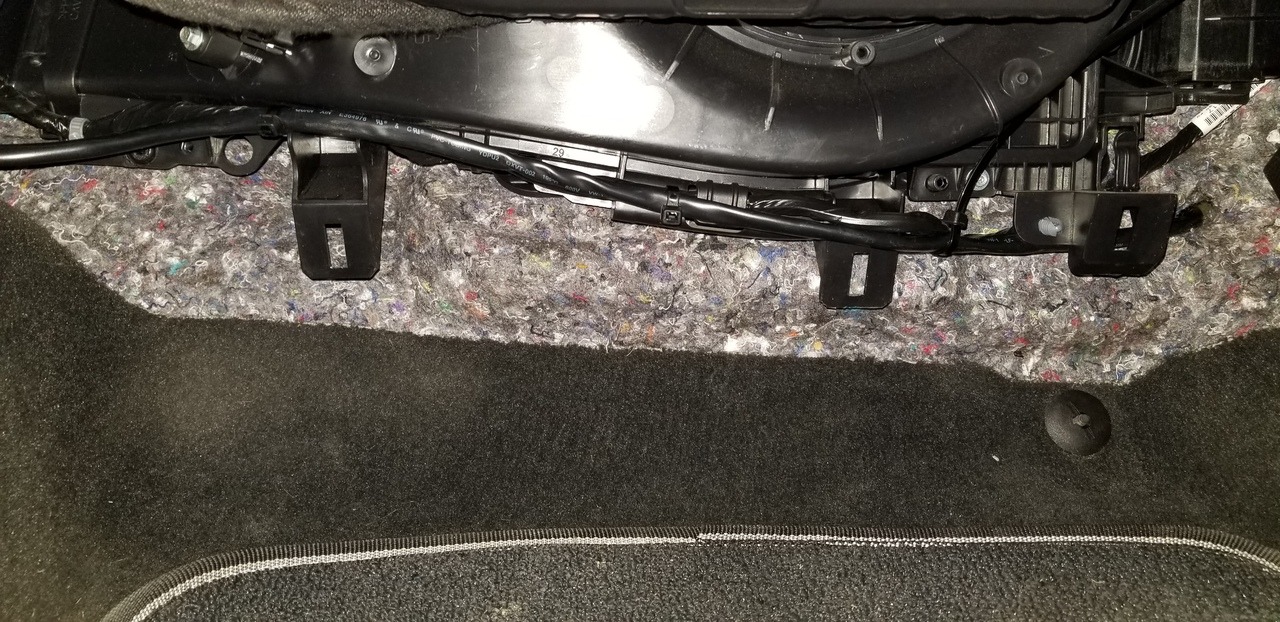 There are 4 wires for the gauge not including the O2 wire harness. A red wire goes to 12v+ (key on). Black wire to ground. White wire for 0-5v signal from gauge controller (not used in my application). Blue wire for serial port data logging. For now I'm only hooking up power and ground. I have parts ordered (DB-9 & Serial to USB converter) in order to datalog, but that will come later. I installed an "add a circuit" (Littlefuse FHM200BP) into F17 fuse slot in the fuse box near the driver door. This particular add a circuit preserves the original circuit as well as provides the new circuit. I had to bend it a bit to work in the tight space, but it works. The ground for the gauge is on the little screw behind the coiled up mess of wires. As soon as I get my Amazon shipment I will wire it for serial-to-USB for datalogging. Most of that coil of wire will be gone. The wires enter the defroster duct through a hole I drilled in it. The drill bit caught and broke the plastic a bit, so the hole ended up larger than desired. I sealed it back over with black RTV: 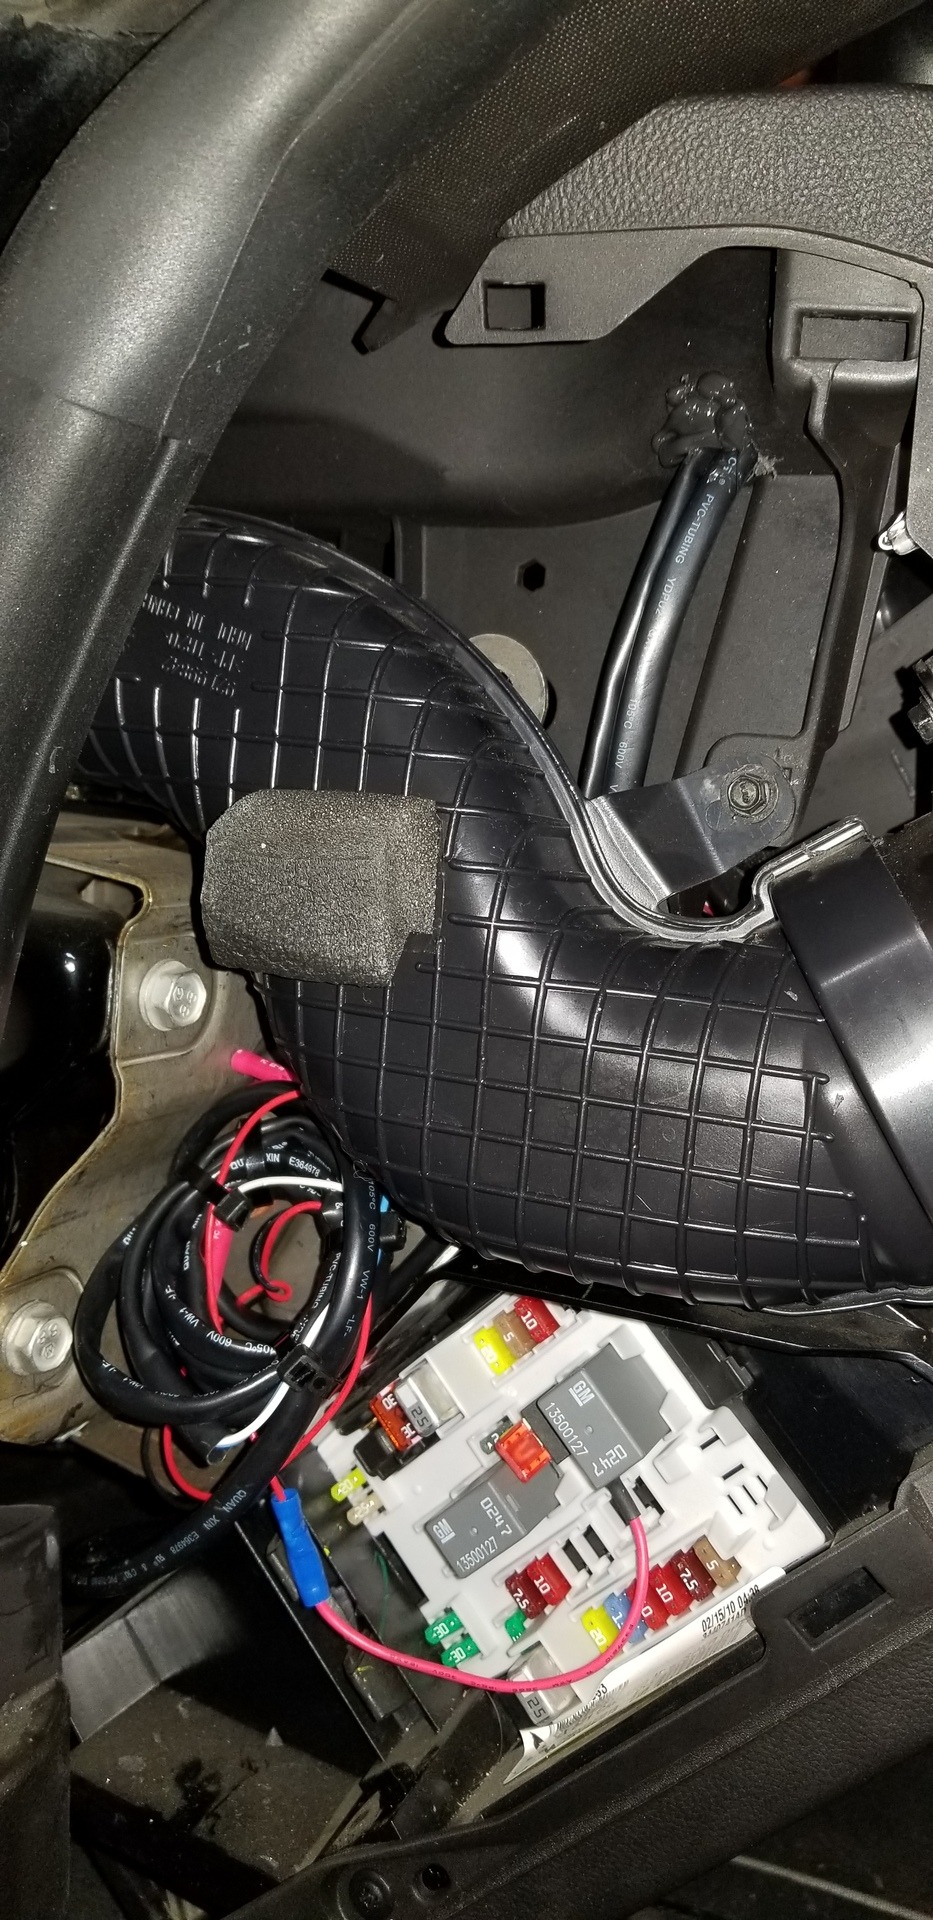 I mounted the gauge in an AeroForce single gauge pod that replaces the defroster vent. The AEM wideband and Bosch O2 sensor and wire harness are calibrated at the factory. There is no need to "open air" calibrate the sensor. Hook it up, give it a power and ground and it reads accurately after about 5 seconds of warming up. I'm really happy with the way that it looks. I have it set to read Lambda: 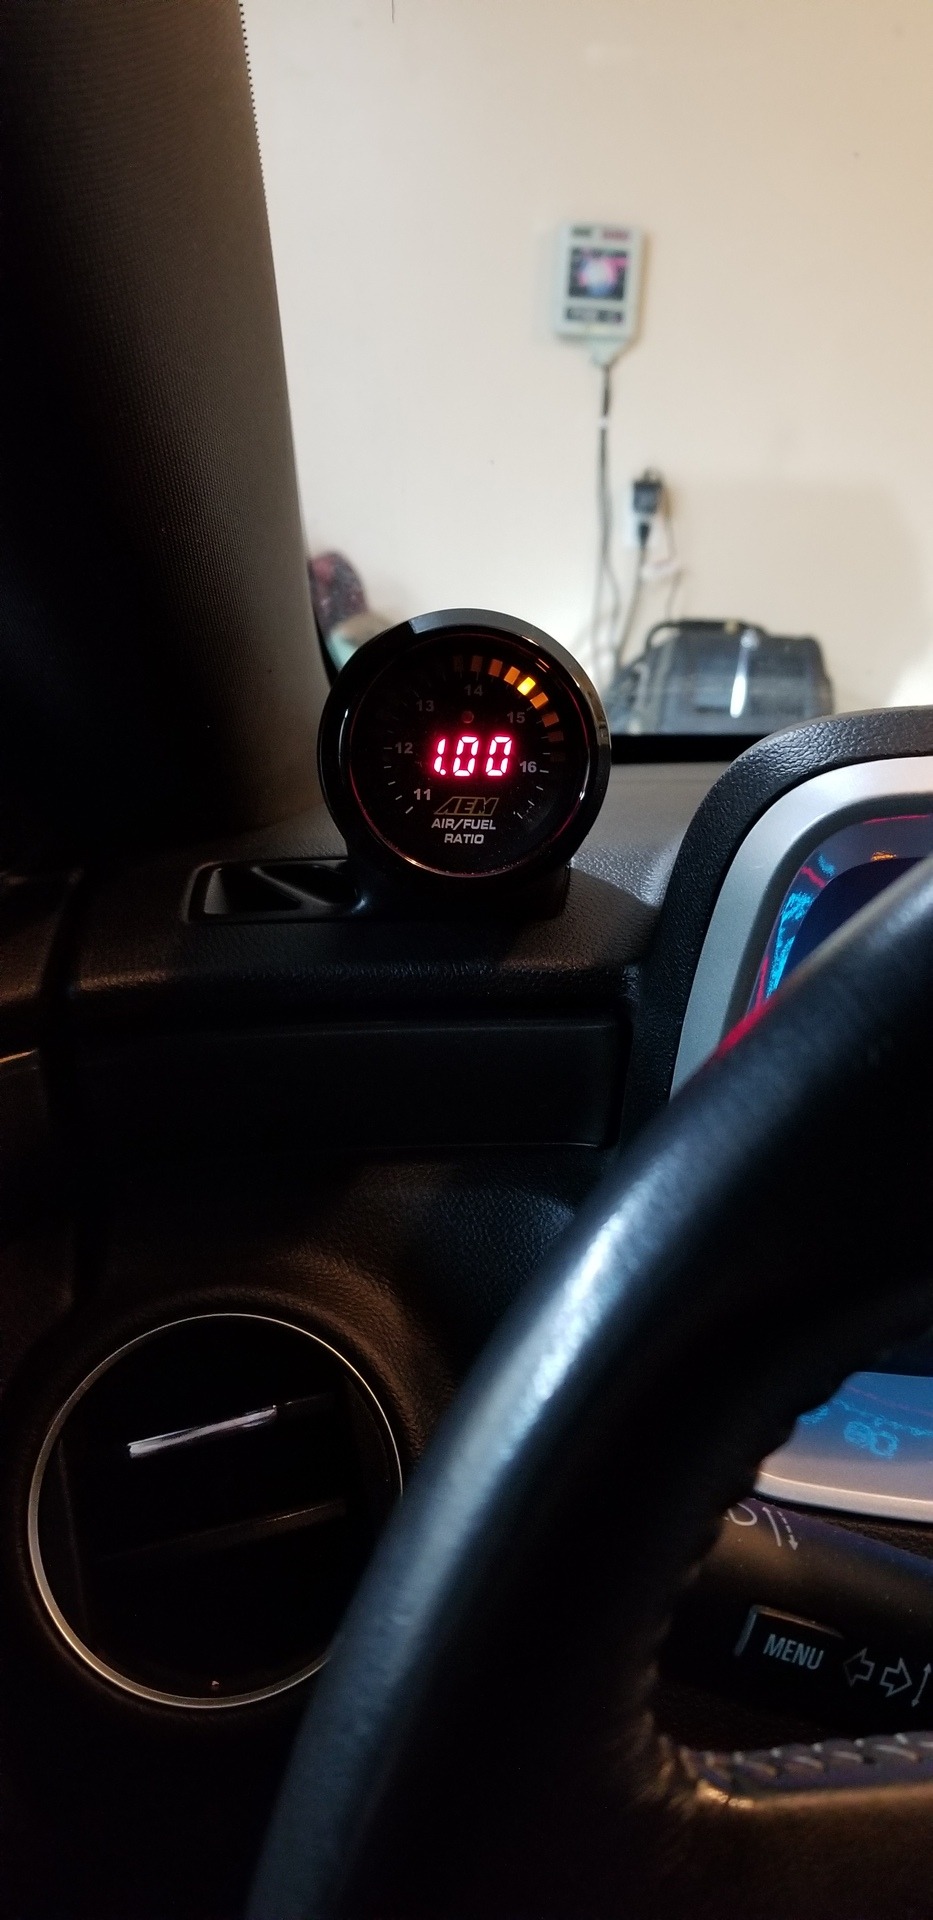
__________________
GPI SS2; EE E2 catch can; SP 1 7/8" LT Headers w/ hfc; FM AT 3" cat-back; CAI Cold Air Intake; AEM Wideband
Tuned by GPI McCleod RXT; MGW flat stick; Ram Clutch slave cylinder & hydraulic adjuster BMR cradle & diff bushings, trailing arms, toe rods & upper control arm bushings Hotchkis sub-frame brace Stop Tech Z-23 brakes 4.10 gears, Eaton Truetrac, LPW diff cover Best 1/4 mile 12.073 @ 115.68 mph 3,300 ft DA Last edited by zlathim; 03-15-2019 at 08:29 PM. Reason: Dang, typo in the thread title and I can't change it. |

|

|
|
02-11-2019, 01:40 PM
|
#2 |
|
Drives: 2010 Camaro 2SS/RS M6 Join Date: May 2009
Location: Idaho
Posts: 726
|
Wait a second. I think I like the grey bezel better with my stock gauge accents:
__________________
GPI SS2; EE E2 catch can; SP 1 7/8" LT Headers w/ hfc; FM AT 3" cat-back; CAI Cold Air Intake; AEM Wideband
Tuned by GPI McCleod RXT; MGW flat stick; Ram Clutch slave cylinder & hydraulic adjuster BMR cradle & diff bushings, trailing arms, toe rods & upper control arm bushings Hotchkis sub-frame brace Stop Tech Z-23 brakes 4.10 gears, Eaton Truetrac, LPW diff cover Best 1/4 mile 12.073 @ 115.68 mph 3,300 ft DA |
|
|
|
|
02-16-2019, 09:50 AM
|
#3 |
|
Drives: 2010 Camaro 2SS/RS M6 Join Date: May 2009
Location: Idaho
Posts: 726
|
I received the pieces that I needed to get set up to datalog. Started with cleaning up that rat's nest of wires. I ran the data wires under the dash to the glove box. This area looks a little bit better now:
 Got the DB-9 wired in: 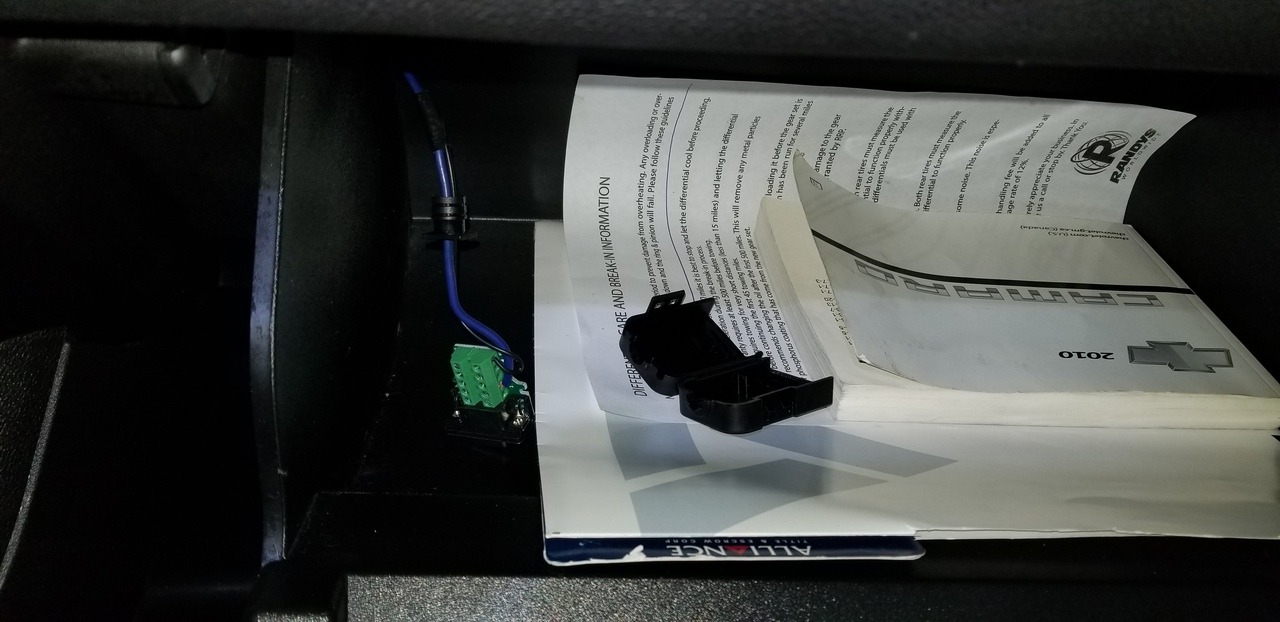 Secured in glove box with serial to USB adapter and 2.5' of cable to hook up to the laptop: 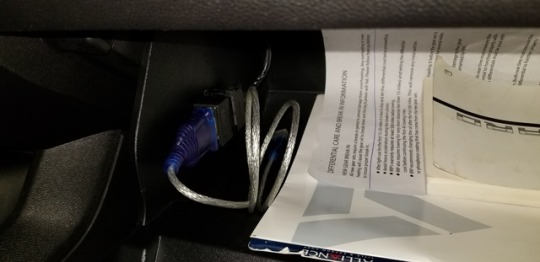
__________________
GPI SS2; EE E2 catch can; SP 1 7/8" LT Headers w/ hfc; FM AT 3" cat-back; CAI Cold Air Intake; AEM Wideband
Tuned by GPI McCleod RXT; MGW flat stick; Ram Clutch slave cylinder & hydraulic adjuster BMR cradle & diff bushings, trailing arms, toe rods & upper control arm bushings Hotchkis sub-frame brace Stop Tech Z-23 brakes 4.10 gears, Eaton Truetrac, LPW diff cover Best 1/4 mile 12.073 @ 115.68 mph 3,300 ft DA |
|
|
|
|
02-19-2019, 10:11 PM
|
#4 |
      
|
Nice write up! Great info to. Besides dealing with welding the o2 bung, what would you say everything ended up costing you?
__________________
Car mods: never enough!
 |
|
|
|
|
02-20-2019, 09:09 AM
|
#5 |
|
Drives: 2010 Camaro 2SS/RS M6 Join Date: May 2009
Location: Idaho
Posts: 726
|
Thanks!
I got the gauge/controller from Dyno Steve. They are on sale now for like $130ish. The vent gauge pod was $75, also from Steve. I think the add a circuit was about $7 or so. The DB-9 and serial to USB adapter were $8 each on amazon. I'd say I'm into this project about $250 including the $20 I gave my buddy to weld in the bung.
__________________
GPI SS2; EE E2 catch can; SP 1 7/8" LT Headers w/ hfc; FM AT 3" cat-back; CAI Cold Air Intake; AEM Wideband
Tuned by GPI McCleod RXT; MGW flat stick; Ram Clutch slave cylinder & hydraulic adjuster BMR cradle & diff bushings, trailing arms, toe rods & upper control arm bushings Hotchkis sub-frame brace Stop Tech Z-23 brakes 4.10 gears, Eaton Truetrac, LPW diff cover Best 1/4 mile 12.073 @ 115.68 mph 3,300 ft DA |
|
|
|
|
02-20-2019, 10:14 PM
|
#6 | |
|
|
Quote:
That’s awesome. Dyno Steve is a great guy. He certainly knows the LS platform tuning. You should add a full material list for the items/ parts at the top since you did such a great job documenting everything of the install. I planned ahead on this project by having o2 bungs welded in last time my headers were off. I had welded one extra bung on each side and capped for future add on etc. after seeing your write up I think I’m gonna add a A/F gauge too. I won’t need the pod though since I have a pillar pod. I’ll probably put the gauge in the circle vent where I use to have my Areoforce gauge before I got a pillar pod. The silver/ gray trim ring looks clean and stock. I like it.
__________________
Car mods: never enough!
|
|
|
|
|
|
03-01-2019, 04:23 PM
|
#7 | |
|
Drives: 2010 Camaro 2SS/RS M6 Join Date: May 2009
Location: Idaho
Posts: 726
|
Quote:
You were smart to have the bungs welded in before hand. It would have saved me some serious time if I had thought of that.
__________________
GPI SS2; EE E2 catch can; SP 1 7/8" LT Headers w/ hfc; FM AT 3" cat-back; CAI Cold Air Intake; AEM Wideband
Tuned by GPI McCleod RXT; MGW flat stick; Ram Clutch slave cylinder & hydraulic adjuster BMR cradle & diff bushings, trailing arms, toe rods & upper control arm bushings Hotchkis sub-frame brace Stop Tech Z-23 brakes 4.10 gears, Eaton Truetrac, LPW diff cover Best 1/4 mile 12.073 @ 115.68 mph 3,300 ft DA |
|
|
|
|
|
04-22-2019, 08:17 PM
|
#8 |

Drives: Never just fly under the radar Join Date: Jul 2015
Location: Kansas
Posts: 1,531
|
Nice write up. Going to be very helpful when my wideband gets here Wednesday. I did decide to try and route near the positive wire, and hood release since there was already a hole there with an unused grommet.
My bung was already welded in drivers side on inside of collecter about the 2 o'clock position. Do you have any advice on routing my O2 wiring to avoid the heat. The car has straight pipes aka no converters so no other sensors down there as they have been deleted. Any thoughts on routing the sensor wiring are appreciated.
__________________
1-8-4-3-6-5-7-2
Old Skool |
|
|
|
|
04-22-2019, 09:29 PM
|
#9 |
|
Drives: Z06 wannabe Join Date: Feb 2015
Location: Daytona Beach, FL
Posts: 1,200
|
Your friend did a nice job welding, I have been wanting to get a tig welder in my shop too.
__________________
Apex Focused
|
|
|
|
|
04-22-2019, 10:17 PM
|
#10 | ||
|
Drives: 2010 Camaro 2SS/RS M6 Join Date: May 2009
Location: Idaho
Posts: 726
|
Quote:
Quote:
__________________
GPI SS2; EE E2 catch can; SP 1 7/8" LT Headers w/ hfc; FM AT 3" cat-back; CAI Cold Air Intake; AEM Wideband
Tuned by GPI McCleod RXT; MGW flat stick; Ram Clutch slave cylinder & hydraulic adjuster BMR cradle & diff bushings, trailing arms, toe rods & upper control arm bushings Hotchkis sub-frame brace Stop Tech Z-23 brakes 4.10 gears, Eaton Truetrac, LPW diff cover Best 1/4 mile 12.073 @ 115.68 mph 3,300 ft DA |
||
|
|
|
|
04-23-2019, 12:20 AM
|
#11 |
|
Drives: Never just fly under the radar Join Date: Jul 2015
Location: Kansas
Posts: 1,531
|
Thanks for the reply and suggestion, great idea with the heat tape for safety.
2nd that your buddy did a nice job welding for you. My brother in-law is a welder but rarely talk him in to anything. Mark must be a good friend!
__________________
1-8-4-3-6-5-7-2
Old Skool |
|
|
|
|
04-26-2019, 02:49 PM
|
#12 |
|
Drives: Never just fly under the radar Join Date: Jul 2015
Location: Kansas
Posts: 1,531
|
So finally got the plug out of the bung. Just took soaking it overnight in penetrating oil, some heat, and the use of a lift to get a better angle. Something to be said for using anti-seize and not putting two different metal types together.
Almost would have rather took the header off and did it the way you had to, almost! Again nice job and write up.
__________________
1-8-4-3-6-5-7-2
Old Skool |
|
|
|
|
04-27-2019, 10:36 AM
|
#13 |
 Drives: 2015 Black rs/ss/1le Join Date: Apr 2018
Location: PA
Posts: 271
|
Nice! Thanks for the write up!
|
|
|
|
|
11-18-2021, 08:11 AM
|
#14 |
 Drives: 2010 Camaro SS Join Date: May 2021
Location: Jacksonville, NC
Posts: 7
|
I’m confused as to how you actually connected the 2 in 1 adapter to the fuse. Do you have a picture of how that connection is made?
|
|
|
|
|
|
|
|
 |
|
|


