You are browsing camaro5 

|
 06-02-2014, 12:26 PM
|
#15 | |
|
2010 2SS/RS M6

Drives: 2010 2SS/RS M6 Join Date: Jun 2010
Location: Auckland, NZ
Posts: 1,482
|
Quote:
Bought them from Gary's Customs: http://www.camaro5.com/forums/showthread.php?t=66848
__________________
2/7/2014: 419 hp, 419 tq
Cosmetic: ZL1 front w/mailslot, painted stripes, powdercoated SS rims, tow hook, and full chrome delete Suspension: Pfadt subframe bushings, Pfadt rear UCA bushings, Z28 Upper control arms, Spohn trailing arms with BMR trailing arm & differential bushings, ZL1 Toe Rods and springs, Prothane radius arm inserts & steering rack bushing, Pfadt Sport front sway, FE4 conversion w/ DS rear sway, Pfadt strut brace Drivetrain: RMCR tune, CAI intake, Kooks headers, hi-flo cats & exhaust, VMAX TB, ZL1 fuel pump, LSR Tri-Ax shifter Bumblebee Racecar Build |
|

|

|
|
06-05-2014, 10:21 AM
|
#16 |
|
2010 2SS/RS M6
Drives: 2010 2SS/RS M6 Join Date: Jun 2010
Location: Auckland, NZ
Posts: 1,482
|
Project: Dynamat the Trunk is complete!!
I ordered the 36sf bulk pack from Amazon for only $140 shipped (9 sheets, each sheet 18" by 32"). What a PITA going around the weird shapes found in the trunk. The floor of the trunk is not flat, the walls have weird bends, curves, welds, and some wide open "caverns", and don't even get me started on all the miscellaneous electrical stuff held down with impossible to remove plastic clips. All of this hidden behind that nicely shaped carpeting. The first night I spent about 2 hours getting the flat part of the trunk floor, and started working on the driver's side wall. The floor wasn't too bad because I could put down half-sheets at a time without having to dodge much. The wall however, was another story. I found myself cutting pieces down to 5x5 squares so I could wrap around the corners, bends, angles, etc. I think the part that made it even more difficult was trying to reach in from the back of the car, bend down, and wrap around to the left just to get just a little bit of leverage on the roller (I ended up using the rounded handle of a screwdriver) to get the mat pressed into all of the folds and depressions. At one point I was actually sitting inside the trunk of the car trying to get a better angle. I am glad I never got a picture of it, because I really don't want to remember that... After that little bit was done, I did notice an improvement in the noise (or reduction in noise). It wasn't quite as good as I hoped it would be, but it was an improvement none-the-less. It was probably louder than it should have been because I did not fully reassemble the trunk as I only put the spare tire cover on and put the rear seat back up just so I could put the sub back in the trunk and be able to drive to work. It was a few days later before I had some more free time to work on it again, and that night I spent another hour getting the rear wall (around the tail lights, tie down hooks, trunk latch, etc), and the passenger side wall done. These weren't as bad simply because I had gotten used to working with the material and knew roughly what shapes were needed. Again, another slight improvement in sound reduction, but still not where I wanted to be. At this point, the only areas really left were around the spare tire compartment and the underside of the window (where the speakers are mounted). I didn't really want to do the underside of the window because I still want to replace those speakers at some point and don't want to hinder that work. I will probably do that area once the speakers are done... Which left only the spare tire compartment. I didn't think this area would be necessary because it has the relatively soft plastic cover. But I did it last night anyways. Well not all of it, mostly because I was lazy and didn't want to remove the battery, so I only did the sides (down to the weld line around the bottom). That made a HUGE difference. Once the trunk was put back together I did a quick cruise around the neighborhood and tried to get the RPM's into the annoying drone range and the sound was a TON better. It's still loud, and it still drones a little, but now it's not headache-inducing loud. I think the big difference is that the reverberation coming from the trunk is gone so I only hear the exhaust and not the vibrating steel of the trunk. When all was said and done, I still have a little more than 2.5 sheets left, so I can still finish out a few other places if I get the ambition. Here is a pic: 
__________________
2/7/2014: 419 hp, 419 tq
Cosmetic: ZL1 front w/mailslot, painted stripes, powdercoated SS rims, tow hook, and full chrome delete Suspension: Pfadt subframe bushings, Pfadt rear UCA bushings, Z28 Upper control arms, Spohn trailing arms with BMR trailing arm & differential bushings, ZL1 Toe Rods and springs, Prothane radius arm inserts & steering rack bushing, Pfadt Sport front sway, FE4 conversion w/ DS rear sway, Pfadt strut brace Drivetrain: RMCR tune, CAI intake, Kooks headers, hi-flo cats & exhaust, VMAX TB, ZL1 fuel pump, LSR Tri-Ax shifter Bumblebee Racecar Build |
|
|
|
|
06-07-2014, 11:30 AM
|
#17 |
|
2010 2SS/RS M6
Drives: 2010 2SS/RS M6 Join Date: Jun 2010
Location: Auckland, NZ
Posts: 1,482
|
Just ordered the majority of the remaining suspension mods. It should give me something to do over 4th of July weekend.
List of things on their way: Rear upper control arm bushings Trailing arms + outer bushings subframe bushings This only leaves coilovers on my suspension wish list. I won't say which ones or where I got them, you'll just have to stay tuned for the install post coming soon... PS. I also got some new LEDs for the front fogs & DRL's. Thanks to Gen5DIY. Pics of those will go up once installed as well.
__________________
2/7/2014: 419 hp, 419 tq
Cosmetic: ZL1 front w/mailslot, painted stripes, powdercoated SS rims, tow hook, and full chrome delete Suspension: Pfadt subframe bushings, Pfadt rear UCA bushings, Z28 Upper control arms, Spohn trailing arms with BMR trailing arm & differential bushings, ZL1 Toe Rods and springs, Prothane radius arm inserts & steering rack bushing, Pfadt Sport front sway, FE4 conversion w/ DS rear sway, Pfadt strut brace Drivetrain: RMCR tune, CAI intake, Kooks headers, hi-flo cats & exhaust, VMAX TB, ZL1 fuel pump, LSR Tri-Ax shifter Bumblebee Racecar Build |
|
|
|
|
06-09-2014, 09:26 AM
|
#18 |
|
2010 2SS/RS M6
Drives: 2010 2SS/RS M6 Join Date: Jun 2010
Location: Auckland, NZ
Posts: 1,482
|
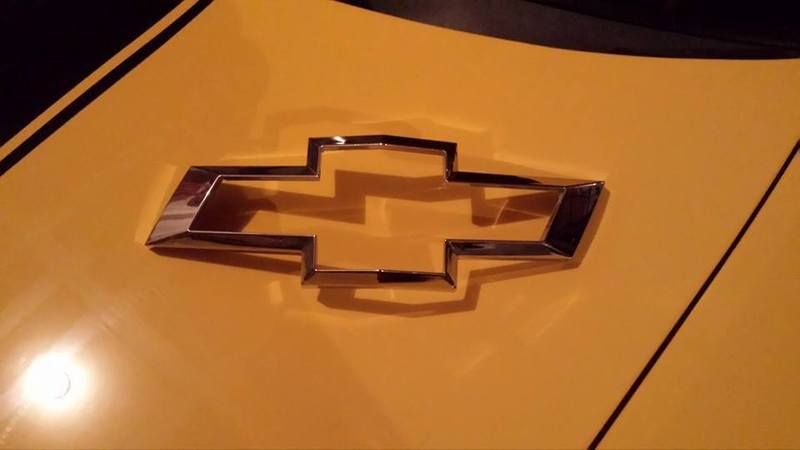
Made a "flow-tie" yesterday. Not quite sure what to do with it yet. If it goes on the car, it definitely won't be chrome, but I'm debating whether to go with black (ghost look), yellow since everything else is black/yellow on the outside of the car, or if I go with red since Bee's is red in the 2nd movie. Then there is the whole issue of trying to figure out how to mount it.
__________________
2/7/2014: 419 hp, 419 tq
Cosmetic: ZL1 front w/mailslot, painted stripes, powdercoated SS rims, tow hook, and full chrome delete Suspension: Pfadt subframe bushings, Pfadt rear UCA bushings, Z28 Upper control arms, Spohn trailing arms with BMR trailing arm & differential bushings, ZL1 Toe Rods and springs, Prothane radius arm inserts & steering rack bushing, Pfadt Sport front sway, FE4 conversion w/ DS rear sway, Pfadt strut brace Drivetrain: RMCR tune, CAI intake, Kooks headers, hi-flo cats & exhaust, VMAX TB, ZL1 fuel pump, LSR Tri-Ax shifter Bumblebee Racecar Build Last edited by Dexman1349; 03-07-2016 at 02:56 PM. |
|
|
|
|
06-18-2014, 03:25 PM
|
#19 |
|
2010 2SS/RS M6
Drives: 2010 2SS/RS M6 Join Date: Jun 2010
Location: Auckland, NZ
Posts: 1,482
|
Bee spent the weekend at Denver Comiccon. I wasn't able to be there nearly as long as I wanted, but the Colorado Movie Car club always ends up with a crowd.
A pic of the setup before doors opened Friday morning:  A few pics from others posted online: 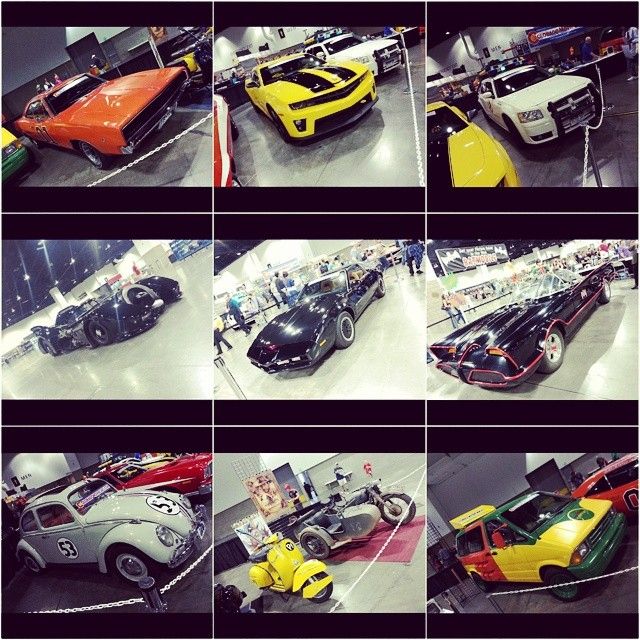 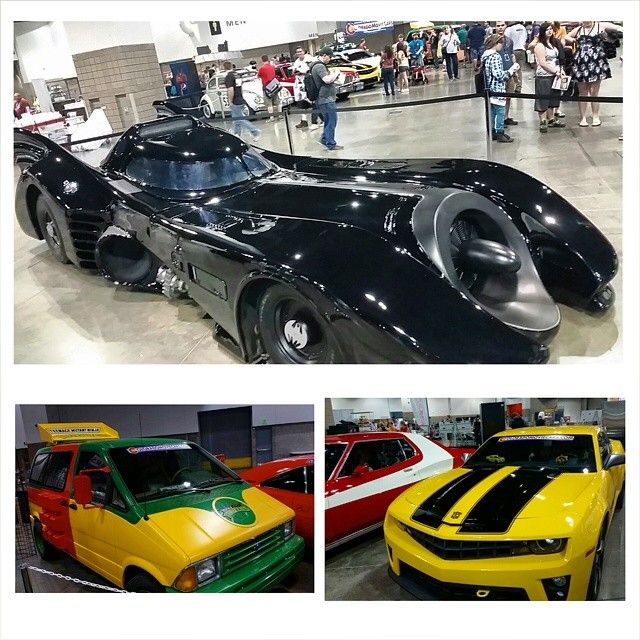 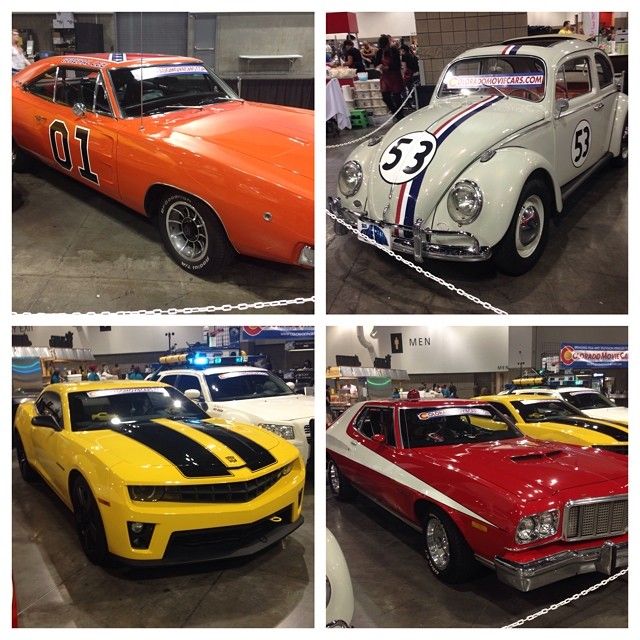 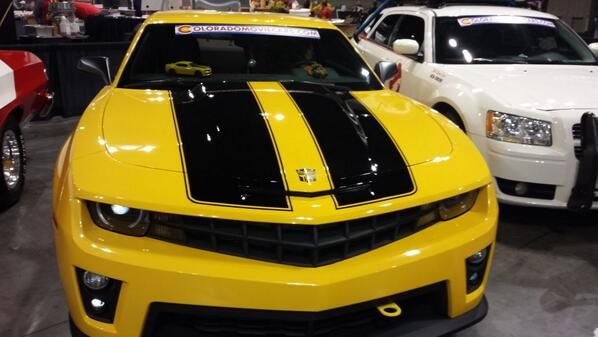
__________________
2/7/2014: 419 hp, 419 tq
Cosmetic: ZL1 front w/mailslot, painted stripes, powdercoated SS rims, tow hook, and full chrome delete Suspension: Pfadt subframe bushings, Pfadt rear UCA bushings, Z28 Upper control arms, Spohn trailing arms with BMR trailing arm & differential bushings, ZL1 Toe Rods and springs, Prothane radius arm inserts & steering rack bushing, Pfadt Sport front sway, FE4 conversion w/ DS rear sway, Pfadt strut brace Drivetrain: RMCR tune, CAI intake, Kooks headers, hi-flo cats & exhaust, VMAX TB, ZL1 fuel pump, LSR Tri-Ax shifter Bumblebee Racecar Build |
|
|
|
|
06-23-2014, 09:42 AM
|
#20 |
|
2010 2SS/RS M6
Drives: 2010 2SS/RS M6 Join Date: Jun 2010
Location: Auckland, NZ
Posts: 1,482
|
Call me lame, but I installed a set of Husky Liner splash guards over the weekend. As I was down there I saw how absolutely pitted those lower fenders were and immediately regretted not having done it earlier. Good news is that they are compatible with the ZL1 side skirts (both shape and color/texture), so I will still be able to install those down the road. I really like how they look. The only thing I adjusted on them were the holes for the front guards were shifted about 1/2" so the guards didn't stick out as far. Overall, I'm really impressed with them.
Sorry for the crappy cell phone pics: 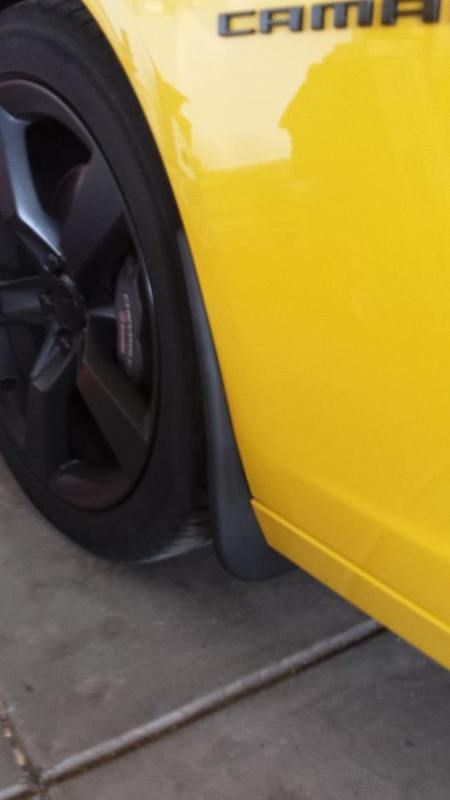 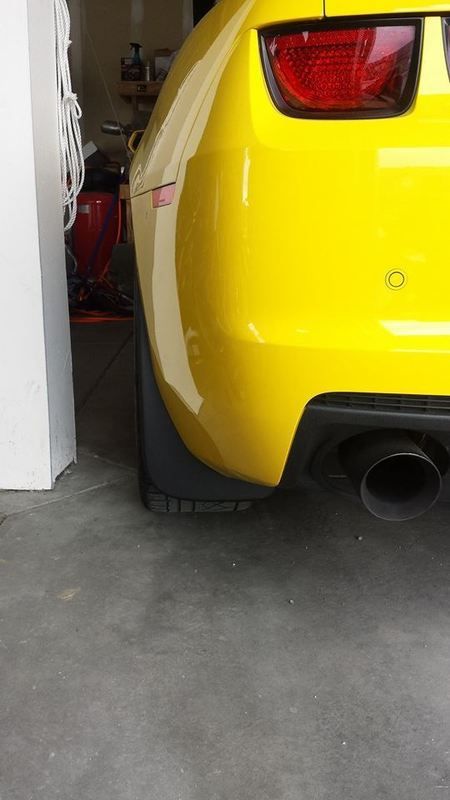
__________________
2/7/2014: 419 hp, 419 tq
Cosmetic: ZL1 front w/mailslot, painted stripes, powdercoated SS rims, tow hook, and full chrome delete Suspension: Pfadt subframe bushings, Pfadt rear UCA bushings, Z28 Upper control arms, Spohn trailing arms with BMR trailing arm & differential bushings, ZL1 Toe Rods and springs, Prothane radius arm inserts & steering rack bushing, Pfadt Sport front sway, FE4 conversion w/ DS rear sway, Pfadt strut brace Drivetrain: RMCR tune, CAI intake, Kooks headers, hi-flo cats & exhaust, VMAX TB, ZL1 fuel pump, LSR Tri-Ax shifter Bumblebee Racecar Build Last edited by Dexman1349; 03-07-2016 at 02:58 PM. |
|
|
|
|
06-27-2014, 10:46 AM
|
#21 | |
|
2010 2SS/RS M6
Drives: 2010 2SS/RS M6 Join Date: Jun 2010
Location: Auckland, NZ
Posts: 1,482
|
Quote:
__________________
2/7/2014: 419 hp, 419 tq
Cosmetic: ZL1 front w/mailslot, painted stripes, powdercoated SS rims, tow hook, and full chrome delete Suspension: Pfadt subframe bushings, Pfadt rear UCA bushings, Z28 Upper control arms, Spohn trailing arms with BMR trailing arm & differential bushings, ZL1 Toe Rods and springs, Prothane radius arm inserts & steering rack bushing, Pfadt Sport front sway, FE4 conversion w/ DS rear sway, Pfadt strut brace Drivetrain: RMCR tune, CAI intake, Kooks headers, hi-flo cats & exhaust, VMAX TB, ZL1 fuel pump, LSR Tri-Ax shifter Bumblebee Racecar Build |
|
|
|
|
|
06-27-2014, 10:58 AM
|
#22 |
|
2010 2SS/RS M6
Drives: 2010 2SS/RS M6 Join Date: Jun 2010
Location: Auckland, NZ
Posts: 1,482
|
On Wednesday I installed the front ZL1 springs on Bee. Didn't have enough time to get to the rear because of time constraints, but those will be done over 4th of July weekend as mentioned above.
Now on to the spring install. Using the DIY threads here, doing the front springs were a lot easier than I had expected. The biggest help was having the nut/bolt sizes laid out ahead of time so I wasn't searching for the correct wrenches. Overall, it was a fairly straight forward install: Disconnect ABS and brake lines from strut. Disconnect sway bar endlink from strut. Remove dual 24mm bolts between knuckle and strut remove nut at the top of the strut tower ---> remove spring/strut assembly from car. Remove nut at the top of assembly (I used some clamps to hold back some of the spring compression as I undid the nut to minimize spring "pop" once the nut released) swap springs, and reassemble in reverse order as steps above. Only real issue that came up during the install was that the nut on the top of the strut tower that holds the spring/strut assembly in place is a thin one and it was difficult keeping the wrench on it. It kept slipping off and one of those slips ended up scraping across the top of the fender causing a series of paint chips about an inch long and 1/8" wide. Because of the shear number of other paint chips on the outside of the car I will just add this to the running tally to be fixed once Bee is removed from daily driver status. Still doesn't mean I'm happy about it though... I put a tape measure to the car to compare the before and after, and noticed that the driver's side had dropped about a half inch, but the passenger side was still at stock height. I double checked the tags to make sure the springs were correct and they were. I let the car sit overnight, drove it about 15 miles, then timed the sway bars and now the car sits much closer to level. I still need to time the rest of the front bushings and hope that will help along with a bit more time to settle. When all was said and done I ended up with about a 1/2" drop in the front. It really isn't noticeable when looking at the car. From a performance standpoint I still have yet to feel anything, but I really haven't had a chance to test it out yet. This weekend I plan on pushing the car a bit to see if they feel much differently than stock. Pics will be posted once the rest of the suspension is done next weekend. After those are installed, the only thing I have left on my to-do list for the suspension will be to install the coilovers.
__________________
2/7/2014: 419 hp, 419 tq
Cosmetic: ZL1 front w/mailslot, painted stripes, powdercoated SS rims, tow hook, and full chrome delete Suspension: Pfadt subframe bushings, Pfadt rear UCA bushings, Z28 Upper control arms, Spohn trailing arms with BMR trailing arm & differential bushings, ZL1 Toe Rods and springs, Prothane radius arm inserts & steering rack bushing, Pfadt Sport front sway, FE4 conversion w/ DS rear sway, Pfadt strut brace Drivetrain: RMCR tune, CAI intake, Kooks headers, hi-flo cats & exhaust, VMAX TB, ZL1 fuel pump, LSR Tri-Ax shifter Bumblebee Racecar Build |
|
|
|
|
07-01-2014, 04:32 PM
|
#23 |
           
Drives: '69 SS Convertible Join Date: May 2009
Location: DFW, TX
Posts: 7,111
|
Don't for get to time your bushings. By the time you're done you'll mostly just have to worry about the front since you'll be replacing pretty much all your rear stuff.
Nice build thread. Keep the pictures coming. You're going to love how much firmer your car will feel after doing the bushings and UCAs.
__________________
-2010 Camaro 2SS | M6 | VR w/White Stripes | 1 3/4" KOOKS - 3" Magnaflow | LPE 3.91 gears | ADM tuned | Halltech w/ADM Scoop | Spohn/BMR Trailing Arm/Toe Rod | BC Coilovers| Pedders FE4 ZL1 swaybars | Cradle/Diff/Radius Rod bushings | VMax TB | Morimoto Projectors | MGW shifter | Red Calipers
Build Journal  |
|
|
|
|
07-03-2014, 08:43 AM
|
#24 |
|
2010 2SS/RS M6
Drives: 2010 2SS/RS M6 Join Date: Jun 2010
Location: Auckland, NZ
Posts: 1,482
|
Follow-up on the flow-tie. I'm not entirely sold on it, so I don't think it will be permanently installed just yet but it does stay in place if I take it to a car show...
 Tomorrow I will be finishing up my suspension mods.
__________________
2/7/2014: 419 hp, 419 tq
Cosmetic: ZL1 front w/mailslot, painted stripes, powdercoated SS rims, tow hook, and full chrome delete Suspension: Pfadt subframe bushings, Pfadt rear UCA bushings, Z28 Upper control arms, Spohn trailing arms with BMR trailing arm & differential bushings, ZL1 Toe Rods and springs, Prothane radius arm inserts & steering rack bushing, Pfadt Sport front sway, FE4 conversion w/ DS rear sway, Pfadt strut brace Drivetrain: RMCR tune, CAI intake, Kooks headers, hi-flo cats & exhaust, VMAX TB, ZL1 fuel pump, LSR Tri-Ax shifter Bumblebee Racecar Build Last edited by Dexman1349; 03-07-2016 at 02:58 PM. |
|
|
|
|
07-03-2014, 10:23 AM
|
#25 |

Drives: Camaro RS/SS, 996TT, E90 335i Join Date: Feb 2012
Location: 1721 E. Lambert Rd. Unit C, La Habra, Ca 90631
Posts: 592
|
I like it. May want to play around on colors. Id be curious for a matching yellow. Glad to see this coming along!
|
|
|
|
|
07-06-2014, 03:25 PM
|
#26 |
|
2010 2SS/RS M6
Drives: 2010 2SS/RS M6 Join Date: Jun 2010
Location: Auckland, NZ
Posts: 1,482
|
Time for an update on the suspension:
For the TL;DR group: Started on the 3rd, finished up yesterday afternoon, and will need an alignment on Monday, but here's what's been done (note the front springs have already been installed): 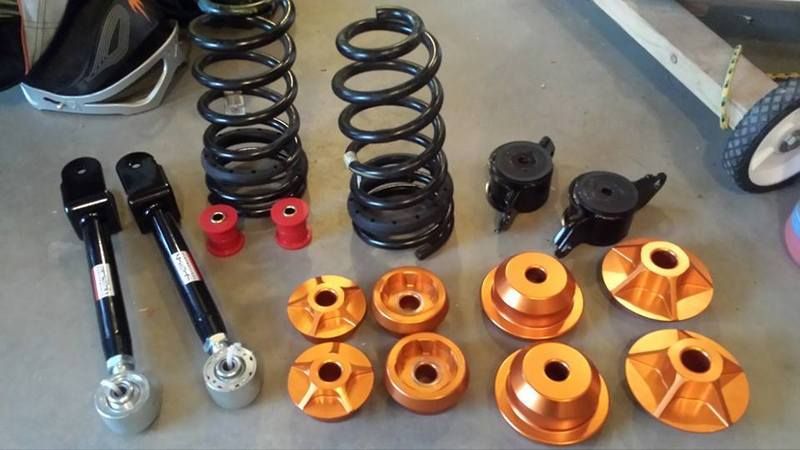 Pfadt solid subframe bushings (Classifieds here on C5) Spohn trailing arms with Del-sphere ends (Thanks to JDP Motorsports) BMR outer trailing arm bushings (JDP Motorsports) Pfadt upper control arm bushings (Camaro club member here in Denver) ZL1 Springs (Classifieds on C5) I'm not going to lie, the install was challenging simply because the only guidance I had were a few posts here on C5 and some youtube videos and I was doing the entire thing in my garage by myself. Full write up: First step was to get everything out. Thought I would start Thursday evening at 7ish and get some of the big things out of the way. Get the car up on jackstands, remove the wheels, loosen the cradle to improve access, this was going to be a challenge, but I knew I could do it. No big deal at first because there were only a handful of nuts/bolts to undo to get the major hardware pieces out (trailing arms, strut/spring assembly, knuckle, subframe, etc). They were all on pretty tight, but with the use of a breaker bar managed to get everything off. I had the passenger side taken apart in little over an hour, leaving only the bushing removal and then reassembly. Figured I would start on the outer trailing arm bushing. Had some PVC pieces, a bolt and washer ready to make my own press. Simple enough right? Nope. 45 minutes and 3 destroyed washers later it was about halfway out. Enter the torch. That didn't help much either, so back to the press. Another 30 minutes of messing around with it I finally got it out. It was now 11pm and everything above my waist hurt. Not sore, I straight up hurt. Those bolts are torqued on there tight, and that stupid trailing arm bushing can suck the <insert choice words here>. Off to bed. Friday morning. Somehow I hurt more than the night before, but I had to get the car done because I need to drive to work on Monday, so back to work at 10am. I removed the Pedders inserts I had installed a couple years ago. Only thing left to remove were the subframe bushings before I could start reassembling the passenger side. No big deal, right? I had read enough DIY threads to know what to do. Had a torch ready, had my jackstands and jack in place to remove the front bushing, then nothing. Didn't budge. I was lifting my car off of the ground supported only by a single socket. I quickly learned these bushings would be a stronger candidate than the trailing arm bushings to <insert inappropriate comment here>. Neighbor walks by. Lucky for me he's a bit of a gearhead too, so we start thinking of ways to get those bastards out. Tried some of that spray stuff that's supposed to loosen things up (like WD-40). Didn't work. Car was too low to get the saws-all under there to start hacking up the front one. What about a jig saw? Blade wasn't long enough, but it was a good start. Neighbor leaves and heads down to the parts store to get some stuff for his own car but said he would check to see if there were any pointers. While he was gone, managed to get the rear subframe bushing out thanks to the saws-all (more clearance in the back) and a small hand saw. Now I was starting to understand how these f*ckers were wedged in there. Back to work on the front one. Neighbor returns and tells me I have been heating the wrong area with the torch. Heat the inner ferrule, not the outer casing. 5 minutes later the ferrule was out. Another 10 minutes with the hand saw and the casing was out. Time to install the new bushings, but the <choice comment here> cradle wasn't low enough to clear the rear "peg". Won't go down any further because it's basically held up by the exhaust. Time to remove the exhaust. 45 minutes later I had everything else done. Pieces and tools scattered across the garage floor and driveway, time to swap the springs. Finally something I know how to do. 15 minutes later I was re-installing the spring assembly. Another 30 more minutes and I had everything back in place but not tightened because I forgot to get blue Loctite  . .Wife comes out and shuts me down for the day because we need to get ready for the 4th of July party at the neighbor's house. Good enough stopping point for the day. Plenty of bbq, beer, explosions, and friends to make any man happy and certainly take your mind off of the continued pain in every joint. Saturday morning, back to work. After learning how everything was to be done on the passenger side, the driver's side was done in only a couple of hours. Insane how easily things go once you've been through it. Managed to get some Loctite the night before, so it was just a matter of reassembly and tighten to spec (whatever that means, so I just tighten to the point I can't tighten anymore). Had to run a few errands, so later that evening I was able to return to get the wheel well liners reinstalled (I was amazed how much space there was once they were out of the way), put the wheels/tires back on and take it for a spin. HOLY $#!+, the car feels better!! Absolutely planted to the ground, no body lean at all, no wheel hop. Car feels like a go cart, and I LOVE IT!!! I can't wait to see how it will feel once the bushings are properly timed and the alignment is done on Monday. For those curious on installing the ZL1 springs on an SS, they feel a lot stiffer, but ride doesn't feel compromised. Still smooth enough to cruise down the highway, but there is no "float" at all. The car also sits about 1/2" to 3/4" lower. I will get a full measurement once the bushings are timed because it's not quite sitting level yet.
__________________
2/7/2014: 419 hp, 419 tq
Cosmetic: ZL1 front w/mailslot, painted stripes, powdercoated SS rims, tow hook, and full chrome delete Suspension: Pfadt subframe bushings, Pfadt rear UCA bushings, Z28 Upper control arms, Spohn trailing arms with BMR trailing arm & differential bushings, ZL1 Toe Rods and springs, Prothane radius arm inserts & steering rack bushing, Pfadt Sport front sway, FE4 conversion w/ DS rear sway, Pfadt strut brace Drivetrain: RMCR tune, CAI intake, Kooks headers, hi-flo cats & exhaust, VMAX TB, ZL1 fuel pump, LSR Tri-Ax shifter Bumblebee Racecar Build Last edited by Dexman1349; 03-07-2016 at 03:01 PM. |
|
|
|
|
07-07-2014, 12:19 PM
|
#27 |

Drives: Camaro Justice Join Date: Jun 2007
Location: Virginia
Posts: 20,174
|
Alignment?
|
|
|
|
|
07-07-2014, 12:25 PM
|
#28 |
|
SoCal HT5 COTW 4/21/13

Drives: 2011 SS/RS Blown & Cammed LS3 Join Date: Sep 2011
Location: Sandy Eggo
Posts: 3,047
|
Looks like fun
__________________
 |
|
|
|
|
|
|
|
 |
|
|


