You are browsing camaro5 

|
 12-14-2014, 06:39 PM
|
#57 |
|
'It's an experiment'

Drives: [COTW 2/09/15] '11 GPI LSA SC Z/LE Join Date: May 2014
Location: Dallas TX
Posts: 8,694
|
So, here is the wiring for the MyLink all setup. You'll notice I had to grind out part of the back support so the Blue GPS cable would fit (per instructions). Also, I added tape to the metal support in order to prevent the wires from 'chaffing' when being pulled on -- that thing is SHARP.
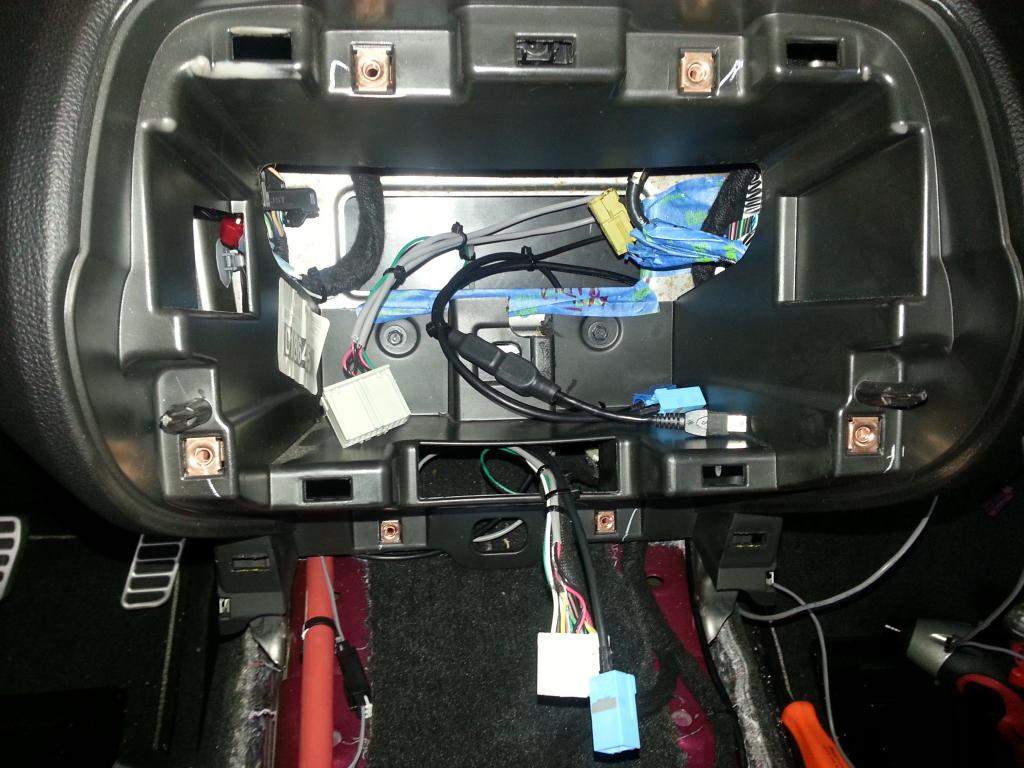 Also, the MyLink I have does not have the upper supports so I used some thermal bubble wrap I had to prevent 'noise' from vibrations. 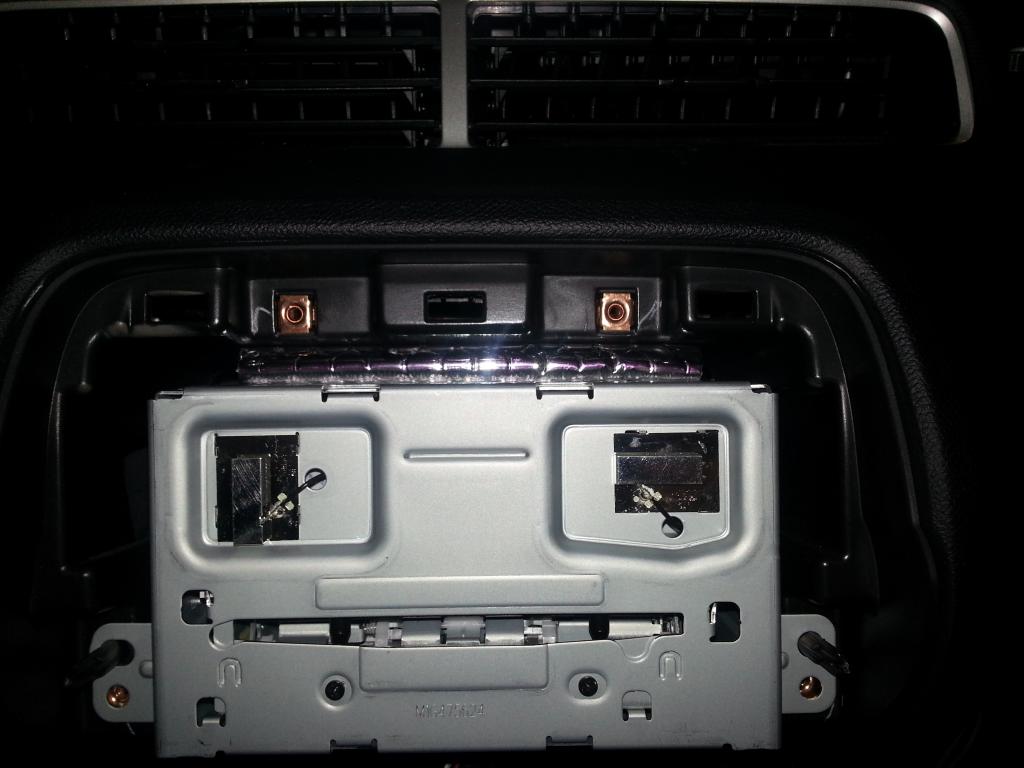 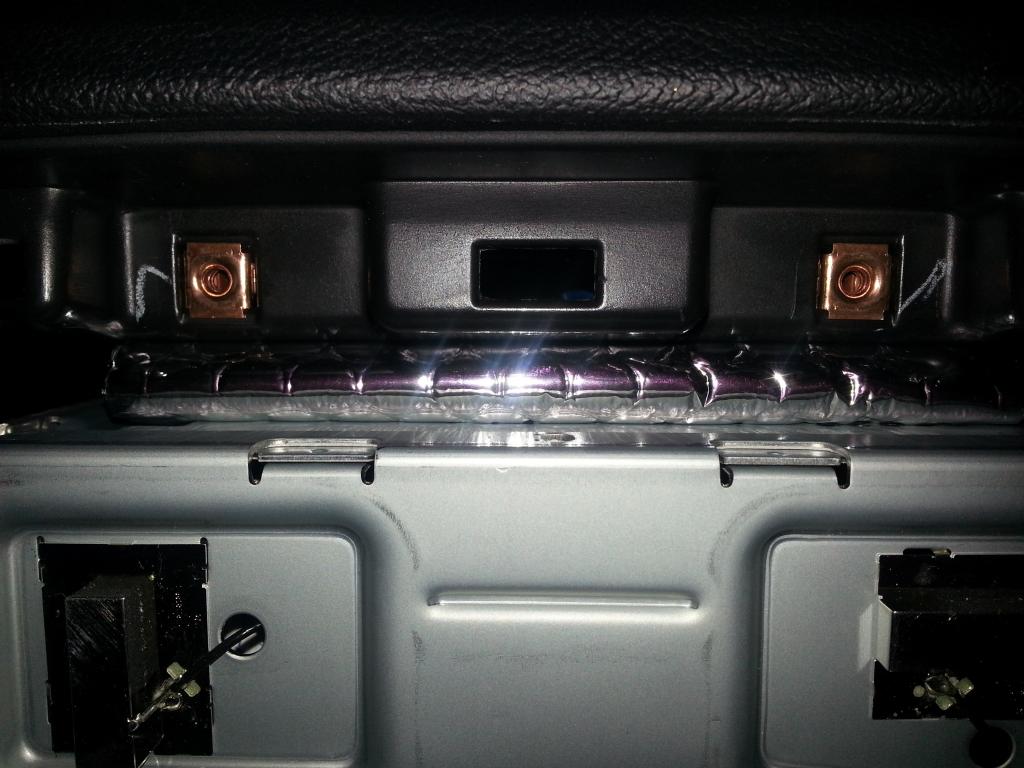 Once I get the connector pins for the OnStar J2 connector, I'll put on the face and do a test run. Once I'm sure things are good, I'll button things up (always check before you bolt things up -- ;o). After that, time for the Heads, Cam, and LSA Supercharger! -Don Last edited by hammdo; 07-02-2017 at 12:03 AM. |

|

|
|
12-14-2014, 07:42 PM
|
#58 |
|
'It's an experiment'
Drives: [COTW 2/09/15] '11 GPI LSA SC Z/LE Join Date: May 2014
Location: Dallas TX
Posts: 8,694
|
Went ahead and bolted in the face plate...
 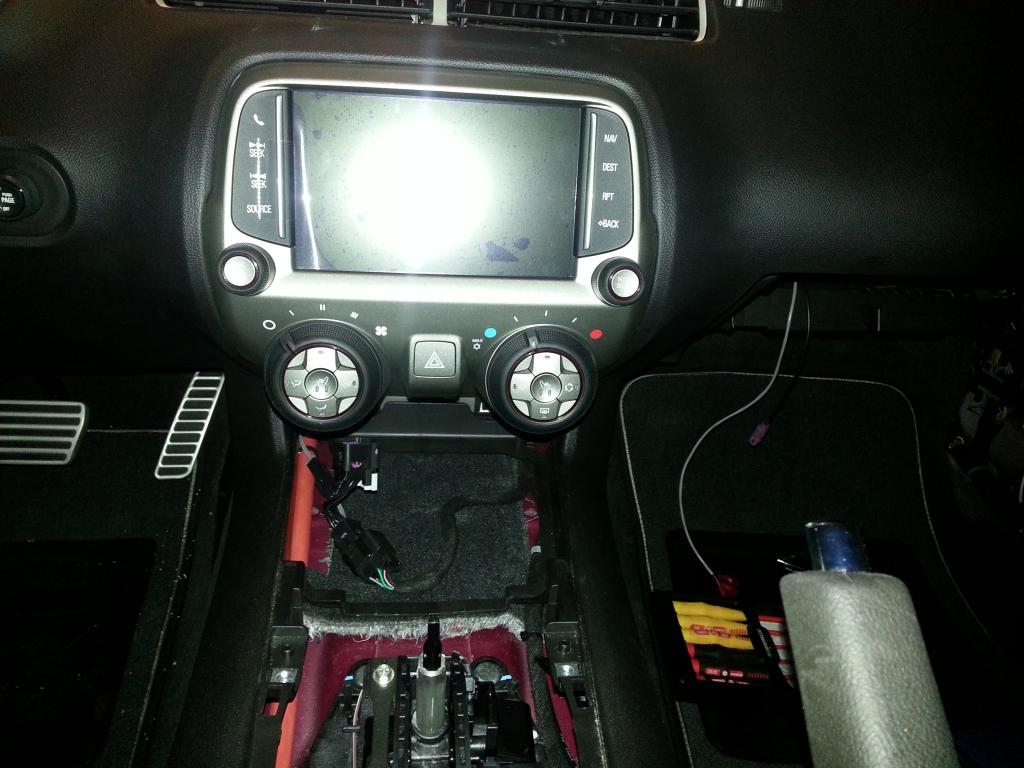 Console is in (plugged in but not bolted up yet), Camera is installed and wired up -- that's the white wire on the right side of the top picture)... The wait begins... -Don Last edited by hammdo; 07-02-2017 at 12:03 AM. |
|
|
|
|
12-15-2014, 10:02 AM
|
#59 |
|
'It's an experiment'
Drives: [COTW 2/09/15] '11 GPI LSA SC Z/LE Join Date: May 2014
Location: Dallas TX
Posts: 8,694
|
Yep, pin connectors were missing so they'll be here by this weekend. I should be able to finish this up on Saturday then, Sunday, if the heads and cam are in, do the SC....
-Don |
|
|
|
|
12-15-2014, 01:40 PM
|
#60 |
|
'It's an experiment'
Drives: [COTW 2/09/15] '11 GPI LSA SC Z/LE Join Date: May 2014
Location: Dallas TX
Posts: 8,694
|
OK, heads and cam are on their way, Ordered my ZL1 Bumper, splitter, and ZL1 Spoiler from Gary (RJT)! Can't wait to see what that looks like!
Have the brake air ducts, lower radiator brace, and fender-well/splash shields for the ZL1 brakes -- can't wait to get that started... -Don |
|
|
|
|
12-17-2014, 05:58 PM
|
#61 |
|
'It's an experiment'
Drives: [COTW 2/09/15] '11 GPI LSA SC Z/LE Join Date: May 2014
Location: Dallas TX
Posts: 8,694
|
Got my ZL1 belly pan today! All part of the ZL1 look. Will have to drill the retainer holes for this to work...
-Don |
|
|
|
|
12-19-2014, 09:40 AM
|
#62 |
|
'It's an experiment'
Drives: [COTW 2/09/15] '11 GPI LSA SC Z/LE Join Date: May 2014
Location: Dallas TX
Posts: 8,694
|
The MyLink is ALIVE! Pics to follow...
-Don |
|
|
|
|
12-19-2014, 06:11 PM
|
#63 |
|
'It's an experiment'
Drives: [COTW 2/09/15] '11 GPI LSA SC Z/LE Join Date: May 2014
Location: Dallas TX
Posts: 8,694
|
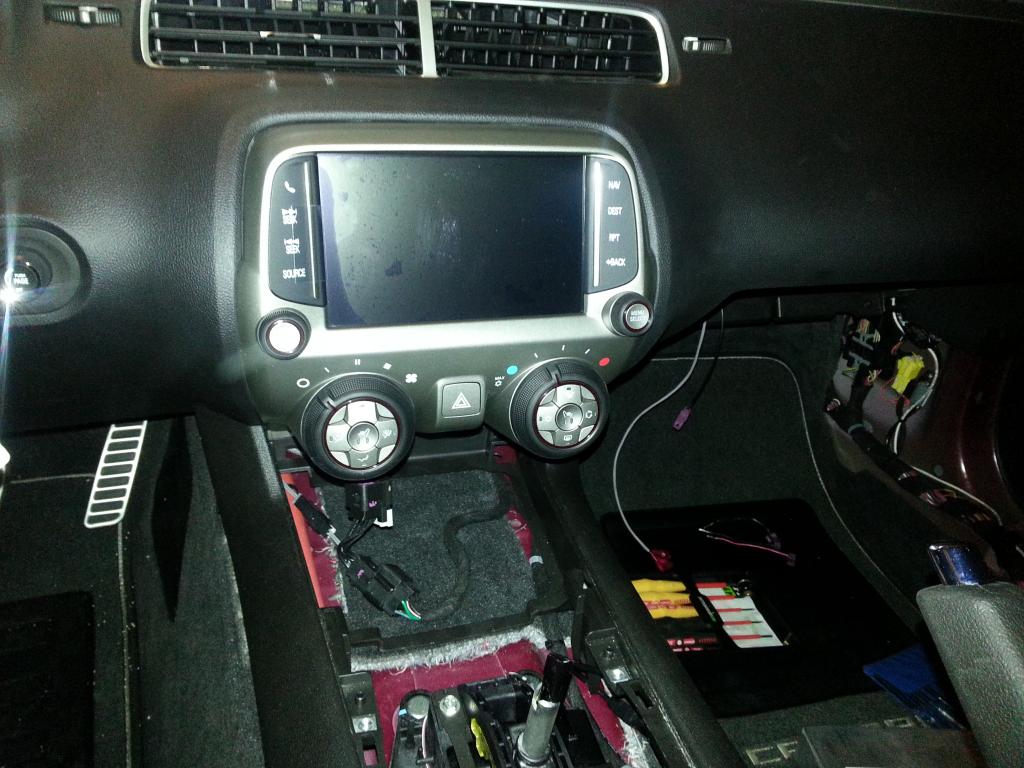
OK, MyLink installed and working with Rear Camera!
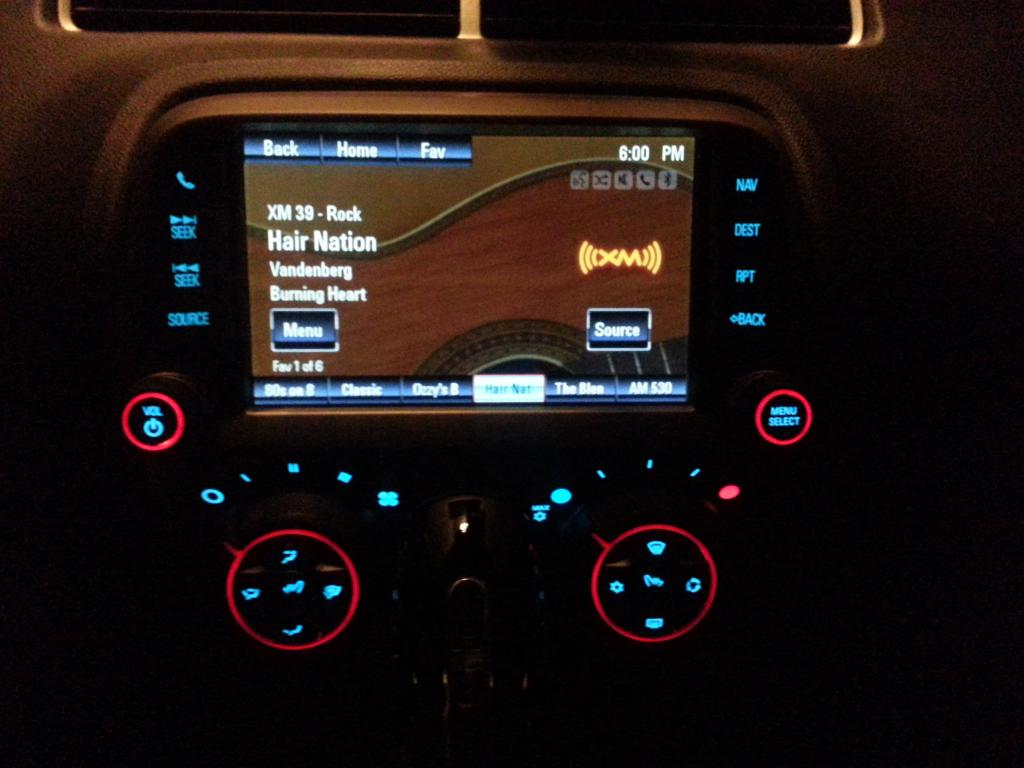 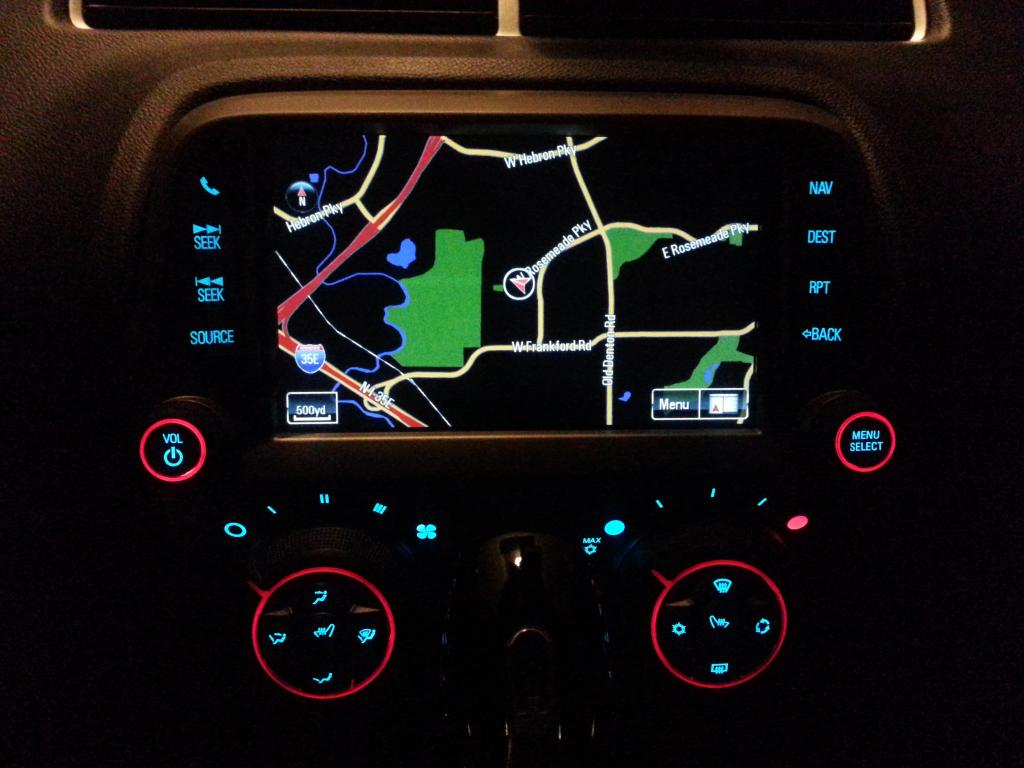 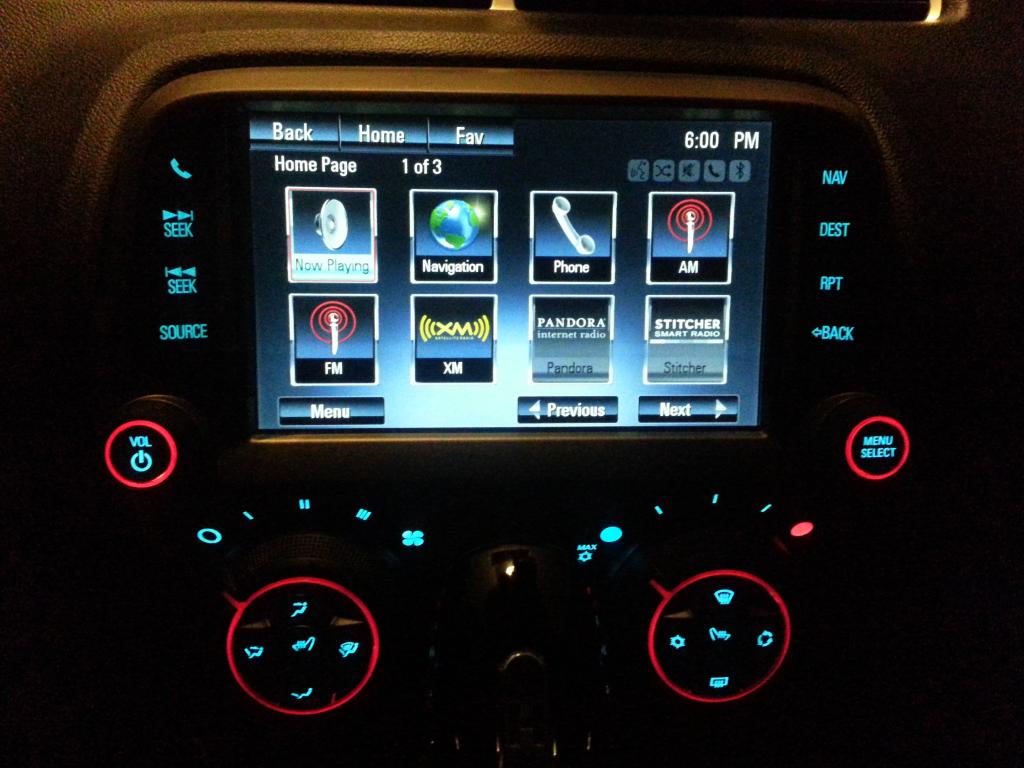 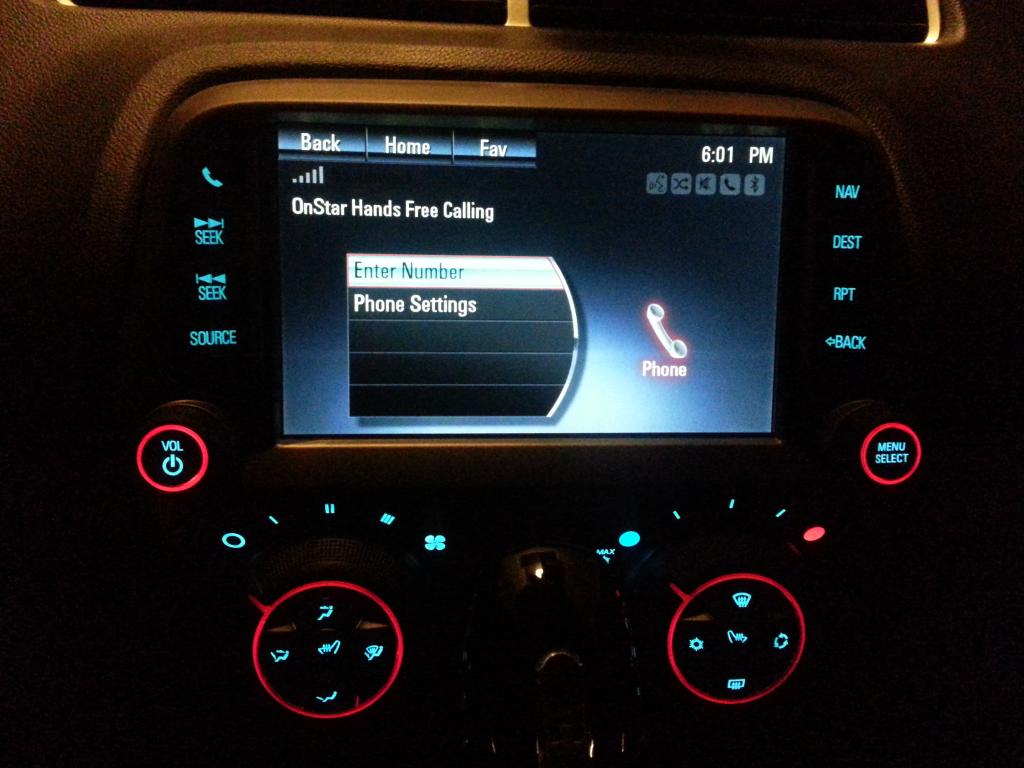  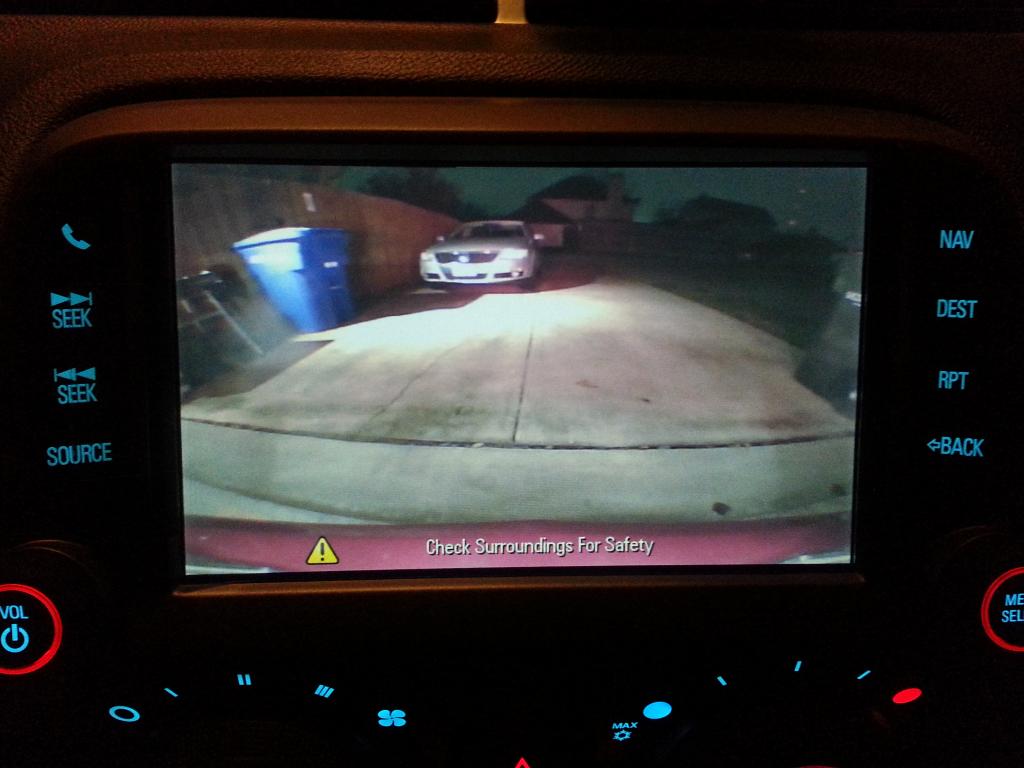 Camera: 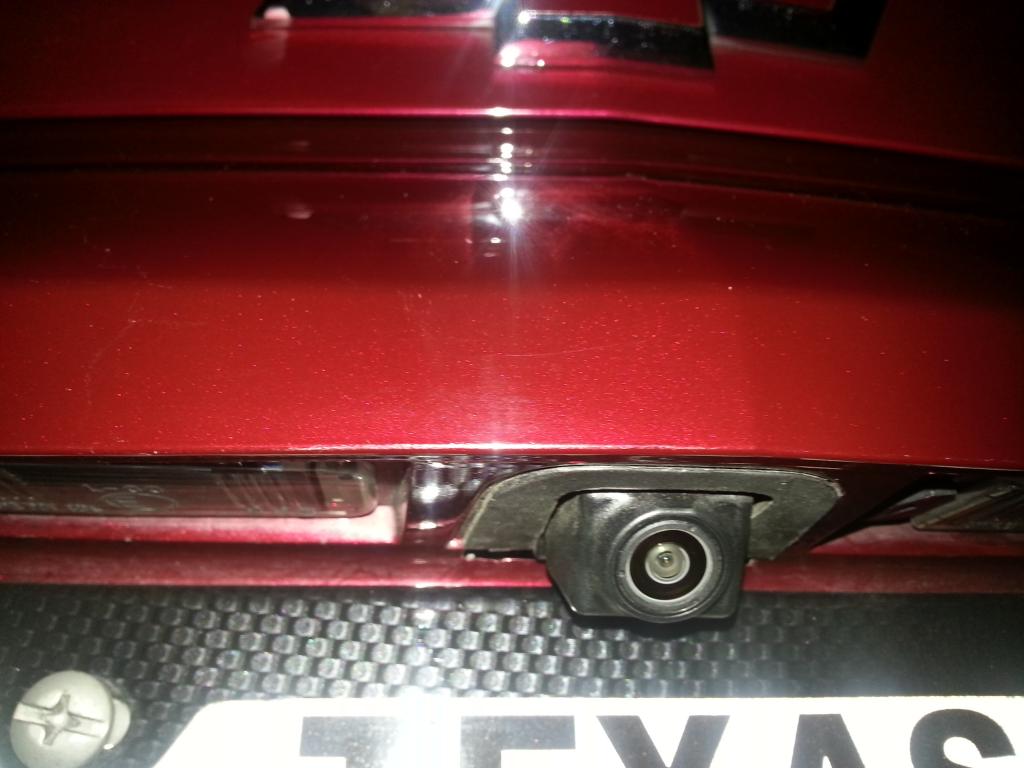 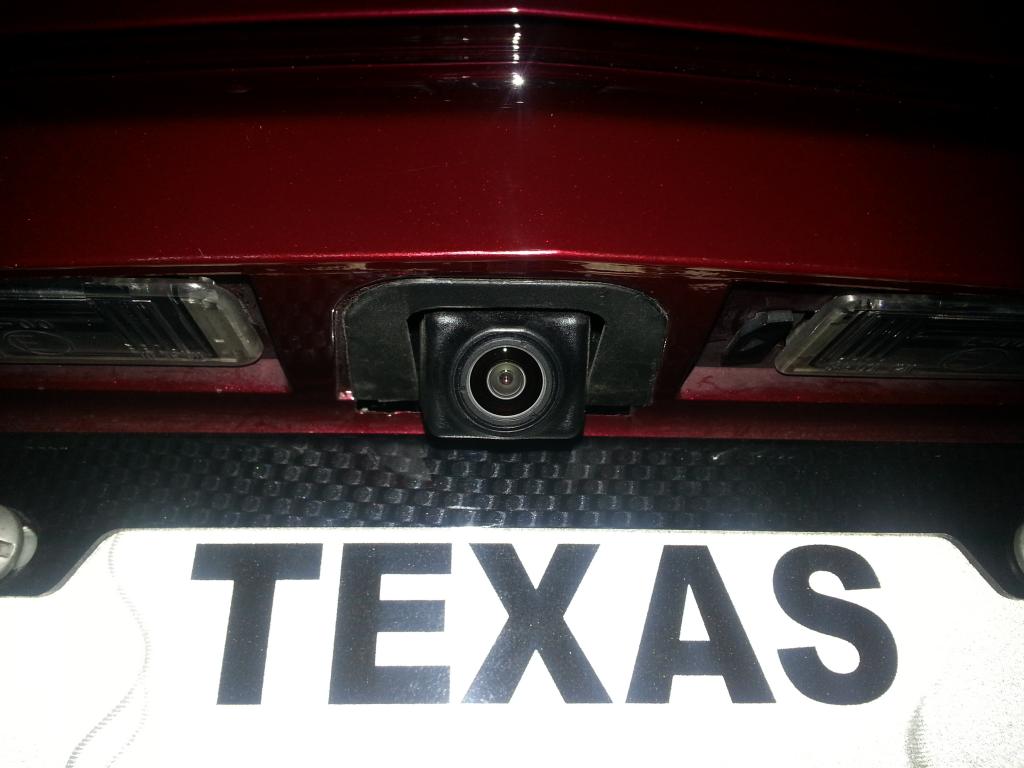 Just awesome! Thanks Ofer and Gen5DIY! -Don Last edited by hammdo; 07-02-2017 at 12:03 AM. |
|
|
|
|
12-19-2014, 06:28 PM
|
#64 |
|
'It's an experiment'
Drives: [COTW 2/09/15] '11 GPI LSA SC Z/LE Join Date: May 2014
Location: Dallas TX
Posts: 8,694
|
Well, talked to Ryan @ GPI today and head gaskets delayed the shipment. They are supposed to arrive today and then the kit will be sent out. Hope so!
Waiting is killing me ;o) -Don |
|
|
|
|
12-22-2014, 09:42 AM
|
#65 |
|
'It's an experiment'
Drives: [COTW 2/09/15] '11 GPI LSA SC Z/LE Join Date: May 2014
Location: Dallas TX
Posts: 8,694
|
OK, were a go on tear down! Today I'm starting the tear-down for the ADM Supercharger kit. The first thing I have to do is document the 'current' setup, what/where the connectors are with LOTS of pictures as a reference. Then, bag n tag everything. I've built a workbench and added a Kobalt one so I can sort the parts accordingly. Lots to get ready for this.
GPI is getting the parts (SS1 cam/heads) to me this week with a start-up tune that takes into account the ZL1/SC combo so that I can @ least start it up and do the initial break-in. After that -- it will go to Andy @ ADM for the 3.45 gears, tune, and probably ZL1 Fuel Pump and ADM controller. Lots to do! Will post pic as I go along. -Don |
|
|
|
|
12-22-2014, 06:28 PM
|
#66 |
   Drives: too many to say! Join Date: Nov 2010
Location: S.E. Michigan
Posts: 1,013
|
Sweet! Giterdone!
|
|
|
|
|
12-22-2014, 08:00 PM
|
#67 |
|
'It's an experiment'
Drives: [COTW 2/09/15] '11 GPI LSA SC Z/LE Join Date: May 2014
Location: Dallas TX
Posts: 8,694
|
All over it! Documenting what I currently have and started taking it apart! Waiting until I have a tracking # from GPI before I take the heads/cam out of it... Should be by tomorrow -- then its heads down and moving....
|
|
|
|
|
12-23-2014, 07:06 PM
|
#68 |
|
'It's an experiment'
Drives: [COTW 2/09/15] '11 GPI LSA SC Z/LE Join Date: May 2014
Location: Dallas TX
Posts: 8,694
|
LSA Supercharger install begins!
OK, Shipping label from GPI came in today and everything will be here on Monday (12/29) so I began the dis-assembly:
First off, I'm using the Magnuson Instructions as a partial guide: http://www.magnacharger.com/pdf/manu...ro_LS3_L99.pdf As well as the cam r n r from here: http://www.camaro5.com/forums/showthread.php?t=125123 Obviously L99 is different and I'm keeping VVT but doing afm delete. The cam is a Cam Motion SS1 -- nothing crazy but a bit more than stock. I wanted to keep the stock converter so no transmission r n r is needed. So, here are a few pics to show the progress: Of course, open the doors to lower the windows, remove the negative cable from the battery, open the gas cap then, you can begin: First I drained the radiator (using a drain pan and splash tray underneath) by opening the drain on the driver's side. This didn't release much even after I took off the cap so... Took off the Vararam intake, removed the fans, then, took off the upper, lower and heater hoses off of the water pump: 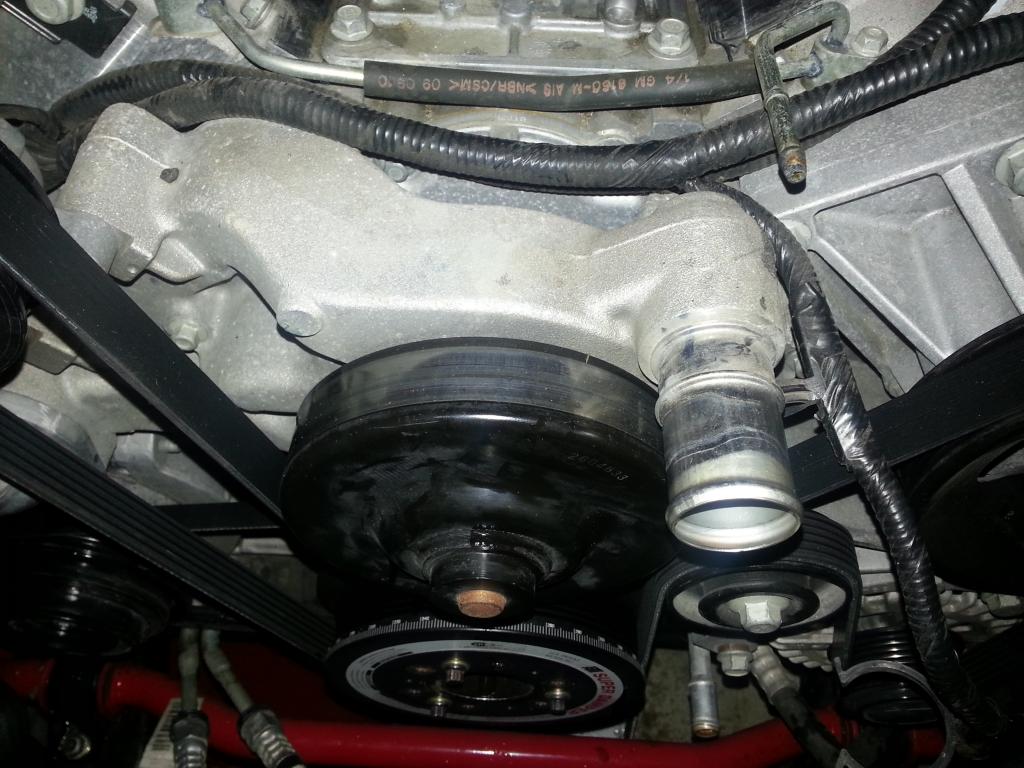 That drained it -- glad I had the splash tray -- took my time and slowly remove the hoses so they would drain into the pan -- very little spillage. Once the hoses were off, I began marking the connectors for the coils, EVAP, MAP, Throttle Body, MAF, and each injectors connector: 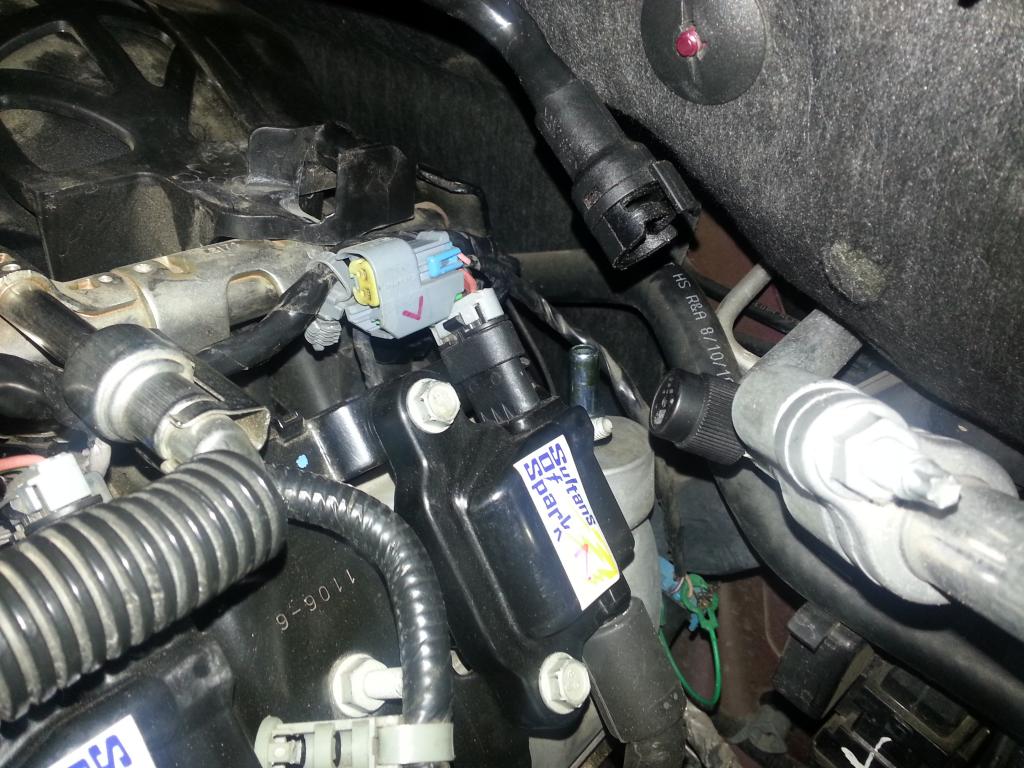 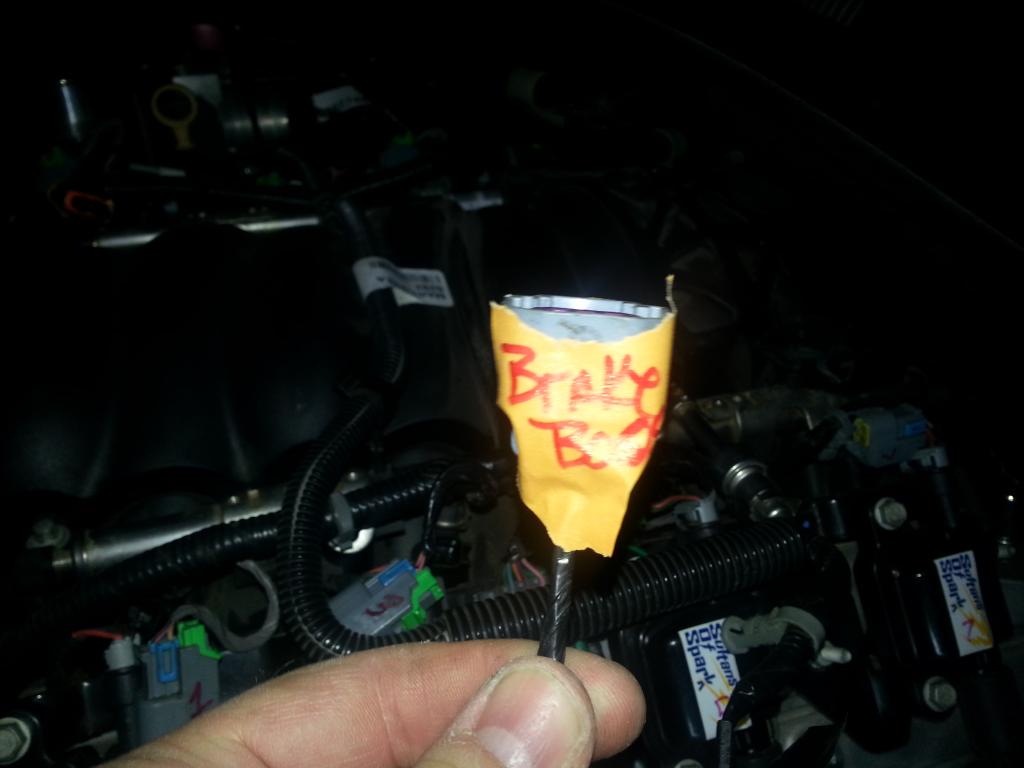 I'll be heading out to get some electricians tags to better id them. As part of the process, when I remove something, I 'tag n bag' it with a description, number of item, and the size (so for the intake manifold bolts I labeled it as such including the size of 8mm socket) and a number so I know what 'progression' I took. Much like a puzzle ;o). With the connectors off of the injectors, hoses off the EVAP, TB, valve covers, hard line for the fuel, and brake booster hose, it was finally time to remove the intake manifold. First, I relieved the pressure in the fuel rail, used rags to catch the leaking fuel, and remove the fuel lines from the fuel rail to the hard line by the passenger side. I plugged the fuel hard line while I was @ it. Next I loosened the 10 8mm intake manifold bolts and lifted the intake -- it didn't want to come forward. Turns out, the Oil Pressure switch (on the Lifter Oil Manifold Assembly or Valley Pan ;o) and the brake booster hose were fighting each other. Remove the Oil Pressure connector from the Oil Pressure switch and the manifold came off: Switch to remove the connector from: 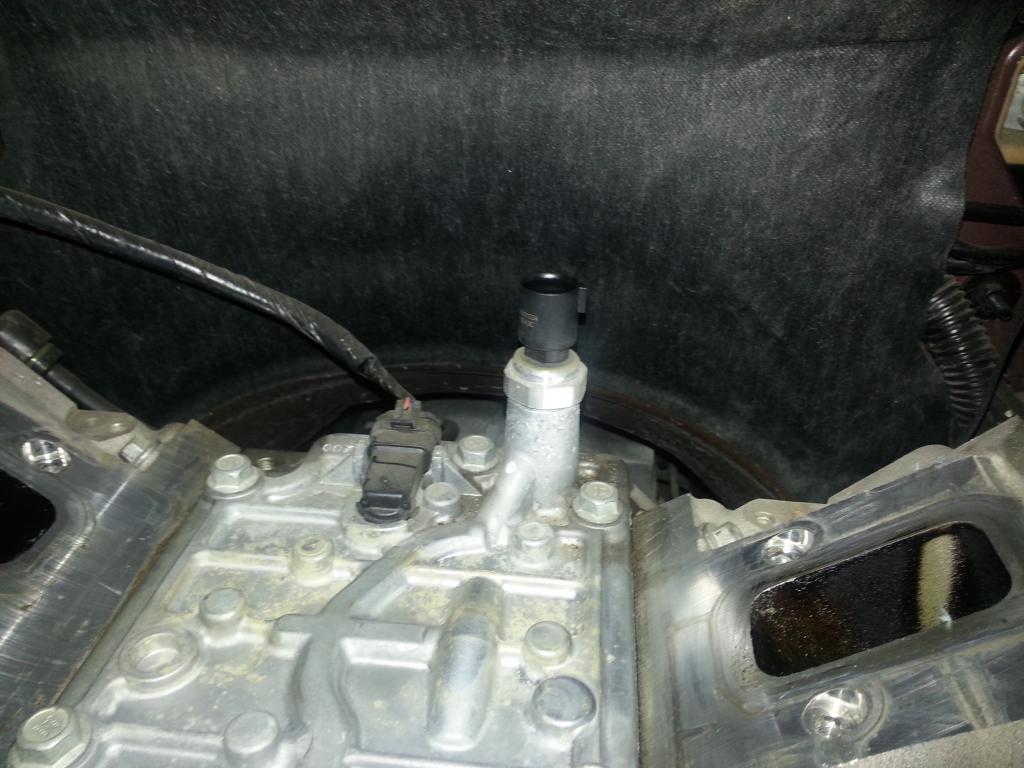 Back of intake manifold where booster hose was installed: 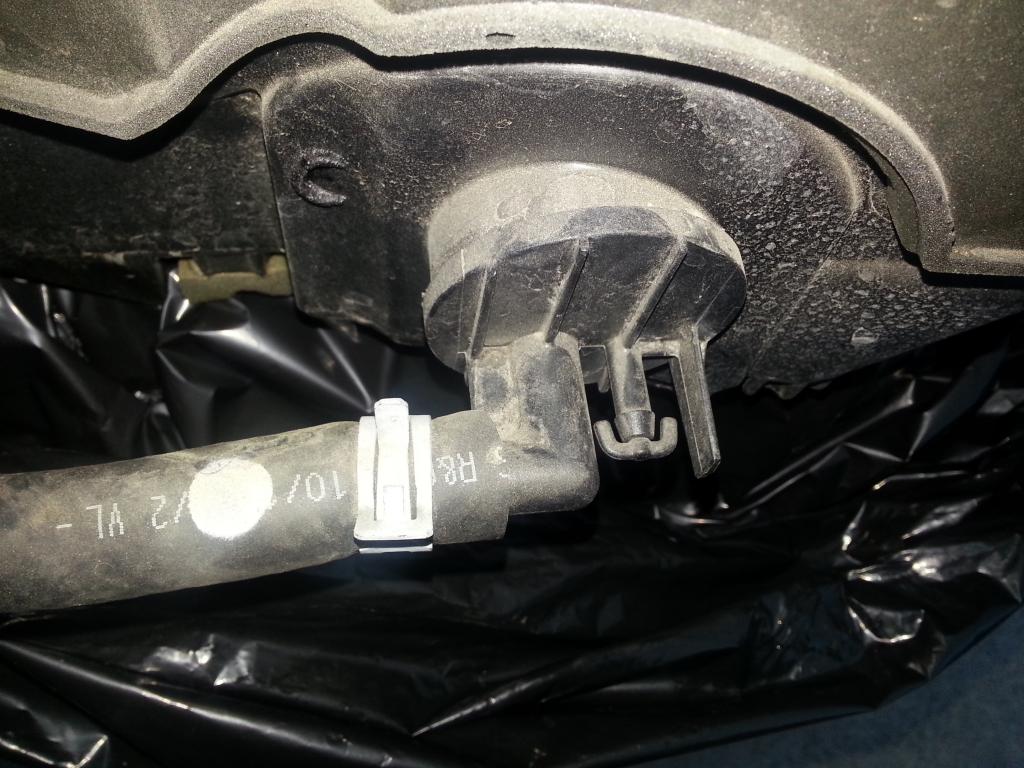 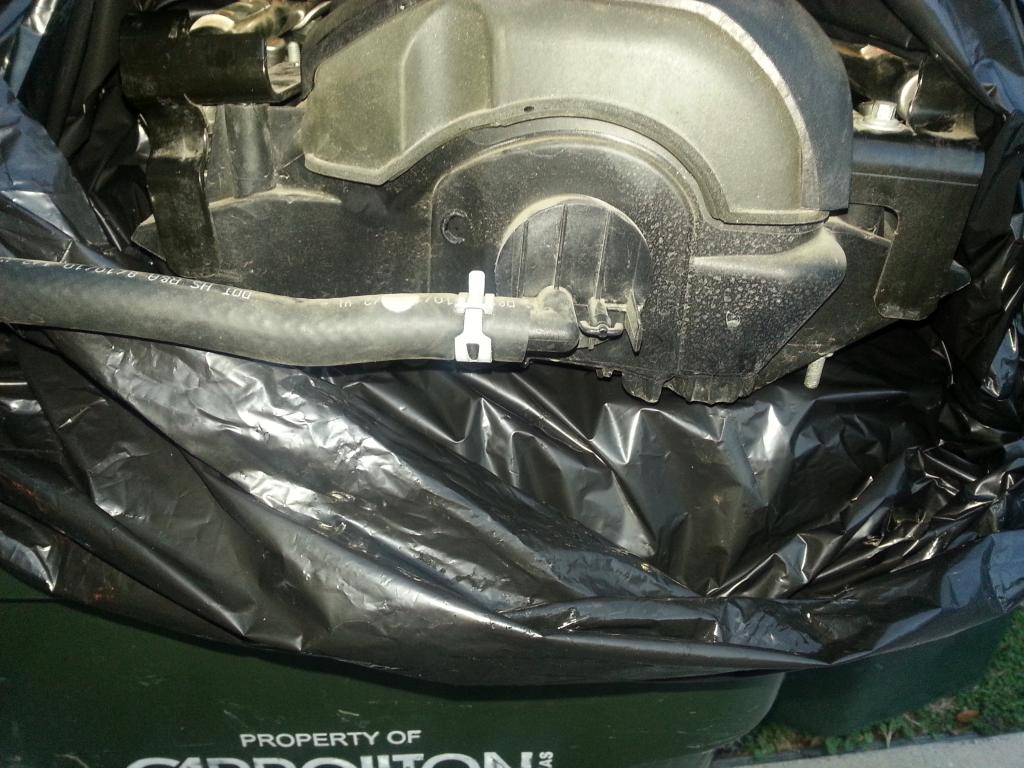 And now the results: 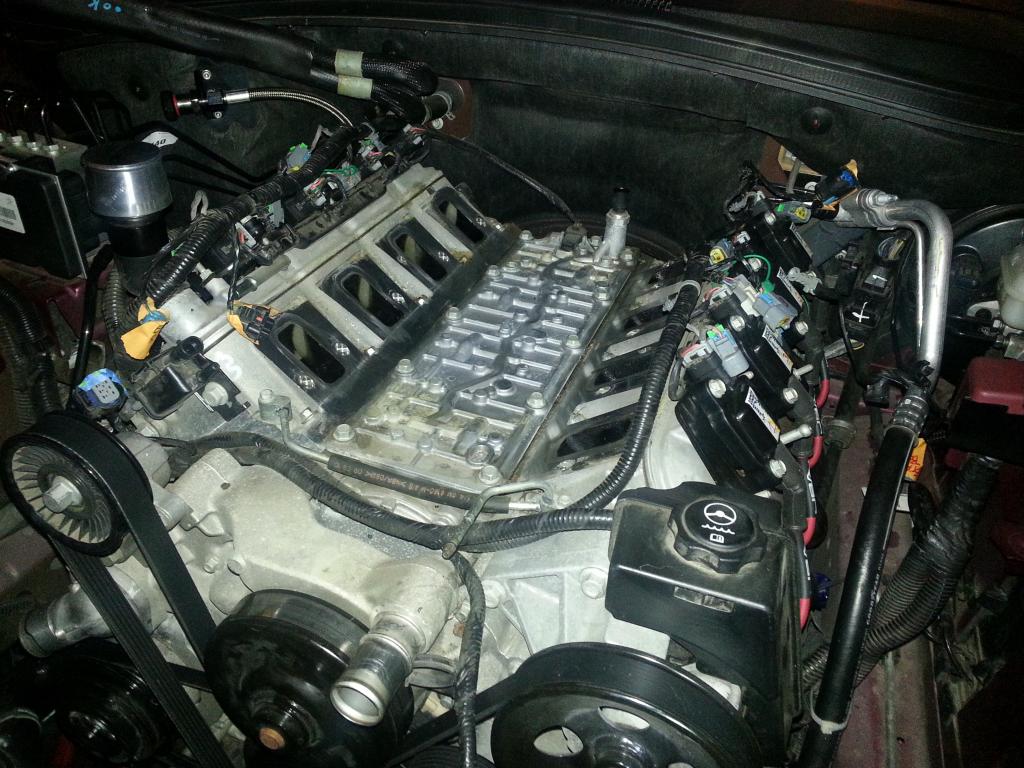 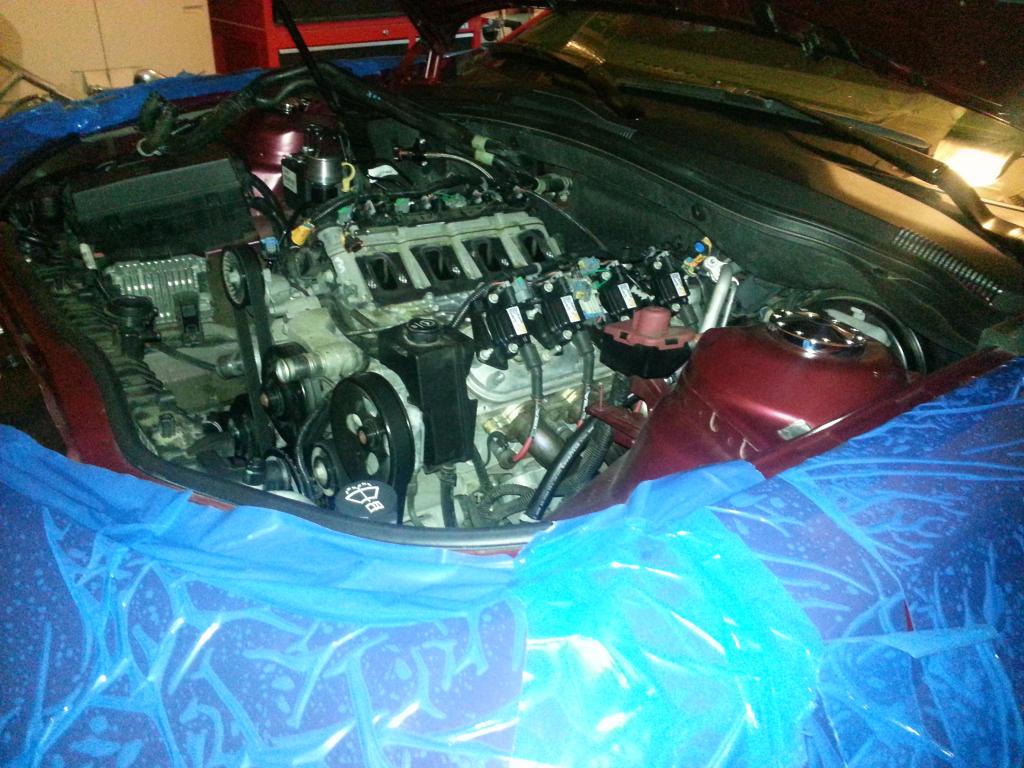 I notice some of the effects of not having the catch can before I bought it: 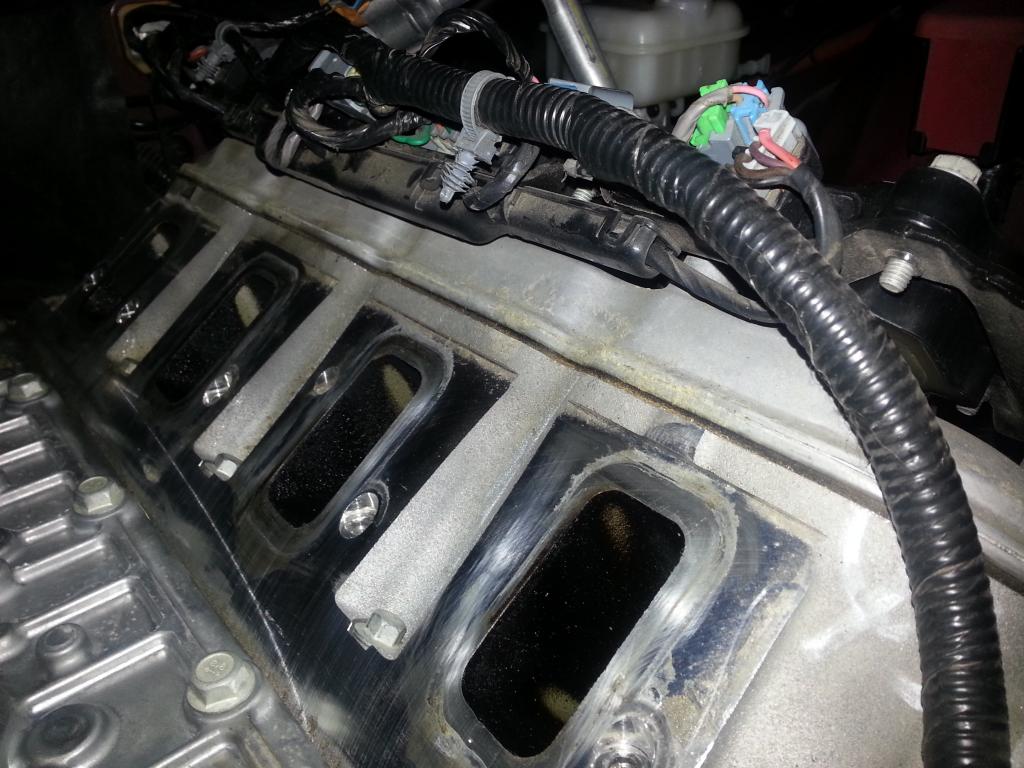 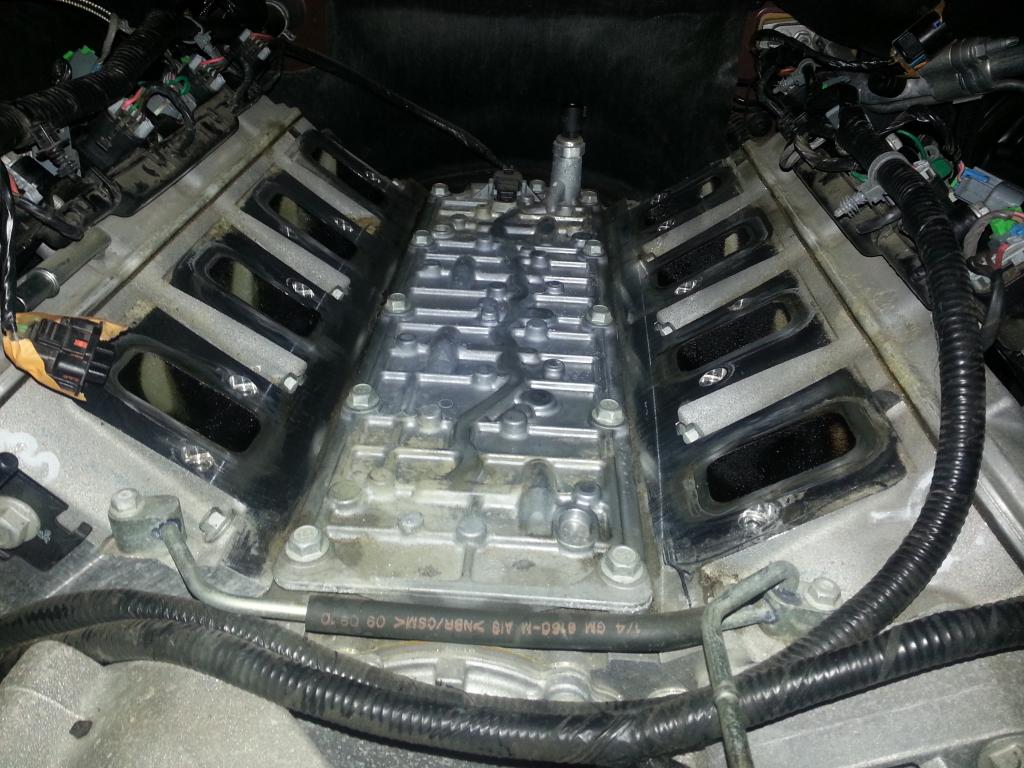 Glad I have new heads and stuff for this one! So I used a wet/dry vac to clean the area, then used Hand Sanitizer (all I had near me) to clean the intake ports. Once that was done, taped the openings (remember, I have to remove the heads so I just covered the intake ports): 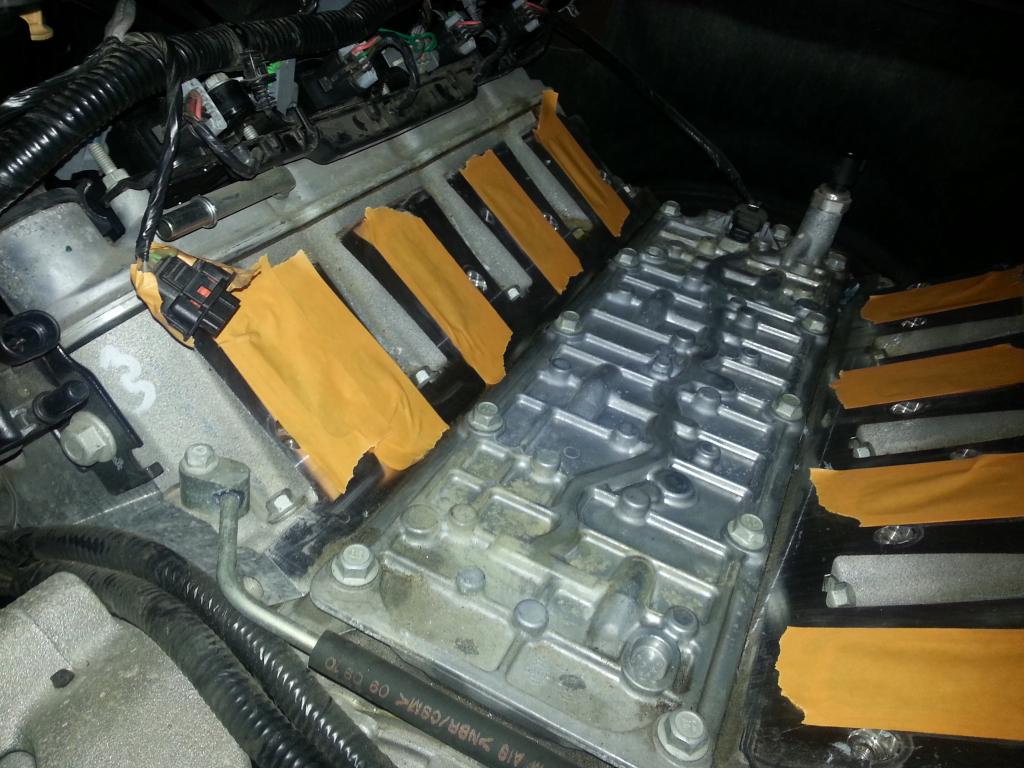 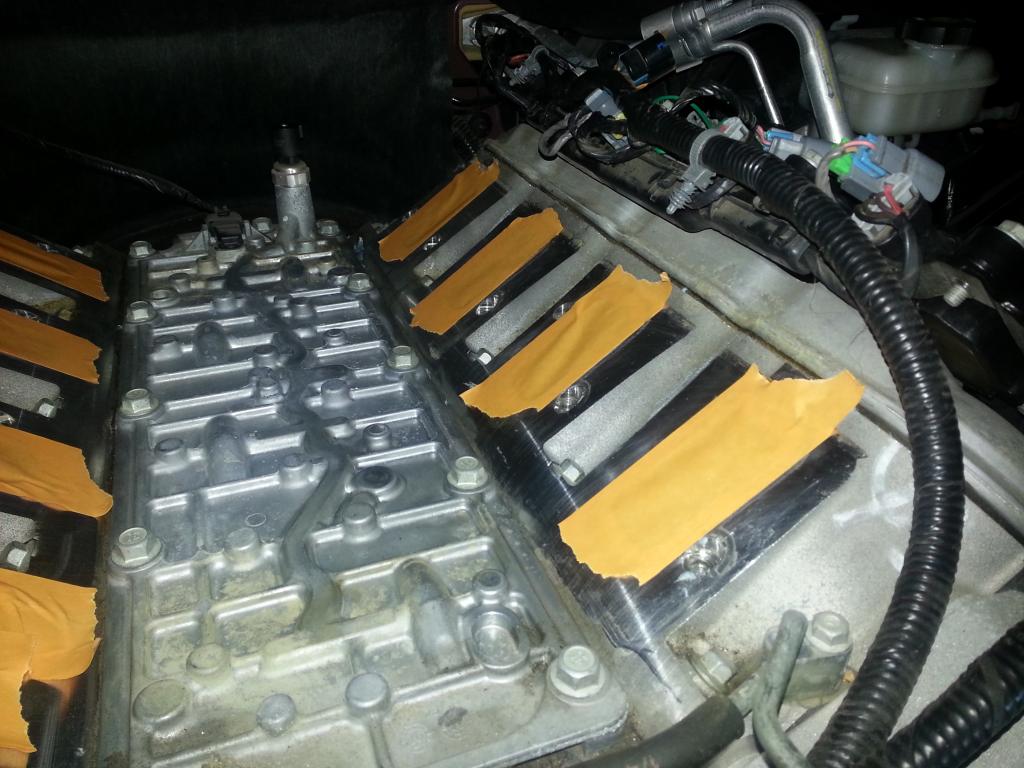 Want to be careful here! More to come... -Don Last edited by hammdo; 07-02-2017 at 12:02 AM. |
|
|
|
|
12-23-2014, 11:09 PM
|
#69 |
|
'It's an experiment'
Drives: [COTW 2/09/15] '11 GPI LSA SC Z/LE Join Date: May 2014
Location: Dallas TX
Posts: 8,694
|
Now Removing the coil packs:
Connector to the main coil pack: 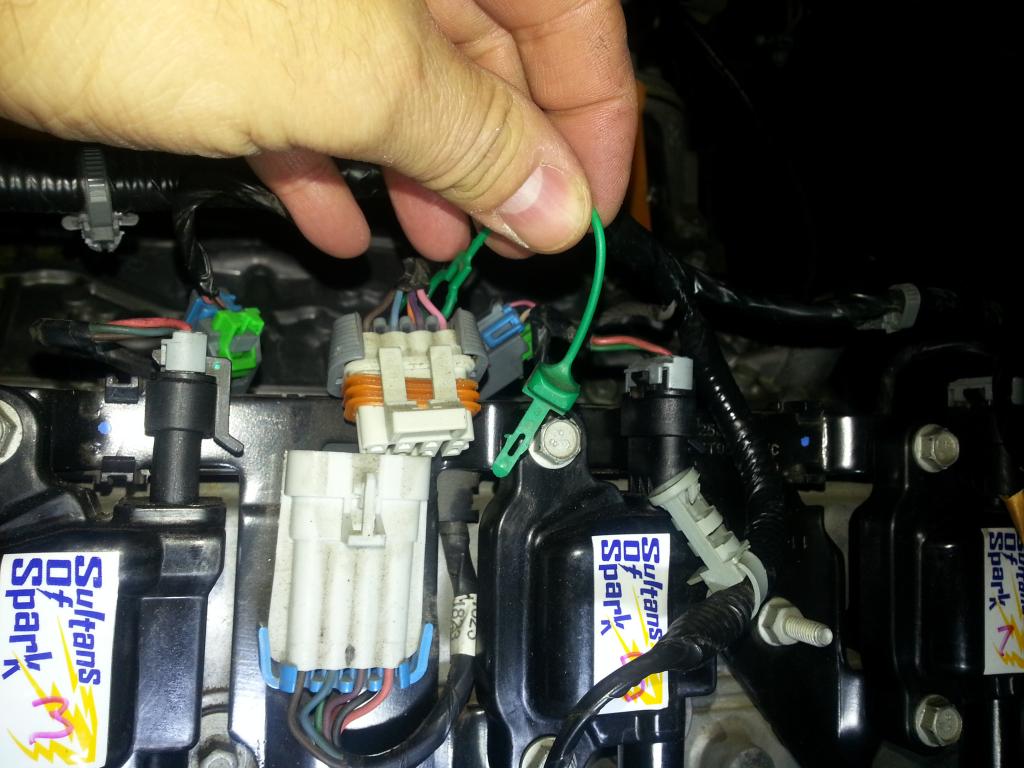 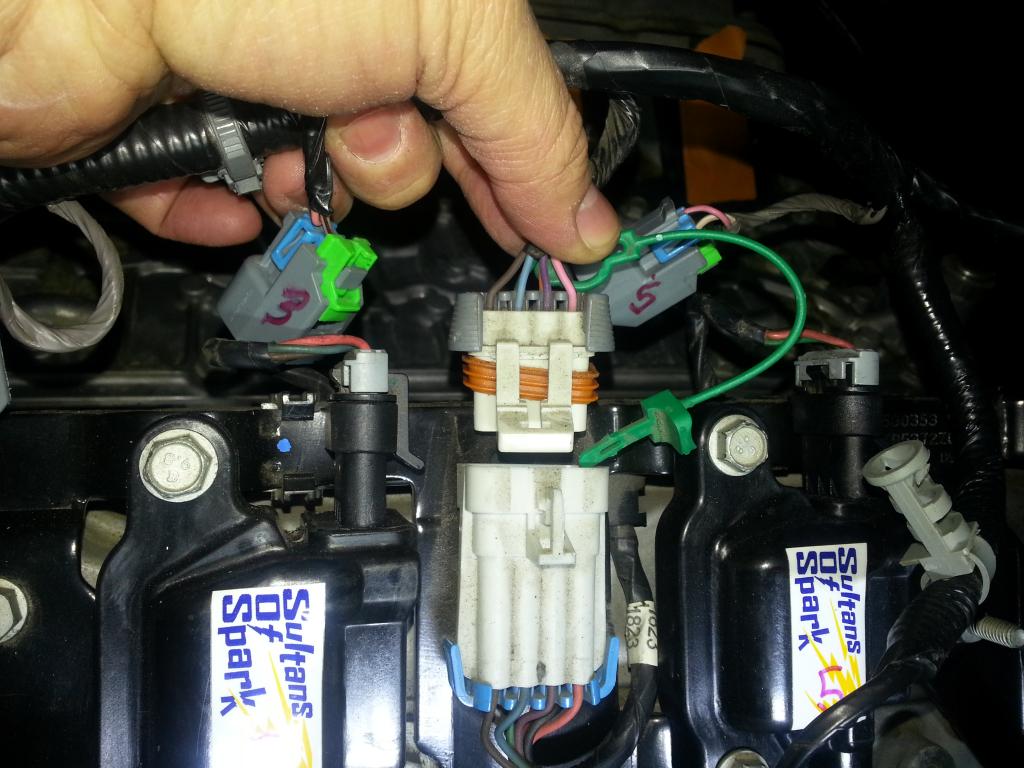 Removing the bolts to the coil pack: 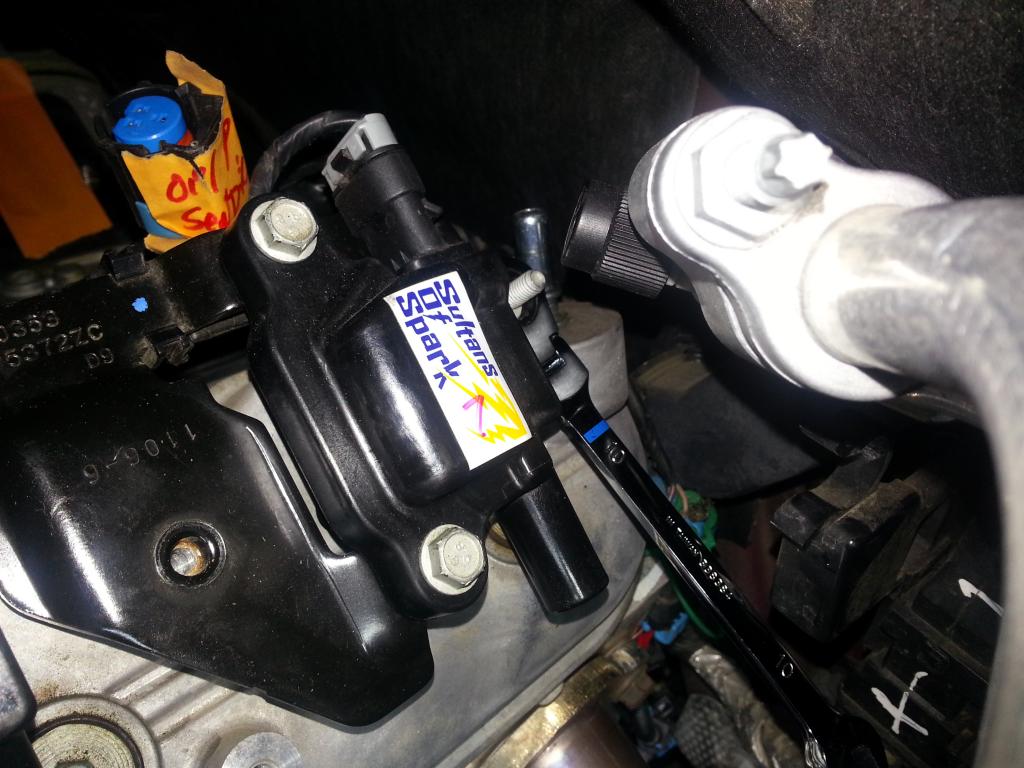 Drivers coil pack: 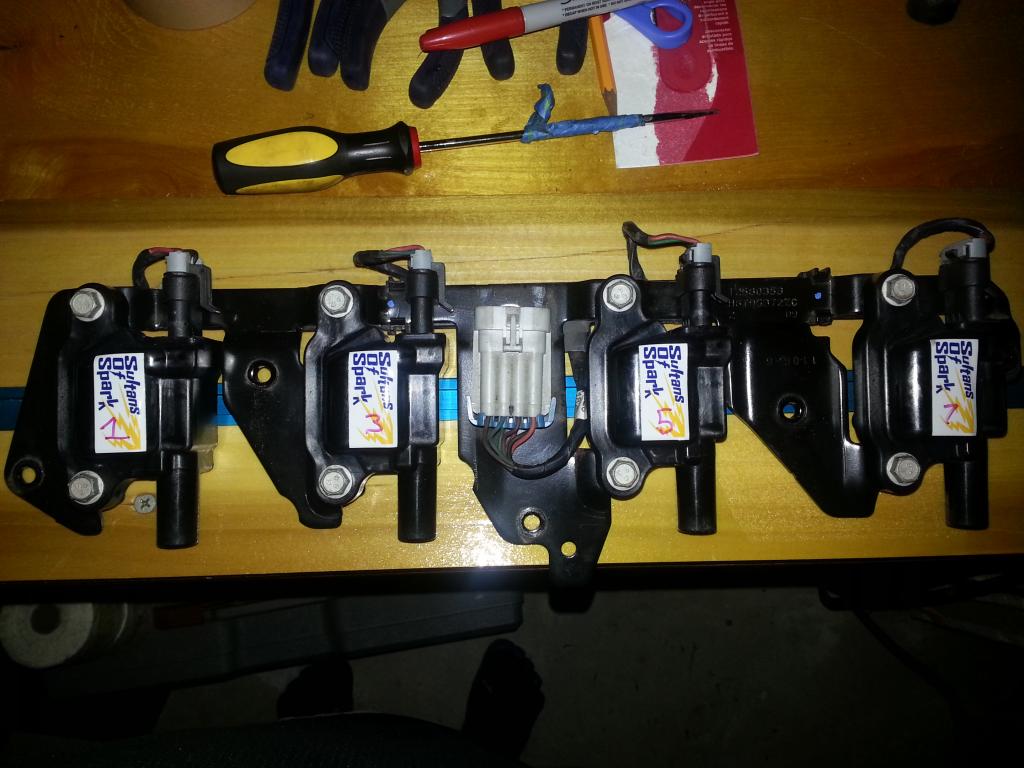 Driver's side valve cover ready for removal: 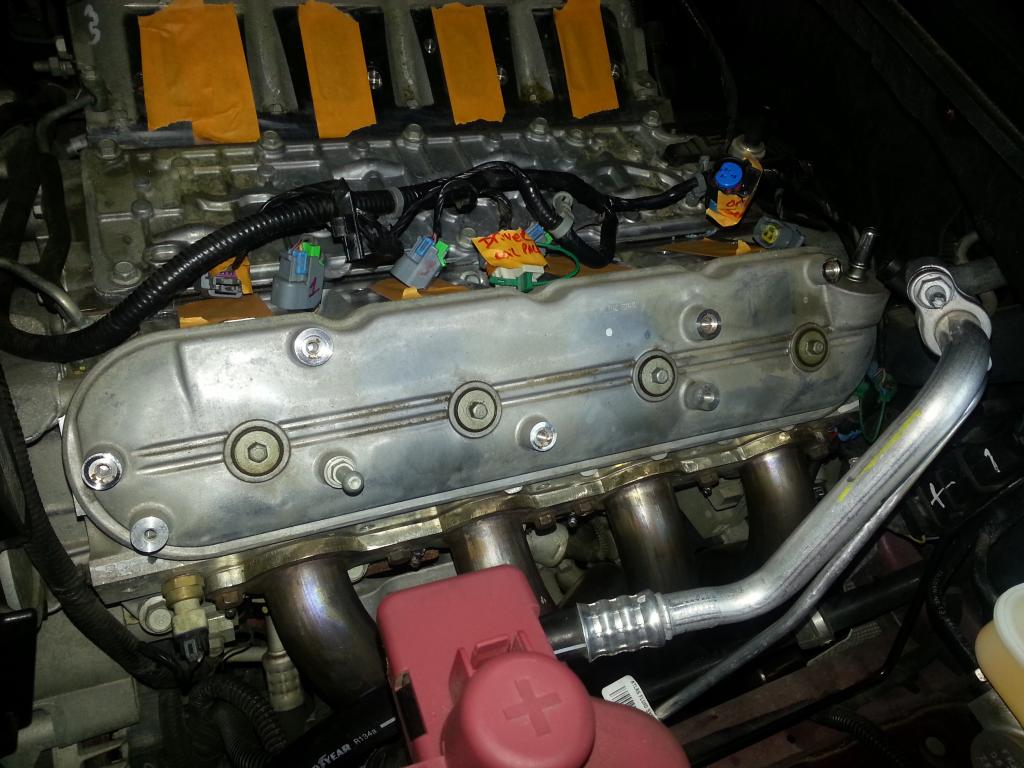 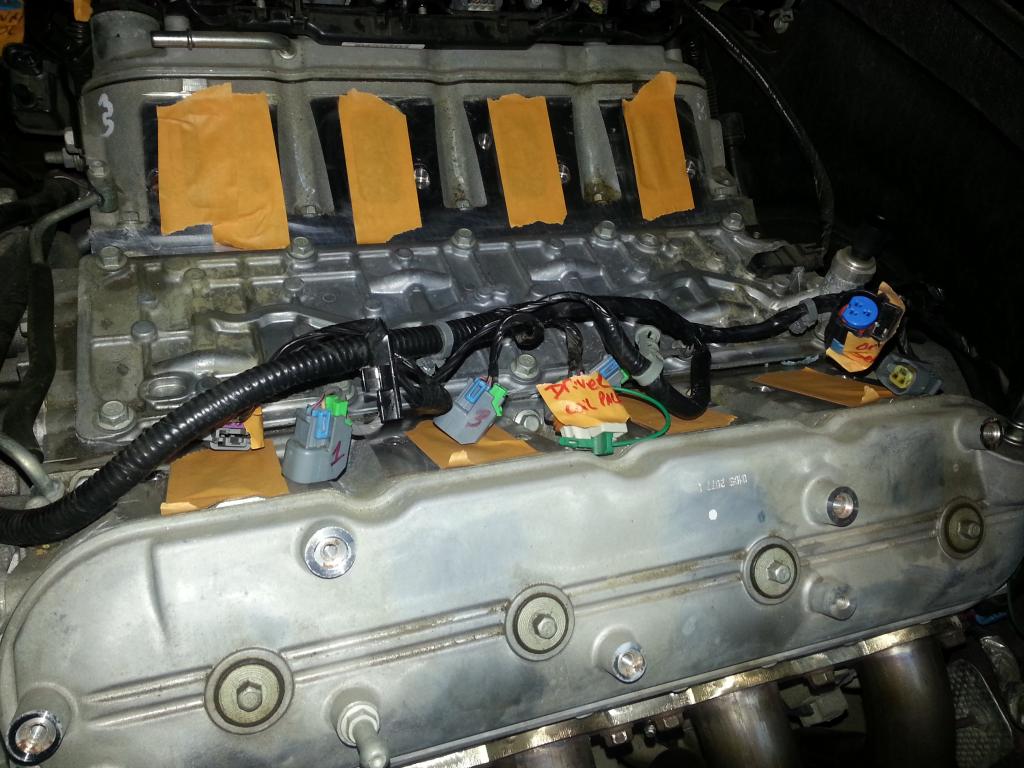 Coil packs removed and tagged n bagged: 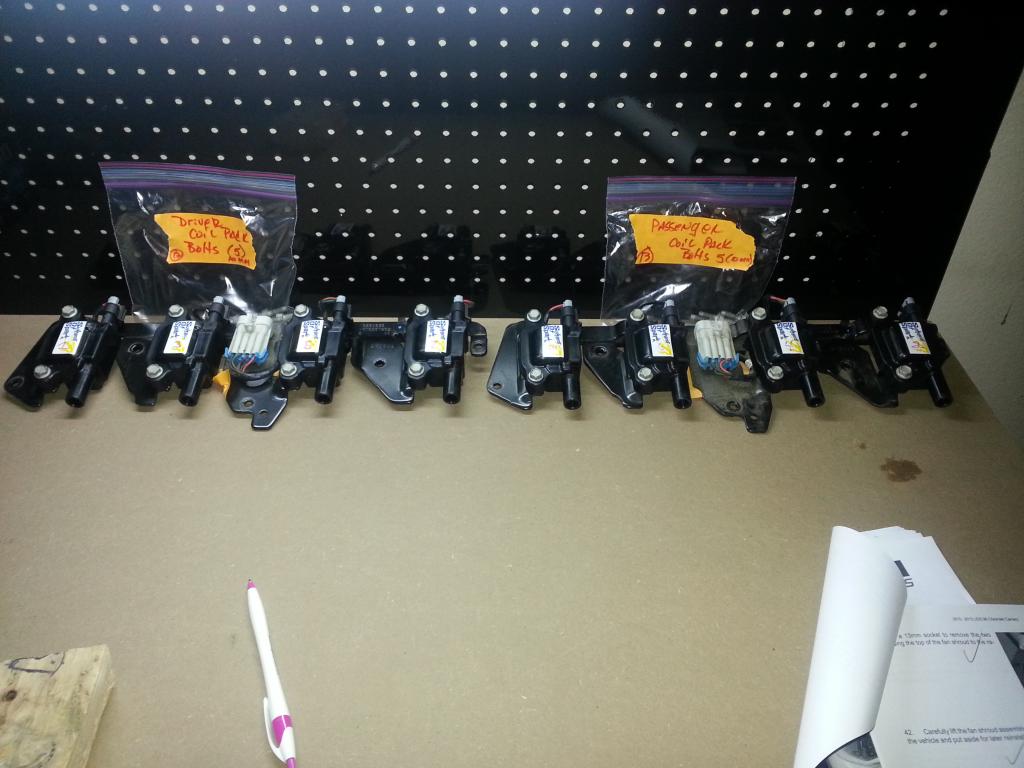 AFM Connector (gonna delete that!): 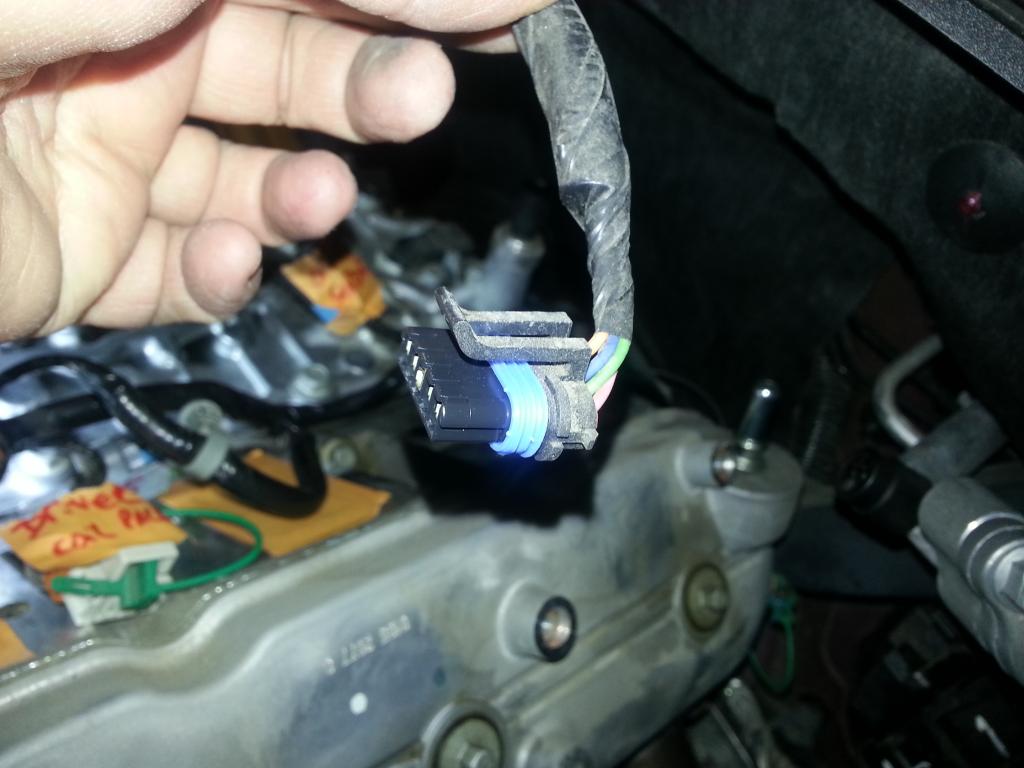 Cleaned coil pack on passenger side: 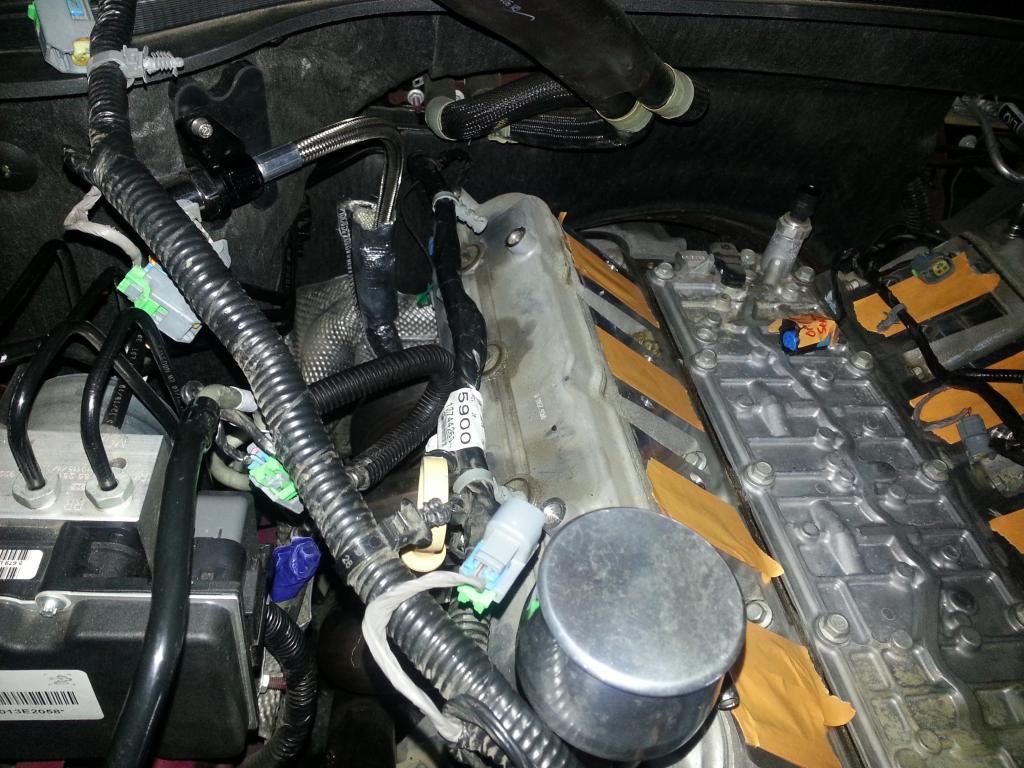  Negative battery line to be removed from the passenger head: 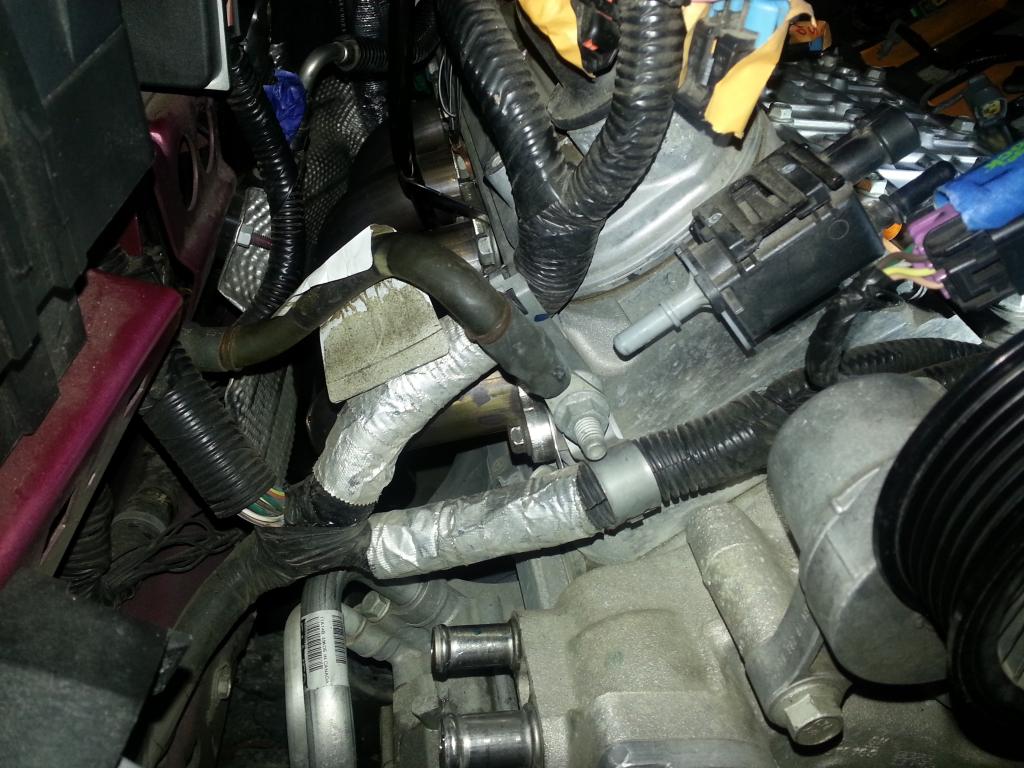 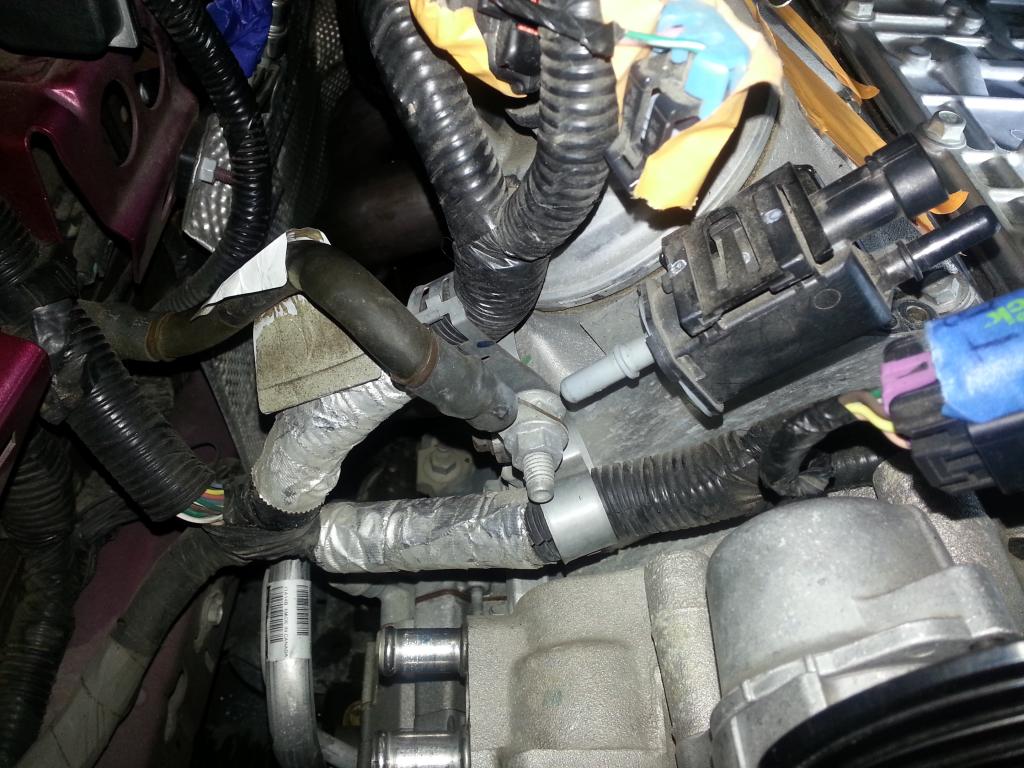 Steam Line removed from top of both heads (front of heads): Before: After:  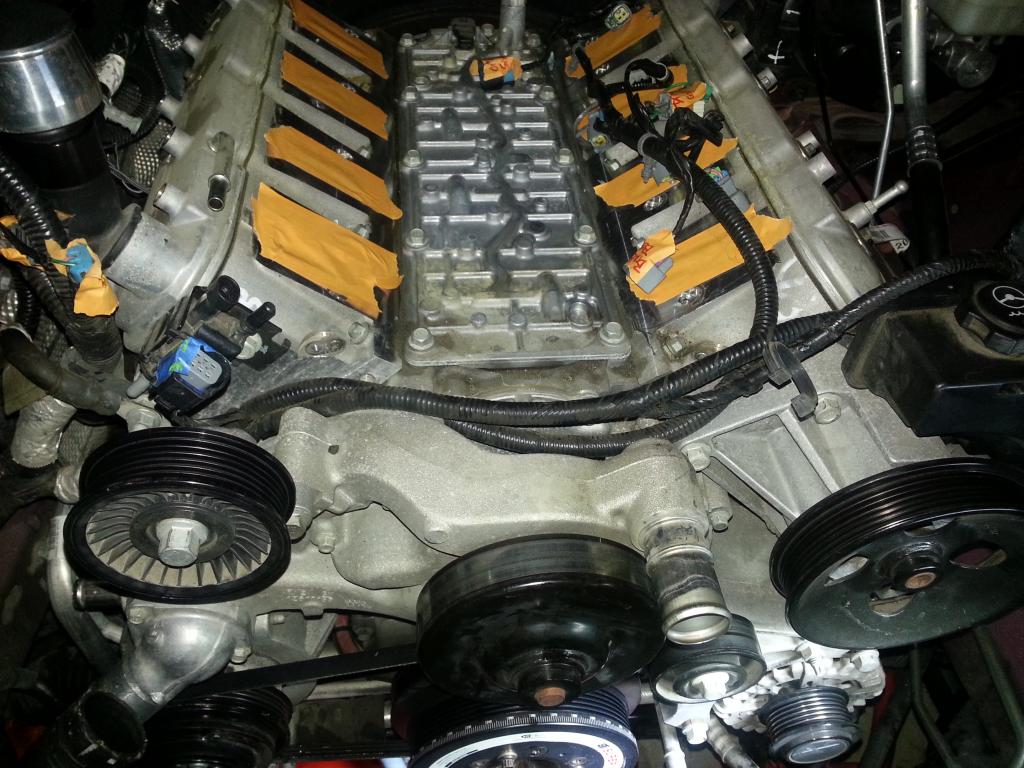 Also removed the serpentine belt... More to come! -Don Last edited by hammdo; 07-02-2017 at 12:01 AM. |
|
|
|
|
12-24-2014, 05:46 PM
|
#70 |
|
'It's an experiment'
Drives: [COTW 2/09/15] '11 GPI LSA SC Z/LE Join Date: May 2014
Location: Dallas TX
Posts: 8,694
|
GPI VVT SS1 Cam for LSA Supercharger
OK, more R-n-R today.
Removed the Negative cable/ground from the Passenger Head (front) and tagged n bagged it: 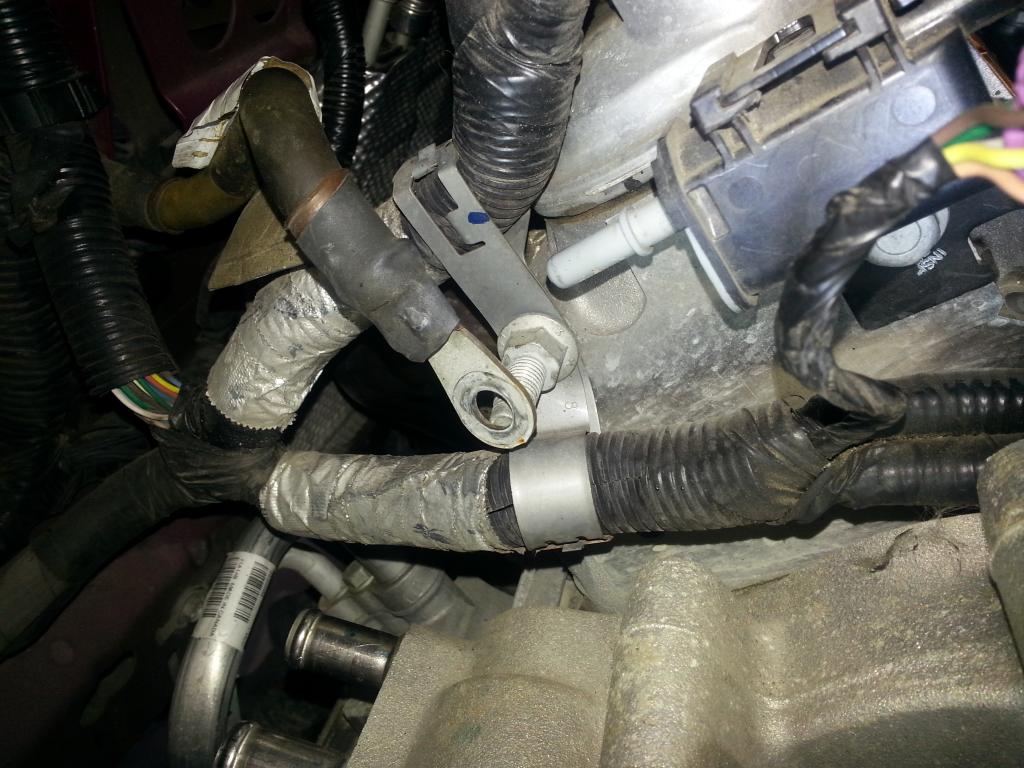 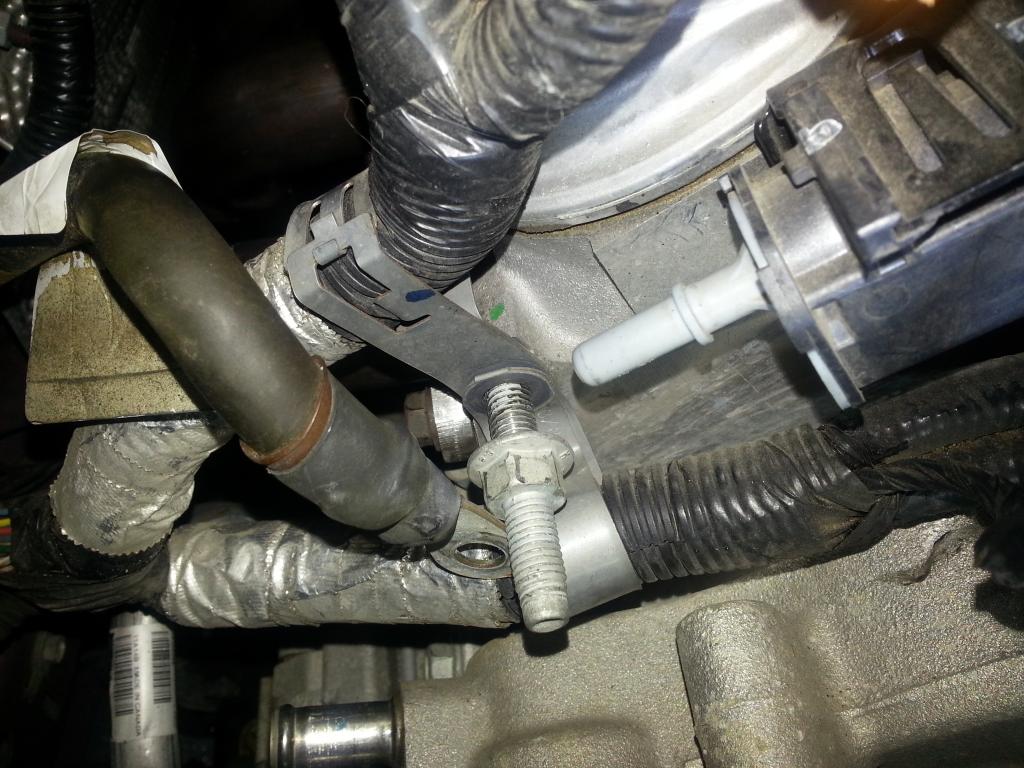 Then, started removing the Power Steering pump from the Driver's side head -- NOTE: The bolt on the Top will not come fully out so you'll leave it in that location. The pulley prevents its full removal: 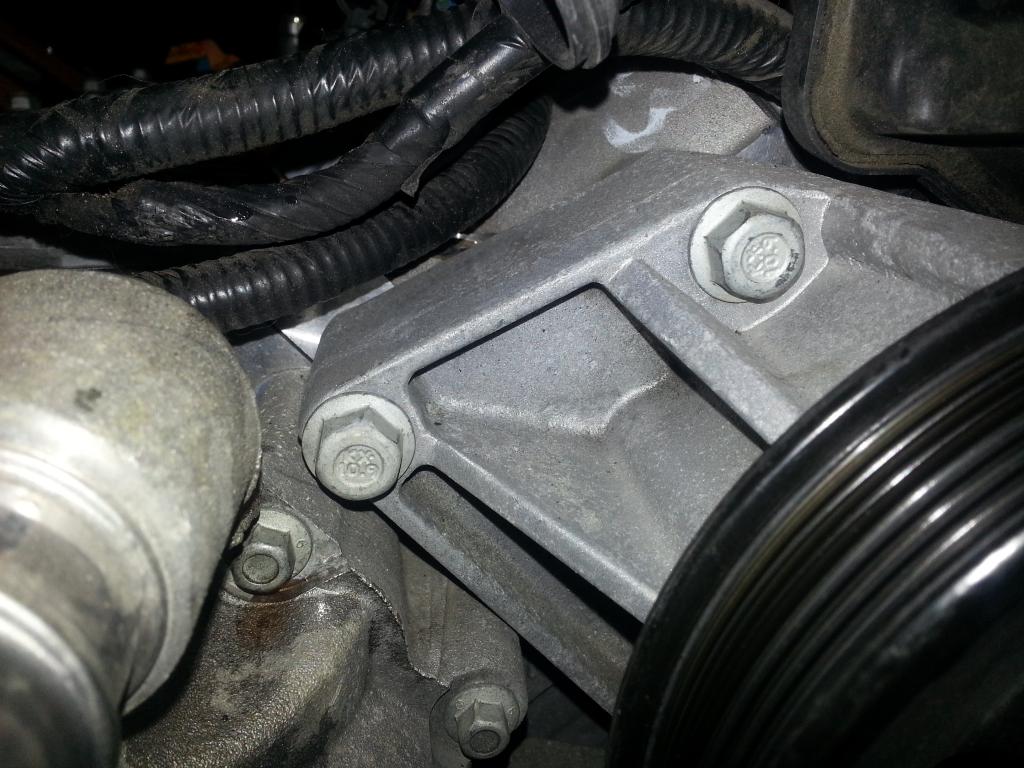 Bottom bolt on the Power Steering: 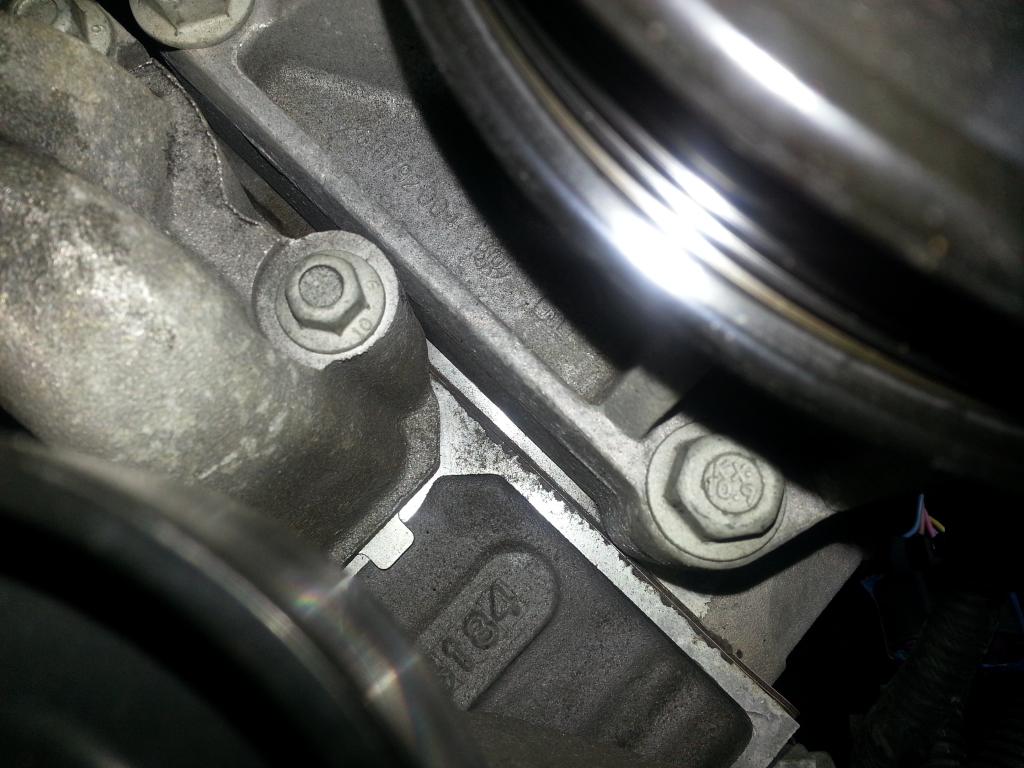 Now, there are wire looms on the front and rear of the Driver side head. These SCREW into the head. The front one is on with a cable tye -- you can just cut that and unscrew it: 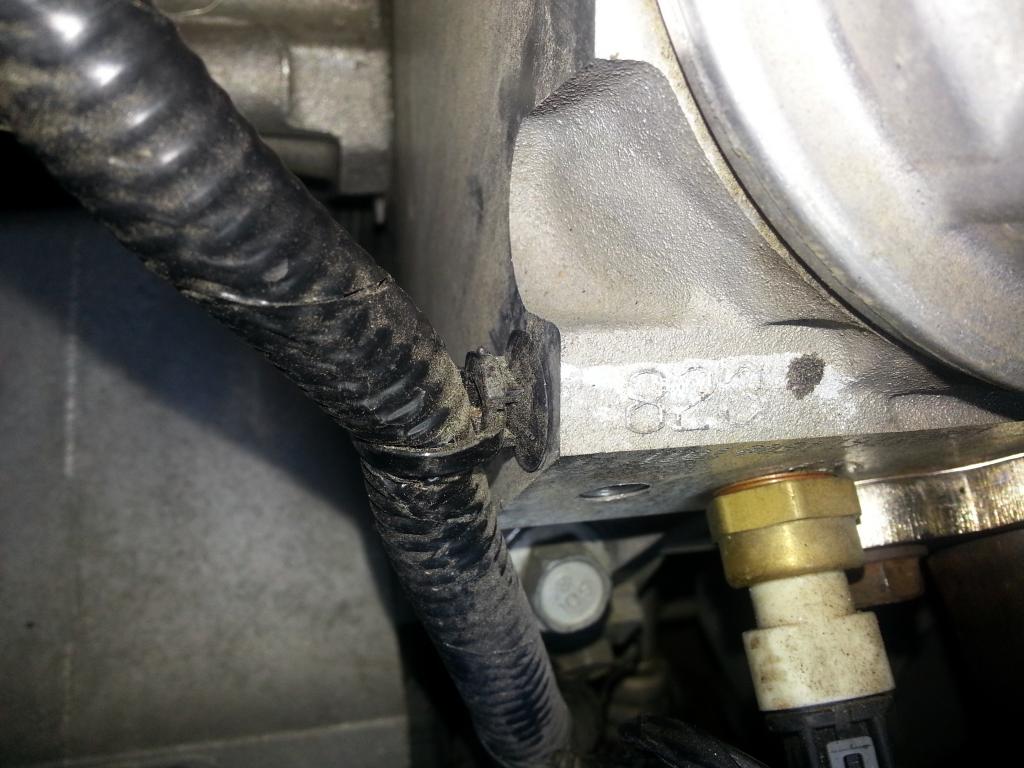 The back one holds the O2 connector. This one is clipped on and requires you to first unclip the connector to the 02 sensor, then pull the connector up slowly but firmly to remove the connector from the loom -- that is a pain to get to. Once you have the connector off, you can unscrew that loom from the back of the head (sorry no pics of the loom as it was hard to get the camera there): O2: 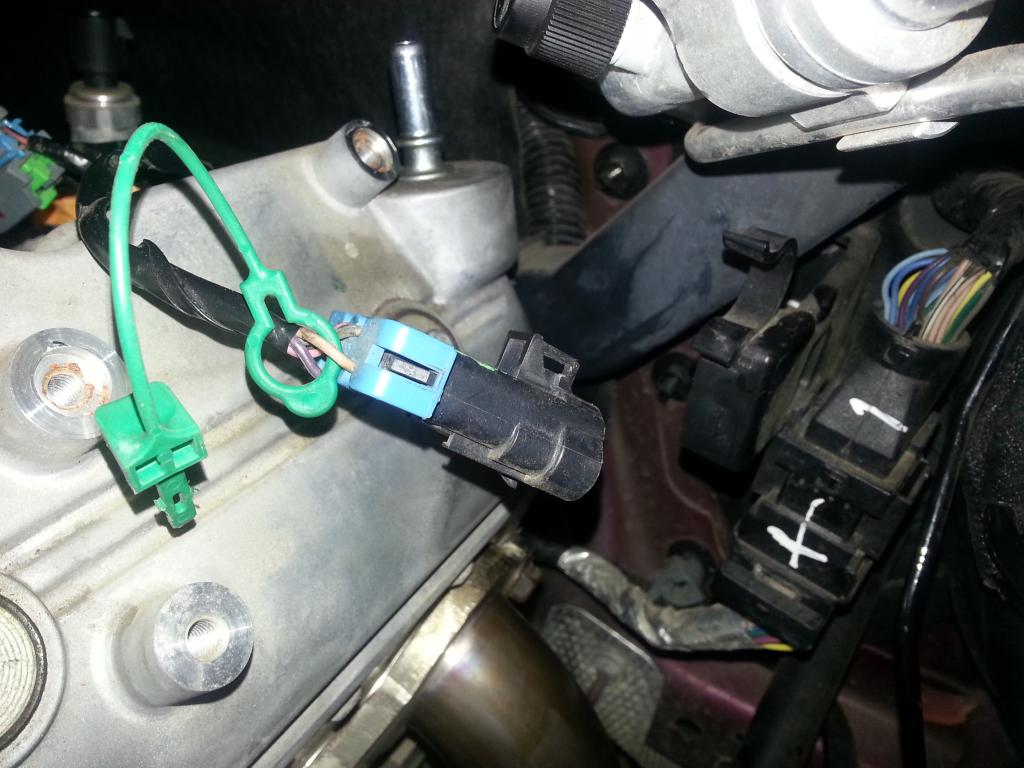 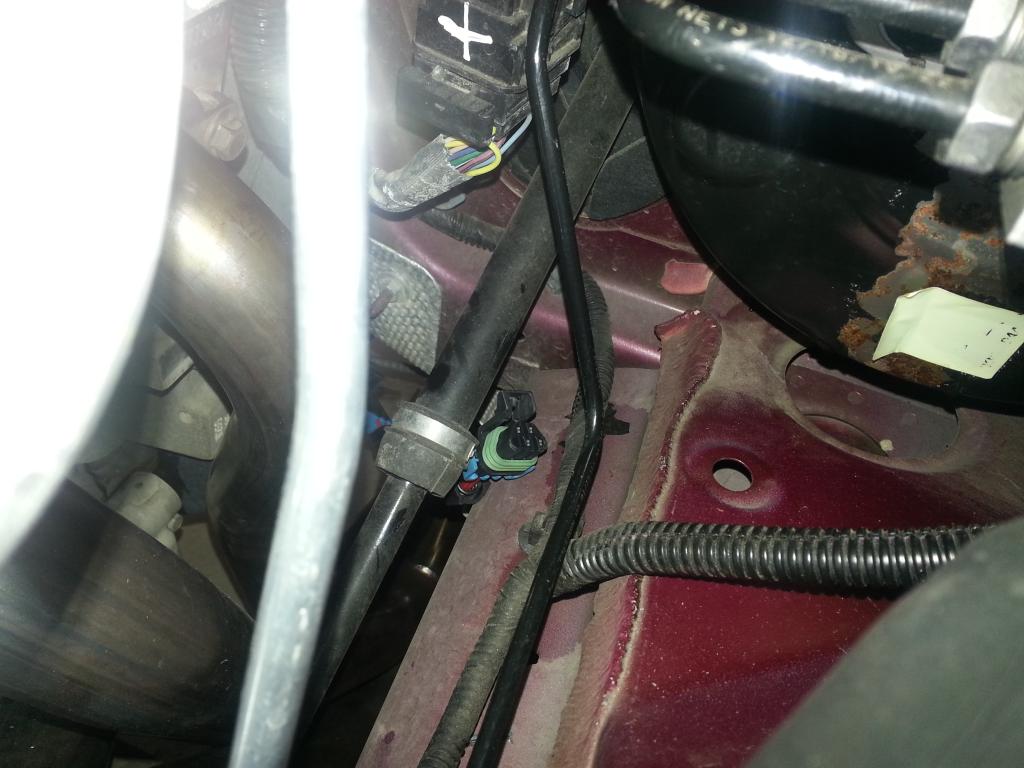 Next, loosen (don't take out) the temp sensor on the front driver's side of the head and the oil pressure sensor from the valley cover (or the Lifter Oil Manifold Assembly): Oil Pressure Sensor Unbolting (using a special socket JUST for this from AutoZone): 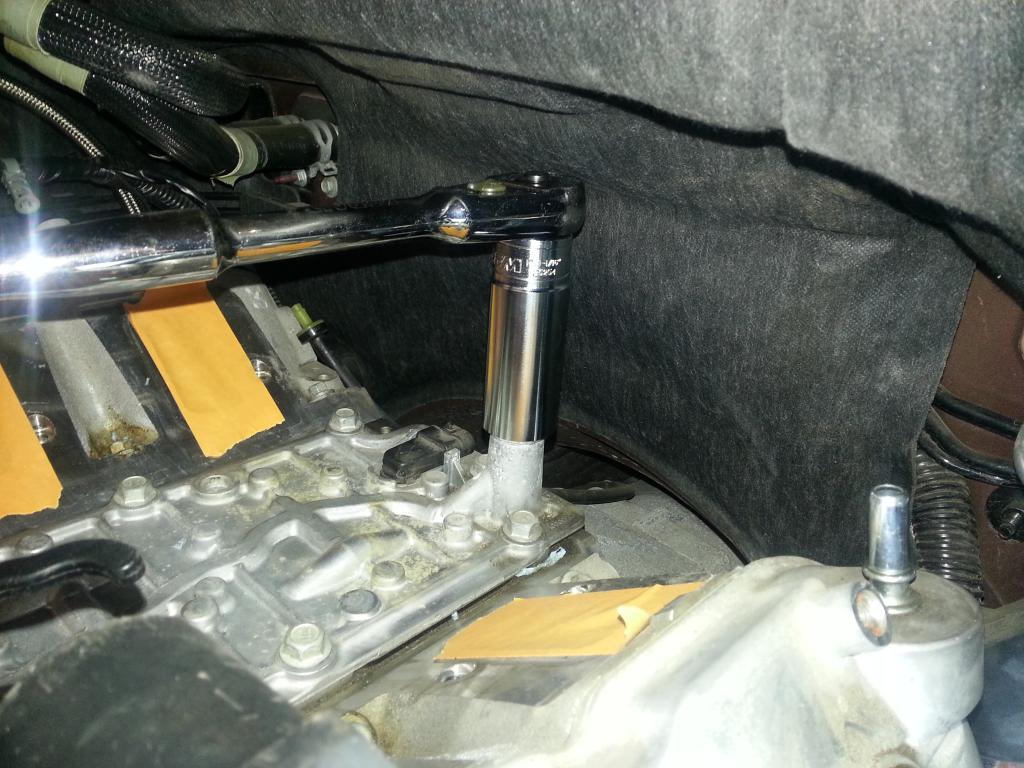 Temp Probe: 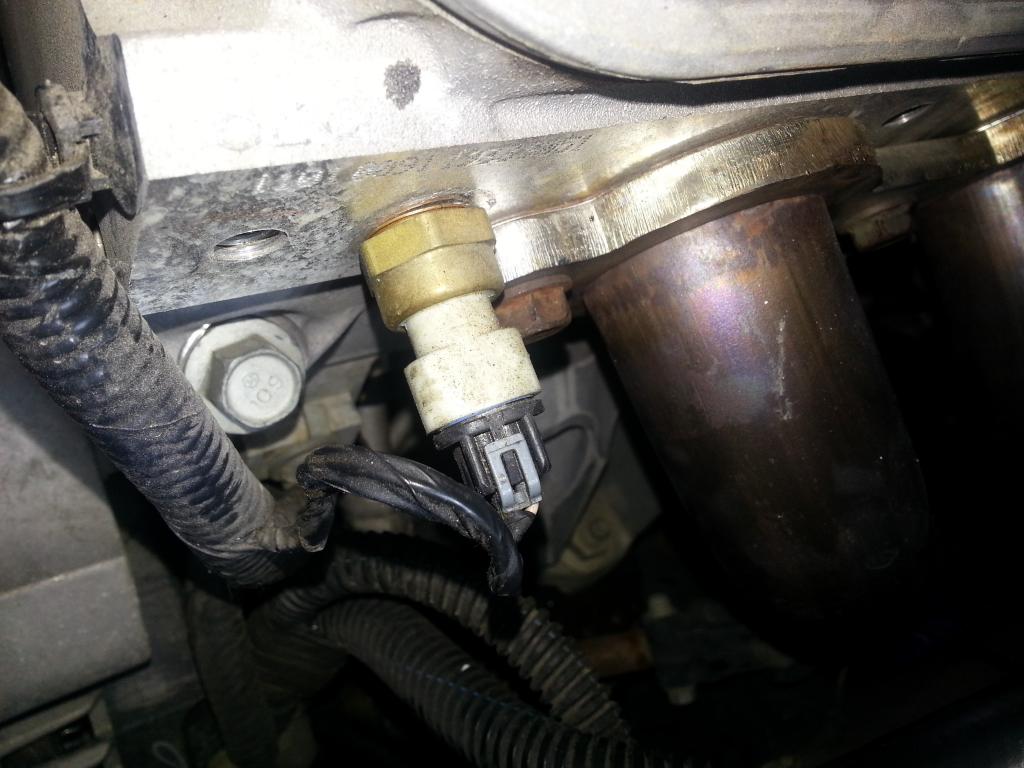 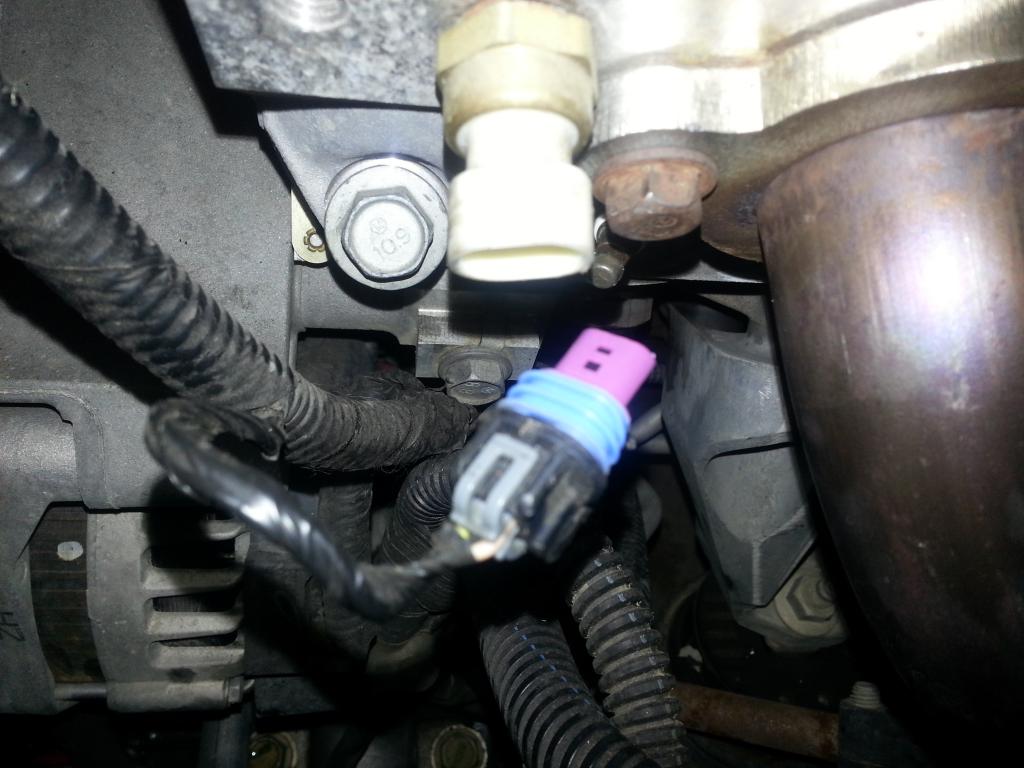 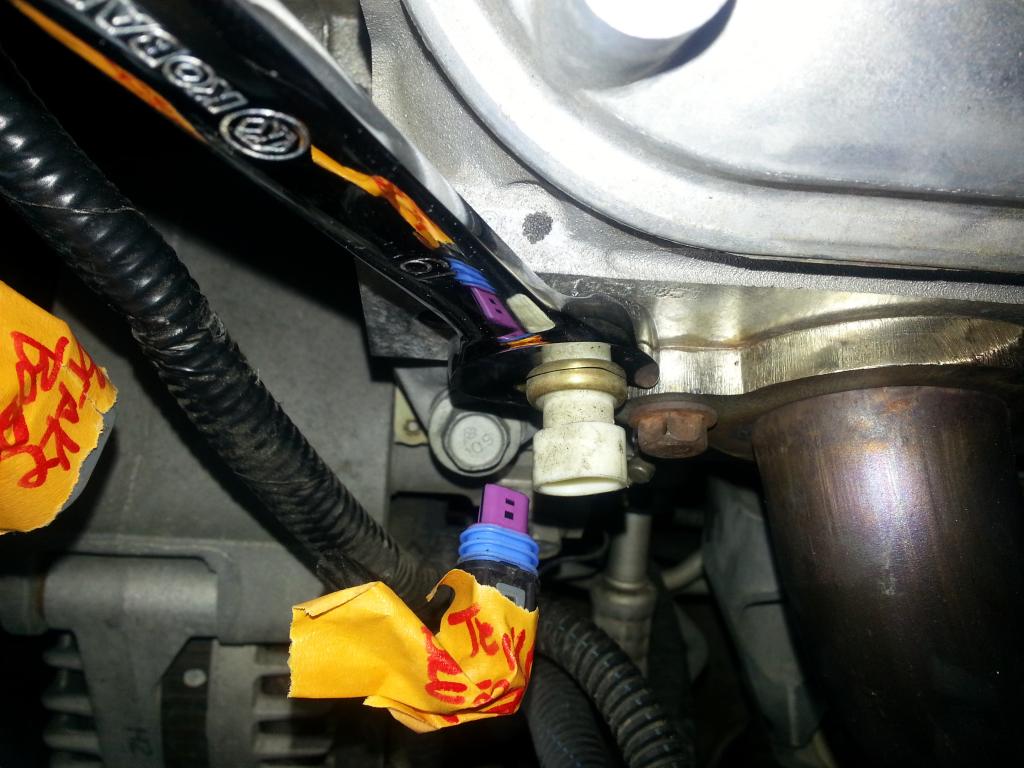 Also on the back of the drivers head near the oil pressure sensor is a 'ground' cable (15 mm socket). You'll need a wrench as a socket won't fit:  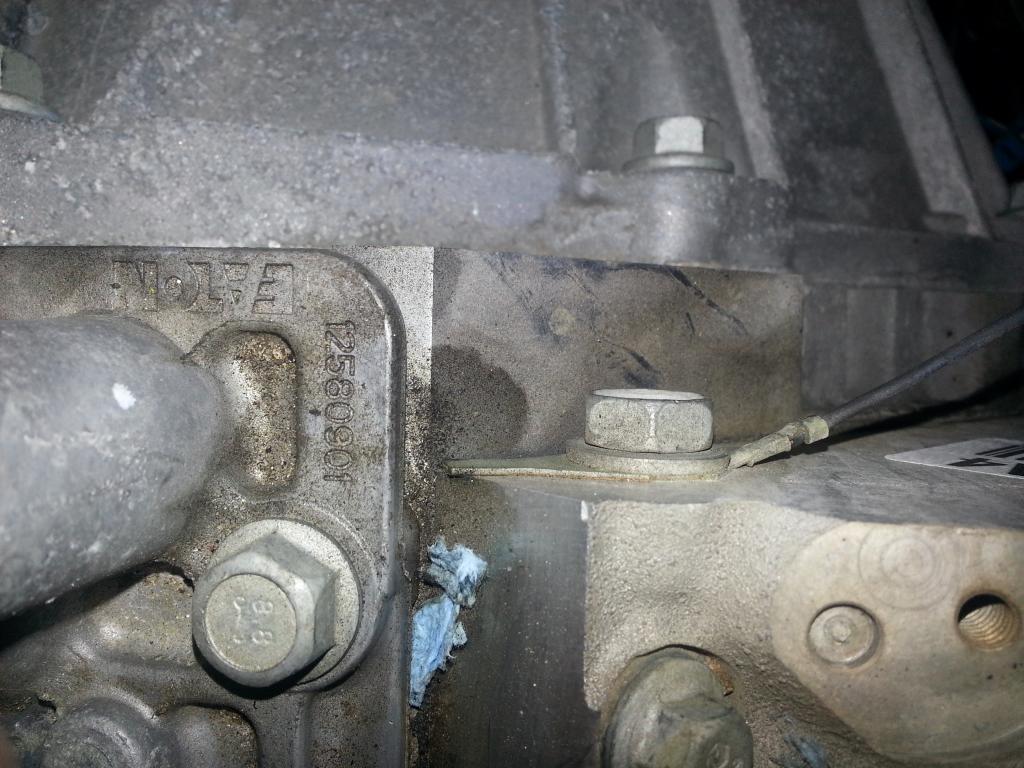 Now, there is a 'vent' that is on the passenger's side. This one also screws into the head. You can remove the line by pulling down gently but firmly and then unscrew the vent cap: 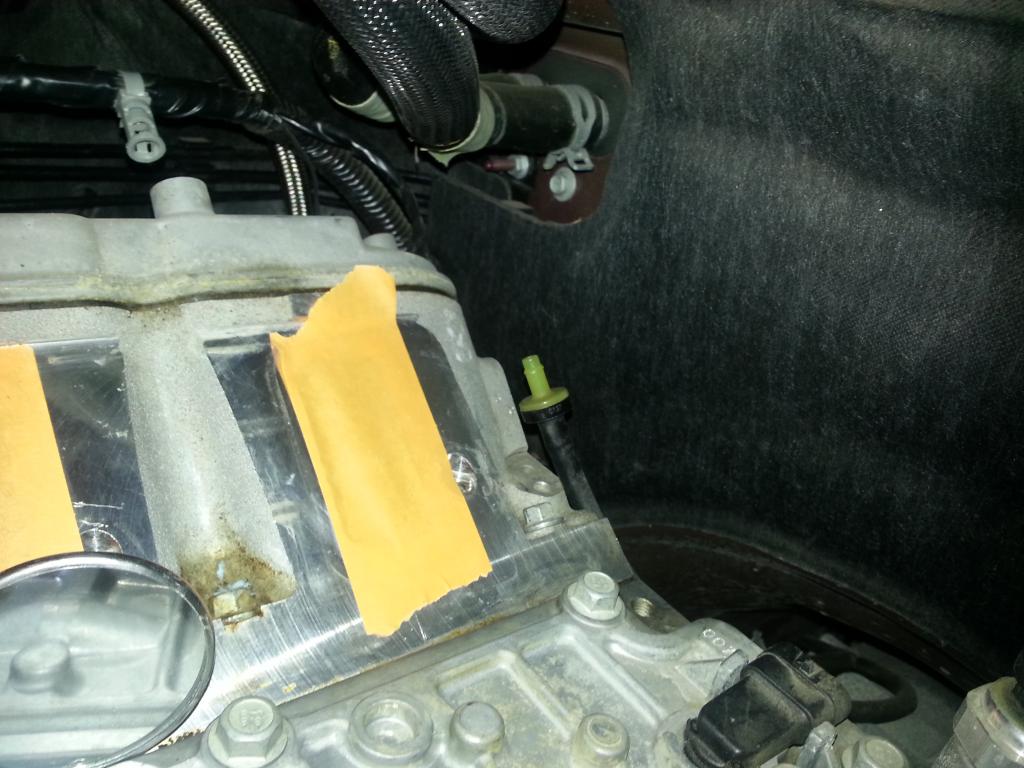 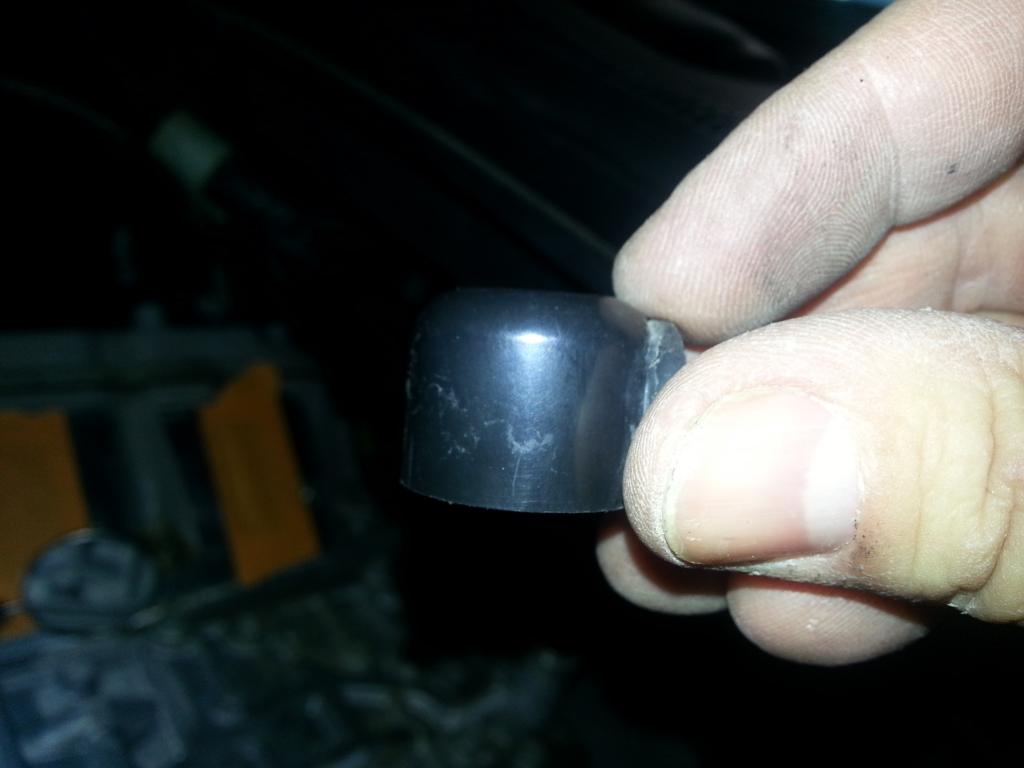 On the passenger head in the front, I'm removing the EVAP solenoid (that I won't be using on the SC) just to have one less thing on the head to remove (15 MM socket):  As habit, mark on the head what went where: Drivers (PS is power steering, wl is wire loom):  Passenger head (front): 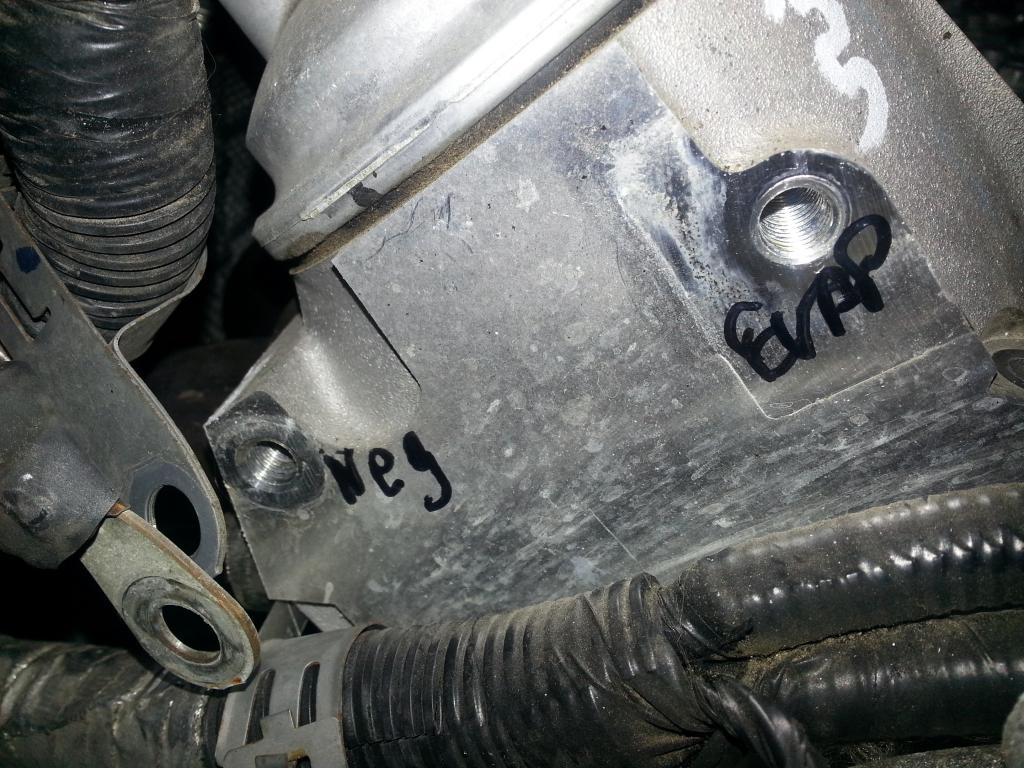 Water pump removal (note the 2 holes on the left upper part of the water pump is for the tensioner I removed -- we'll be using the new one from ADM!): 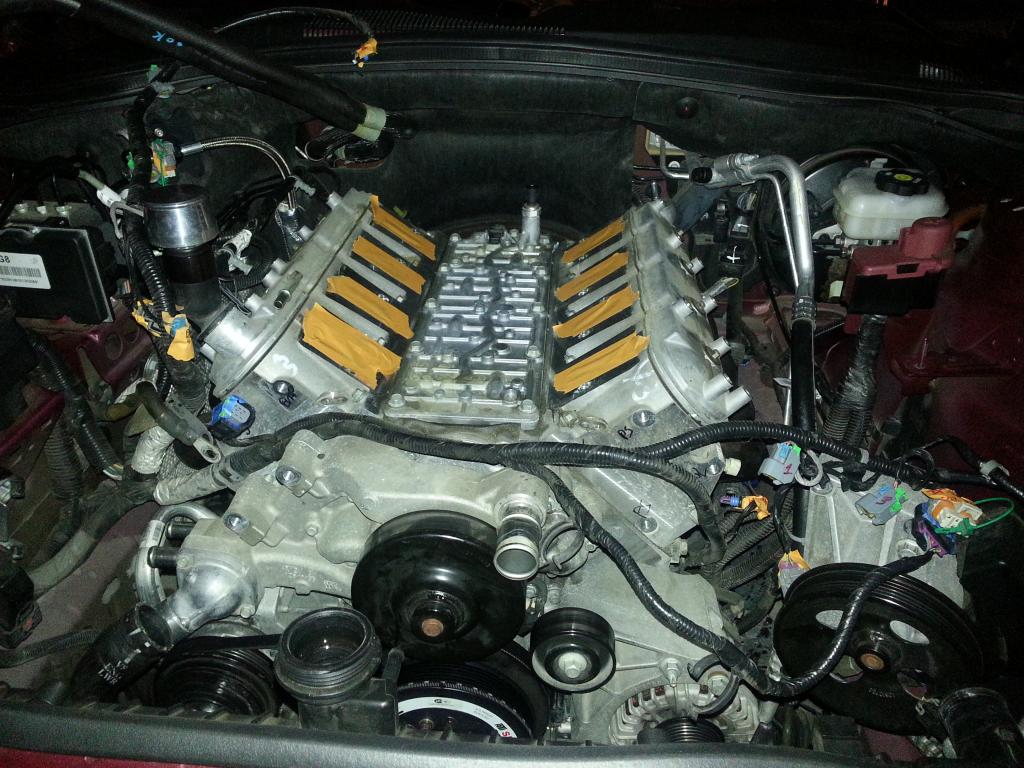  3 Bolts on Passenger side (10 MM socket): 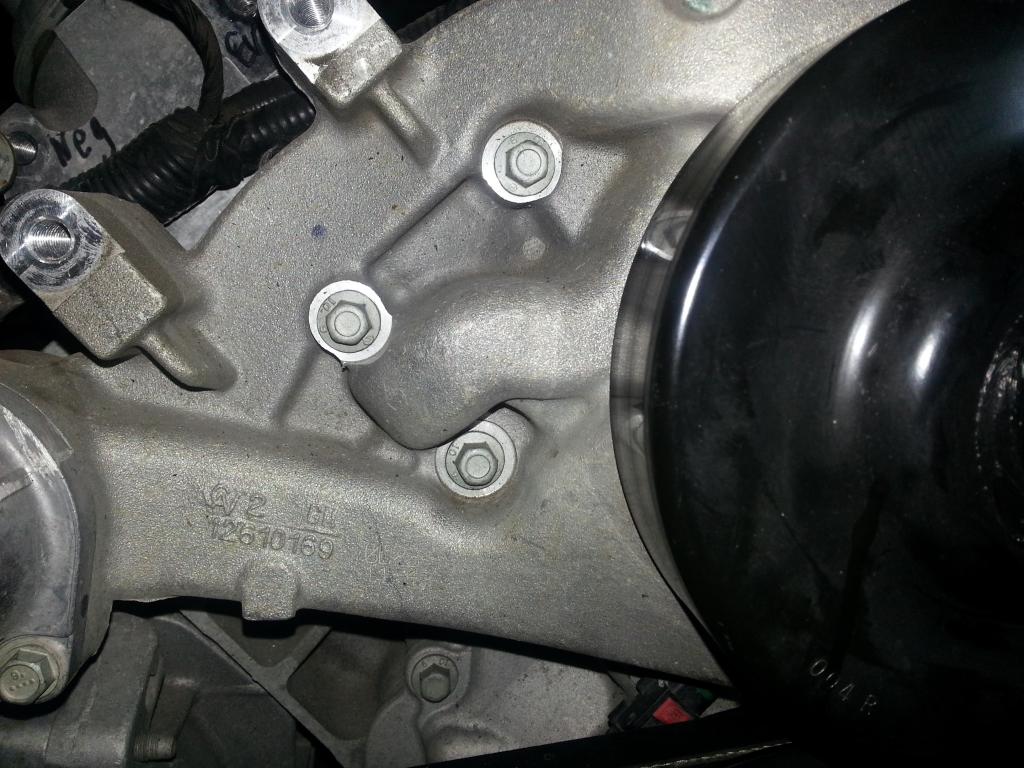 3 bolts on Driver's side -- NOTE: the lower bolt will need to be in place when putting the pump on as the idler pulley will NOT allow install or removal: 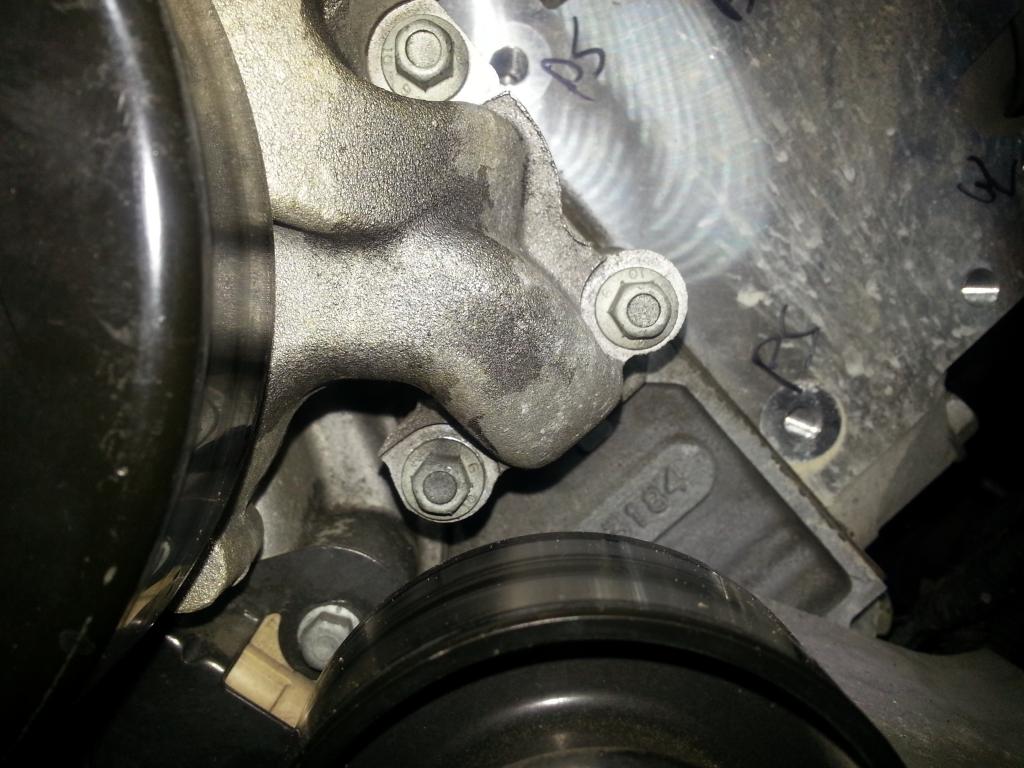 Bolt that won't be removed: 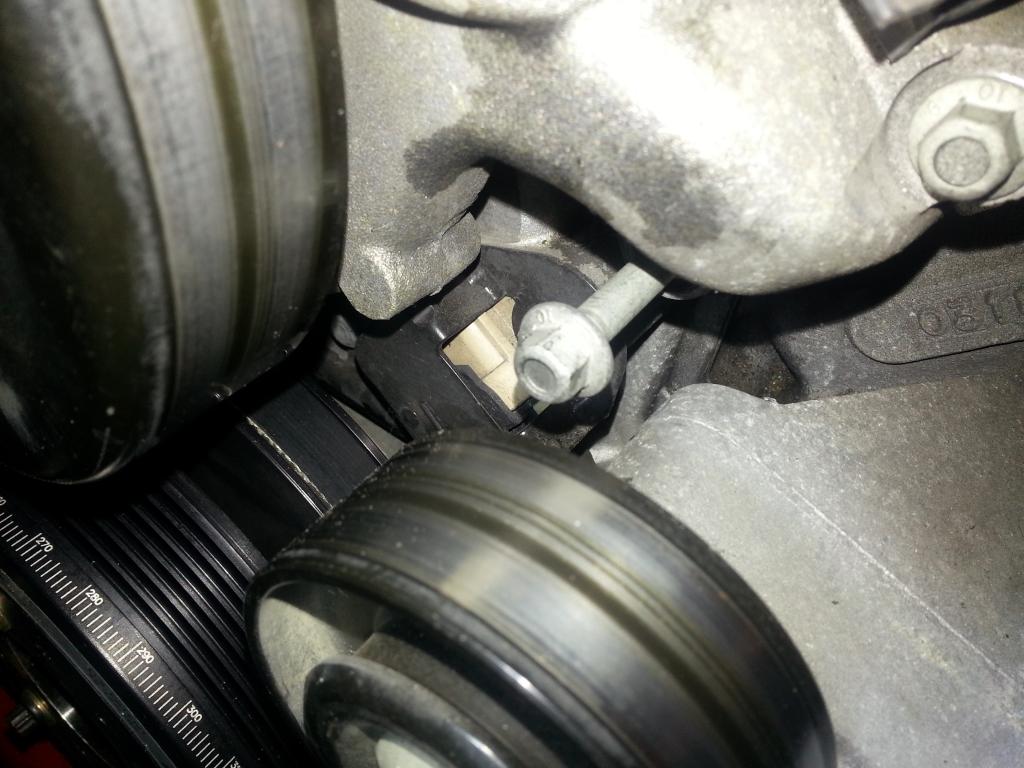 Pump removed and bagged n tagged: 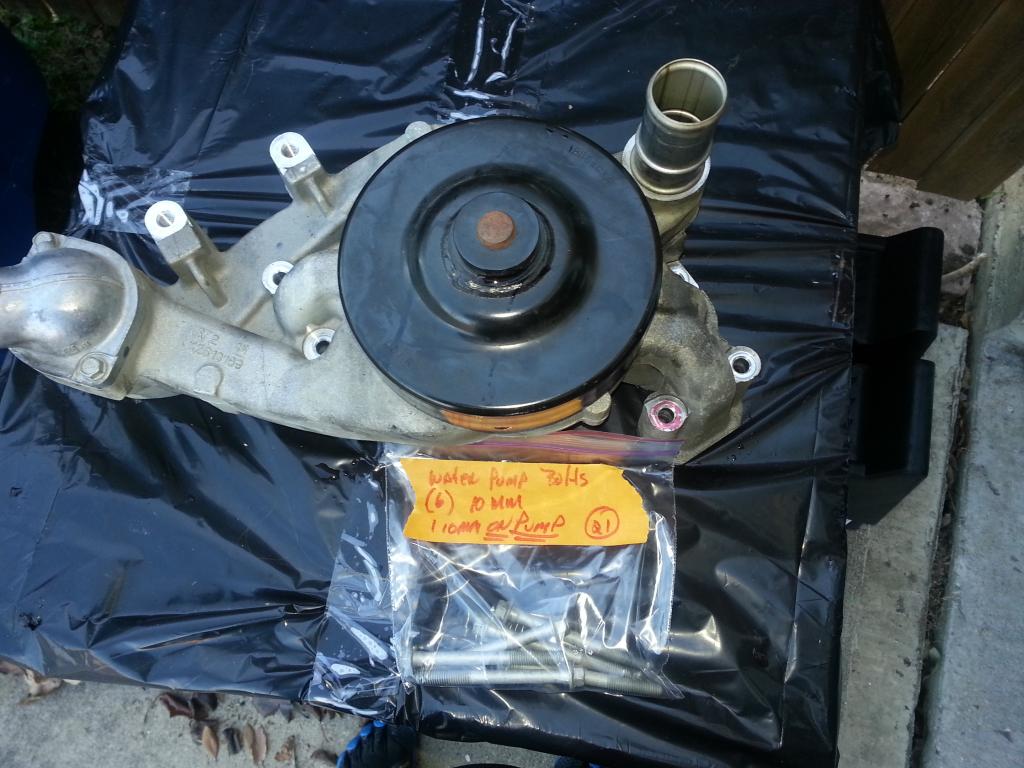 Note how I tag each item and related ones: 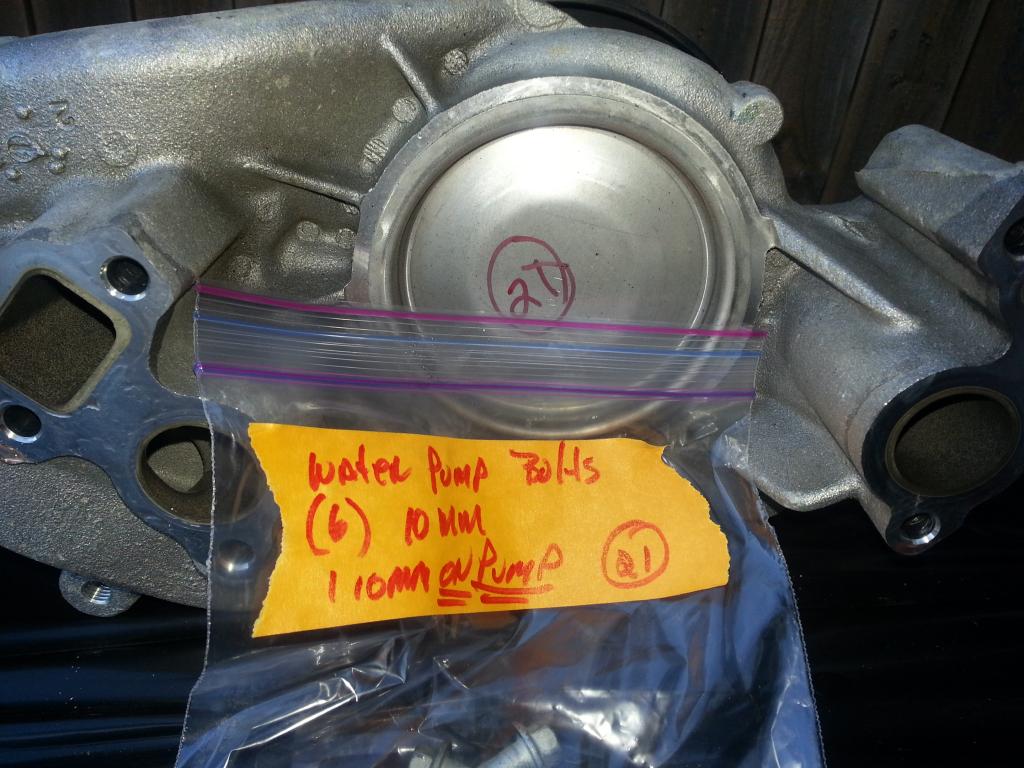 All the bag n tags in order front to back since I don't have a lot of room for everything: 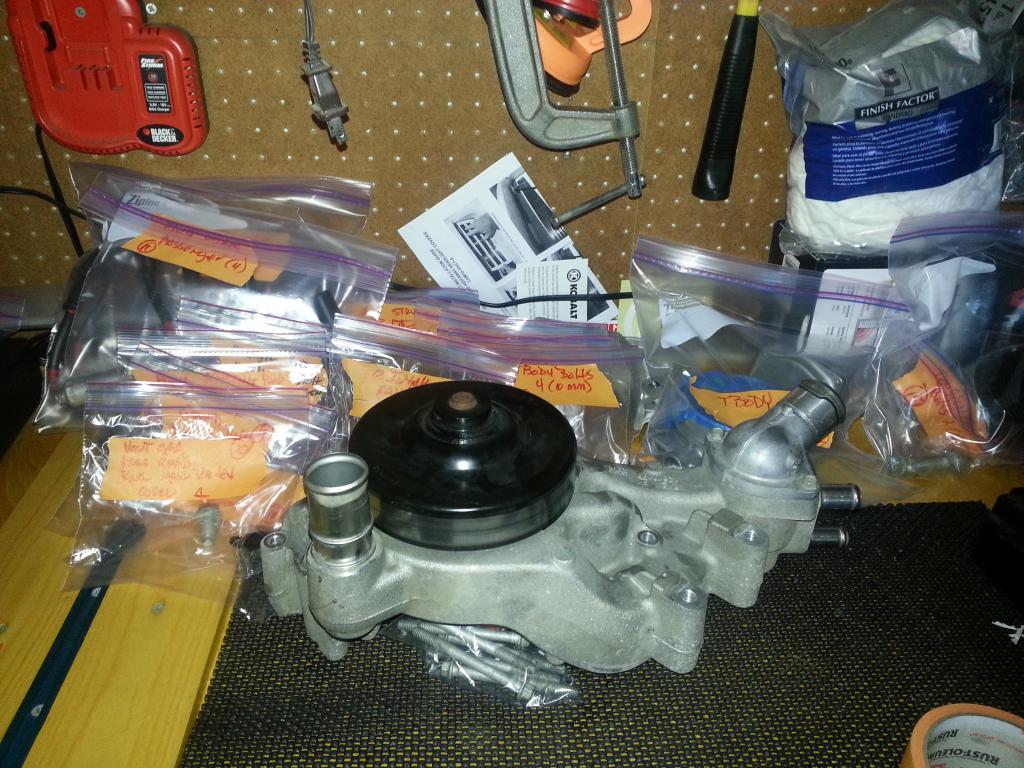 My uninstall log as I go with the bag number and contents: 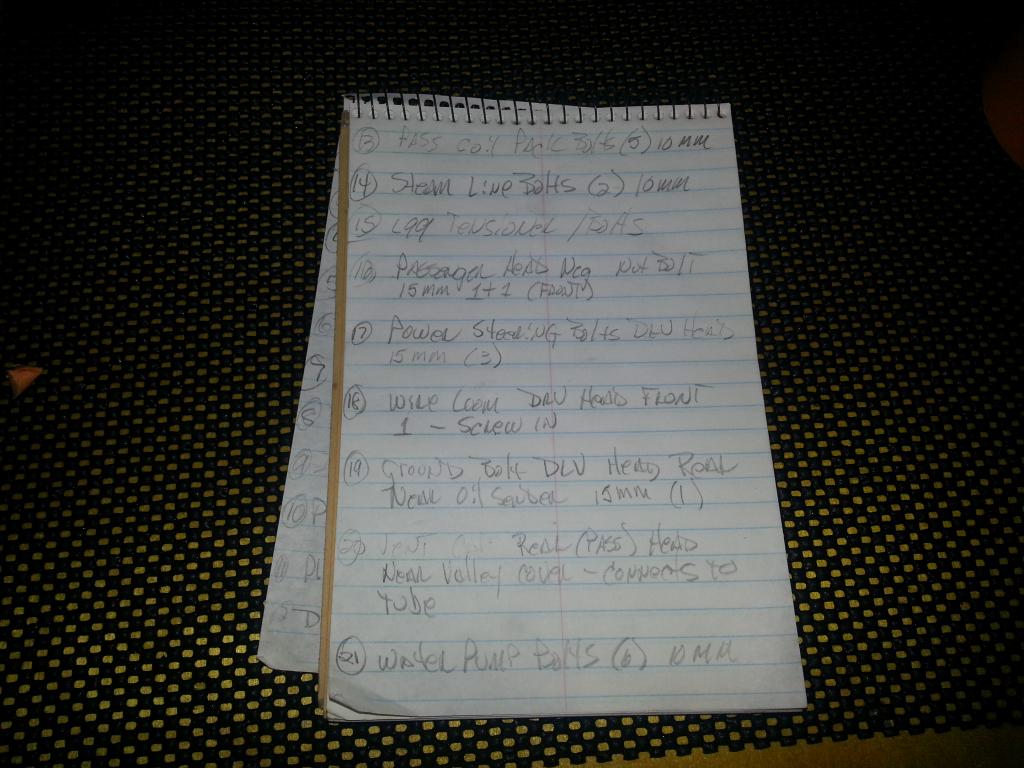 Getting closer: 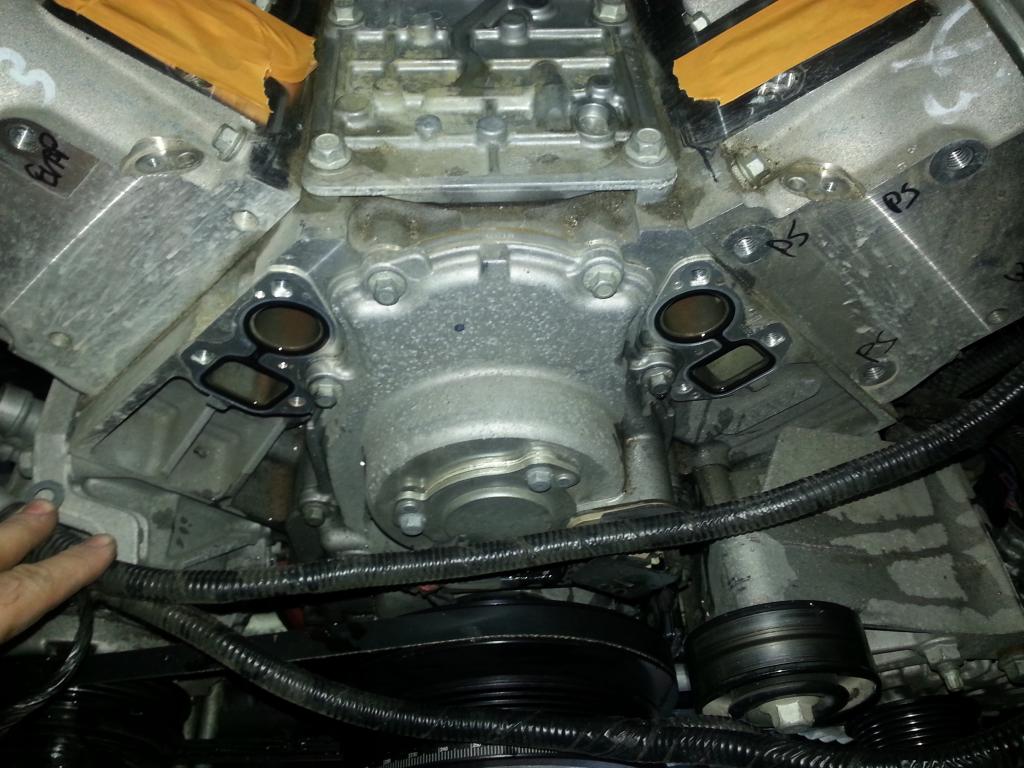 Next I'll take a wet-dry vac and vacuum out what anti-freeze I can from the block. Passenger head still has an O2 connector that I have to remove. Once that is done, valve covers come off, rockers and push rods will be removed and organized!... More to come! -Don Last edited by hammdo; 07-02-2017 at 12:00 AM. |
|
|
|
|
|
|
|
 |
|
|


