You are browsing camaro5 

|
 03-02-2013, 05:59 PM
|
#99 |
|
Camaro CRAZY

|
Bringing this thread back from the dead because this is awesome!
|

|

|
|
03-02-2013, 06:04 PM
|
#100 |
|
Account Suspended
Drives: nothing Join Date: Nov 2010
Location: a hole
Posts: 17,906
|
I missed this one....that is a cool mod.
|
|
|
|
|
03-04-2013, 10:57 AM
|
#101 |
|
I am the Stig

Drives: Black w/ IOM stripe 1SS Join Date: Jan 2010
Location: Saskatoon, SK, CAN
Posts: 1,312
|
Thanks folks!
I have made SOME progress on it. Unfortunately not as much as I'd like, life has kinda gotten in the way lately haha. I had considered updating this but thought people may have lost interest. For those that might be, here's a few more pics. to make the cowl piece I clay sculpted it on the car. This was the only possible way to get the right shape.  Then I picked up some plaster cast material just like they'd use if you broke your arm. It's a mesh tape impregnated with plaster. Very easy to clean, dirt cheap and won't hurt the paint. 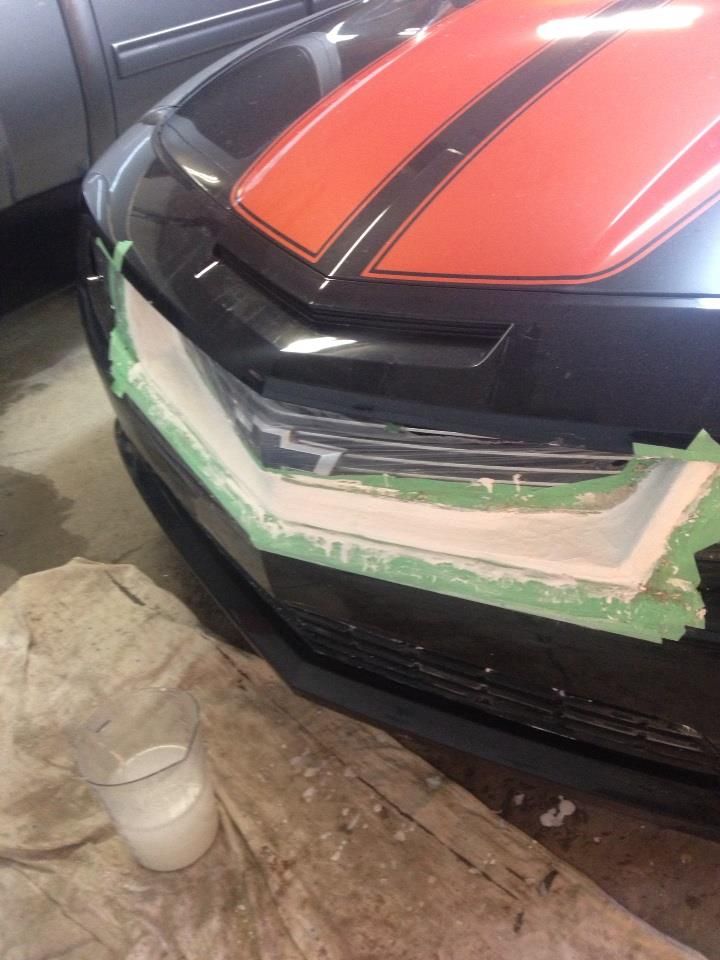 I used some vaseline as a mould release and it popped right off. Just hit it with some sand paper and primer to seal it up and it's ready to fibreglass! 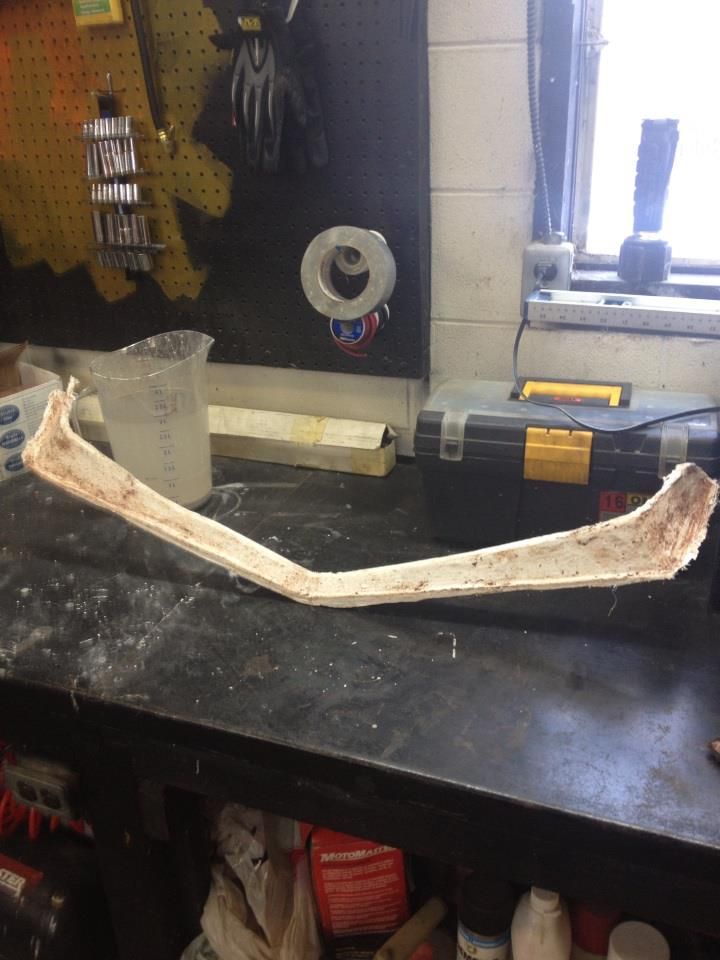 Lay up the part nice and thick. I used 3 layers of glass, it's good and sturdy, ended up about 3/8" thick. 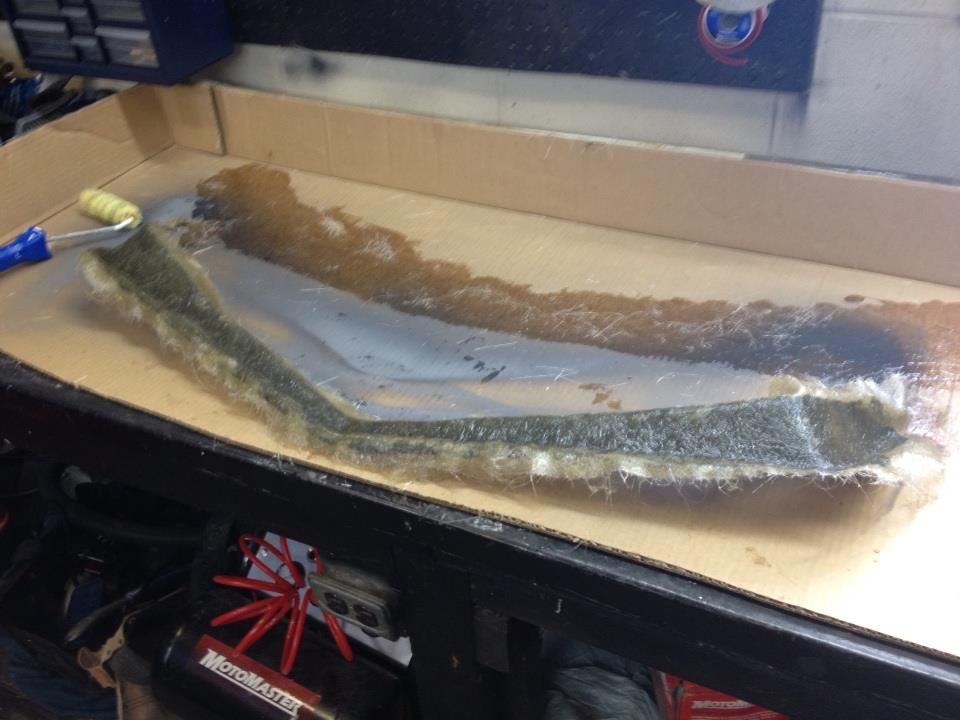 Then you pop it out of the mould, do a little trimming and test fitting until it's right! This was my first test fit, it fits much nicer now 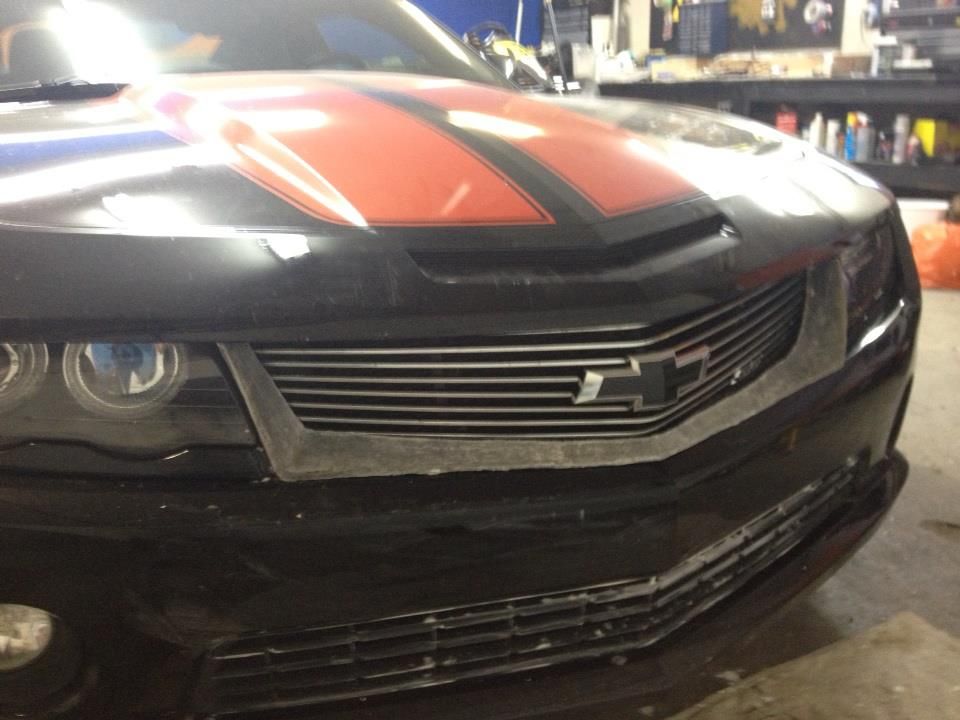 I've since glassed some plywood support into the back that fits through the bottom grill slot. I'm going to mount this cowl to the grill itself so it will all be one piece and can be removed like a stock grill insert. So the wood sticks through, I'm going to add one screw to the wood against the back of the grille bars to hold it in place, and then do a layer of glass on the back to make it solid and permanent. All these connections will be hidden by the cowl itself. Right now it's just about ready for body filler and sanding to make it nice and smooth, some paint and she's done! And it will only take 2+ years haha
__________________
2010 Camaro - 1SS, Black w/ Orange stripes
 |
|
|
|
|
03-04-2013, 11:59 AM
|
#102 |
|
750HP of Twisted Reaper!

Drives: Blk 2SS/Blk Carb Fibr NS-1 stripes Join Date: Oct 2010
Location: Northern VA & NC
Posts: 2,244
|
Dude i'm impressed.....it def has that shock value when you see it! The BMW Halo's are some of my favorite! Great Job!
__________________
Fear the LMR Twisted Reaper Brotherhood!
 |
|
|
|
|
03-30-2013, 05:35 PM
|
#103 |
|
I am the Stig
Drives: Black w/ IOM stripe 1SS Join Date: Jan 2010
Location: Saskatoon, SK, CAN
Posts: 1,312
|
I got a little further today. I was able to shape the new piece a little better and I've grafted it to the billet grille by glassing in some wood reinforcement and using some screws through the bottom of the piece. You can't see any of the attachment points from the front, which is Perfect! I put a coat of primer on it, and that's how it sits here.
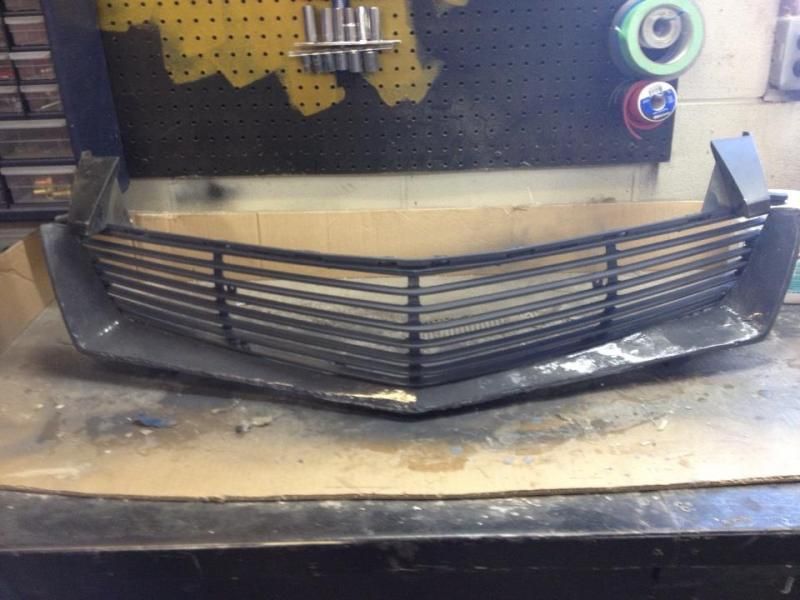 Next step is to body fill and paint the new piece, then re-install on the car! I'm going to do the whole grille black as well, then the chrome bowtie outline (it's black in the middle) should really jump off it! ALMOST THERE!!
__________________
2010 Camaro - 1SS, Black w/ Orange stripes
|
|
|
|
|
03-30-2013, 10:59 PM
|
#104 |
|
Camaro CRAZY
|
Can't wait to see the finished product. Definitely one of a kind!
|
|
|
|
|
03-30-2013, 11:10 PM
|
#105 |
|
BRUCE WAYNES DD

Drives: 2010 2SS/RS CGM Join Date: Dec 2011
Location: wilmington NC
Posts: 511
|
 : :Couldnt help it A for effort tho!!
__________________
JBA 1 7/8 LT`s, High flow mids, and Cat back,Airaid intake, JRE Tune, & alot of flat black....
  |
|
|
|
|
05-28-2013, 06:40 PM
|
#106 |
|
I am the Stig
Drives: Black w/ IOM stripe 1SS Join Date: Jan 2010
Location: Saskatoon, SK, CAN
Posts: 1,312
|
HOLY SWEET BABY JEBUS.... I'M DONE!!
It only took a couple of years haha, but the front end is complete! Just be stubborn, and keep at it and eventually you can do anything! Please don't mind the dust on the car in the garage pics, they were taken pre-wash. Is it professional shop quality? no, it isn't. It's hand sanded and formed basically, so there are still some wavy bits that I will probably try to straighten out next winter. Is it pretty good for a dude in his garage with minimal tools and working on it the odd weekend? Hell ya! I think it turned out great, and I am going to just enjoy driving it around for a while before thinking too hard about what I want to do next.     
__________________
2010 Camaro - 1SS, Black w/ Orange stripes
|
|
|
|
|
05-28-2013, 07:00 PM
|
#107 | |
|
knows 2 facts about ducks

Drives: ...and they're both wrong Join Date: Aug 2009
Location: The HMS Invincible
Posts: 25,072
|
Quote:
 been following your build on this for quite some time - glad to see you finally able to finish it. been following your build on this for quite some time - glad to see you finally able to finish it.
__________________
 |
|
|
|
|
|
05-28-2013, 07:02 PM
|
#108 |

Drives: 2010 Camaro 2LT VR/RS CGM Rally's Join Date: May 2009
Location: Palmyra, PA
Posts: 5,675
|
wow it looks fantastic! great job!
__________________
|
|
|
|
|
05-28-2013, 07:09 PM
|
#109 |
 Drives: 1979 camaro z28,2010 camaro 2ss/rs Join Date: Oct 2012
Location: san angelo
Posts: 62
|
now I think i'd like to see something like that on the 6th gen! AMAZING ENGINEERING SKILLS MY CAMARO FRIEND LOVE IT
__________________
Some say good things come to those who wait,the rest of us think this red light is way too long
  |
|
|
|
|
05-28-2013, 09:26 PM
|
#110 |
         
Drives: 2011 1LT/RS A6 RJT SuperCharged Join Date: Mar 2011
Location: 87114
Posts: 3,503
|
One of a kind, that's so sick! Any plans on marketing it?
__________________
Power is worthless without control. The 2nd protects the 1st.
BMR sub frame brace, BMR tunnel brace, LSR sways, LSR CM ca & tl, Sphon ExD el, GM tower brace, Megan EZ Streets, Goodridge Stainless Steel Braided brake lines, PowerStop D/S rotors & pads, Doug Thorty Ceramic Shorties, Magnaflow x-pipe, MRT V2.0, KICKER PowerStage sub & amp, Infinity speakers & tweeters, Viteese Throttle Controller, Viteese Paddle Shifters, ACS T2 Splitter, ACS T2 Ports/Quad LED lights, VDI kit, Havoc diffuser, IPF ECU/TRANS tuned, IPF/KPE Supercharged. 364RWHP/297RWTQ |
|
|
|
|
05-29-2013, 10:02 AM
|
#111 |
|
I am the Stig
Drives: Black w/ IOM stripe 1SS Join Date: Jan 2010
Location: Saskatoon, SK, CAN
Posts: 1,312
|
Thanks folks!
I don't think I'll be marketing it any time soon. It took me about 2 years to complete this haha. I just don't have the time to develop all the parts, it's pretty involved. That's kindof why I started this thread, so that if someone were interested in it, they could see how I did it and it would help them get there.
__________________
2010 Camaro - 1SS, Black w/ Orange stripes
|
|
|
|
|
|
|
|
 |
|
|
 Similar Threads
|
||||
| Thread | Thread Starter | Forum | Replies | Last Post |
| Restoring Headlights with Headlight Armor Lighting Protection | HeadlightArmor | Cosmetic Maintenance: Washing, Waxing, Detailing, Bodywork, Protection | 3 | 01-12-2016 11:58 AM |
| Headlight conversion completed!! change your Non RS headlights to a RS Bi-Xenon!! | ottobody | Cosmetics and Lighting Modification Discussions | 150 | 10-28-2010 09:13 PM |
| LT headlight to RS/SS headlight conversion? | SDCamaro10 | Cosmetics and Lighting Modification Discussions | 3 | 06-29-2010 07:25 PM |
| NON-RS to RS headlight conversion kit | ottobody | Exterior Parts & Accessories | 31 | 05-19-2010 11:23 AM |


