You are browsing camaro5 

 |
|
|
#1 |
 Drives: 2011 SS/RS convertible Join Date: Feb 2016
Location: Bryant, al
Posts: 60
|
Fix your bent 5th bow for $200ish version 2.0
Alright boys and girls. You asked for it and now you will have it. The original post went a long way I helping us fix our convertible top woes, but lacked some vital info. Namely pictures and a tool list.
So we are here to fix this. 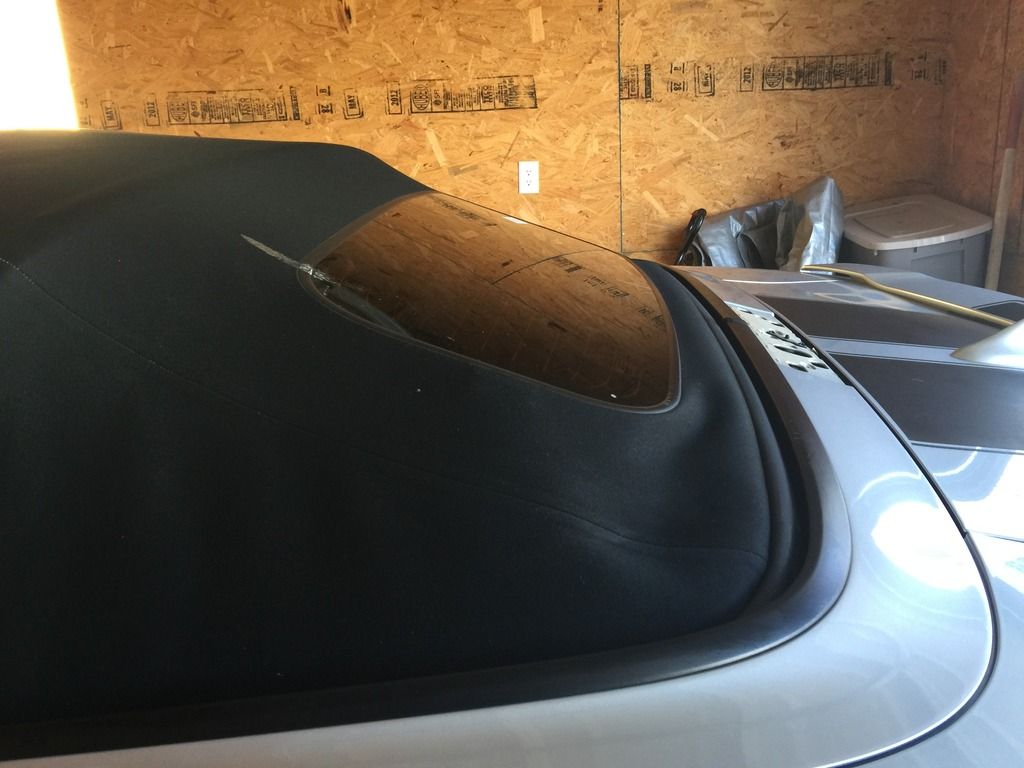 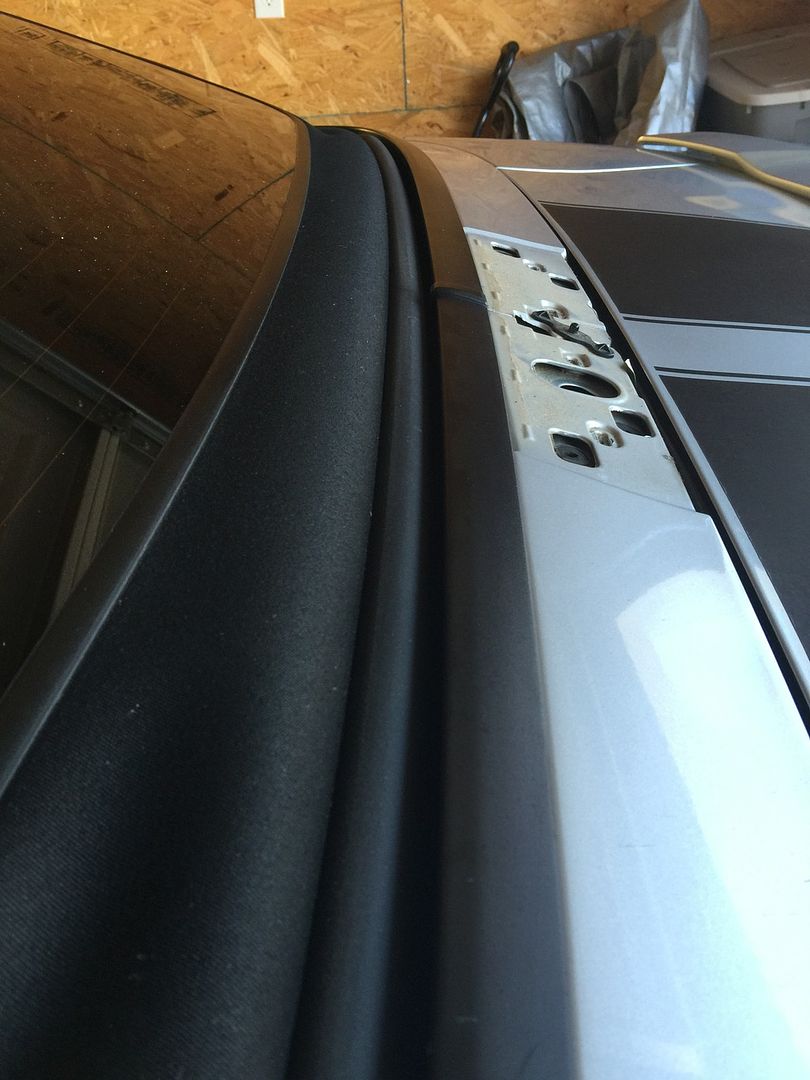 This is due to the two brackets on the end on the 5th bow bending. This causes the 5th bow to pull away from the rear of the convertible top well, subsequently causing the main seal to not be where it should be. I will be updating the posting in sections. Next will be a comprehensive list of tools needed to complete this job. Last edited by DanielW; 03-01-2016 at 11:17 PM. |
|
|

|
|
|
#2 |
 Drives: 2011 SS/RS convertible Join Date: Feb 2016
Location: Bryant, al
Posts: 60
|
Alright let's start with the list of tool needed to complete this job and get your vert back in proper form.
Straight and angled long needle nose pliers Plastic prying tools 1/4" pivoting head ratchet 1/4" 10mm in short and deep well 1/4" T20 (torx) Assortment of flathead screw drivers Rubber mallet Drill with proper sized bit for removing the rivets High quality rivet gun (source an air powered one if you can) 3/8" ratchet (pivoting head if you have one, will make your life easier) 3/8" T40 (torx) Magnet I will update if I missed anything. |
|
|

|
|
|
#3 |
 Drives: 2011 SS/RS convertible Join Date: Feb 2016
Location: Bryant, al
Posts: 60
|
And here we go.
First we need to remove the 3rd brake light. From inside the trunk if you look up below the light housing you will see four green body clips. These are all that hold the light in. Using your needle nose pliers and your plastic prying tools, manipulate the clips while applying constant pressure forcing the light housing out. The two outer clips are going to be the hardest to get to and will make you curse and want to take a shot...or two. 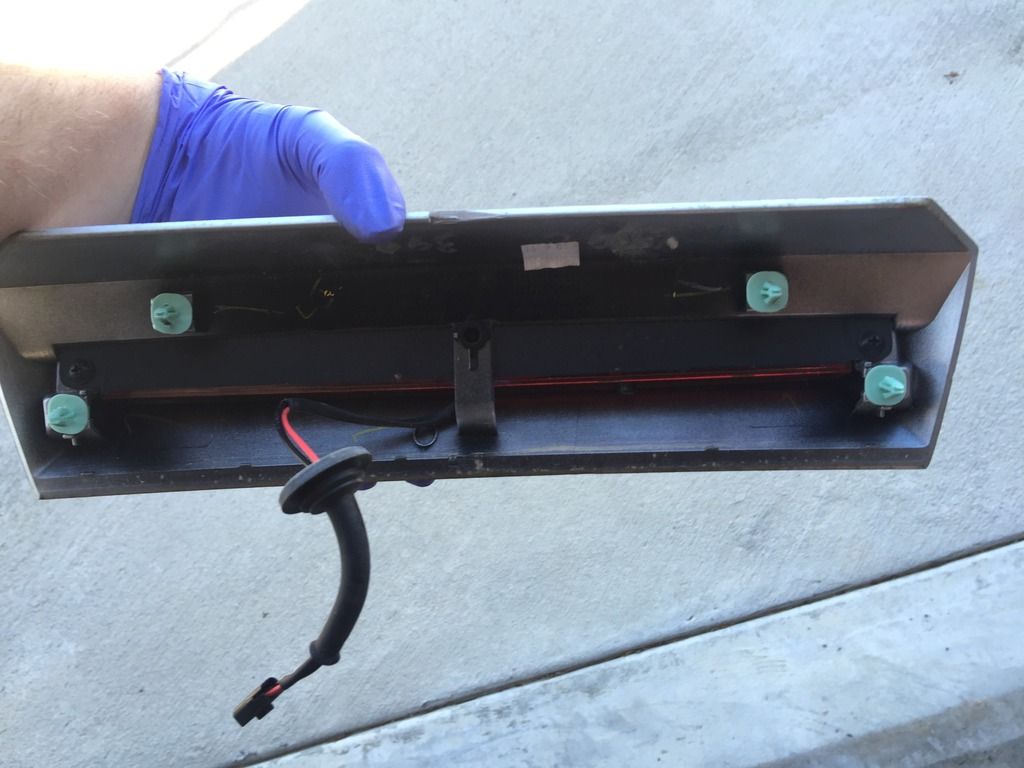 You then end up with this 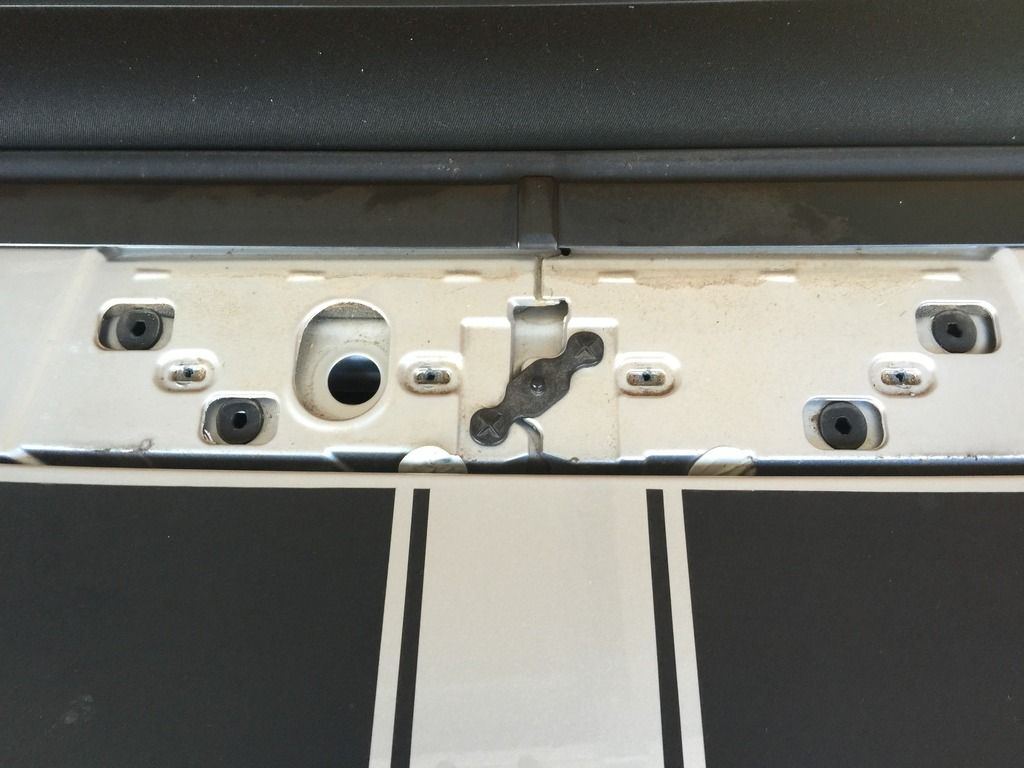 Next we need to remove the two trim pieces that surround the convertible top well. There are four t20's where the 3rd brake light was and two more on the backside of the trim pieces that can only been seen with the trunk open. Remove those 8 screws. Now get the top open to approx 50%. Underneath the trim pieces inside the well are 12 10mm nuts. Using your 1/4" ratchet remove those 12 nuts. 3 are shown here circled for reference. 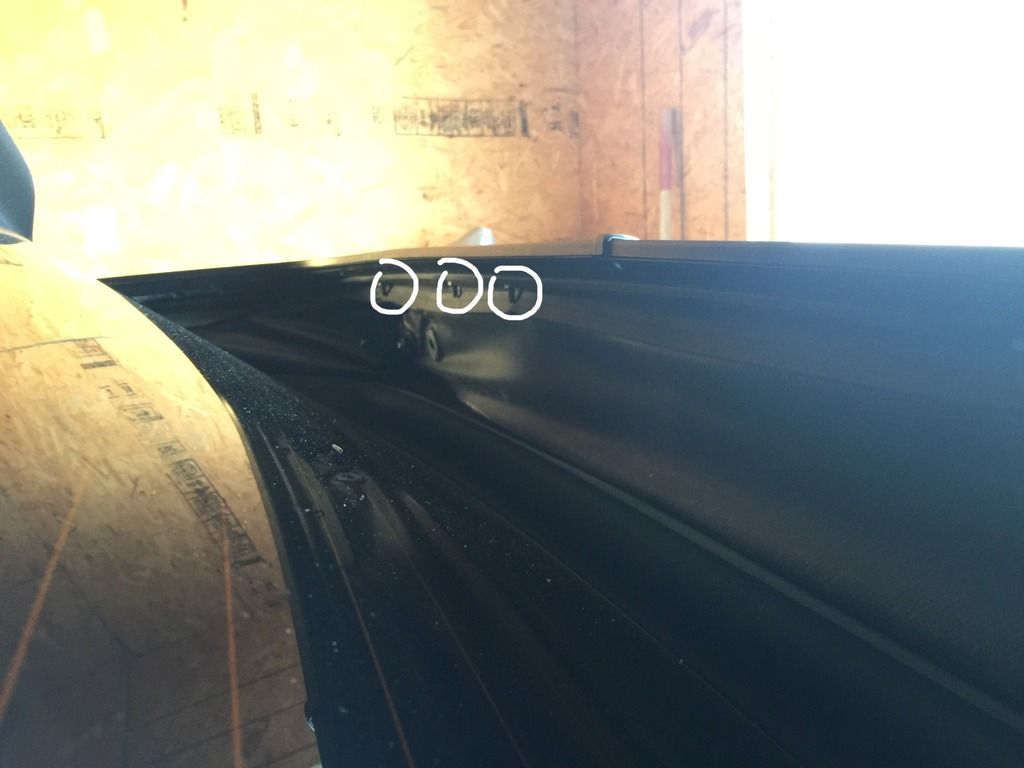 After you have removed those nuts start pulling up on the passenger side trim piece, being mindful that the from section of this piece fits under the small trim piece directly ahead. Stay tuned. |
|
|

|
|
|
#4 |
 Drives: 2011 SS/RS convertible Join Date: Feb 2016
Location: Bryant, al
Posts: 60
|
Alright, so now the well is exposed. Next is to partially remove the fabric top from the small frame section that seals to the rear windows.
To do this you will still have the top at 50% open, this frame section is about 10-12" long. Starting from the bottom your going to use a flathead screw driver to carefully let out the plastic tab that holds the fabric top to the frame. This tab runs the whole length of the frame and is pressed in. Take your time, be patient, and again careful. This tab is sewn to the fabric and if your not careful you will rip the top. After you have pulled the tab out about halfway up the frame pull the rubber weather strip up the same height. Here I have circled the plastic tab in white and a red arrow point to the channel it came out of. 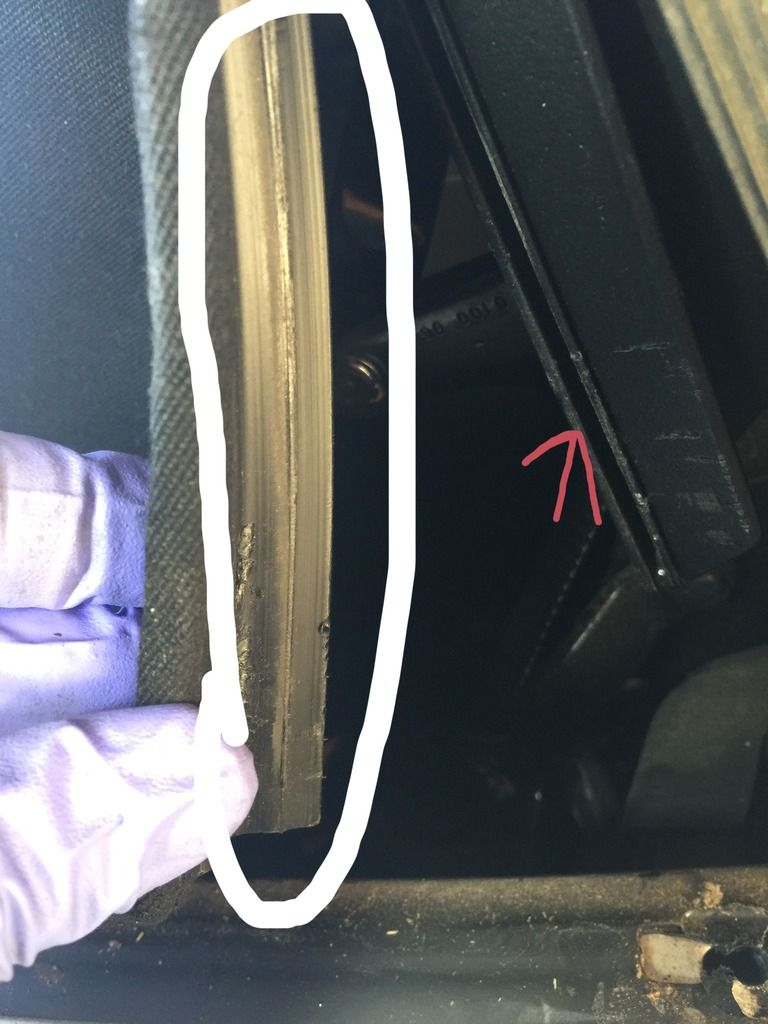 It should end up looking like this, on both sides. 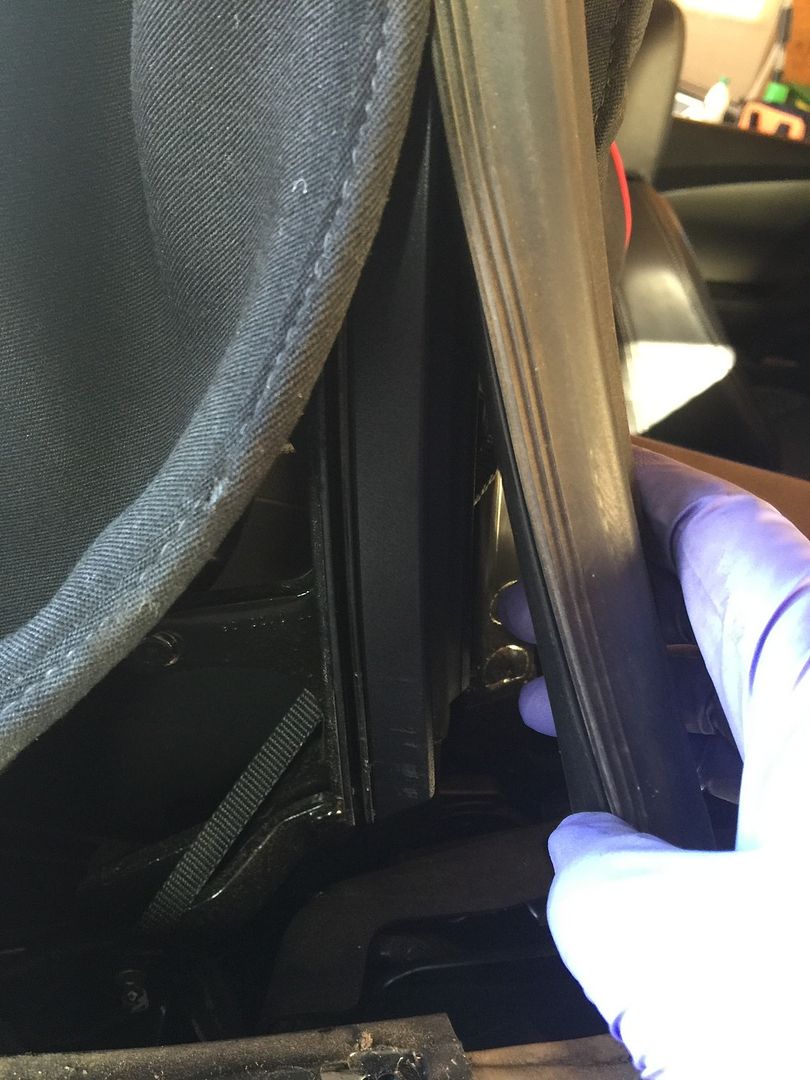 To be continued. |
|
|

|
|
|
#5 |
 Drives: 2011 SS/RS convertible Join Date: Feb 2016
Location: Bryant, al
Posts: 60
|
Now we can get into the meat and bones of this debacle GM gave us. But that's ok, we have the technology. We can make it better, stronger, fas...sorry wrong time for a tangent. So let's get back to it.
Next we have to partially remove the main weather seal from the top of the 5th bow. I removed the entire seal and found this to provide a little more room to work. It was easy to remove and easy to reinstall. It also provided me with the opportunity to lubricate the entire seal to prolong its life. Here it is removed sitting next to the new 5th bow (which you only need the brackets and spacers. 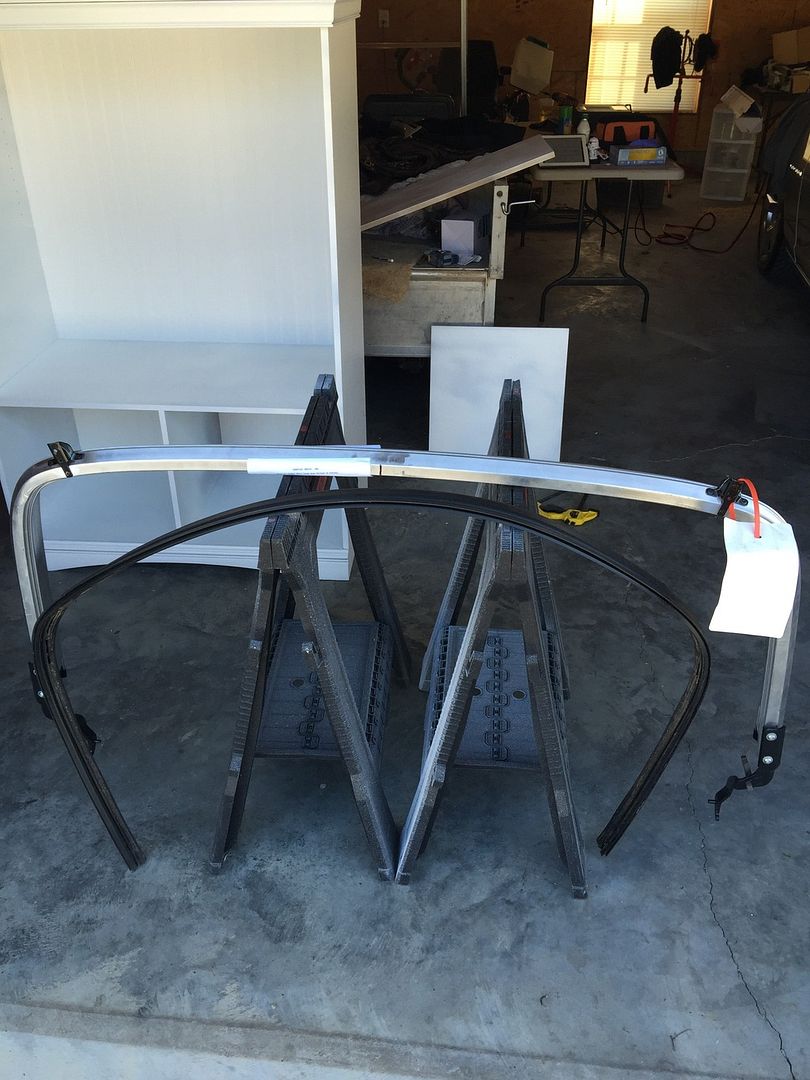 Next we need to pull the water bag and the top out of their respective channels in the fifth bow. Now we are only going to pull these guides out of the 5th bow back about 6-8 inches. Here I have circle the guide for the top in white and the guide for the water bag in red  We have now cleared our path to start doing the actual repair. First take a look at your brackets on the new 5th bow to give yourself a visual reference. Ok now we are going to remove the clips the secure the bracket's stud to the top mechanism. Using a small flathead (I prefer just a simple pocket screw driver) pry the inner tab of the clips and slide it off. |
|
|

|
|
|
#6 |
 Drives: 2011 SS/RS convertible Join Date: Feb 2016
Location: Bryant, al
Posts: 60
|
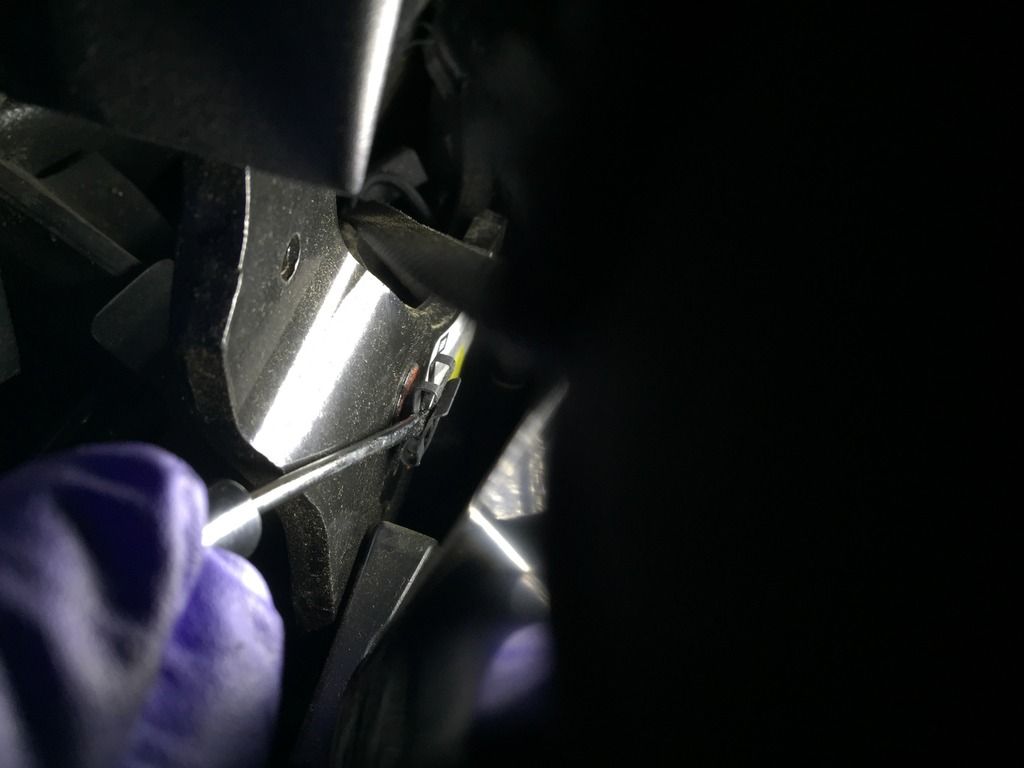 Now pull the bracket out of the mechanism so it looks like this 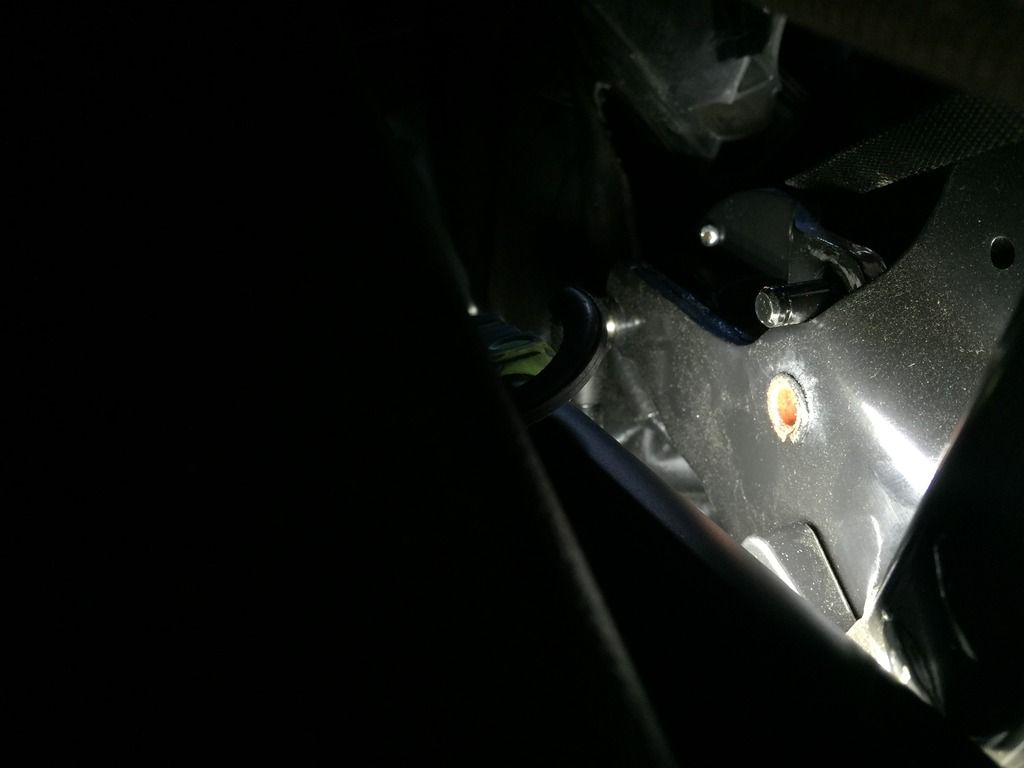 Now we remove the old bent bastard brackets Using your 3/8" ratchet and your T40 torx start removing the bolts on the bottom side of the brackets (DO NOT FULLY REMOVE YET!). There are two bolts per bracket. The reason for not fully removing the bolts is that there is a metal plate inside the bow. This is what the bolts attach to and once the bolts are removed it could slide down inside the bow....forever gone. So, once you have successfully loosened the bolts grab your magnet and place it on the end of the plate to keep it in place like so. 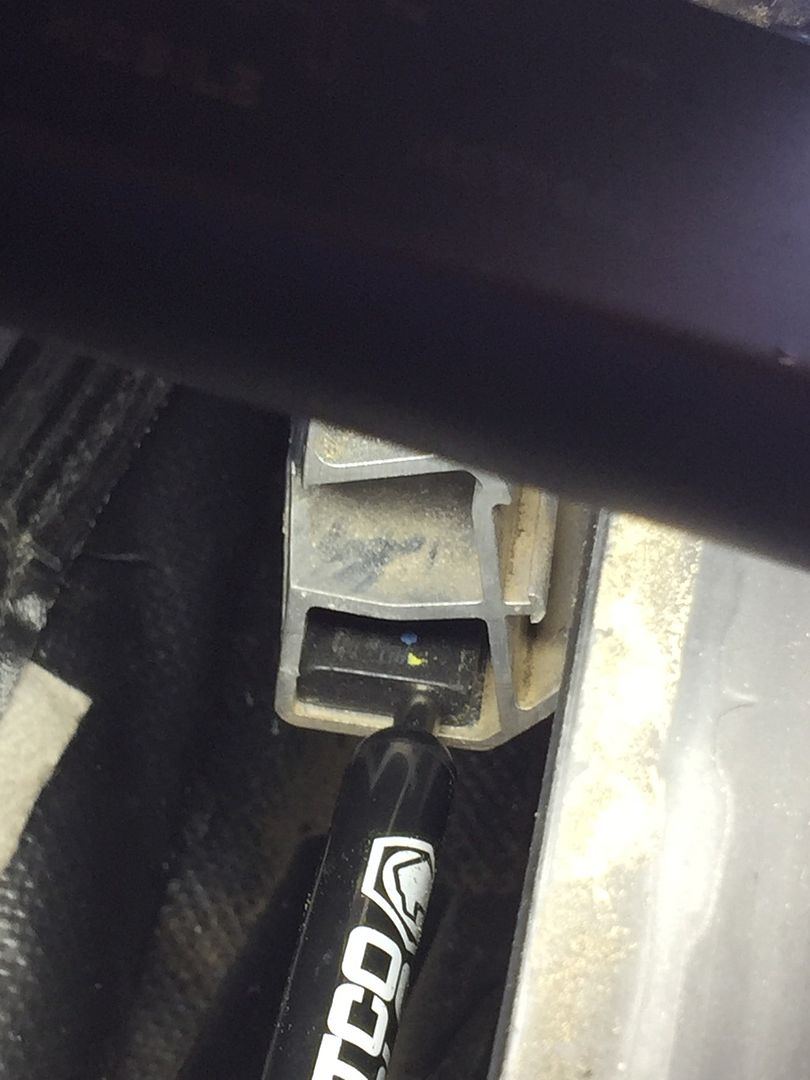 Congratulations the brackets are detached from the bow. Next we need to take care of those rivets. Drill them out, taking care to use whatever you can find to keep the shaving from falling down into the water bag. I think you can understand why this would be bad 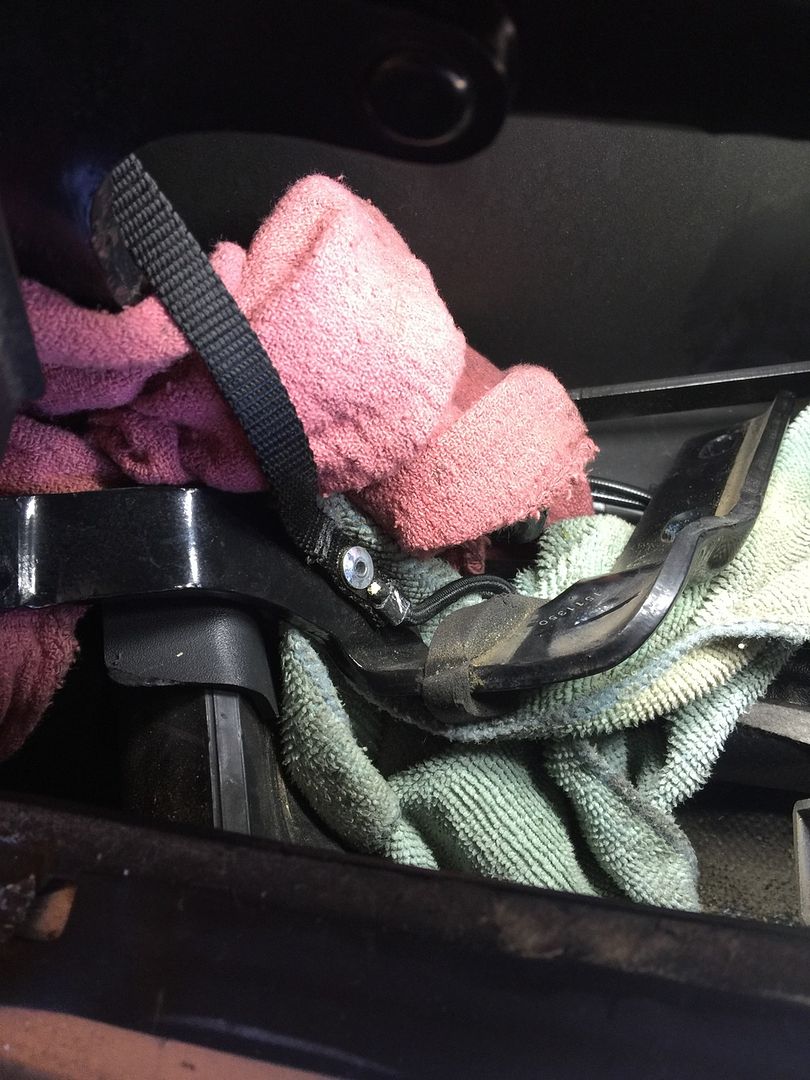 Rivet drilled out 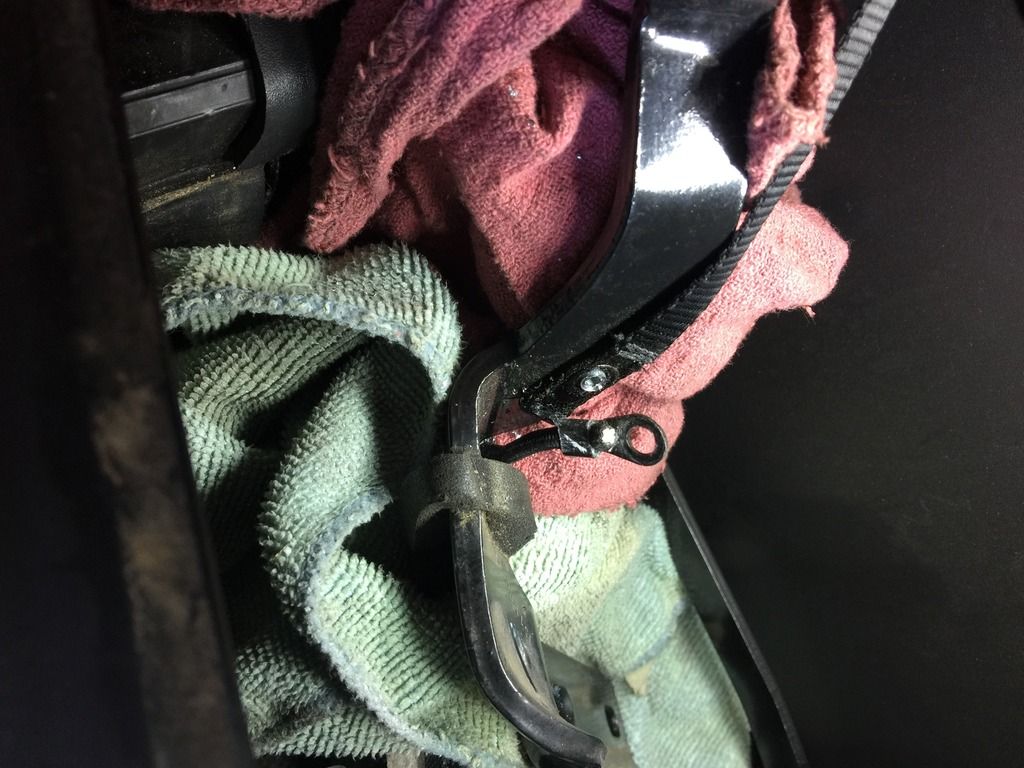 You can now remove the brackets from the car. Go have a beer, smoke a cigarette, whatever. Your halfway done, and going downhill is easier the up. You deserve a break. |
|
|

|
|
|
#7 |
 Drives: 2011 SS/RS convertible Join Date: Feb 2016
Location: Bryant, al
Posts: 60
|
|
|
|

|
|
|
#8 |
 Drives: 2011 SS/RS convertible Join Date: Feb 2016
Location: Bryant, al
Posts: 60
|
Alright if you have gone this far then I am confident you can go back together on your own. Just make sure that you use the 3 spacers that were used with the new brackets instead of the two that came out with the old one. Also make sure that you place both brackets equally when you tighten them down, otherwise your top will be crooked.
Just go in reverse and you should be fine. Oh and the rubber mallet is to help get the plastic tab of the top the goes in the frame above the rear window. It's a bitch. Well when your done your top should look like this. 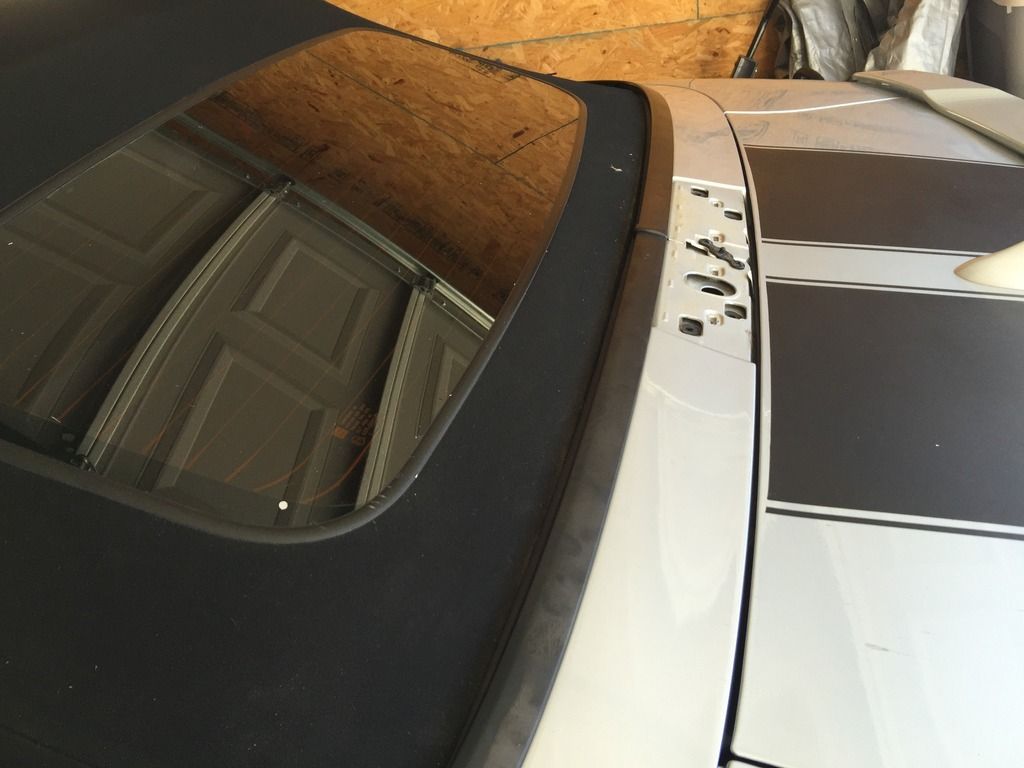 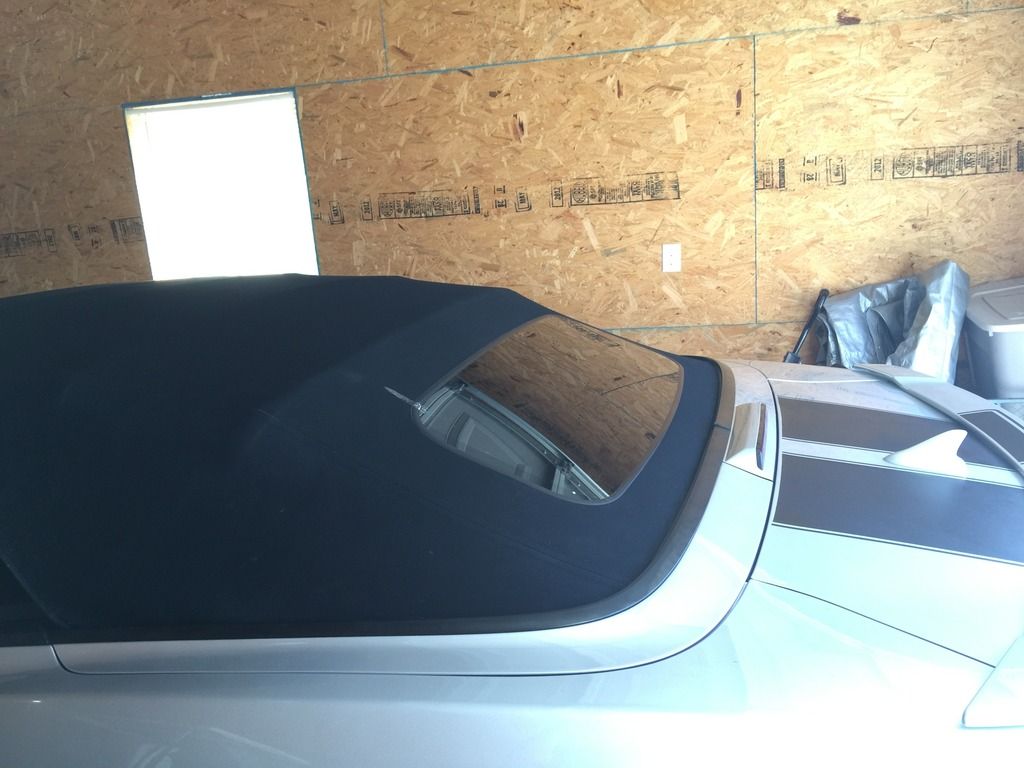 Well that does it. If this helps one person I have done my part. Good luck guys! |
|
|

|
|
|
#9 |
 Drives: CAMARO CONVERTIBLE L99 2012 Join Date: Aug 2014
Location: FRANCE
Posts: 66
|
My result after 5th bow's replacement!
 Do you know how to adjust for a better result ? |
|
|

|
|
|
#10 |
 Drives: 2011 SS/RS convertible Join Date: Feb 2016
Location: Bryant, al
Posts: 60
|
The brackets have slotted holes. Loosen bolts and push the bow towards the rear and retighten. But you have to be careful, if you go to far you can cause the rear window to separate from the soft top.
|
|
|

|
|
|
#11 |
|
"Catharine"
Drives: '11 2SS/RS LS-3 IOM/IO vert Join Date: Mar 2011
Location: Southern NH
Posts: 2,132
|
Daniel, pics blocked here at work but I will check out at home tonight. Thank you!!!
__________________
 |
|
|

|
|
|
#12 |
 Drives: 2011 SS/RS convertible Join Date: Feb 2016
Location: Bryant, al
Posts: 60
|
No problem. Hope it helps.
|
|
|

|
|
|
#13 | |
 Drives: CAMARO CONVERTIBLE L99 2012 Join Date: Aug 2014
Location: FRANCE
Posts: 66
|
Quote:
Thank you for your advice ! Here, in France, it seems that GM's garages are not informed about this setting! 3 weeks awaiting notice from US. I send them this solution in order to get back my Camaro. |
|
|
|

|
|
|
#14 |
 Drives: 2012 1LT Drop Top Join Date: Oct 2013
Location: Yardley, Pa
Posts: 745
|
Great right up! Thanks for taking the time. (Mine was done under warranty)!
__________________
 |
|
|

|
|
|
|
|
 |
| Thread Tools | |
|
|