You are browsing camaro6 
 02-08-2023, 11:23 AM
|
#1 |
|
Petro-sexual
|
TooHighPSI Port Injection Plates/Lid/Upgrades - Experience
This is my little journey into full E85 fueling. For the interest of anyone who finds the available videos or information lacking their own regard, this is for you. I'm going to try to focus on the stuff I haven't seen much of, so hopefully it might help others.
My build is mild, compared to many others (BIG for me). It's a mostly stock powertrain, with the exceptions being: 2650, 103, RFBG. Exhaust is mostly stock (OEM manifolds, cats', muffler), and that's about it. It's not by accident it's built the way it is, and I won't bother with getting into it much. Whether or not it's effective, is almost less of a priority, because there are proven ways to make similar power with less money and mods', but there was an architecture I was trying to follow as closely as I could. This thread is more about an overview to anyone looking for the latest in port injection (PI). I intend to share what parts I'm adding and the way I'm installing them. I'm a simple gearhead DYI'r. There are probably better ways to do this, and I'll admit, this (I'm sure) is only my first iteration of, likely, many, until I get it how I want it. I want to add that I could not be more pleased with any of the parts and vendors I used for this project. Mike was the standout, and was always quick to help with any questions. MOTIV was also great with a hardware update that was suggested to be performed. The update was applied to units manufactured after, something like, April '23, but I paid extra for shipping, and they matched it. In fact - I had it back, coast-to-coast, within a week. They performed the update the same day they received my CONTROLLER, AND GOT IT BACK IN THE MAIL THE SAME DAY. I'm not suggesting this can be done in every circumstance, but the service I got showed they made every effort to get it back to me as fast as reasonable - matching the extra-fast service I paid for getting it to them. EXCELLENT SERVICE, and, I think, goes to show the thought and dedication Mike put in to selecting a quality company to work with. I could not ask for better service from either of these guys. PARTS LIST:
The plan is to mostly mirror the videos Mike has put on his channel to install these goodies. With the exception of parts of the tuning, I've modeled almost everything as he has shown. I'm trying to hide as much as I can of everything, so there's where most of the difference is going to be. I don't plan on talking/showing too much of the low-side upgrade, as it's probably all been shown before. If anyone want, I'll be happy to share, as I'll be documenting for myself, but otherwise - I'll mostly document and show what's PI-related. I am also going to try a little bit different approach to the tuning. I've "learned" of a slightly different method of compensating for the E92-side of the fueling. I won't go into it too much, until I see that it's worth pursuing. I have Mike's method to fall back to, so I'll quickly brief on that as time goes on. If there are any specific questions or comments, I welcome them. I'll be updating this thread as I progress over the next several days. If there are any pictures anyone would be interested in, I can try to get them along the way. Just speak up. RESOURCES: https://www.camaro6.com/forums/showthread.php?t=608360 https://www.camaro6.com/forums/showthread.php?t=608699 https://www.camaro6.com/forums/showthread.php?t=600573 
__________________
 '20 ZL1 Black "Fury" A10, PDR, Exposed CF Extractor Magnuson Magnum DI TVS2650R // RFBG // Soler 103 // TooHighPSI Port Injection // THPSI Billet Lid // FF // Katech Drop-In // PLM Heat Exchanger // ZLE Cradle bushings // BMR Chassis-Suspension Stuff // aFe Bars // Diode Dynamics LEDs // ACS Composites Guards // CF Dash // Aeroforce // tint // other stuffs |

|

|
|
02-08-2023, 11:24 AM
|
#2 |
|
Petro-sexual
|
!!! THIS THREAD IS NOT MEANT TO EXPLAIN HOW TO TUNE YOUR CAR. I AM NOT RESPONSIBLE (NOR ANYONE ELSE HERE, OR THAT HAS CONTRIBUTED) FOR ANY TUNING YOU ATTEMPT. YOUR TUNING IS YOUR RESPONSIBILITY, AND I (NOR ANYONE ELSE HERE) ACCEPTS ANY RESPONSIBILITY FOR THE RESULTS OF WHAT COULD HAPPEN. USE AT YOUR OWN RISK !!
01/27/24 - FINAL THOUGHTS & QUICK OVERVIEW/SUMMARY I'll probably add some screenshots in the future, but I'm not sure how valuable they would be for anyone. Not many people, who aren't calibrators/tuners are likely to try this method, let alone, perhaps, understand it, so I'm not sure it's worth it. But - I wanted to, pretty much, wrap-up what I have learned, and what I think are valuable takeaways, as just a backyard-type-home-schooled-tuner of my own cars, and one that's learned A LOT from others, including several from this Community.
09/12/23 - Supplemental Follow-Up to Updated Report: After continuing to polish (as I said I was going to), I'm still confirming [17071] seems to be the table that really completes this method, as far as I can see (from all of the SCANNER data I'm capturing/reviewing). But - I don't think I mentioned that among the things you might have to consider is VVE-tuning. While - I maintain that should have already been optimized, it occurred to me that after a pulley update, some parts of the VVE-tuning might be compromised. This might already make sense to others, but I haven't noticed anyone say anything so far, so I wanted to make a little supplemental comment. I'm still looking into this, but I feel like my regular SCANNER GRAPHS, in CLOSED LOOP (CL), don't work like they used to. They are considerably off, after adding the smaller pulley. After reviewing SCANNER data from before the pulley, my VVE seemed (essentially) the same as before the PI (on the 90mm upper that I've been using this whole time). Now - after the 82mm upper, my VVE, in CL, is all wonky. I panicked a little at first, but realized that the changes in [17071], as far as I understand, altered the FUEL MODEL. This is my current logic, because all my OPEN LOOP (OL) readings, before the PI, make sense (obviously, though, need a little work because of the extra boost), and those parts of the VVE table are not all crazy and way out of whack. I'm validating my theory, because my MAF/VVE/DYN_Af all line-up, as good as they had before, through all of my STEADY STATE scanning. So - since this is what we're actually tuning the AIRFLOW MODEL to (as far as the conventional wisdom I've read), and my model is still all lining up together, I an convinced the changes I made to the FUELING MODEL for the PORT INJECTION are what has thrown off my CLOSED LOOP VVE. As stated - my SCANNER GRAPH continues to show MAF/VVE/DYN_Af lines are well within 5% at all times. So - for anyone who's messed with the FUEL MODEL, be prepared (as far as I can understand) to know that the old SCANNER GRAPHS/FILTERS could be off in CL. I hadn't thought about this before, but after seeing it now, I get it. If I'm wrong, I'd like to know, and correct the post. I am all ears. Fury's running better than ever. 07/20/23 - Updated REPORT (for the most part): !!! THIS THREAD IS NOT MEANT TO EXPLAIN HOW TO TUNE YOUR CAR. I AM NOT RESPONSIBLE (NOR ANYONE ELSE HERE, OR THAT HAS CONTRIBUTED) FOR ANY TUNING YOU ATTEMPT. YOUR TUNING IS YOUR RESPONSIBILITY, AND I (NOR ANYONE ELSE HERE) ACCEPTS ANY RESPONSIBILITY FOR THE RESULTS OF WHAT COULD HAPPEN. USE AT YOUR OWN RISK !!! Relevant fuel system mods':
Relevant tune changes for this method:
To start, it will be important to have your fueling already optimized as much as possible. ALSO - I'm, MOSTLY, referencing a stock LT4 tune file and FUEL SYSTEM (so if you've upgraded pump or injectors, you'll have to make some correlations), so you'll have to make correlations for anything else (the only changes to the car in this regard is what is listed above). Essentially - you should be able, for the most part, to use whatever your gasoline MAF curve is to run E85. The intent of this thread is solely offer insight into an alternate fuel compensation method for adding supplemental PORT INJECTION (PI) to my car (I'm not even close to being a competent tuner or calibrator - just a guy that tunes on his own junk, and got where I am by a lot of research). I haven't seen an alternative method for supplemental fueling, except for, basically, altering the AIRFLOW MODEL. Adjusting the AIRFLOW MODEL seems to be a successful method, but I didn't like the idea of that, and what (it is my understanding) changing the model effected. Altering the AIRFLOW model affects TORQUE calculations, which leads to altered correlations to other tables in the ECM, and other controllers in the car. Again - there are compensations that still allow the car to work successfully, but I just like doing the things the way I think they should be done. I won't leave anyone with the suggestion I believe my way is correct, or better than other ways - I just like doing things the way I want them to be done. Years of studying, experimenting on my own cars ('05 H2 with a 408, '16 Sonic with just a tune, and this car), and several training media have led me to where I am in my understanding of these systems, so - I'm definitely no tuner or calibrator. Also - there is an updated REFLEX CONTROLLER feature that enables it to calculate fueling in CLOSED LOOP [CL]. It works great, but, at the time, it was confusing for me, so - the following does not take that into account at all, as getting all of the FUELING changes I'm going to describe will make the CL operate even better, rather than cover-up deficiencies in the tune. The REFLEX CONTROLLER DOES work FAST and great, too, though. I'm not going to get into much of other aspects of this tuning requires, like LOW-SIDE fueling, and adjusting, nor the changes to take full advantage of running E' (like SPARK tables, and such) as that will probably vary from car-to-car even more. That's largely covered elsewhere, too (HPTuners Forum, for example). The hinge pin of the alternative method I'm going to describe is instead of altering my AIRFLOW MODEL, I am going to slightly alter my FUELING MODEL. Where I'm making the compensation, mostly, is in definition FUEL PRESSURE MULTIPLIER 3 [33355]. This definition has HIGH PRESSURE fuel control from RAIL PRESSURES beginning around 16MPa, through maximum commanded RAIL PRESSURE. This means, this table will control RAIL PRESSURES from about mid-THROTTLE to WOT. This table controls about where you'd want the PI to kick-in, and start to add the additional fuel volume E85 requires. I observed that this is not the only table to modify, though. I had to also get into [33354] (the MULTIPLIER 2 definition), and I eventually learned I had to get into the DESIRED FUEL PRESSURE [17071] table, too. It seems [17071] was the last bit of the larger puzzle to massage, and everything I'm seeing suggests that this is the final piece of the compensation. As far as I can tell up to now (07/12/23) - this completes the PI compensation. All my SCANNER feedback shows I have consistency/repeatability, and predictability now. What seems to be necessary, is to start with your good gasoline tune file. Make sure you turn-ON your E85 settings (but stay conservative with SPARK). Set-up your PI, as directed in the TooHighPSI videos listed. Then - go into [33355], and change the value at <20MPa (this MIGHT be different on a NA-car that was converted to FI, like an SS with a 2650) to "2.0". 2.0 is the maximum allowed in the definition, and will be the most fuel retard you'll get out of the multiplier (which happens to be about 30% or so). This means the DIRECT INJECTION INJECTORS (DI) will flow at about 30% LESS fuel at that FUEL RAIL PRESSURE (at 20MPa). If you change any of the other cells, you'll be changing flow by whatever percentage away from OEM settings. The idea of these changes is this is where the PI will be supplementing the remainder of the FUELING your combination will require. While, still, in this definition, blend that 2.0 in cell 20MPa, down to the 14MPa cell. Copy that entire definition. Then, get into PROFILE [33354]. Paste over the entire definition. What you have done, is blended MULIPLIER 2 and 3 tables together, so you have smooth transitions back-and-forth. This is where I was stumbling A LOT, until recently. Making this smooth will create an environment where the ECM will stay predictable and consistent when you're transitioning in the region where you're PI will be starting to add fuel, and when it will be deactivating when you don't need it. This was difficult for me to see and understand until recently, but this was a BIG key to moving to the last part of this puzzle. Next - you'll want to get into DESIRED FUEL PRESSURE [17071]. This is going to be where I can offer less specifics than above, but you'll be able to start to see the trends that will give you guidance on how to massage the tune further. Basically, as best as I can understand, this table is what allows the MAF CURVE to be predictable and fuel consistently. It allows each cell of the CURVE to add the correct fueling, whether you're at a LIGHT LOAD AT HIGH RPM, or at HIGH LOAD AT LOW RPM. In those scenarios, you can reference the SAME MAF FREQUENCY, and this table is the correction that allows for compensation. Because tables like [33354] and [33355] reference [17071], and we pulled FUEL from [33354]/[33355], it's reasonable to expect that those FUEL PRESSURES (MPa) are going to actually flow LESS FUEL than before. So - where're going to have to compensate by forcing lower FUEL PRESSURE in [17071] (closer to OEM values) in order to maintain enough pressure to keep CLOSED LOOP (CL) functionality happy with OPEN LOOP (OL). What you'll have to do is drive the car in regimes that allow you to log PART THROTTLE and WOT, in these overlapping MAF FREQUENCY cells. You'll also want to reference SCANNER GRAPHS/CHARTS that will show you STFT/LTFT CORRECTIONS. You'll want to cross-reference all of this in OL and CL. Because the MAF CURVE should be the same as gasoline, I started comparing the individual cells of the MAF CURVE and adjust CL cells by altering [17071]. So - if I saw the cell at 5500Hz was lean in CL, I'd find where that was in [17071], and lower the value (i.e. if the starting value was 17, I'd change it to 14, as this was the smallest compensation we began with in [33354]/[33355]) enough such that the correction was reduced to a more reasonable value. Lowering the value at that cell would INCREASE fuel flow, because lower values were flowing more fuel (due to the compensations we made in the MULTIPLIERS earlier). As a result of making these changes in the DESIRED' table, fuel flow came up in the same cells, and CL CORRECTIONS came down. It, also, seems like there is a (more-or-less direct) correlation in the delta of these pressures to fuel flow. So - if there is about a 8% difference from 14MPa to 15MPa, you'll see about the same difference in your CL for that pressure. If you need to add about 8% fuel for CL, you would lower the fuel pressure from 15MPa to 14MPa. After beginning these DESIRED FUEL PRESSURE changes, I began and continued seeing improvements to my CL CORRECTIONS. All that, and my HIGHER THROTTLE/WOT values were still all, essentially, the same, meaning we made compensations to CL values that matched OL WOT values. In essence - we recharacterized FUEL PRESSURE, which matched better to AIRFLOW, which brought fueling in-line. That was the last part of the puzzle I have been struggling to understand, after I started observing it. I didn't know that until a while ago, as I was changing my known-good-MAF CURVE, POWER ENRICHMENT THRESHOLDS, and a few other things that were just band aids for the real problem. I was seeing inconsistency with CL CORRECTIONS not match OL and I just wasn't finding repeatability from one file to the next. I feel confident in my judgement because, NOW, I have consistency and predictability now, that I hadn't had before. That, pretty much, sums up the basic changes for this method. If you want a better idea of why, I'd recommend reading my comments later in the thread. I know it's a lot, but it might offer insight onto how I arrived where I am with this strategy. There's a possibility you'll find I'm wrong, too, or that I'm missing something. If I am, I'd like to know, and encourage anyone to correct me. There are MANY more people that know WAY more than I, so I'd strongly suggest you follow up with research of your own. I'm not done with my tuning for this, as my OCD won't allow it. BUT - I have the confidence to drive the car anywhere now. I feel confident I can actually enjoy the drive, without much worry of TORQUE calculations being off, and burning-up the tranny or E'diff on account of bad models. I hope this is helpful to anyone looking for an alternate method to compensate for supplemental fueling. If I find I need to make corrections, I will update this thread and still plan to post some screenshots, and maybe a few more updated photos (I've made a few minor mechanical changes since the beginning of this endeavor). I encourage comments, challenges, and questions. CHEERS, and GOOD LUCK. *** Comments regarding some points to where I stumbled, and a bit on how I got here:
07/10/23 - Update: Not surprisingly, over the last several weeks, I've noticed and learned some more about getting the final parts of the controllers cooperating with each other better. Most of what I have learned lies within the fueling in the E92. I think I've been battling this particular aspect of the balancing unknowingly, which is why it took this long to get consistency. Part of the issue has been continuation of recharacterizing the DI INJECTORS, and following that up with recharacterizing the relationship between DI FUEL PRESSURE and the new FUEL FLOW from the DI INJECTORS. What follows is as best as I can understand, and as close to an explanation of those correlations. I started this venture with changing the characterization of the DI INJECTORS. Essentially, I lowered the FUEL FLOW from them, at the higher-THROTTLE-to-WOT in the PROFILE 3 MULTIPLIER [33355]. In ONLY modifying this table, I was violating (unknowingly) one of the cardinal rules of tuning: making smooth transitions. PROFILE 2 MULTIPLIER [33354] controlled FUEL RAIL PRESSURE from about 12MPa to 14MPa, and [33355] influenced <16MPa. You'll notice there is no apparent, direct (there is a transitional control, but that was elsewhere in the definitions), control from 14MPa to 16MPa - the crossover between these two tables. This is precisely the range I was having my fueling issues. I would see my STFT/LTFT CORRECTIONS act inconsistently from one hit to another, all on the same drive, and on the same tune file. On one hit, I could see CLOSED LOOP (CL) CORRECTIONS, at some parts of the MAF CURVE, go as high as +30% for several cells, and then as low as -30% over THE SAME SET of cells on a follow-up hit. I noticed this was happening, pretty much always, when DESIRED RAIL PRESSURE was from about 15-16MPa; which is right where I started my FUELING COMPENSATION. It took a LONG time to understand why, because I just couldn't interpret what I was seeing. Later in the thread, I came up with a couple simple GRAPHS to show me exactly what was going on with the DI FUEL PRESSURES, and this is where I started seeing correlations between FUEL PRESSURE and my FUELING CORRECTIONS. I did know there was a correlation, but I didn't understand how to control it, nor what parts of the tune influenced it. After seeing the fluctuations (through the GRAPHs), though, I was able to start experimenting, and finally able to make positive changes to get the DI to do what I needed it to. Despite the training I took (I tried to follow it exactly, knowing it was probably not the end-all-be-all), I started contemplating extending the DI INJECTOR RECHARACTERIZATION into [33354], as it's influence went as high as about 14MPa (again - there was a transition value that defined about 15MPa as a transition from the bottom pressure of [33355] to [33354], but that was not part of this exact table). When I scrutinized the two tables, I noticed a HUGE jump in pressure (which I did create), right around 15MPa; and it was about 30%... It occurred to me to reset [33355] to OEM (which is almost exactly the same as [33354]), make my maximum compensation reduction at 20MPa, and blend down toward 15MPa (i.e. think of 15MPa as the actual breakpoint, even though it's 16MPa - more on the next). Then - I essentially smoothed from 14MPa to 20MPa, and copied that to [33354]. So - I, practically, restored [33355] back to stock >14MPa, and started pulling fuel <16MPa, and made both tables, essentially - the same. The result of this, predictably to some of you, was that the transitions, around 15MPa, between these MULTIPLIER tables smoother, and now, I've gotten consistent CL CORRECTIONS. BUT - I started noticing I would see considerably different MAF error values, at the same signals (i.e. at low THROTTLE, at say 5000 RPMs; and high THROTTLE at say 3000 RPMs @ 5500Hz), I could see FUELING CORRECTIONS spot-on, or LEAN OR RICH, for example; as stated above - it could be 30% LEAN or RICH in the same frequency cell at LOW AIRFLOW DEMAND or HIGH AIRFLOW DEMAND. This is where the DESIRED FUEL PRESSURE table started coming into play. Using my curve signal example above, if I was at 5000 RPMs, and .30 CYLINDER AIRMASS at one hit, and the table showed it was COMMANDING 14MPa of FUEL PRESSURE (again - at 5500Hz), I would see about 16MPa of COMMANDED FUEL PRESSURE at 3000 RPMs and 0.50 CYLINDER AIRMASS, and show a CL CORRECTION of +20%, for the same MAF FREQUENCY cell (e.g. 5500Hz) - not good... For the MAF signal to have consistent AIRMASS reporting, each individual frequency needs to be consistent, so every time it's at 5400Hz, the ECM needs to be calculating the same amount of fuel for that frequency. Well - I was not achieving that, and I started to understand that I changed the relationship of all that when I recharacterized the INJECTOR MULTIPLIERS ([33354] and [33355]). So - what I started doing was changing the DESIRED FUEL PRESSURE [17071] table to keep the fuel mass higher for more of that table, with the goal being to find the equilibrium of my new characterizations. So - I started, specifically (through SCANNER analysis) lowering the values in the FUEL PRESSURE table back down to where I wasn't really altering (lowering) fuel flow from the INJECTORS (i.e. around 15-16MPa in [33355]). For example: if I was seeing FUEL CORRECTIONS of 20% @ 5000 RPMs/.030 AIRMASS, I would change the value in that cell from 17MPa to 14MPa, because the delta of fuel flow of those pressures was ABOUT the correction I was seeing at that point. I started applying this method across the range of my lower-to-middle parts of this table (again - based off SCANNER data), and started seeing the CL CORRECTIONS start diminishing. BUT - I think you can go too far, if you get carried away. So - if the MAF FREQUENCY was 5500Hz, and the engine was seeing 5000 RPMs and .30 CYLINDER AIRMASS, I would see about the same CL CORRECTION at the same MAF FREQUENCY if the engine were at 3000 RPMs and .65 CYLINDER AIRMASS, at 5500Hz. I believe the idea of the DESIRED FUEL PRESSURE [17071] table is to match FUEL FLOW to MAF signal. So - it doesn't matter what LOAD or RPM you put the engine under, the FUELING will always (as closely as possible) match the MAF airmass signal. So - if you're at 30% THROTTLE/5000 RPMs/0.35 AIRMASS (at 5500Hz) the fueling is the same as if you were at 60% THROTTLE/3000 RPMs/0.60 AIRMASS. I don't recall dealing with this correlation, directly, in a GEN III file (I've only done a little work on my '05 H2 with a 408/LS3 head/BTR Stage IV LS3 cam), but that was a while ago, or I just never gotten into that part of the tune. Regardless - so far - with everything stated above, I've never been this close to being dialed in as I am now. WOT's been fine for a while, but I'd been chasing my tail in this transitional area, trying to use PE to cover it up, or some other band aid. I still have a few more drives to go on, to finish polishing this table, but after getting the [33354] and [33355] tables smoothed, and largely matched - I'm getting a consistency, in all regards, that I haven't had until now. I'm more confident than ever that the E92 still has most of the control over fueling (which is what I wanted, as I still wanted all the TORQUE control to be where it needed to be for all the OEM controllers to work together correctly), and the REFLEX is only there when it's necessary. It's only coming in for heavier fueling demands, and not patching inconsistencies, like it was at the beginning of this endeavor. Unless I find some contradictions to my statements above, it will be fair to leave this update as my final thoughts on a strategy for this method. As I get closer to my "final" tune (it will never be final, because I'm never done because of my OCD, lol...), I'll try to add some screenshots or something. I've used a lot of the more important definition numbers for easier reference. A lot of the values I'm using are specific to my combination, and likely won't be useful in any of your builds, but maybe you can see some trends that might be helpful. Smooth transitions are one of the capstones to tuning, and that can be applied to most parts of your tune file. This has been a lot of fun, and a great reason to just make time to drive the car. I hope everyone luck in trying this method. 06/08/23 - UPDATE: Everyone's a fan of my pontifications, so here we go! * Overview: [33355] PROFILE 3 MULTIPLIER This is the keystone of the tuning part of the thread. The point of this part of the thread is to try an alternate method of adding supplemental fueling without altering MAF AIRFLOW (e.g. lowering TORQUE (TQ) calculations to compensate for the additional fueling). What this method is doing is over-reporting the DIRECT INJECTOR (DI) flow, so they actually produce LESS fuel. This way, you can bring the REFLEX PORT INJECTION (REFLEX/PI) in, and reduce the load on the DI without changing the AIRFLOW model significantly, and under-report TORQUE (TQ). This can have an effect on automatic transmission and other aspects of the drivetrain (I've heard E'LSDs, too). I believe a way to compensate (to an extent) is to change the EQ RATIO for the TQ COEFFICIENTS and/or VIRTUAL TORQUE MODEL (VTT), and/or POWER ENRICHMENT (PE) - or ALL or a BLEND of those. I hear this, if changed enough, can also effect your SPARK, too, as you'll be in lower parts of the SPARK TABLE, so that might need some massaging, too. I'm only offering a very high-level overview of that method, as I haven't used it, but have done some research on it, in addition to watch ToohighPSI's (THP) tutorial videos. It's my understanding that is the predominate method that has been used widely and successfully by many an expert calibrator (which I am not even close to being/suggesting), in contrast to the method I'm trying to outline below. * How to begin balancing DI/REFLEX PI?: It was my understanding a duration of about 5.0ms of INJECTOR PULSE WIDTH (IPW) at WOT, was safe, and allowed full DI control. That said, that IPW became the target to achieve with the E92 MAF CURVE. The goal was to supplement the rest of the fueling necessary to reach LAMBDA with the REFLEX PORT INJECTION (REFLEX) (PI). I understand IPW can be stretched closer to 6' (under some circumstances), but what was the need to strain the stock fuel system, and inject fuel into parts of the combustion cycle that were not efficient (at making power or poluting), nor safe, if I'm adding PI? I started on 91 octane/E10 (I will transition, back, to 91 with octane booster to get to about 93-94 octane, as I was running before), lowered SPARK ADVANCE, and just drove around until I had some WOT pulls with [33355] altered. Training showed that if we start MULTIPLYING the desired % of fueling to [33355] I'd be supplementing with, I could use that % for the REFLEX MAF CURVE. So - to remove the % I was commanding the REFLEX to add to total fueling, I multiplied parts of [33355] by about 30% to 16MPa and higher, and left the remainder of that table alone. [33355], unless altered, controls INJECTOR FLOW from only 16MPa and above, so ideally, nothing below this RAIL PRESSURE would be altered, and therefore not needed to have fueling compensation. Later - I would try to blend from the OEM values, at 16-18MPa, to 20MPa (where I wanted the full 30-plus-% fuel pulled from), but that's basically what I did. After I got WOT reasonably close, I started to blend in E', because I was seeing reasonably safe EQs, but needed to validate the demand of fueling for E' was still close to my target IPW. Eventually - I was able to bring full pump E' from my area (which looks to be about 75%), and have plenty of DI headroom at WOT for about any part of the RPM BAND/MAF CURVE. I have small 60-lb injectors, as I didn't need near the headroom any more injector would allow, so there was plenty of PI to support my combination. I stumbled a little bit, but it seems like WOT is okay, FUEL VOLUME REQUIREMENT-wise. * Chipping away: As stated earlier in the thread, I added a DSX AUXILLIARY FUEL PUMP KIT (DSX), too. I have not had much experience (at all) with fuel system changes, so this was a learning curve, too. I read as much as I could find (my Google-fu' is not great), and went after it. My logic was to try to keep the LOW SIDE FUEL PRESSURE from dropping much lower than about the lower-70s-psi. I'll admit I'm still working on this a little, as I'm seeing pressures in the 80s under BOOST, but I wanted to get the FUELING reasonably safe before pulling LOW SIDE PRESSURE down too much more. I did get tripped up a bit in this, but think I'm in a better spot now. I did have to mess with definitions for both HIGH and LOW-sides, as it seemed like the DSX would start freaking-out the OEM-pump. I increased several definitions (that I'll come back to outline later) so the OEM LOW-SIDE wouldn't drop-out as much when the DSX came in. I know there is still a little more I can polish, but at least I'm seeing LOW SIDE PRESSURE increase when it needs to, and decrease when there's no demand; and to come down to a low-pressure when cruising or at idle. So - fuel pump/pressure-wise - it seems I'm at least in fairly consistent/predictable control. VIRTUAL TORQUE TABLES (VTT) was another aspect I'd have to refine a bit, too. My E85 VTT had nothing more than OEM gasoline values in them, so I increased these tables by about 80-lb-ft. higher than what I changed them for my gasoline tables. Some say a combination like mine should be able to run on OEM VIRTUAL VOLUMETRIC EFFICIENCY (VVE)/VTT/DRIVER DEMAND (DD)-tables, but I would see THROTTLE closure/TMA, or some other crazy, so mine are modified from OEM. Given my E' VTT changes, I eventually noticed I had to change-up my DD tables, particularly from a dig. I noticed the THROTTLE wasn't following the PEDAL after the car started moving, until it started to get within about less than 10% at around 40-MPH. Increasing DD, at relevant PEDAL angles, moved THROTTLE behavior ever closer to PEDAL REQUEST in these trouble areas. This might be something you have to do if you have changed your AIRFLOW MODEL much (which can include MAF or VVE changes). There are a couple camps on VVE/VTT-tuning, and I'm in the camp if you change AIRFLOW, you should be adjusting your VVE if necessary (which means you may have to change your VTT and DD), so this was another layer I found myself getting into. It was expected, and I had/have a fair enough understanding to make positive changes with consistency and predictability. This was not too big a deal. I found that E92 MAF changes were still necessary. Because of trying to find my IPW target, and especially with I brought the PI in to cover my [33355] changes, there were parts of the E92 MAF CURVE that I needed to move around a little. The issue (so far as I can tell) with this method is manipulating INJECTOR FLOW RATES can affect some aspects of RAIL PRESSURE under differing loads, but for the same cells on the MAF CURVE. So - I could have one FLOW RATE at 5200Hz under light load, but different FLOW RATE at HIGHER loads at the same signal. This was because of changing the INJECTOR CHARACTERIZATION [33355] for higher loads (which REDUCE INJECTOR FLOW). It seemed like I needed to start blending around this area to transition the REFLEX FUELING, so I split the percent-fueling to where it seemed like I could see consistency and have predictability, too. E92 MAF changes weren't necessary at WOT, so I do not believe there were any risks to powertrain behavior (e.g. not enough calculated TQ to hold the clutches together). Again - there weren't changes that were necessary to the E92 MAF CURVE because [33355] pulled the fueling out at higher-WOT regimes, and the fueling that was subtracted by the [33355] changes was compensated by the REFLEX fueling, so TQ calculations weren't changed. Because of making some changes to the E92 MAF (and maybe unnecessarily), I started noticing LTFTs were going off a bit. At least, for the most part, they were showing they were pulling fuel, but I was seeing into the 20-plus-%-range sometimes in the lower-transient areas. This has been the BIGGEST time grab in the project. Moving the E92 MAF around from where I started to make-up for the fueling compensation made this really fun... The MAF range this would happen in was about 4000-6000Hz, and I think I finally have tools to get a good handle on this area. I'm still contemplating how, best, to use the REFLEX PE for this spectrum, but I'm making progress. Trying to determine what relationships I need to make, and then execute ways to see those relationships work together to finally adjust them was the tricky part, and a part I couldn't figure out for a while. More on that shortly... * POWER ENRICHMENT (PE) is another area I'm trying to work on: I have it set-up pretty conservative (???) for the E92. I have it set to come in sooner than OEM, with the logic being since I only have 91 available from the pump, I would try to compensate with a little more fuel to cool the combustion chambers. I am targeting pretty rich for 91 octane (91), even though, later, I'll lean it out (I'm targeting .80) because I still have a lot of octane booster that I'll run when I need to fuel-up with 91. I am on edge of OEM-fueling on 91 (almost 6.0ms IPW), but the PI is helping that out, and I can run a PE table that looks like it makes sense. However - on E' - I've pulled most of the PE out of a part of the E' PE table, because I was seeing fueling issues under extreme regimes. When I would force the engine to lug (which I don't typically do, but I wanted to run here, in testing, so I could try to reproduce as many possible scenarios as reasonable) around 1500-RPMs in 4th GEAR, and stab the PEDAL to WOT (NOT roll-in, but stab it into WOT, because it wasn't as big an issue rolling into it - even rolling into it aggressively), I could see IPW skyrocket and the HIGH PRESSURE SIDE drop to the basement, until about 2000-RPMs, where it would start to recover. It was explained to me that it was probably because the ENGINE wasn't spinning that fast (or fast enough, perhaps), that the fuel requirement was greater at that point than the HIGH PRESSURE FUEL PUMP (HPFP) could keep up (still a stock LT4 cam). Someone else also said that it really didn't matter, in that area, what I was seeing (because PE wasn't terribly necessary that low in the RPM-band), but my OCD made me try to reconcile this part of the FUEL PUMP control some. So I made many changes to many tables for LOW-SIDE and HIGH-SIDE parts of the tune. I've gotten IPWs (in this area) to about 7'ish-ms (it would go to about 11ms) and RAIL PRESSURE doesn't drop much below commanded (it would drop close to about 1000-psi). Part of this compensation was with the E' PE tables, and some were in commanding higher RAIL PRESSURE in this small area. I pulled almost all PE-fueling in this small sweep of the RPM-band, and just buff'd with the REFLEX. The rest of the PE CURVE probably looks reasonable to most anyone else. In the REFLEX, I'm being a little more conservative (i.e. bringing in fueling more and sooner) with the PE (for E'), for the fueling necessary, above. I'm trying to cover that low-RPM-WOT-sweep in the E92 MAF curve, but relax the fueling a little more around that area. I have to bring REFLEX-fueling in a little sooner than THP's tutorial suggests, but I think that has to do with my INJECTOR characterization, and the complications that brings in. I also learned that I can FEEL bringing-in the REFLEX strong; the car almost lurches forward, like I stabbed the THROTTLE or something. So - I'm feathering-in the REFLEX FUELING before where it needs to come it to compensate, and that extends to the PE PEDAL ENRICHMENT in the REFLEX control. I'm still watching this closely, and using SCANNER data (more on that a little later) to try to find a good average to when to effectively bring it in. I have to check back in with THP and re-verify if this is a good idea with the REFLEX CLOSED LOOP (CL) feature. I feel like we already touched on this, but I can't, exactly, remember (and partly, because I think I didn't quite understand what Mike was trying to convey as much then, as I do now). I know that I was using the CL feature for a little while, but felt like I was just confusing myself with the data I was observing in the logs, so I've turned it off, for now, and am manually polishing everything, as best as I can tell. The REFLEX does have tools to show how it is, and how much it compensates in CL, but - again - I wasn't making good progress, based off my knowledge and understanding (and ability to see and apply global corrections to these independent systems on the car simultaneously). WOT was totally fine, but these transitions were tough. I think I was told it had to do with the way I was using the THROTTLE PEDAL PE %, but my memory could be wrong. The transitions are probably where anyone would spend the most time in this effort, trying to smooth the fueling coming in, and how best to use PE. * The BIG one: How is it I can effectively model how to be blend the DI and PI? It seems, to me (and is likely apparent to most people who've tuned much), AIRMASS/PEDAL/FUEL PRESSURE have to jive particularly well together in this area. In areas were PI is nearly never needed (low-PEDAL) and where it is always needed (WOT), it was relatively easy. But - these transitions require a balance that took me a while to figure out. It was too much for me to visualize on my own, and I just could not produce anything else that would help me see how all of this was working together, until I figured out new GRAPHS and CHARTS to look at. I use CHARTS and GRAPHS already, but haven't created many because it wasn't necessary for my relatively small changes, so it took a while to figure out how to plot what I thought I needed. The key GRAPH was overlaying PEDAL % on top of the REQUESTED FUEL PRESSURE table. That table has RPMs and CYLINDER AIRMASS and plots what the REQUESTED FUEL PRESSURE is. Instead of reporting FUEL PRESSURE, I reported PEDAL %, and then I started getting a clearer picture of what PEDAL it took to get to what CYLINDER AIRMASS, at what RPM, at what RAIL PRESSURE. It wasn't perfect, because I could only usefully use averages in this table, so then I added separate line graphs for each of those in a CHART. Then - I could specifically see what each value was for any given part of the LOG FILE. THIS - is proving to be what I think it the pivotal element in nailing the transitions down better. Seeing how specific CHANNELS of the SCANNER overlay at the same time helps me to determine the correlation to all of these details. Seeing what happens to FUEL PRESSURE, at a particular AIRMASS, for a certain PEDAL REQUEST-position is now showing me where I might need to bring PE-in, for example. I could see the PRESSURE I was commanding in the table, but it was easier to understand when I could actually see all of these CHANNELS working at the same time. This revelation is clinching this method for me. I'm not quite done with this project, though I am more confident than ever that I'm getting closer to 95% (I thought that before, lol, and I'll never get to 100% because - OCD...). Polishing the transitions is probably the toughest part, as it is in most tuning, but if this gets me to where I'm hoping it will, this might be the viable method it was made out to me, to be. If/when I close in on the < 95% target, I'll refine this post better, add some screenshots, and hope to trim this down into something easier to understand, and try to make this as easy to read as possible. Update: 02/10 Whew... still not done, lol. I'm still not caught up on uploading current pics, but here are most of what I ended up with at the end of the day yesterday. Some quick thoughts (PI comments will be at the top, so you don't have to read unrelated comments if you aren't really interested):
Work continues today. My goal is to try to be able to start and run the car today. I want to lay all the wiring out, organize it, loom it, and at least get the terminations for the controllers, about where I think they're going to go. I'm not following Mike's model for the REFLEX box, but it won't be too far from where he shows he likes installing his at the time. I have to figure out where the DSX controller needs to go, too. And - I want to plan, and leave space, for the TCM. I need to make it easier to swap in-and-out soon. All of this is because of California stuff. That's, really, the impetuous and rationale behind a lot of they way I planned and built this combination. It's because of that this combination is not as effective as many of yours. But - it's how I thought I needed to do it, within the confines I'm trying to work in. More updates and pics soon! Update: 02/17 Still not quite done... More pics' added, and a few more comments. And parts getting modified (as expected). The car moved about the garage, under it's own power, perfectly fine by Sunday. An updated E85 file was flashed, and the REFLEX controller (REFLEX) was updated. I tried pretty much all of the tests Mike showed, but the only one I could not duplicate was triggering the MAF switch-over, because I just couldn't get it to rev' fast enough to get to the 6000hz switch-over point. All the data showed it should be okay though. But - I just wanted to move the car so I could get the wife's car back into the garage, so I wasn't focused on perfection. I think he's ready to get on the road, at least around the neighborhood for some preliminary data collection. But - I had to pull the extractor support panel off, because I couldn't close the hood. There seemed to be interference at the front edge of the blower lid to that panel. I think I noticed at least a little rubbing (from just closing the hood) near the back of the lid, directly on the hood itself. So - though I don't have pics', I did trim the support panel directly above the front of the lid, and while I'm not finished, I'm not really happy about it. THIS IS ALL MY DOING AND KNEW GOING INTO THIS THAT A BILLET LID WAS PROBABLY THE ANSWER, so I'm accepting all responsibility for it. But - I'm going to clean-up my cuts on the support panel, dress then, and probably, after I've had a chance to take everything in, probably panel bond a filler back over the part I cut out, and patch that area. Part of the reason I did this was because the panel has a few stamped creases that hit the lid. I tried to flatten and hammer and dolly them flat, but I'm neither skilled at anything, nor a bodyman, lol, so I cut-out what was in the way at the time. BUT - if my plan works, that patch panel should be fine, and come out looking okay I think. I did take the blower lid to my machinest though. I'm having him trim the ribs on the top of the lid down, by more than half. I'm crossing my fingers it won't do anything to reduce the strength of it enough to my boost level. If it does compromise, then I guess I'm going billet. But - I'm waiting to get it back from the machine shop and will do another test fit. I'm positive it will help, but don't know if it will be enough when the engine torques over, but there's only one way to find out. I'm definitely not cutting the hood itself, so if I need to, I'll go to billet. That's really about all at this point. As of yet (and fingers still crossed), there are no fuel leaks. I also added a few pics' of intercooler brick dimensions that I don't think I've ever noticed anyone post before. Maybe those might be helpful to someone for some reason. I'm not done with the looming. I really just needed to get him out of the way so I could park my wifey's car in the garage again. I'll have to re-address the organization better the next time I pull the front facia, and see about moving things around more. There's REALLY not a lot of room around there. Maybe the way it is would be fine most anywhere else, but I'm trying to be more discrete. Next - is getting the lid back, and starting to put some miles on with E' and making necessary fueling changes. Update: 02/20 We went on our first drive yesterday, and learned a few things, and came back with a few questions, but everything is working as it needs to, which is awesome. To reiterate: I saw and knew that hood clearance was likely a problem, but had a method to my madness, which I committed to from the beginning, so not billet lid from Mike. I took the stock Magnuson lid to my machinist, and had him trim all of the ribbing on the top to near half the height. This is still not enough. After getting into some throttle, I can see that even though the ribbing (above the intercooler bricks) was rubbing on the removable panel, at the driver's side, front corner. I'm going to hand-grind the offending ribs down some more, and probably trim another section of the panel itself. There MIGHT be some rubbing on the nameplate flanges, too. I am going to watch closely, but this is part of the hood itself, so I'm going to be deliberate in what I do, and if I need/should do anything. I'm NOT cutting on the hood. I think I MIGHT need to skin the flanges a little more, but I'm just going to monitor those spots. It's raining for the next several days here, so I have this to keep me a little busy. It SEEMS like my alternate fueling compensation method MIGHT be working at this time. I was careful to not pull all the fuel out yet, and take baby steps, but it seems like what I'm requesting is happening in the ECM, so because I'm still on the rich side, I'll be pulling more fuel through this method until I get closer to smaller EQ error corrections. I think I'll have to pull fueling from the PE table(s), but I haven't been into the throttle long enough to see what the Injector Pulse Width is yet, so once I can get those to about 5.0ms, I think I will adjust the PI-side from there. As it is, I'm pushing for about 35% from the PI, so I haven't concluded where precisely I am. The DSX fueling is coming in strong, though, right at 3-psi of BOOST (I was seeing up to about 11-psi for quick bursts to see how far off I was on fueling), and I was compensating by pulling about 20% fuel from the DI. I was showing I was about 10% rich when the PI came in, so I feel like I'm on the right track. We'll see, though, because I'm close to the limits of the compensation, so I'll be watching that. All-in-all - it's coming out and together nicely. Once I get the hood clearance figured out, I can completely focus on the tuning. I need to bug Mike a little about that, but I think it's a pretty simple answer; I just want to be sure. Update: 02/27 The weather's been poo for a while, so there aren't many tuning updates. But - I've been "massaging" what I've needed to to fit everything under the hood. None of this might be a problem for SSs, but they are for ZL1s. I'm not really loving what I had to do, as Mike has billet lids that make this a lot easier, but I'm trying to stick to my architecture, so I would just get a lid, if I "could". I had my machine shop cut down all the ribs on top of the Maggie lid. By reducing their height, by more than half, I still had to trim the extractor insert hood panel. It's not complete (I have a little more touch-up metal work and painting), but I think it will clear what it needs to now. It was a pain to try to get an "OK" texture match, so I used wrinkle paint. It's not perfect/great, but it will do for now for me. I have a little more metal work on that, too, but that will wait, until I pull the lid off again, which I'm sure won't be too long from now. But - I guess that's better than front cradle spacers to gain clearance... I'm not sure I believe that completely, but I'm going with that for now. Some other thoughts: The PI kit from Mike came with head studs to help locate the plates and blower for reassembly. They have allen heads, and after Grant explained what they were, I realized they were a brilliant little touch to make it easier to keep everything aligned. These get installed in (4) head holes, and you leave enough stud exposed so the plates AND blower drop over them. And after some blower screws are installed, you pull the studs out (one-at-a-time) drop one of the included (LONGER - duh) blower bolts in. Brilliant. Engineering and thought are put into this kit. Just get the billet lid from Mike unless you're trying to do what I am, for the reasons I am. It will make it so much cleaner and faster, IMO. There are still 2-spots, under the hood itself, we I think there is contact, although (so far) super small. I might see about just ignoring these for now, unless I see them affecting my logs (KNOCK spikes or something). I could see wheel-hop'ing might induce the powertrain to bounce more, but it's not like I'm trying to aim for that, so maybe it doesn't matter. Those, as far as I can tell at this point, are the last to lid contact points. I don't like how I had to trim the hood panel. It's not completely finished, but it bugs me. Maybe I'll look for something else to support the extractor panel or something, but I know I'll be losing the aero' functionality, as GM designed it. It probably won't matter much, but what do I know? Onto to more driving and tuning...
__________________
'20 ZL1 Black "Fury" A10, PDR, Exposed CF Extractor Magnuson Magnum DI TVS2650R // RFBG // Soler 103 // TooHighPSI Port Injection // THPSI Billet Lid // FF // Katech Drop-In // PLM Heat Exchanger // ZLE Cradle bushings // BMR Chassis-Suspension Stuff // aFe Bars // Diode Dynamics LEDs // ACS Composites Guards // CF Dash // Aeroforce // tint // other stuffs |
|
|
|
|
02-08-2023, 11:57 AM
|
#3 |
          
Drives: 2017 Camaro 2SS A8 Join Date: Aug 2018
Location: Petersham MA
Posts: 4,758
|
Looking forward to this thread! Good luck, you should be in good hands. Mike Sitar is the man.

__________________
2017 Chevy Camaro 2SS A8 Whipple 3.0, Mast Black Label heads, Fore triple in-tank pumps, 112mm TB, LPE +52% injectors, LPE BB HPFP, 15 conversion 1059 WHP/944 WTQ, 9.48@150
|
|
|
|
|
02-08-2023, 02:32 PM
|
#4 |

Drives: 2016 1SS NFG A8 Join Date: Aug 2017
Location: 46804
Posts: 6,800
|
Also looking forward to the results. If I was starting over I would of likely went this route. Mike is on his game!!
__________________
2016 NFG 1SS A8
Options-2SS Leather/NPP Perf. mods-Whipple 2.9/Fuel System/Flex Fuel/103mm TB/Rotofab Big Gulp/Cat Deletes/Corsa NPP Per. times- 10.5 @ 137 w/ 1.8 60ft Full weight on 20's 1200DA |
|
|
|
|
02-08-2023, 02:55 PM
|
#5 |
|
Drives: 2020 Camaro ZL1 Join Date: Oct 2020
Location: Fort Worth, Texas
Posts: 1,150
|
Subscribed.
__________________
2020 ZL1 A10 Shadow Gray Metallic
Magnuson Magnum DI TVS2650R| Mamo Throttle Body V2| RotoFab Intake| AWE Touring Catback Exhaust| TCM Tune| Tune| Eibach Pro| BMR Rear Cradle Lockout| PPF| Ceramic| BCForged HCS21  |
|
|
|
|
02-08-2023, 03:12 PM
|
#6 |

Drives: 2022 Lt1 A10 Join Date: Nov 2015
Location: clark, mo
Posts: 8,860
|
Radz, I think you got this without a doubt. Planning is important and you've done that perfectly. Did you make up your own fuel fittings and have someone make them for you? I have my FF sensor on the back side of the blower so the fuel hits the rail first and gets to the FF sensor last just before the HPFP. That's how Mike likes to set it up. Its a tight fit on back there so take your time, all the fuel lines need to be in place before you put the blower back on, especially on the back side and the 90 degree fittings on the rear of the blower. You really can't get to any of that with the blower on the motor. Maybe different since your fuel lines were different since you already had a 1740 from the factory. Its very tight on the passenger side by the brace from the fender to the firewall. You may have to loosen it and move it slightly.
__________________
2022 Lt1 6.2 A10, Maggie 2300, THPSI Port Inj/10 rib, Rotofab, E, Nickey, SCOL, Griptech, RC Bandits, Hoosiers/MT 9.80@142.96 1.44 60ft, 6.34@112 707/669 RWHP/TRQ. 16SS Maggie 2650 9.41@147 1.35 60ft, 5.99@119. 16 C7 A8 10.90@128 Bolt on stuff
 |
|
|
|
|
02-08-2023, 04:56 PM
|
#7 |
 Drives: 2017 ZL1 Join Date: Sep 2022
Location: CO
Posts: 9
|
Looking forward to seeing the results! I need to order the TooHighPSI port injection stuff myself
|
|
|
|
|
02-08-2023, 05:03 PM
|
#8 |
 Drives: 2020 Chevy Camaro ZL1 1LE Join Date: Nov 2017
Location: Earth
Posts: 108
|
Awesome! Super excited to see the results. I am also planning on getting the toohighpsi PI setup. My current setup is identical to yours, just a 2650, 103 TB, rotofab BG. Hope to learn from your journey so I can do mine properly.
|
|
|
|
|
02-09-2023, 06:18 AM
|
#9 |

Drives: 2017 Camaro SS 50th Anniversary Join Date: Apr 2021
Location: Missouri
Posts: 929
|
 Looking forward to this thread.
__________________
2017 50th Anniversary Edition | P1X Stage 2
DSX Aux Low Side | LT4 high side | Flex Fuel TooHighPsi Port Injection (installed & tuning) CircleD 3K Stall | QA1 CF Driveshaft Forgestar F14 Drag 17x10 NT555R2 305/45/17 Rear Forgestar F14 18x8 NT555G2 235/50/18 Front 10.84@131 w/4.13" pulley ??.??@??? w/3.7" pulley (installed & tuning) |
|
|
|
|
02-09-2023, 11:03 AM
|
#10 |
 
Drives: 18 ZL1 - M6 Join Date: Mar 2019
Location: MI
Posts: 440
|
I’m in on this build progress as well. I’ll be adding these PI plates to my Z as well as some additional goodies I’m the next couple months. Good stuff brother
|
|
|
|
|
02-09-2023, 11:50 AM
|
#11 |

Drives: Chevy Camaro Join Date: Sep 2022
Location: IN
Posts: 193
|
Subscribing for the journey. Thanks for sharing!
__________________
'20 Camaro LT1
Twin 67/62 turbo 401(L8t) Texas speed forged piston & rod, BTR stg1 turbo cam, holley ultra lo, port injection, circle d 3600 stall, hoosier bias ply quick time pro's on racestar recluse wheels 1.45 4.01 6.07@120.74 9.28@153.43 '94 Camaro Z28 6mt cc306 cam, 4:10's, longtubes with x pipe, getting an engine rebuild |
|
|
|
|
02-10-2023, 01:19 PM
|
#12 |
|
Petro-sexual
|
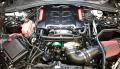
UPDATES for 02/10.
Just comments/pics/thoughts. Blower is going back on as I speak, and hope to have wiring and controller layout organized/finalized/loomed. Controllers should be roughly finalized, but probably not yet permanent. Maybe just a basic restart, but no port until I can make sure the tank fitting isn't leaking and that everything else is buttoned up. And real quick - I had a quick question for the plates. I called the guys over there, and they were GREAT. I bugged Mike, later, for a couple other questions (like the belt length) and he gave me SO much information. All of the guys I've communicated with, there, are so d@mned awesome. I can't speak highly enough about them. Thanks for the interest  
__________________
'20 ZL1 Black "Fury" A10, PDR, Exposed CF Extractor Magnuson Magnum DI TVS2650R // RFBG // Soler 103 // TooHighPSI Port Injection // THPSI Billet Lid // FF // Katech Drop-In // PLM Heat Exchanger // ZLE Cradle bushings // BMR Chassis-Suspension Stuff // aFe Bars // Diode Dynamics LEDs // ACS Composites Guards // CF Dash // Aeroforce // tint // other stuffs |
|
|
|
|
02-10-2023, 07:01 PM
|
#13 | |
|
Drives: 2022 Lt1 A10 Join Date: Nov 2015
Location: clark, mo
Posts: 8,860
|
Quote:
__________________
2022 Lt1 6.2 A10, Maggie 2300, THPSI Port Inj/10 rib, Rotofab, E, Nickey, SCOL, Griptech, RC Bandits, Hoosiers/MT 9.80@142.96 1.44 60ft, 6.34@112 707/669 RWHP/TRQ. 16SS Maggie 2650 9.41@147 1.35 60ft, 5.99@119. 16 C7 A8 10.90@128 Bolt on stuff
|
|
|
|
|
|
02-16-2023, 10:28 AM
|
#14 | |
|
Drives: 2022 Lt1 A10 Join Date: Nov 2015
Location: clark, mo
Posts: 8,860
|
Quote:
__________________
2022 Lt1 6.2 A10, Maggie 2300, THPSI Port Inj/10 rib, Rotofab, E, Nickey, SCOL, Griptech, RC Bandits, Hoosiers/MT 9.80@142.96 1.44 60ft, 6.34@112 707/669 RWHP/TRQ. 16SS Maggie 2650 9.41@147 1.35 60ft, 5.99@119. 16 C7 A8 10.90@128 Bolt on stuff
|
|
|
|
|
|
|
|
|
|
Post Reply
|
|
|


