You are browsing camaro5 

|
 08-26-2018, 08:08 AM
|
#155 | |
 Drives: . Join Date: Jun 2016
Location: .
Posts: 589
|
Quote:

|
|

|

|
|
08-26-2018, 08:21 AM
|
#156 | |
 
|
Quote:
|
|
|
|
|
|
08-28-2018, 01:27 PM
|
#157 |
|
Drives: . Join Date: Jun 2016
Location: .
Posts: 589
|
Other updates pending:
Camber plates ordered and awaiting delivery. Michelin tyres to fit. New engine rocker covers to fit. Version 2 steering wheel centre in progress. Version 2 brake ducts in progress. Lots of development ongoing on this wonderful car!
|
|
|
|
|
08-28-2018, 01:45 PM
|
#158 |
|
@MrRaZ28

|
Looks pretty bad ass Pat. Love how you set that up. I'd heard we could stand on the front splitter, but I do not have the balls to test it.
Extremely interested in what you come up with second go around on the brake ducts. I've been debating making my own and using the faux fog light covers as the entry point. Now that I've swapped to Girodiscs, I want to make sure they last as long as possible. |
|
|
|
|
09-23-2018, 08:49 AM
|
#159 |
|
Drives: . Join Date: Jun 2016
Location: .
Posts: 589
|
Just completed a cool little mod this weekend. Fitted Holley valve covers. I ordered them in the plain "as cast" finish and then prepped and painted them myself in Velocity Yellow. This is a respectful nod to the 2006 Corvette Z06 which was the first production car to take the LS7, without the success of which we might never have had the 2014 Z/28. I also painted the mounting bolt heads black, and wrapped the fuel rails in DEI Gold heat reflective film while I was at it.
Got a chance to take a look at my valvetrain after 4200miles, all looks to be in great condition under there. The covers save over 1lb in weight and also lower the Centre of Gravity of the coils. By eliminating the extra bracket it's all a lot tidier once you've tucked the wires away neatly. I managed to retain the factory breather pipes, although I had to cut the quick release ends off as spigots on the Holley covers are smaller. A few pictures attached below. |
|
|
|
|
09-23-2018, 10:33 AM
|
#160 |
|
Life Is Short Enjoy It!

Drives: Original Owner 15 Z/28 #934 Join Date: Sep 2016
Location: S. Cal
Posts: 891
|
Looks great!
|
|
|
|
|
09-25-2018, 09:48 AM
|
#161 | |
|
Drives: . Join Date: Jun 2016
Location: .
Posts: 589
|
Quote:
A few more engine bay detail pictures below.In other news, my Gen5DIY/Moreno Motorsport camber plates are nearly here! Just waiting on them to clear UK customs. I've already got the DSSV struts out ready to fit them so will post my first impressions as soon as I receive them. When fitted I'll be switching straight over to a new set of Michelin Pilot Sport Cup+ N0/N2 (porsche spec) tyres. Should get at least 2 more trackdays in this year... 
|
|
|
|
|
|
09-25-2018, 01:48 PM
|
#162 |
 Drives: 2015 Z/28 #1251 Join Date: Sep 2015
Location: AR
Posts: 72
|
Did you end up doing away with the EVAP/purge solenoid or just re-routing the hose and wires?
|
|
|
|
|
09-26-2018, 06:46 AM
|
#163 | |
 
Drives: 14' Red Z/28 #336 Join Date: Mar 2016
Location: Northen Indiana
Posts: 367
|
Quote:
Do you have a picture of the under side of those valve covers? I am looking into those as well or the OEM LSA/LS9 covers to clean it up some and to get rid of those coil brackets. Your looks nice without. Also I am doing the fuel rail reverse and spinning it a 180 degrees to eliminate the long goofy fuel line that crosses over the intake, Got my short fuel hose from TechAFX that is made like an OEM hose but way shorter and made to do just this, they also make an Evap hose to replace the goofy looking metal hose from the solenoid to the right fender (wing) I will post a few pictures at some point. Keep it up...Love what you have done with yours! |
|
|
|
|
|
09-26-2018, 06:55 AM
|
#164 | |
|
Drives: . Join Date: Jun 2016
Location: .
Posts: 589
|
Quote:
Thanks for your reply on my other thread. I've left the EVAP as factory for now. I don't want the weight or the clutter in the engine bay so would love to remove it, but equally I don't want the check engine light. The valve has some weight to it, but more so does the EVAP canister, which doesn't appear to be removable without dropping the fuel tank. My research and understanding suggests the EVAP purge contribution to fuelling will be so slight on such a large engine that removal shouldn't affect the engine tune. Normally the valve tends to make the purge contribution on areas at low load where the engine is running closed-loop stoichiometric (so the ECU should effectively compensate itself for the removal of EVAP). I've added it to the list of 'long term projects'!
|
|
|
|
|
|
10-06-2018, 12:09 PM
|
#165 | |
|
Drives: . Join Date: Jun 2016
Location: .
Posts: 589
|
Quote:
Also on the underside the Holley covers have a copy of the OE breather plate, and a threaded port for the breather takeoffs (although fyi on the driver's side this ends up not being in the exact same location as OE) I'm very interested by what you describe for the fuel rail and EVAP hose mods... please post some pictures when you can! To finish off the engine bay for now I've got some nice pressed aluminium "7.0L LS7" badges which I found on eBay-Australia!! |
|
|
|
|
|
10-06-2018, 12:47 PM
|
#166 |
|
Drives: . Join Date: Jun 2016
Location: .
Posts: 589
|
Camber plates
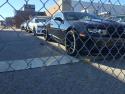
as you might have seen in the dedicated camber plates thread, I recently got the first set of Moreno Motorsport V2 camber plates, brought back by Gen5DIY.
I got these fitted earlier in the week, installation was straight forward, and they are easy to adjust with just a floorjack and a 6mm allen key so can easily be done at the track if you desire I've attached a couple of pics below showing how you have to trim the spacer ring to clear the bonnet (hood) stay bracket in case this helps someone. Then this afternoon I got a full alignment done on a brand new £60,000 Hunter Alignment rig local to me! I'm also on new tyres now. Michelin Pilot Sport Cups. front - 305/30/R19 "N0 Porsche spec" rear - 325/30/R19 "N2 Porsche spec" For the alignment I went slightly different to the Chevrolet track settings or the JPSS settings. I've now got the following geometry: Front left camber -2.5 degrees Front right camber -2.5 degrees Front left caster 6.3 degrees Front right caster 6.3 degrees Front left toe 0.017 degrees IN (was shooting for zero) Front right toe 0.05 degrees IN (was shooting for zero) Rear left camber -1.25 degrees Rear right camber -1.05 degrees Rear left toe 0.167 degrees IN (was shooting for 0.12) Rear right toe 0.133 degrees IN (was shooting for 0.12) Observations [1] I could have got more negative camber than this.. Not at the limits of adjustment, but I thought this would be a good starting point. [2] The stock caster on a Z28 appears to be about 5 degrees. I'm interested to see how turn-in feels with the additional caster I've added, but the zero front toe (which should help with tyre life and maybe making the front a bit less "nervous" on country lanes!) |
|
|
|
|
10-06-2018, 03:47 PM
|
#167 |
Drives: 2015 z28 Black w/ac #645 Join Date: Jan 2017
Location: Southeast Texas
Posts: 337
|
Those NSpecs do look good mounted dont they. Widest tires I've found in the 305 & 325 sizes. I have the exact same setup mounted on a second set of wheels . Theres not alot of info on these out there anymore that i could find. Bought them to try on track but havent yet.I have seen a video where they said it takes alil while for these to heat up. Like the fitment though .its pefect . Really gives the car a tubbed look from behind . But the ROCKS lol.i hate rocks on the road. They pick up as much if not more than the trofeos being a softer compound . love your car man.
|
|
|
|
|
10-26-2018, 11:31 AM
|
#168 |
|
Drives: . Join Date: Jun 2016
Location: .
Posts: 589
|
Sooooo.... I'm leaving at 5am tomorrow for 3 days driving the Nurburgring!!!
 It's 1050 miles there and back and I'm driving the Z the whole way! It will be Touristfahrten for all 3 days, with all that that entails. Having said that two days are weekdays and it's very late in the season so I'm hoping the track is fairly quiet compared to TF in peak summer. I'll try to post updates here and on Instagram whenever I get a chance ☺️ Wish me luck 🤞🏼 |
|
|
|
|
|
|
|
 |
|
|


