You are browsing camaro5 

|
 12-27-2014, 08:16 PM
|
#85 |
|
'It's an experiment'

Drives: [COTW 2/09/15] '11 GPI LSA SC Z/LE Join Date: May 2014
Location: Dallas TX
Posts: 8,694
|
Passenger Side completed and then final wipe-down!
So before: .jpg) After: 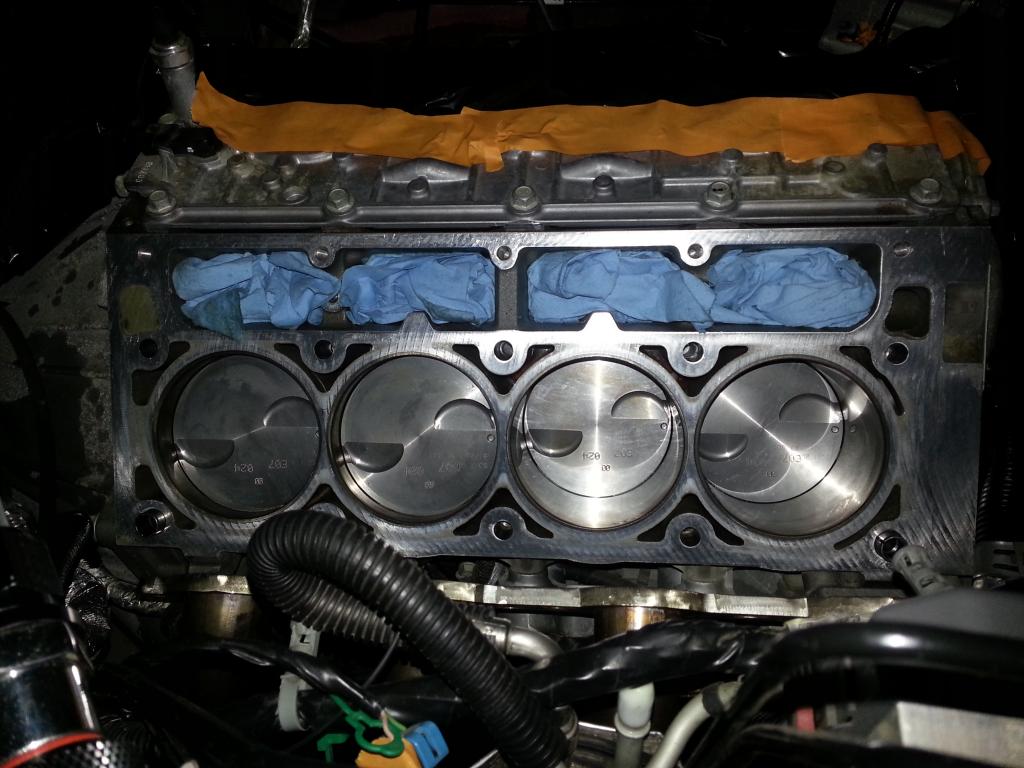 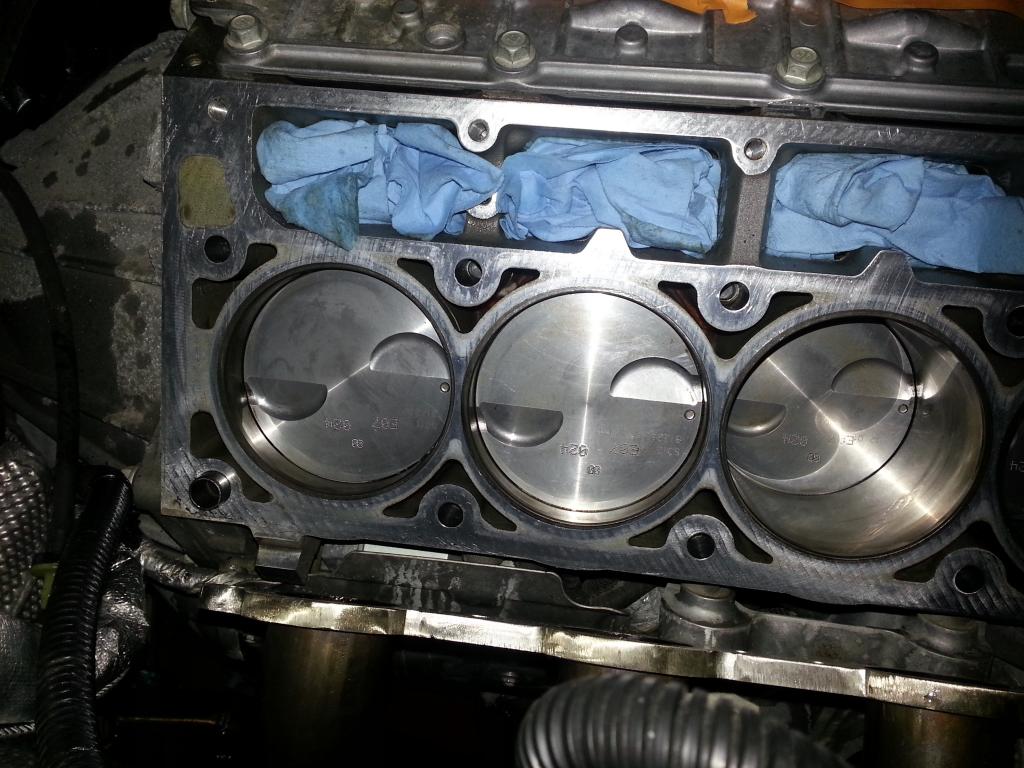 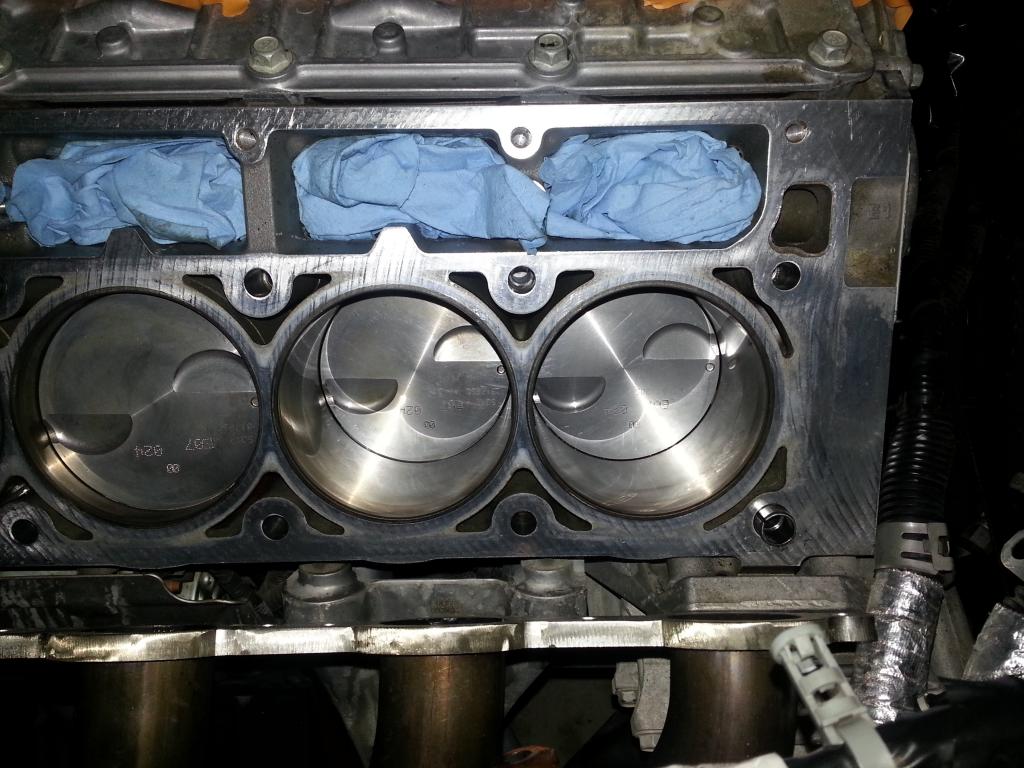 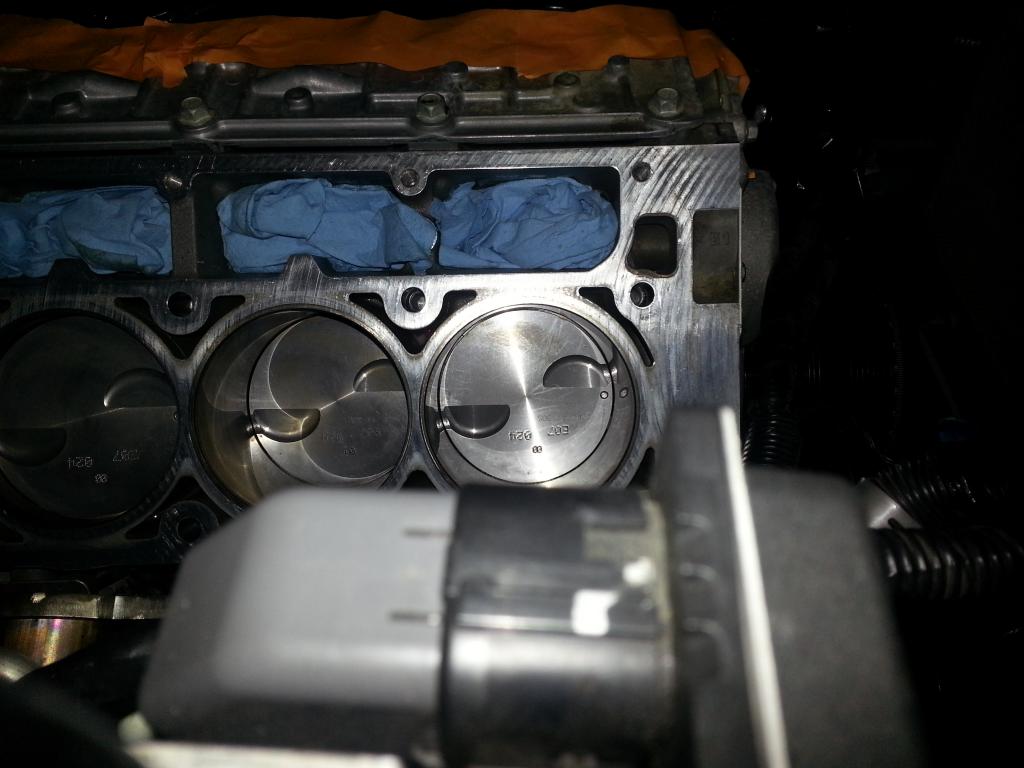 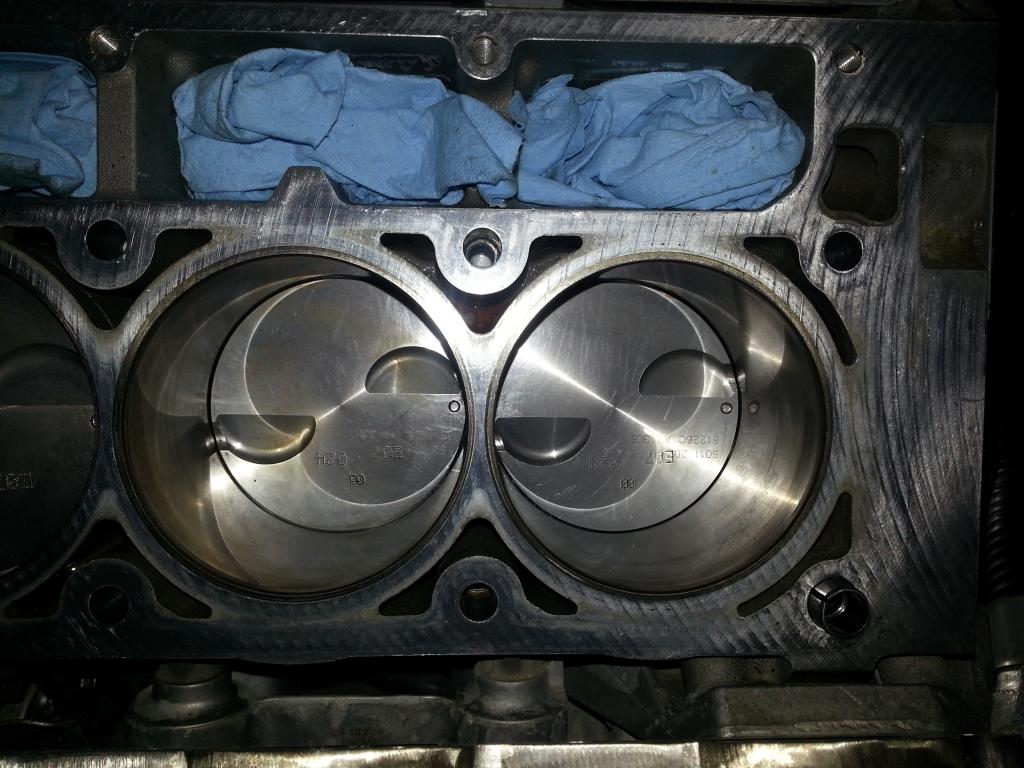 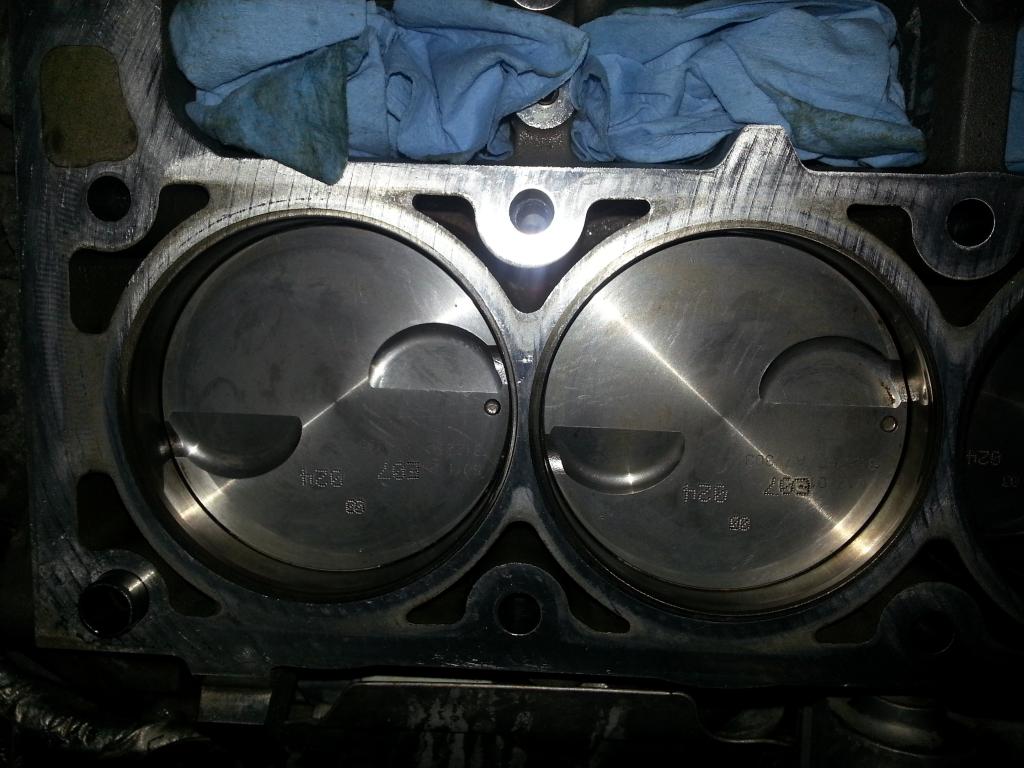 Marvels: 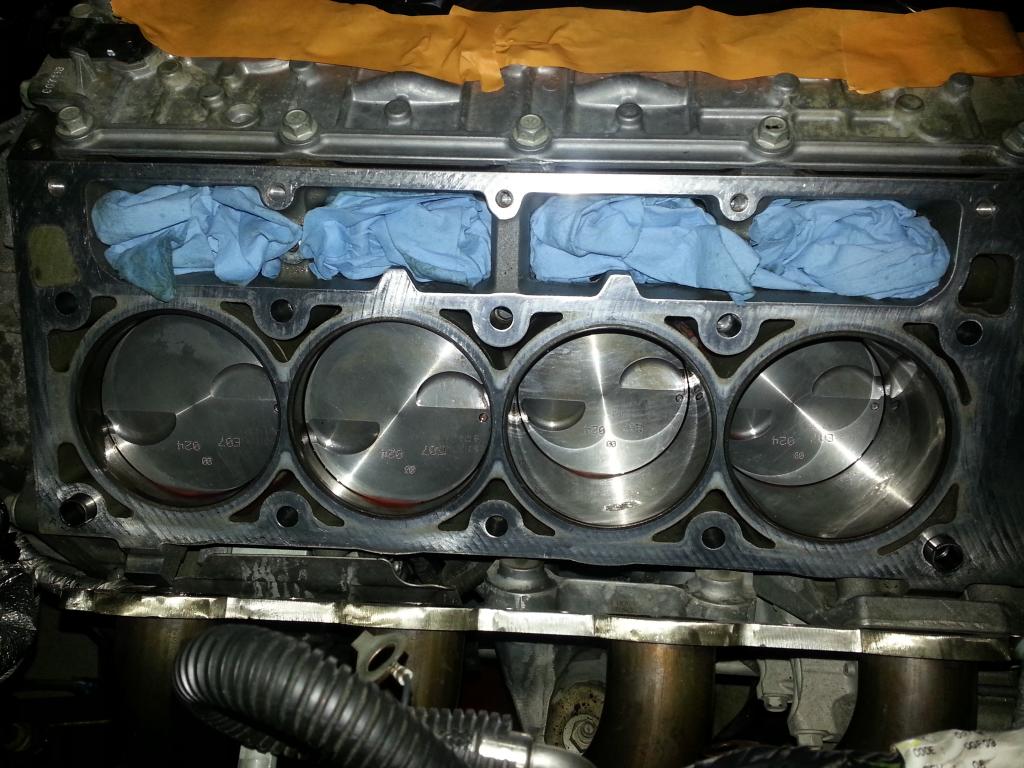 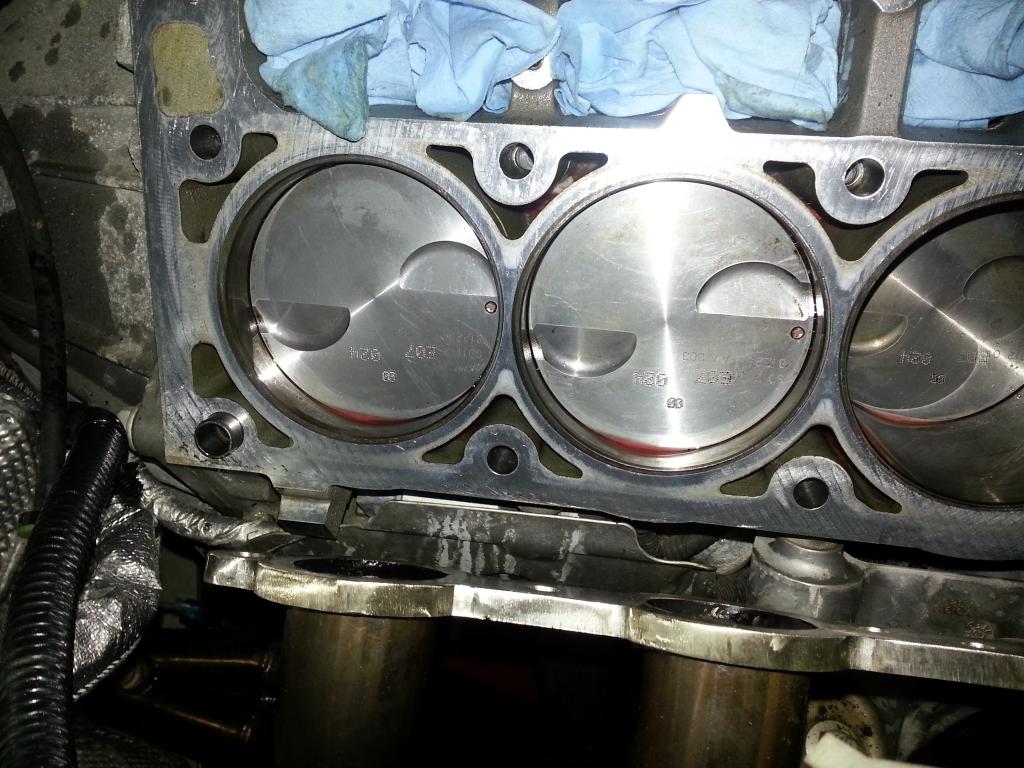 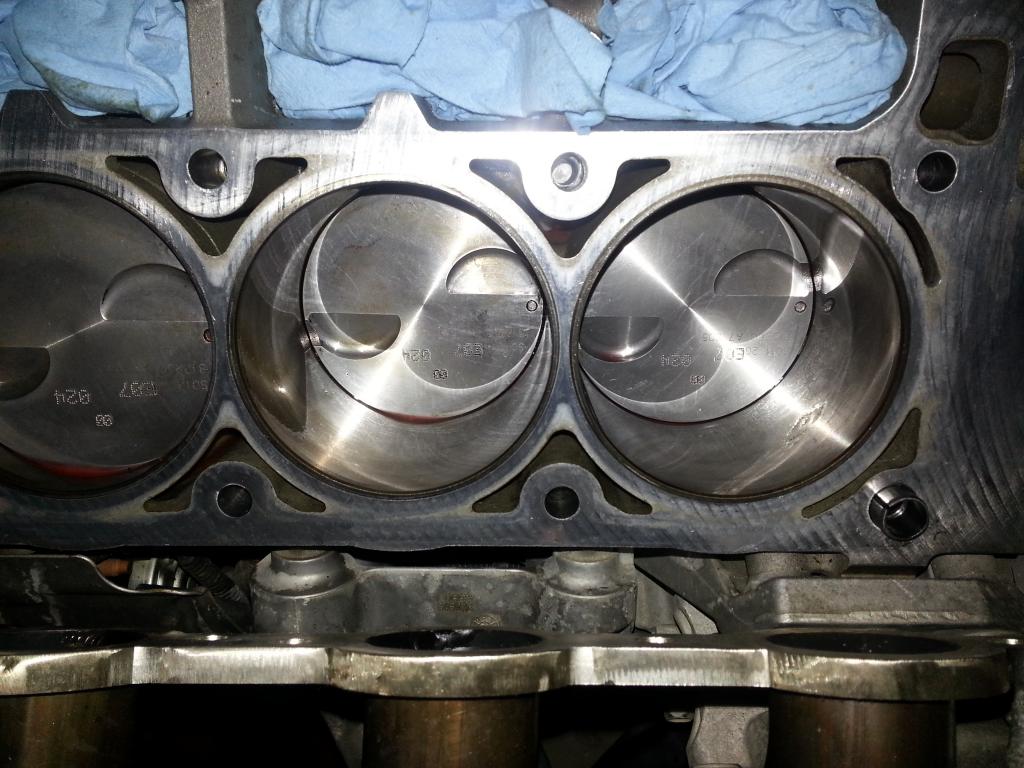 Rotated and final wipe-down: 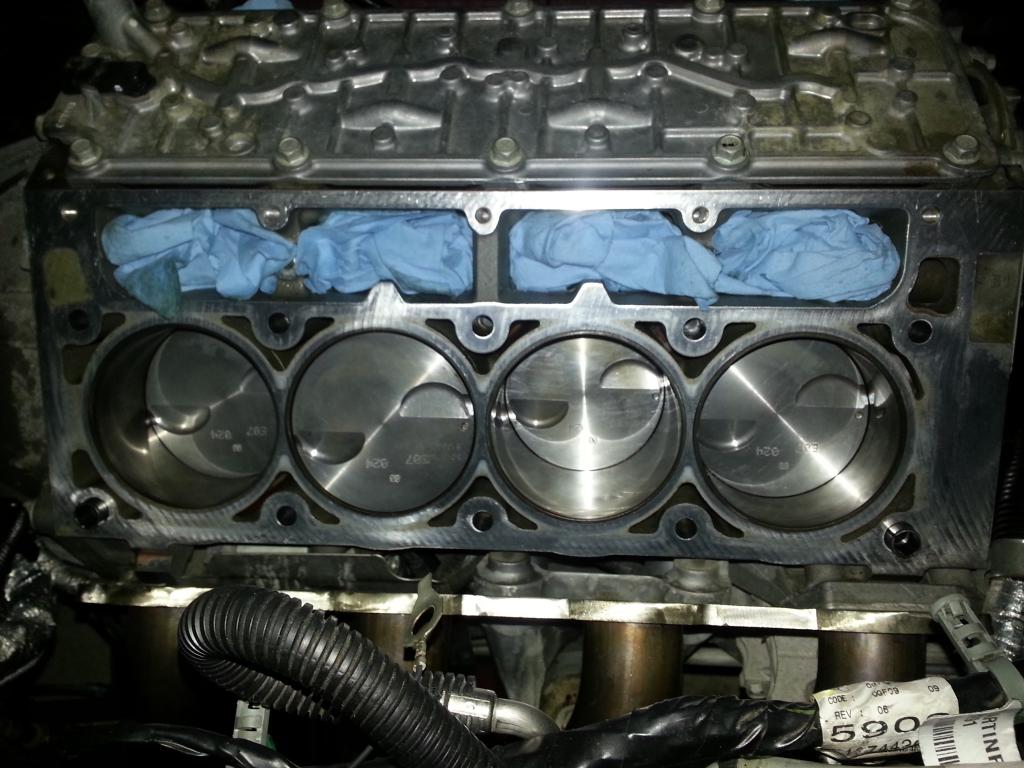 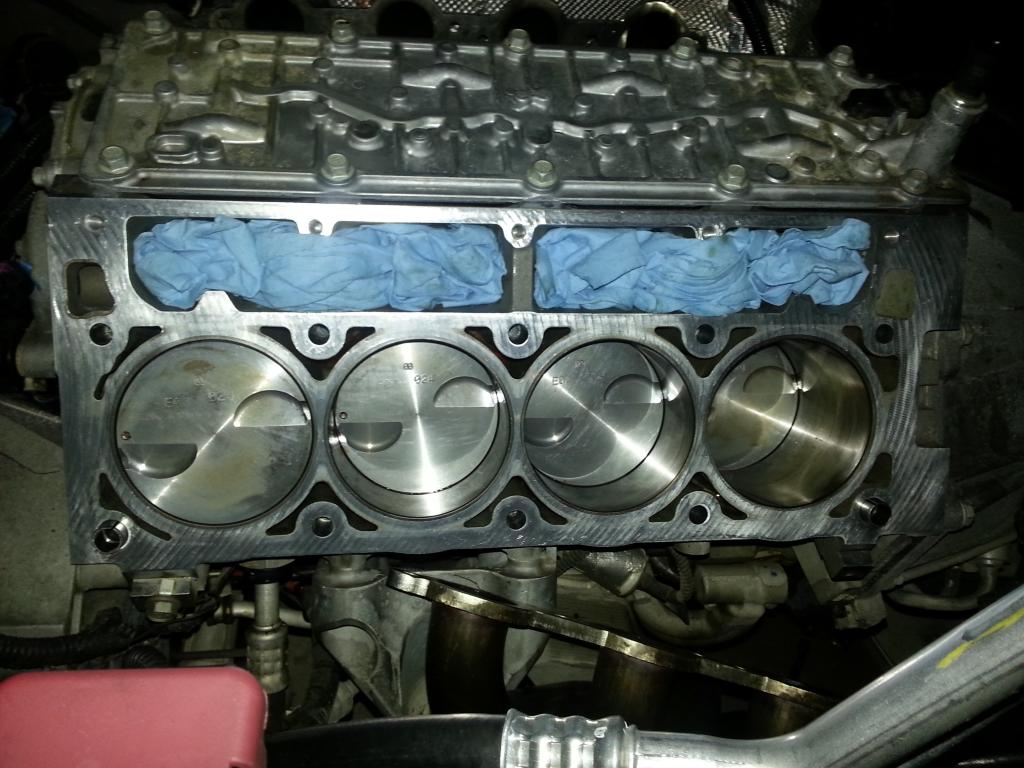 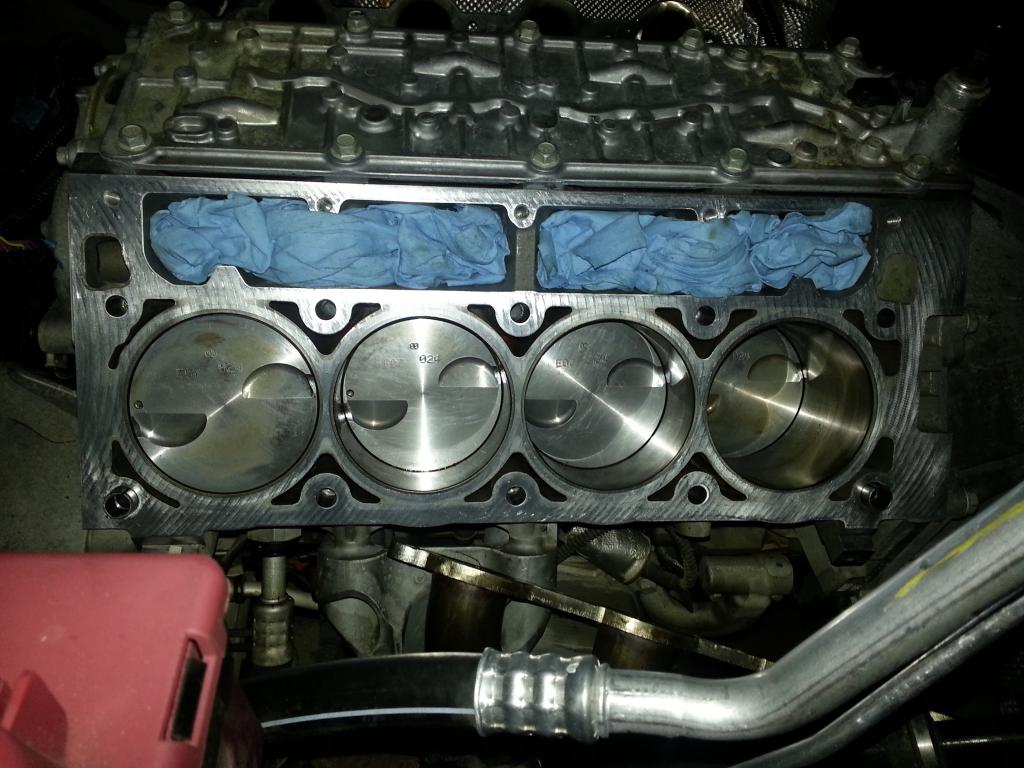 Covered for next round! 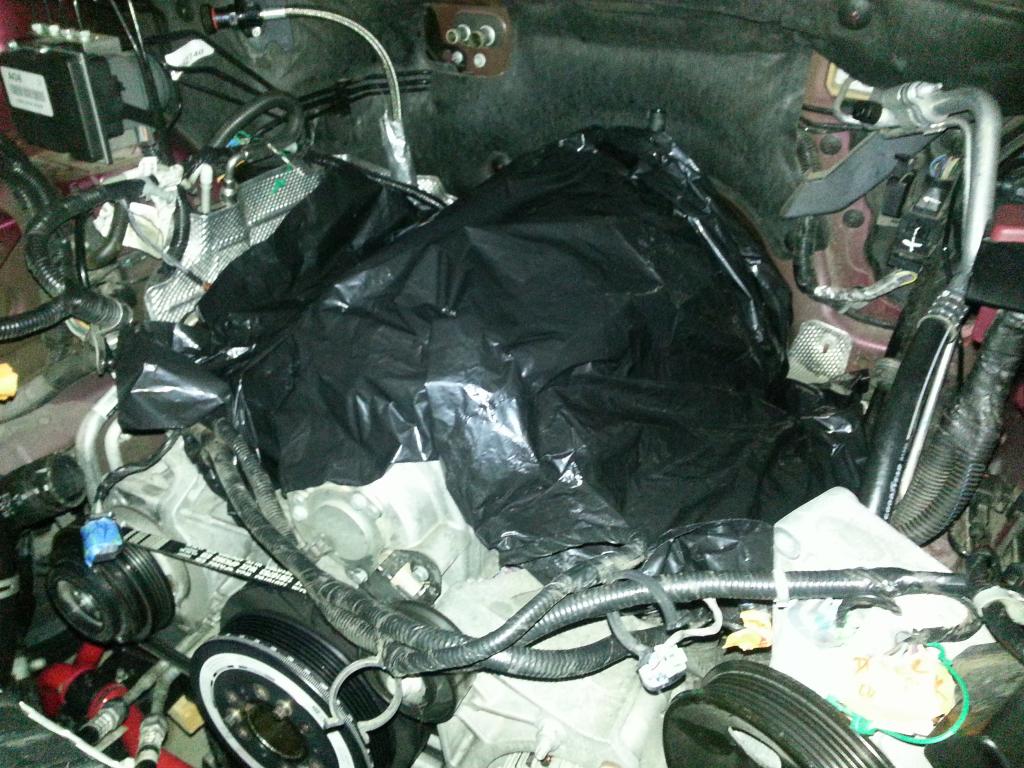 -Don Last edited by hammdo; 07-02-2017 at 01:59 PM. |

|

|
|
12-28-2014, 04:34 PM
|
#86 |
|
'It's an experiment'
Drives: [COTW 2/09/15] '11 GPI LSA SC Z/LE Join Date: May 2014
Location: Dallas TX
Posts: 8,694
|
Today, cleaning out the head bolt holes -- and that took some time as you have to clean out all thread lock and make sure it will screw in by hand -- some had more others not so.
First, took 2 existing bolts from one of the heads and cleaned/grooved then in order to allow the 'gunk' to come out (head bolts are one time use ONLY):  Then I prepped the engine to make sure ONLY the bolt holes were exposed. As I did a hole, I'd cover it up so I knew which one I finished. I started from the bottom, then left to right until all were done: Prepping: 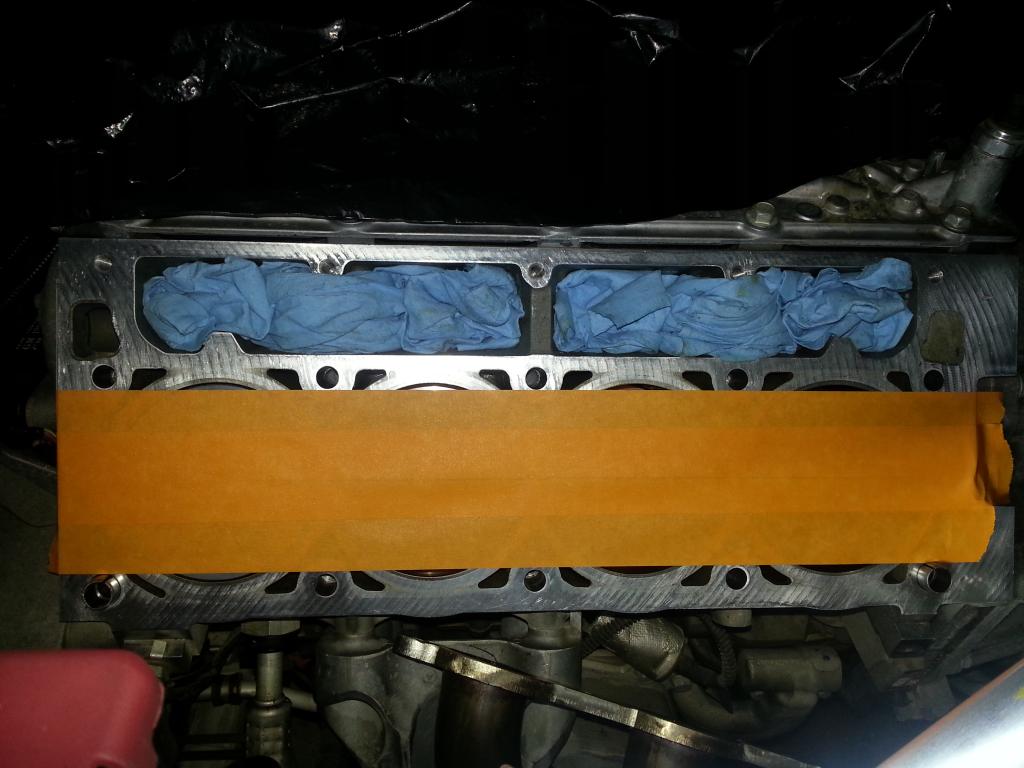 (The two holes covered were opened when I started them)... 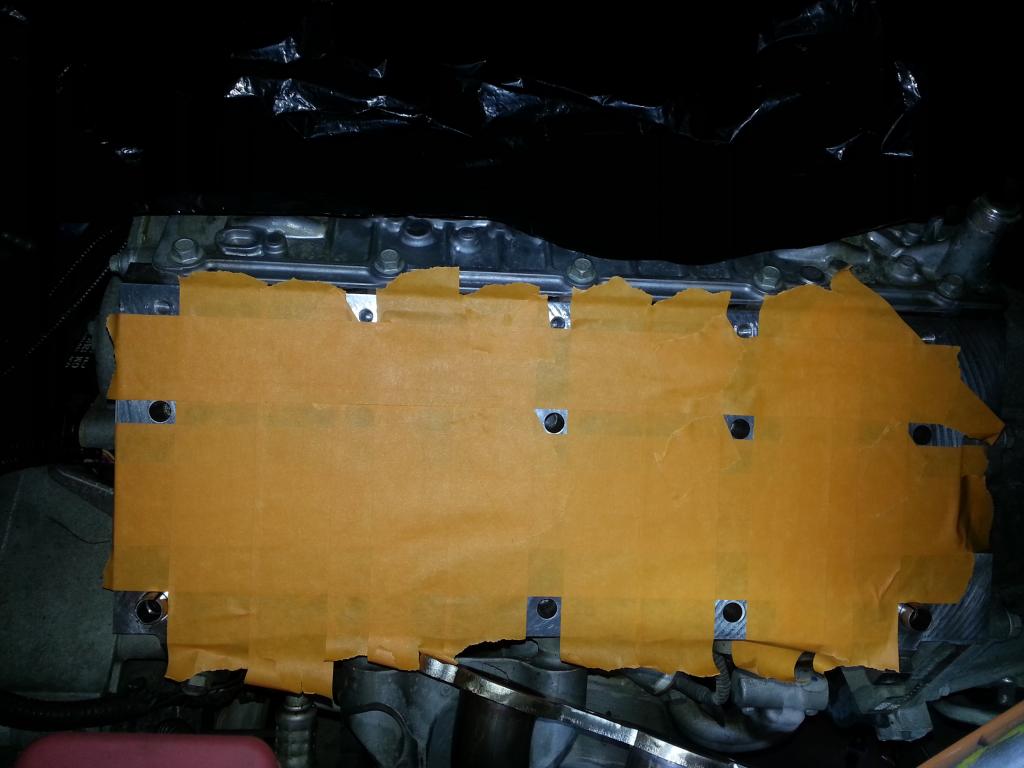 Gunk!:  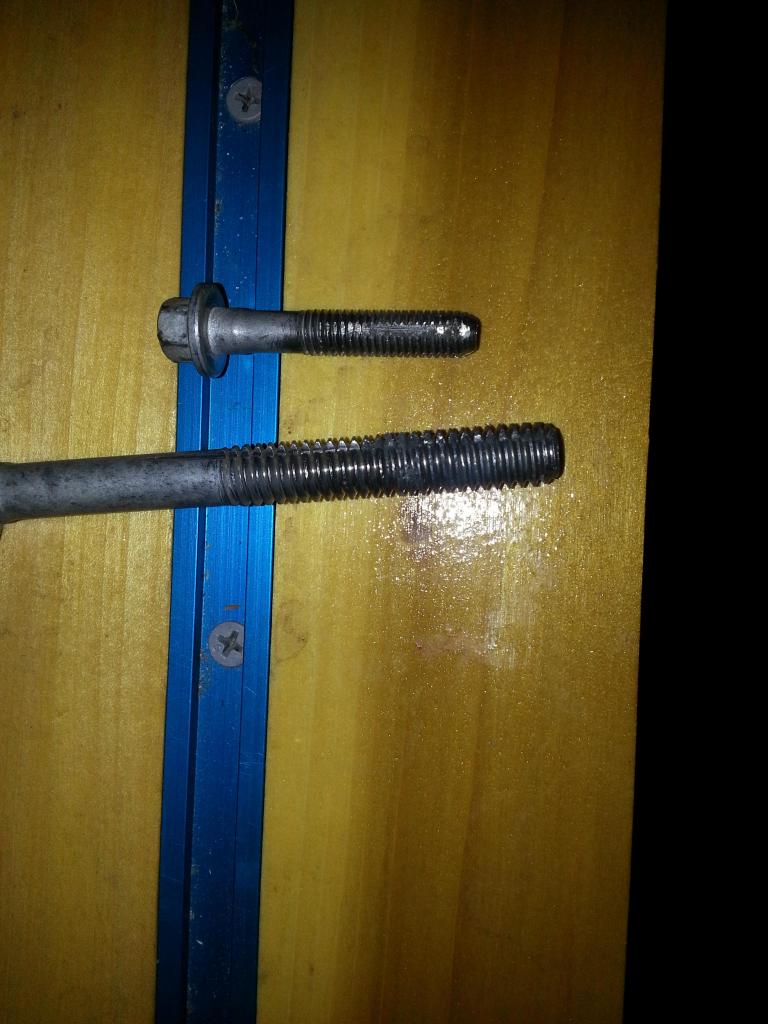 De-gunking the bolt holes: 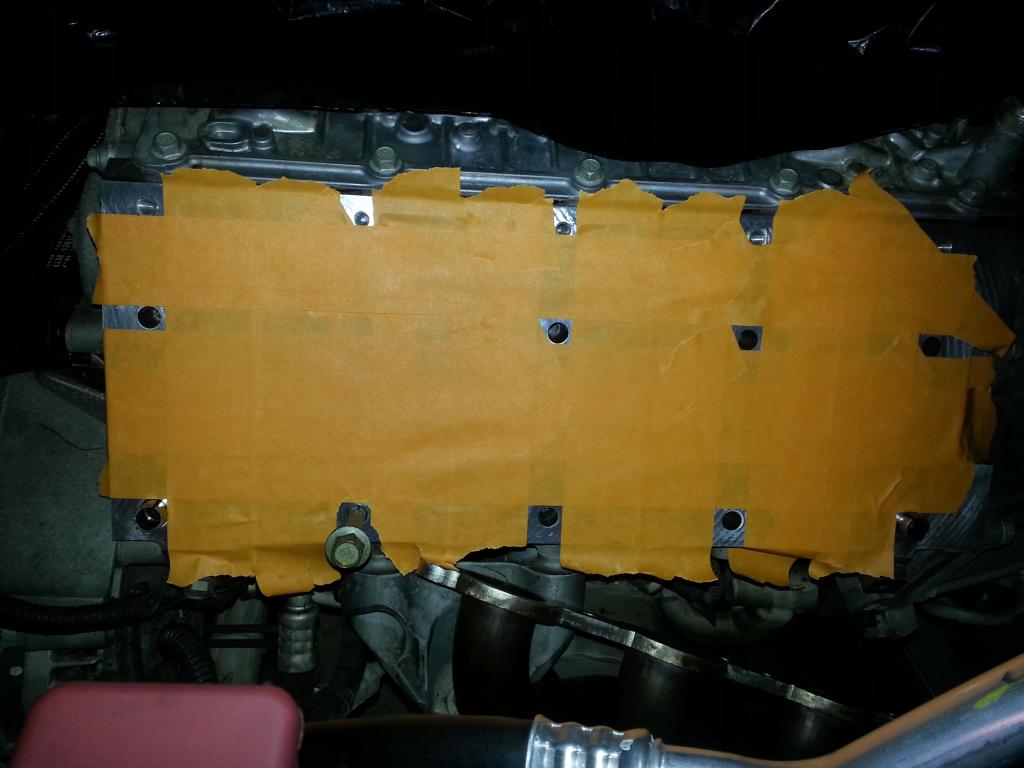 Covering the ones that were done: 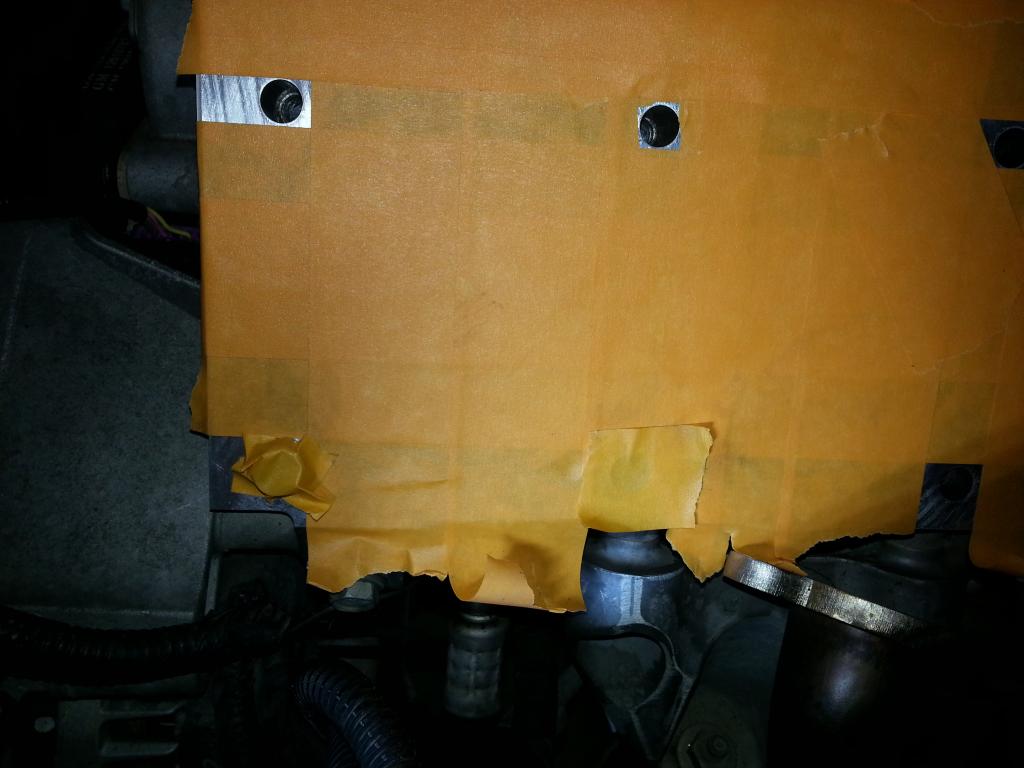 Now, once I had the holes cleaned, I used brake kleen, q-tips and air hose to clean them out and chase them again with the bolt until it came out clean: Q-tip: 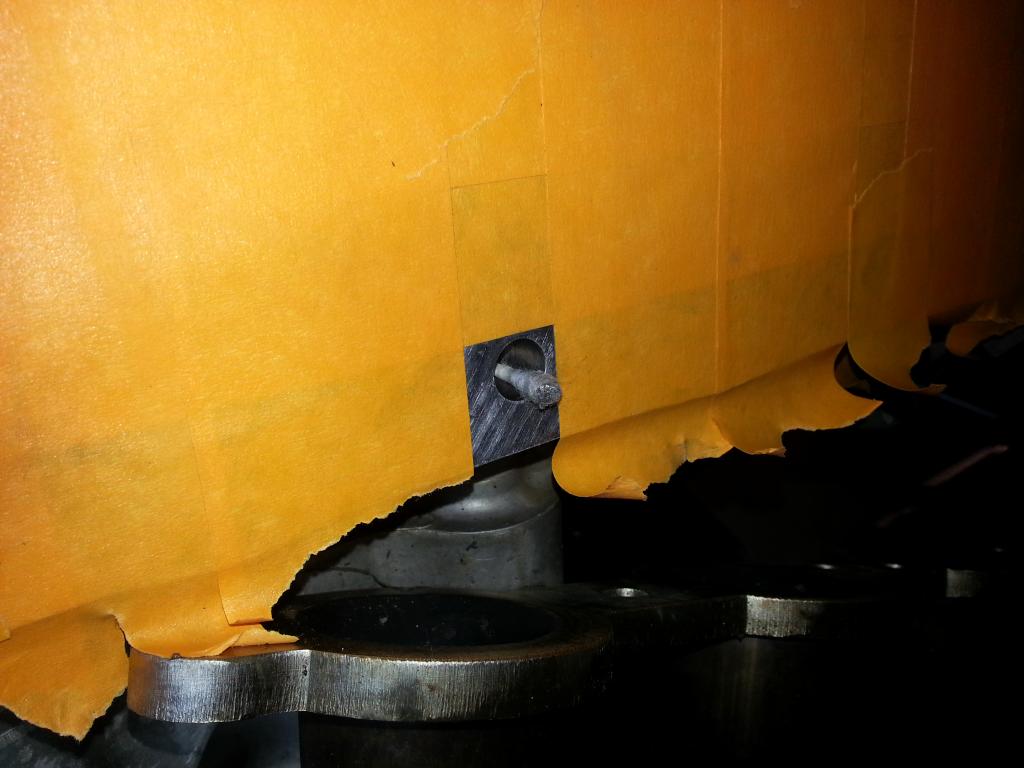 All done!: 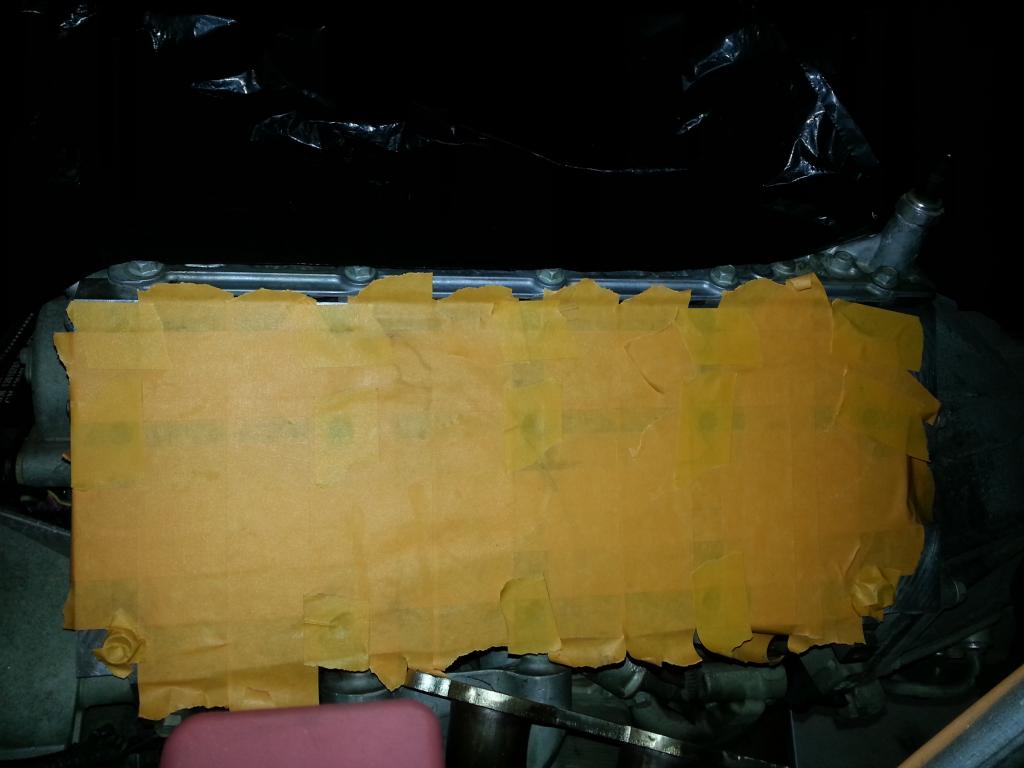 Boy, this took quite a while, but I'd rather do it right the first time and not have any issues with torquing the head bolts -- besides, any 'professional tuner' that works on this car will want to know the 'level of effort' I put in doing the work-- so there you go ;o) Tomorrow, the passenger side head bolt holes. The Cam and Heads are due in late tomorrow, so that will be just about right timing. Work day tomorrow so limited time to do 'this' fun stuff... More to come... -Don Last edited by hammdo; 06-22-2019 at 08:51 AM. |
|
|
|
|
12-29-2014, 06:17 AM
|
#87 | |
|
Drives: Anything I want Join Date: Oct 2008
Location: DfW - Texas
Posts: 5,405
|
Hey Don
So you have done such a great job at this,why not come by and grab a set of head studs by ARP and never look back.
We have them in stock ready to go. BTW- We did your exact build (we used stock heads and BTR Stage 1 Cam)last week on a 2014 with amazing results.Over 595 rwhp  Cant wait to see how Ryans VVT cam and Heads works out....Lets get it done |
|
|
|
|
|
12-29-2014, 01:42 PM
|
#88 | ||
|
'It's an experiment'
Drives: [COTW 2/09/15] '11 GPI LSA SC Z/LE Join Date: May 2014
Location: Dallas TX
Posts: 8,694
|
Quote:
That is amazing results... -Don |
||
|
|
|
|
12-29-2014, 06:26 PM
|
#89 |
|
'It's an experiment'
Drives: [COTW 2/09/15] '11 GPI LSA SC Z/LE Join Date: May 2014
Location: Dallas TX
Posts: 8,694
|
OK, Passenger Side Head Bolt Holes Cleaned and Prepped!:
 GPI goodies came in today -- next will be the DOD Delete, and FINALLY the cam... Working 2 Jobs makes it tough to get to all of this but @ least I have Thursday the 1st! -Don Last edited by hammdo; 07-02-2017 at 01:56 PM. |
|
|
|
|
12-29-2014, 07:08 PM
|
#90 |
|
What's this button do?

Drives: 2019 Black 2SS Join Date: Apr 2013
Location: Wylie, Texas
Posts: 1,364
|
Race car!!!
I admire your drive and determination Don. Can't wait to see this beast after the transformation. 
__________________
2019 Black & Red & Silver 2SS - Bone Stock
 |
|
|
|
|
12-29-2014, 07:32 PM
|
#91 |
|
'It's an experiment'
Drives: [COTW 2/09/15] '11 GPI LSA SC Z/LE Join Date: May 2014
Location: Dallas TX
Posts: 8,694
|
Its been fun, and a LOT of work. I'm in no major rush so I'm sweatin' the details a bit more. If I had a lift, it would have been a TON easier as I would have dropped the front cradle out of the car and had access to everything -- not that kind of room in a 2 car garage and work benches ;o).
Getting there! Thanks! -Don |
|
|
|
|
12-29-2014, 11:29 PM
|
#92 |
|
'It's an experiment'
Drives: [COTW 2/09/15] '11 GPI LSA SC Z/LE Join Date: May 2014
Location: Dallas TX
Posts: 8,694
|
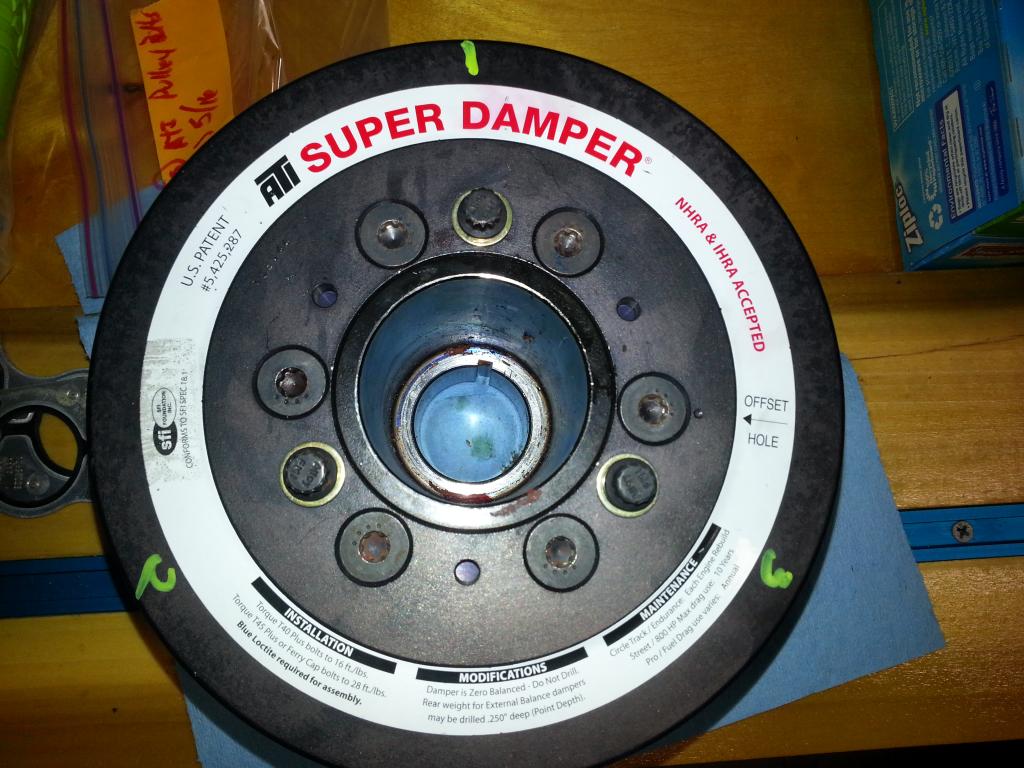
Before Calling it a night, removed 2 bolts for the alternator and loosened the 3rd (the one with the 'nut' so I can get the timing chain cover off), removed the starter and tye wrapped it out of the way, removed the flywheel cover on the passenger side, installed the flywheel retainer (A6 so not as lucky as the M6 folks) and removed the ATI Super Damper puller bolt holds and the Crank Bolt with the breaker bar:
Alternator: 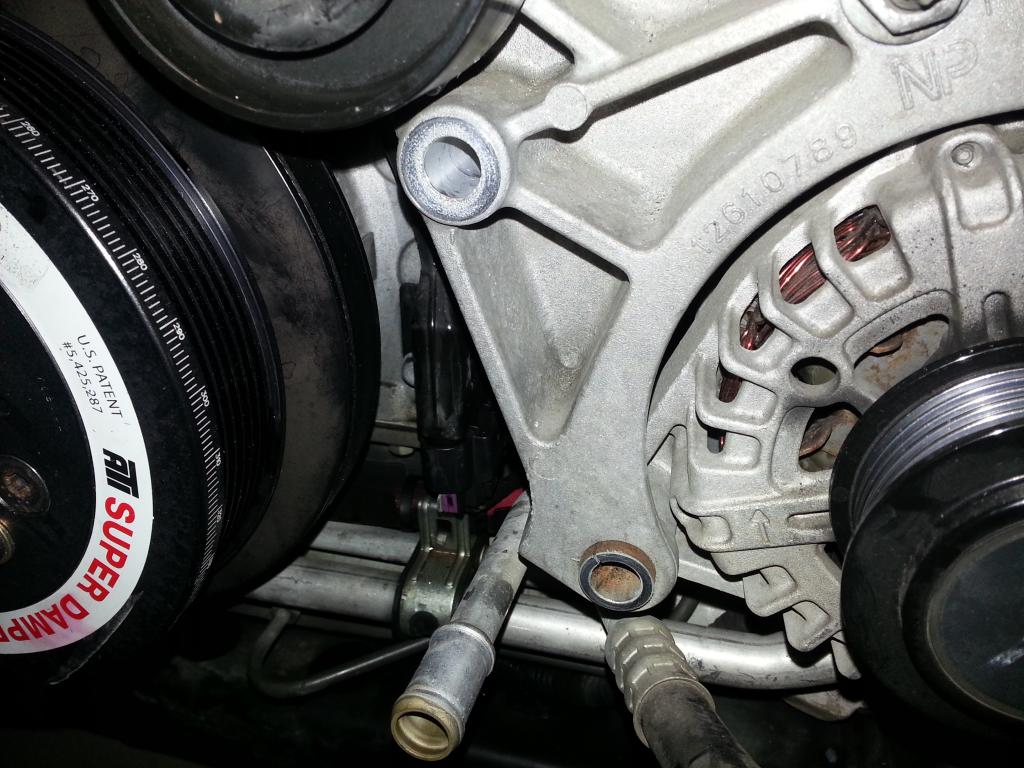 Starter: 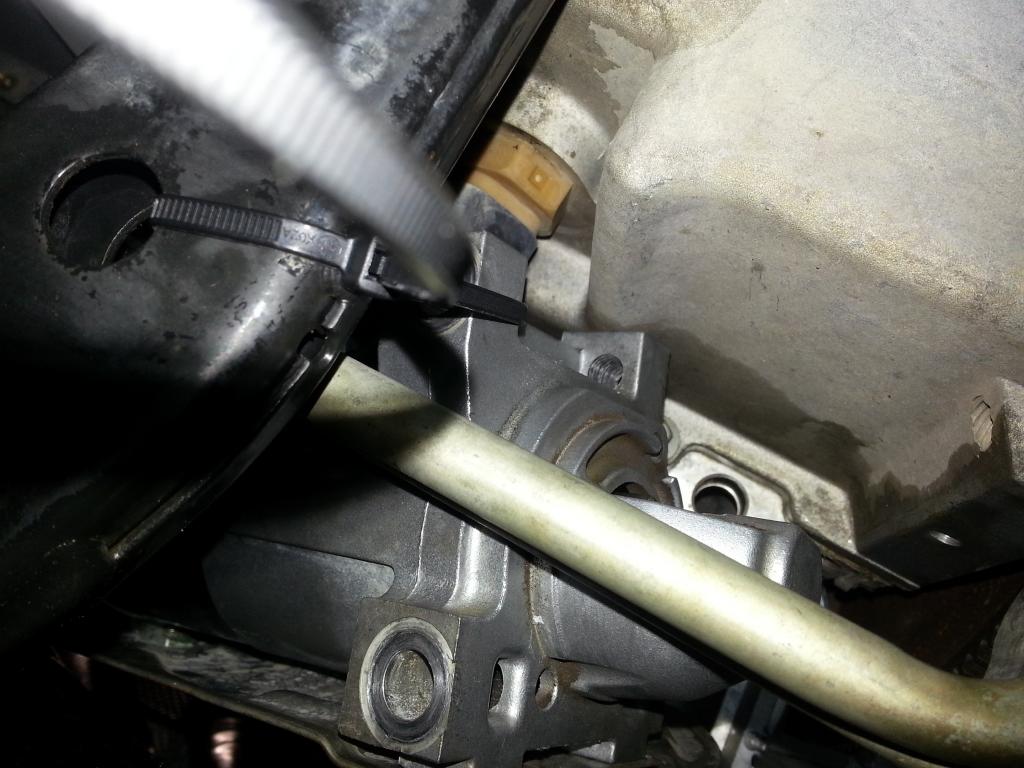 Flywheel holder (after removing the flywheel cover): 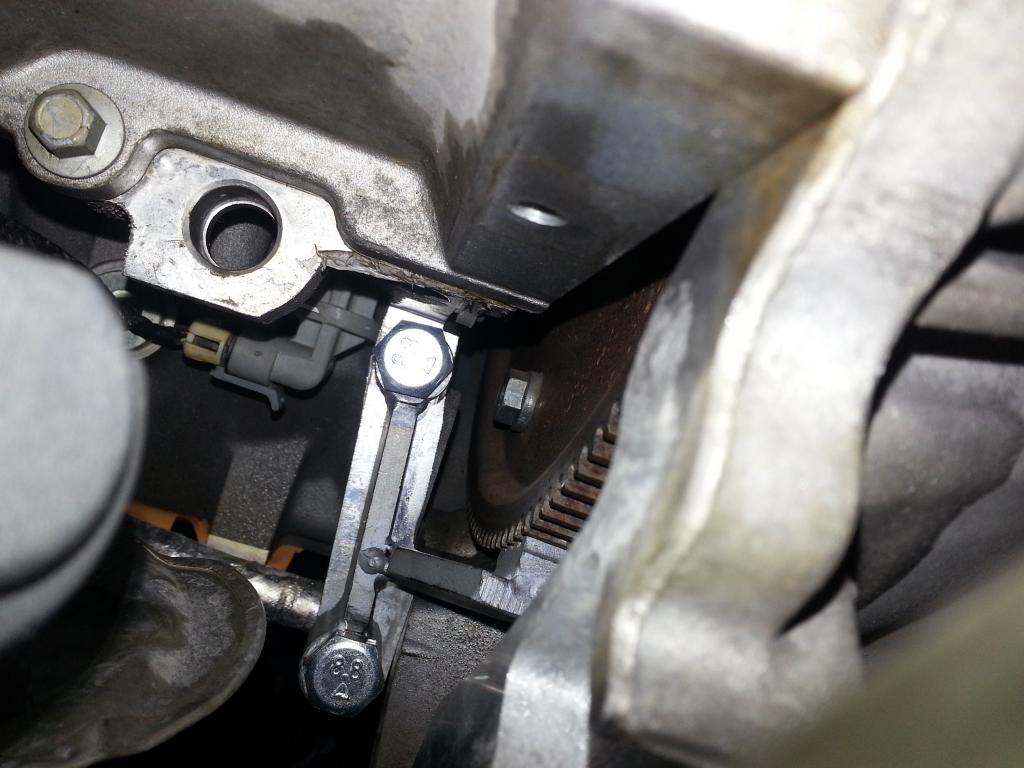 ATI super damper: 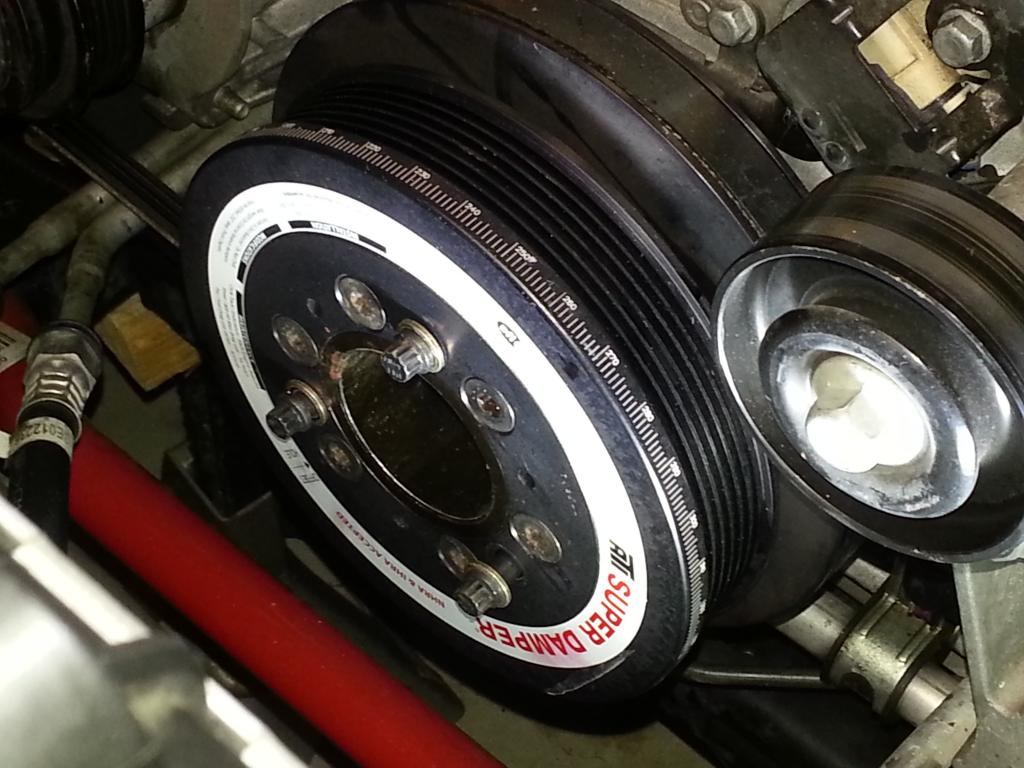 Crank bolt removed (and while I was @ it, remove the water pump gaskets): 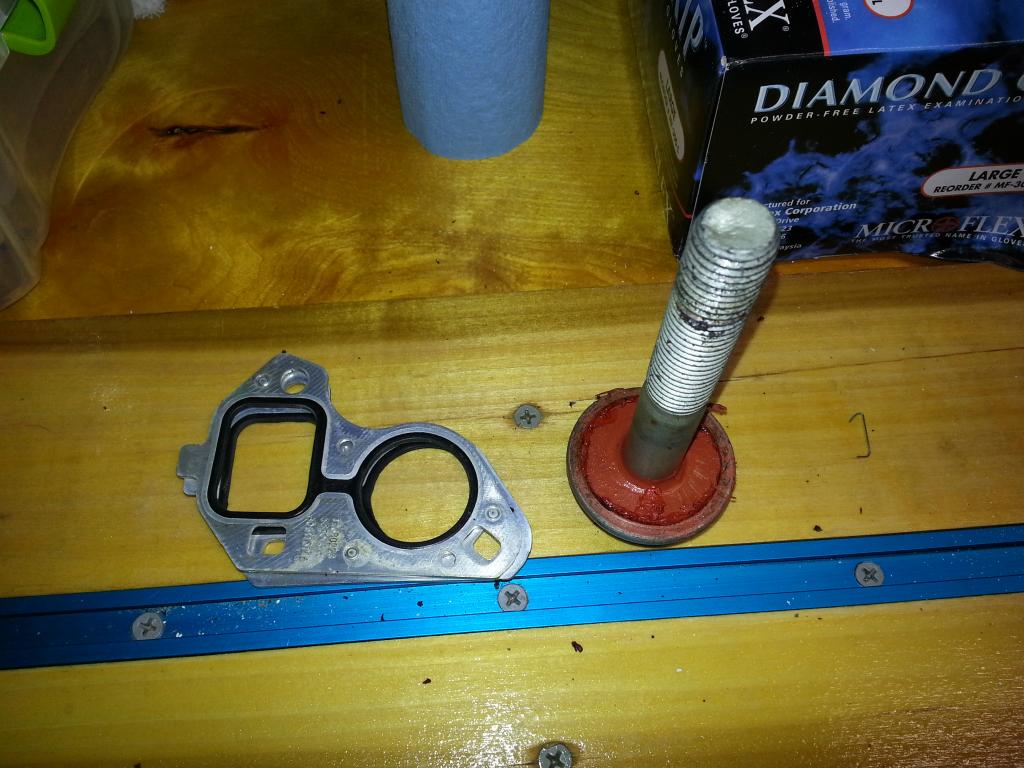 Anyone looking for an ATI Super Damper low miles ;o)? -Don Last edited by hammdo; 07-02-2017 at 01:55 PM. |
|
|
|
|
12-30-2014, 07:01 AM
|
#93 |
        |
Don, Pm me a price on balancer!
|
|
|
|
|
12-30-2014, 09:56 AM
|
#94 |
|
'It's an experiment'
Drives: [COTW 2/09/15] '11 GPI LSA SC Z/LE Join Date: May 2014
Location: Dallas TX
Posts: 8,694
|
Vararam OTR intake no tune low miles if anyone is interested. No MAF with it. I need that...
-Don |
|
|
|
|
12-30-2014, 08:39 PM
|
#95 |
|
'It's an experiment'
Drives: [COTW 2/09/15] '11 GPI LSA SC Z/LE Join Date: May 2014
Location: Dallas TX
Posts: 8,694
|
OK, Damper is off:
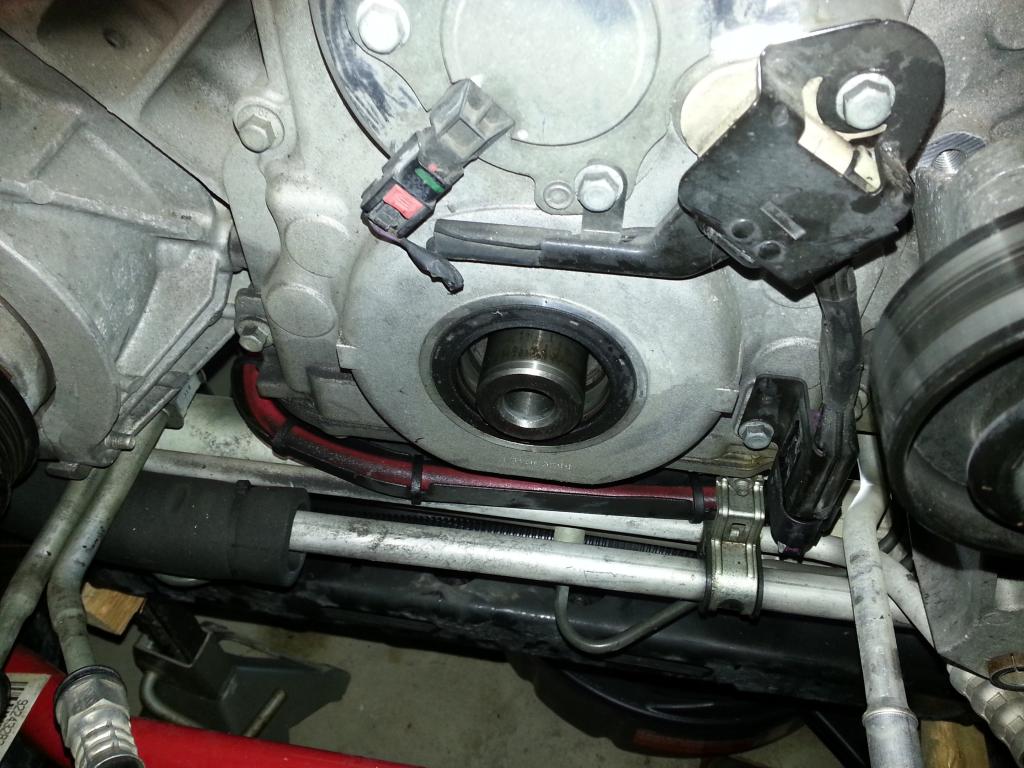  Ready to ship to Ryan (Rhino79).... Next, I drained the oil before taking off the cover -- inspected the drain plug magnet for big chunks of metal -- nothing but small amounts of gunk and little metal: 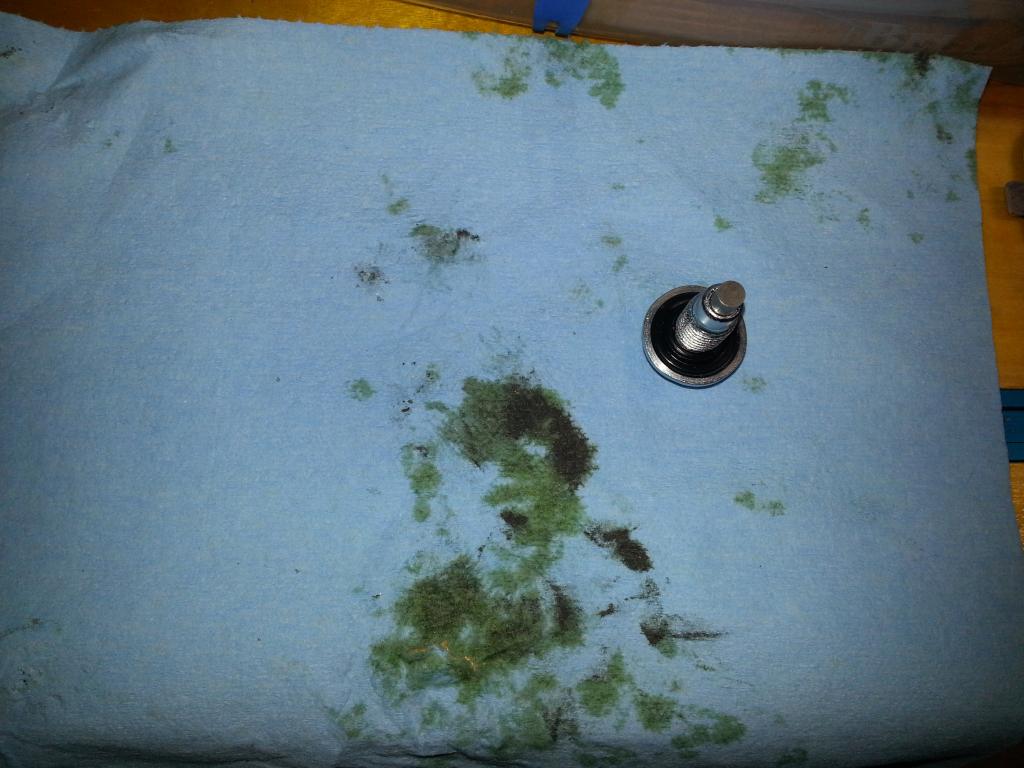 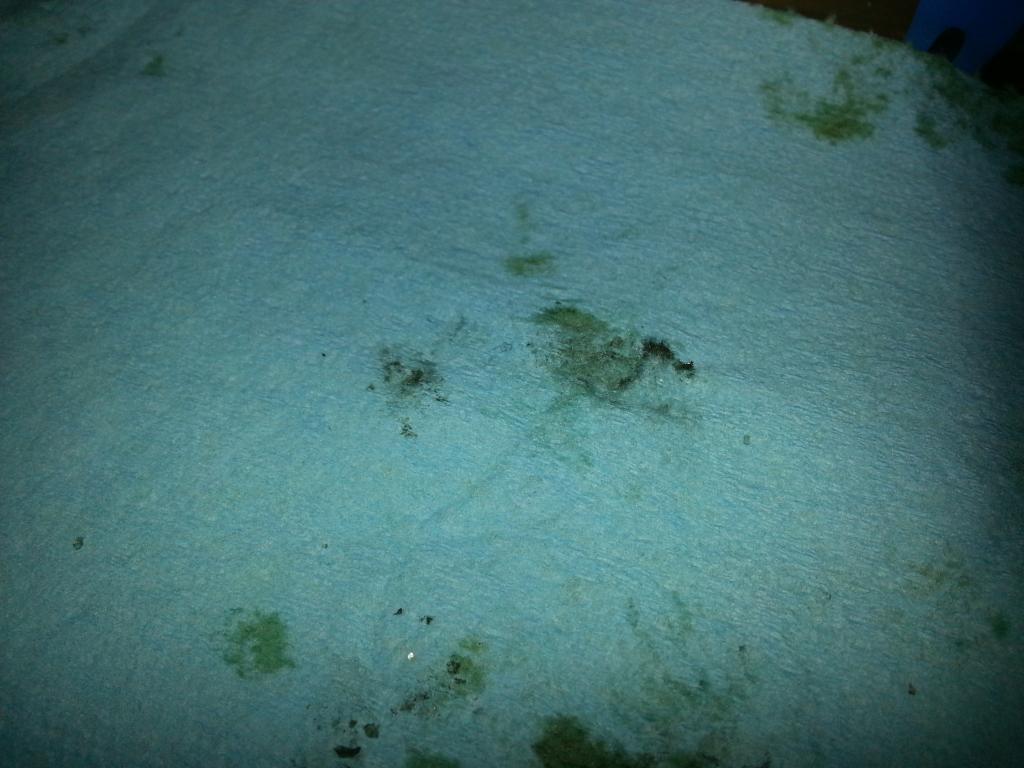 Next, I had to dis-connect the Cam Sensor @ the bottom of the cover (squeeze just the lower connector -- it appears to be '3' pieces but only the 'bottom' connector really comes out): 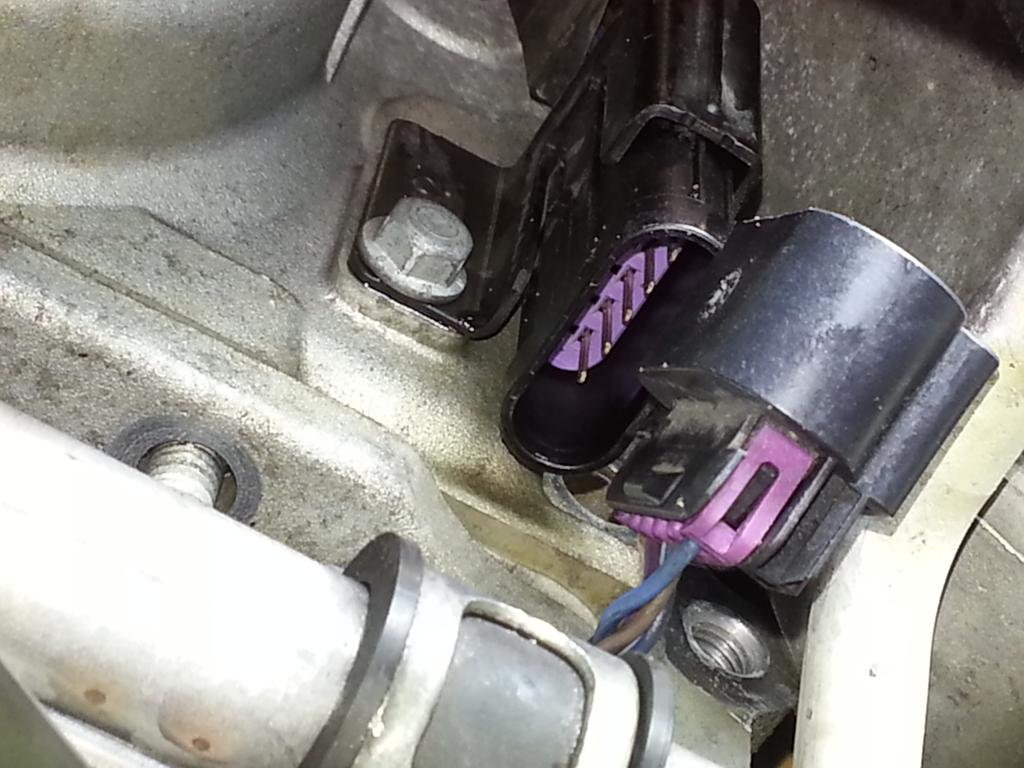 Loosened the two bottom 10 mm (socket) bolts until they were as loose as possible. After that, I removed the rest of the bolts. In order to fully loosen the bottom bolts (2), I had to 'lift' up the Timing Cover to completely unbolt the 2 bottom bolts. Once that was done, the Timing Cover came off: 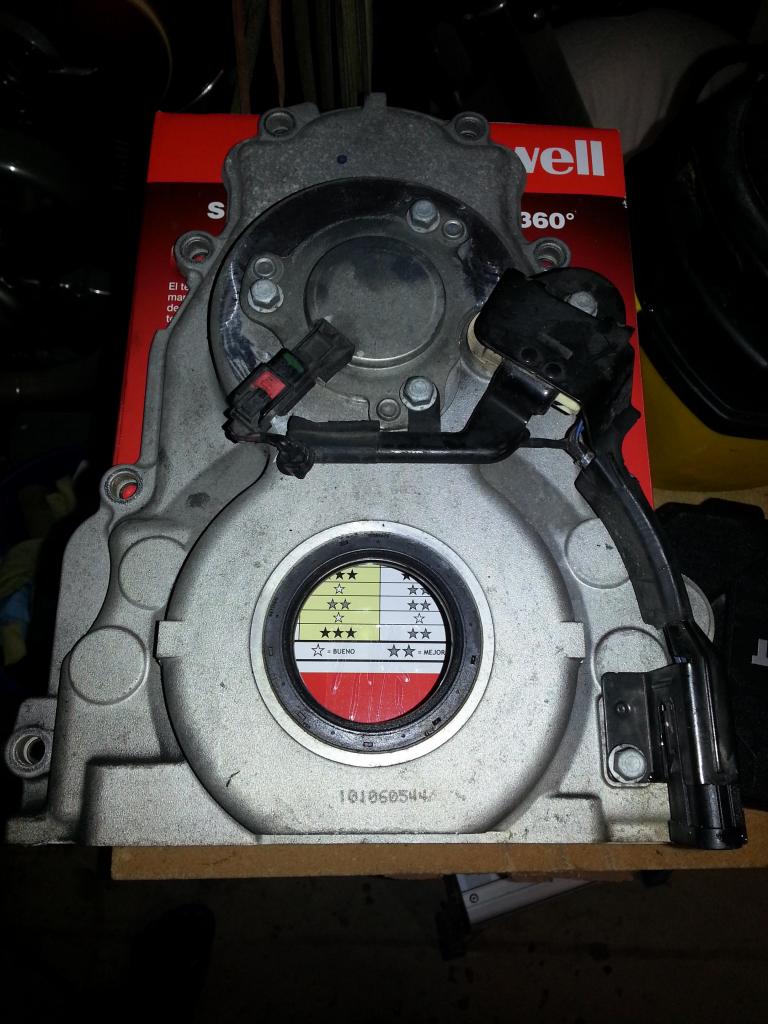 Note the sealant on the bottom -- we'll need to do that when we put it back on (new seal for the Balancer too) : 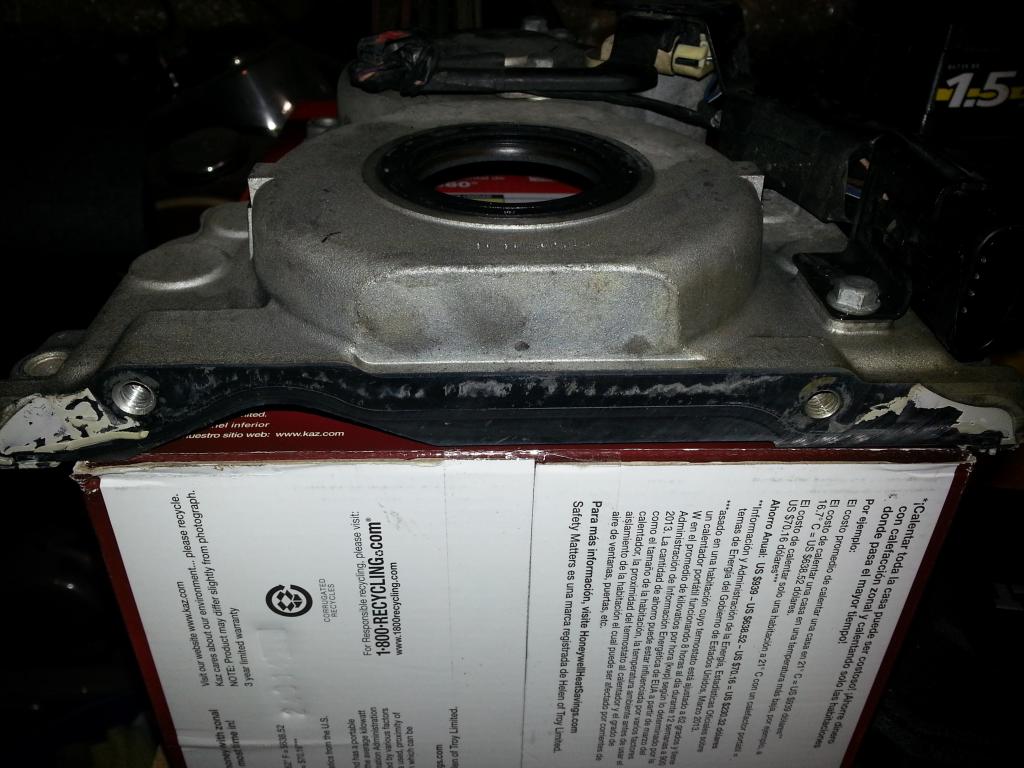 VVT setup ready for dis-assembly but first, I'll need to drop the pan to get to the scourge of all bolts, the oil pickup tube bolt (why GM didn't allow this to be installed on the easy side is only an 'engineers' answer)... 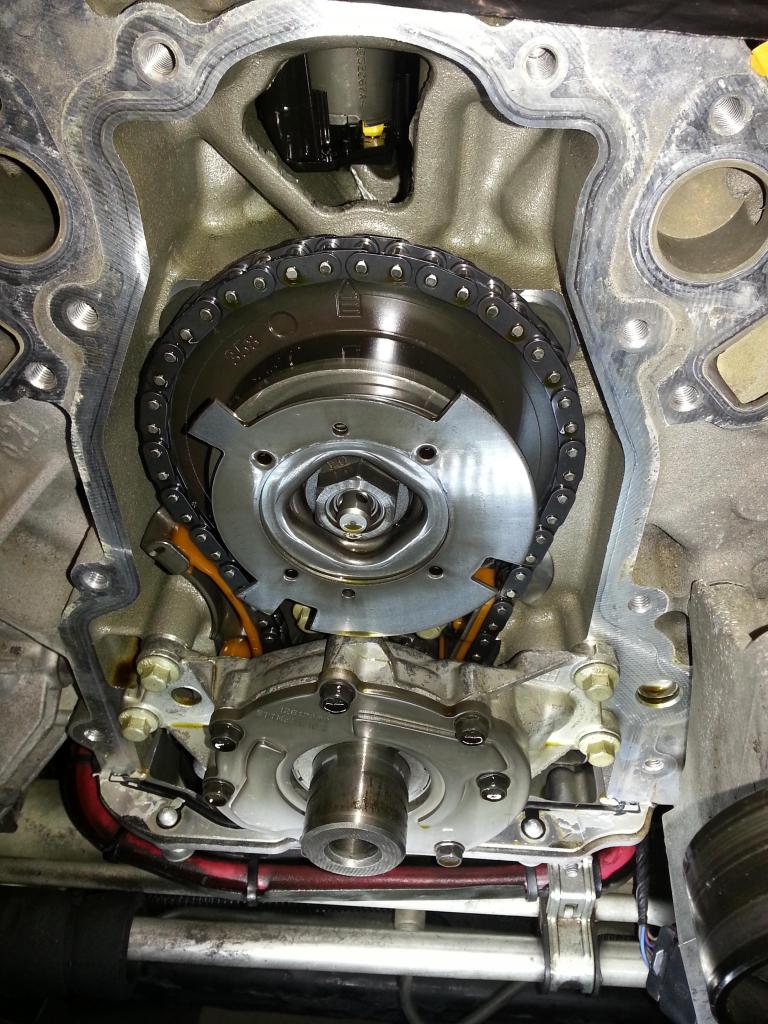 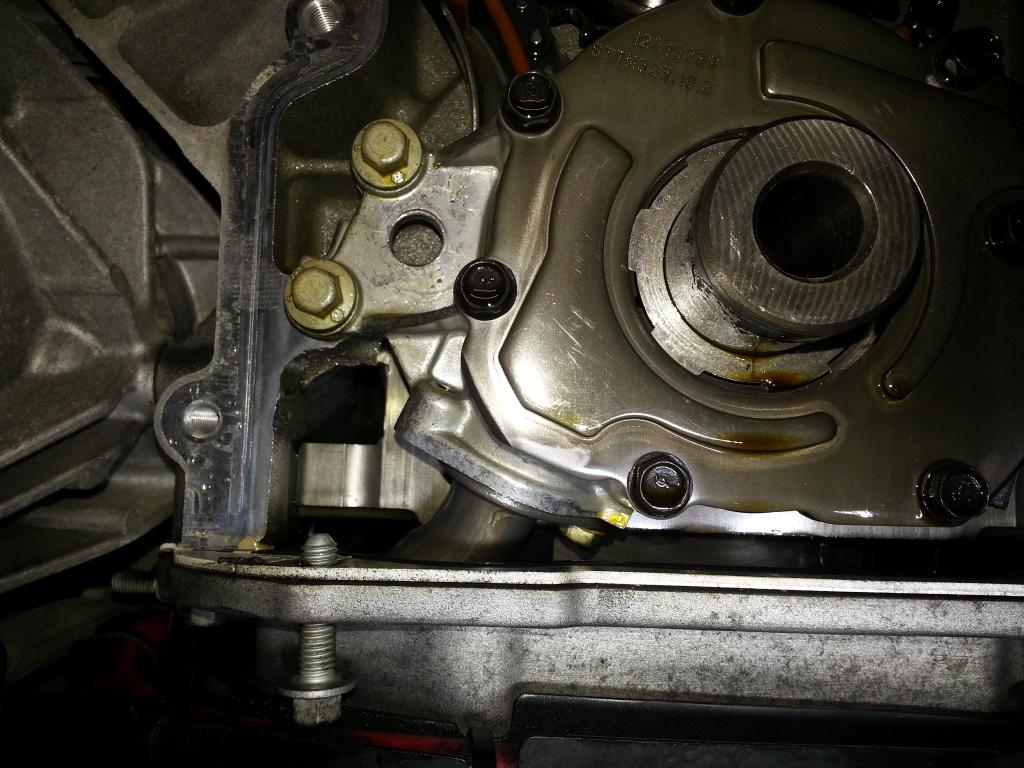 That adventure begins tomorrow (after work)... -Don Last edited by hammdo; 07-02-2017 at 01:55 PM. |
|
|
|
|
12-31-2014, 10:18 AM
|
#96 |
 Drives: 2021 Wild Cherry ZL1 1LE, A10 Join Date: Jun 2013
Location: Carlsbad, NM
Posts: 106
|
We just got done doing this setup on my buddies 2014 L99. We did do the LS3 conversion however because the Supercharge we got came off a LS3 and not a L99 and my buddy didn't want to source the L99 accessory drive for the supercharger and all other parts. We got out and did the first run with Ryan's LS3 version of the SS1 and all I can say is that car pulls like a frickin Freight train. Going to try and do some full pulls today to do some more logging today. North Dakota is a bit cold this time of the year so we will have to be careful.

|
|
|
|
|
12-31-2014, 02:30 PM
|
#97 |
|
'It's an experiment'
Drives: [COTW 2/09/15] '11 GPI LSA SC Z/LE Join Date: May 2014
Location: Dallas TX
Posts: 8,694
|
That's awesome!
I can't wait Have to gut the HFCs so a bit more work for me... -Don |
|
|
|
|
12-31-2014, 04:48 PM
|
#98 |
|
'It's an experiment'
Drives: [COTW 2/09/15] '11 GPI LSA SC Z/LE Join Date: May 2014
Location: Dallas TX
Posts: 8,694
|
Happy New Year to everyone!
More updates on the 1st... -Don |
|
|
|
|
|
|
|
 |
|
|


