You are browsing camaro5 

|
 10-24-2011, 06:38 PM
|
#1 |
|
knows 2 facts about ducks

Drives: ...and they're both wrong Join Date: Aug 2009
Location: The HMS Invincible
Posts: 25,072
|
My New Concept Afterburner Tail lights
Before I start on my afterburner install I want to say two things.
Now, onto the afterburners  Look how nicely Ofer packed them, seriously though there was SO much bubble wrap. 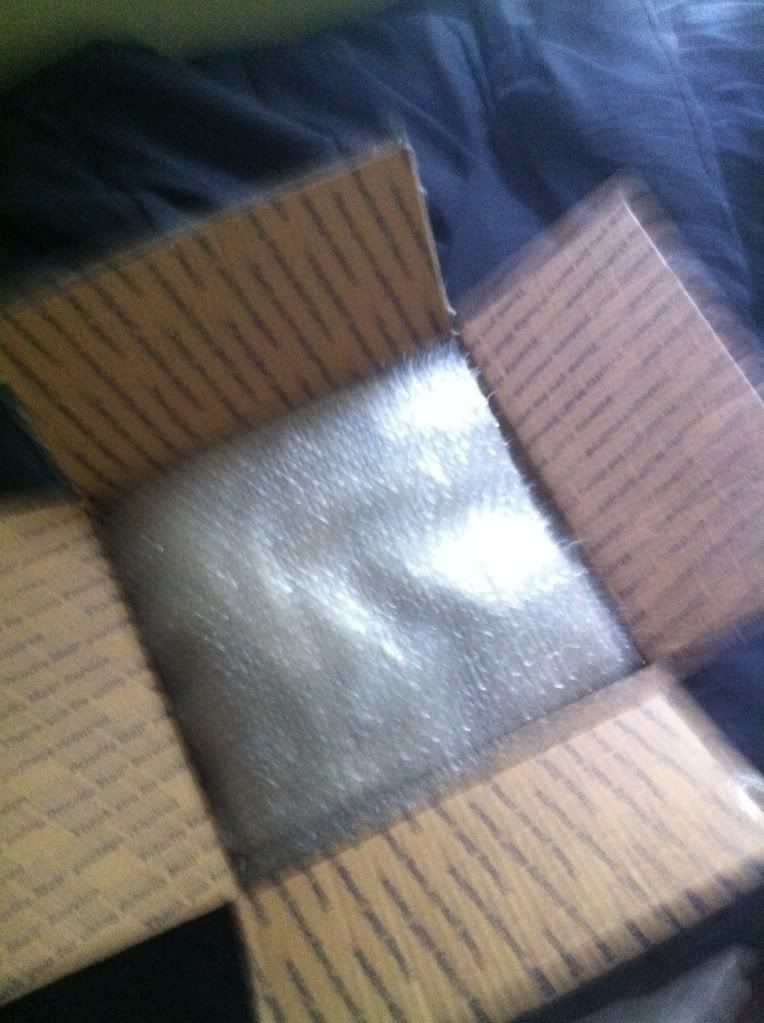 Each of the lights was even wrapped in more packing stuff 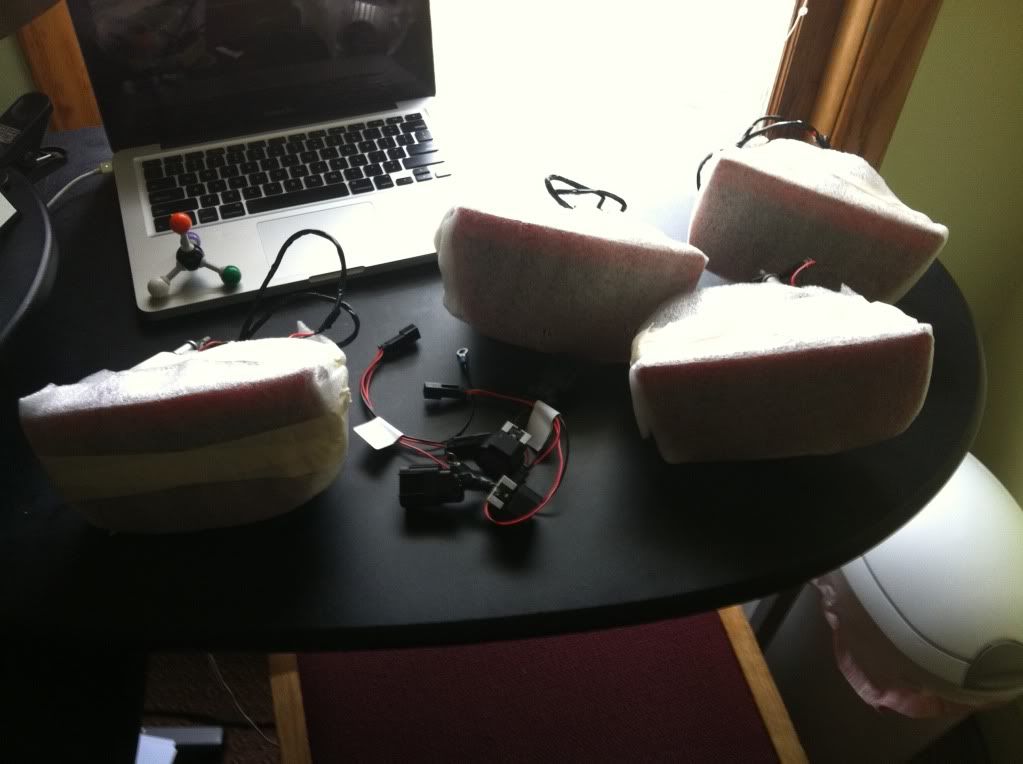 Close ups: without flash 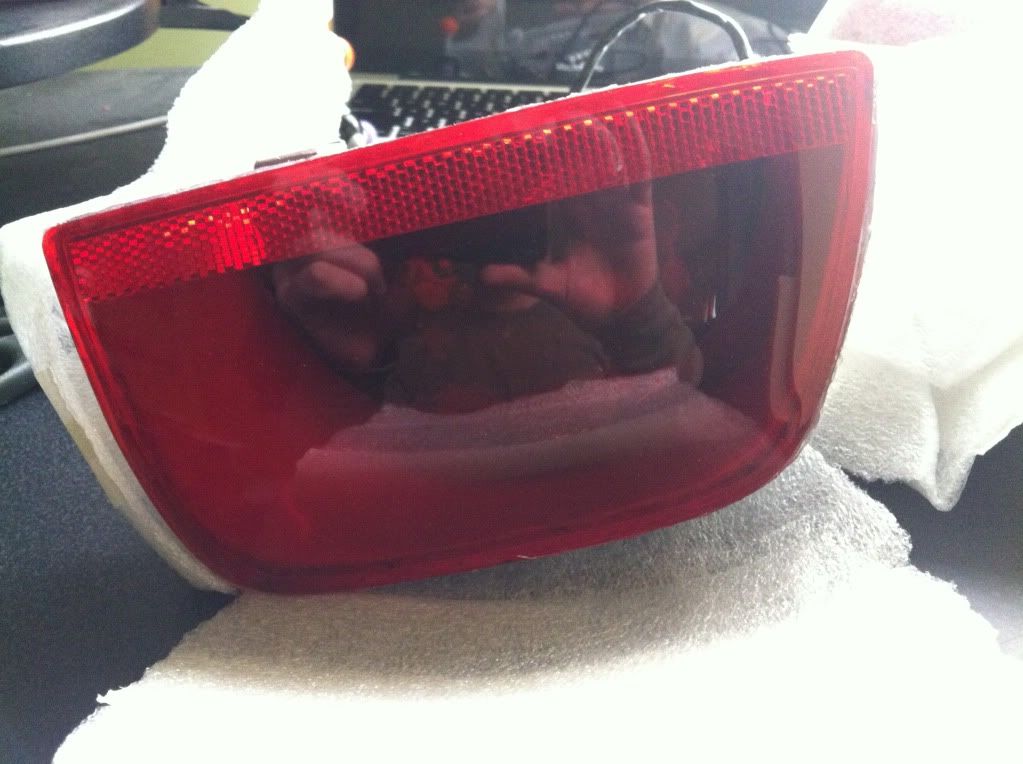 and with flash 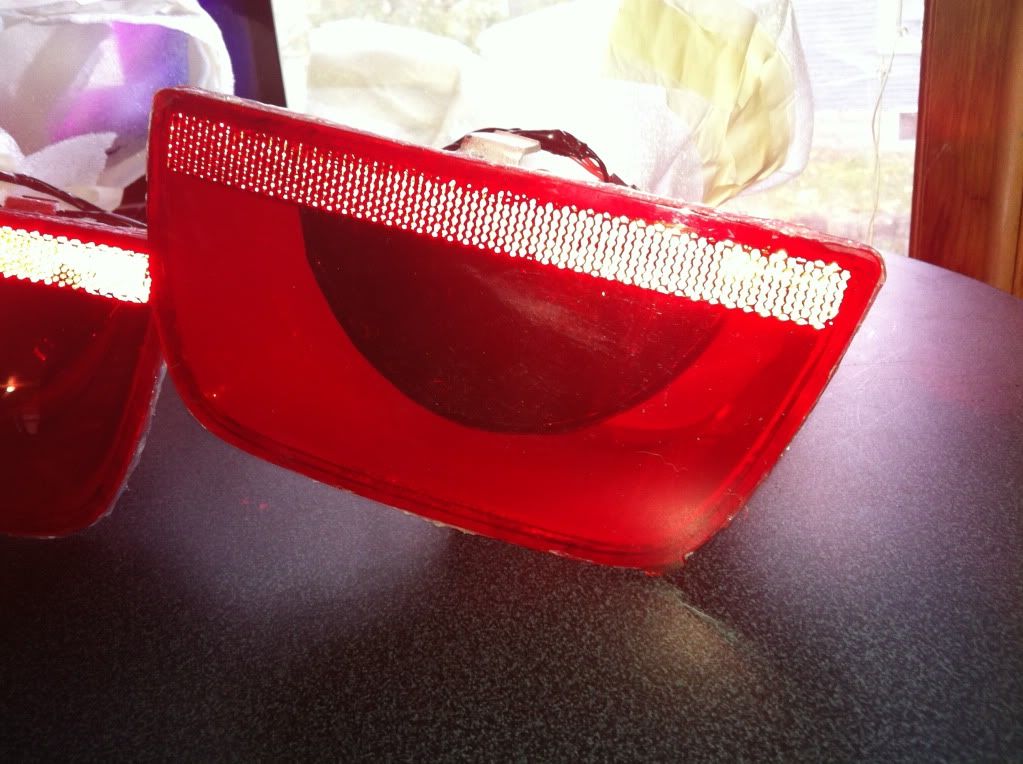 The tail lights bezels. Fun fact though: knowing how to remove them does NOT make it any easier. 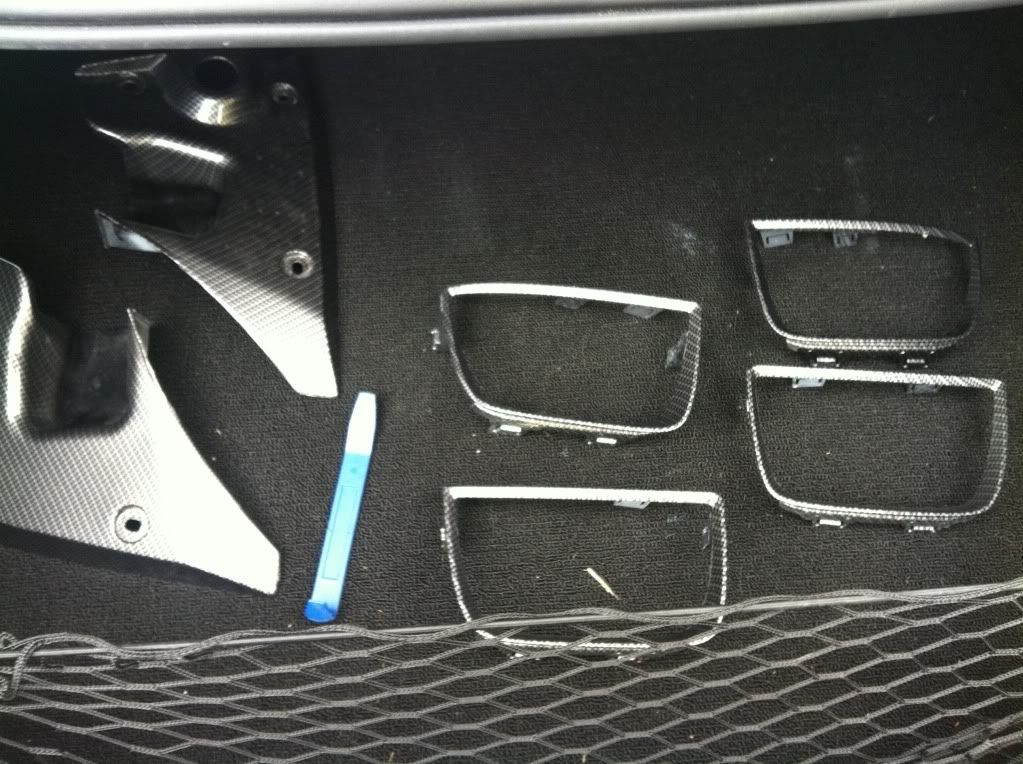 That said though, I did find a tool that helped a little bit...... my handy dandy trim removal tool 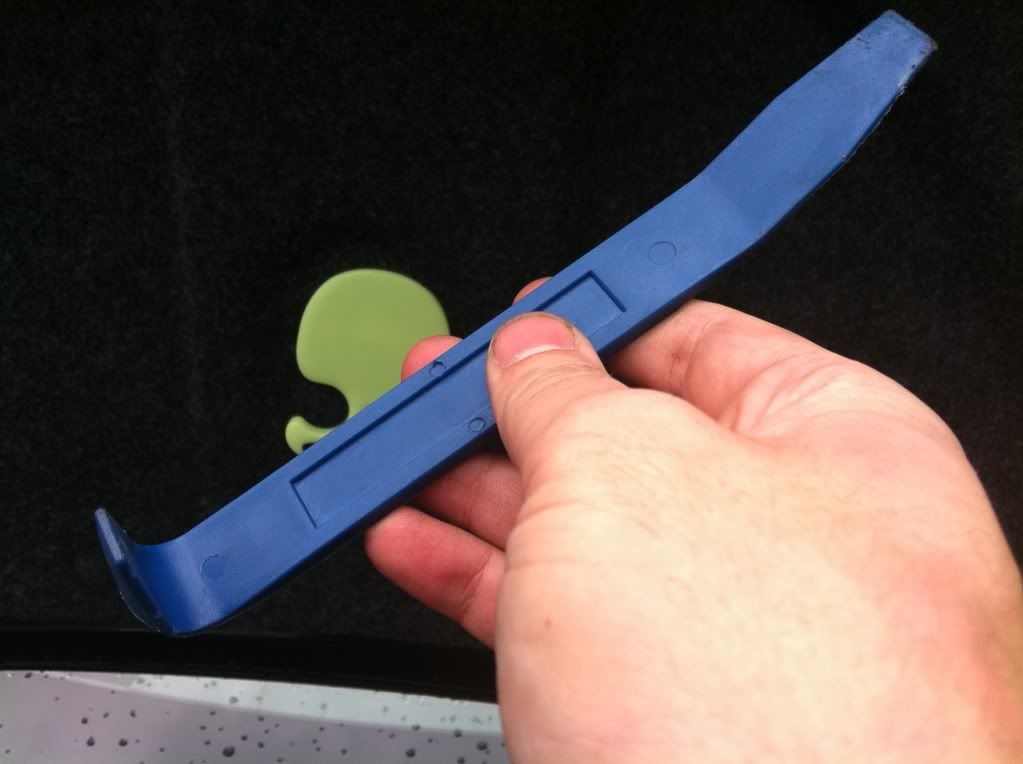 Basically I used my finger to push down the retaining tab on the bezel. Then I would use the skinny end of the trim removal tool to pry the bezel away from the tail light. I found that this was an easier way than trying to push the bezel out from the back side. The FUBAR that is my trunk 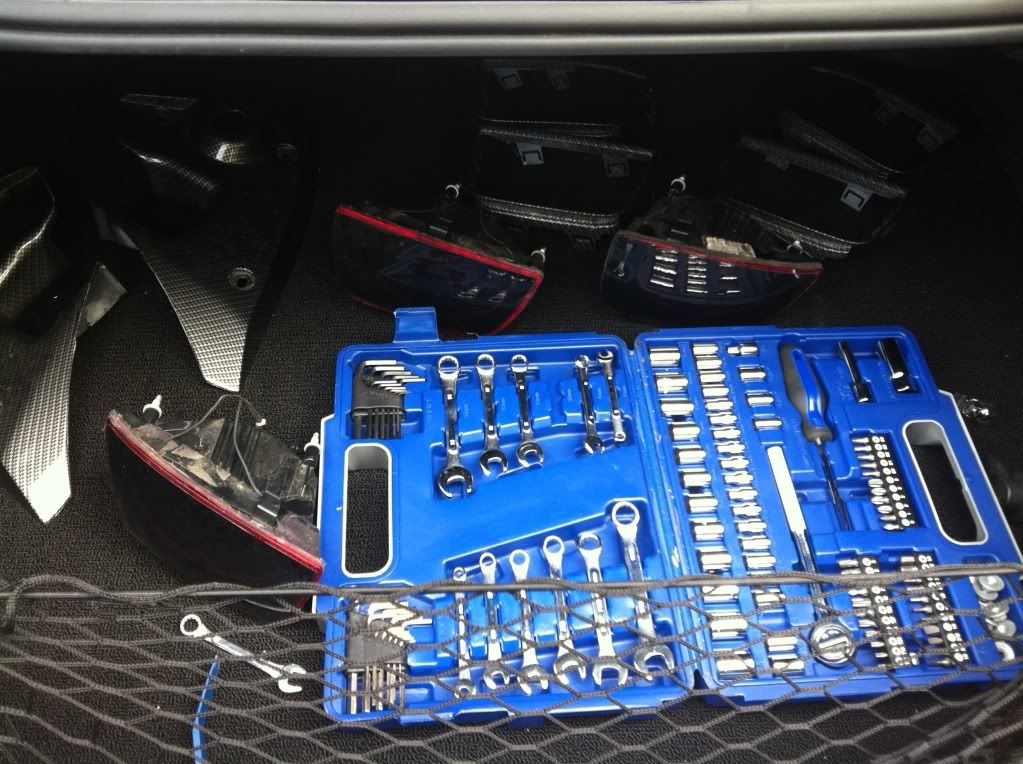 Upon removing the tail lights I was greeted by a not so happy sight.  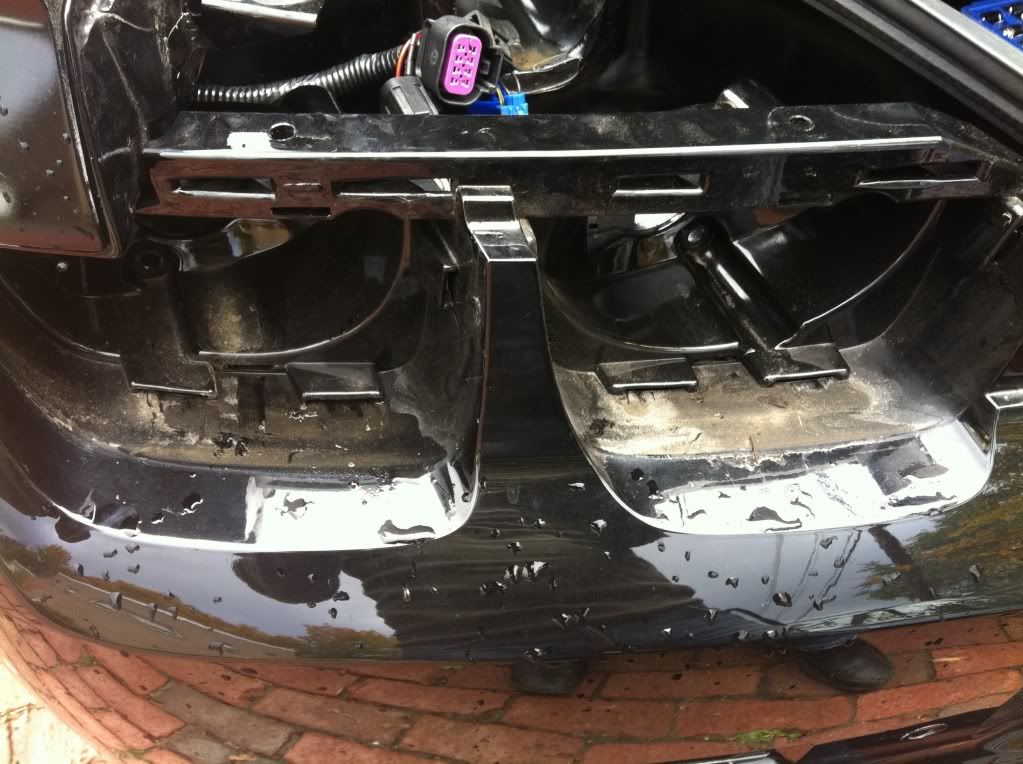 and 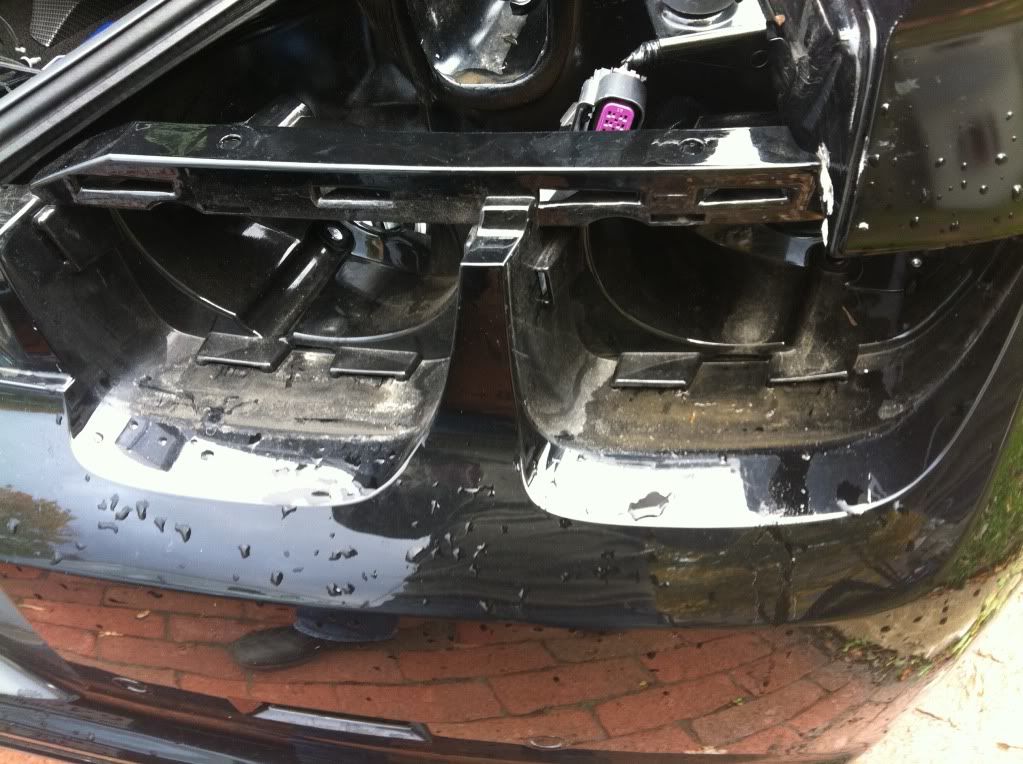 Apparently my Adam's products don't make it into that crevice :( Nothing a wet microfiber towel couldn't fix. So at this point I took a step back. I was curious to see what Kaylee looked like without tail lights. It kind of gave me the creeps, like a "staring at a head with no eyes" kind of thing. Reminds me of that guy from The Mummy who gets his eyes sucked out (I'm referring to the first Mummy btw for all you young folk). Any who, it's just a bit unsettling. Not in a bad way, just a "this isn't right" kind of way. 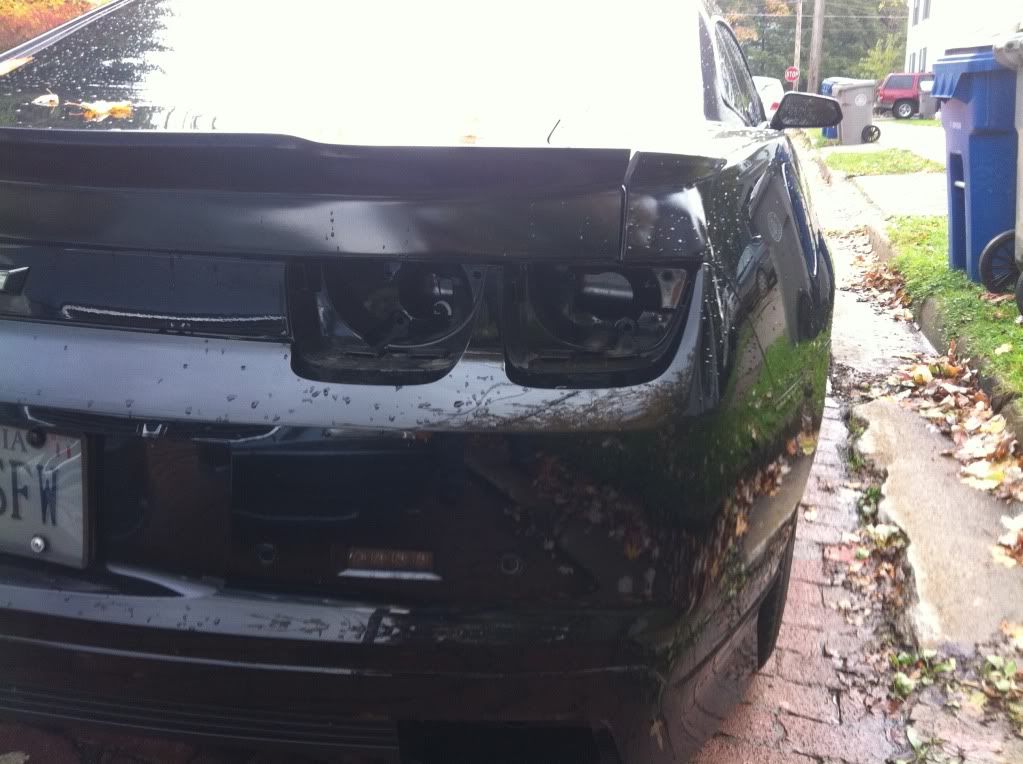 The actual install for the afterburners was pretty easy. Ofer (2SSRS) had it all plug and play (sort of). The one part that wasn't plug and play was the ground wire. The LEDs behind the bulb need a ground wire that isn't part of the harness. The problem with this is that Chevrolet/GM didn't put a single ground bolt on the rear bumper. The solution to this: make my own I actually had to call Ofer (2SSRS) and ask him about this as I was lost.Basically, I needed to drill a screw into the body of the car. Which isn't too hard mind you; just a self tapping screw and a power tool. Well in a hypothetical scenario where you don't have a power tool this becomes a bigger project. 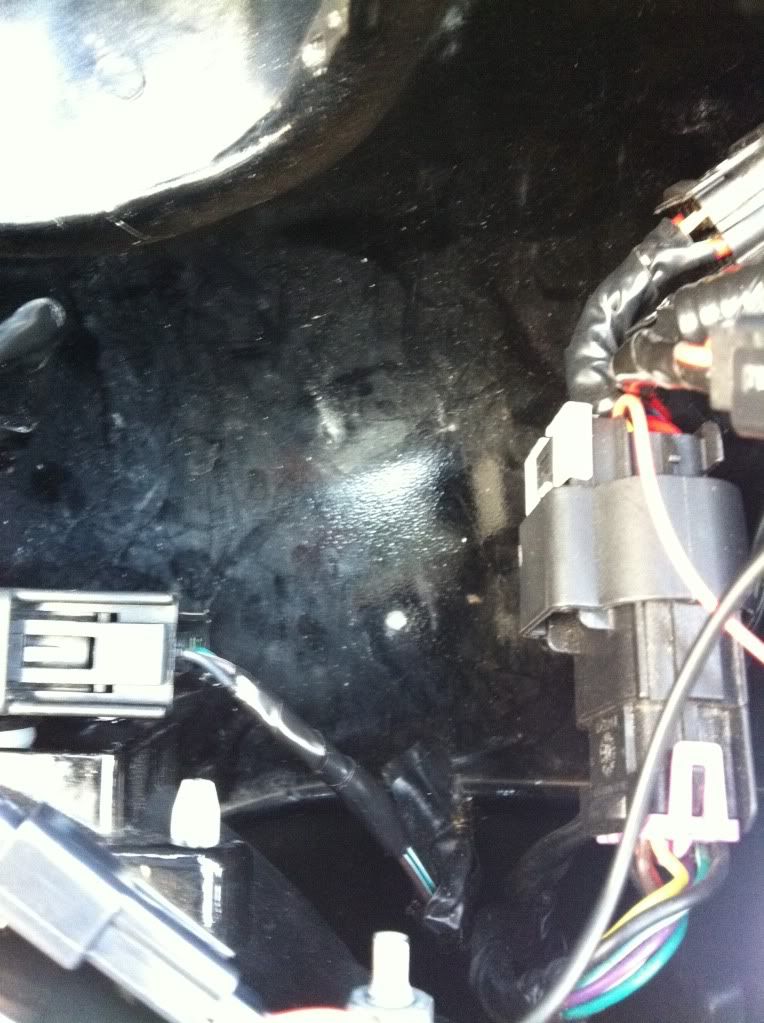 Took about 10 minutes per screw. Thank Pete that their were only two of them. Grounded the ring terminal 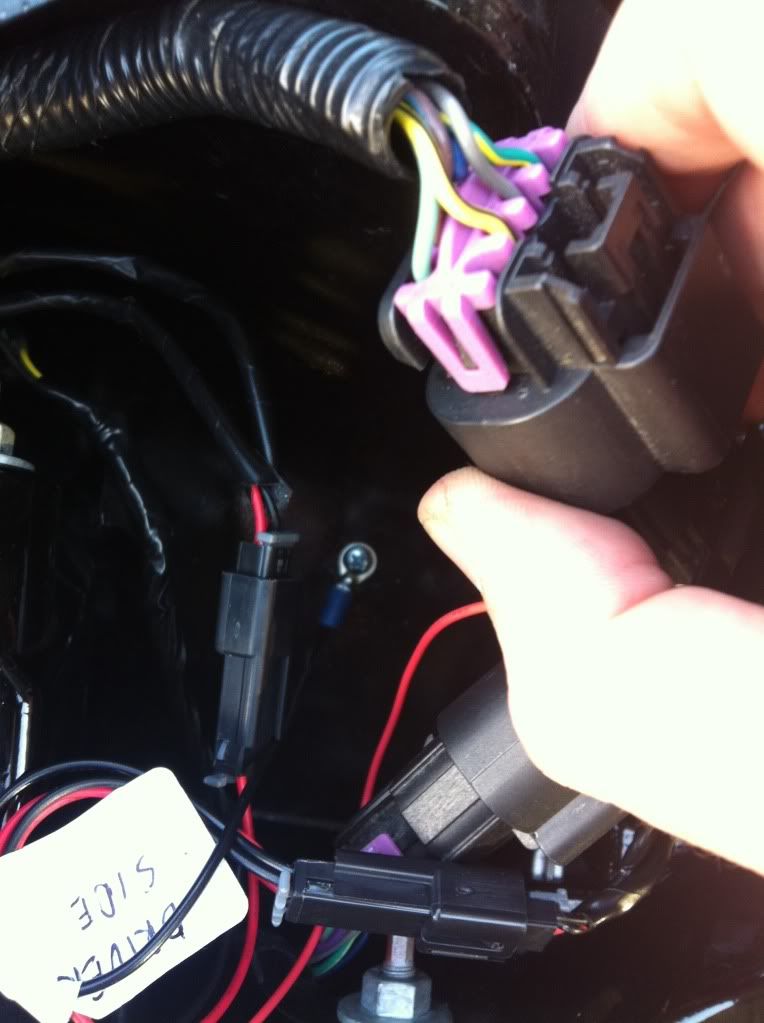 And that's it, all done. Just need to put everything back together. Total install time was about an hour and a half. A decent portion of that was drilling those screws. The final product 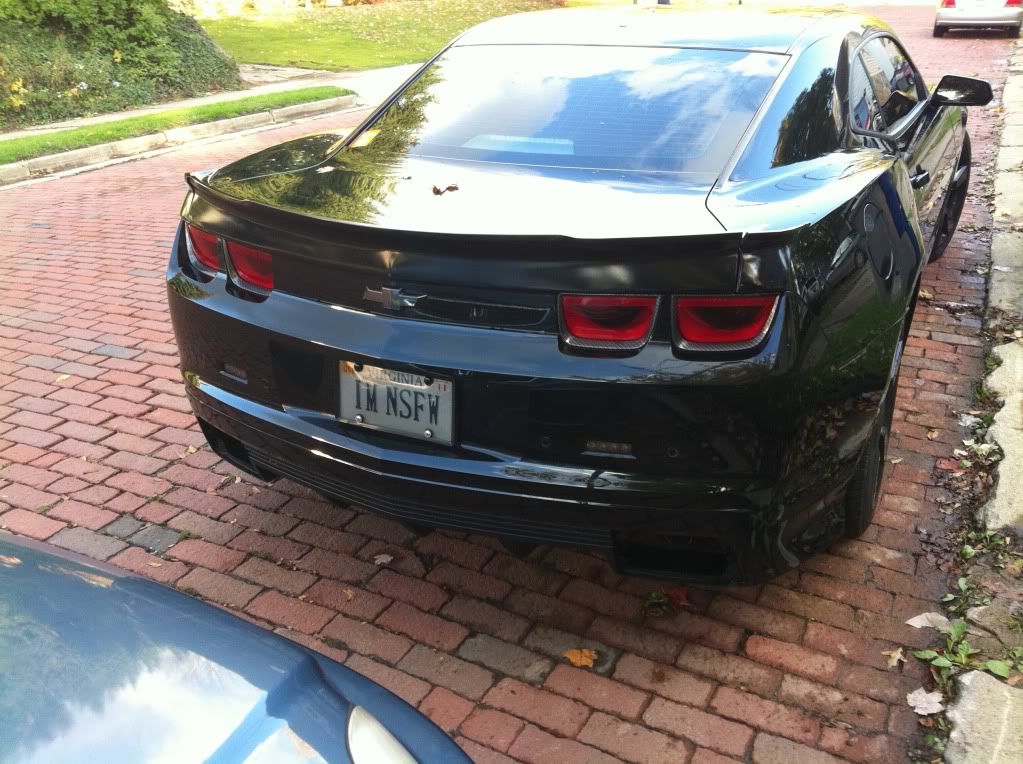 I'll be taking some more pics once the sun sets. Need a little less light to get the awesome afterburner effect. Depending on how they look I may be tinting them. Well I will be tinting them. The tail lights are literally the only thing on Kaylee's exterior that isn't black or black chrome. 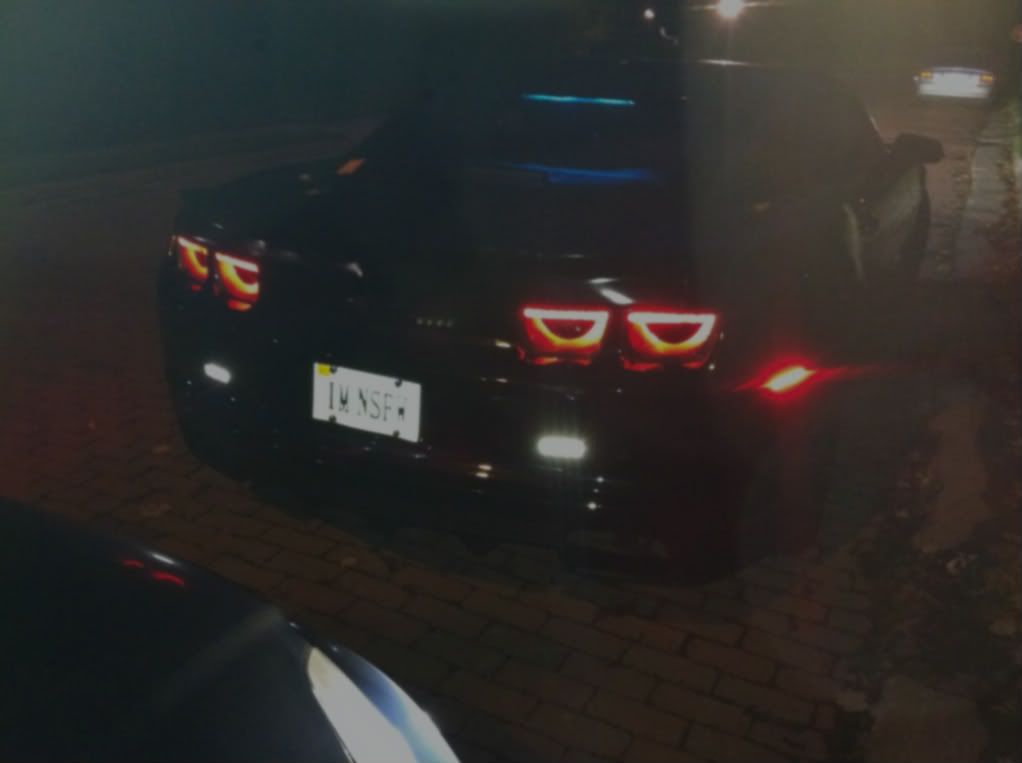 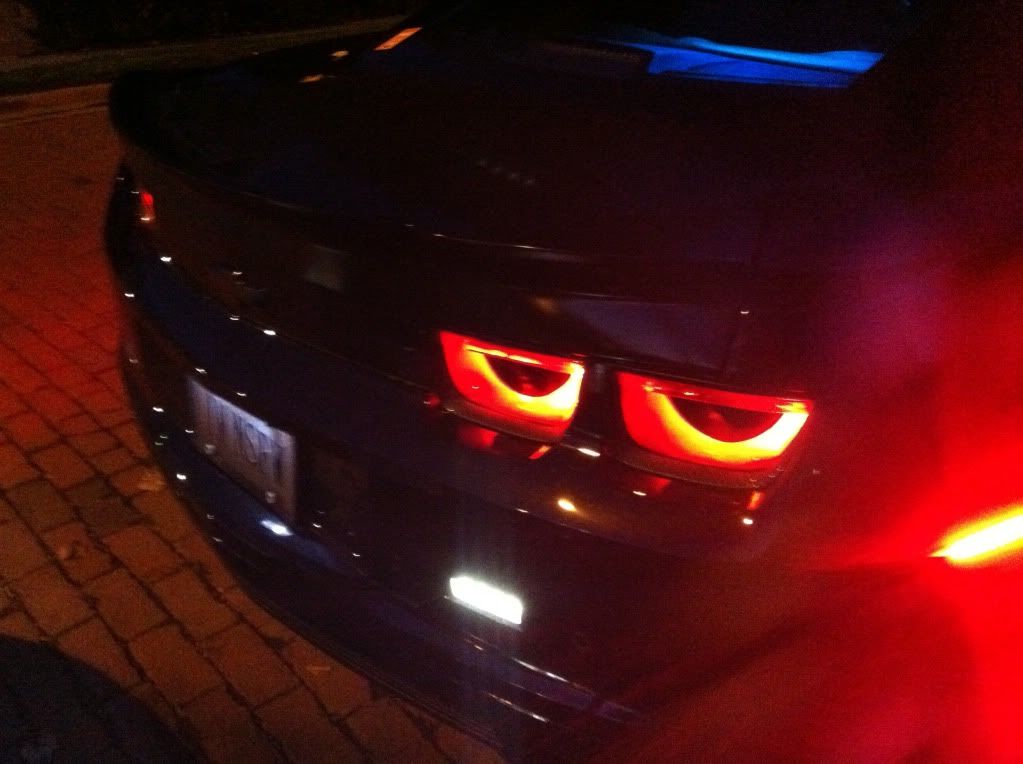
__________________
 |

|

|
|
10-24-2011, 06:44 PM
|
#2 |
|
it's mind bottling..

Drives: SGM Join Date: Apr 2011
Location: miami floirda.
Posts: 5,393
|
very nice indeed
whats the blue light in the rear seat area though ?
__________________
 |
|
|
|
|
10-24-2011, 06:45 PM
|
#3 |
|
OKCamaros

Drives: 4 banger Diesel Join Date: Mar 2010
Location: Philippines
Posts: 4,572
|

|
|
|
|
|
10-24-2011, 06:51 PM
|
#4 | |
|
knows 2 facts about ducks
Drives: ...and they're both wrong Join Date: Aug 2009
Location: The HMS Invincible
Posts: 25,072
|
Quote:
__________________
|
|
|
|
|
|
10-24-2011, 06:53 PM
|
#5 | |
|
it's mind bottling..
Drives: SGM Join Date: Apr 2011
Location: miami floirda.
Posts: 5,393
|
Quote:
no way ? could you take a pic of it , you gave me an idea
__________________
|
|
|
|
|
|
10-24-2011, 07:22 PM
|
#6 | |
            
|
Quote:
The AAC fotwell strip does great in the trunck as well. It's like daylight. |
|
|
|
|
|
10-24-2011, 07:25 PM
|
#7 |
|
knows 2 facts about ducks
Drives: ...and they're both wrong Join Date: Aug 2009
Location: The HMS Invincible
Posts: 25,072
|
It's just a LED strip that I stuck to the top of the rear window.
__________________
|
|
|
|
|
10-24-2011, 07:31 PM
|
#8 |

Drives: Silver 1LT 2011 camaro Join Date: Jul 2011
Location: Decatur, Alabama and Troy, Alabama
Posts: 1,846
|
Looks good and your license plate is epic.
__________________
 |
|
|
|
|
10-24-2011, 07:31 PM
|
#9 |
      
|
looks cool
__________________
Jannetty Racing JRE Street Package
 |
|
|
|
|
10-24-2011, 08:07 PM
|
#10 |
|
That Cam though...

Drives: 11 Camaro 2SS 02 T/A WS6 15 SSV Join Date: Mar 2010
Location: NJ
Posts: 2,817
|
love those tail lights
__________________
 |
|
|
|
|
10-24-2011, 08:16 PM
|
#11 |

Drives: 2010 Camaro 2LT VR/RS CGM Rally's Join Date: May 2009
Location: Palmyra, PA
Posts: 5,675
|
i am ordering a pair november 1st cant wait!!!!!!!!
__________________
|
|
|
|
|
10-24-2011, 10:35 PM
|
#12 |
|
RIDING ON AIR

Drives: 2010 2LT/RS Summit White Join Date: Dec 2009
Location: Long Island NY
Posts: 964
|
i love the taillights
__________________
--John--2010 Camaro 2LT/RS, Summit White Air Ride Suspension, BBK Longtube Headers, Hi-Flo cats, Doug Thorley catback exhaust, Elite Catch-Can, Airraid CAI, Trifecta tune, ZL1 front end with Phantom grille, ZL1 side skirts, MRR228 graphite wheels |
|
|
|
|
10-24-2011, 10:54 PM
|
#13 |
|
Supercharged LSX

Drives: 2011 2SS/RS Black/Carbon Fiber Join Date: Dec 2010
Location: City of Angels
Posts: 6,741
|
They are very nice!
__________________
 |
|
|
|
|
10-25-2011, 01:26 AM
|
#14 |
|
it's mind bottling..
Drives: SGM Join Date: Apr 2011
Location: miami floirda.
Posts: 5,393
|
what does it stand for lol
__________________
|
|
|
|
|
|
|
|
 |
|
|
 Similar Threads
|
||||
| Thread | Thread Starter | Forum | Replies | Last Post |
| AAC's Afterburner Tail Lights | The Stig | Cosmetics and Lighting Modification Discussions | 32 | 05-17-2011 02:42 PM |
| Removal of tail lights | Germann | Camaro DIY & HOW-TO instructions & discussions | 8 | 12-14-2010 09:43 PM |
| AAC Afterburner lights | chozn4service | Exterior Parts & Accessories | 1 | 07-01-2010 06:50 PM |
| New tail lights? | 2000v6 | 4th Generation Camaros | 40 | 03-17-2010 03:07 AM |


