You are browsing camaro5 

|
 06-25-2011, 06:42 PM
|
#1 |
|
Tampa Bay Camaros
|
I recently purchased the "Quarter Panel Gill Scoop Inserts" from RPIDesigns.com (Item # CAMT65) and they didn't come with any type of instructions... after waiting 24 hours for a response from the website, I went ahead and installed them myself without instructions; after all, how hard could it be? Well, after messing up the drivers side, I figured out exactly how to do it properly so I decided to write this for anyone who might need it.... after all, it's the least I could do to start assisting the Camaro5 community; you guys have helped me out a TON.
I'm happy if even 1 person finds this useful. - Jay Required items:
Installation Time: 15 - 20 minutes. (I went SLOWLY) CAMT64 Kit Contents: 6 Vinyl Inserts - Appropriately labeled. PIECES LABELED:
 First thing's first; this is important. DO NOT remove the protective side tape from the non-adhesive side until after the installation is complete. If you do, the vinyl will stretch and will never sit properly. The second thing to remember is to NOT remove the entire protective film strip from the adhesive side; if you do, it's going to be a pain in the rear to get lined up properly. THIS IS WHAT HAPPENS WHEN YOU DO THE TWO THINGS MENTIONED ABOVE: Stretched and folded...  Stretched/not aligned... 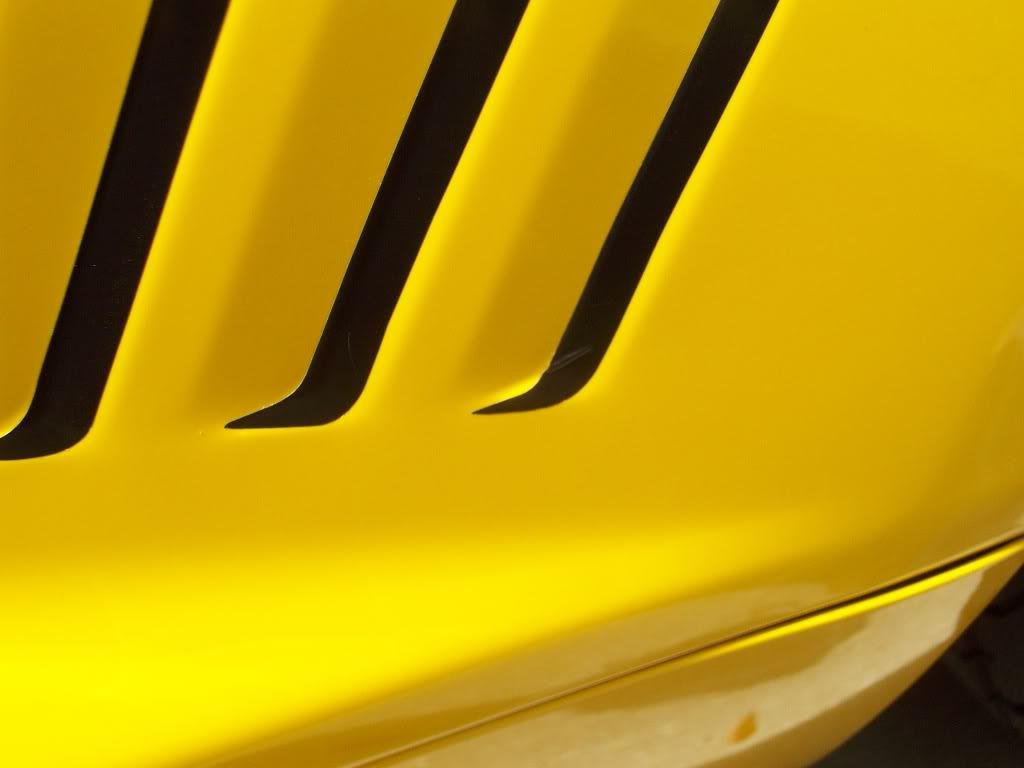 That being said, let's get started. Make sure the area is CLEAN. I strongly suggest doing it just after you've washed and thoroughly dried your vehicle. Installation Step 1: Line it up Before removing ANY protective strips, hold the piece in place to get a good idea of how you want it to look/line up. In this image I've already finished installing the PR & PM stripes; I'm lining up the PF stripe here. 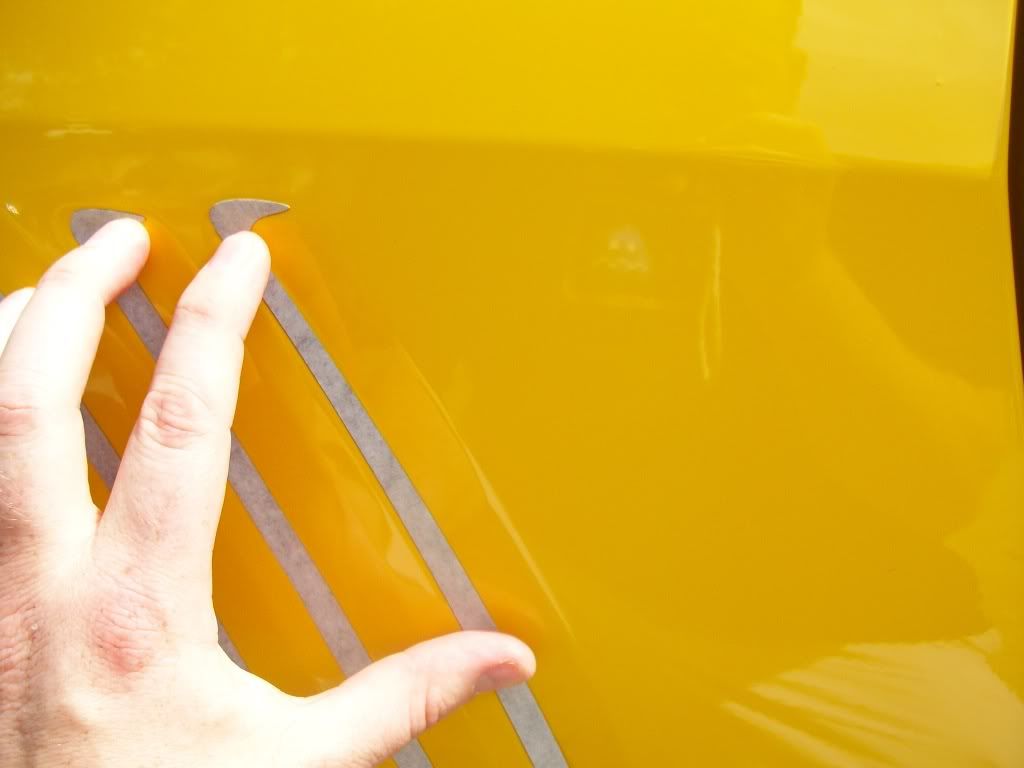 Installation Step 2: Partially Remove Protective Film from Adhesive Side Now that we know how we want the piece to line up from top to bottom, peel back a small section of the protective film that's covering the adhesive side; at the top. This will allow you to realign the strip without actually sticking it to the vehicle. This is where fingernails and patience are important... I don't have much of either, but I eventually got the adhesive side exposed. 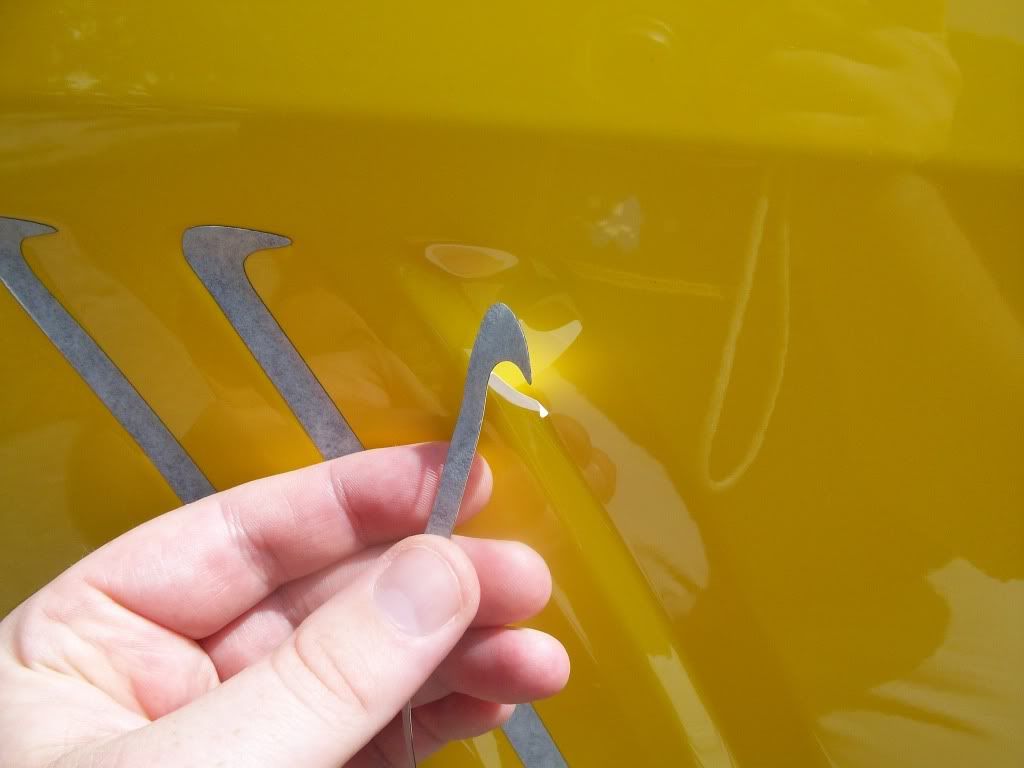 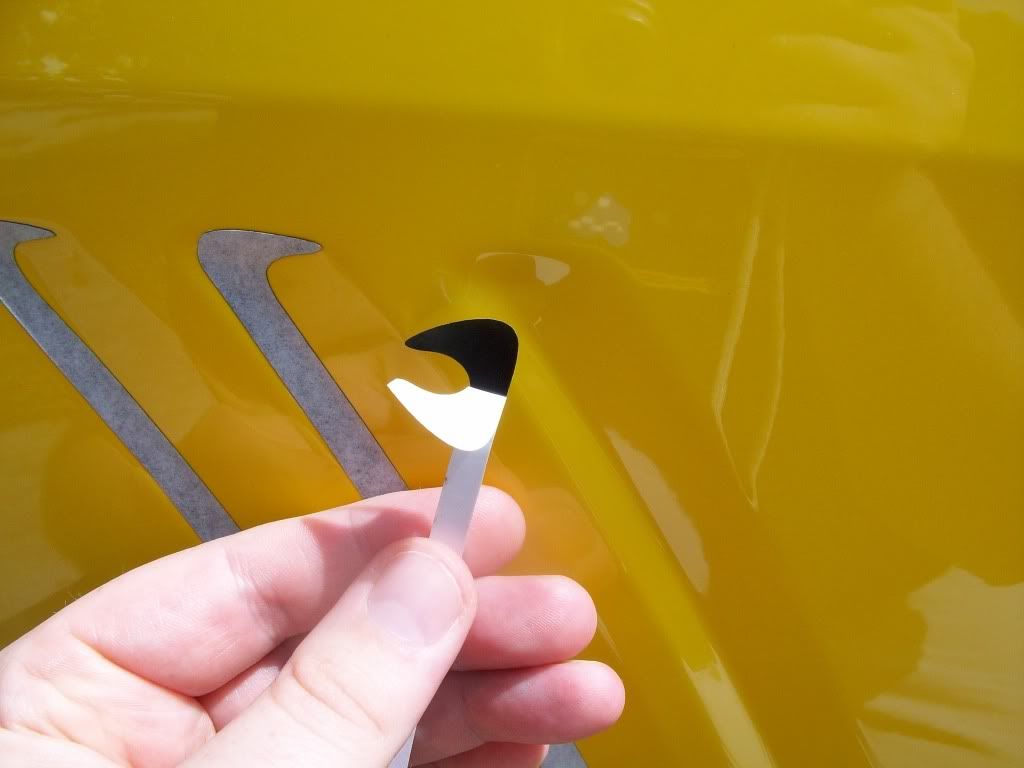 Installation Step 3: Anchor the Top Now that we've got the piece properly placed, hold it in place with one hand, and press the top piece in place to anchor it. Once you've anchored it, you can release the lower portion. 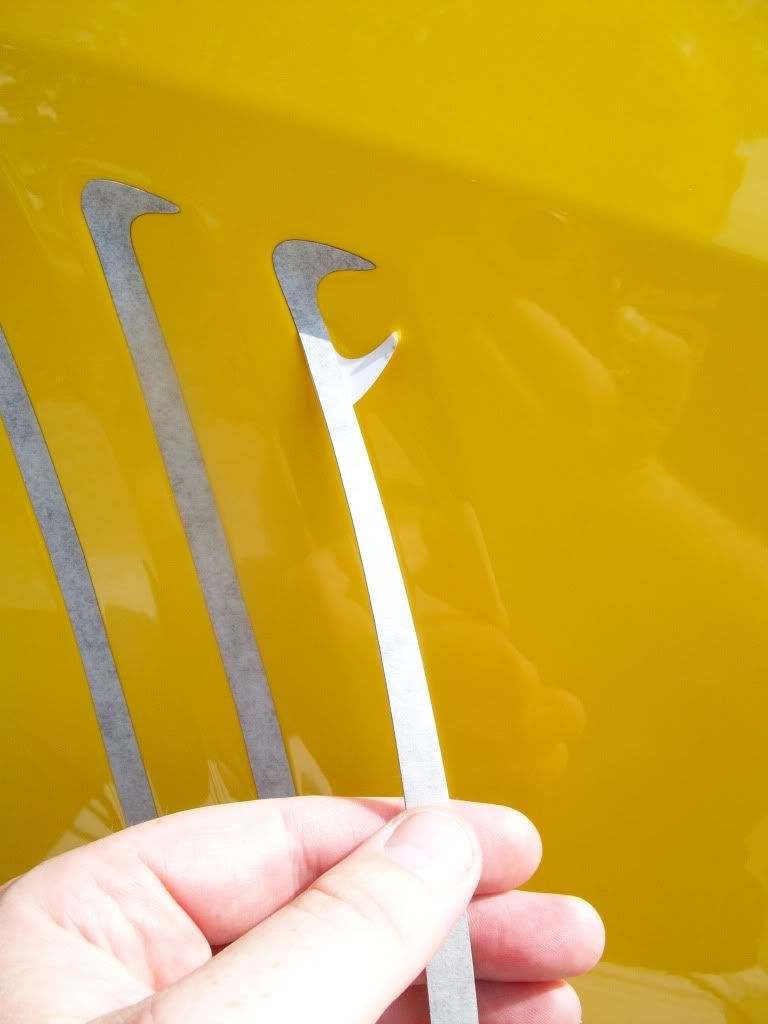 Installation Step 4: Verify Alignment Now that the top is anchored, and you're no longer holding the bottom, lightly press against the anchored portion and slowly run your finger from the top, down. This will allow you to verify that everything will be lined up properly when the protective strip is removed. When your finger reaches the bottom, you'll know if it's properly aligned or not... if it's NOT lined up properly, gentility pull the strip off and realign it. (Basically, return to step 2 after removing the anchored portion.) Installation Step 5: Slowly Remove and Stick in Place. Now, while holding the bottom securely in place with one hand, slowly/gently remove the protective film and use your thumb to press the piece in place. Just do a small section at a time and make sure everything is lined up properly. (Be careful not to pull too quickly, or slide your other hand down; you may stretch the vinyl and if that happens, you should just go buy another set because it'll never fit properly.) 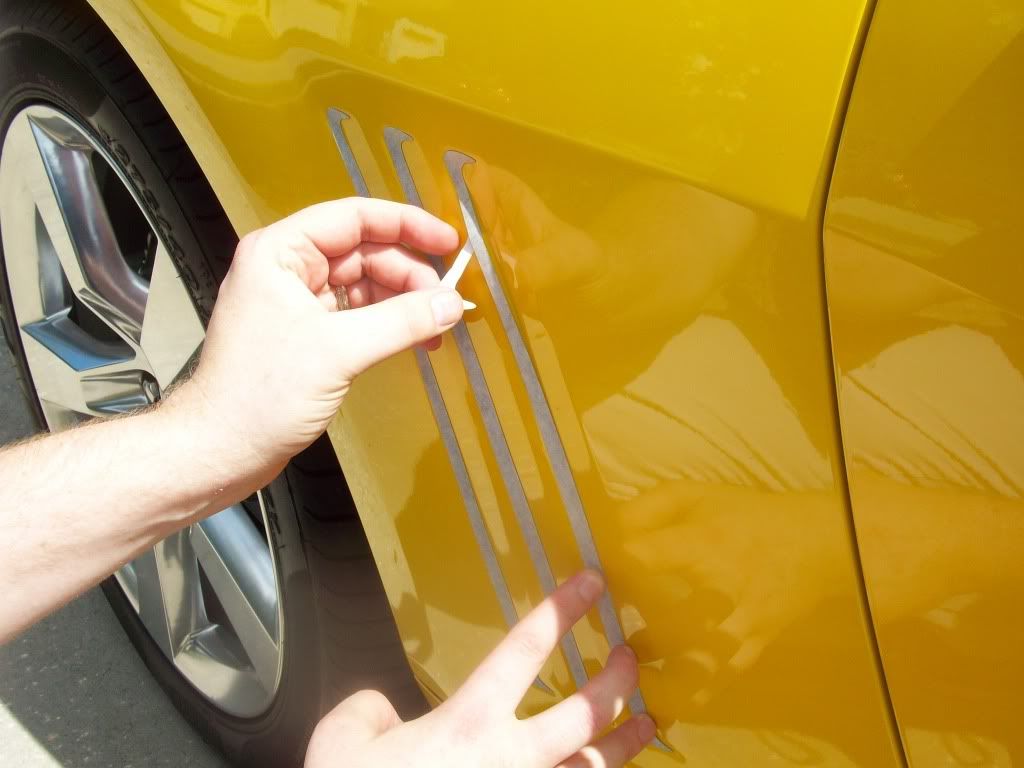 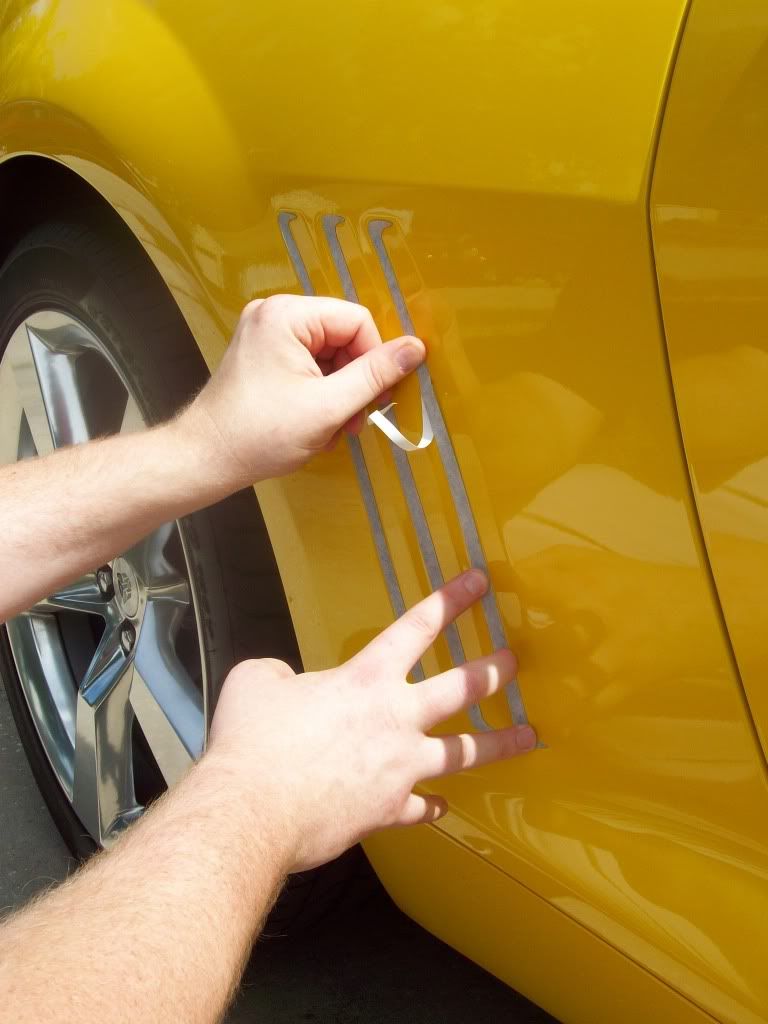  Installation Step 5: Final Adhesion. Now that the piece is finally "stuck" in place, apply firm pressure to it and run your finger from the bottom, to the top, and back down. This is just to make absolutely sure that it's properly seated and there are no air bubbles or folds. 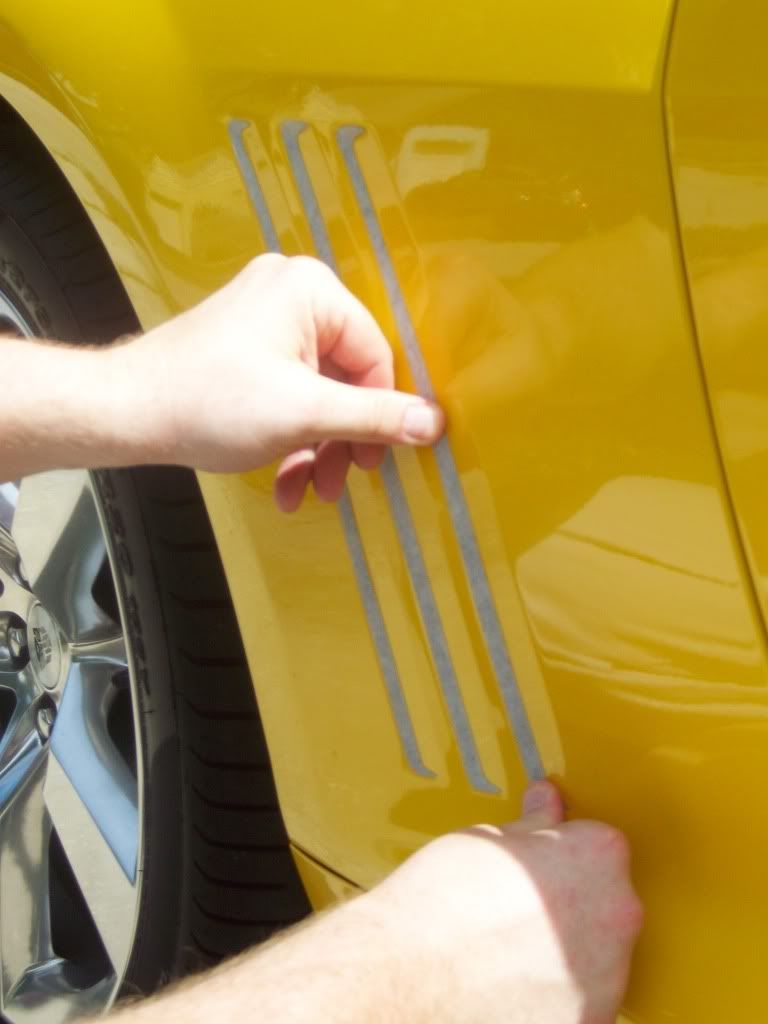 Installation Step 6: Protective Film Removal. This part is easy. Simply apply some pressure at the top and rub your thumb up and down from the car onto the vinyl piece and the protective film will roll off. When it starts to come free, simply pull down slowly and you're done.. repeat this for the other two. 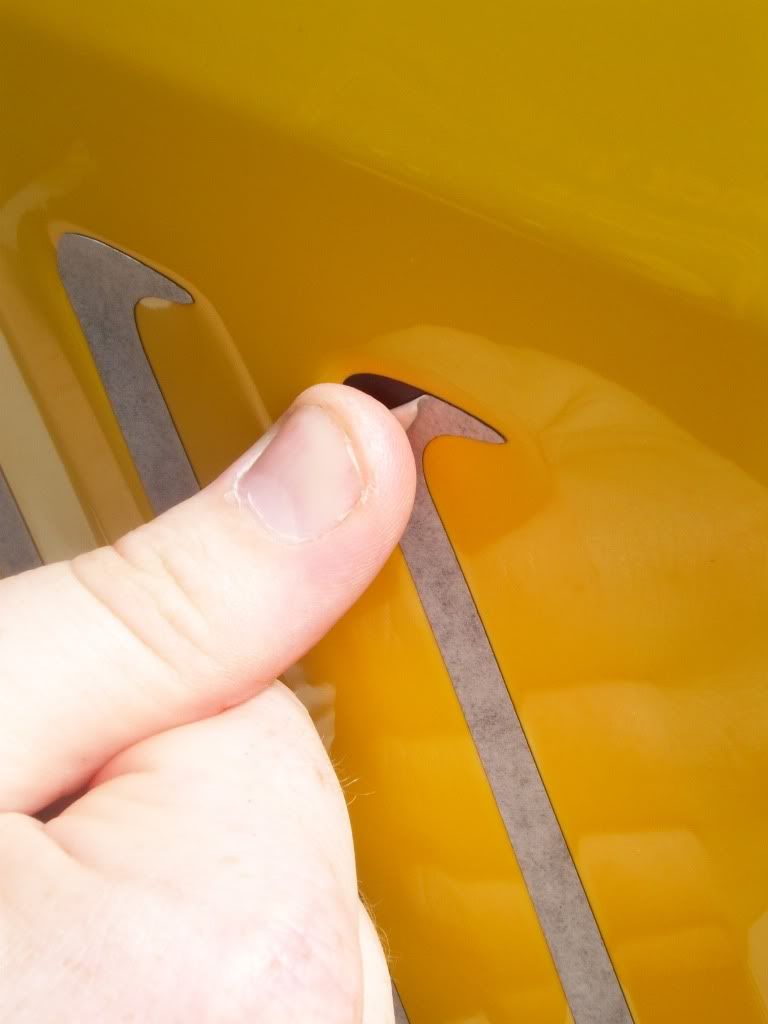 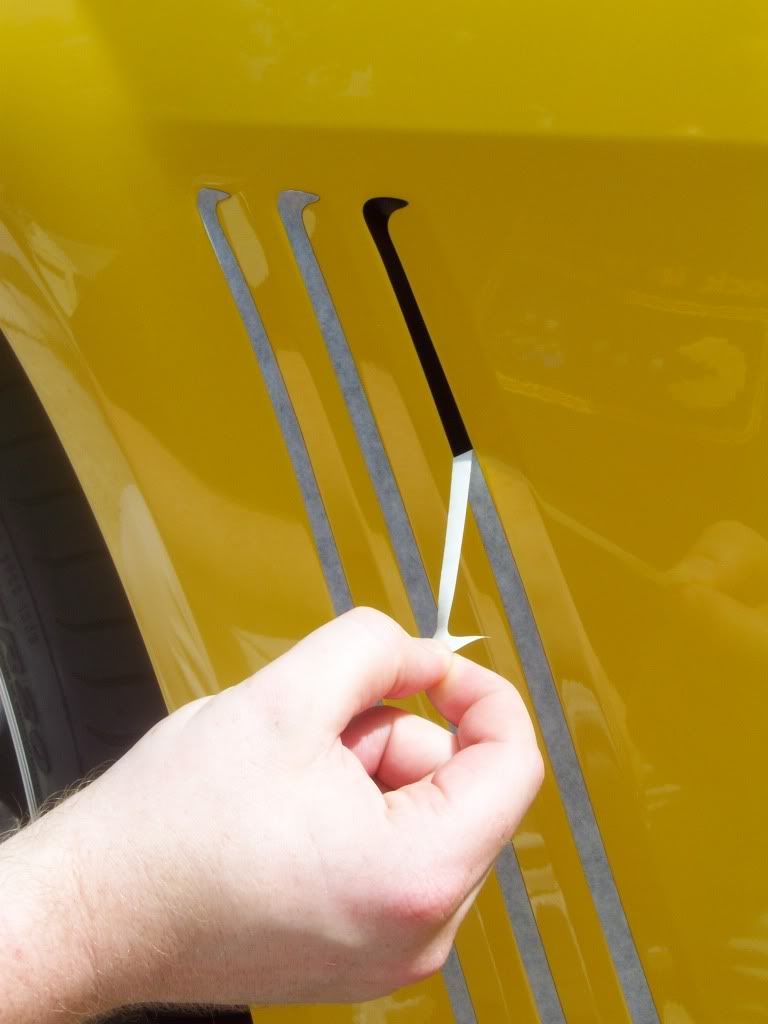  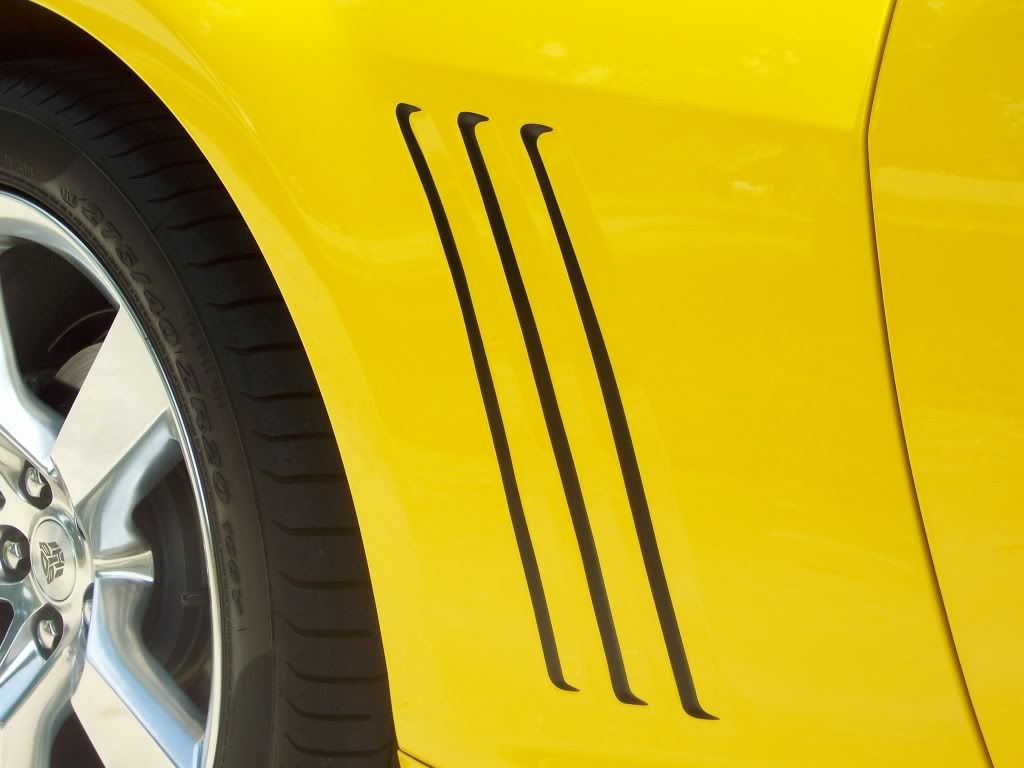
Last edited by FNG; 06-27-2011 at 09:10 AM. Reason: fixed a spelling error. |

|

|
|
06-25-2011, 07:47 PM
|
#2 |
    
Drives: 2013 Hot Wheels Special Edition Join Date: May 2009
Location: Auburn,Mass
Posts: 1,333
|
Really nice job they look good.
|
|
|
|
|
06-27-2011, 11:16 AM
|
#3 |
|
Tampa Bay Camaros
|
Here it is in .pdf format.
__________________
|
|
|
|
|
11-26-2012, 04:23 PM
|
#4 |
 
Drives: 2013 chevrolet camaro rally yellow Join Date: Nov 2012
Location: United States
Posts: 170
|
Just ordered some, got the Black Friday discount - $17.05 shipped! thanks
|
|
|
|
|
11-29-2012, 08:49 PM
|
#5 |
|
Account Suspended
Drives: 2010 SS 426 V8 M/T Join Date: Aug 2012
Location: Scottsdale AZ
Posts: 1,376
|
make sure you mention camaro5 at checkout for discount!
|
|
|
|
|
11-29-2012, 10:34 PM
|
#6 |
|
Account Suspended
|
this is decal install 101,
I just bought a set of these myself, I'm not sure if I will like them or not, the cool thing about the 5th gens is that less is more, the cleaner this car looks the better it looks, when you start tacking a bunch of decals & badges on it, the looks go down hill, I dont even like the rs & ss badges that much to be honest. |
|
|
|
|
11-30-2012, 01:28 AM
|
#7 | |
|
Drives: 2013 chevrolet camaro rally yellow Join Date: Nov 2012
Location: United States
Posts: 170
|
Quote:
|
|
|
|
|
|
01-20-2014, 03:46 PM
|
#8 |
 Drives: 2013 Camaro ZL1 #7600 Join Date: Jul 2012
Location: Oklahoma
Posts: 3
|
Thanks for the help with this. I just got mine in the mail and called the company and the only advice the guy gave me is to make sure the surface is clean. Duh! He wanted me to take pictures of them so he could better understand what I was talking about. No instructions provided so I'm glad you posted this.
Bob B 2013, IOM ZL1 |
|
|
|
|
|
|
|
 |
| Tags |
| camt65, gills, inserts, rpidesigns.com, vinyl |
|
|
 Similar Threads
|
||||
| Thread | Thread Starter | Forum | Replies | Last Post |
| GM bulletin on Perceived Paint Mismatch on Door and Quarter Panel Paint Appearance | Tran | Camaro Issues / Problems | Warranty Discussions | TSB and Recalls | 53 | 07-17-2013 01:16 PM |
| GM bulletin on Perceived Paint Mismatch on Door and Quarter Panel Paint Appearance | Tran | 5th Gen Camaro SS LS LT General Discussions | 114 | 04-16-2012 03:04 PM |
| IOM gill inserts? | ducq | Cosmetics and Lighting Modification Discussions | 3 | 08-23-2010 03:33 PM |
| Question - Gill Inserts Different Lengths? | alexw | Cosmetics and Lighting Modification Discussions | 5 | 04-27-2010 08:29 PM |


