You are browsing camaro5 

|
 11-18-2011, 08:52 PM
|
#1 |

Drives: 2010 CGM Camaro 2SS/RS 429 LSX/F1X Join Date: Aug 2011
Location: Sandy, UT
Posts: 429
|
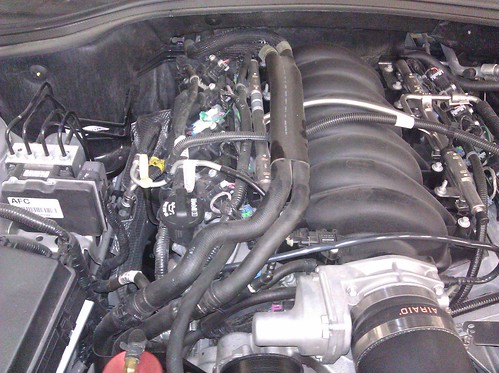
JDP Motorsports' 2010-11 SS Heater Hose 2012 Update DIY
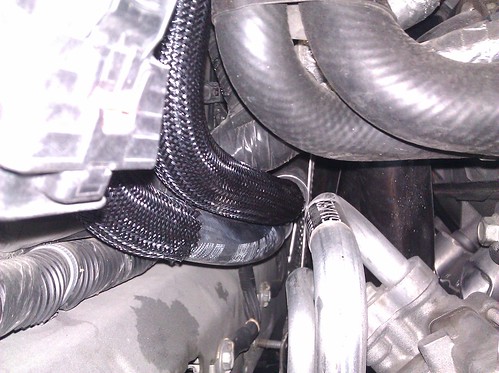
The JDP Motorsports 2010-2011 Camaro SS Heater Hose 2012 Update is now available, and here is the do-it-yourself instructions for installation
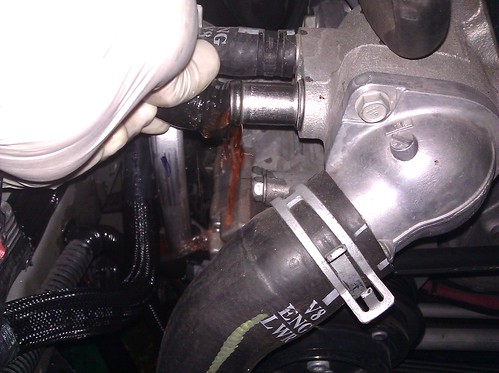
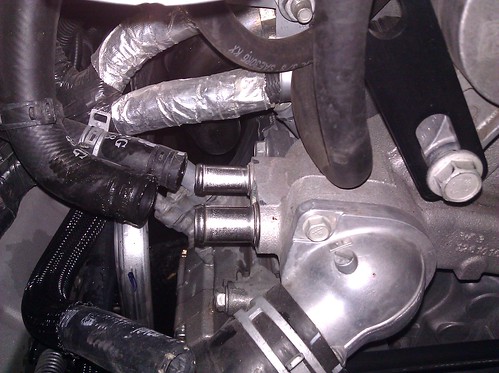
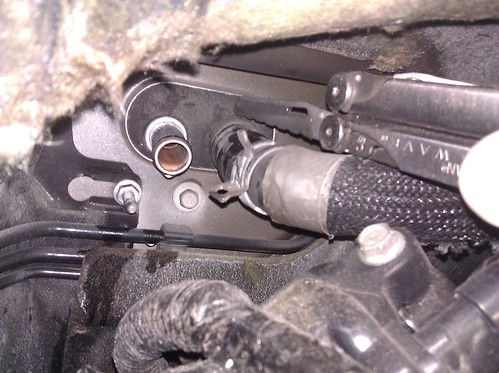
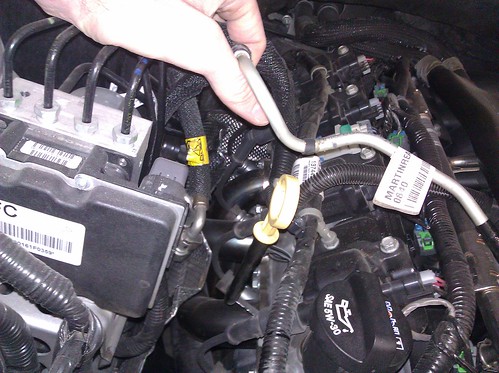
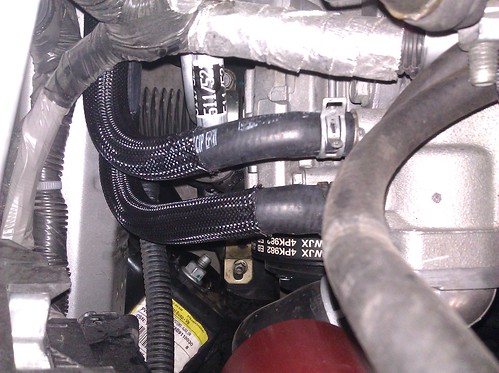
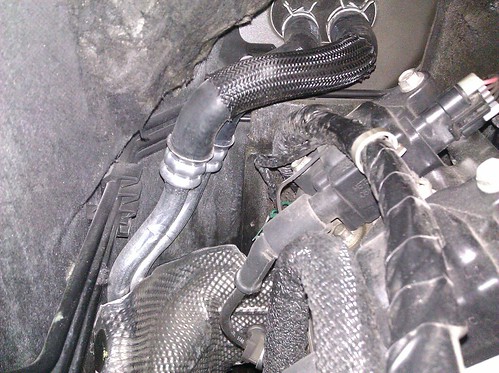
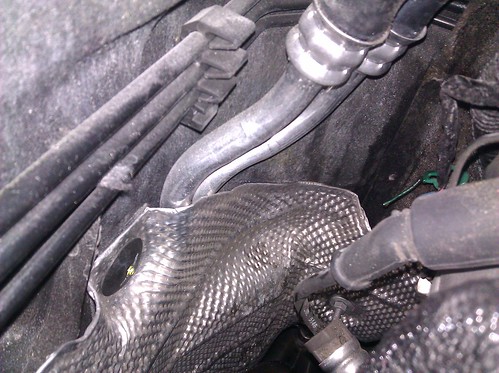
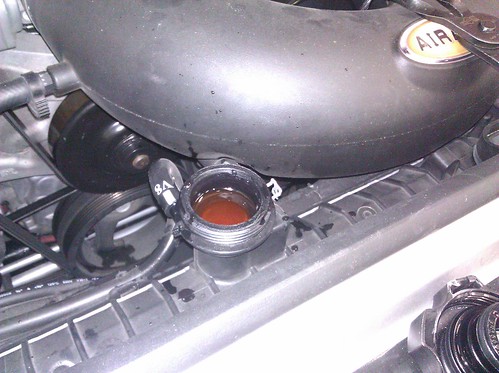
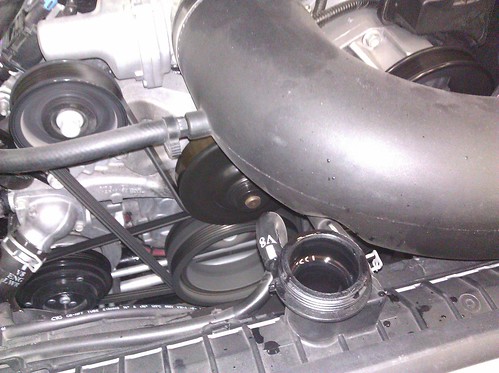
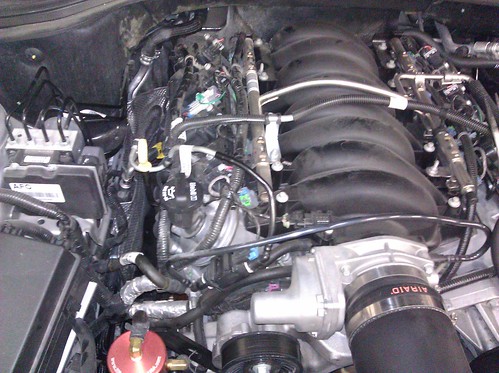
 This relocation of the heater hoses from on top of the intake manifold to the passenger frame rail is beneficial for a couple reasons. It keeps the hot hoses from possibly heating the intake manifold and therefore heating the intake air, which reduces power. It also makes the engine bay look much more professional and clean without the awkward hoses flopped on top. This, in addition to the JDP Motorsports' 2010+ Camaro SS Fuel LineRetrofit will make your Camaro SS's engine bay look the best on the block, with an actual good looking engine staring at you! Tools needed: Catch bucket or similar Long needle nose pliers or similar Long hose pliers (if available) Knife (if needed) 10mm 1/4" deep socket 1/4" ratchet
Please feel free to call, email or Pm us anytime with questions! 
Last edited by JDP Tech; 02-25-2013 at 02:20 PM. |

|

|
|
11-18-2011, 09:15 PM
|
#2 |

Drives: 2014 Z/28 #82+#192, 18ZLE 66Nova Join Date: Oct 2008
Location: By the lake in AZ
Posts: 15,728
|
Nice work guy's and thanks one of my next mods.
|
|
|
|
|
11-19-2011, 07:08 AM
|
#3 |
 
Drives: 2010 SS/RS, Black/Inferno Orange Join Date: Oct 2009
Location: Lake City Fla
Posts: 199
|
Thanks!!
|
|
|
|
|
11-19-2011, 09:59 AM
|
#4 |
|
knows 2 facts about ducks

Drives: ...and they're both wrong Join Date: Aug 2009
Location: The HMS Invincible
Posts: 25,072
|
Great write up
__________________
 |
|
|
|
|
11-21-2011, 12:57 PM
|
#5 |
|
The Mark of Excellence

Drives: 2010 ABM 1SS RS LS3 Join Date: Jan 2009
Location: Smallest State in the Union
Posts: 8,688
|
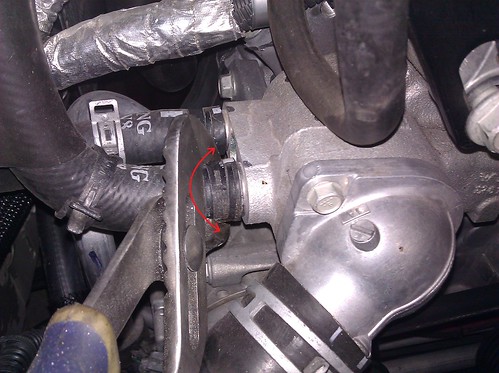
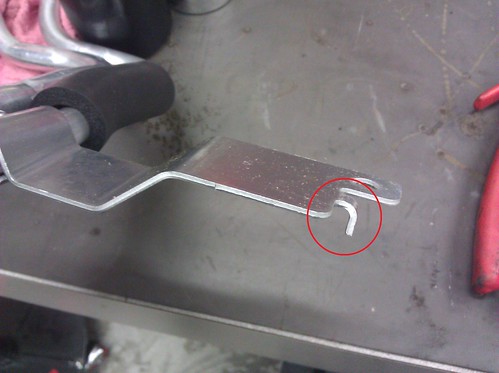
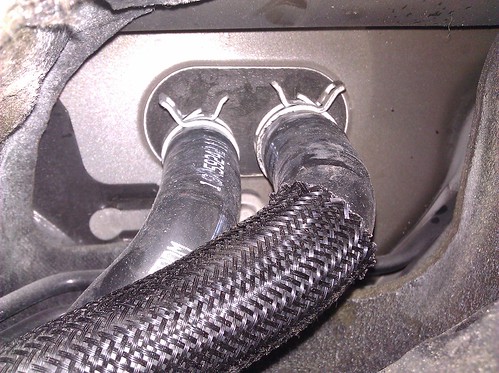
11. Take your new heater hoses, and on the bracket, there is a little tab sticking out. Bend that down flush with the rest of the bracket.
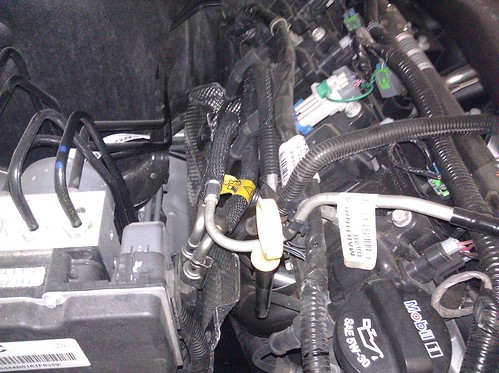
I recommend going under the car once the hoses are in place. There is a locating hole for the tab but no hole for a screw. With a very compact close quarter 90 degree drill you can drill a hole for a self tapping bolt and secure the bracket. I was not comfortable leaving the hoses unsecured.  Bracket with bent tab and hole  Installed bracket Nice diy write up!
__________________
BMR, CAI, DynoMax, Elite Eng., Hurst, Jannetty, Clear Image Headers & Hi Flow cats, Jet Hot, LSR, TSW, VMax, Vredestein  Last edited by PAUL SS; 11-21-2011 at 05:27 PM. |
|
|
|
|
11-23-2011, 07:48 PM
|
#6 | |
|
Drives: 2010 CGM Camaro 2SS/RS 429 LSX/F1X Join Date: Aug 2011
Location: Sandy, UT
Posts: 429
|
Quote:
Its a great, easy, cheap mod for anybody looking to dress up their engine bay, using GM parts! 
|
|
|
|
|
|
11-27-2011, 06:07 PM
|
#7 |
|
US Army Retired
Drives: IOM 2SS-RS - A6 (L99) Join Date: Aug 2009
Location: Northern Virginia
Posts: 655
|
Jeremy,
Great write up, I have my hose assembly and will put it on this weekend. Tom |
|
|
|
|
11-27-2011, 09:51 PM
|
#8 |
|
by Odeon

Drives: '12 SS/RS A6 IOM SOLD, '13 1LE IOM Join Date: Nov 2011
Location: Good question
Posts: 1,707
|
Wait, so do the 2012's already have this update?
Edit: Never mind, I got my answer.
__________________
"It works 60% of the time, every time."
 "Some say it's a waste of time, others say it's an incredible waste of time." "The ultimate measure of a man is not where he stands in moments of comfort and convenience, but where he stands at times of challenge and controversy." 2013 IOM SS/RS - 1LE. Born 5/6/2013 (1 of 32 1SS IOM 1LE's) |
|
|
|
|
12-05-2011, 02:30 PM
|
#9 |
|
Drives: 2010 CGM Camaro 2SS/RS 429 LSX/F1X Join Date: Aug 2011
Location: Sandy, UT
Posts: 429
|
Coming up after lunch, we'll be posting the companion DIY for this mod, the changing of the ugly factory fuel line for an even cleaner look!

|
|
|
|
|
12-20-2011, 11:47 AM
|
#10 |
|
Drives: 2010 CGM Camaro 2SS/RS 429 LSX/F1X Join Date: Aug 2011
Location: Sandy, UT
Posts: 429
|
Edited to add in the optional heater hose bracket tab info.
- Jeremy
|
|
|
|
|
04-07-2012, 08:24 PM
|
#11 |
|
Booooosted.

|

__________________
 |
|
|
|
|
07-12-2012, 12:18 PM
|
#12 |

Drives: 2011 Camaro SS/ 2016 Camaro SS Join Date: Jun 2009
Location: Sandy, Utah
Posts: 3,256
|
Bump for excellent info!
|
|
|
|
|
07-12-2012, 12:22 PM
|
#13 |
|
Booooosted.
|
This info helped me a TON.
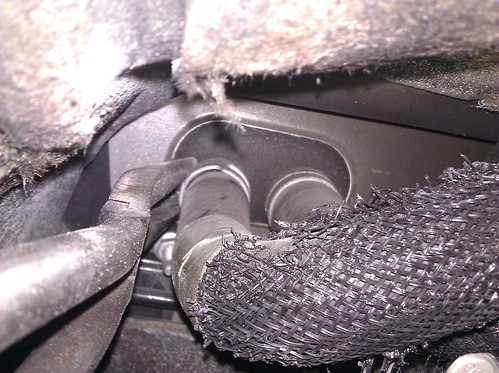
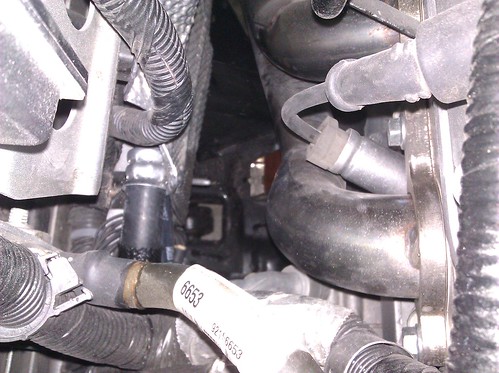
I had actually tried to do it in front of the heat shield. LOL The headers were in the way and I was thinking it wasn't gonna go.
__________________
|
|
|
|
|
07-12-2012, 05:01 PM
|
#14 |
 
|
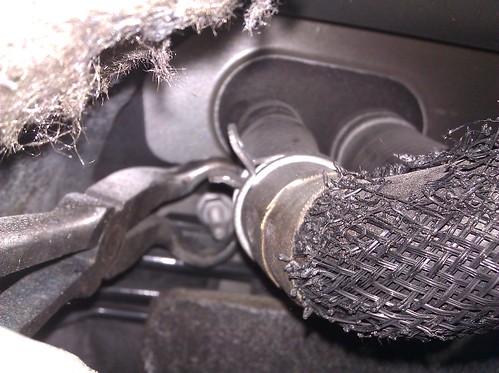
Yes I forgot to state the obvious, great write up and thanks for the Hose too. I did have to laugh at the "choose to cut off the lines", there is no way mine would break free.
__________________
 Her Hot Rod. |
|
|
|
|
|
|
|
 |
|
|
 Similar Threads
|
||||
| Thread | Thread Starter | Forum | Replies | Last Post |
| CAMARO WIKI | Tran | Wiki | 67 | 11-27-2024 09:02 AM |
| LG Motorsports full 2010 Camaro SS exhaust dyno results | Anthony @ LG Motorsports | Camaro V8 LS3 / L99 Engine, Exhaust, and Bolt-Ons | 20 | 09-20-2010 06:44 PM |
| Mustangs................ | vontivonti | 5th Gen Camaro SS LS LT General Discussions | 4051 | 12-21-2009 11:42 PM |
| ProCharger Systems for 2010 Camaro SS Available in June | khislop007 | Forced Induction - V8 | 29 | 06-09-2009 03:34 PM |