You are browsing camaro5 

|
|
|||||||
| View Poll Results: Which LFX V6 Cold Intake System? | |||
| Injen |
|
2 | 22.22% |
| Roto-Fab |
|
0 | 0% |
| Cold Air Inductions |
|
5 | 55.56% |
| K&N |
|
1 | 11.11% |
| Other |
|
1 | 11.11% |
| Voters: 9. You may not vote on this poll | |||
 |
|
|
Thread Tools |
 02-26-2013, 05:07 PM
|
#1 |
 
|
'12 2LT RS Inferno Camaro Build
Hi Everyone, this is Cliff and my '12 2LT RS Inferno Camaro Build. A recent Engineering Student graduate, my first purchase out of college was this baby. While I had my heart set on an identical SS, my wallet and gas prices convinced me to opt with the 3.6L Manual V6 (Although I hope to add an SS 1LE to my collection one day).
My planned modifications are listed below and the thread will be updated as they are installed. I will also include detailed contact information and specs for any body shops, parts, or websites used in the modification process. Any parts or materials used will also be reviewed as I have found this lacking in a lot of builds. I hope you enjoy and please contact me with any questions! - Cliff ============================ Most Recent Photo ================================ 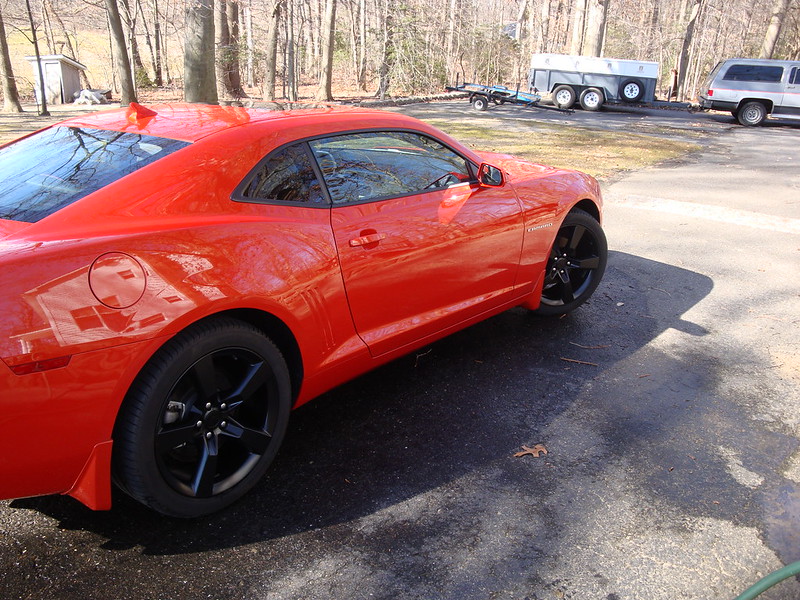 Modifications Cover King Seat Covers Powder Coated Rims Cold Air Inductions CAI System Planned Modifications Interior: Ambient Lighting Kit Sill Plates Exterior: Rear and Side Window Tinting Razzi V6 GFX kit Rider Graphix Wheel Pin-striping Painted Bowties Black Rear Light Bezel Rear Black-Out kit Big Worm Graphix Hood Spear Decals Big Worm Graphix Light Black-Out kit Big Worm Graphix Side Spears Gullwing Doors Engine Bay Strut Tower Brace Painted Engine Cover Painted Fuse Box Cover Roto-Fab Radiator Cover Performance Cat-Back Exhaust System (Open to suggestions) Automatic Cut-outs Ported Throttle Body Headers March 2013 ================= Mod 1: CoverKing Seat Covers ================== Purchased: Carid.com Price: $149.99 + $30.00 ("Camaro" Stitched Headrest Cover) Recomendation: I would recommend these covers if you want to protect your seats. The "Camaro" stitching across the headrest also looks great from the outside and adds to the look of the car. These are very comfortable and easy to clean. I purchased seat covers after discovering a small tear in the passenger side leather. This was somewhat of a bitter sweet modification as I love the stock orange accented leather but I wanted to protect the seats from any future damage. Starting to take the Camaro to shops for upgrades, I am much more comfortable with mechanics and gear heads moving my car with these seat covers installed. I am also no longer grimacing when friends come along for rides  Installation: The installation is a little tricky - the instructions are not over helpful as they are generic. The bottom portion of the cover fits snugly on over the seat with the edges tucked into the plastic trim. Two straps extend under the seat from the front of the cover to the back. These straps are extremely difficult to tighten and I had to use a heavy gauge wire to pull the draw strings taunt. I ended up only doing one of the two straps on the passenger side as it was too difficult to fish the wire through the under-seat motors. The back cover fits snugly with a portion being slipped between the backrest and seat. This is portion is Velcroed to the rear portion of the the backrest cover. The headrest installation is intuitive. Issues: One issue I noticed is that when the backrest is lowered for someone to enter the rear seat of the vehicle the covers shift a little. This shifting is minimal with proper installation an can easily be corrected in a few seconds. Also, there are a couple straps hanging from the rear of the backrest cover that I could not figure out where to attach to. These are just pushed under the seat (I never sit in the back so I don't mind lol). Also, there is a flap that extends from the back of the backrest down to the floor (not a tight fit); however, this keep feet from being put on your rear seats. 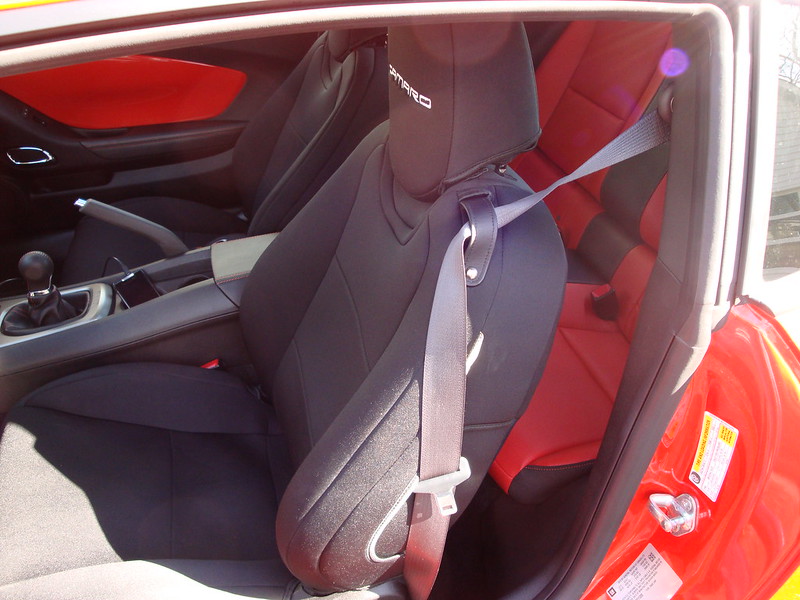 ========= Mod 2: Powder Coat Stock Rims and Fix Curb Rash ========== Body Shop: Kwicksilver Wheel Repair Location: 13 New Brooklyn Road Edison, NJ 08817 Contact: jiskander@kwicksilverusa.com Price: $175/wheel (including curb rash repair to one rim) - Included unmounting wheels from car, removing tires, removing TPM sensors, remounting TPM sensors, remounting tires, remounting wheels to vehicle. Recomendation: I would highly recommend this repair shop. I emailed John with photo's of my curb rash and a request to powder coat my rims. He called me back later that evening and was extremely helpful through the whole process in setting up an appointment. I arrived at his shop at 8:30AM with my vehicle - by 1:30 I was leaving with beautiful powder coated rims. He stepped me through the whole process and showed me each stage of the application. After having the car for 1 week I had my first (hopefully my last) experience with curb rash. My previous/other vehicle ('89 Caprice) has large walled tires which don't mind a curb now and then but the Camaro was a whole different animal. Needless to say I found that out the hard way. After a significant amount of researching and getting various prices from repair + powder coating I opted with John at KwickSilver due to some good reviews he had received.  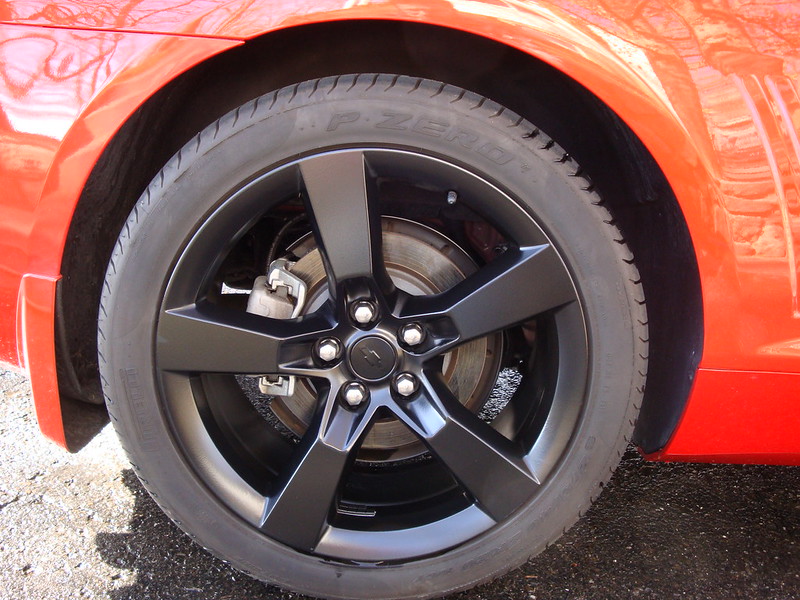 ============================== Pre-Mod ===================================== 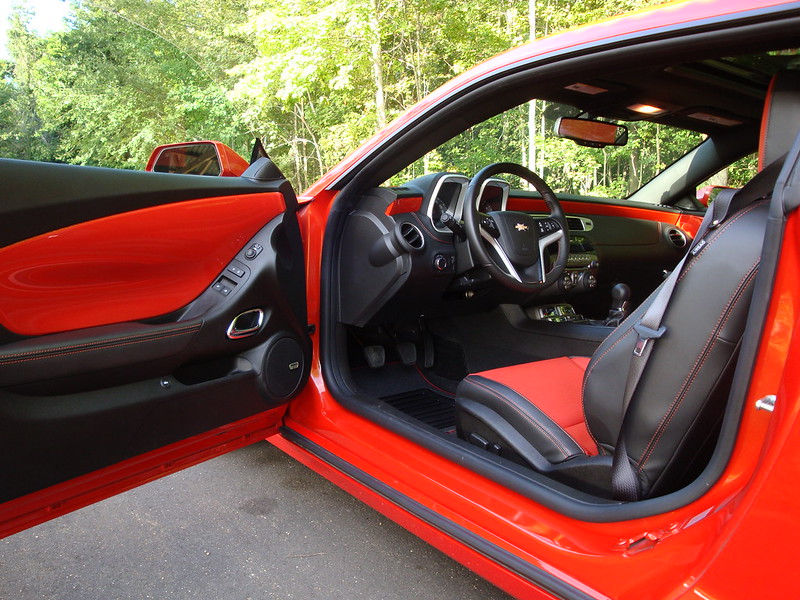 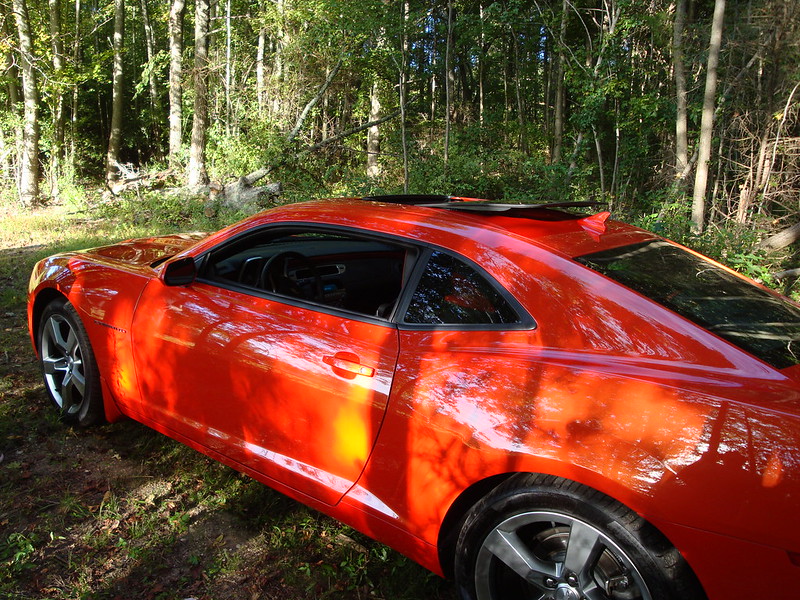 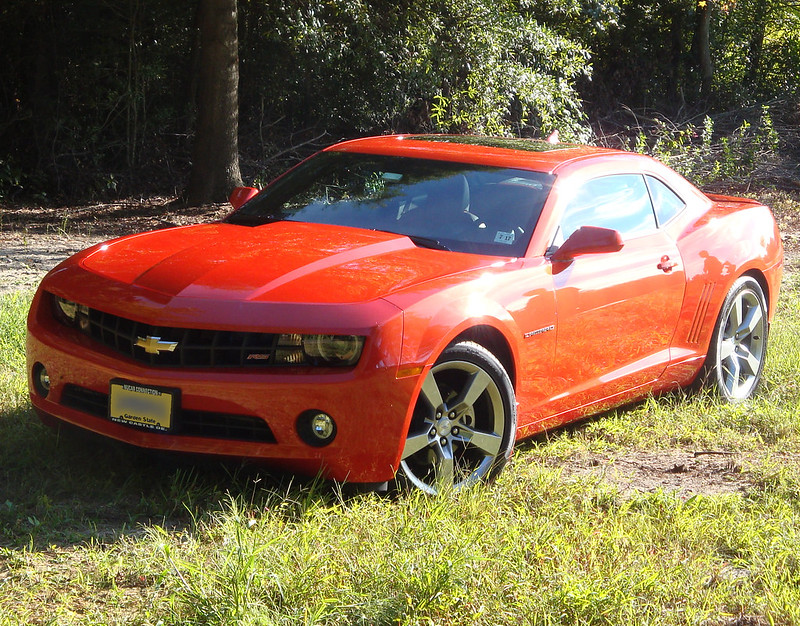
Last edited by cliffdog89; 05-04-2013 at 03:42 PM. |

|

|
|
05-04-2013, 04:16 PM
|
#2 |
|
|
Mod 3: Cold Air Inductions Cold Air Intake System
Purchased: www.coldairinductions.com
Price: $399.99 + $17.00 S&H Recomendation: I would recommend purchasing this CAI system. Great Customer Service. After much deliberation I decided to go with the Cold Air Inductions CAI system. Unlike many of the other companies that make cold air intake systems for every vehicle on the road - Cold Air Inductions focuses on the GM family of vehicles with a few exceptions (such as challenger intake systems). I was also considering the Roto-Fab CAI system and the Injen CAI system. Injen received solid reviews for the 2010-11 V6 camaro's but I could not find any systems installed in the updated '12 LFX engine. Roto-Fab was also high on my list but was on the expensive side and did not include a fully enclosed air box like the Cold Air Inductions system. Installation: The Installation took under a half hour. It was fairly straightforward except for the airbox which took a little shimmying to get it in place; However, once it was in place it fit like a glove!  The lid was a little problematic getting the half turn screws locked in and required a little re-adjustment of the box but as you can see in the photos it fit perfectly once aligned properly The lid was a little problematic getting the half turn screws locked in and required a little re-adjustment of the box but as you can see in the photos it fit perfectly once aligned properly  Performance Gains: I have not taken my car to a Dyno but even without the numbers I can feel and hear the additional power. Shifting from 1st to 2nd (Only Manual Camaro's for this guy) and giving the car a little throttle, an immediately noticeable deep roar is present. These deeper tones only increase as the RPM's climb. The car is also much more responsive to the gas then before. The nice bass tones (as much as a V6 can put out anyways lol) continue up through all the gears, although they are not as noticeable in 6th. According to CAI, the system provides an average 17 RWHP gain on my car. As far as fuel economy, I seem to have increased about 1 MPG over my previous driving; however, I feel that I am pushing the car harder now because of how awesome it sounds  so I am probably not realizing the full gains added by the system. so I am probably not realizing the full gains added by the system. CAUTION: CAI recommends that you check the filter periodically to ensure that it has not become loose on the system. DO THIS! After about two weeks of driving with the CAI system I started noticing diminished throttle response and a lack of the deep tones I had become accustom too. The engine was also idling hard. Sure enough, after popping the hood, I saw that the filter had worked its way off and was sitting in the air box  I reattached it and made doubly sure that everything was extremely tight. It has been a week since reattaching the filter and I have not had any problems; however, I now carry a screwdriver in my glovebox just in case   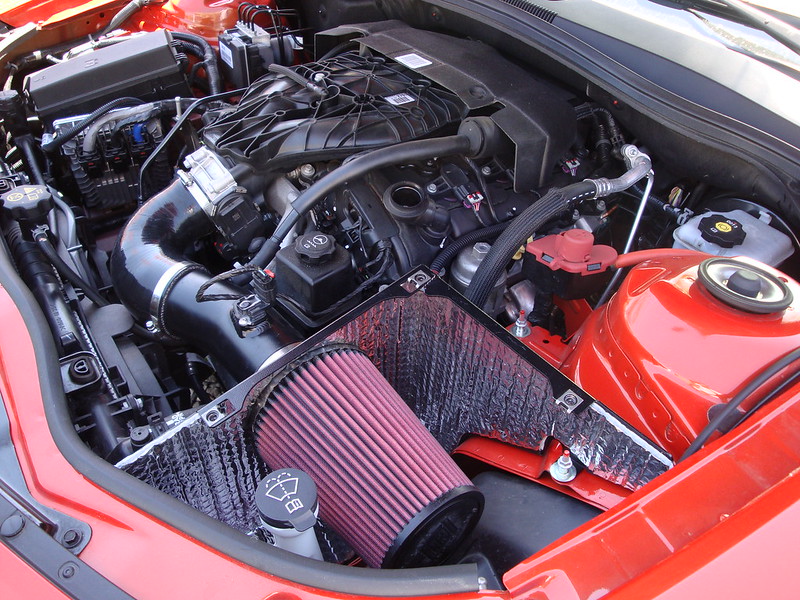 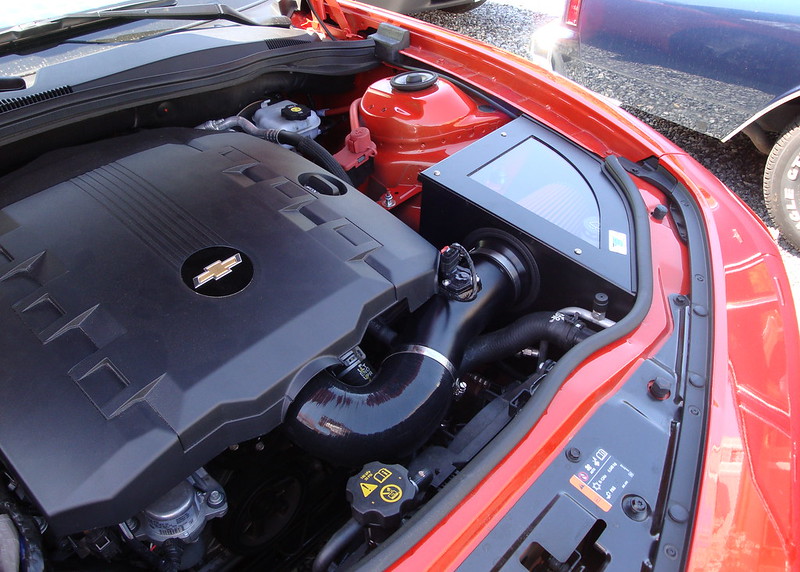 
|
|
|
|
|
|
|
|
|
| Tags |
| 2lt, build, modifed, modifications, mods |
|
|


