You are browsing camaro5 

|
 10-14-2010, 09:06 PM
|
#1 | |
|
xbox360 tag

Drives: 2010 inferno orange 2SS Join Date: Apr 2010
Location: elkhart indiana
Posts: 768
|
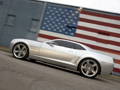
how to paint your rims
trip to store
1-2 cans brake cleaner or rim cleaner and degreaser 2 packs of 400 grit wet-dry sand paper 4 cans of duplicolor self-etching primer 4 cans of duplicolor wheel paint (flat black or gloss) 4 cans of duplicolor wheel clear paint ***notes*** i did one rim at a time because the tpms (tire pressure monitoring system) (i didnt want to mix them up) but take your time. if you rush it it will show first wheel chocks jack the car up from a safe point take off tire clean clean clean i used brake cleaner and rim cleaner(found buy rim paint supplys at walmart) i curbed this rim so i started with it. dont for get the lug nuts this is the point of no return this part is the one that almost made me cry so if your weak of heart stop take a min and be sure you want to do this ($40,000 car and your going to take sand paper to it) (just take a min and think) now that you got that out of the way, sand the crap out of them with fine grit 320 or 400 ( i used 400) and the lug nuts also clean, clean, make sure they are clean tape both sides of the rim and cover the tire then primer it make sure you get both sides i started with the back side first (including the inside of the rim) then fliped tire over and do the front i took out the center caps and did those apart from the rim after waiting like 2 hours for the primer to dry paint the rim. I did 2 coats started on the back side first then to the front, half hour wait time, then apply 2nd coat. dont forget the lugnuts same as the rim, primer and paint then clear coat i did 2 coats 1 hour wait between the coats let dry for atleast an hour or two you are going to mess up the lugnuts here but reinstall the tire unless you can wait for a couple of days for the lugnuts to fully cure. stand back and admire your work then do other rear tire clean, sand, primer, paint, paint, clear, clear, install now do the fronts make sure you use good lift points and safety first clean, sand, primer, paint, paint, clear, clear, install park in the light take some pictures and admire what you have just done then drive around town and accept all the complements you get i just got them done and drove to the gas station and first guy that walked out of the store told me that those rims looked bad a$$ on that car all i could say was THANKS MAN! hope this helps you guys out there that want to do this it was relatively easy and inexpensive just take your time or it will not look as good as you wanted remember you want to be able to stand back and say LOOK WHAT I DID! and not say OH MY GOD LOOK AT WHAT I DID TO MY CAR, WHY DID I DO THAT. any thing i forgot let me know and i will add it
__________________
Quote:
 Last edited by destroyerofu2; 10-21-2010 at 05:51 AM. |
|

|

|
|
10-14-2010, 09:31 PM
|
#2 |
|
NorCal Camaro➎ Member

|
Looks good..
Did you at least fix the curb rash?
__________________
 |
|
|
|
|
10-14-2010, 09:36 PM
|
#3 | |
|
xbox360 tag
Drives: 2010 inferno orange 2SS Join Date: Apr 2010
Location: elkhart indiana
Posts: 768
|
yea sanding and primer made it dissapear
__________________
Quote:
|
|
|
|
|
|
10-15-2010, 09:58 AM
|
#4 |
|
Living the American Dream

Drives: 2010 Camaro RS/2SS Rally Yellow Join Date: Oct 2008
Location: Westfield, IN
Posts: 782
|
Lookin good! Great write-up!
__________________
Rally Yellow 2SS/RS w/Cyber Gray Stripes
Customer pick-up: June 17 2009 C5 Indiana Camaro Club Central Indiana Camaro Club  |
|
|
|
|
10-15-2010, 02:00 PM
|
#5 |
|
Darth Martel

Drives: Black 1SS with 20% tinted windows Join Date: May 2009
Location: Bizzaroland
Posts: 1,495
|
that is bada$$... I thought about doing that but, figured it would look ghetto. Yours look pro. Great job and write up. My only question is... how will they hold up to the elements/rock chips/etc... ?
|
|
|
|
|
10-15-2010, 02:04 PM
|
#6 |
           Drives: 2010 2SS IOM L99 Join Date: Jan 2010
Location: LOUISVILLE,KY..
Posts: 7,545
|
very nice job.
|
|
|
|
|
10-15-2010, 02:15 PM
|
#7 | |
 Drives: 2013 SIM Camaro 2SS/RS/1LE NPP NAV Join Date: Jun 2010
Location: Callaway, FL
Posts: 154
|
Quote:
I have a few months of driving on my painted rims, basically the same method as described above (http://www.camaro5.com/forums/showthread.php?t=101480), mine are holding up fantastically. No rock chips, paint flakes or anything of the sort. |
|
|
|
|
|
10-15-2010, 03:25 PM
|
#8 | |
|
xbox360 tag
Drives: 2010 inferno orange 2SS Join Date: Apr 2010
Location: elkhart indiana
Posts: 768
|
Yea I put on two coats of paint and two coats of clear because that's what I was afraid of but so far two weeks now and no scratches or chips and still looks great
__________________
Quote:
Last edited by destroyerofu2; 10-21-2010 at 05:53 AM. |
|
|
|
|
|
10-15-2010, 08:51 PM
|
#9 |

Drives: 2010 2SS/RS Join Date: Dec 2009
Location: Clarksville Tennesse.
Posts: 6,148
|
when are you going to do the orange part of the wheel
|
|
|
|
|
10-15-2010, 08:59 PM
|
#10 |
 
Drives: 2010 white SS Join Date: May 2010
Location: DMI
Posts: 216
|
good job!
|
|
|
|
|
10-16-2010, 10:19 AM
|
#11 |
|
Darth Martel
Drives: Black 1SS with 20% tinted windows Join Date: May 2009
Location: Bizzaroland
Posts: 1,495
|
excellent... thanks for letting me know the durability. I'll probably wait until spring for this but, it's now on my list of mods.
|
|
|
|
|
10-16-2010, 10:24 AM
|
#12 |
|
looks great
|
|
|
|
|
10-16-2010, 10:32 AM
|
#13 |

|
looks great
__________________
 |
|
|
|
|
10-16-2010, 12:09 PM
|
#14 |
|
I have no life

Drives: 06' Subaru STI, ex-Camaro V6 LLT Join Date: Apr 2010
Location: Top Gear Test Track
Posts: 3,189
|
hmm, wouldnt the painted lugnuts chip when you remove the tires or re-torque the tires? I'm just thinking there is a lot of contact with the sockets... dont know how that would hold up @_@.
Looks awesome though, I really want to do that for my LT rims =D
__________________
|
|
|
|
|
|
|
|
 |
| Thread Tools | |
|
|
 Similar Threads
|
||||
| Thread | Thread Starter | Forum | Replies | Last Post |
| Understanding Paint Correction-The Nitty-Gritty | Mr CLuTcH | Cosmetic Maintenance: Washing, Waxing, Detailing, Bodywork, Protection | 29 | 03-02-2012 04:51 AM |
| Paint your own stripes? | blackZbandit | Cosmetics and Lighting Modification Discussions | 44 | 09-18-2011 10:22 AM |
| Has anyone have their front end replaced and/or repainted??? Paint issue inside... | marcao | 5th Gen Camaro SS LS LT General Discussions | 42 | 07-20-2010 06:57 AM |
| Gill Paint Chips | MMaglione | Cosmetic Maintenance: Washing, Waxing, Detailing, Bodywork, Protection | 83 | 05-03-2010 06:35 PM |
| Adam's Polish & Car care Products | Charlie@STILLEN | Wash/Wax/Detailing and Cosmetic Maintenance Parts | 50 | 04-01-2010 04:28 PM |


