You are browsing camaro5 

|
 01-14-2015, 01:47 PM
|
#183 |
   Drives: too many to say! Join Date: Nov 2010
Location: S.E. Michigan
Posts: 1,016
|
is the coil reloc mandatory? or can you modify existing?
|

|

|
|
01-14-2015, 01:51 PM
|
#184 |
|
'It's an experiment'

Drives: [COTW 2/09/15] '11 GPI LSA SC Z/LE Join Date: May 2014
Location: Dallas TX
Posts: 8,709
|
You can modify the existing. I wanted to use a relocation bracket vs upgrading the valve covers.
-Don Last edited by hammdo; 01-14-2015 at 02:08 PM. |
|
|
|
|
01-14-2015, 03:24 PM
|
#185 | |
|
Drives: too many to say! Join Date: Nov 2010
Location: S.E. Michigan
Posts: 1,016
|
Quote:
|
|
|
|
|
|
01-14-2015, 03:59 PM
|
#186 |
|
'It's an experiment'
Drives: [COTW 2/09/15] '11 GPI LSA SC Z/LE Join Date: May 2014
Location: Dallas TX
Posts: 8,709
|
yep, I have the L99 valve covers, you can just drill a new hole above the current hole in the coil bracket to lower it about a half inch -- that would do it...
|
|
|
|
|
01-14-2015, 04:12 PM
|
#187 |
|
'It's an experiment'
Drives: [COTW 2/09/15] '11 GPI LSA SC Z/LE Join Date: May 2014
Location: Dallas TX
Posts: 8,709
|
OK, SC Upper Lid is ON!
I did NOT have to drop the cradle. I was able to use these tools to tighten all the bolts: 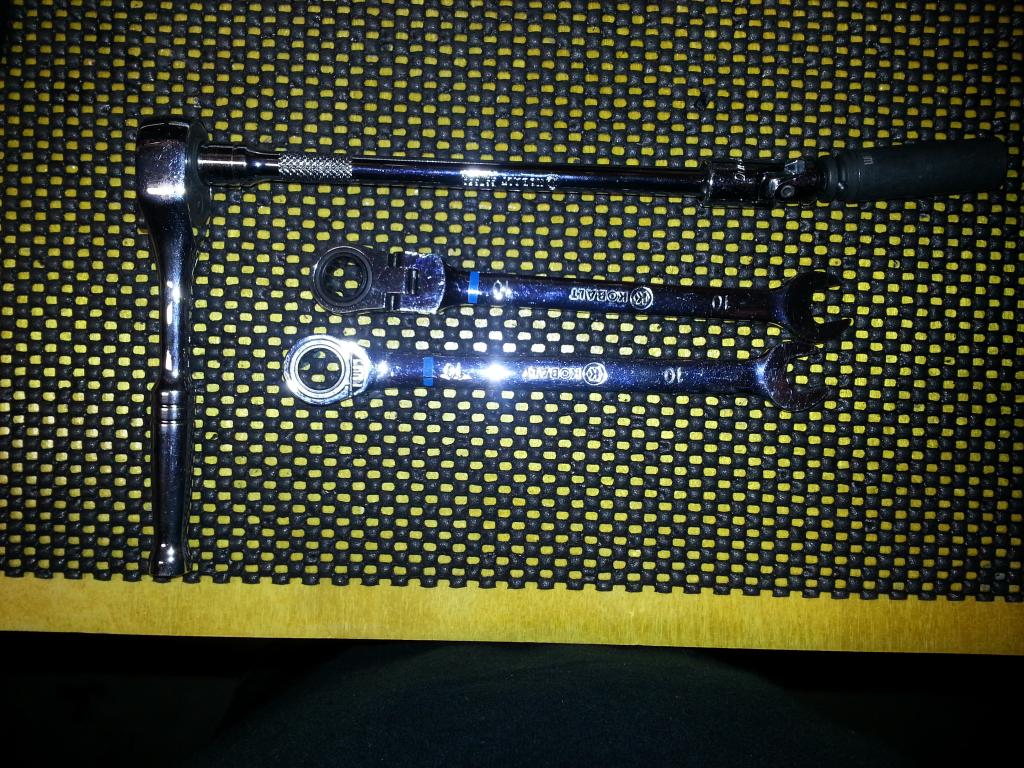 Now my hands were able to get on all the bolts behind the lid. I was able to use the ratchet wrenches to get the bolts tighten -- except the two (# 15 and 16 shown below) in the middle back -- that I used the socket, extension and swivel to get that done! Of course torqued all the ones I could get to, and tightened the others 'good n tight' to make sure they were on. To get to the very back two bolts (# 15 and 16) I used a hammer handle to give me just a little bit more room: 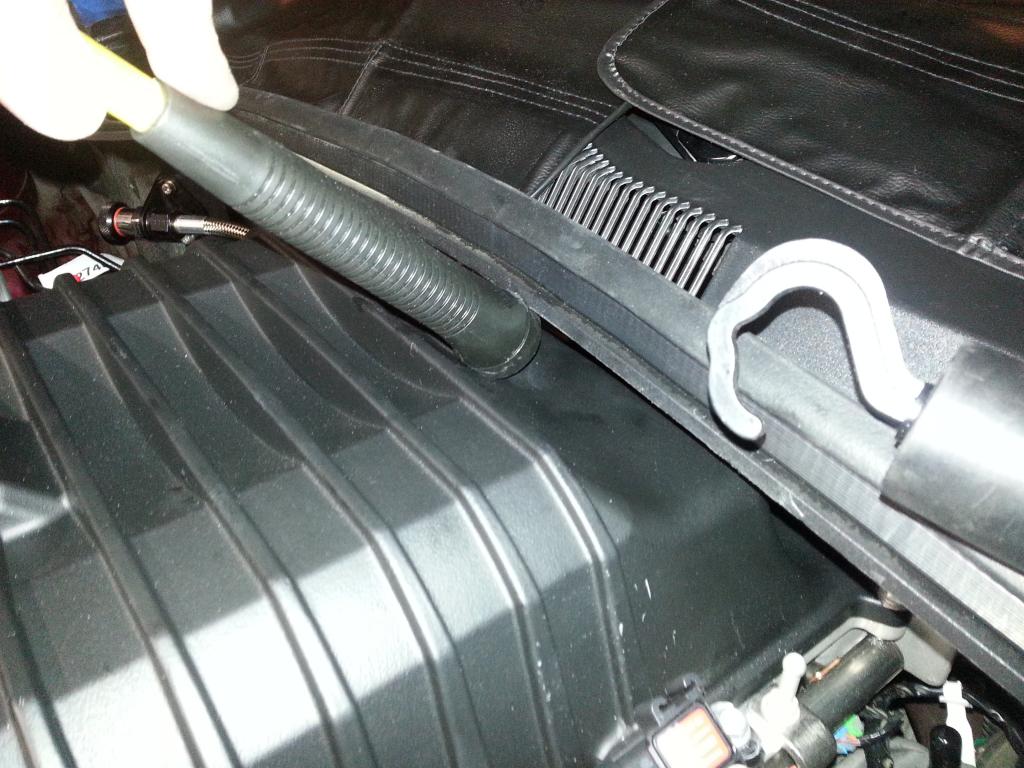 Its rubber so I was able to wedge it under the cowling just enough for the ratchet and socket to do its work! So the specs: 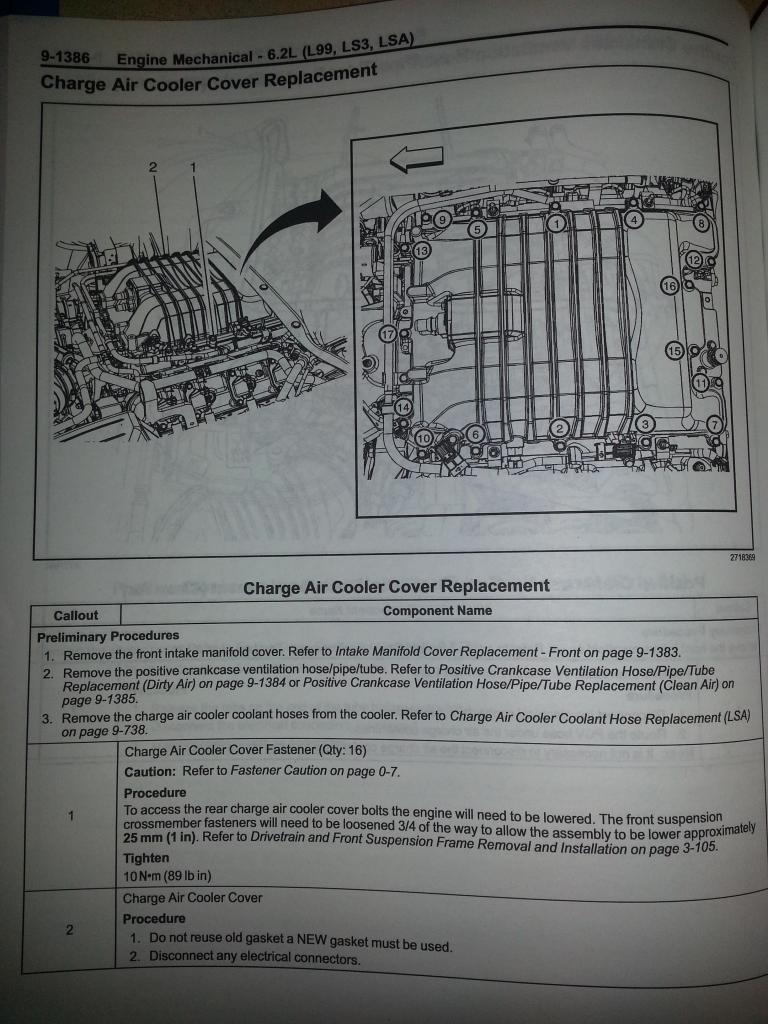 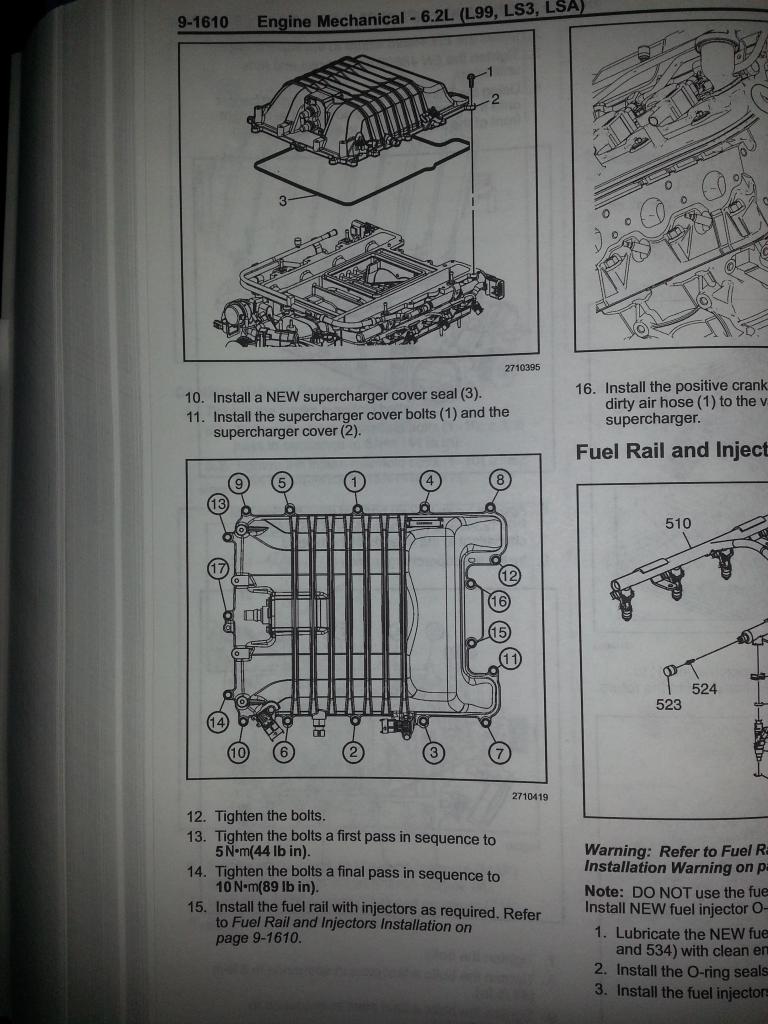 Used vacuum grease to ease the lid -- just on the outer edge of the lower manifold where the green gasket sits: 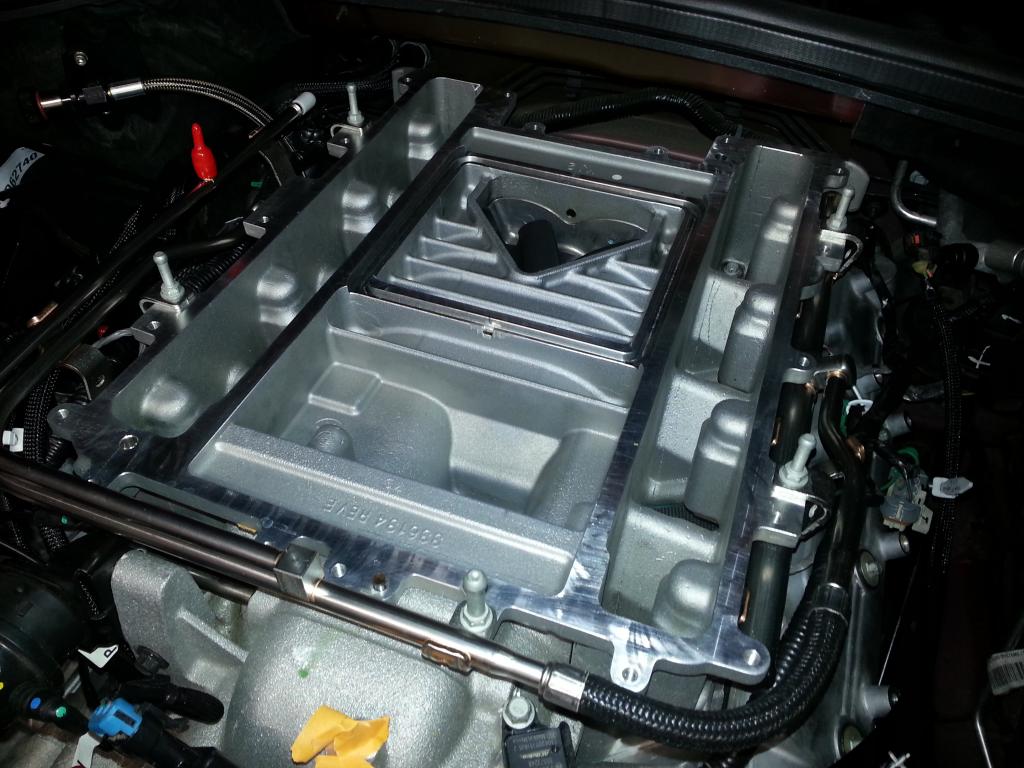 Installed the intercooler gasket -- NOTE the orientation!: 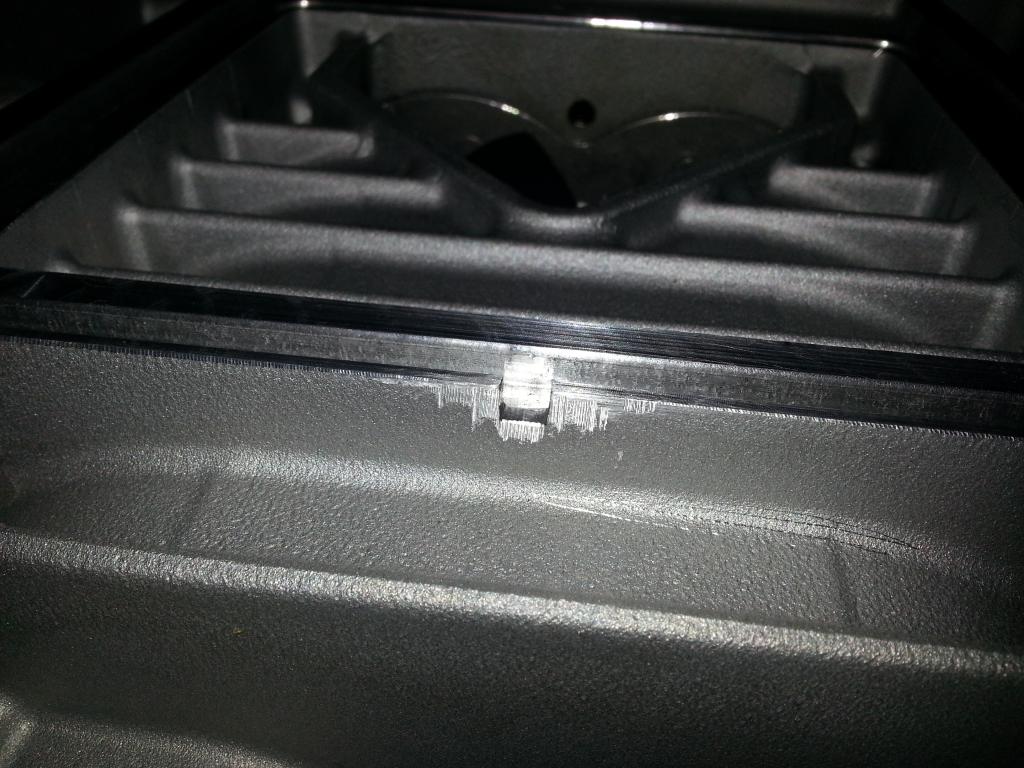 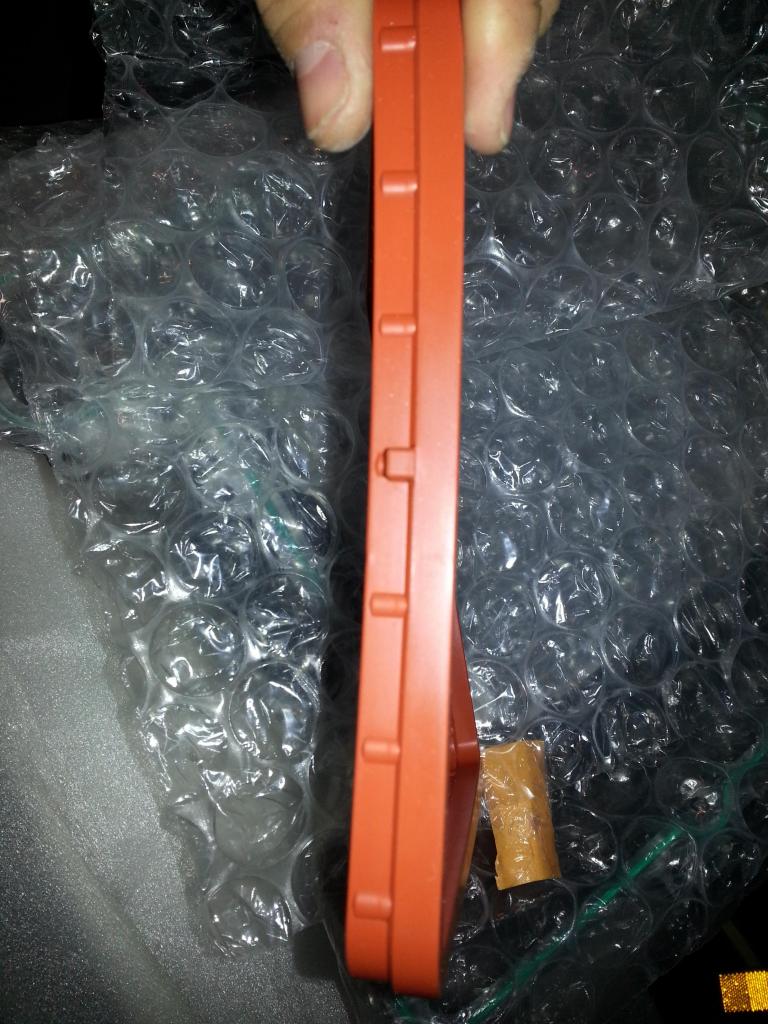 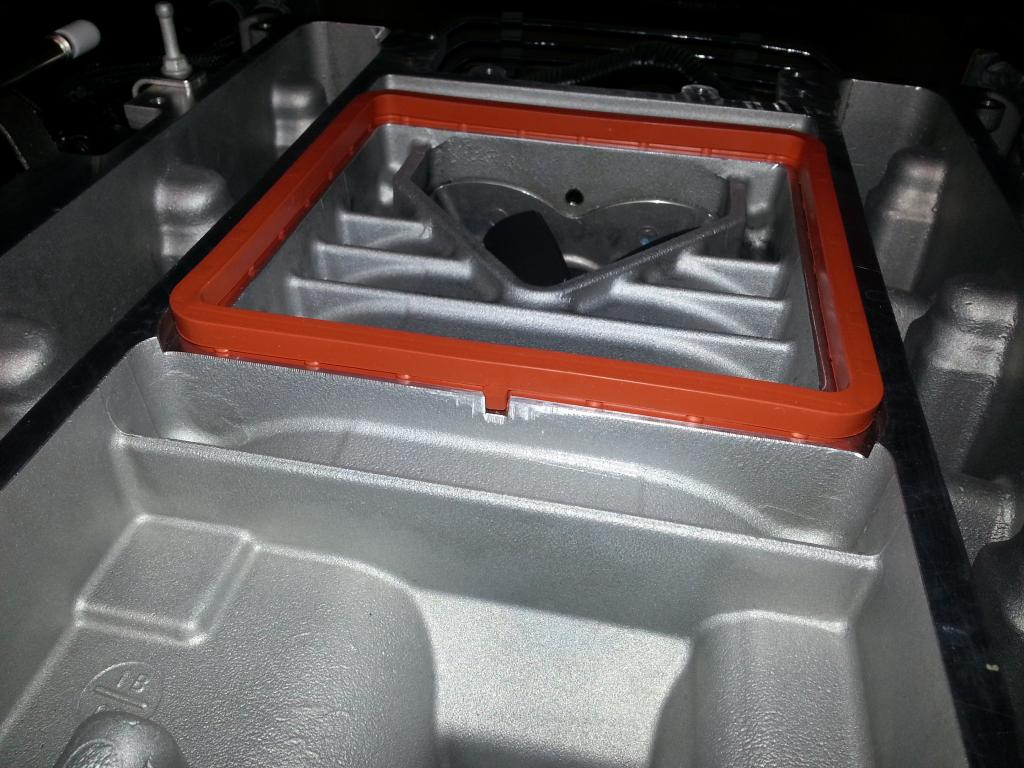 It can only go on one way -- good too! Now, I put the bolts on the lid as there are 'holders' to keep them in place (the lower manifold has them too, but I was too paranoid). VERIFY the green lid gasket is on (Mine was): 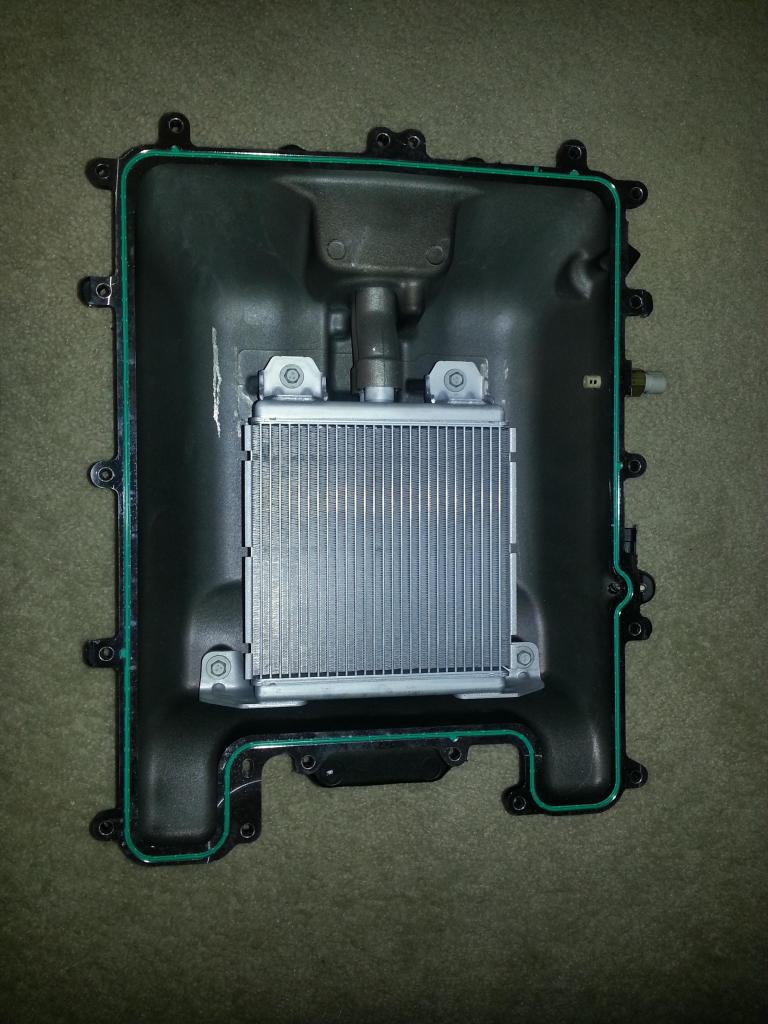 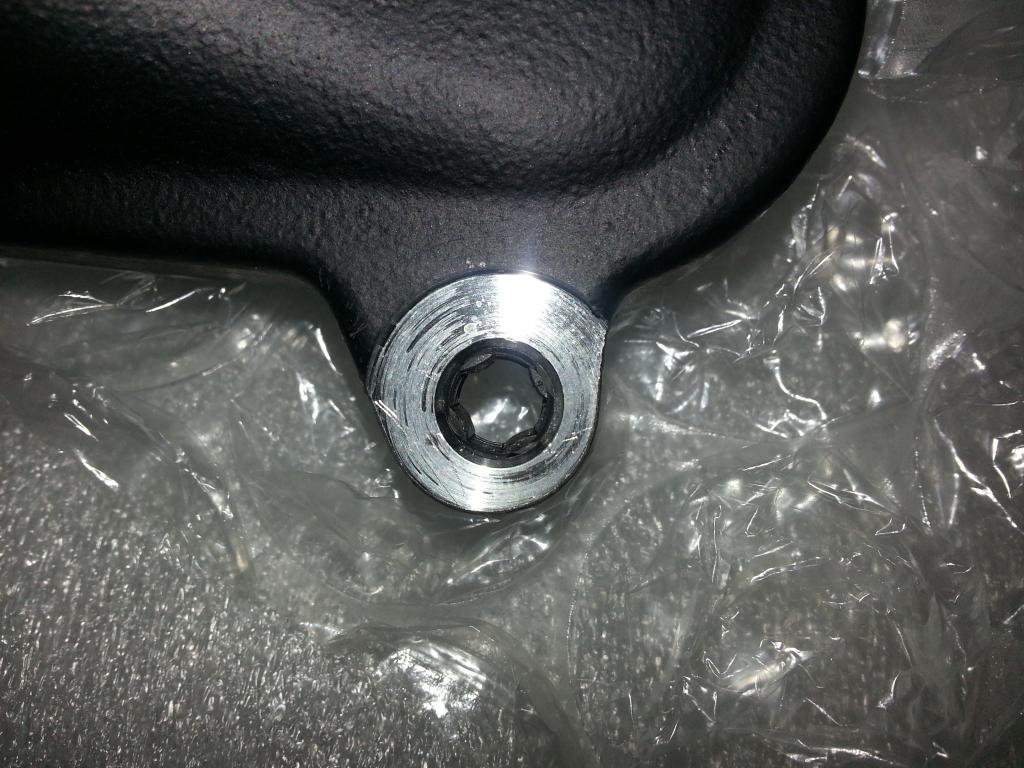 Ready to go! 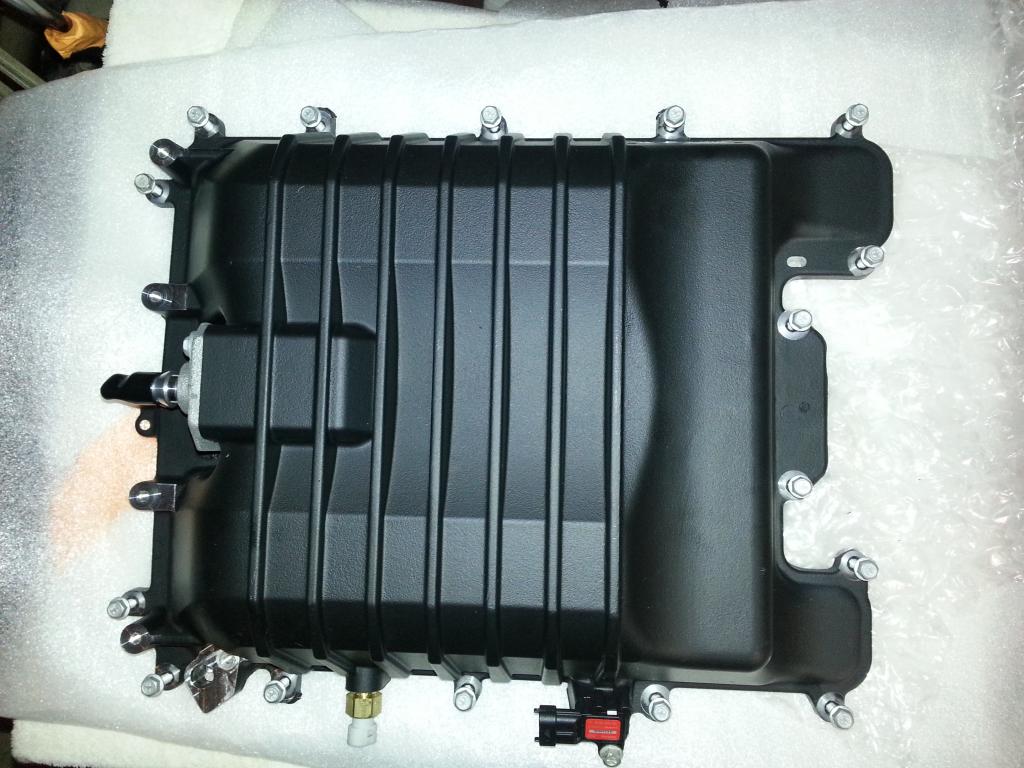 Now, to get to the back bolts, I remove 2 cowling pins as they hit my hand while tightening the screws: 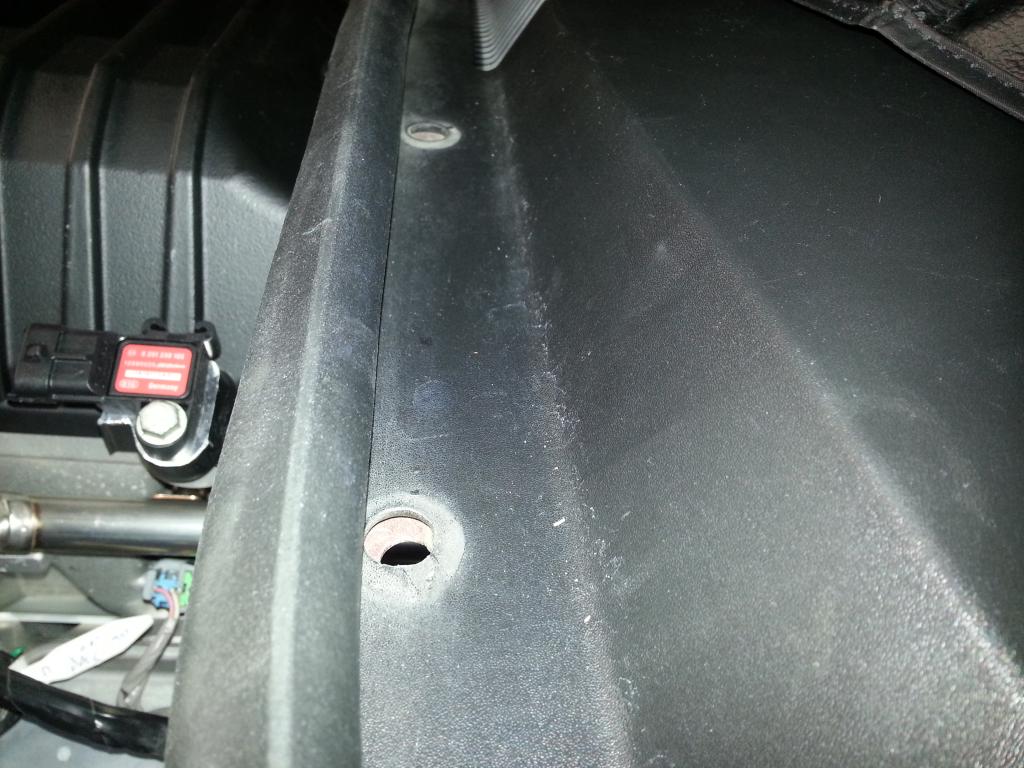 Waa-Laa -- Lid is on! 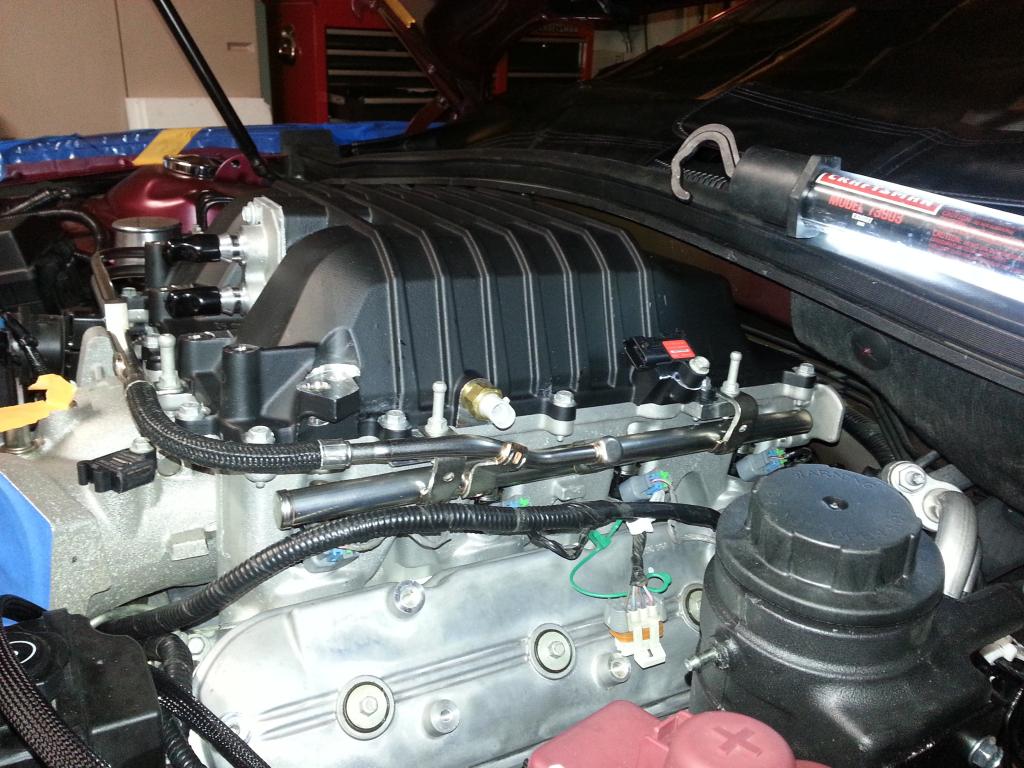  All tight and good to go! Followed the tightening sequence in the manual 44 inch lbs (First Pass) 89 inch lbs (Second Pass). Good thing my hands are a little smaller ;o) More to come... -Don Last edited by hammdo; 07-02-2017 at 03:57 PM. |
|
|
|
|
01-14-2015, 08:35 PM
|
#188 |
       
Drives: 2013 SS Join Date: May 2013
Location: DFW
Posts: 4,102
|
Sweet!!!!
__________________
|
|
|
|
|
01-14-2015, 08:46 PM
|
#189 |
|
'It's an experiment'
Drives: [COTW 2/09/15] '11 GPI LSA SC Z/LE Join Date: May 2014
Location: Dallas TX
Posts: 8,709
|
Work keeps getting in the way ;o) Need the time!
-Don |
|
|
|
|
01-14-2015, 11:45 PM
|
#190 |
|
'It's an experiment'
Drives: [COTW 2/09/15] '11 GPI LSA SC Z/LE Join Date: May 2014
Location: Dallas TX
Posts: 8,709
|
Getting the brake booster hose (came with the kit), coil packs (kept the originals -- they will get me running until the relo kit gets here) and map sensor (with longer wire that I added) going:
   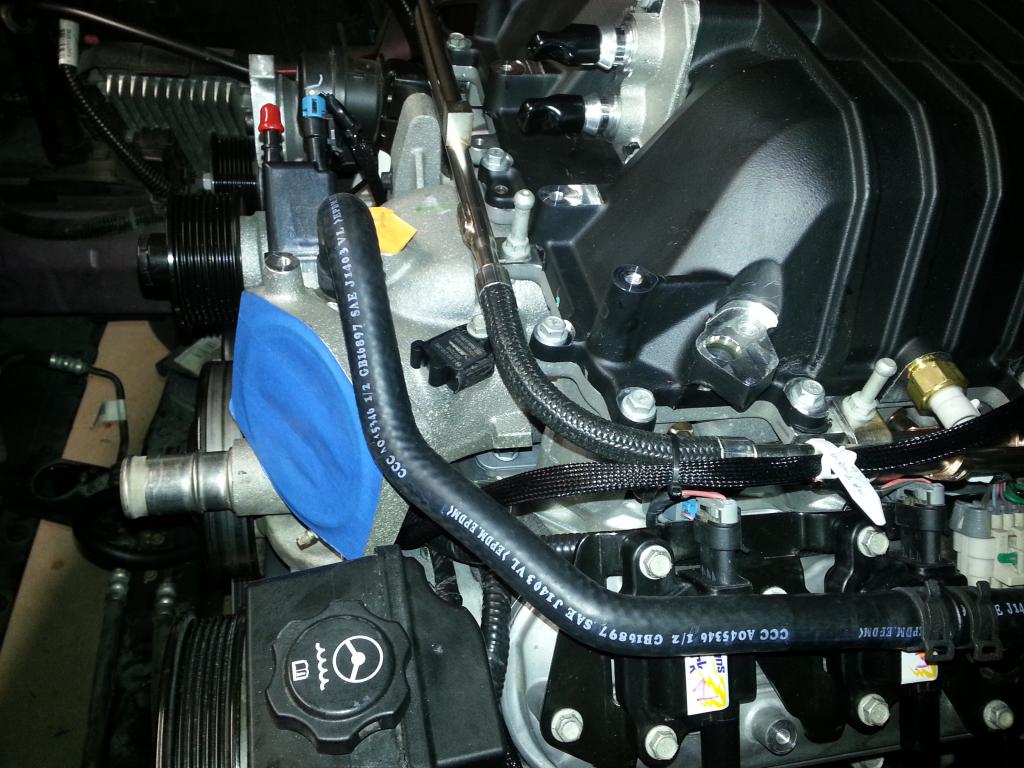 Need to get the headers, O/2 sensors, and exhaust on before getting to far on the top end... Will be starting the heat exchanger tomorrow... -Don Last edited by hammdo; 07-02-2017 at 03:57 PM. |
|
|
|
|
01-15-2015, 10:39 AM
|
#191 |
|
'It's an experiment'
Drives: [COTW 2/09/15] '11 GPI LSA SC Z/LE Join Date: May 2014
Location: Dallas TX
Posts: 8,709
|
Someone asked what I did for the existing coil brackets; I drilled a hole above the existing one so it would give the injector wires some clearance:
 -Don Last edited by hammdo; 07-02-2017 at 03:57 PM. |
|
|
|
|
01-15-2015, 06:57 PM
|
#192 |
|
'It's an experiment'
Drives: [COTW 2/09/15] '11 GPI LSA SC Z/LE Join Date: May 2014
Location: Dallas TX
Posts: 8,709
|
Well, the exhaust parts came in so I'll get that started and hopefully, get those done by tomorrow!
Have the O/2 extensions installed on driver and passenger side now: Drivers:   Passenger:  Coil Pack on Passenger's side:  Getting closer!:  -Don Last edited by hammdo; 07-02-2017 at 03:56 PM. |
|
|
|
|
01-15-2015, 07:16 PM
|
#193 |
|
Drives: too many to say! Join Date: Nov 2010
Location: S.E. Michigan
Posts: 1,016
|
Do like!
|
|
|
|
|
01-15-2015, 10:06 PM
|
#194 |
|
'It's an experiment'
Drives: [COTW 2/09/15] '11 GPI LSA SC Z/LE Join Date: May 2014
Location: Dallas TX
Posts: 8,709
|
Belts are on.
The one that came in the kit was too short so I had to go and pick-up one that did fit: 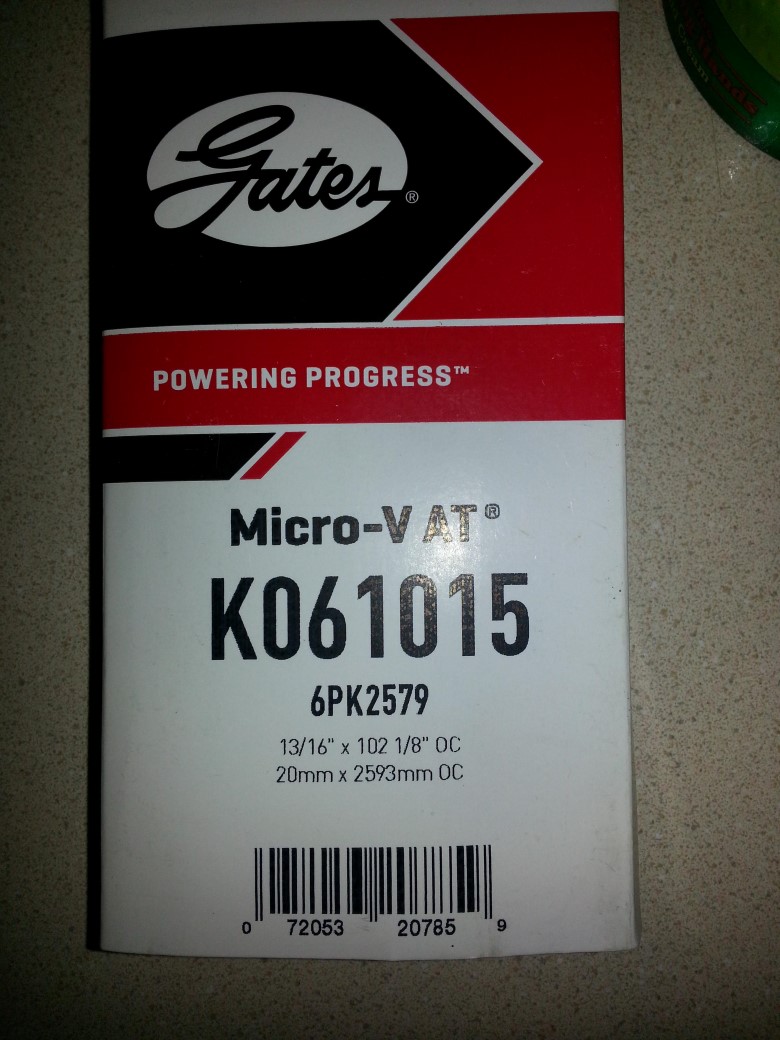 O'Reilly's had it... Since the tensioner and pulley on the snout are 8 ribbed, I had to move the belt in 1 rib so it would line up correctly: 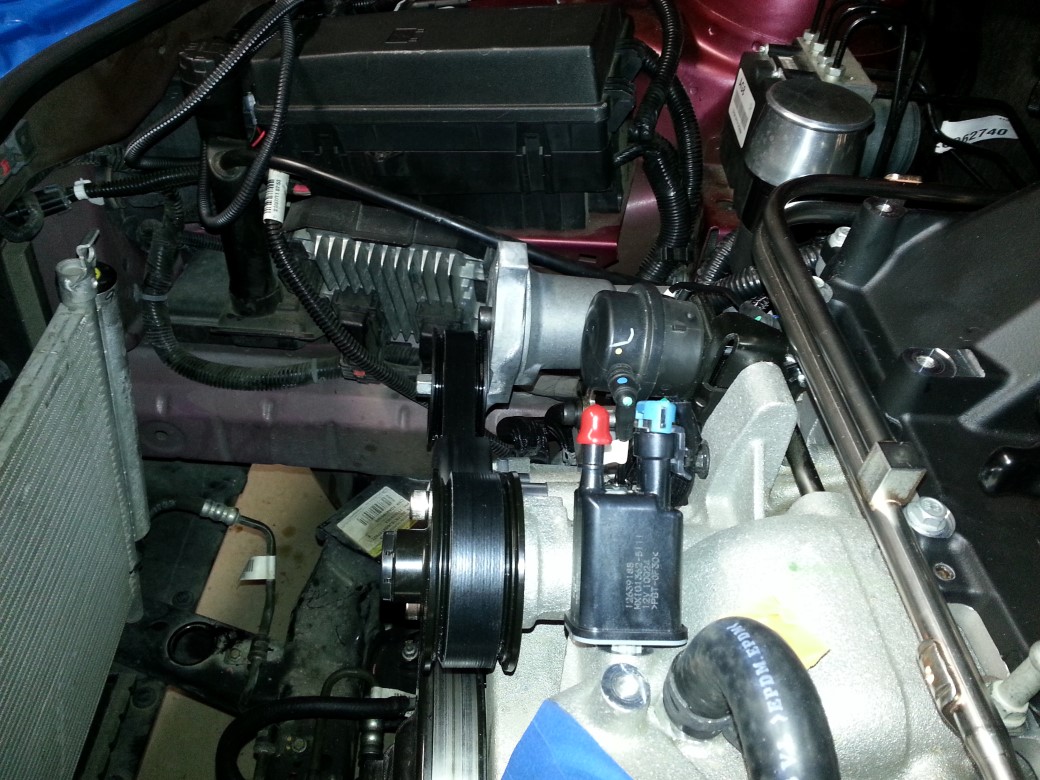 Looking nice! 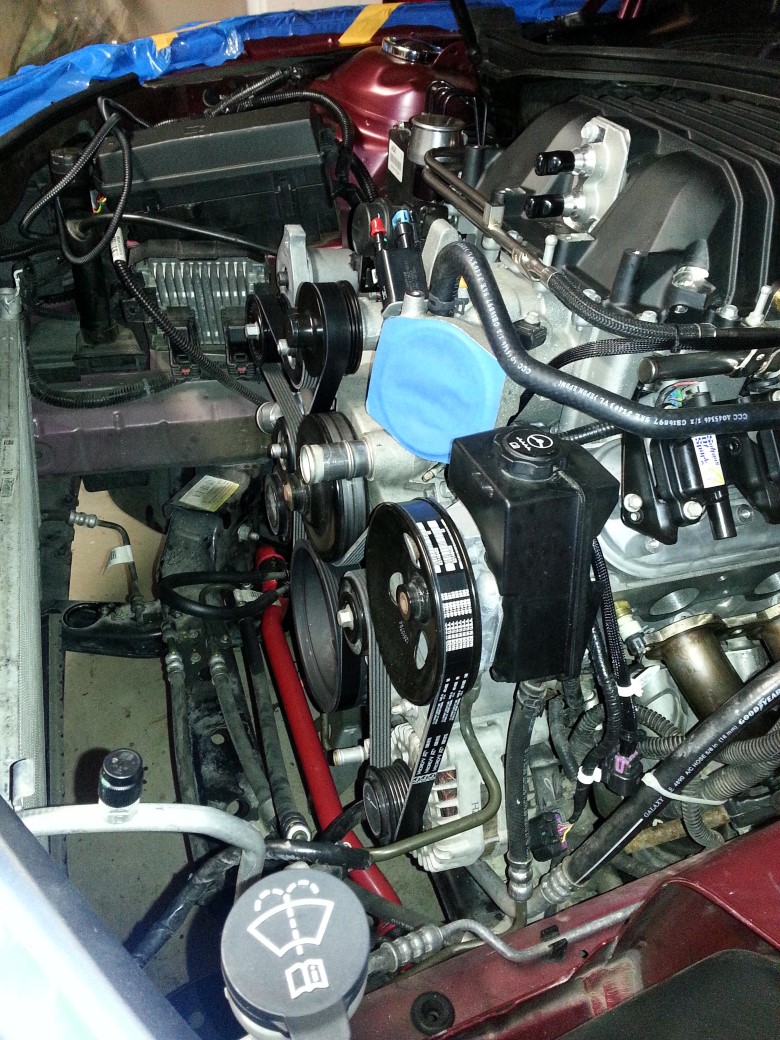 Still more to do to get it ready -- Heat exchanger, the exhaust, hose routing, still a bit to do, but I can see the light @ the end of the tunnel... -Don Last edited by hammdo; 02-10-2015 at 06:39 PM. |
|
|
|
|
01-15-2015, 10:32 PM
|
#195 |
|
Drives: too many to say! Join Date: Nov 2010
Location: S.E. Michigan
Posts: 1,016
|
Does the tensioner show you the optimum operating range?
|
|
|
|
|
01-15-2015, 11:06 PM
|
#196 |
|
'It's an experiment'
Drives: [COTW 2/09/15] '11 GPI LSA SC Z/LE Join Date: May 2014
Location: Dallas TX
Posts: 8,709
|
No, it sets the tension once I take off the tool. It's pretty tight...
|
|
|
|
|
|
|
|
 |
|
|


