You are browsing camaro5 

|
 06-05-2012, 07:51 PM
|
#29 |
    
Drives: 2010, 2LT, RS, 6M, ABM (#1893) SOLD Join Date: Mar 2011
Location: Willits, CA
Posts: 1,437
|
i then put the bolt in the rear hole of the IM, put the top gasket on, and held everything in place while i tilted the IM up in front and shoehorned the bolt under the wiper/cowl trim.
once i got the threads started on that bolt, i got a couple others started just to make sure the gasket and spacers were all aligned. then i removed the bolts that go through the plenum cover, and installed it, just loosely tightening all 6 bolts. i then installed the plenum cover bolts, except of course the rearmost one, i had to run to the HW store to get one that would barely fit. i got an M6x1.00x12 flanged bolt. 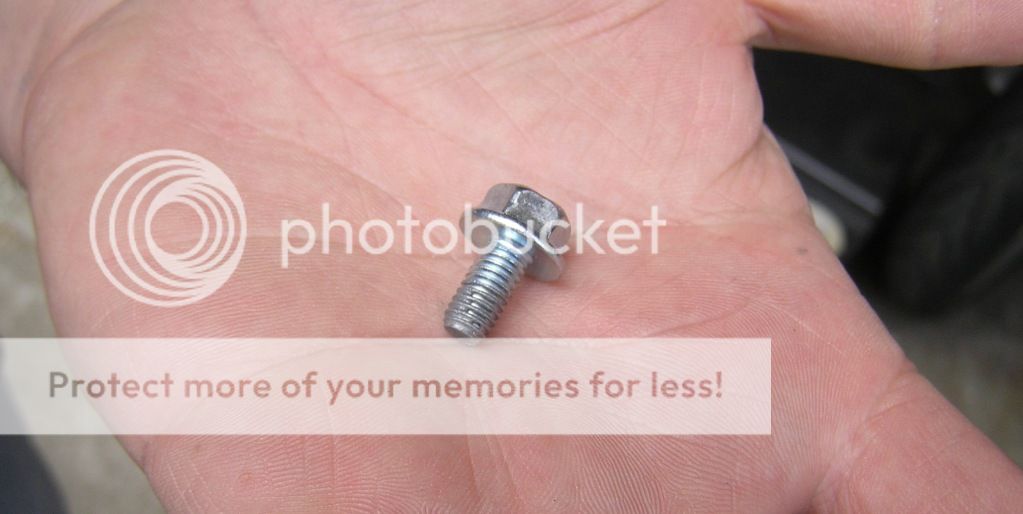 luckily my GF was home, she was able to get her hand in there to get it started while i pulled up on the cowl. tight fit; 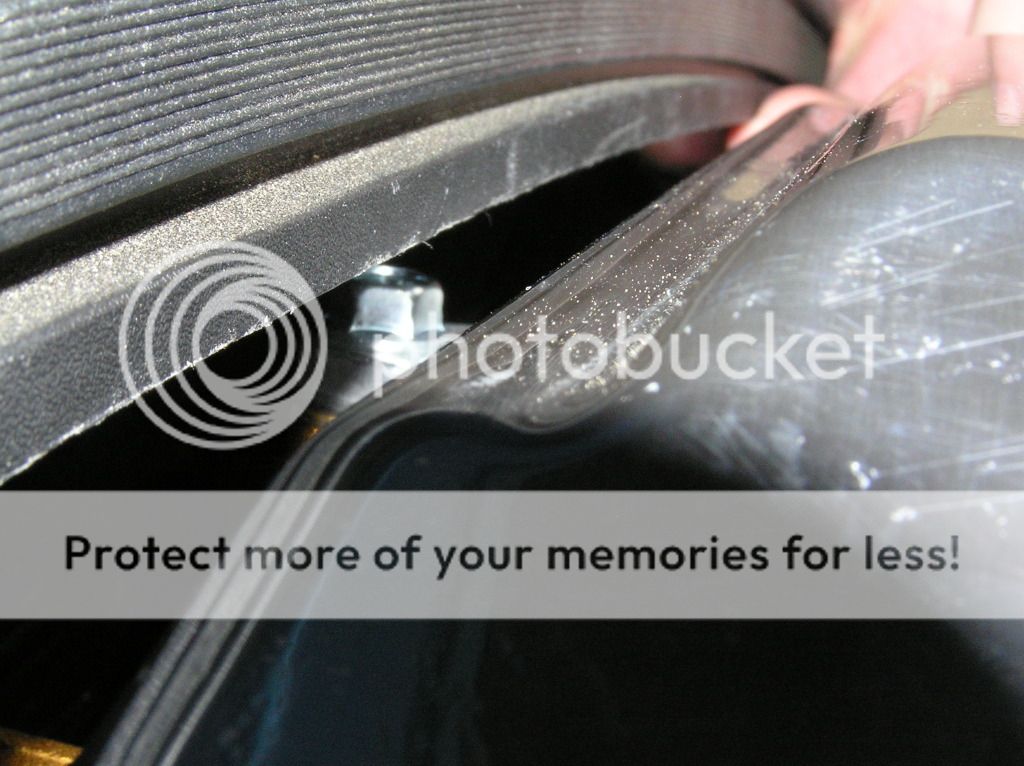 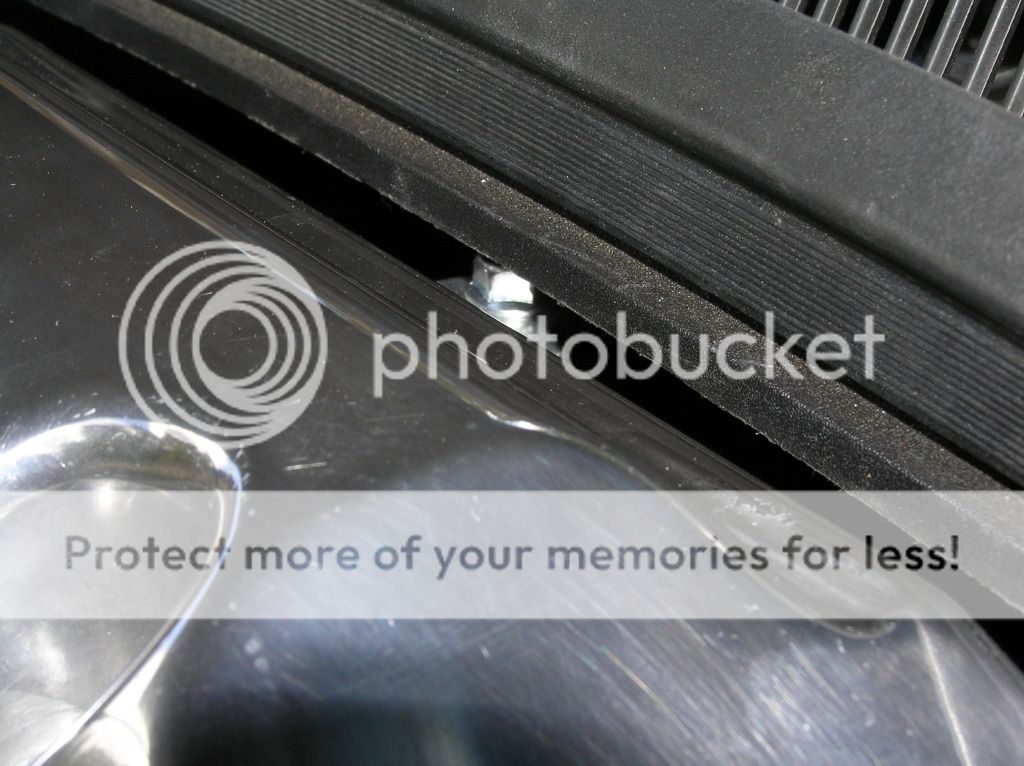 i then installed the rear horiz bolts, the driver's side was pretty easy, the passenger side was a bit harder, had to use a little shorter bolt, and my GF had to start it for me. then i snugged them down with the 13mm swivel head ratchet!  i then re-installed the TB and re-connected all the hoses. i used some of the left over bracket to make a bracket for the front mount near the TB. i used a shorter bolt and added a nut at the bottom, and used a shorter bolt at the top. looks like it belongs.   and the completed project;  so far i have driven about 60 easy miles to let the ECM relearn, it feels lighter like most everyone has said. i'll know more when i really get on it in a few days. |

|

|
|
06-06-2012, 05:56 AM
|
#30 |

Drives: LLT Machine Join Date: Nov 2011
Location: VIC/AUS
Posts: 563
|
|
|
|
|
|
06-06-2012, 01:16 PM
|
#31 |
|
Wind Rider

Drives: ZL1 19 White; Jeep 5.7 GC 15 Join Date: Jan 2010
Location: Muscat
Posts: 2,059
|
Do you really have to use another T brackets for the rear horiz bolts? or your setup was not settled without them !
It looks like one hell of a narrow angle
__________________
Im not Gray any more !!
|
|
|
|
|
06-06-2012, 01:26 PM
|
#32 | |
|
Drives: 2010, 2LT, RS, 6M, ABM (#1893) SOLD Join Date: Mar 2011
Location: Willits, CA
Posts: 1,437
|
Quote:
not sure what you mean by "narrow angle", they are square, and the oem bracket they connect to has some give to it, went pretty well, other than the access to get your hands back there. |
|
|
|
|
|
06-06-2012, 11:47 PM
|
#33 | |
|
Wind Rider
Drives: ZL1 19 White; Jeep 5.7 GC 15 Join Date: Jan 2010
Location: Muscat
Posts: 2,059
|
Quote:
Well I heard from many members that the rear bolts were a bit hard to reach. I guess that they were not using the right wrench. Be careful not to get your IM stolen. It is the first GOLD PLATED now 
__________________
Im not Gray any more !!
|
|
|
|
|
|
07-04-2012, 11:43 AM
|
#34 |
 
Drives: 2011 1LT RS Join Date: Apr 2011
Location: Memphis
Posts: 184
|
Thanks for the write up sleez. I'll be doing this sometime today.
|
|
|
|
|
07-04-2012, 11:45 AM
|
#35 |
|
Drives: 2010, 2LT, RS, 6M, ABM (#1893) SOLD Join Date: Mar 2011
Location: Willits, CA
Posts: 1,437
|
derek19; you are welcome, good luck, hope it all works out as well as mine did!!
you will be happy!! |
|
|
|
|
07-04-2012, 12:58 PM
|
#36 |
|
Account Suspended
Drives: 2012 Camaro RS, RX supercharged Join Date: Dec 2009
Location: Bradenton, FL
Posts: 6,063
|
Nice job!!!!!
|
|
|
|
|
07-04-2012, 11:40 PM
|
#37 |
|
Drives: 2011 1LT RS Join Date: Apr 2011
Location: Memphis
Posts: 184
|
Is it going to be a problem if I put the manifold gasket on top of the 25mm insulator and not on the bottom like the in te picture above?
|
|
|
|
|
07-05-2012, 11:52 AM
|
#38 |
|
Drives: 2010, 2LT, RS, 6M, ABM (#1893) SOLD Join Date: Mar 2011
Location: Willits, CA
Posts: 1,437
|
as long as you use some sealant, it should be fine either way. i actually used a gasket on top and below the spacer. don't like RTV unless i absolutely need it.
|
|
|
|
|
07-12-2012, 04:58 PM
|
#39 | |
 
Drives: 2010 Camaro V6 LLT Rally Yellow Join Date: Jul 2011
Location: Vancouver, BC, Canada
Posts: 90
|
Quote:
 I am going to install both black ice-olator and plenum spacer next week maybe, could you tell me the part # for the OEM gaskets please? I am thinking to use a extra gaskets instead of RTV. 
|
|
|
|
|
|
07-12-2012, 05:25 PM
|
#40 |
|
Drives: 2010, 2LT, RS, 6M, ABM (#1893) SOLD Join Date: Mar 2011
Location: Willits, CA
Posts: 1,437
|
ACDelco 12590958 Lower Intake Manifold Gasket, got mine at amazon.com
|
|
|
|
|
07-14-2012, 10:51 PM
|
#41 | |
|
Drives: 2010 Camaro V6 LLT Rally Yellow Join Date: Jul 2011
Location: Vancouver, BC, Canada
Posts: 90
|
Quote:
|
|
|
|
|
|
07-14-2012, 11:56 PM
|
#42 |
|
Drives: 2010, 2LT, RS, 6M, ABM (#1893) SOLD Join Date: Mar 2011
Location: Willits, CA
Posts: 1,437
|
don't know that one, didn't do the plenum spacer, anyone else?
|
|
|
|
|
|
|
|
 |
| Tags |
| llt, mace, manifold, ported intake, spacer |
|
|


