You are browsing camaro5 

|
 06-17-2012, 10:24 PM
|
#1 |
|
Mid-Florida Camaro Club

Drives: 2018 ZL1 Join Date: Nov 2011
Location: Orlando, FL
Posts: 2,220
|
Replace Fender Letters - Step by Step
This was the last step to replacing my exterior chrome with matte black or summit white. There may be another step by step, but I couldn't locate it. Hopefully this will help someone if they wonder what it takes to get it done.
First I cleaned the area with rubbing alcohol. Then I outlined the chrome Camaro fender letters with blue masking tape. 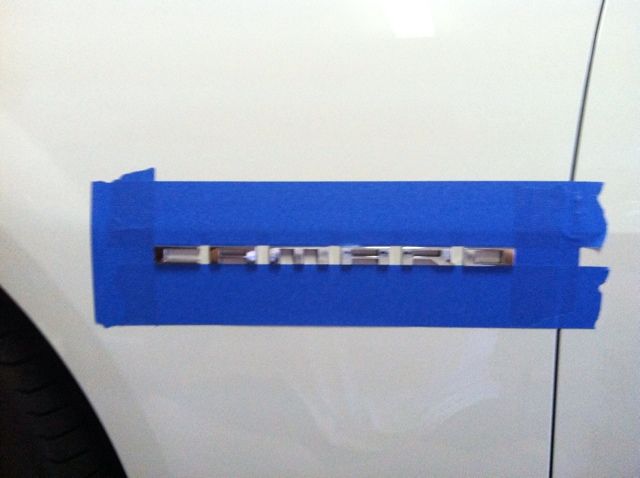 I want to possibly reuse or sell the letters later on, so I covered them with masking tape. This will allow me to keep them aligned exactly how they are sitting on the car.  I put on mechanics gloves and heated the letters with a hair dryer. I wrapped my index and middle fingers with waxed dental floss (I used the flat kind). The gloves are to keep the waxed dental floss from cutting into my fingers. I then worked the dental floss behind the 'O" sliding it slowly back and forth while very slightly pulling out. I also had my wife hold the tape to keep the letters from possibly falling off the tape. I continued from one letter to the next without stopping until all the letters were off. This is the left over adhesive after cutting the badging off with the dental floss. 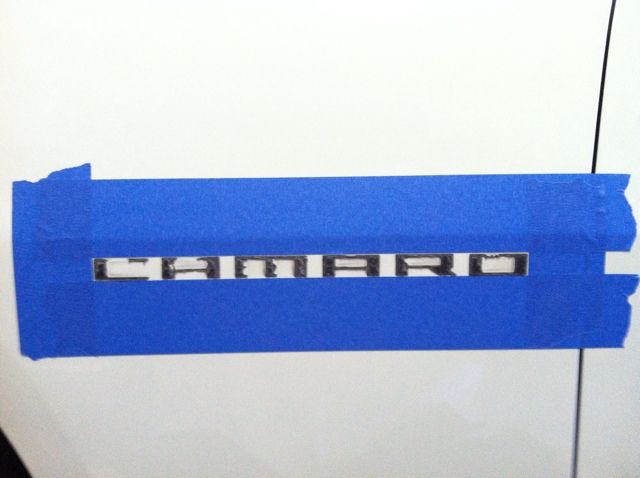 I used my thumbs to get as much of the big pieces off as I could. I was a little too aggressive and split one of my thumbs open, so be careful. Then I used Goo Gone and a microfiber towel to remove the rest of the adhesive and cleaned the area with rubbing alcohol again. All cleaned up and ready for the new letters. 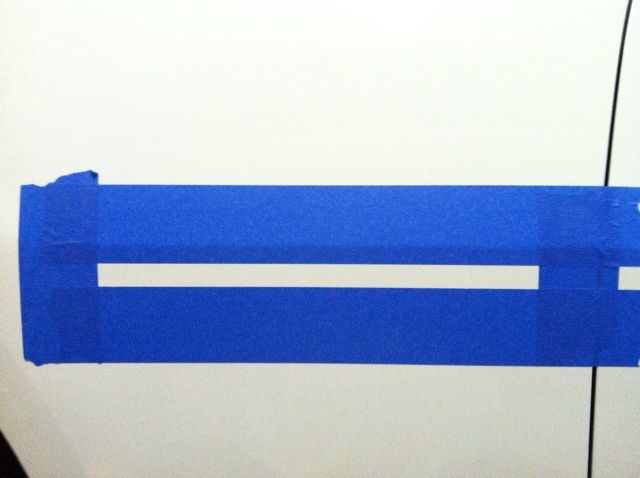 I applied a strip of masking tape across the edge of the new letters to be applied. This will allow easy visibility while you align the letters. 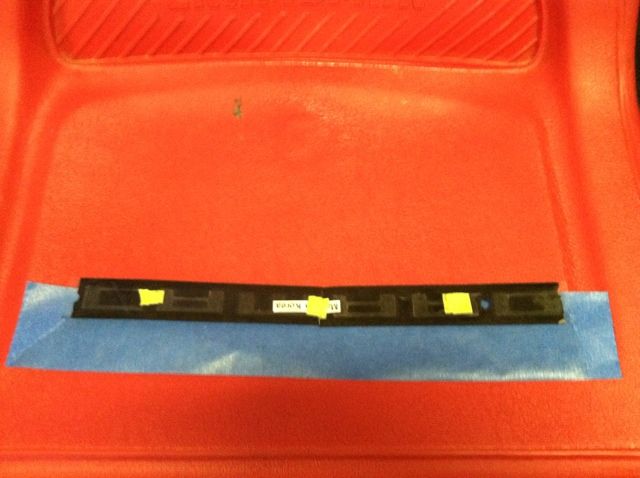 Next I removed the backing from the letters and picked them up by the ends of the masking take. I kept it pulled tight and aligned the letters alongside the masking tape on the car and lightly placed them. After making sure they were exactly where I wanted them, firmly pressed them into place. Removed the masking tape outline and here they are. 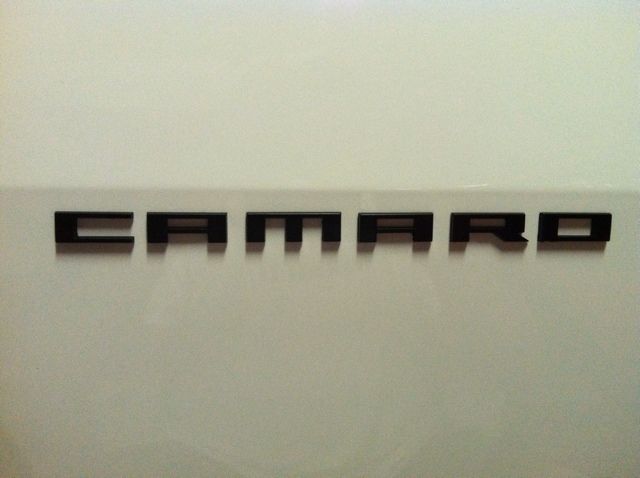 I'm glad I did this. I really like the way it looks against the summit white paint. Rob |

|

|
|
06-17-2012, 11:14 PM
|
#2 |
 Drives: 2012 Camaro 1LT/RS Join Date: Feb 2012
Location: Virginia
Posts: 81
|
Where did u get the matte black letters from
|
|
|
|
|
06-17-2012, 11:14 PM
|
#3 |
  
Drives: '17 SS 50th Camaro Join Date: Apr 2012
Location: Tampa, Florida
Posts: 921
|
Thanks for the tips never thought about the masking tape across the letters good call
|
|
|
|
|
06-17-2012, 11:15 PM
|
#4 |
|
Mid-Florida Camaro Club
Drives: 2018 ZL1 Join Date: Nov 2011
Location: Orlando, FL
Posts: 2,220
|
Purchased from Lupe @ River City Creations and Lighting.
Rob |
|
|
|
|
06-18-2012, 02:07 AM
|
#5 |
          
Drives: 2011 CGM Camaro LS A6 Join Date: Jan 2011
Location: San Antonio, Texas
Posts: 10,305
|
Did the letters you bought come with the adhesive backing or did you use something you bought?
__________________
 Click Picture for Build Thread |
|
|
|
|
06-18-2012, 06:12 AM
|
#6 | |
|
Mid-Florida Camaro Club
Drives: 2018 ZL1 Join Date: Nov 2011
Location: Orlando, FL
Posts: 2,220
|
Quote:
Rob |
|
|
|
|
|
06-18-2012, 07:48 AM
|
#7 |
|
AKA "Beefcake"

Drives: 2023 ZL1 Sharkskin Join Date: Oct 2009
Location: Indy
Posts: 8,573
|
When I put the tape around the letters, before removing the letters, I marked on the tape, each letter edge. So when I was reapplying the new letters, I new where they lined up at.
|
|
|
|
|
06-18-2012, 11:01 AM
|
#8 |

Drives: 2011 Black RS/SS Join Date: Feb 2012
Location: Indiana
Posts: 1,030
|
Great post!!
|
|
|
|
|
|
|
|
 |
|
|


