You are browsing camaro5 

|
 05-20-2014, 09:12 PM
|
#1 |
 
Drives: 2010 Camaro 1LT/RS Victory Red Join Date: Jun 2009
Location: Knoxville, TN
Posts: 277
|
DIY Front Wheel Air Deflector
Hey guys, this is just a short write up on how to make some front wheel air deflectors. This current application is for my v6 with the ACS T2 front splitter, but it can be similarly used for other fascias/splitters. I'll apologize for the lack of step-by-step pictures in advance as I know how helpful they can be. I didn't plan on making a write up for these, but a couple members have asked.
Items Needed: Generic Mudflaps (Picked mine up from the local Autozone) X-Acto/Dremel (Something to cut the mud flaps to desired size) Drill PVC Pipe Torx bit (To remove fender well) Bolts/Nuts/Washers 3M Double Sided Tape Black Paint (Optional if you want to paint bolts/washers) Process: 1.) Cut mud flaps to desired size. 2.) Position on front of fender, mark 3-4 spots to place the PVC supports. 3.) Measure the lengths of PVC needed at each of these points. (It seemed easiest to do one at a time and temporarily bolt it in place.) (Mine were from top to bottom: 1 5/8" , 1 7/8" , 1 5/8") 4.) Run a bolt through each piece of PVC, with a nut on the inner-side of the fender well. (Watch out for the front side marker, it's a tight fit and there's not enough room to fit a nut on the backside there.) 5.) After all supports are in place, drill 2 holes to have access to the torx bolts on the fender well. 6.) Run a piece of double sided tape in between your new deflectors and your front fascia. Backside Pictures:      Final Product: 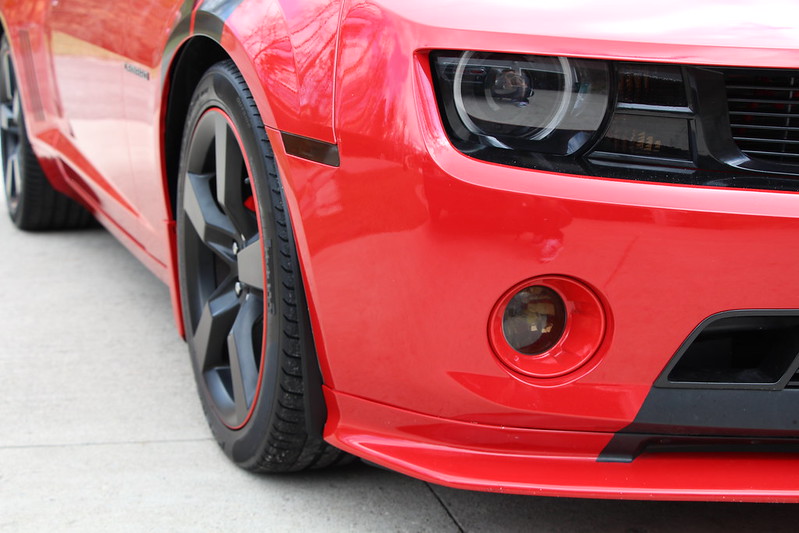 *This final picture was before I installed my spacers in case anyone notices that. I'm sure there are better ways of installing these, but without knowing how the ZL1 ones are installed, this seemed like the easiest method for us. I also know you can buy these for some fascias, but this was just a project for my dad and I. They have held up for over 1,000 miles now, and we will see if they can hold up to some cones at auto-x in the following weeks. If you guys have any tips/advice for this write up or my car in general feel free to let me know!
__________________
|

|

|
|
05-20-2014, 11:53 PM
|
#2 |
    
Drives: Supercharged LLT Join Date: Aug 2012
Location: San Antonio, Texas
Posts: 1,437
|
Nice . What was your total cost to make em ?
__________________
 CLICK IMG FOR BUIlD THREAD CLICK IMG FOR BUIlD THREAD |
|
|
|
|
05-21-2014, 08:35 AM
|
#3 |
|
Drives: 2010 Camaro 1LT/RS Victory Red Join Date: Jun 2009
Location: Knoxville, TN
Posts: 277
|
Generic Mudflaps ($12)
X-Acto/Dremel (Already Had) Drill (Already Had) PVC Pipe ($3) Torx bit (Already Had) Bolts/Nuts/Washers ($12) 3M Double Sided Tape (Already had) Black Paint (Already Had) So for is it came out to just under $30 and a couple hours of work.
__________________
|
|
|
|
|
05-21-2014, 09:43 AM
|
#4 |
 
|
I like it! Well done. I think I'll be adding these to my car as well!
__________________
 |
|
|
|
|
05-21-2014, 09:57 AM
|
#5 |
 
|
Excuse my ignorance.....but is this an aesthetic mod or are these functionally doing something?
__________________
 |
|
|
|
|
05-21-2014, 10:01 AM
|
#6 |
|
All About That Speed

Drives: 2010 Camaro 2SS/RS Join Date: Mar 2013
Location: Memphis
Posts: 1,181
|
With wider tires, I'm sure this could help to deflect wind around the tires instead of directly onto them...So it is functional in my opinion
__________________
 2010 SS M6 | 416 CI | H/C/I | GPI TUNED | SNSSTR |
|
|
|
|
05-21-2014, 10:08 AM
|
#7 | |
|
|
Quote:
__________________
|
|
|
|
|
|
05-21-2014, 10:24 AM
|
#8 | |
|
Drives: 2010 Camaro 1LT/RS Victory Red Join Date: Jun 2009
Location: Knoxville, TN
Posts: 277
|
Quote:
__________________
|
|
|
|
|
|
|
|
|
 |
|
|


