You are browsing camaro5 

|
 09-18-2012, 12:05 PM
|
#1485 |
   
Drives: 2013 Sea Ray 220 Sundeck Join Date: Apr 2011
Location: Fontana
Posts: 1,138
|
I have a brand new engine stand in the box still from summit racing and a brand new small one on rollers if anyone is interested
__________________
It's not who you are underneath but what you DO that defines you
|

|

|
|
09-19-2012, 06:48 PM
|
#1486 | ||
|
Drives: G5.R Join Date: Sep 2010
Location: SoCal
Posts: 2,377
|
Quote:
Quote:
Well, another major marker in the project........... everything is painted  This morning at 7 AM. Paint shop.......... Block painted the base coat but before the flat clear coat. And finally......... it's been a long road to get to this point! The contrast between the brackets and engine paint is killer now (pictures don't do it justice). For those of you that have been following from the beginning, I'm finally happy with the colors! |
||
|
|
|
|
09-19-2012, 06:49 PM
|
#1487 |
|
Drives: 2011 2ss/rs Join Date: Aug 2010
Location: houston
Posts: 531
|
are those the katech covers?
|
|
|
|
|
09-19-2012, 06:56 PM
|
#1488 | |
|
Drives: G5.R Join Date: Sep 2010
Location: SoCal
Posts: 2,377
|
Quote:
Yes Better pic |
|
|
|
|
|
09-19-2012, 07:18 PM
|
#1489 |
 Drives: 2010 SS L99 Join Date: Feb 2012
Location: Edmonton
Posts: 50
|
people who have won the ridler award are going to be jealous of your engine!!! Really another level sir
|
|
|
|
|
09-19-2012, 09:25 PM
|
#1490 |
|
SoCal Race Team #13

|
Wow, so much still going into your project Nathan... as always wish mine wasn't a daily driver so i could do it without interrupting life...
That said.. i have phase 1 of my setup done (not as dramatic as yours). Measured and drilled the hinges for the "pin" like the LG race car, then welded a nut on the inside of the hinge (see below) primered and painted white to match the car. 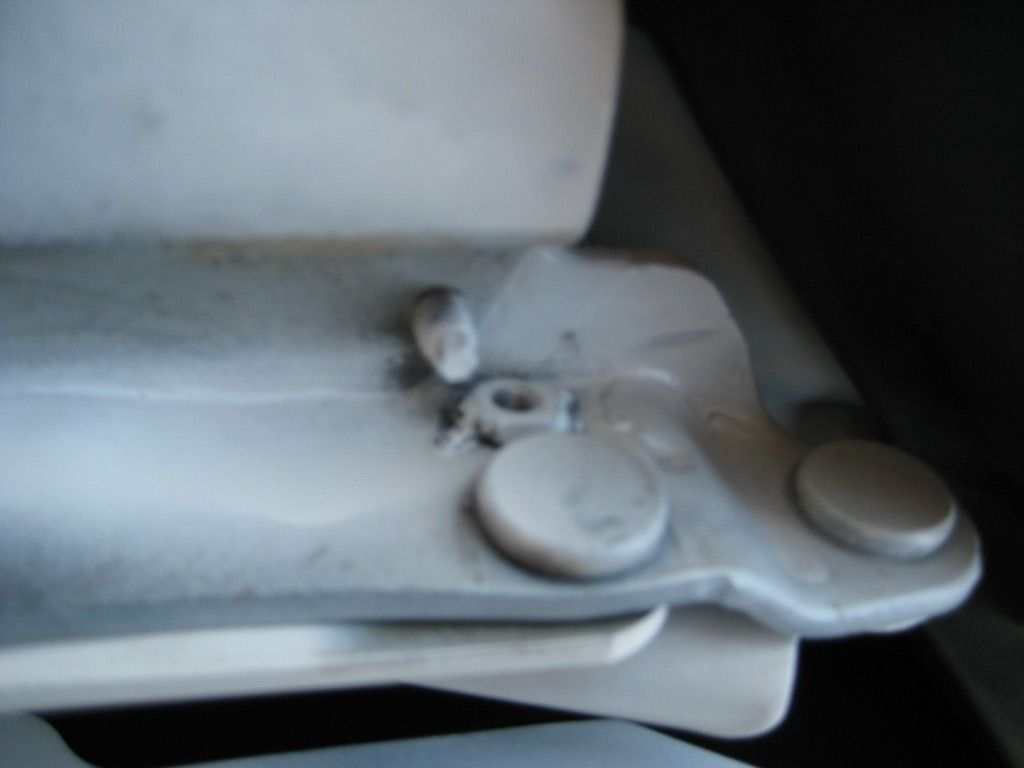 Purchased a set of 5 knurled thumbscrews (only need 2, and cut them down to the right length) in stainless steel to be the "pin". 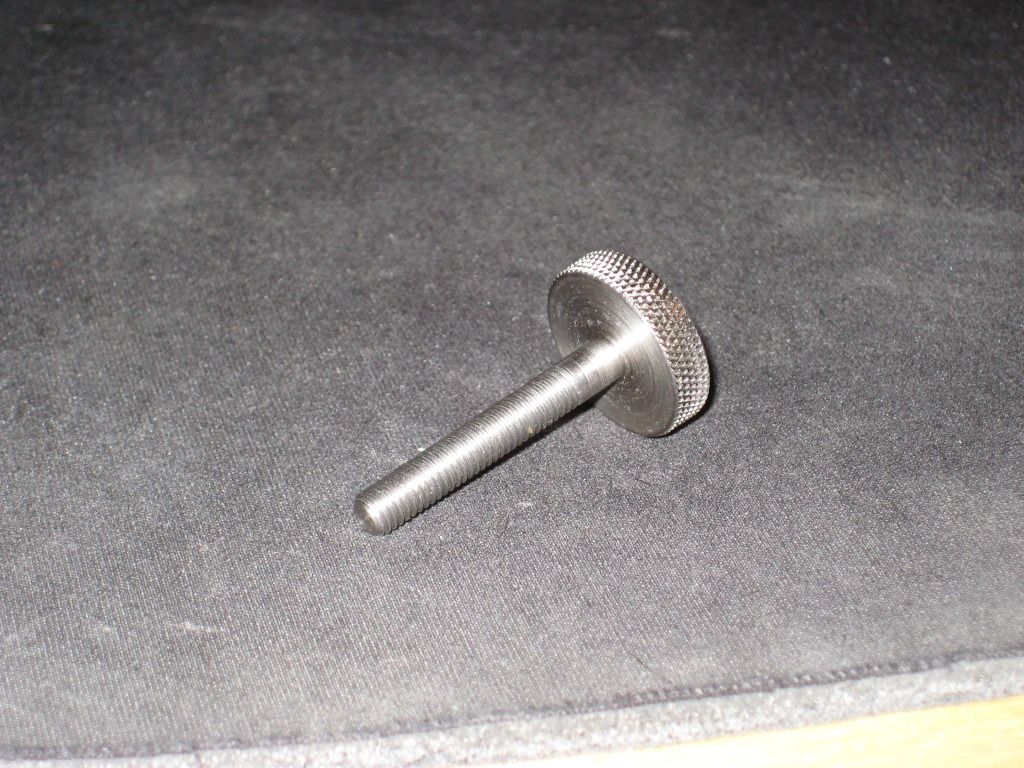 Here is a side view with the "Pin" installed... 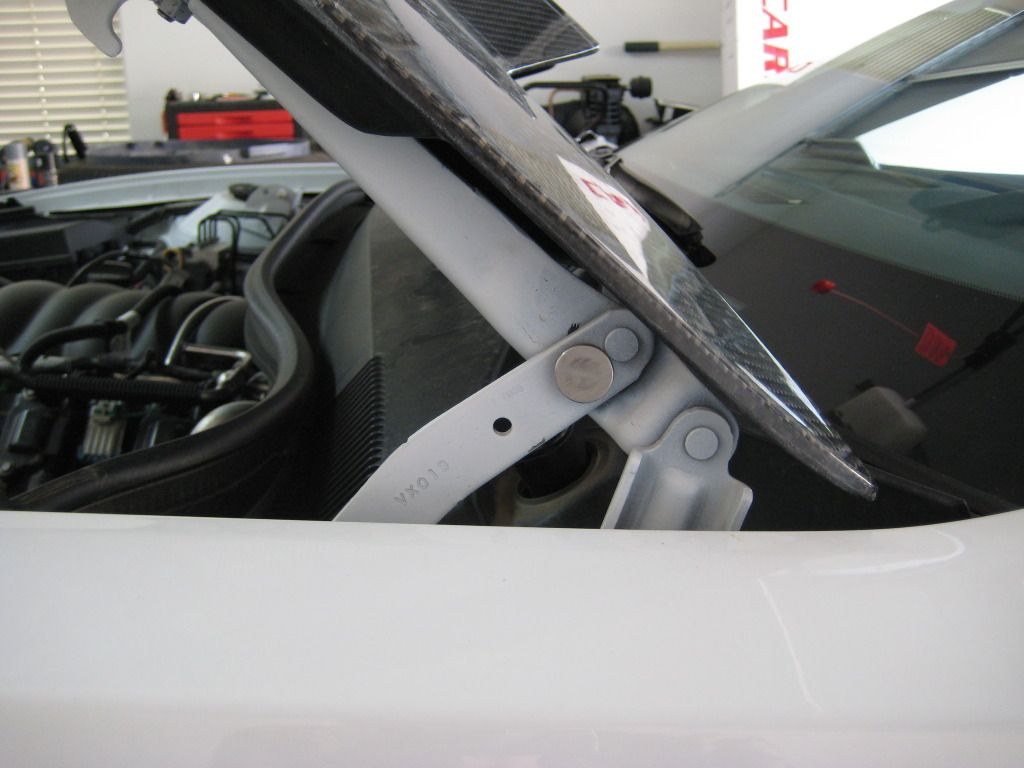 And one from 5 feet away.. they disappear leaving the hood floating. Since the "pin" is inside the body of the hinge there is nothing that muddies up the look, and the knurled head looks like its part of the hinge. This is really dramatic with the hood strut and mount removed. For that I drilled the spot welds and primered over, not painting yet as I still have plans to move the abs tower/mount for stage 2 of my cleanup... Stage 2 will also involve a method of retaining the thumbscrews under-hood. 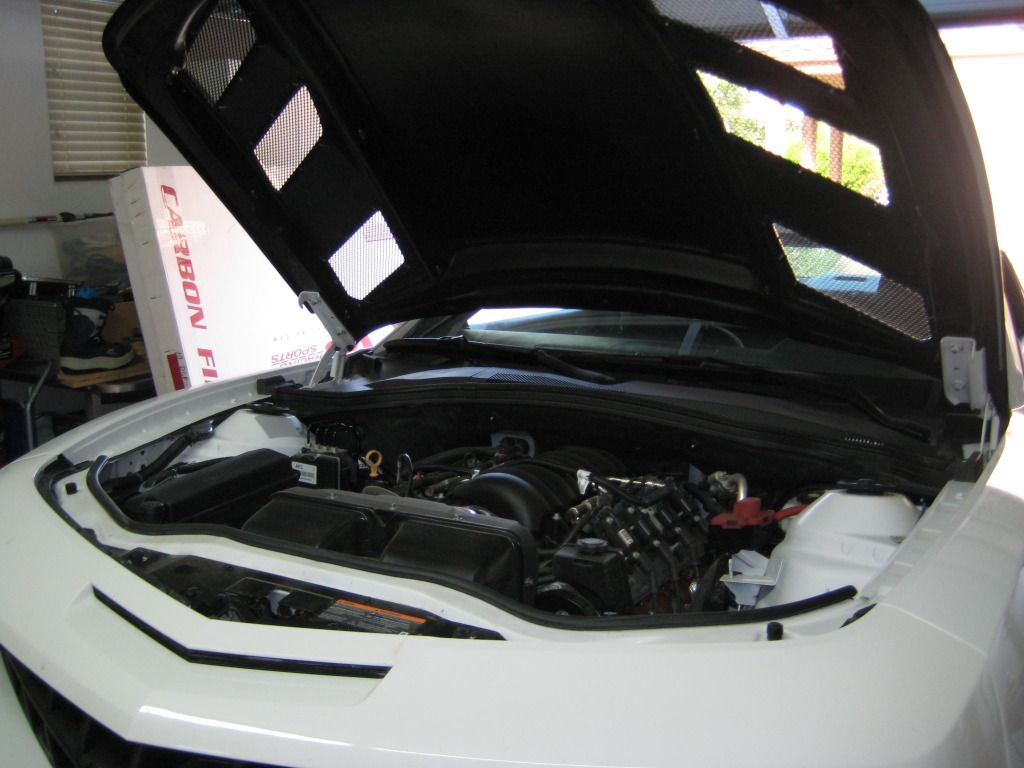
__________________
A.K.A - Diarmadhi (old handle) - So much to do.. So little money
Owner : Fast-Stache Industries LLC |
|
|
|
|
09-19-2012, 09:28 PM
|
#1491 | |
|
need....more....hp

Drives: The Neighbor Hater Join Date: Dec 2010
Location: San Mateo, CA
Posts: 4,091
|
Quote:
glad everything is starting to get buttoned up. Hopefully I can make a trip down to SoCal soon to check this out in person!
__________________
Mast Motorsports Built LS3 Stroker 418, IPS GT35R Twin Turbos, Exedy GTO4XD Twin Disc Clutch, Aeromotive A1000 Eliminator Stealth Fuel Pump, AEM Meth Injection, DSS 1400hp Axels, BC Coilovers, Pfadt & BMR Suspension, Hawk HPS Pads, Drilled/Slotted Rotors, Hurst Shifter, Custom Roll Cage by Blu808, T3 Ports, 22" Custom Concave Mesh Rims |
|
|
|
|
|
09-19-2012, 09:31 PM
|
#1492 | |
|
need....more....hp
Drives: The Neighbor Hater Join Date: Dec 2010
Location: San Mateo, CA
Posts: 4,091
|
Quote:
__________________
Mast Motorsports Built LS3 Stroker 418, IPS GT35R Twin Turbos, Exedy GTO4XD Twin Disc Clutch, Aeromotive A1000 Eliminator Stealth Fuel Pump, AEM Meth Injection, DSS 1400hp Axels, BC Coilovers, Pfadt & BMR Suspension, Hawk HPS Pads, Drilled/Slotted Rotors, Hurst Shifter, Custom Roll Cage by Blu808, T3 Ports, 22" Custom Concave Mesh Rims |
|
|
|
|
|
09-19-2012, 09:46 PM
|
#1493 | |
|
SoCal Race Team #13
|
Quote:
The carbon fiber hood I have is light enough that just doing one side would have been sufficient, but only barely (in my mind), and I would not do this with the stock hood even though its very light. I did both hinges this way so don't have to worry about hood flex or even pin fatigue... also why I got stainless steel thumbscrews with a solid shoulder, they are less likely to shear than harder metals and less likely to deform than standard machine screws.
__________________
A.K.A - Diarmadhi (old handle) - So much to do.. So little money
Owner : Fast-Stache Industries LLC |
|
|
|
|
|
09-20-2012, 01:02 PM
|
#1494 |
 
Drives: 2010 Camaro 2SS/RS,LS3 Join Date: Oct 2010
Location: South Florida
Posts: 1,237
|
Nathan every time I come back to this thread to read you surprise me with your incredible talent. Amazing work

__________________
  LS-3, ProCharger D1SC LS-3, ProCharger D1SC 665. rwhp /562. rwtq @ 9.3 psi |
|
|
|
|
09-20-2012, 11:47 PM
|
#1495 | ||||
|
Drives: G5.R Join Date: Sep 2010
Location: SoCal
Posts: 2,377
|
Quote:
Quote:
Quote:
 I still need to figure how I'm going to approach mine. Perhaps I will do a stock set like yours and then try to figure something out with my billet. I still need to figure how I'm going to approach mine. Perhaps I will do a stock set like yours and then try to figure something out with my billet.Quote:
************************************************** ************************************************** *********************** Here a few pics, some have a little better lighting. Now it's time to start assembling.  Some of you might appreciate this..... the stud for the alternator is 140MM and ARP doesn't make them that long. So I polished the factory one and put and ARP 12 point nut. The powder coated anthracite make up a really good contrast against the satin gun metal gray. Again pictures suck and are not doing justice. Comparing both the brush and black anodize and I really like the brush a lot better. It will tie in the Meizeire aluminum pump. Nobody would ever know there were four bolt whole at one point on the face of the head. Stay tune for final assembly. Last edited by Moreno1; 09-21-2012 at 12:23 AM. |
||||
|
|
|
|
09-21-2012, 12:38 AM
|
#1496 |
|
Drives: G5.R Join Date: Sep 2010
Location: SoCal
Posts: 2,377
|
A few more.....
This "Turn One High Performance Power Steering Pump" went through a long journey from this...... To this....... To finally....... It's seems like everything I've done, I've done at least twice, LOL. A good example is this tank, it will definitively not be going in my bay (Too Bling Bling for me)! I have to rethink that deal. |
|
|
|
|
09-21-2012, 08:19 AM
|
#1497 |
|
Dances With Mustangs

|
It's going to be a crime to put this engine into an engine bay; it should be under glass in a museum. This car is going to be unbelievable when you're done. I think you've just slid across the line of being crazy to being a true automotive artist. Grats Nathan; this has turned out to be a true work of art.
__________________
 Blue Angel is here!!  1SS/RS LS3 M6 IBM |
|
|
|
|
09-21-2012, 10:28 AM
|
#1498 |

Drives: 93GMC sierra stepside/ ctsv3 Join Date: Dec 2011
Location: San Antonio, Texas
Posts: 914
|
Nathan.. Ive been popping in and out of here for awhile and thought you was crazy for doing all that.. but I haft to tell ya, after seeing it all painted it looks bad ass man!
|
|
|
|
|
|
|
|
 |
|
|
 Similar Threads
|
||||
| Thread | Thread Starter | Forum | Replies | Last Post |
| Roto-Fab | Engine Covers - S/C | Fuse Relay Cover | Radiator Cover | Billet Oil Cap+ | AutoAgenda | Exterior Parts & Accessories | 14 | 02-06-2013 08:43 PM |
| New Texas Speed & Performance Engine Machining Center! | Trevor @ Texas Speed | Camaro V8 LS3 / L99 Engine, Exhaust, and Bolt-Ons | 18 | 01-16-2013 03:46 PM |
| Hawk Performance Brake Pads part HB247Z.575 $85.00 | Rogan | USA - Florida | 2 | 10-07-2011 12:10 PM |
| Acronyms? | KEEP RT | Camaro V8 LS3 / L99 Engine, Exhaust, and Bolt-Ons | 20 | 03-11-2011 08:57 PM |
| Great Read and Info on Oil Weight | Banshee | Mechanical Maintenance: Break-in / Oil & Fluids / Servicing | 1 | 11-23-2009 09:03 PM |


