Camaro5 Chevy Camaro Forum / Camaro ZL1, SS and V6 Forums - Camaro5.com
 
KPM Fuel Systems
Go Back   Camaro5 Chevy Camaro Forum / Camaro ZL1, SS and V6 Forums - Camaro5.com > Engine | Drivetrain | Powertrain Technical Discussions > Camaro V8 LS3 / L99 Engine, Exhaust, and Bolt-Ons


Reply
 
Thread Tools
Old 09-13-2012, 04:40 PM   #1471
pyr0b0y
need....more....hp
 
pyr0b0y's Avatar
 
Drives: The Neighbor Hater
Join Date: Dec 2010
Location: San Mateo, CA
Posts: 4,091
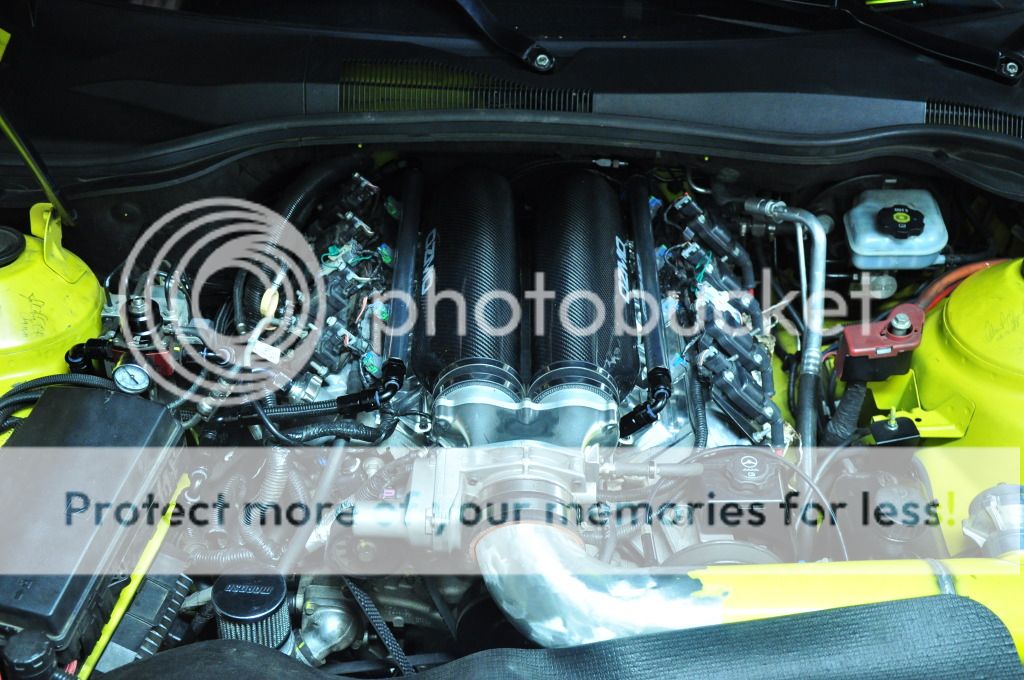
So I called up Scooters Performance today to find out more info on the valve covers. They do have a no questions asked warranty on the valve covers, against any defects or leaks that might occur.

The only question I have for you guys is they are non baffled; is not a good idea to get them? Or do they sell kits that let you add baffles to the valve covers?
__________________


Mast Motorsports Built LS3 Stroker 418, IPS GT35R Twin Turbos, Exedy GTO4XD Twin Disc Clutch, Aeromotive A1000 Eliminator Stealth Fuel Pump, AEM Meth Injection, DSS 1400hp Axels, BC Coilovers, Pfadt & BMR Suspension, Hawk HPS Pads, Drilled/Slotted Rotors, Hurst Shifter, Custom Roll Cage by Blu808, T3 Ports, 22" Custom Concave Mesh Rims
pyr0b0y is offline   Reply With Quote
Old 09-13-2012, 05:03 PM   #1472
Synner


Drives: cars
Join Date: May 2011
Location: Oversneeze
Posts: 4,542
It will need a baffle which means drilling a hole which may jack up any warranty they will give. I'd see if they can do it for you. Have to have a means of relieving crank case pressure. It also need to be routed back to the intake tube or something along those lines, don't vent to the atmosphere. One way around it might be placing an adapter on the oil fill cap to remove the need to drill through carbon fiber.

SBC covers are for older chevy engines. I think it was around '85 when they switched to a center bolt. You can see both types in the SBC picture. And then the LS based center bolt covers after that in the 90's or whenever they showed up. I have no idea why companies call them LSX as that's an engine marketing name for GMPP engines with certain features. Companies use it as synonymous with any LS based engine which isn't really accurate. But yeah those are the ones you need.
Synner is offline   Reply With Quote
Old 09-13-2012, 05:46 PM   #1473
pyr0b0y
need....more....hp
 
pyr0b0y's Avatar
 
Drives: The Neighbor Hater
Join Date: Dec 2010
Location: San Mateo, CA
Posts: 4,091
Quote:
Originally Posted by Synner View Post
It will need a baffle which means drilling a hole which may jack up any warranty they will give. I'd see if they can do it for you. Have to have a means of relieving crank case pressure. It also need to be routed back to the intake tube or something along those lines, don't vent to the atmosphere. One way around it might be placing an adapter on the oil fill cap to remove the need to drill through carbon fiber.

SBC covers are for older chevy engines. I think it was around '85 when they switched to a center bolt. You can see both types in the SBC picture. And then the LS based center bolt covers after that in the 90's or whenever they showed up. I have no idea why companies call them LSX as that's an engine marketing name for GMPP engines with certain features. Companies use it as synonymous with any LS based engine which isn't really accurate. But yeah those are the ones you need.
Would this suffice? I have a return line that goes back into my valve cover. Can I take the baffles off my current valve covers and replace them on these? Here:
__________________


Mast Motorsports Built LS3 Stroker 418, IPS GT35R Twin Turbos, Exedy GTO4XD Twin Disc Clutch, Aeromotive A1000 Eliminator Stealth Fuel Pump, AEM Meth Injection, DSS 1400hp Axels, BC Coilovers, Pfadt & BMR Suspension, Hawk HPS Pads, Drilled/Slotted Rotors, Hurst Shifter, Custom Roll Cage by Blu808, T3 Ports, 22" Custom Concave Mesh Rims
pyr0b0y is offline   Reply With Quote
Old 09-13-2012, 05:55 PM   #1474
Synner


Drives: cars
Join Date: May 2011
Location: Oversneeze
Posts: 4,542
Tough to tell whats going on there. Does that line go to a catch can or external baffle setup?

Also what is it screwing into on the valve cover? Did something get welded on there or was it a twist on cap that replaced the stock filler neck? Whatever size that fitting is would need to be on the new valve covers for it to be plug and play. Not all oil fill caps are equal size. The one on my holleys is smaller than the stock one and is threaded versus the twist lock OEM style.
Synner is offline   Reply With Quote
Old 09-13-2012, 07:01 PM   #1475
pyr0b0y
need....more....hp
 
pyr0b0y's Avatar
 
Drives: The Neighbor Hater
Join Date: Dec 2010
Location: San Mateo, CA
Posts: 4,091
Quote:
Originally Posted by Synner View Post
Tough to tell whats going on there. Does that line go to a catch can or external baffle setup?

Also what is it screwing into on the valve cover? Did something get welded on there or was it a twist on cap that replaced the stock filler neck? Whatever size that fitting is would need to be on the new valve covers for it to be plug and play. Not all oil fill caps are equal size. The one on my holleys is smaller than the stock one and is threaded versus the twist lock OEM style.
The circle on top is the hose that goes to the catch can. The circle on the bottom is a return line. It is an aluminum oil cap, that was modified with an opening to accept a fitting for an oil line. Hope that makes sense; i SUCK at trying to explain some things lol
Attached Images
 
__________________


Mast Motorsports Built LS3 Stroker 418, IPS GT35R Twin Turbos, Exedy GTO4XD Twin Disc Clutch, Aeromotive A1000 Eliminator Stealth Fuel Pump, AEM Meth Injection, DSS 1400hp Axels, BC Coilovers, Pfadt & BMR Suspension, Hawk HPS Pads, Drilled/Slotted Rotors, Hurst Shifter, Custom Roll Cage by Blu808, T3 Ports, 22" Custom Concave Mesh Rims
pyr0b0y is offline   Reply With Quote
Old 09-13-2012, 07:15 PM   #1476
Synner


Drives: cars
Join Date: May 2011
Location: Oversneeze
Posts: 4,542
Gotcha. Then you'd need 2 fittings on the new valve covers. I'd definitely talk to the company to see if they'd hook you up and still provide a warranty. Otherwise I'd probably look elsewhere if it were me. Are you definite on carbon fiber? The GMPP covers are a somewhat reasonable price cast aluminum and you can get ones that say camaro.
http://paceperformance.com/i-6255436...cover-kit.html

They have the one connection and you could modify the oil cap in the same way you did the stock ones.
Synner is offline   Reply With Quote
Old 09-14-2012, 11:28 AM   #1477
pyr0b0y
need....more....hp
 
pyr0b0y's Avatar
 
Drives: The Neighbor Hater
Join Date: Dec 2010
Location: San Mateo, CA
Posts: 4,091
Quote:
Originally Posted by Synner View Post
Gotcha. Then you'd need 2 fittings on the new valve covers. I'd definitely talk to the company to see if they'd hook you up and still provide a warranty. Otherwise I'd probably look elsewhere if it were me. Are you definite on carbon fiber? The GMPP covers are a somewhat reasonable price cast aluminum and you can get ones that say camaro.
http://paceperformance.com/i-6255436...cover-kit.html

They have the one connection and you could modify the oil cap in the same way you did the stock ones.
I'm pretty set on carbon fiber, just trying to save a few hundred dollars since Katech's are $750. It might come out close to Katechs if they install the baffles, so I might just have to break down and buy the Katech valve covers, or just polish my current ones and save up.....
__________________


Mast Motorsports Built LS3 Stroker 418, IPS GT35R Twin Turbos, Exedy GTO4XD Twin Disc Clutch, Aeromotive A1000 Eliminator Stealth Fuel Pump, AEM Meth Injection, DSS 1400hp Axels, BC Coilovers, Pfadt & BMR Suspension, Hawk HPS Pads, Drilled/Slotted Rotors, Hurst Shifter, Custom Roll Cage by Blu808, T3 Ports, 22" Custom Concave Mesh Rims
pyr0b0y is offline   Reply With Quote
Old 09-15-2012, 07:54 PM   #1478
Moreno1
 
Drives: G5.R
Join Date: Sep 2010
Location: SoCal
Posts: 2,377
Quote:
Originally Posted by Synner View Post
I have such a love/hate relationship with polishing. I keep saying this is last part I want to do...
Before:


After:


Synner, that looks AWESOME!!! It really shows all the hard work you did in 7.5 minutes ............

Quote:
Originally Posted by stieger View Post
yeaaaaa that didn't really happen. My graduate program started up the last week of August and it's basically taken over my life. This is the first chance I've gotten to catch up on your thread. Looks amazing btw. It's funny though, this thread started out so quiet. Just move this bracket over here, polish up the valve covers, and now you've got the trans out in your driveway.

I here ya, I doing 16 credits and along with everything else, I haven;'t even had the time to post here.

I am keeping a list though of all the stuff I want to do when I have the time. Well the list is more just a list of your post numbers that I can reference, but it gets the job done.
LOL, ya........ I don't know what happened!

Quote:
Originally Posted by pyr0b0y View Post
Here you go:

http://www.krcpower.com/catalog_i112...l?catId=366482


They're asking $40

The only other company I know of is Kurt Urban, and the fittings are $16 each
http://www.kurturbanperformance.com/...-adapters.html

Pyro those are the two companies I know of also. I think I had about $170 into my whole water vapor line replacement deal by the time I was done. Never mid all the research, phone call and driving around to pick up parts. The facts that is all listed here now makes it a great time save!

Quote:
Originally Posted by pyr0b0y View Post
Anyone have any dealings with Scooters Performance? They sell carbon fiber valve covers, but $389 instead of Katechs $750. Any input?
I know of several guys running them for a few years with no problems.

Quote:
Originally Posted by pyr0b0y View Post
Well I finished up redoing my fuel lines over the weekend, I think it cleaned up pretty well. I also did a mini write-up in the DIY section:
http://www.camaro5.com/forums/showthread.php?t=249437

Before:


After:


I was able to relocate the driver side fuel line, but not the passenger side. Once I clean up some wiring, I'm considering redoing the line to go down and across (below where the EVAP solenoid is located)
That looks a million times better!

[QUOTE=TXM62SS;5571605]
Quote:
Originally Posted by Nathan Moreno View Post
TXM62SS, thanks for posting the pics. looking really good and love how you ran your fuel and vacuum lines! Mike did a great job on the intake manifold, almost looks wet ]


Nate...I just spoke with Mike and he is going to do some Holley valve covers for me to match the intake. I will post the pics when its all done! Can't wait to get rid of the stock covers and brackets.
TXM62SS thats going to look nice! Can't wait to see it.

Quote:
Originally Posted by pyr0b0y View Post
I'm pretty set on carbon fiber, just trying to save a few hundred dollars since Katech's are $750. It might come out close to Katech's if they install the baffles, so I might just have to break down and buy the Katech valve covers, or just polish my current ones and save up.....
The thing I like about the Katech's is that they have a more traditional small block Chevy look to them the the flat LS Valve covers. It makes the engine look more significant. Pyro, just bit the bullet and save the extra monies.

Hoping to start painting next week and doing final assembly.....boy it's been along road!

Well from this.......

Name:  2.jpg
Views: 1706
Size:  169.3 KB

to finally........ there was a bunch of other insignia that in each of the boxes I ended grinding off. I just left the Tremec logo and the "FILL" one.

Name:  022.jpg
Views: 1808
Size:  62.4 KB

The seam that separate the rear cap from the trans case is no longer visible. The bolts also stuck out about an 1/8 of an inch and I shave them down.

Name:  020.jpg
Views: 1698
Size:  52.9 KB

Here you can't see the seem that separates the trans casing from the housing.

Name:  026.jpg
Views: 1678
Size:  50.4 KB

Name:  025.jpg
Views: 1706
Size:  90.3 KB

I joke with Synner about spending just 5 minutes to polish but I mush have at least 50 hours of work on the trans.

Also did the heads. I first spray them with a aluminum metal prep solution before I primer-ed them.

Name:  003.jpg
Views: 1831
Size:  106.8 KB

Name:  009.jpg
Views: 1805
Size:  78.4 KB

Everything is coming out really nice.I couldn't be happier with the results.
Moreno1 is offline   Reply With Quote
Old 09-15-2012, 09:06 PM   #1479
Synner


Drives: cars
Join Date: May 2011
Location: Oversneeze
Posts: 4,542
Quote:
Originally Posted by Nathan Moreno View Post
Synner, that looks AWESOME!!! It really shows all the hard work you did in 7.5 minutes ............
Thanks.


Quote:
Originally Posted by Nathan Moreno View Post
I joke with Synner about spending just 5 minutes to polish but I mush have at least 50 hours of work on the trans.
You must take a lot of breaks. That's 10 minutes tops.
Synner is offline   Reply With Quote
Old 09-15-2012, 10:26 PM   #1480
LC
ou mai gad
 
LC's Avatar
 
Drives: SW 2SS x2
Join Date: Feb 2010
Location: MX
Posts: 643
Man that transmission looks like a solid piece of plastic...

amazing work.. I hope mine turns out as good as yours...
__________________
LC is offline   Reply With Quote
Old 09-16-2012, 12:20 AM   #1481
My 5th

 
My 5th's Avatar
 
Drives: 2010 2SS/RS M6 Black on Black
Join Date: Jan 2010
Location: Global Citizen
Posts: 1,243
Nathan, once you get 10 color coats and 8 clear coats on that transmission how are you going to get your Porter Cable into those little squares to polish the paint? ;^)
__________________
Meh
My 5th is offline   Reply With Quote
Old 09-16-2012, 06:51 PM   #1482
Moreno1
 
Drives: G5.R
Join Date: Sep 2010
Location: SoCal
Posts: 2,377
Quote:
Originally Posted by LC View Post
Man that transmission looks like a solid piece of plastic...

LOL, I laugh because that exactly what my Mom said, only in a derogatory way. She said, "it's that what you've been working on all week?! It looks like crap! It looks like a piece of plastic!" Woman, what does she know, LOL.

amazing work.. I hope mine turns out as good as yours...
LC, since your the only one on here that seems to be a crazy as I am to want to do this, I will give you some tips I learned as I went.

1. I had a engine stand and didn't want to buy another one just for the trans. Well, I finally broke down and went and bout a second one towards the end of the project. Knowing what I now know, I would have gladly paid to buy the second stand. Made my life a whole lot easier.

2. I 1st used my large dremel to remove the all the crap off my bell housing. The challenge is it leaves little divets in the metal. It's kind hard to see until I used my jitterbug to remove the sand scratches and saw all the low stops. I was using a cheap jitterbug thats probably ten years old and finally burn up. I went to HD and bought a new one for $50 along with some sanding paper thats sticks to the bottom. I bought 60, 100, 150 and 220 grit. I ended up just using a few sheets of the 60 grit.

It worked great and would have save me a bunch of time had I had this one from the beginning. In fact, I could have done about 50% of the work with it!

Instead of using the dremel on the housing, I could've just run the bug over it and not have to do the same work twice.

3. There's areas were the grinder will work best. Use the 40 and 60 grip sanding flappers. This will remove the seam a lot quicker than anything else. I paid about $30 for the grinder and about $5 for each flapper. If you don't know what I mean by "flapper" just ask. I'm not sure if that's what it's technically called.

4. Take your time and don't focus on how long and how much work it taking, just how good of a job you can do.

Hope that helps, I will add more to this list as I remembered other useful tips.


Quote:
Originally Posted by My 5th View Post
Nathan, once you get 10 color coats and 8 clear coats on that transmission how are you going to get your Porter Cable into those little squares to polish the paint? ;^)
5th I wont have a need to polish the paint. I'm going with a special edition color from N+BMW called "Frozen Gray". It has a gun metal base with a satin clear. Once the clear is sprayed, your done!

Quote:
Originally Posted by Synner View Post

You must take a lot of breaks. That's 10 minutes tops.
Yea, I've become a slacker lately


Finsihed primering the block today. Tidiest job prepping for paint.

Name:  009.jpg
Views: 1847
Size:  77.2 KB


Name:  012.jpg
Views: 1808
Size:  62.9 KB


Here is the last of my plastic components ....... another chapter done!

Name:  014.jpg
Views: 2006
Size:  69.8 KB


Name:  1.jpg
Views: 2122
Size:  63.9 KB

paint and assembly next week
Moreno1 is offline   Reply With Quote
Old 09-17-2012, 10:20 PM   #1483
pyr0b0y
need....more....hp
 
pyr0b0y's Avatar
 
Drives: The Neighbor Hater
Join Date: Dec 2010
Location: San Mateo, CA
Posts: 4,091
Quote:
Originally Posted by Nathan Moreno View Post
LC, since your the only one on here that seems to be a crazy as I am to want to do this, I will give you some tips I learned as I went.

1. I had a engine stand and didn't want to buy another one just for the trans. Well, I finally broke down and went and bout a second one towards the end of the project. Knowing what I now know, I would have gladly paid to buy the second stand. Made my life a whole lot easier.

2. I 1st used my large dremel to remove the all the crap off my bell housing. The challenge is it leaves little divets in the metal. It's kind hard to see until I used my jitterbug to remove the sand scratches and saw all the low stops. I was using a cheap jitterbug thats probably ten years old and finally burn up. I went to HD and bought a new one for $50 along with some sanding paper thats sticks to the bottom. I bought 60, 100, 150 and 220 grit. I ended up just using a few sheets of the 60 grit.

It worked great and would have save me a bunch of time had I had this one from the beginning. In fact, I could have done about 50% of the work with it!

Instead of using the dremel on the housing, I could've just run the bug over it and not have to do the same work twice.

3. There's areas were the grinder will work best. Use the 40 and 60 grip sanding flappers. This will remove the seam a lot quicker than anything else. I paid about $30 for the grinder and about $5 for each flapper. If you don't know what I mean by "flapper" just ask. I'm not sure if that's what it's technically called.

4. Take your time and don't focus on how long and how much work it taking, just how good of a job you can do.

Hope that helps, I will add more to this list as I remembered other useful tips.


5th I wont have a need to polish the paint. I'm going with a special edition color from N+BMW called "Frozen Gray". It has a gun metal base with a satin clear. Once the clear is sprayed, your done!


Yea, I've become a slacker lately


Finsihed primering the block today. Tidiest job prepping for paint.

Attachment 423206


Attachment 423207


Here is the last of my plastic components ....... another chapter done!

Attachment 423208


Attachment 423215

paint and assembly next week
pics like these make me want to tear everything apart and clean it up! I'm soooo envious of what you are doing! btw, what was the name of the book you're using? I know quite a bit about our engines, but I'm sure I'd learn a lot more!

Do you think I should upgrade my radiator next or valve covers? I can only do one right now.
__________________


Mast Motorsports Built LS3 Stroker 418, IPS GT35R Twin Turbos, Exedy GTO4XD Twin Disc Clutch, Aeromotive A1000 Eliminator Stealth Fuel Pump, AEM Meth Injection, DSS 1400hp Axels, BC Coilovers, Pfadt & BMR Suspension, Hawk HPS Pads, Drilled/Slotted Rotors, Hurst Shifter, Custom Roll Cage by Blu808, T3 Ports, 22" Custom Concave Mesh Rims
pyr0b0y is offline   Reply With Quote
Old 09-18-2012, 12:16 AM   #1484
LC
ou mai gad
 
LC's Avatar
 
Drives: SW 2SS x2
Join Date: Feb 2010
Location: MX
Posts: 643
Thanks for the heads up man... I still have to get a jitterburg, never owned one before...
__________________
LC is offline   Reply With Quote
 
Reply


Posting Rules
You may not post new threads
You may not post replies
You may not post attachments
You may not edit your posts

BB code is On
Smilies are On
[IMG] code is On
HTML code is Off

Forum Jump

Similar Threads
Thread Thread Starter Forum Replies Last Post
Roto-Fab | Engine Covers - S/C | Fuse Relay Cover | Radiator Cover | Billet Oil Cap+ AutoAgenda Exterior Parts & Accessories 14 02-06-2013 08:43 PM
New Texas Speed & Performance Engine Machining Center! Trevor @ Texas Speed Camaro V8 LS3 / L99 Engine, Exhaust, and Bolt-Ons 18 01-16-2013 03:46 PM
Hawk Performance Brake Pads part HB247Z.575 $85.00 Rogan USA - Florida 2 10-07-2011 12:10 PM
Acronyms? KEEP RT Camaro V8 LS3 / L99 Engine, Exhaust, and Bolt-Ons 20 03-11-2011 08:57 PM
Great Read and Info on Oil Weight Banshee Mechanical Maintenance: Break-in / Oil & Fluids / Servicing 1 11-23-2009 09:03 PM


All times are GMT -5. The time now is 06:51 PM.


Powered by vBulletin® Version 3.8.9 Beta 4
Copyright ©2000 - 2026, vBulletin Solutions, Inc.